HojPoj
-
Posts
290 -
Joined
-
Last visited
Content Type
Profiles
Forums
Articles
Gallery
Downloads
Events
Everything posted by HojPoj
-
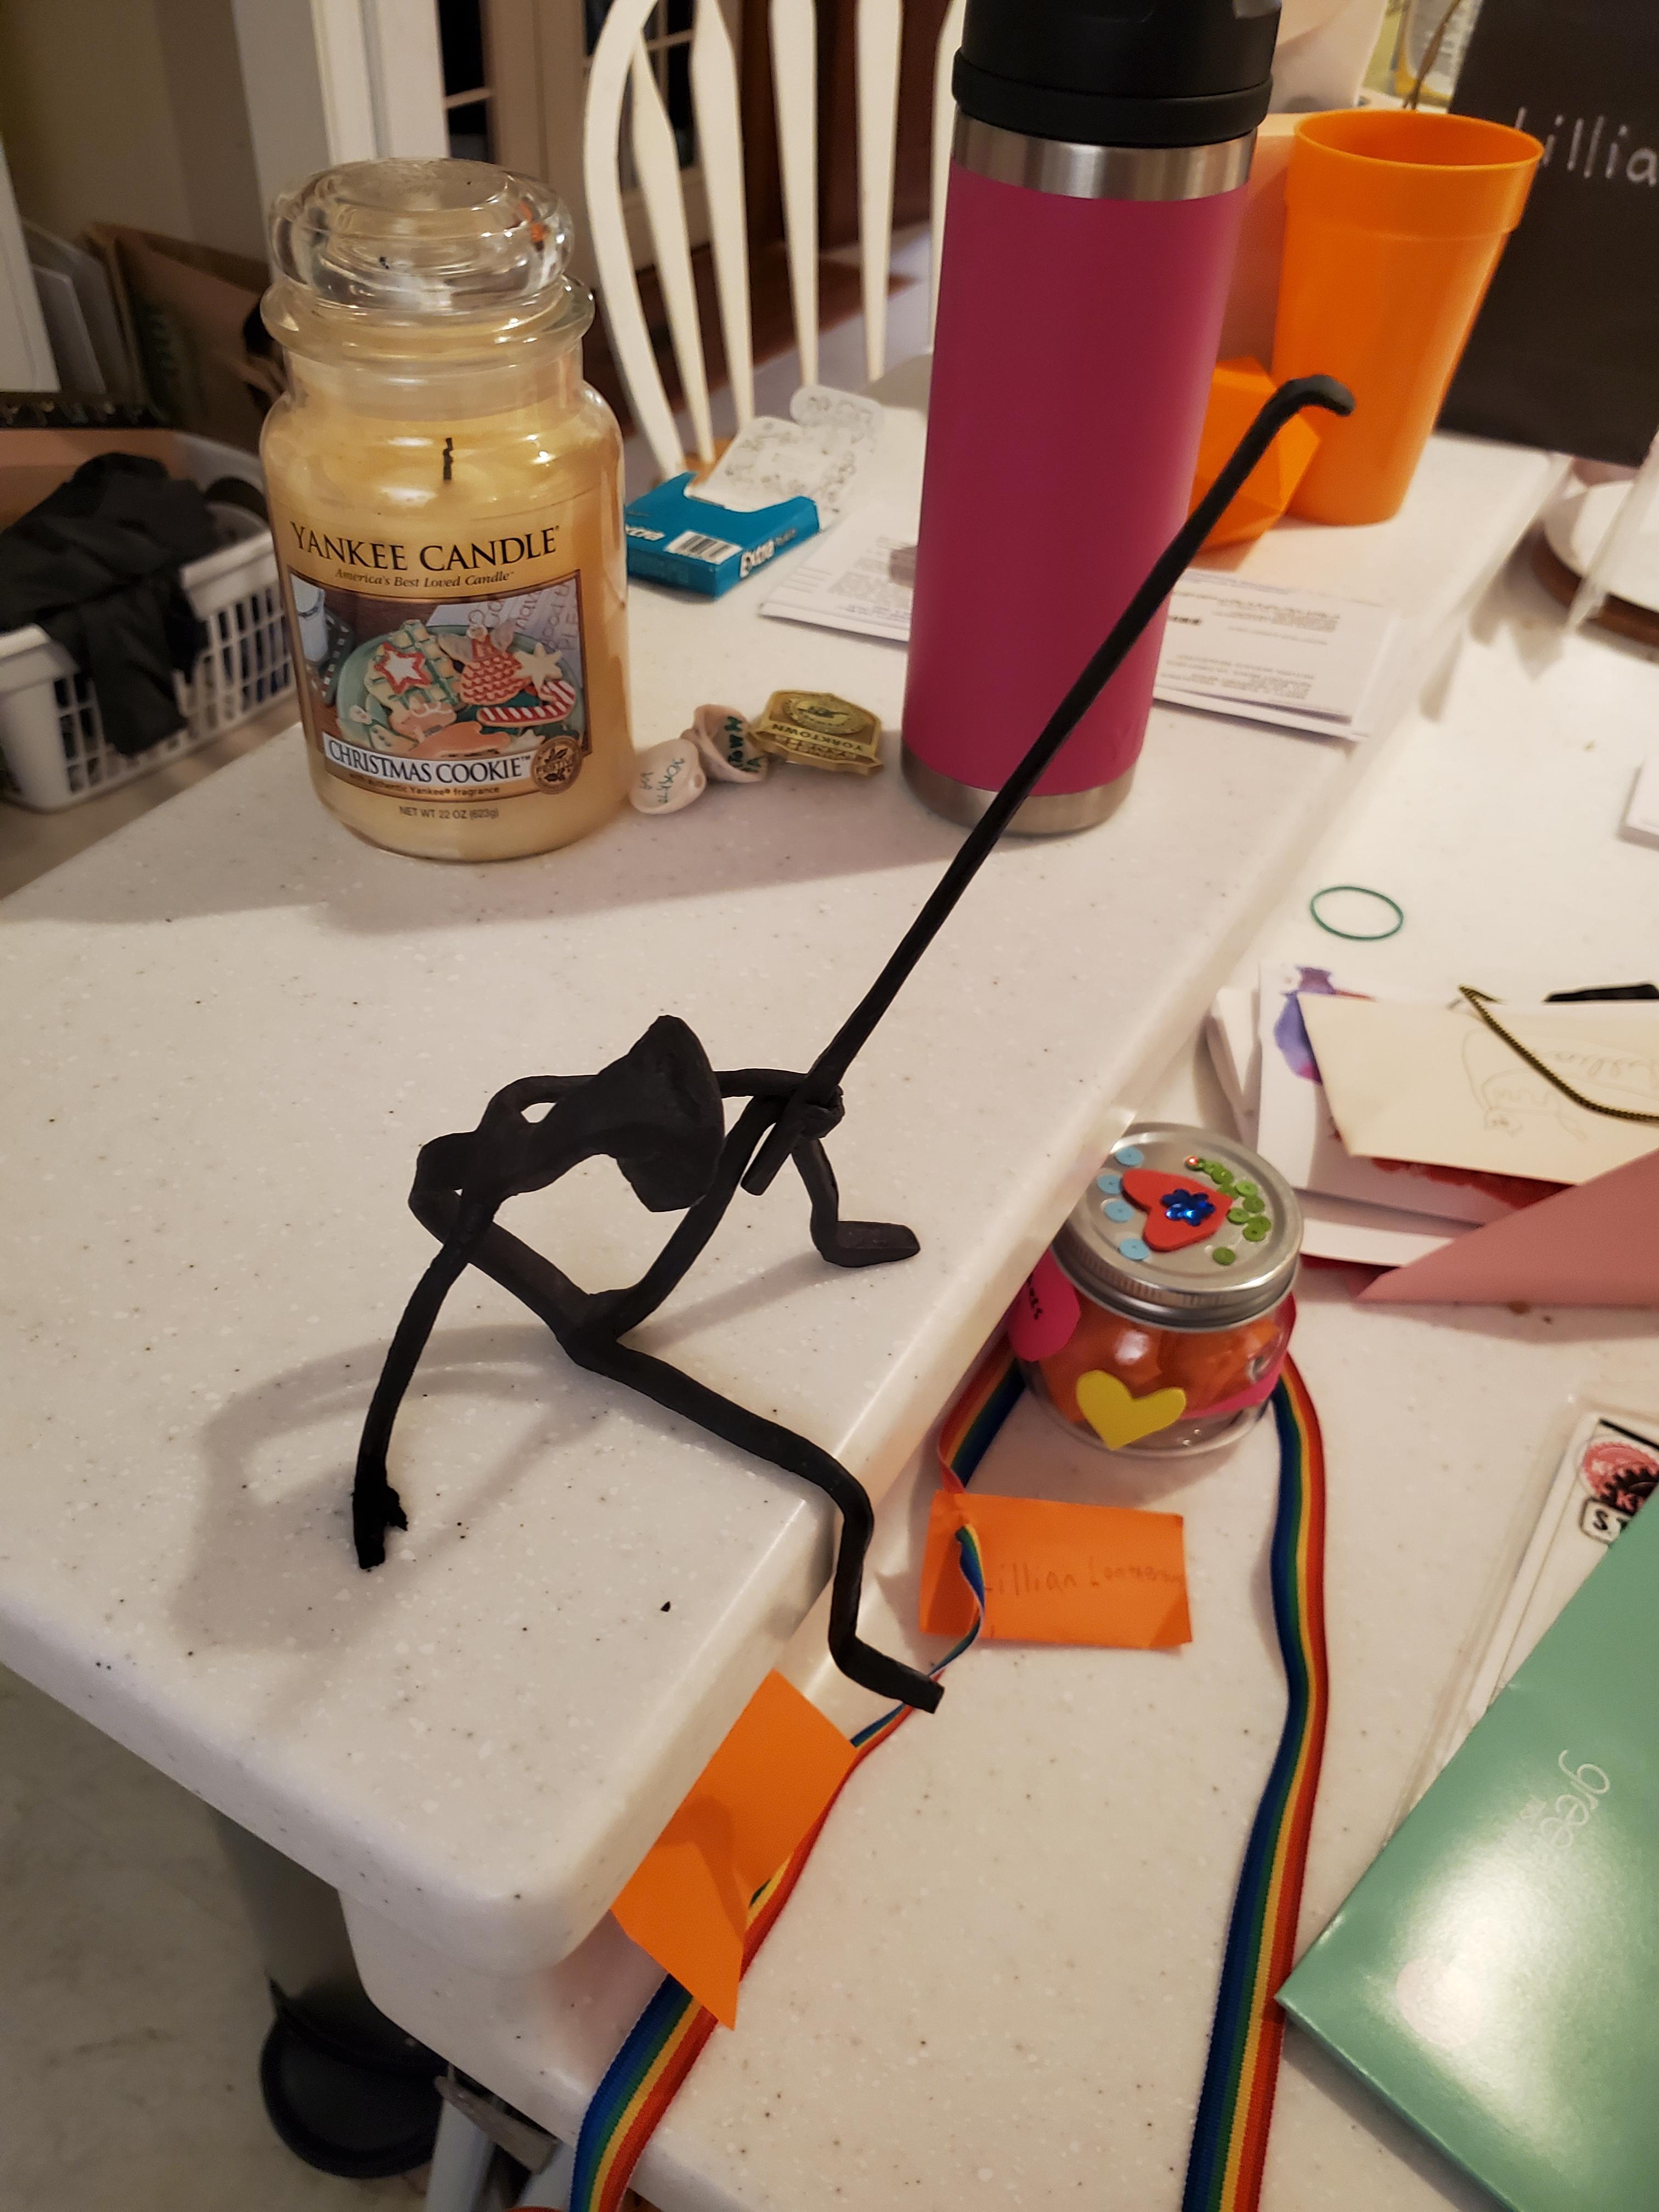
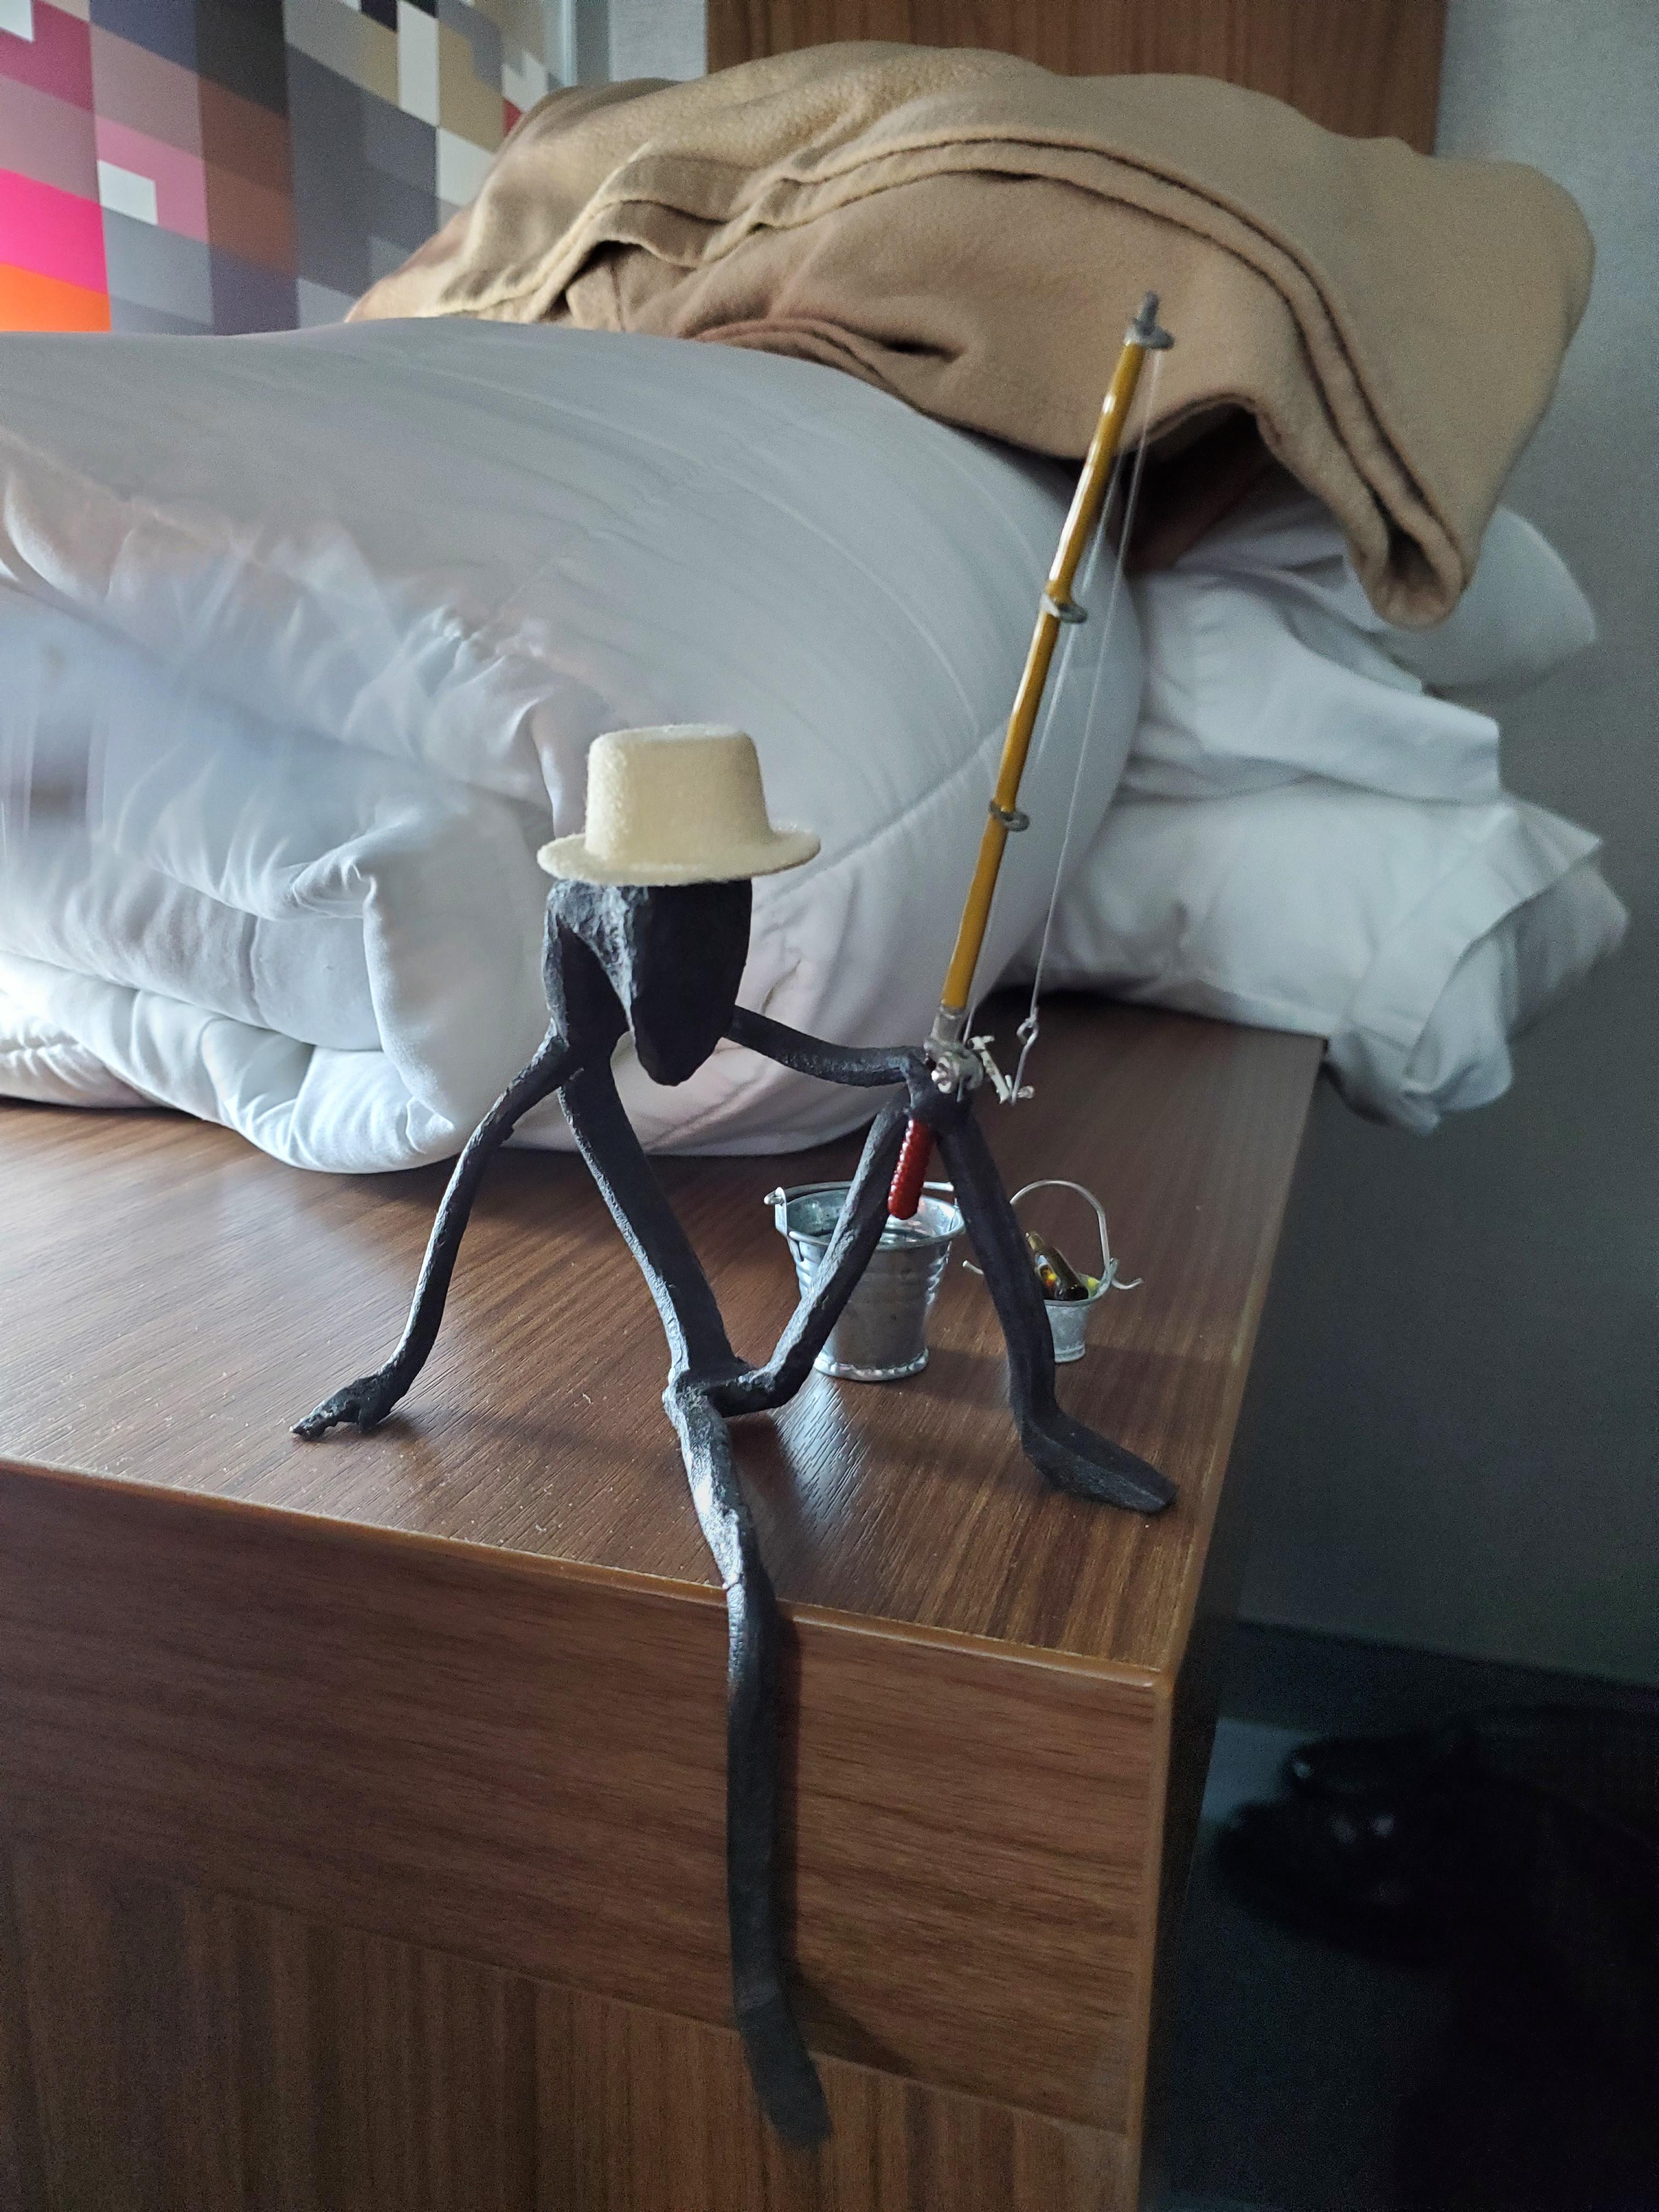
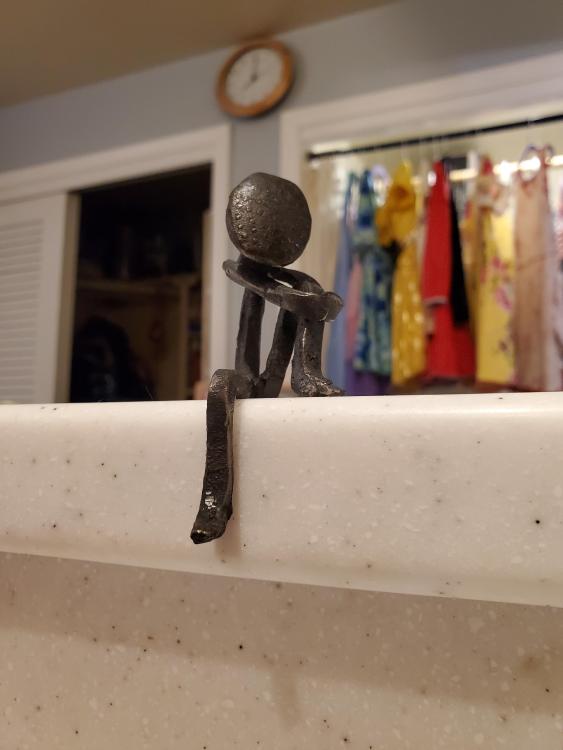
Mostly chiseled, with some sawing to clean up certain bits. Here's a couple blanks I hammered out at the same time as the fisherman. I learned that it is important to maintain proportions even with these caricatures... the arms definitely need to be longer than the torso, otherwise the 'lean' only looks good from limited viewing angles. To whit: The spine is too long to do it without that kink in it. ...oh, and I'd make the neck thinner, too. As far as the accessories, it was just going to be a fishing pole from steel with copper wire for the line, but I ran out of time to it. Instead I had to resort to some doll house accessories on Amazon in order to make the deadline.

-
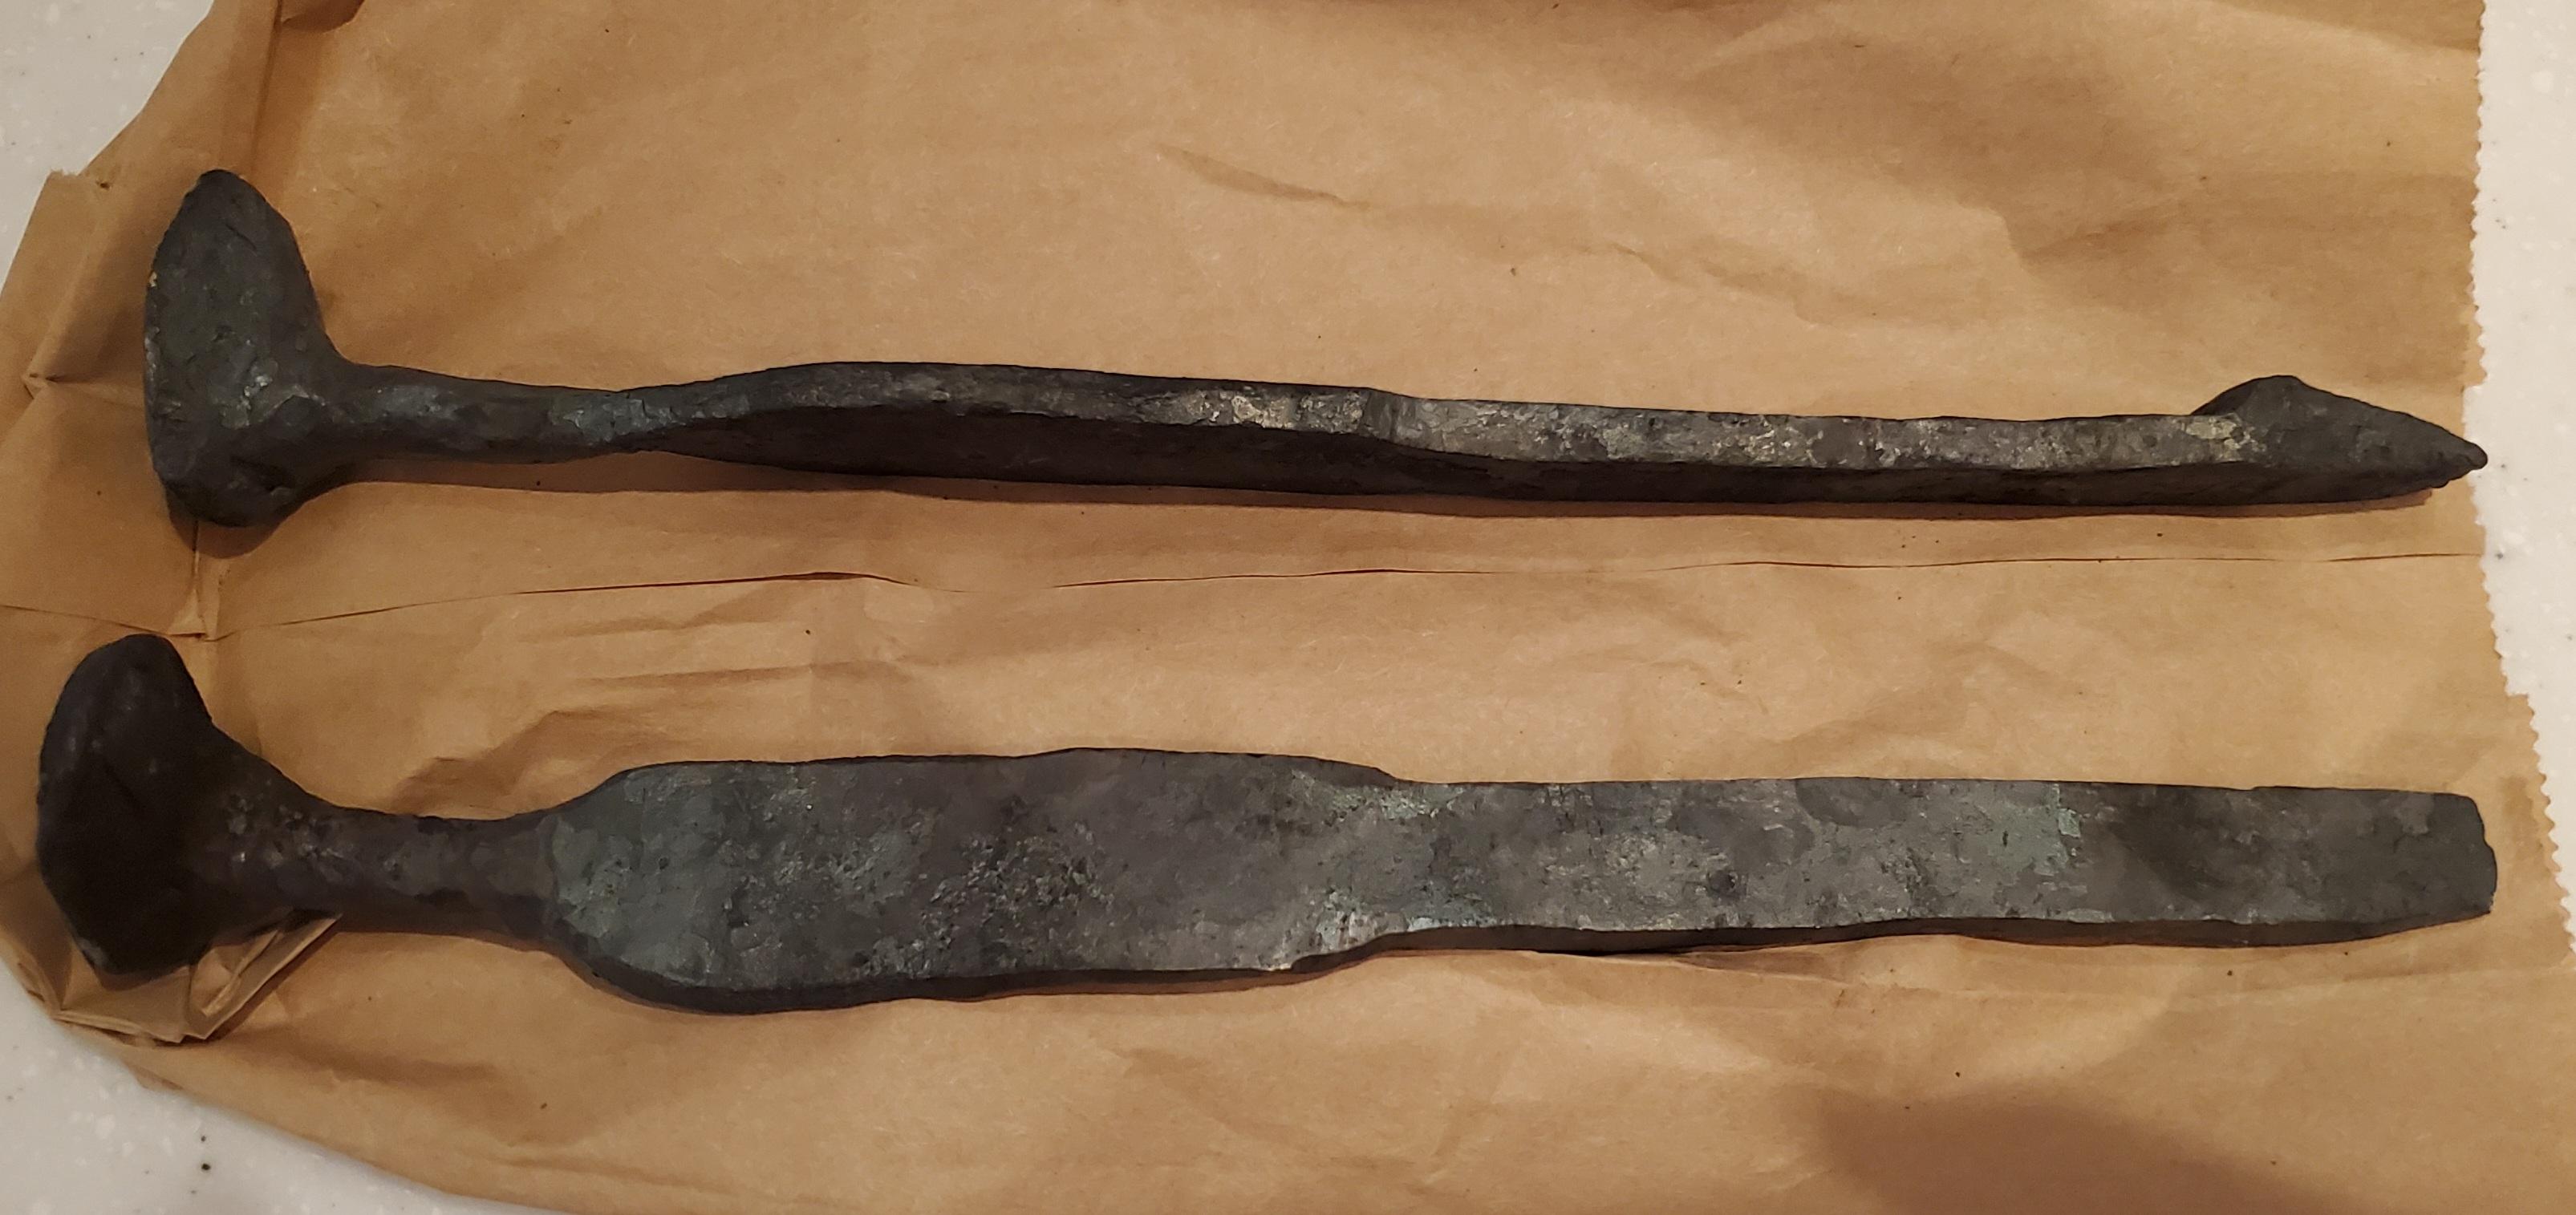
Did my first attempt at sculpture with a mini spike: My mother was jealous and wanted one, did this one out of a full size spike:

-

What did you do in the shop today?
HojPoj replied to Mark Ling's topic in Blacksmithing, General Discussion
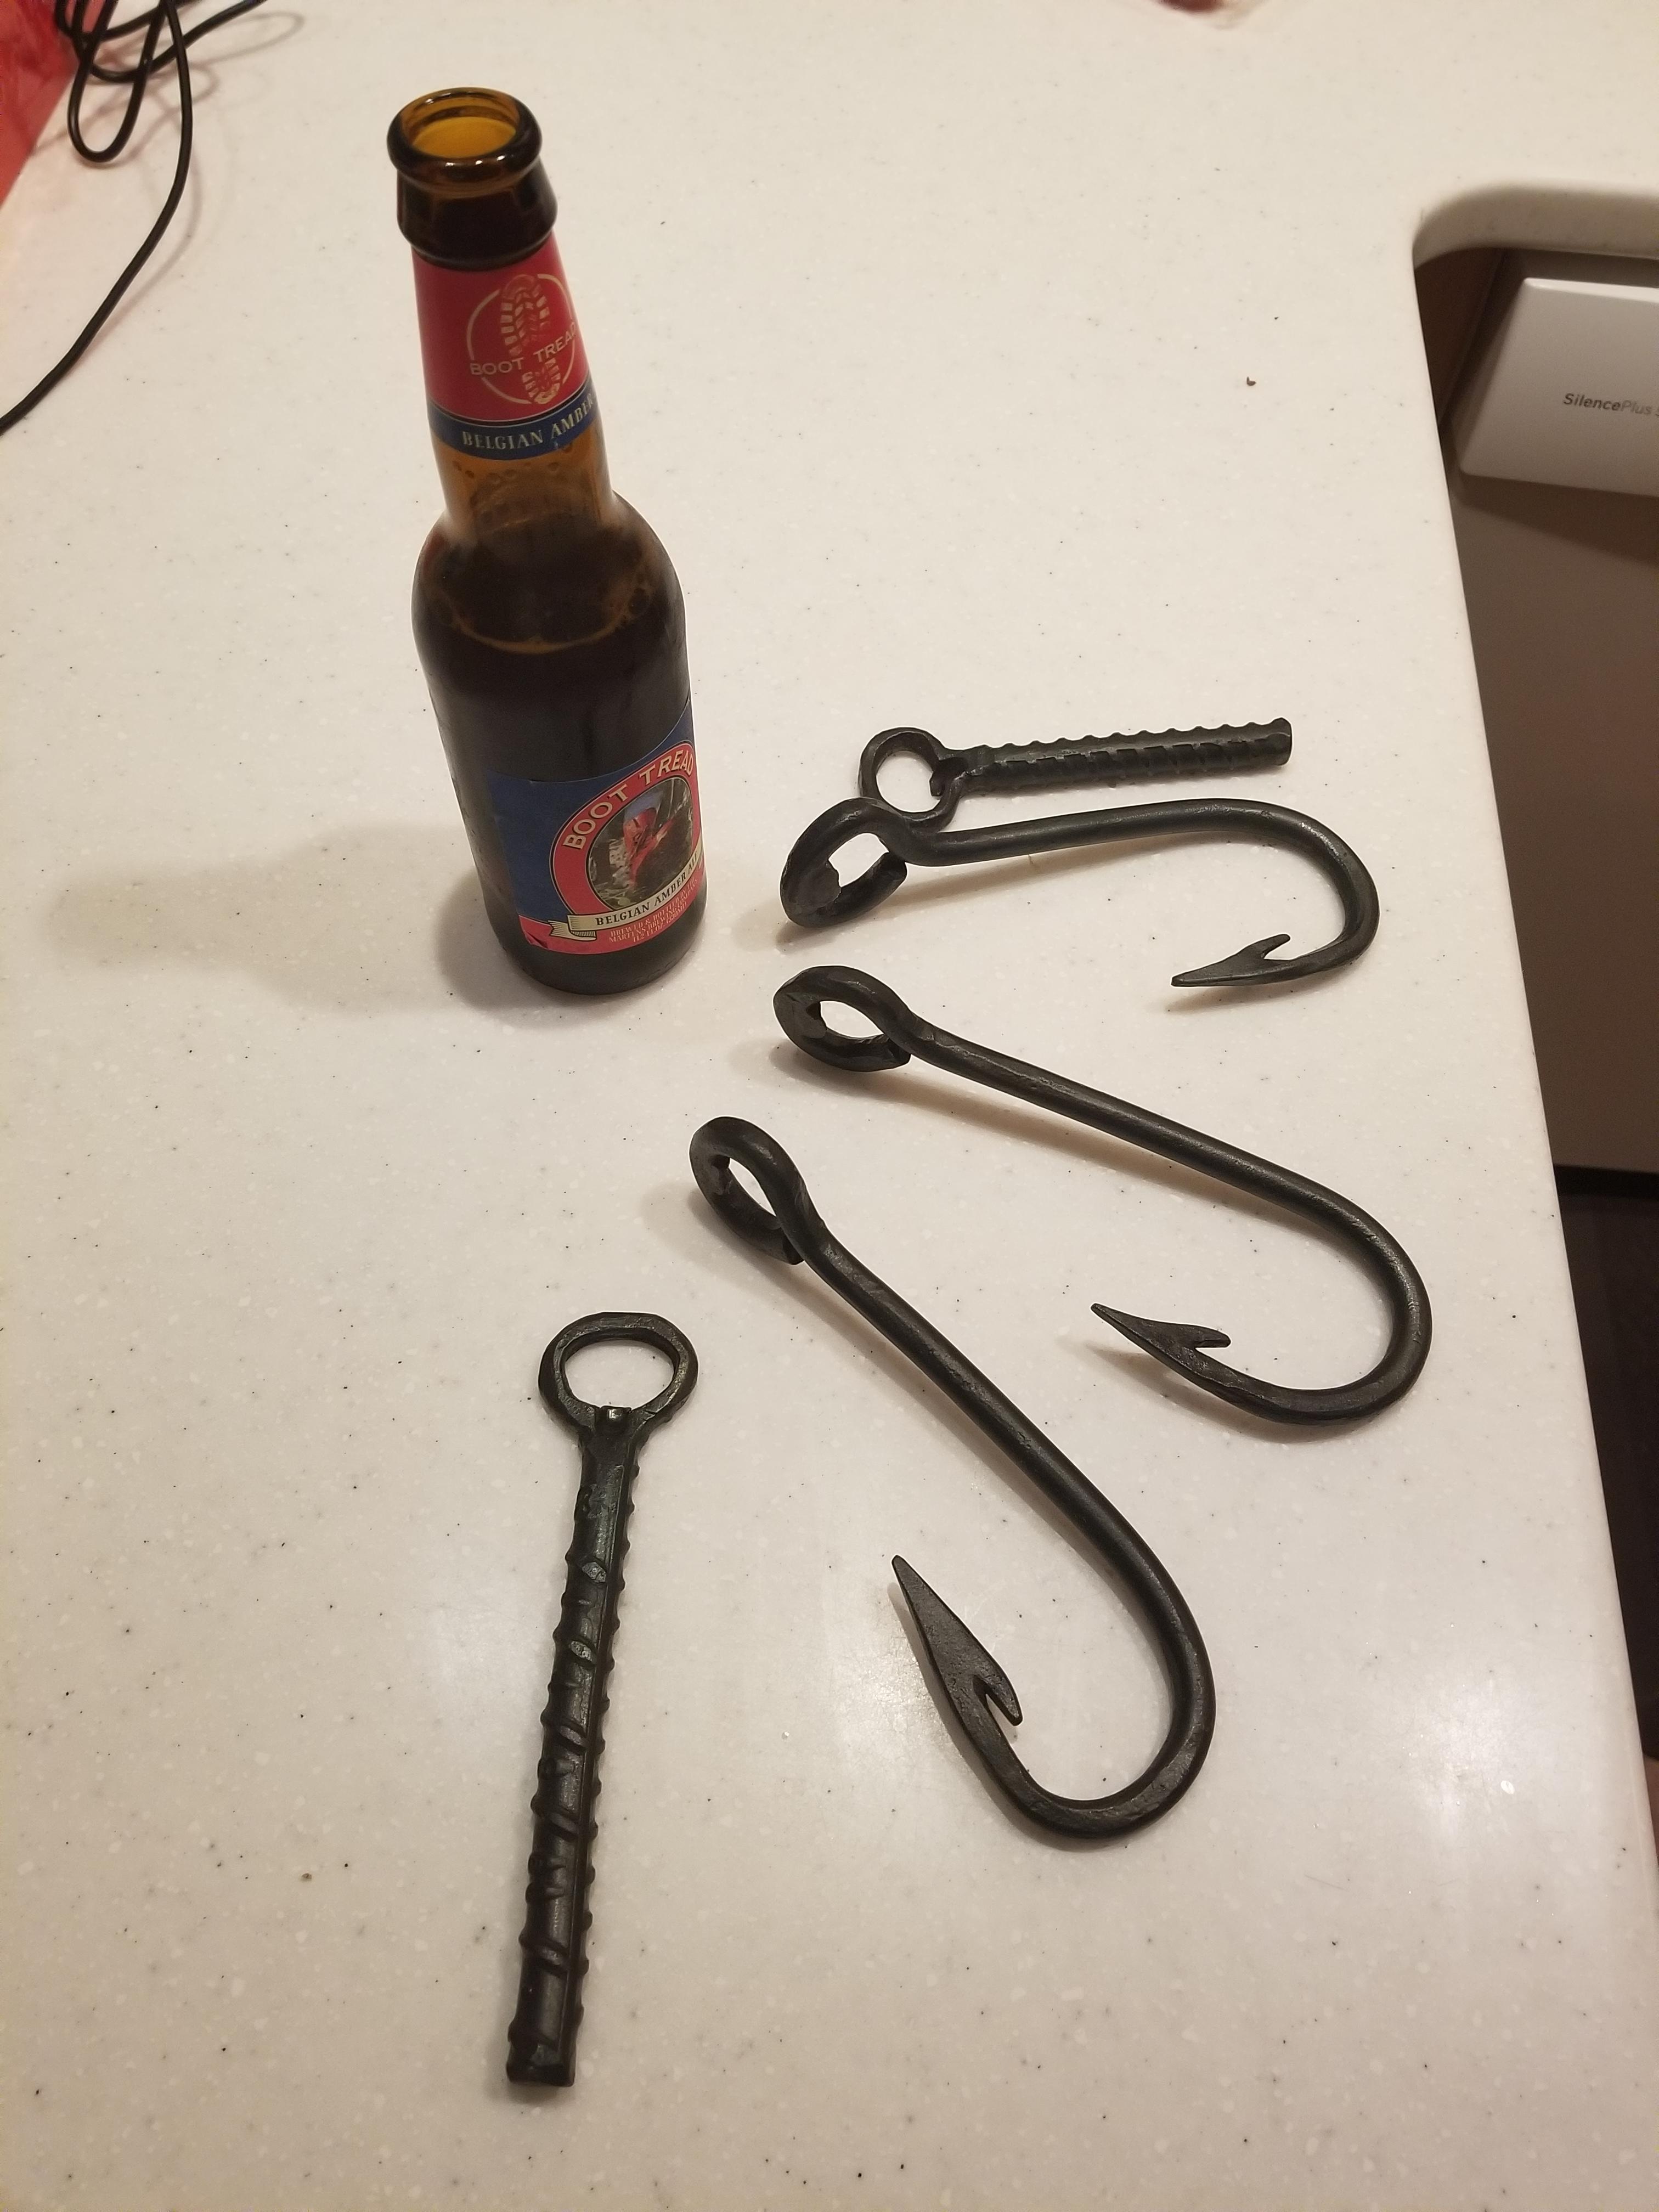
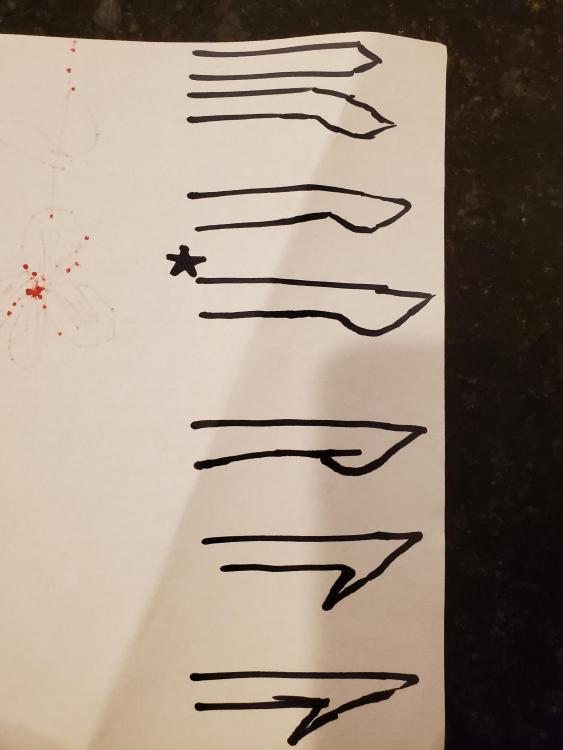
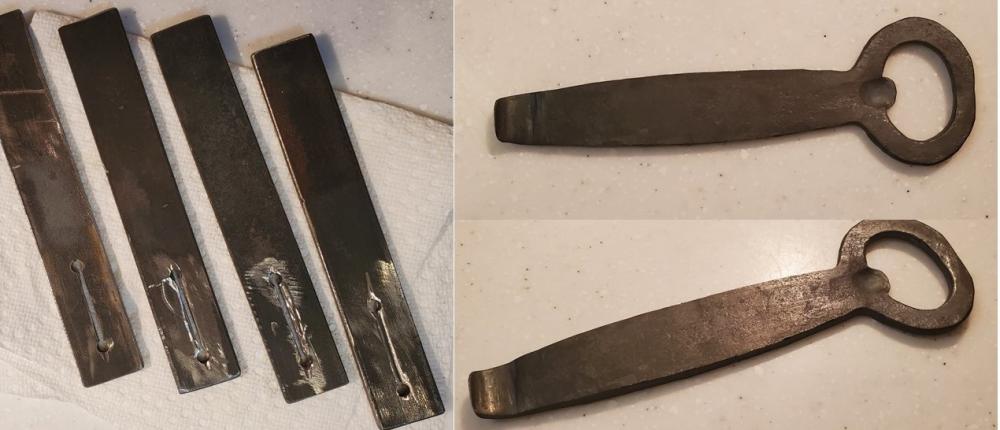
These are early iterations of my bottle openers, but I never had very good results trying to make the barb with a chisel. My method is to do a slight set down and isolate some material to the side (like half a leaf) and cut the resulting bump from the backside with a hacksaw. That's when I use a chisel to raise the barb and start shaping it. At the star below I flatten the sides out which makes the setdown disappear. This does result in the whole barb and point area being an overall taper from the original round stock. I generally clean up the back of the barb with a file to get rid of the sharpness and snags, probably not what you're going for though.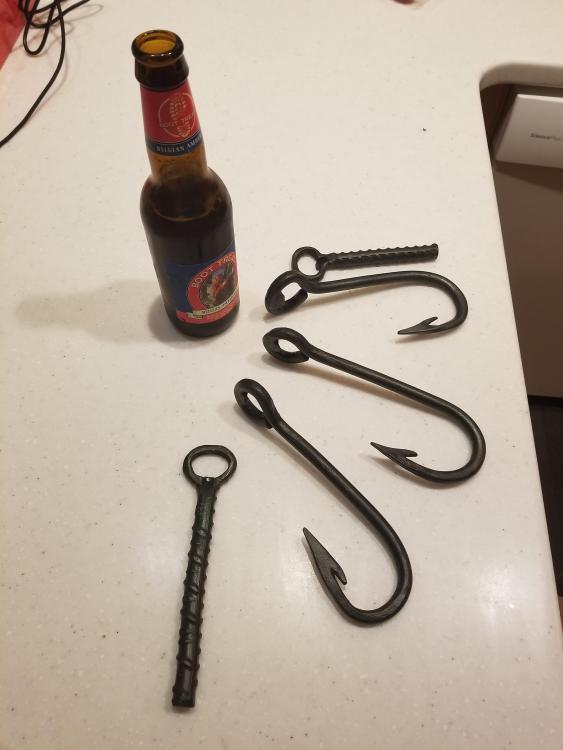
-
What did you do in the shop today?
HojPoj replied to Mark Ling's topic in Blacksmithing, General Discussion
George, unfortunately no, she lacks the attention span. She's got her own toolbox and eye protection, but since she's 7 she lacks the strength and stamina to be of much use. Doesn't help that she had a bad experience with some scale popping off and getting her hand. -
What did you do in the shop today?
HojPoj replied to Mark Ling's topic in Blacksmithing, General Discussion
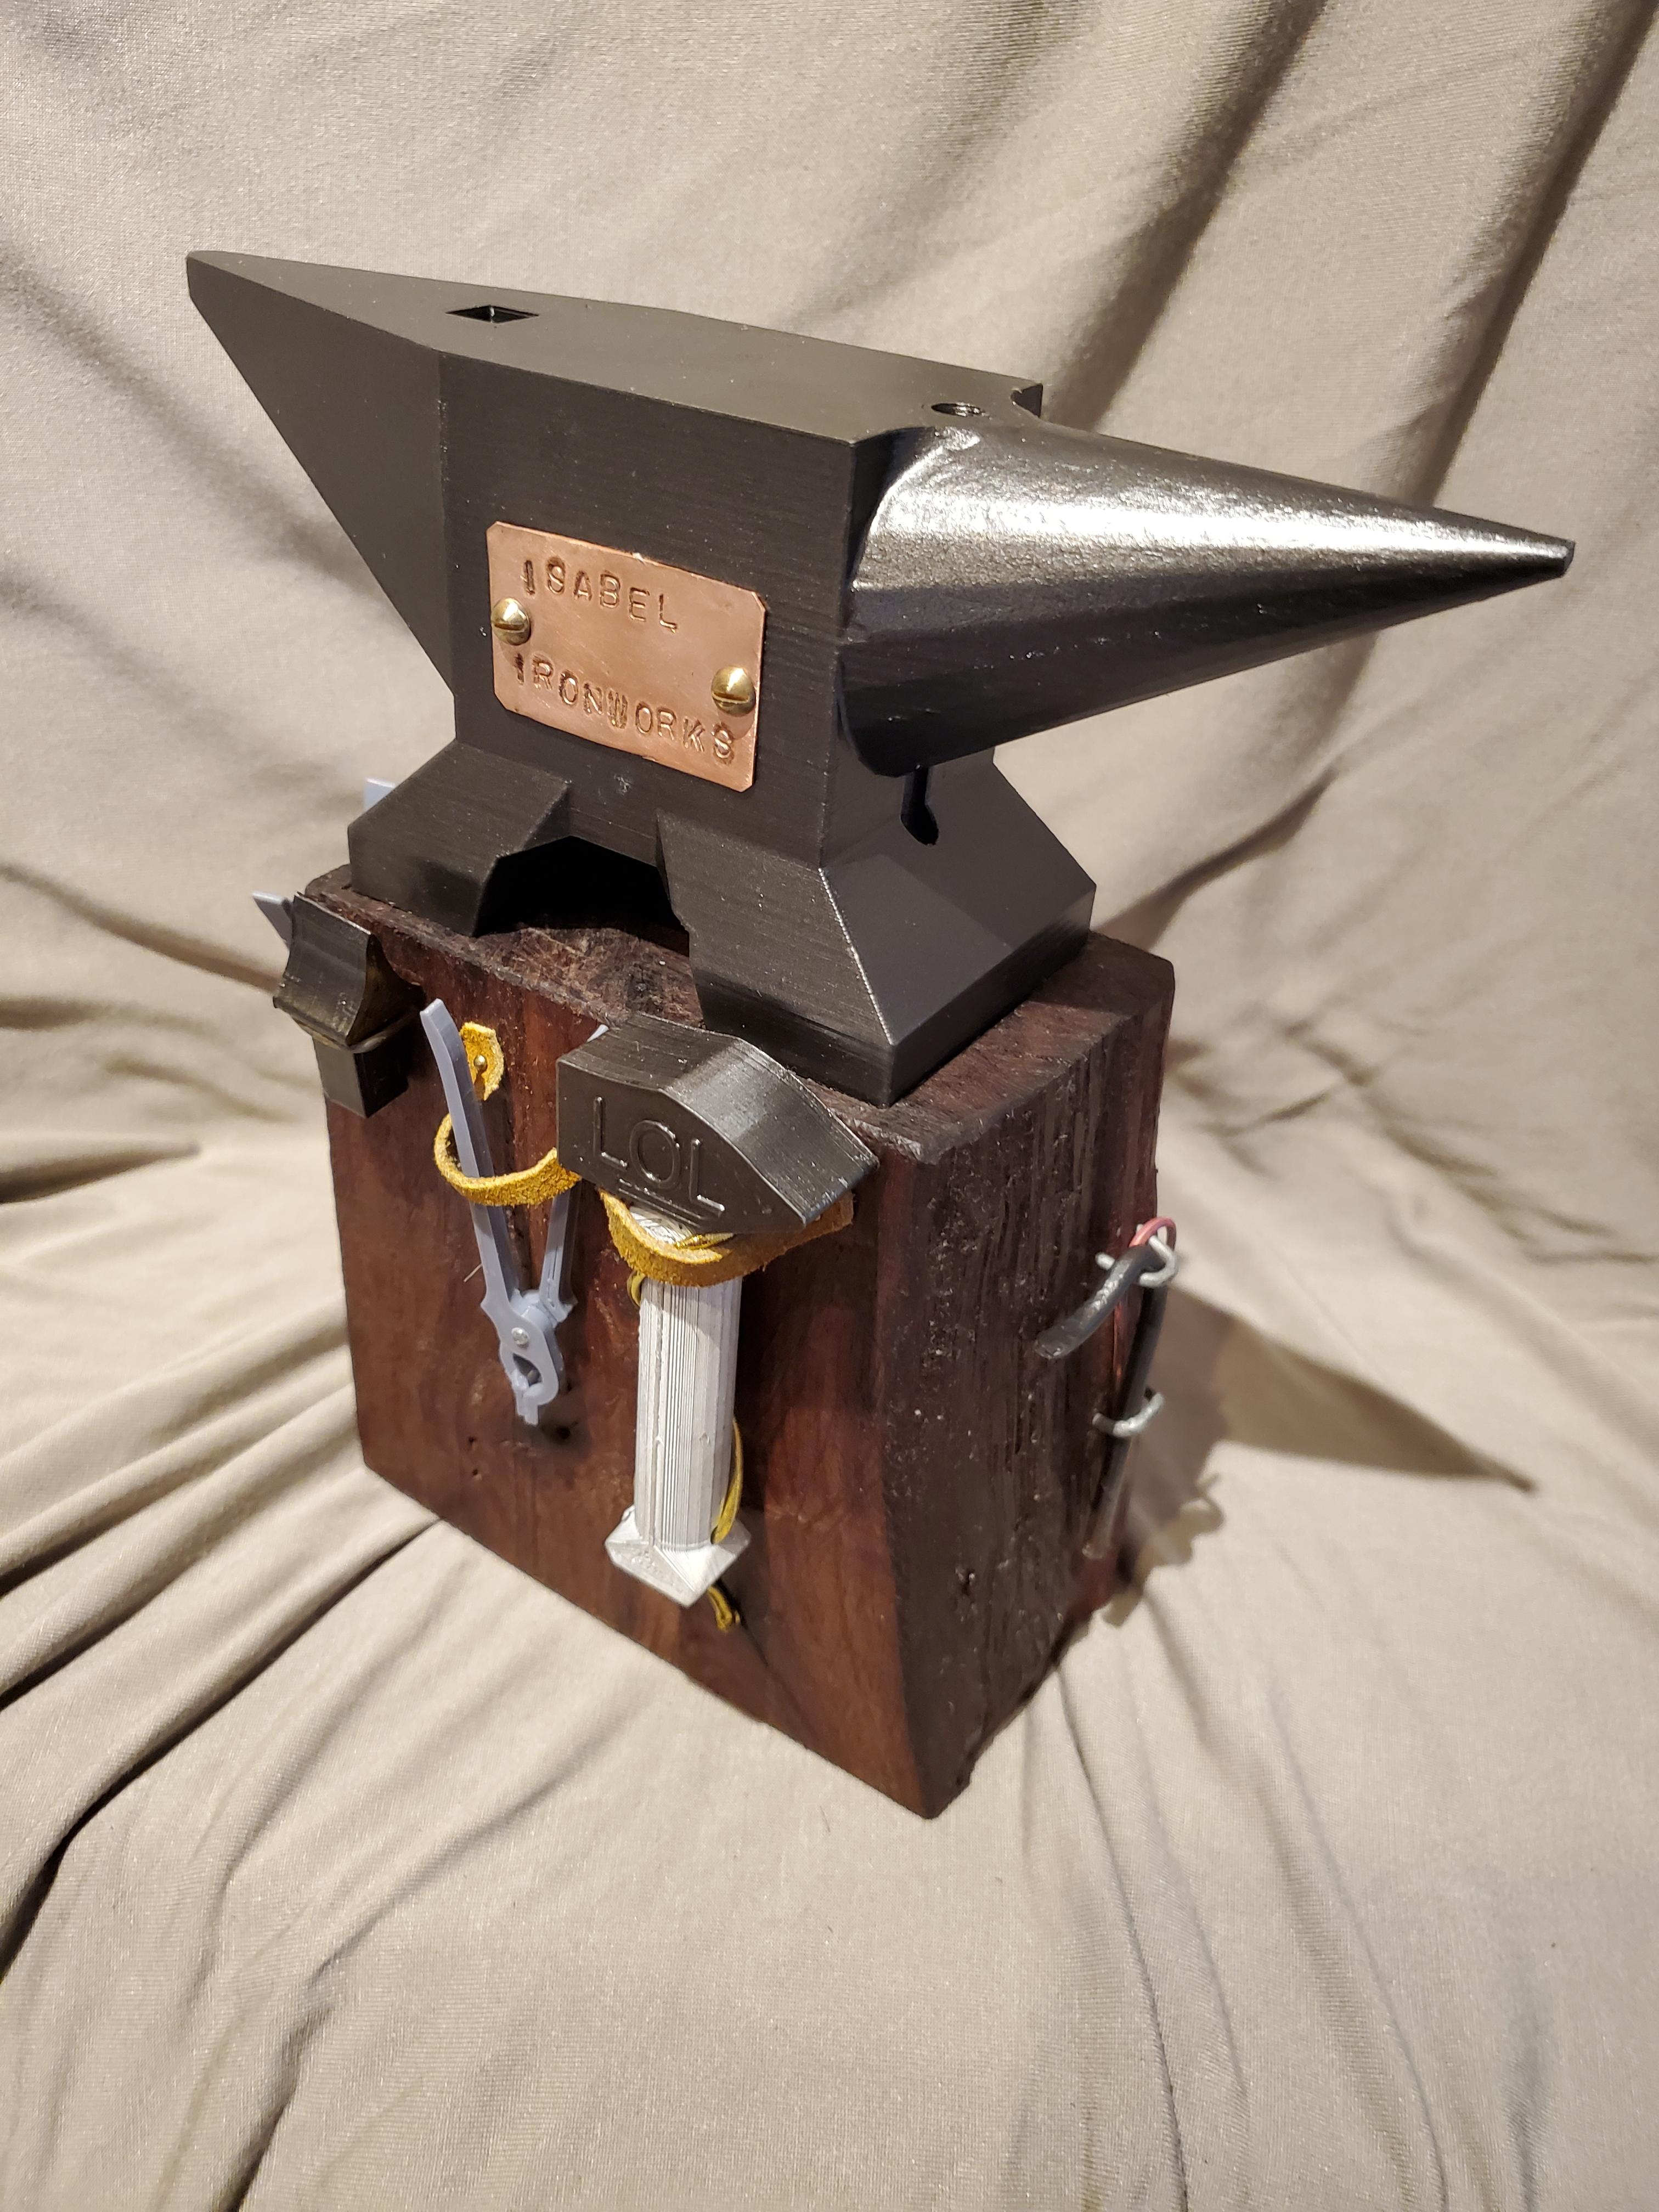
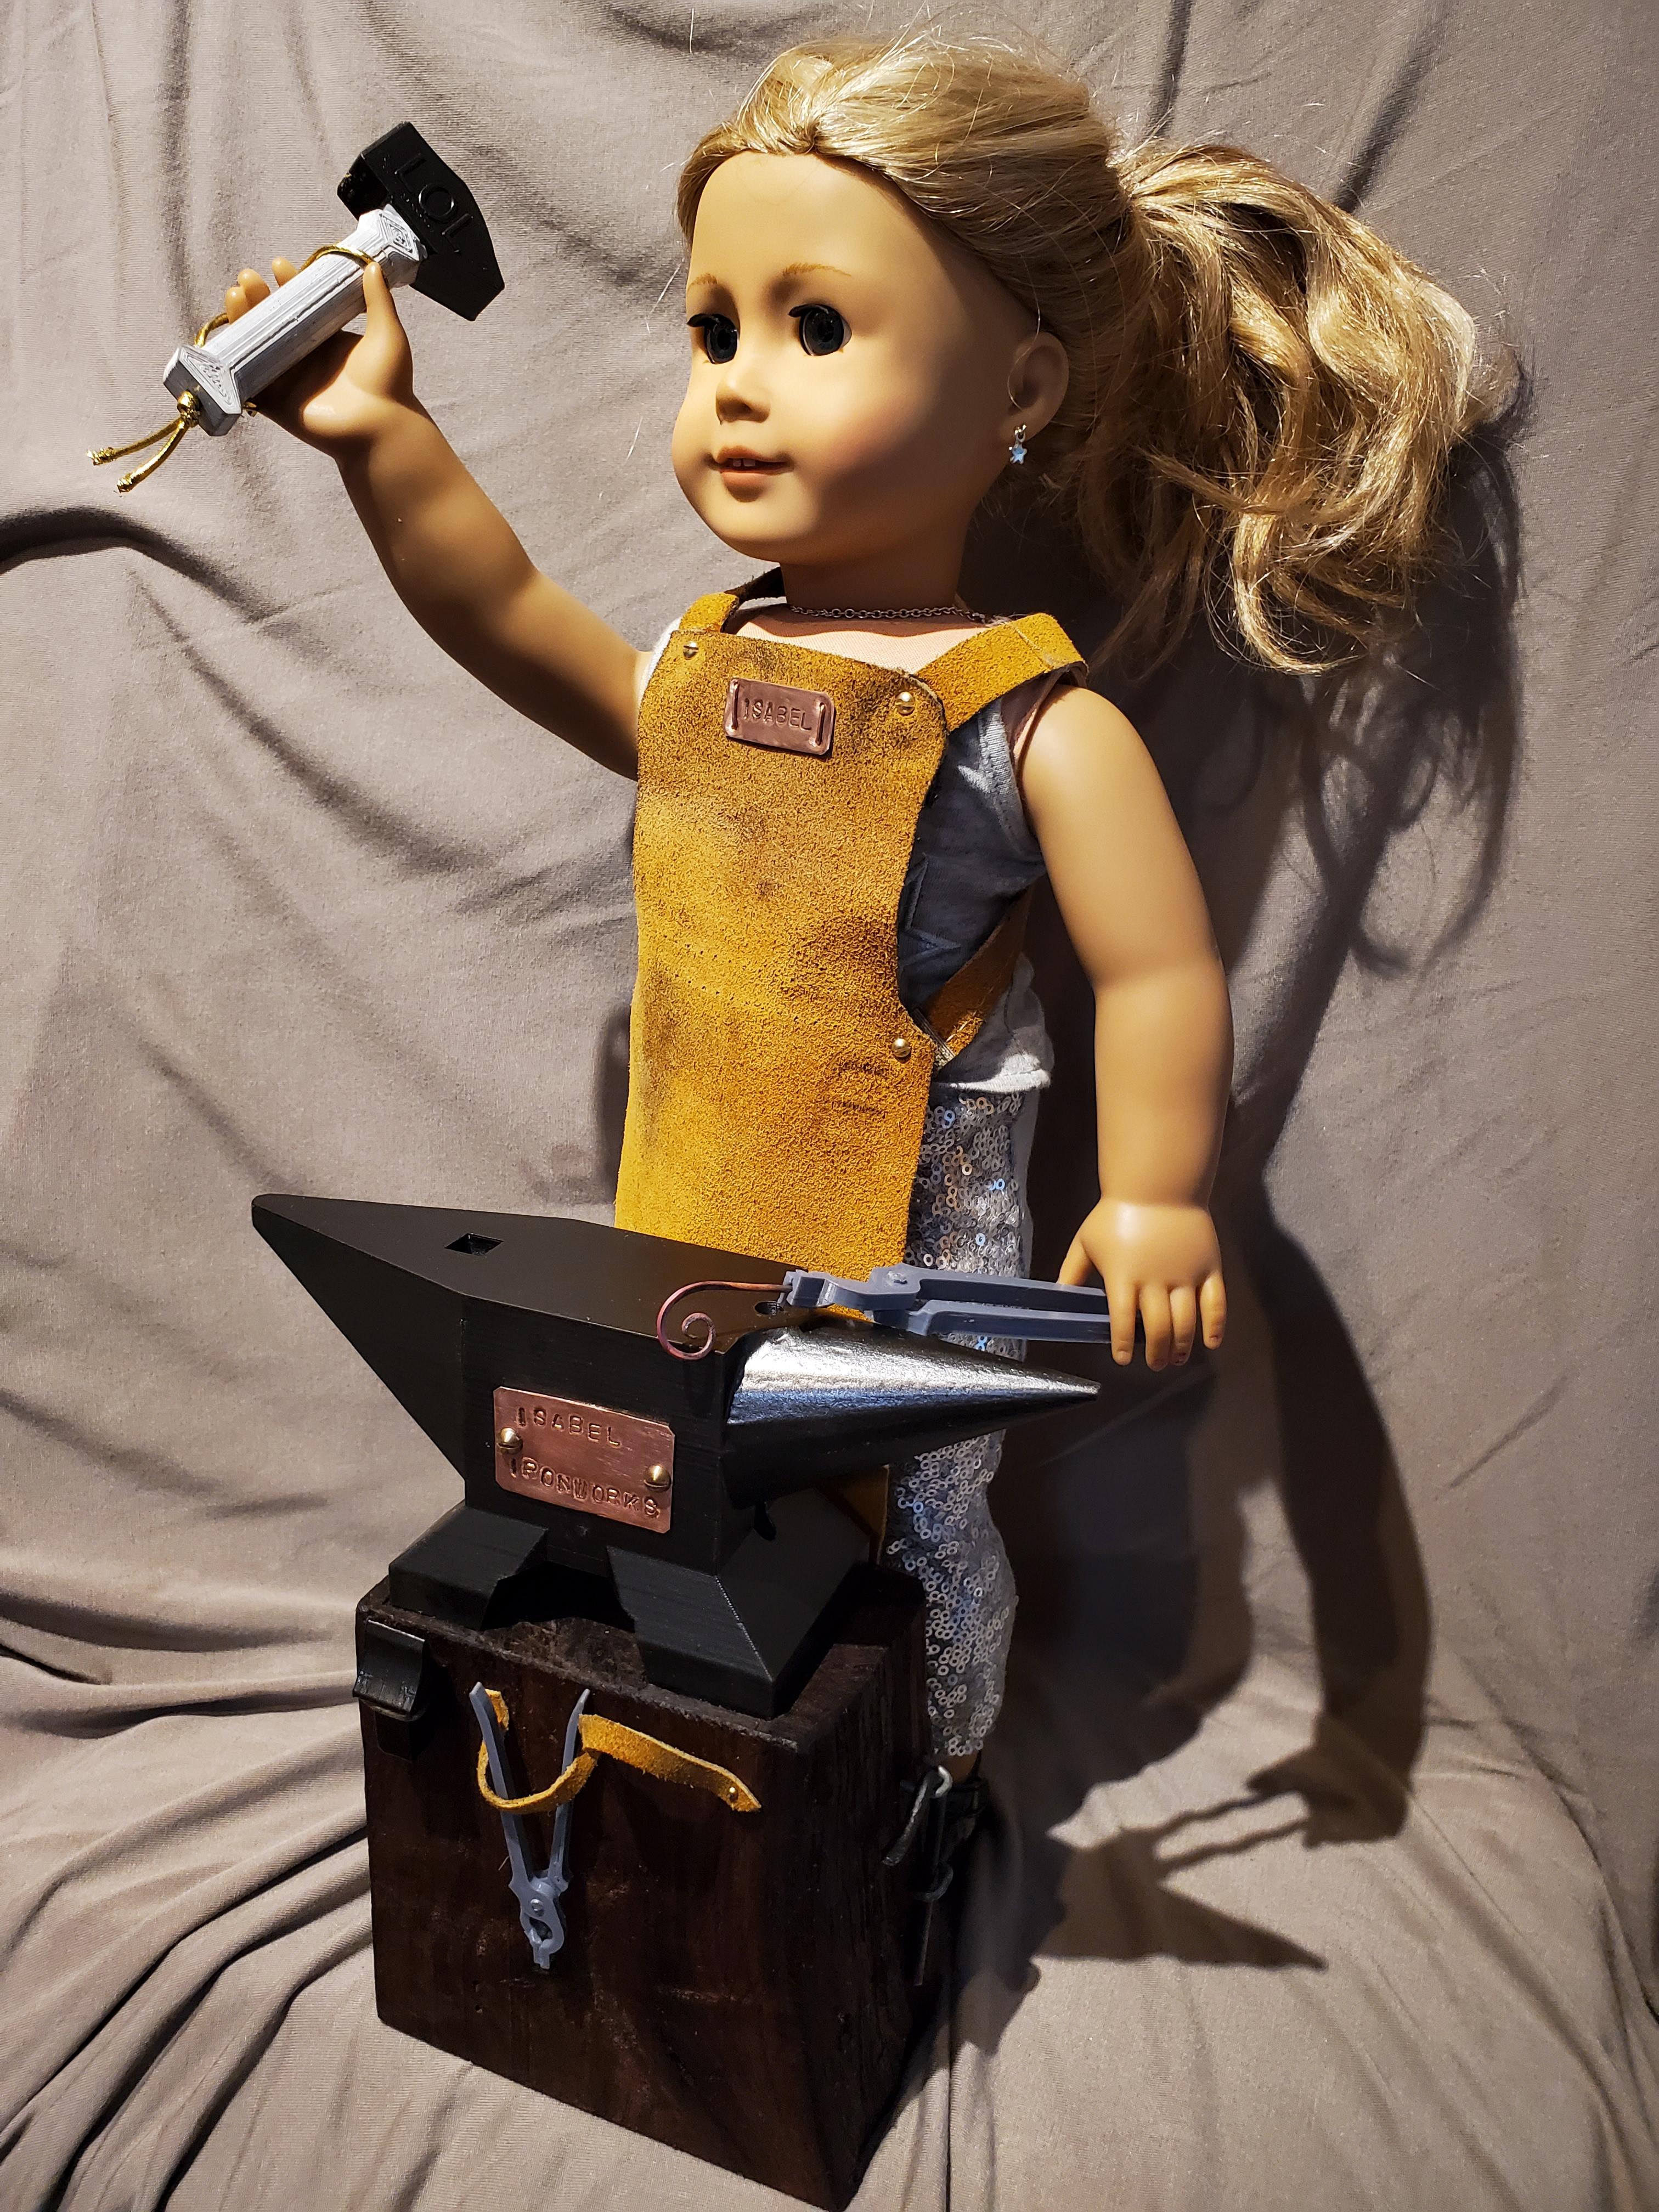
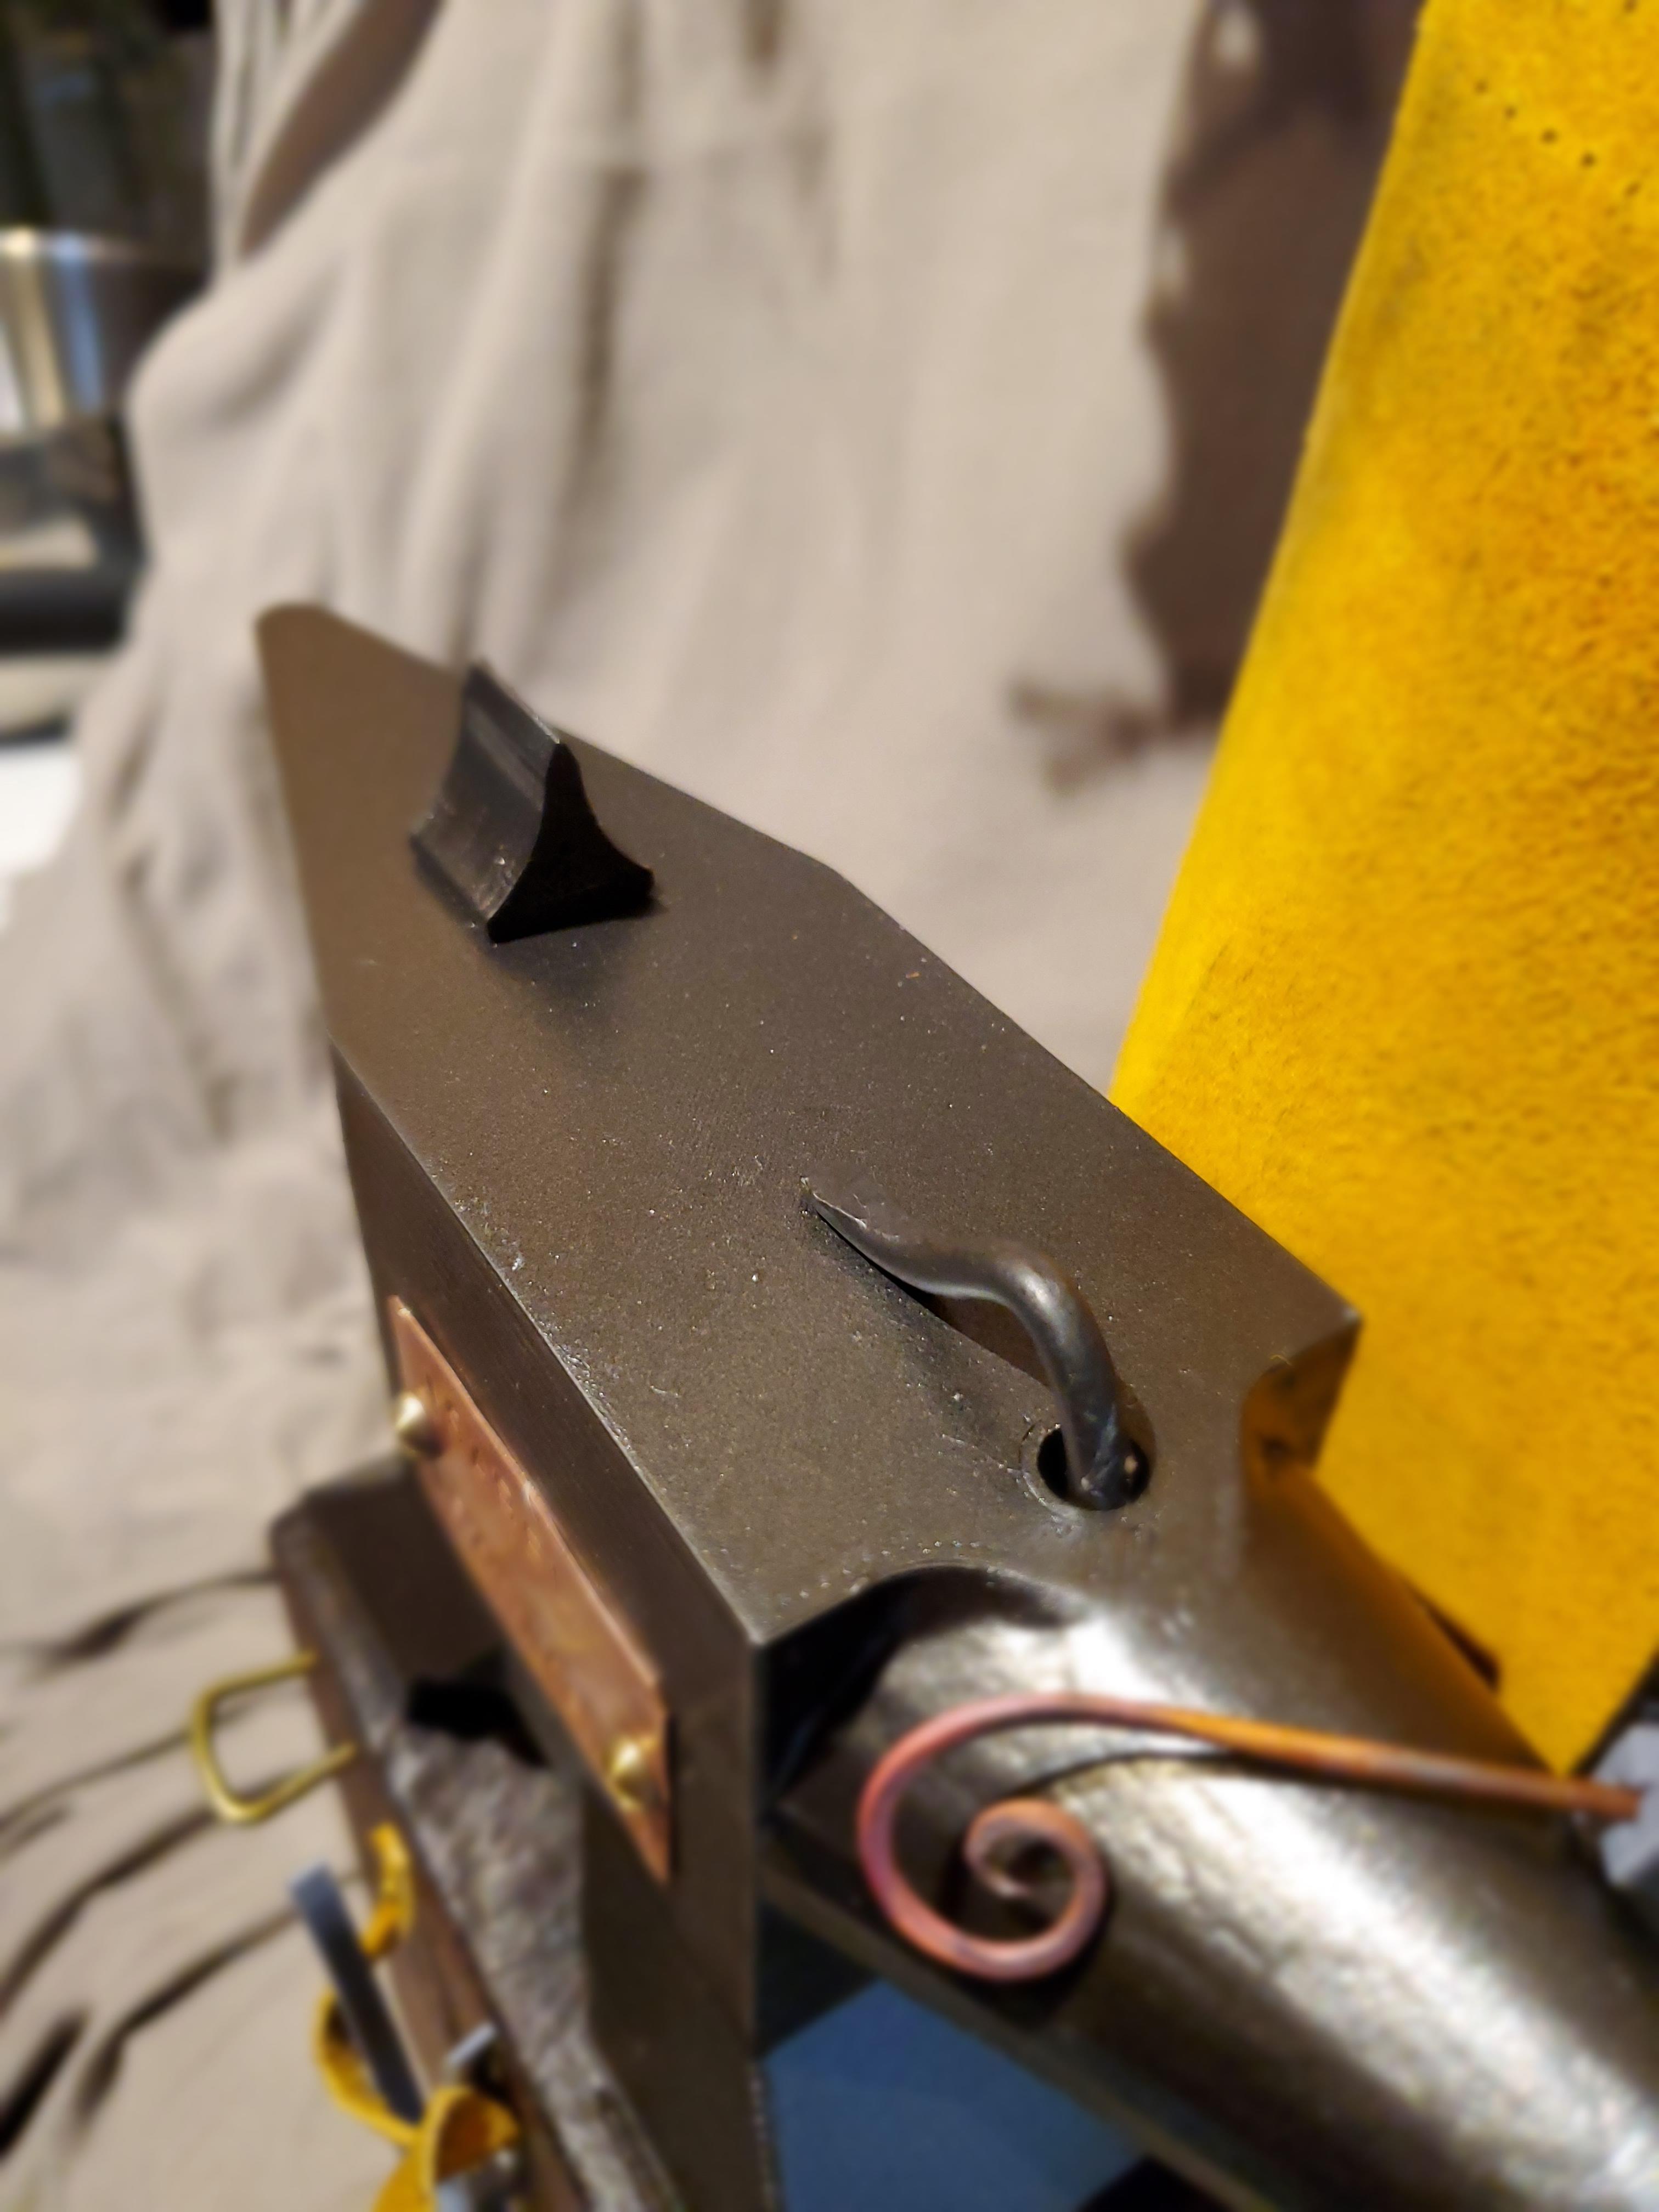
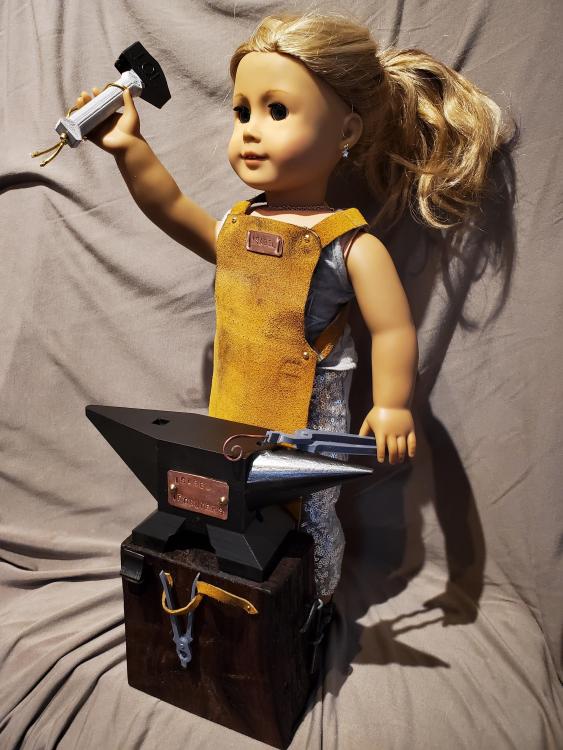
Not much forging, but I did finish my gift for my daughter (and her American Girl doll). Most items were 3D printed and painted, and the apron was cut from my old cheapo HF welding apron. Base was a chunk of black walnut, and the holdfast is steel. Anvil stays on the base with pairs of magnets that prevent it from coming off easily.

-
What did you do in the shop today?
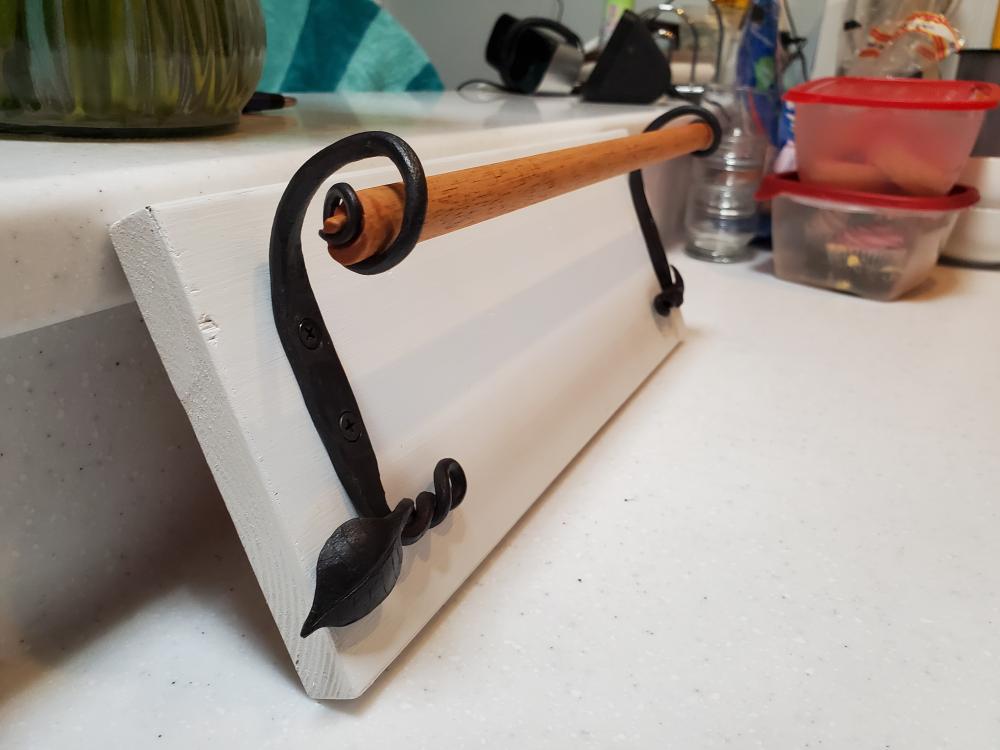
HojPoj replied to Mark Ling's topic in Blacksmithing, General Discussion
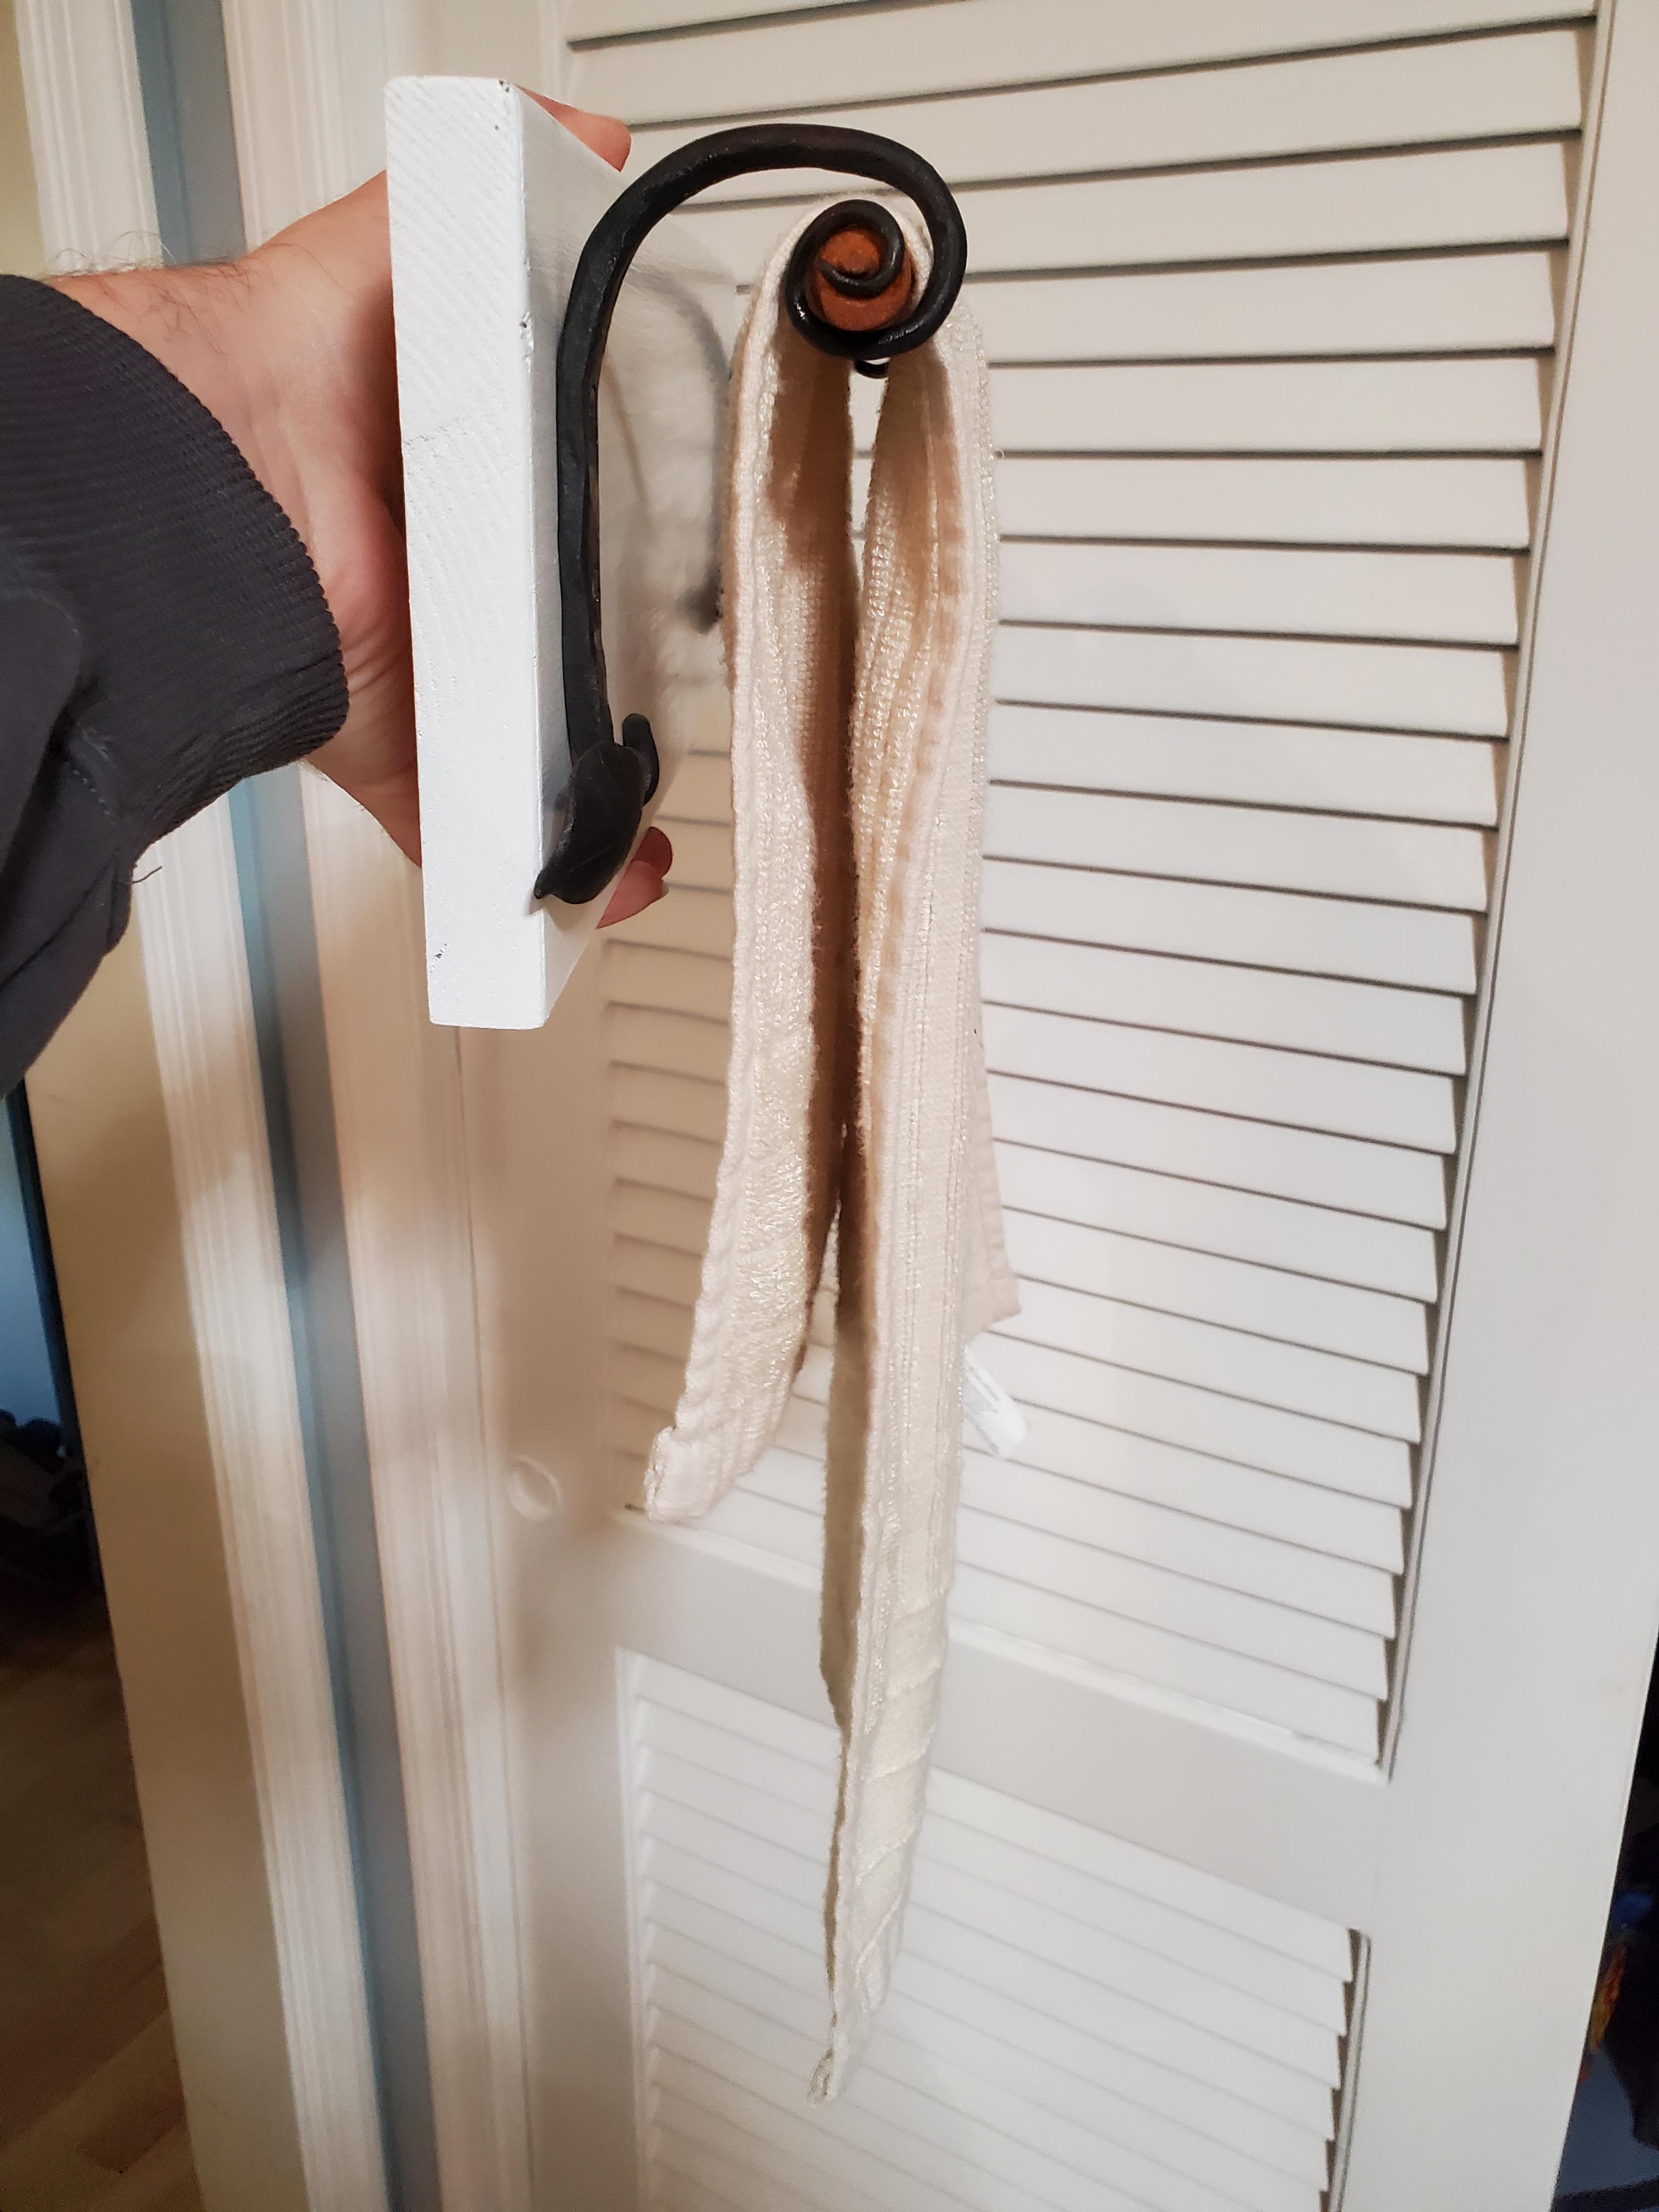
Finally finished dish towel holder for my mother. My parents recently moved away and accidentally left behind the wooden one I'd made for Mother's Day when I was ~10 (I'm 38 now). This'll be mounted on the inside of the cabinet door beneath the kitchen sink like its predecessor was (which is why it's upside-down from the orientation one would expect). The rod has to be as high as possible for convenience's sake.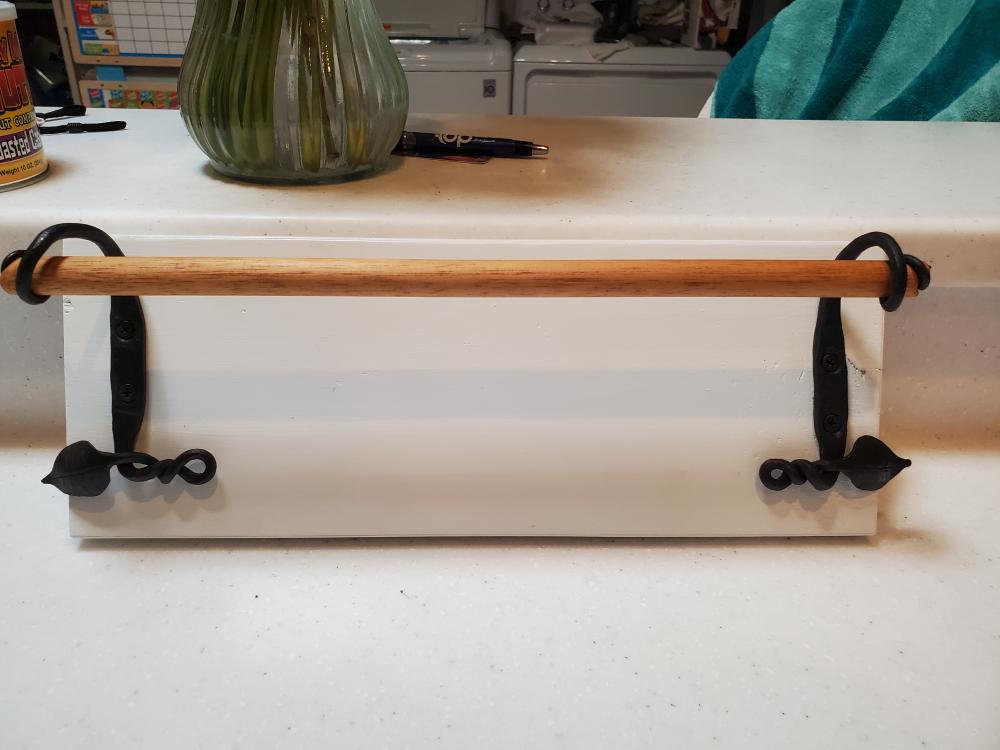

-
I'm with Latticino, would make a great base for some sort of stand.
-
Top tools with loose wooden handles
HojPoj replied to LeMarechal's topic in Tools, general discussion
My stickout's not quite that much, but you'll come to find what works for you. Probably would've only given a small clearance between nut and head, as well (don't want the head wandering *too* far around). Many ways to address the problem, so long as it works and isn't unsafe, it ain't stupid. -
Top tools with loose wooden handles
HojPoj replied to LeMarechal's topic in Tools, general discussion
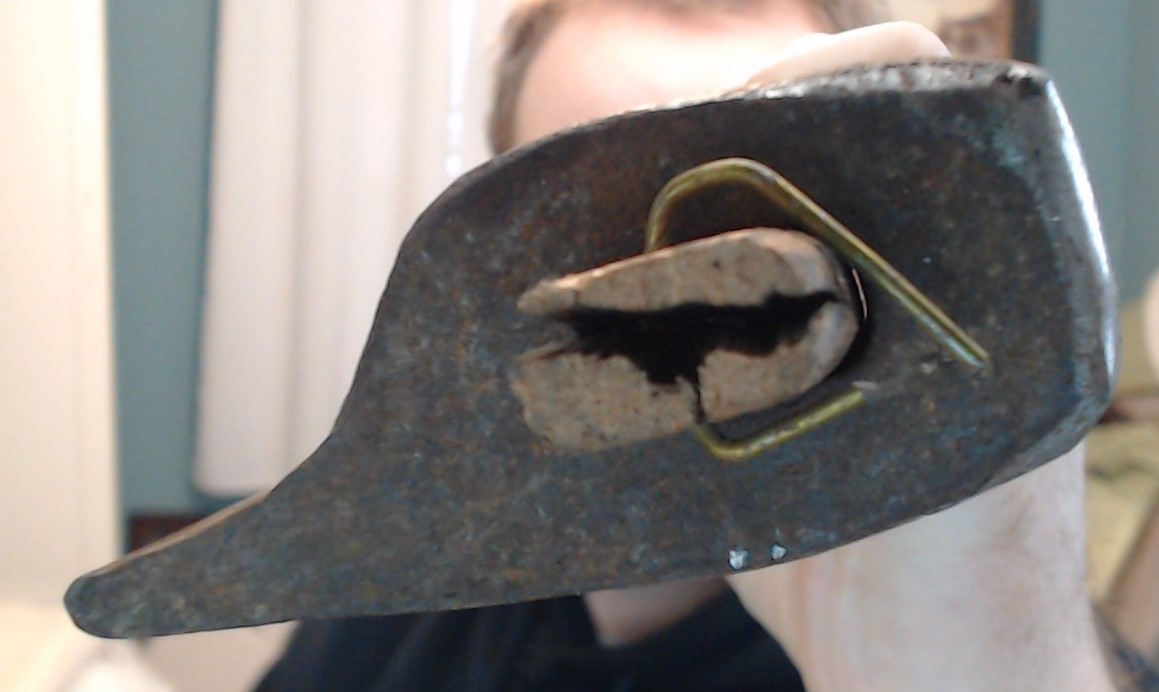
As Swedefiddle mentions above, a retaining pin arrangement can be helpful, *especially* if it's an asymmetric tool. That allows you to flip the tool around for left-or-right side configurations. For example, this fuller that is useful for shoulders:
-
66 lb. Chinese 'ACCIAIO' Anvil Unboxing and testing
HojPoj replied to HojPoj's topic in Anvils, Swage Blocks, and Mandrels
My guess is that Viceplaint is a bot or shill account trying to link to other sites for the traffic. But since the question was asked... I did not use a ring light, nor do I document things this thoroughly enough times to warrant the investment. That being said, ring lights are GREAT for a lot of arms-length and closer shots since you don't have to combat shadowing nearly as much. I invested in an on-lens one at work for taking pictures of stuff in cramped spaces of aircraft. For most of what I normally document, I usually just position stuff to have adequate light- it makes everything so much easier and clearer to capture. Doesn't hurt that I like to have lighting as bright as the noon-day sun in my workspaces, either. Given my limited experience with them, I'd try to get one around 4000K in color, and uses COB LEDs and not a boatload of the old-style 5mm ones. -
What did you do in the shop today?
HojPoj replied to Mark Ling's topic in Blacksmithing, General Discussion
Billiybones, would that happen to a four and a three letter word that would refer to a cajun? My father is from Bayou Lacombe and I *think* I know which one you're talking about. -
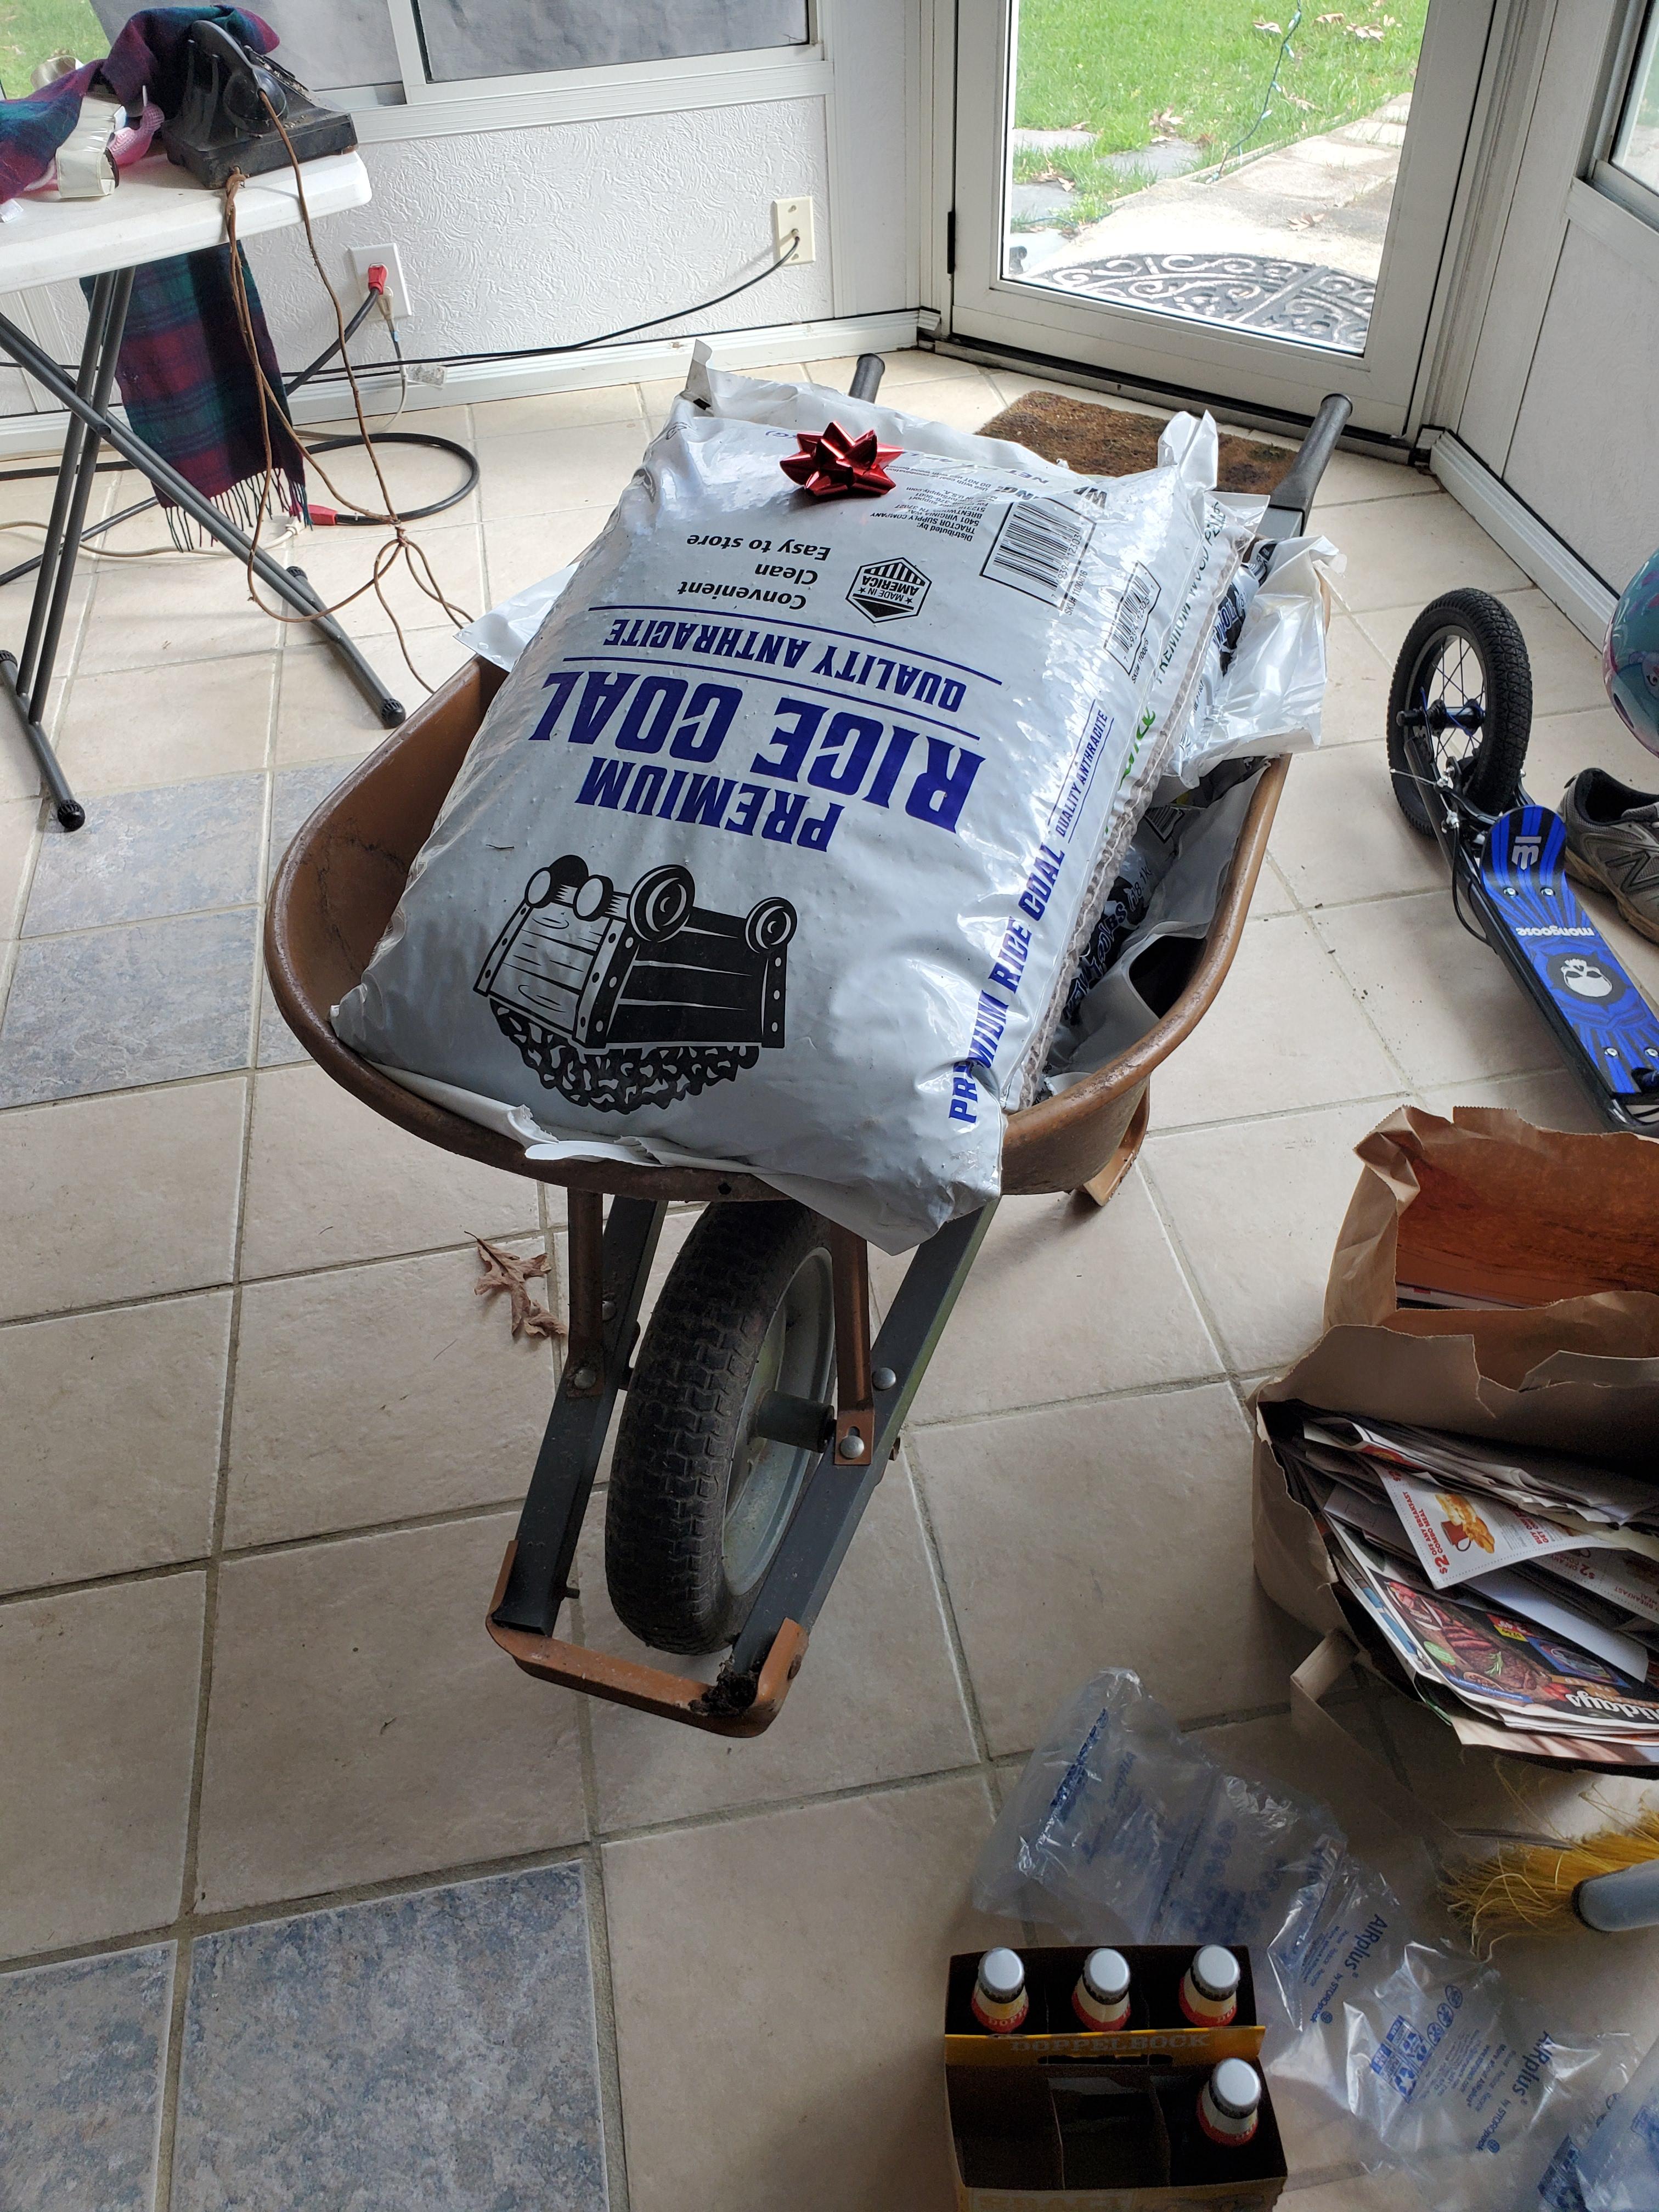
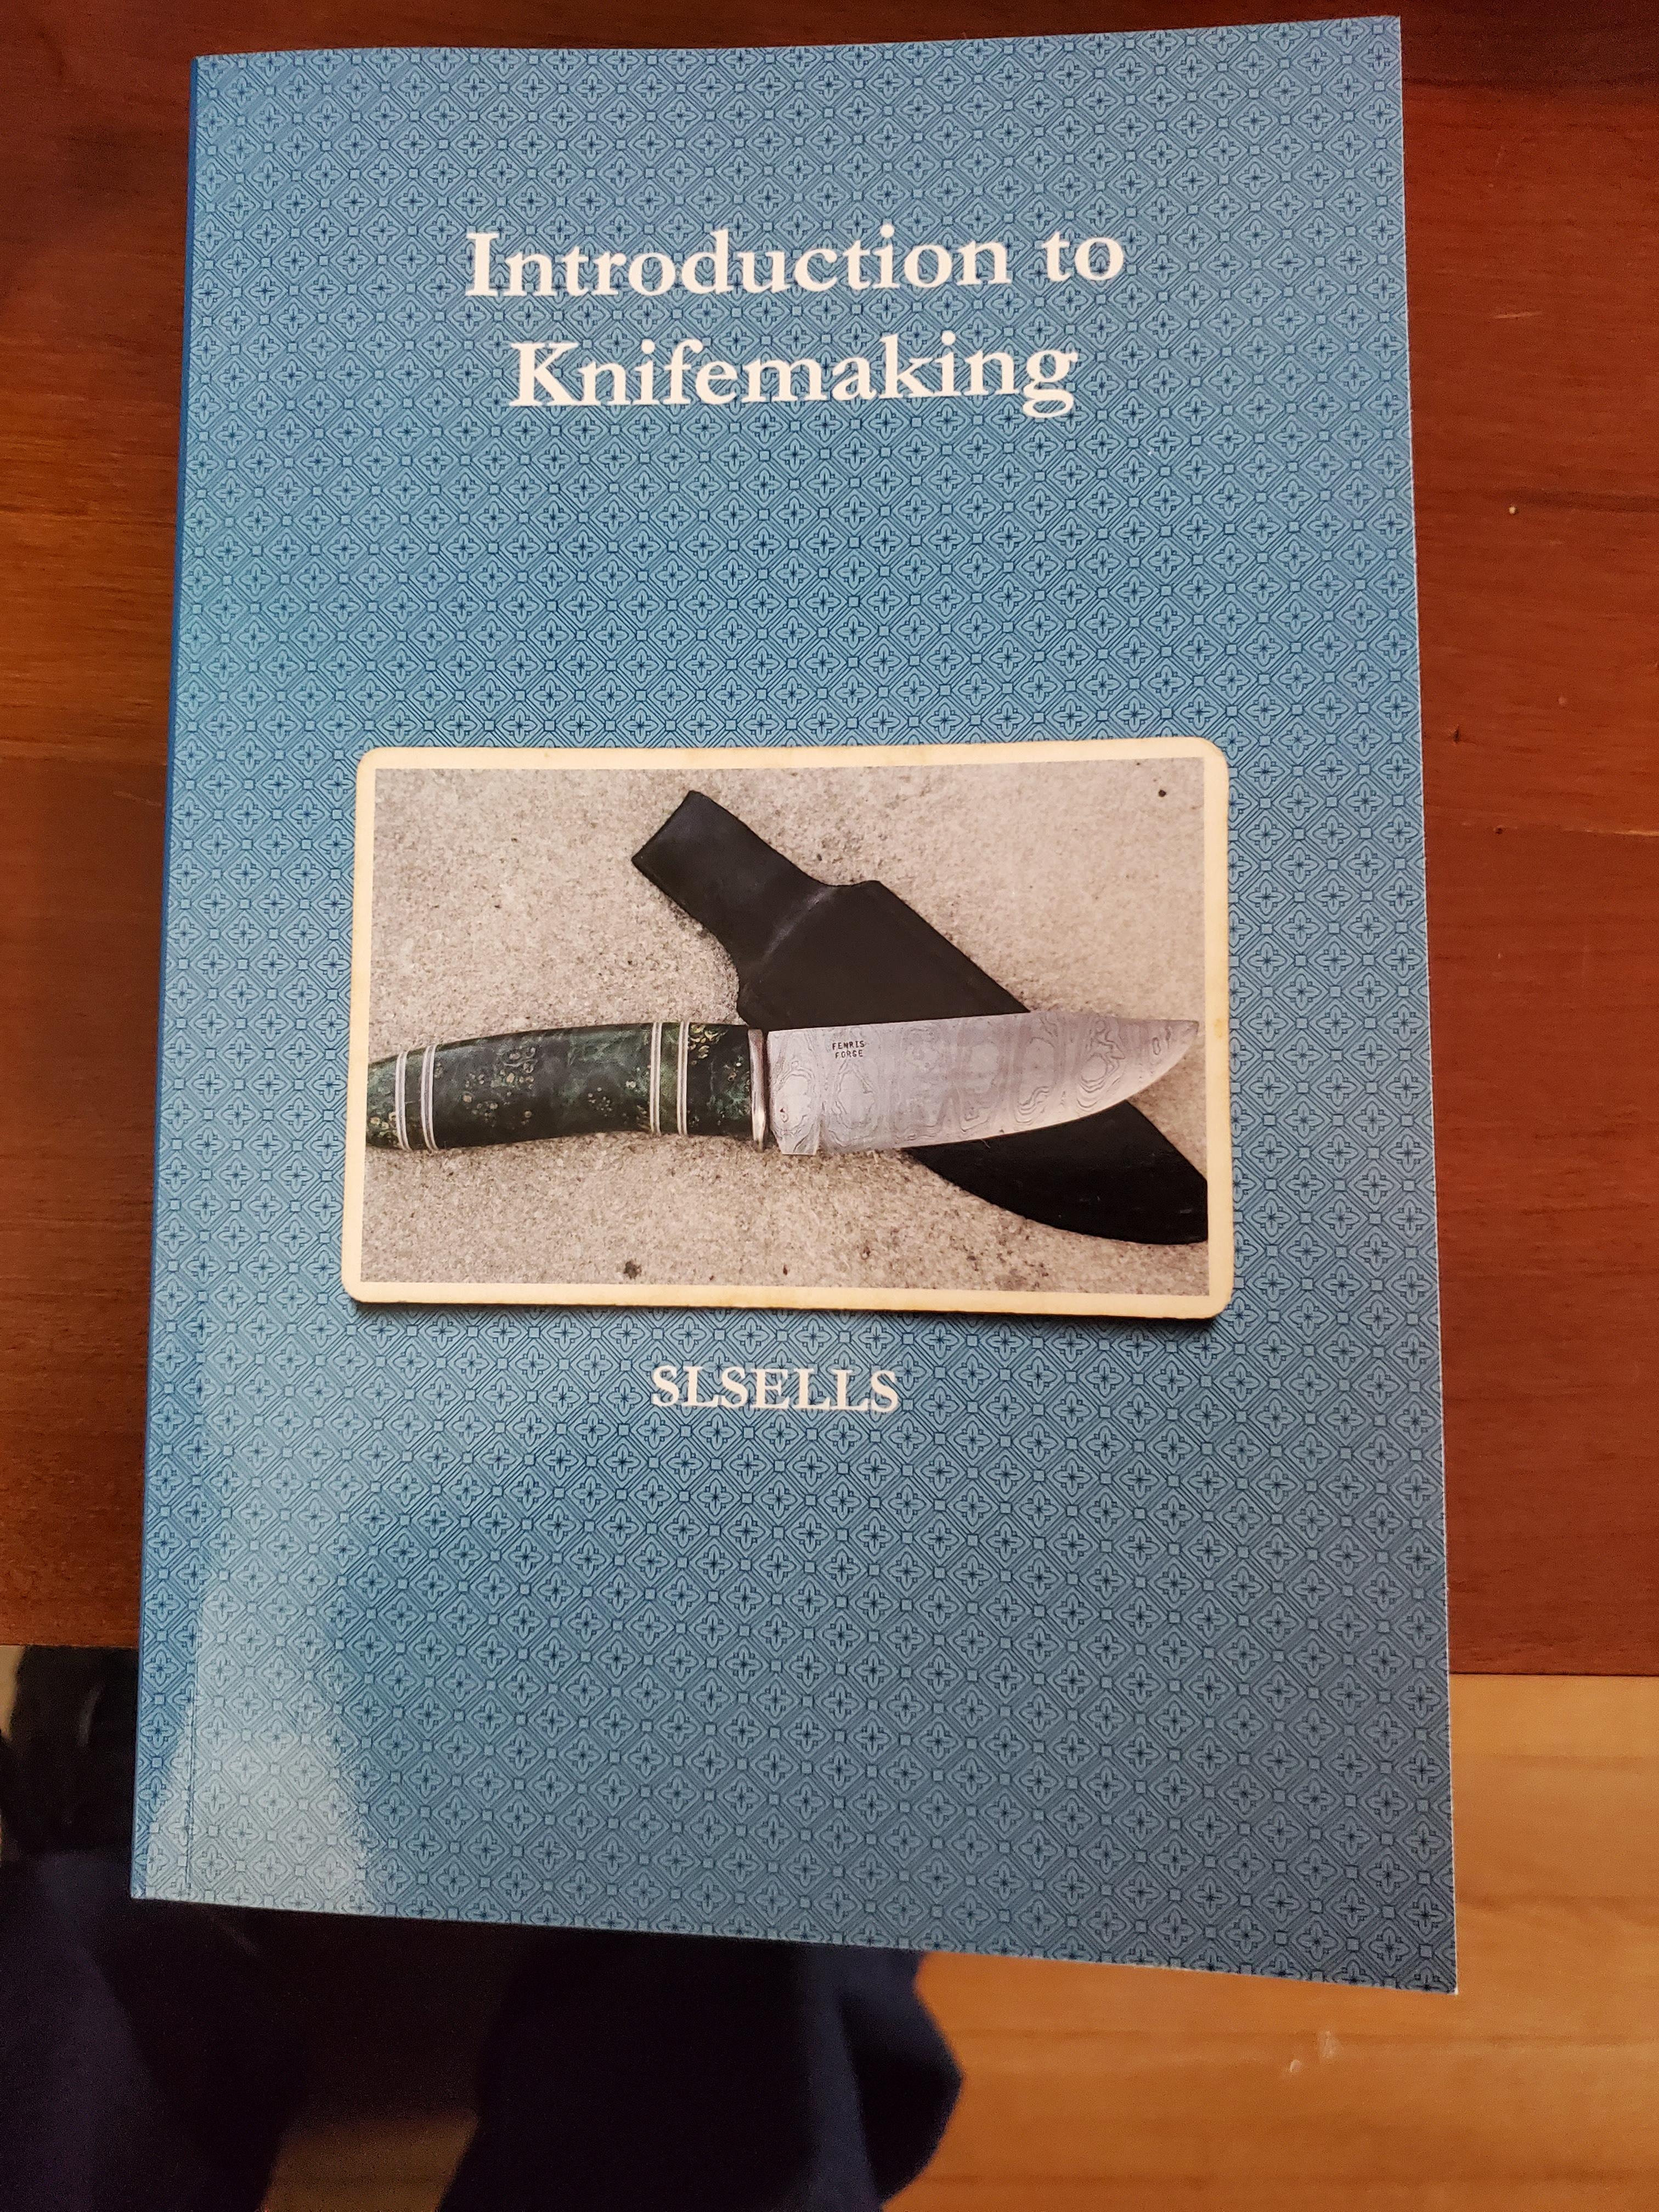
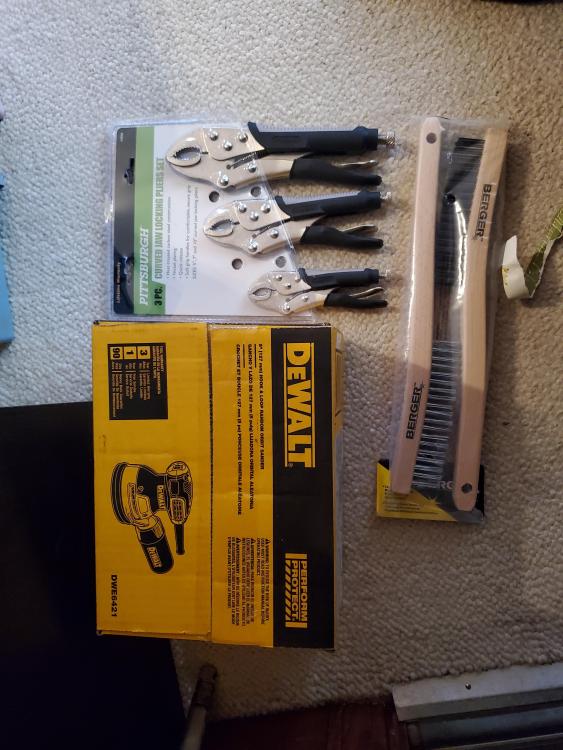
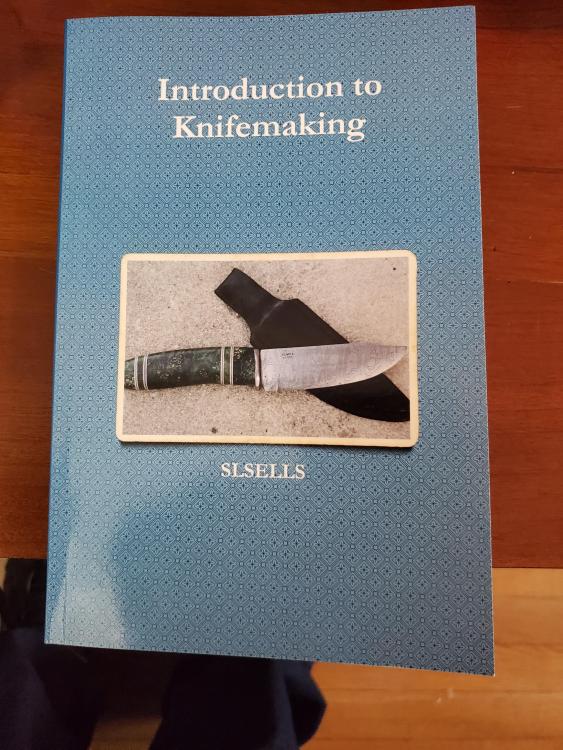
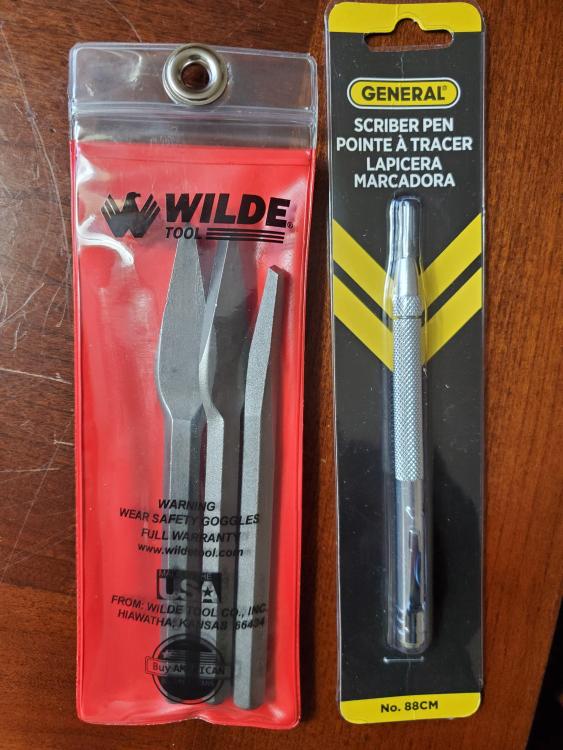
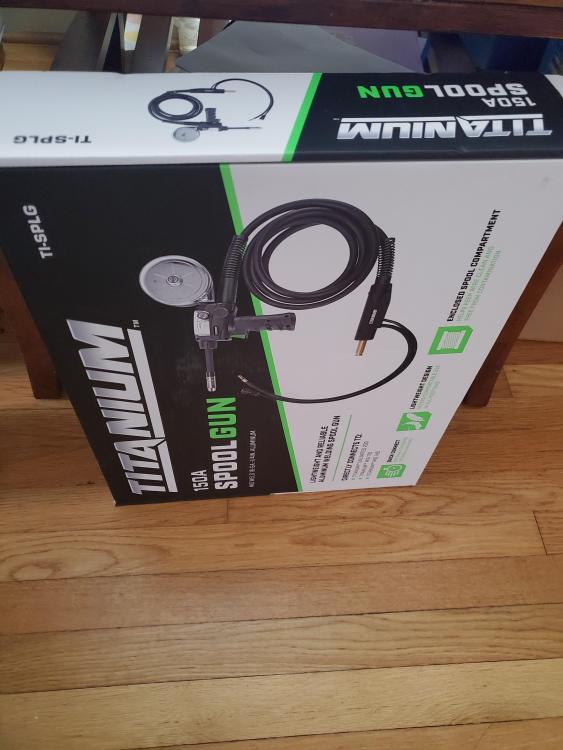
My wife and santa were good to me this year. I'd gotten one of the HF Titanium multi-process welders secondhand recently. Now I can finally start trying to weld some Aluminum! Asked for the chisel set so I had some references for making my own. Cape, round, and diamond chisels. Also a carbide scriber for marking metal. Steve's book was in my stocking. Glanced through the majority of it today. Sander wasn't on my list, but was appreciated. Other stuff was to help with the welding endeavor. Apparently Santa couldn't bring this gift inside (I have a 6 year old, I do things to try and keep the magic alive). Now I see why he didn't bring it inside. 1 Bag of Rice Coal, the other 4 are Nut size Anthracite. Got some to try it out. Still unsure whether this means I'm on Santa's naughty or nice list, though.

-
Thanks for keeping the series going, Jennifer!
-
Making a keychain with rusty old nails!
HojPoj replied to TechnicusJoe's topic in Blacksmithing, General Discussion
Love it, thanks for sharing more of your work, Joe! -
What did you do in the shop today?
HojPoj replied to Mark Ling's topic in Blacksmithing, General Discussion
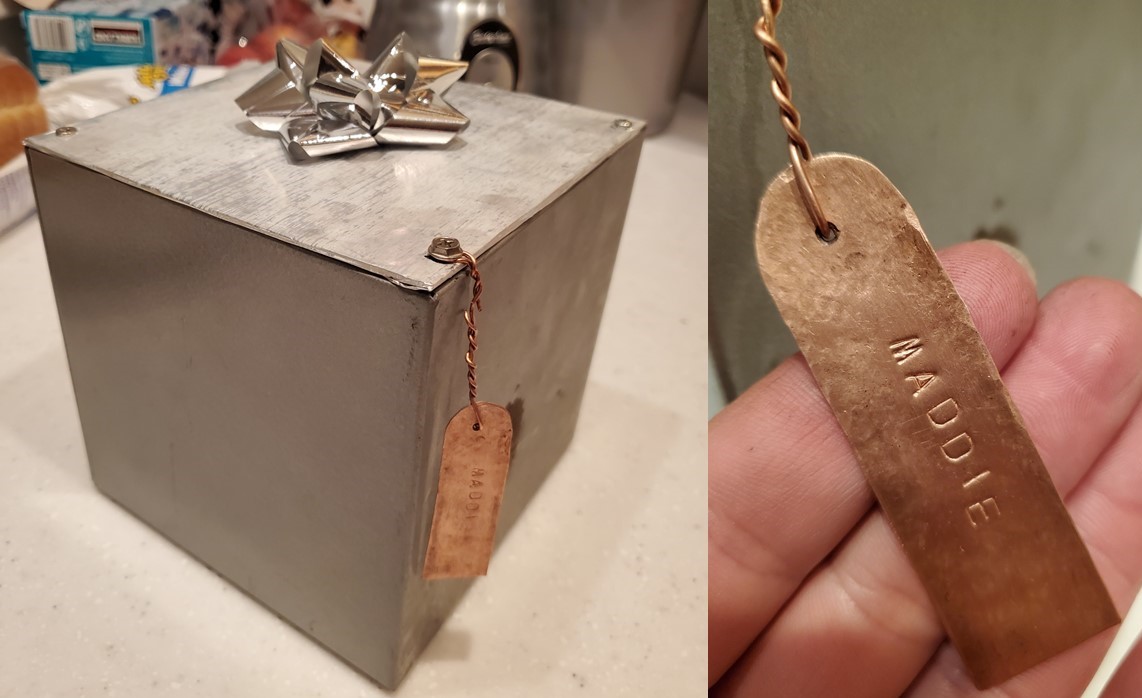
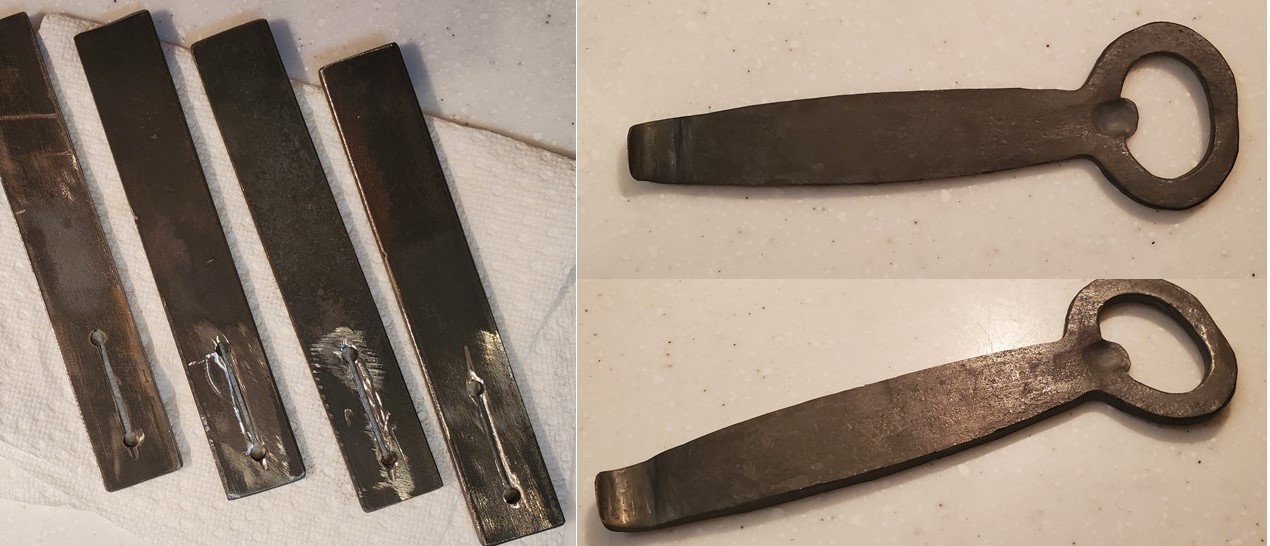
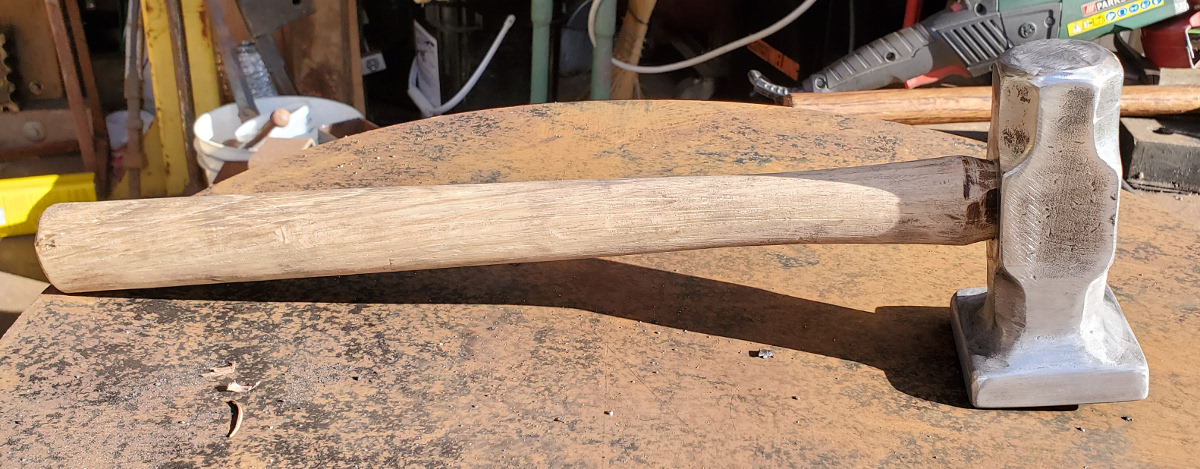
A few things since my last update. Making my first go at doing a batch of bottle openers to sell. After spending way too long slitting and drifting the first, I opted to try drilling and grinding the slot for drifting. These will be getting wooden scales. The curved butt-end can be used for prying (like for paint cans and such). Messing around with arc-welding a claw hammer back together to see if I can make a functional curved top chisel. Not optimistic, but figured I'd give a shot. Welded together a very light duty pair of box jaw tongs. More as an experiment in the method than anything else- could work if I was better at welding (previously only did flux core MIG, which let the magic smoke out). Got one of the HF titanium multi-process welders secondhand and have both C25 and Pure argon tanks. Have just been practicing with stick until I have the time to set up and try good MIG or TIG. Tapered and bent a U into some coil spring, and welded it to a handle. Got it to red and let it slow cool post welding. Geometry needs serious tweaking to make it work for a bending fork. Cobbled together a hoe-style fire tool. Forged out the bottle openers and drilled holes for pins for wooden scales. Oh, and welded a plate to a HF 2lb. Hammer to make a flatter. Head was pulled off the handle and heated to remove the hardness of the striking end before welding. Stuck the handle back in and Bob's yer uncle. And just to frustrate my niece, her Christmas gift gets wrapped in a electrical box that requires a screwdriver to open, and got a custom copper tag.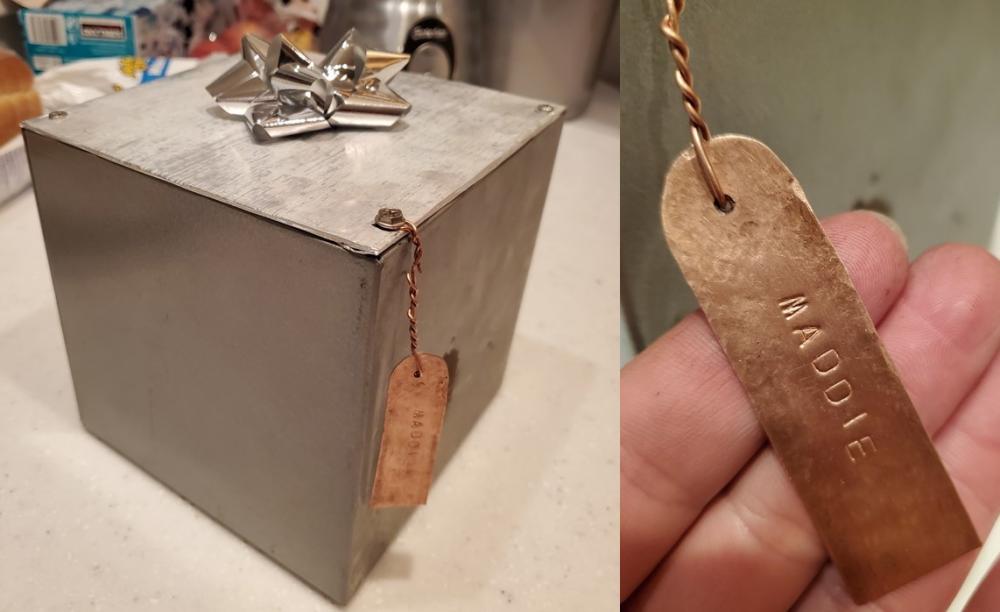

-
As far as staying warm, if the place is too drafty a space heater won't do much for you, but a radiant heater can help take the chill off without wasting too much energy.
-
Hex bar for making tools and axes.
HojPoj replied to Jobtiel1's topic in Blacksmithing, General Discussion
Take what you can get! Hex cross section has more material than the equivalent in round, but less than square. Still a big chunk regardless. Pavement breaker bits I got are about that size, and good for a number of tools. You can make hex round fairly easy, just need to be careful with how you line it up (unless you have an appropriate round swage). Dont think it'd be the right size for full size axes without a LOT of hammering. -
Nothing inherently dangerous in running a burner outside of the forge. Also keep in mind that if it's mild steel you can quench around the heated section to further isolate the heat. Another option is using a second torch.
-
Sure did, thanks. Wanted to see how you handled the blending of the weld of the eye and what it looked like in the end. Makes sense that such a big weld close to the eye will be visible, but that doesn't matter one whit when it comes to structural integrity in the chosen application (shouldn't ever be any peeling stress, only shear)
-
Thanks for the photos!
-
While I'd commented on the video, guess it's easier to answer here... do you have a close up photo of the finished piece? Particularly the eye?
-
3D printed plastic burner experiments (photo heavy)
HojPoj replied to Another FrankenBurner's topic in Gas Forges
And from what I understand, the ones closest to the high temperature regions actually end up burning out of the refractory matrix, their primary role is helping the refractory keep its shape until it can be fired. -
Does anyone know what this is?
HojPoj replied to BHGiant's topic in Blacksmithing, General Discussion
BHGiant: There's another type (a bit less effective) that uses a- or a couple, large weights that tumble inside in a drum to do the compaction/smearing of the sand, and a scraper takes it off the walls. As far as what it *would* have looked like, think a cement mixer style drum made from a 20lb propane tank. Only reason for doing that vs. the wheel style muller is that the wheel style can require a lot more torque and lower speed (I would have a hard time sourcing an affordable gearbox to do the job). With the stuff I had I could've used jackshafts and pulleys to get a low enough speed and sufficient torque to do the job. At this point I'm just gonna have to give up on sandcasting so that project never had enough priority to go any further. -
Does anyone know what this is?
HojPoj replied to BHGiant's topic in Blacksmithing, General Discussion
More interestingly, they can wear unevenly. I recall seeing at some cement manufacturing plants a number of old ones laying about, they were lumpy, egg shaped, or looked like meteorites. The ones in the pictured stash appear to be in pretty good condition. At one point I was looking for some to use in making a muller for sand casting but couldn't locate a plant in my area. -
66 lb. Chinese 'ACCIAIO' Anvil Unboxing and testing
HojPoj replied to HojPoj's topic in Anvils, Swage Blocks, and Mandrels
Did you cut holes in the stand for stuff to drop through the hardy and pritchel holes? That's what I did on my stand and i'll say I've used that a lot for drifting holes. Your method for holdown looks like it'll work great, for my purposes I wanted the underside of the anvil to be open since I'm frequently putting chisels or other tools there that'll be a part of the next operation. To each their own, though. On second thought, yours would be pretty great if one were to drill and tap a few holes further outboard from the hold-down holes in order to be able to put on a removable tray- that'd do well for me, anyways. (All that comes from the standpoint of me having to pull the smithing stuff out of the garage and set up in the driveway every time I want to forge, so mobility and small footprints are a requirement *for my particular situation*). As an aside, is there anything at the bottom of the legs that prevents them from splaying? The prying forces those single threaded rods in each direction will experience are going to be larger than you might think. At the very least the cyclic loading is liable to loosen the bolts up so you might wanna give 'em a crank before each session.