evfreek
Members
-
Joined
-
Last visited
Everything posted by evfreek
-
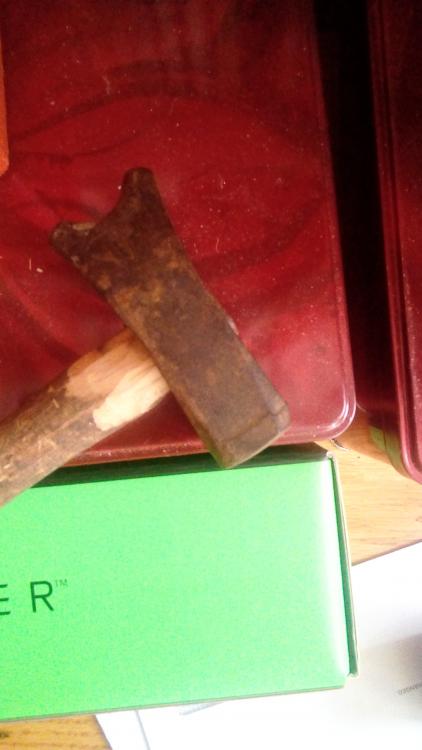
Hi. I found this tool at a garage sale, and the seller didn't know what it was. I know what it is, but I don't know what it's called. My name for it would be "fork fuller" for obvious reasons, but that's not the correct name. I don't see any of these on eBay. Does anybody know what they are called?
-
Some time ago, a fellow smith made a fuller out of a railroad spring clip. These are fairly high carbon, and must be treated carefully. He had an accident in which the tool shattered while he was using it. He said it just sort of crumbled, and he was not injured. He gave me the other piece from the same spring. This was very scary, so I wasn't going to use it without looking it over very well. First, I determined that the tool had been tempered, since a file could cut it easily. Then, I looked at it very carefully. There was a tiny crack where the sharper part of the curve was straightened. I figured that it would be a good idea to file out the crack. Anyway, every time I thought I had gotten through it, there still seemed to be a little bit left. Finally, it became clear that the crack was very deep. I eventually ended up filing almost half the thickness away before getting to the bottom of that crack. Eventually, it became more driven by curiosity than the desire to salvage the tool. Despite the huge notch in the middle, this has become one of my favorite fullers for light detailed work. It has lasted for many years and has produced hundreds, if not thousands of items, most of which sold. Careful with salvaged steel. It is more fun than it is economical.
-
I used to be really picky about drill bits, and always seemed to get mediocre results unless I used the classic USA HSS brands. These are pricey, and I resorted to garage sales. Sometimes, you can get new ones pennies on the dollar. One day, my shop teacher forced us to learn how to sharpen drills. It was like a bright new day. I never learned that well in the class, even though I passed the test, but when I joined a cooperative machine shop, I just sat down and worked on blunt drills until I got it right. It cost several inches of drill bits to learn, and this is with all the confusing stuff on the Internet. Now, my favorite drill bit is Harbor Freight TiN coated $9.99 special on sale. They are good for about one deep hole in 4140 PH, but a 5 second touch, and they are ready to go again. The cooperative shop members leave a whole pile of bits with the lips snapped off, and these can be sharpened in just a little more than the time required to size them (the writing on the shanks is obliterated). The only bit I have trouble with now is old fashioned carbon steel bits. These are really cool, but if you toast the end, even if you sharpen them, they don't last very long. It is much better to repurpose these things into something else, like unwinding them and welding them in as a cutting edge.
-
Yeah, things are pretty fishy when it comes to anvils on Craigslist, especially these days. I have run into all kinds of weird situations and should probably know better. One ad I responded to was quite a ways away, but I was driving down south and figured I would get it when I was there. A lady answered the phone and said that the anvil was already gone, but she was curious if I was a real blacksmith. She asked all kinds of questions like how did it start, do you get burned, is it lucrative, etc., etc. Eventually, about half an hour into the conversation, she told me that she had something to admit. She just put up the ad in hopes that she would get some calls from blacksmiths who were interesting to talk to. She said that she wasn't disappointed, and the calls just kept pouring in. The ad stayed up for some time. Guess I should have known better. This is the second time this sort of thing happened to me. And, I don't like just sitting around chatting on the phone; there are a lot of more pressing things to do.
-
The difficulty with making rings round is that it is really hard to bend a round shape in the contour of the ring. Instead of trying to do that, flatten the ring. Flattening is easy. Just hit the bend at its highest point, and it will collapse to being flat. The trick is to find the part of the ring with the smallest radius. In the above picture, this is at 10:00. There is another small radius at about 7:00. Place the small radius section on the anvil horn so that a small amount of daylight is showing, and give it a whack. Note that this doesn't require a cone shaped horn, although it does help. The shape of your anvil looks a little challenging. it may be helpful to make a hardy with half a cone bent and welded out of plate. Note that it doesn't have to be perfectly round if you are using the above technique. Even a chamfered bar clamped down will work in a pinch. If you have trouble finding the tight part of the contour, draw a circle in chalk on a piece of plate and compare with the circle.
-
Too big.
-
Thanks, Frosty. I'll report back after the firing and the get together. The mortar is a bit uncertain, but it started with a commercial mix. At least that insulating wool looks pretty stable now. By the way, that friend with the properly built forge has given up on blacksmithing. Unless he sells out to a real thrasher, his high quality job will end up outlasting any of my efforts.
-
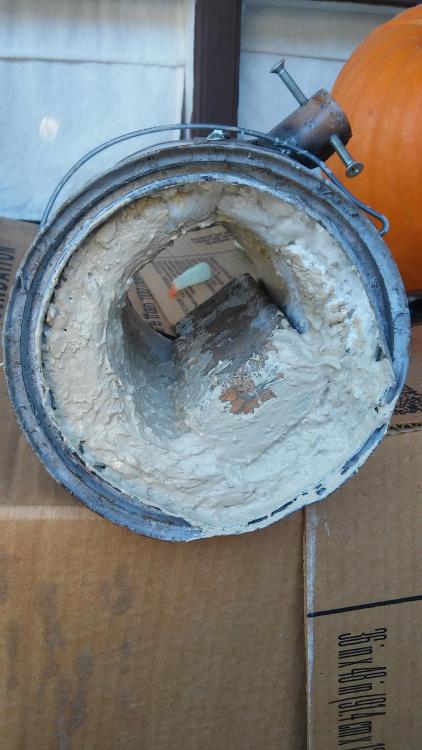
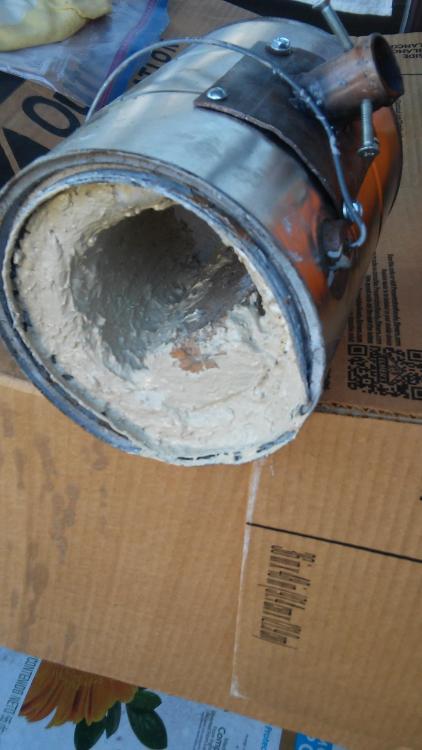
Hi Thomas and Frosty. I have used a proper forge before, but it was a long time ago. It was at a friend's house. He had Ron Reil personally instruct him on building it. It used T-Rex burners and was lined with kaowool and ITC-100. It used a silicon carbide kiln shelf piece for the floor. This was a bit out of range in terms of cost for me. When I look back over the years, the expense does not seem that bad. At the time, I didn't know if I would stick with it. We made a few small leaves, and it was a good experience, but it seemed to be overkill. The posts in this sub-forum are excellent, and I don't have many questions. I did have one, but I just decided to go about it my way and see if things worked out. Instead of using bubble alumina or Kastolite to coat the wool, I made another homemade cost saving concoction. The ceramics store in the neighborhood only sells full bags, and the crowd around here is pretty tough, so you don't get much for a mostly full bag on Craigslist. Likewise, if you want a partial bag, you pay and pay. So I used some leftover firebrick mortar like Tenax thinned with water and sodium silicate. Should this work out ok? The mortar worked out great in my ceramic kiln, so it is good at temperature. Also the composition did look similar to satanite from the MSDS. Here are a couple of photos of the mortar going in. There are still patches of rigidized but uncoated wool in the back. By the way, the rigidizer worked just great and did not mat the wool at all.
-
Hi Thomas and Frosty. This actually was a good little forge. It was a step up from my solid fuel forge. I built this forge when I had to produce some product to sell at a craft fair. It even made it to our annual conference and was used during Mark Aspery's tools workshop. I still have the punch and chisel from back then, and they are some of my favorite tools. This forge was an expedient for when I first started selling, and it was made in a rush from info I found on the Internet. It has lasted 10 years and has served its purpose well. As for forge welding, I really meant that it can weld, not that it does weld. I have only done four welds in that forge, and only two are in finished product. The two items are still in use, though. I prefer to weld in a charcoal or coal fire. The advice for building gas forges provided in this forum is really great. My new one will use ceramic wool, rigidizer, and mortar hotface. It will be interesting if it works better for welding.
-
Looks great. I wouldn't worry about prep. Most of the stress is compression and not in the direction of most of the welds. I just used 6011 for the root and welded right over any light rust. Mine worked just great for upsetting a flatter, which is a pretty heavy job.
-
Hi. I built a gas forge from a paint can. A lot of shortcuts were taken to save time and money. Many things were not done quite right according to helpful posts in this subgroup. The forge was lined with a homemade refractory composed of fireclay, grog, perlite, wood ash, and concrete. When it was first built, it could barely weld mild steel. Since it was outside, it eventually rusted through and the refractory collapsed. Even after repairs, it wouldn't weld. Some colleagues wanted to use it, so it looked like time for a new one.

-
See you there.
-
-
Wow. Looks great, and has the natural luster of aluminum.
-
Hi. I was welding in a shared facility yesterday, and was getting a lot of welding light from the next table. There is a tinted curtain separating the two areas, but someone had stacked some new sheet metal on the back wall and it was reflecting the arc through a gap in the curtain right into my eyes. I politely asked the other person if I could move the sheet metal. He said no, but I could move the curtain so that the reflection would be blocked. After several minutes, he pulled the curtain aside and came up to me while I was fitting up, stood a little too close to me, and started lecturing. It was then that I realized that I was dealing with an old curmudgeon. He told me that I ought to get over my fear of reflected arc light. He informed me that although you can get sunburned from a reflected arc, it is absolutely impossible to get flash burn. This sounded strange to me, since it seemed that one was kind of like another. Then he said that sunburn was nothing to worry about; only flash burn was really dangerous. Finally, he said I should be happy since he is quitting for the day. He then suggested that I get my own welder if I had my own shop so I wouldn't have to come in to the shared facility. This seemed kind of rude, since I didn't mention that my shop is more of a blacksmith shop and having an open front, it is not really suitable for a delicate TIG welder. Recently, there was an thread on this topic, but I am kind of afraid of UV radiation. I was very respectful, and did not disagree with him as the thread suggested, but, really, how does one deal with an insistent old curmudgeon?
-
Has anybody had success with this technique? "Crayoning" I tried it once but just made a mess. Welcome, Seth, to the group. Make sure to keep us informed about what is going on there.
-
I never light a torch with a cigarette lighter. They are for lighting forges. I do feel quite safe lighting a torch with one of those BBQ lighters with the stalk and trigger.
-
Horns are really great for making bottle openers, but a drift will do in a pinch. Bending or welding chain can be done off the edge of the anvil, and drawing can be done on a hump ground in the top or already present on your anvil. I don't use a horn much, but it is nice to have. It is also useful for welded hearts. It is hard to fully open the heart without a big cone shape. I just bought a cone mandrel which should do this job well, though.
-
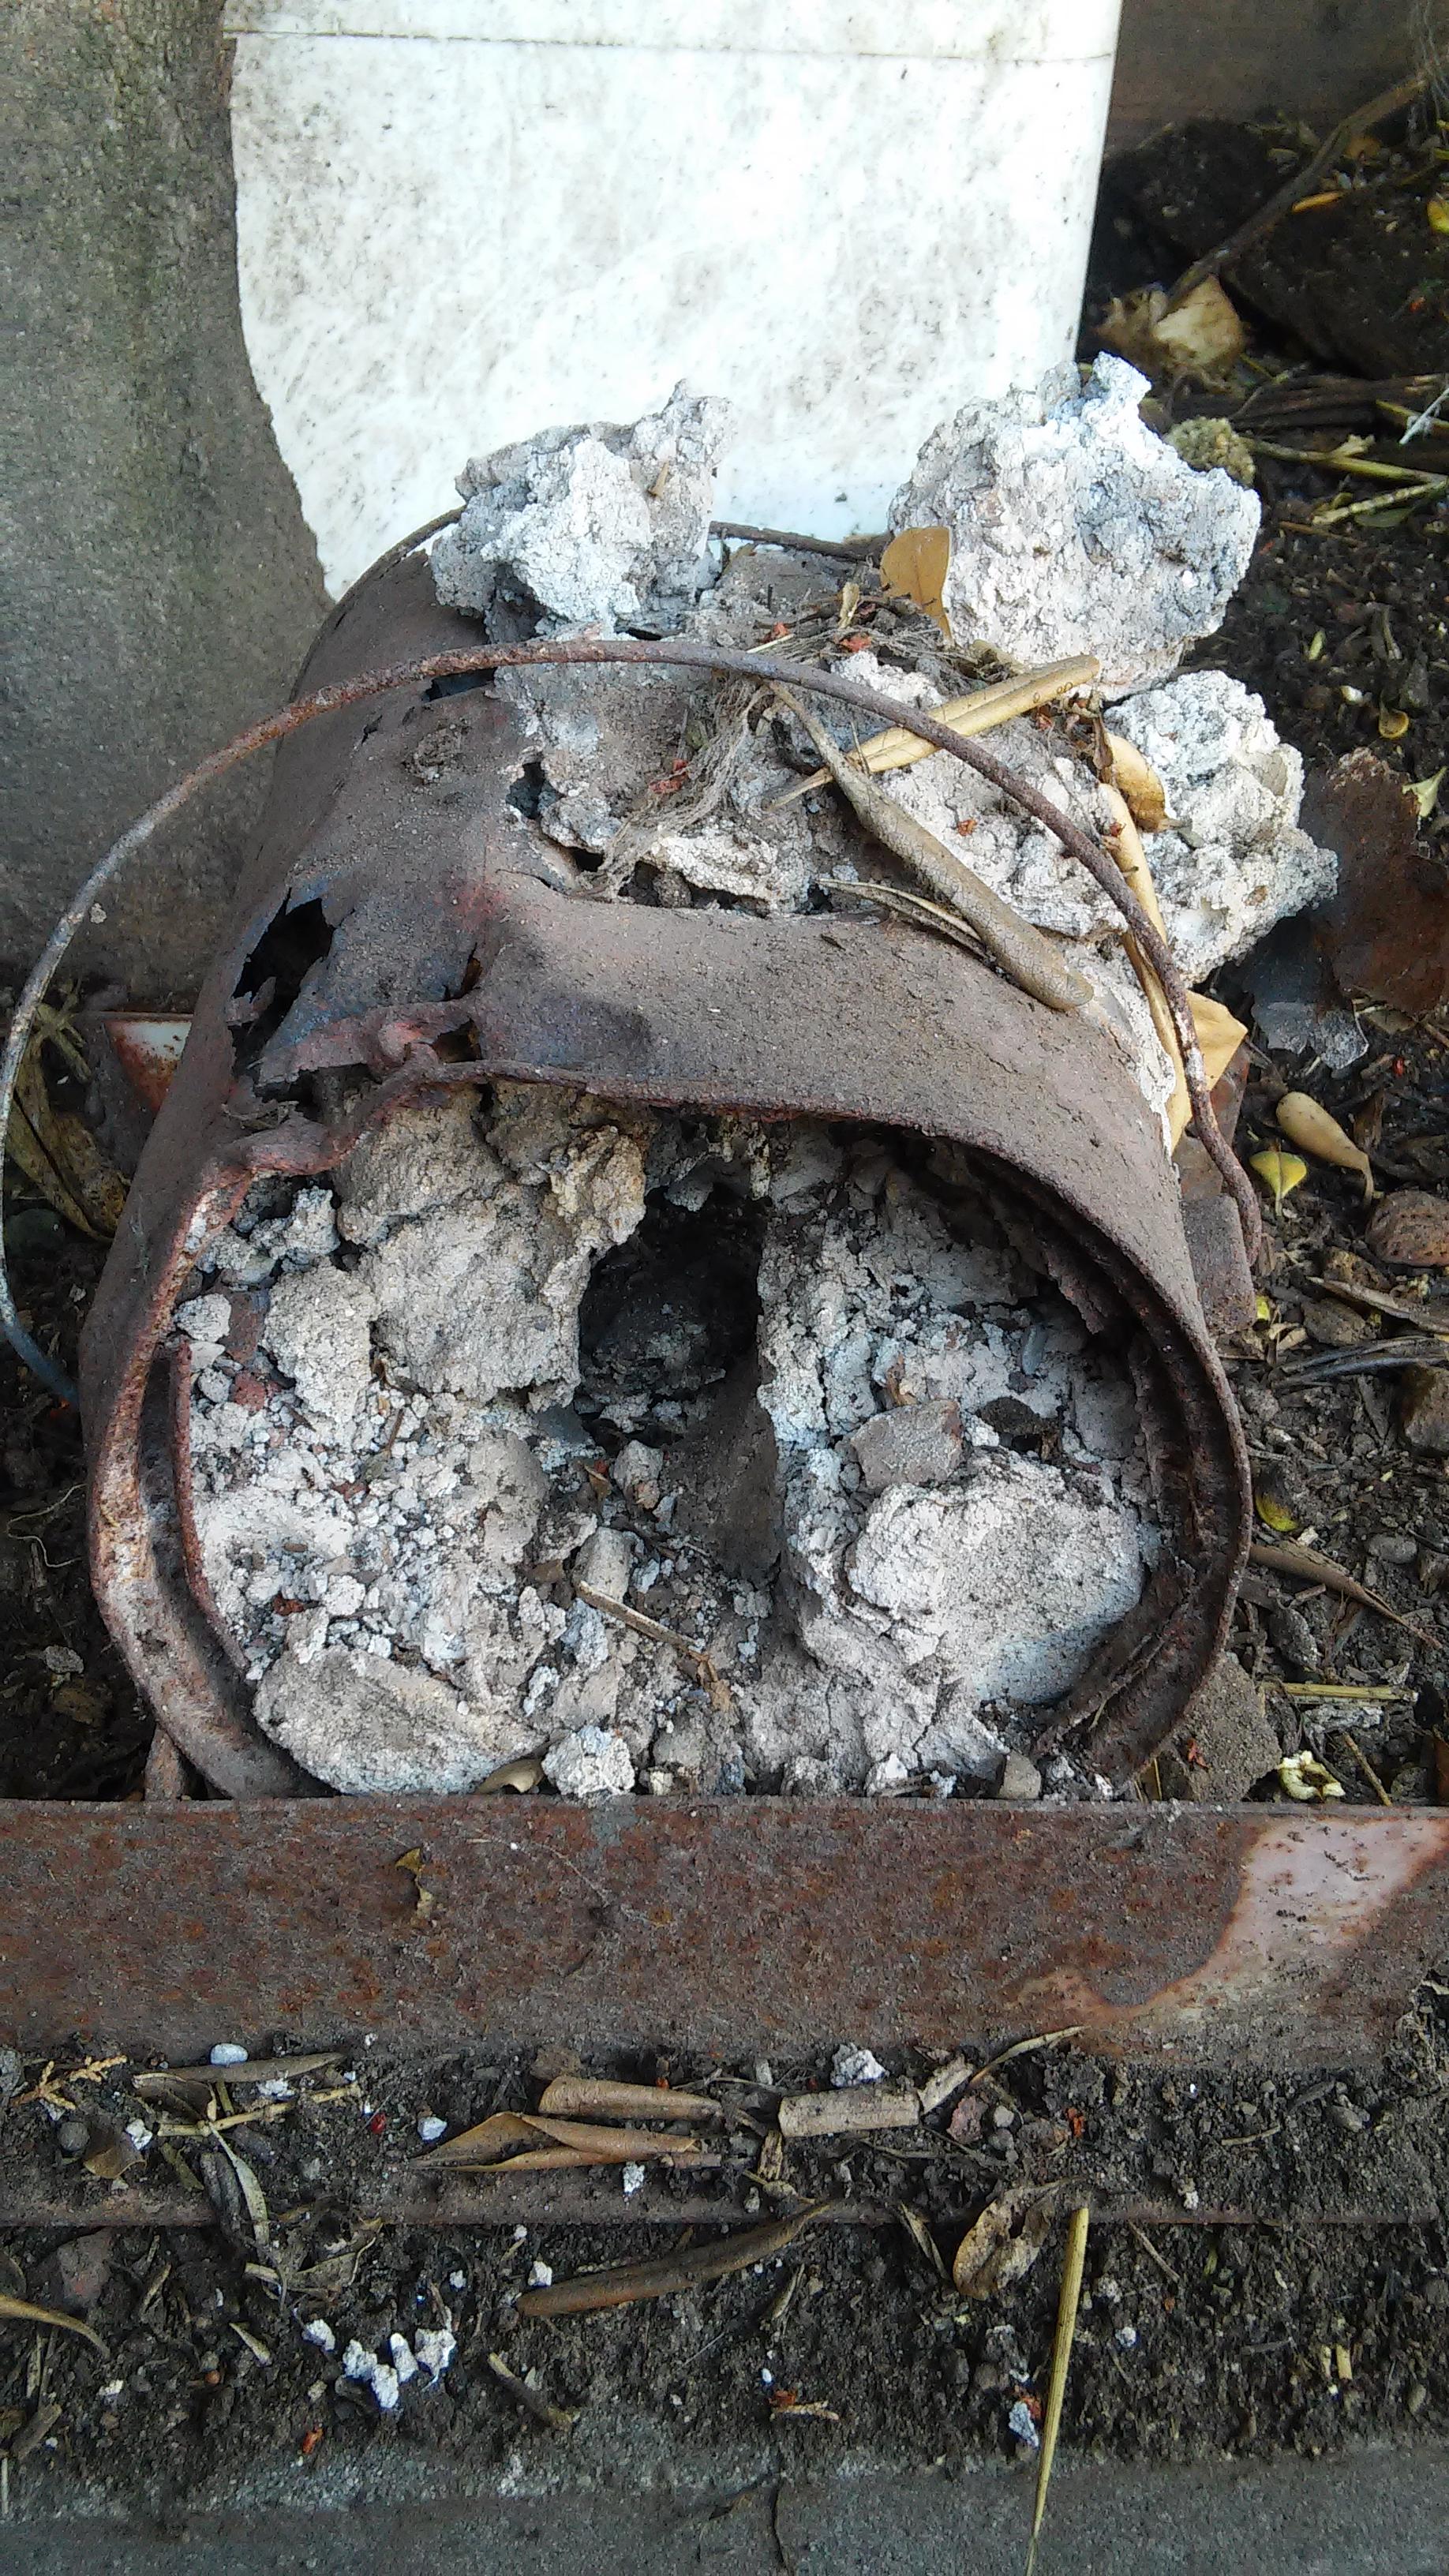
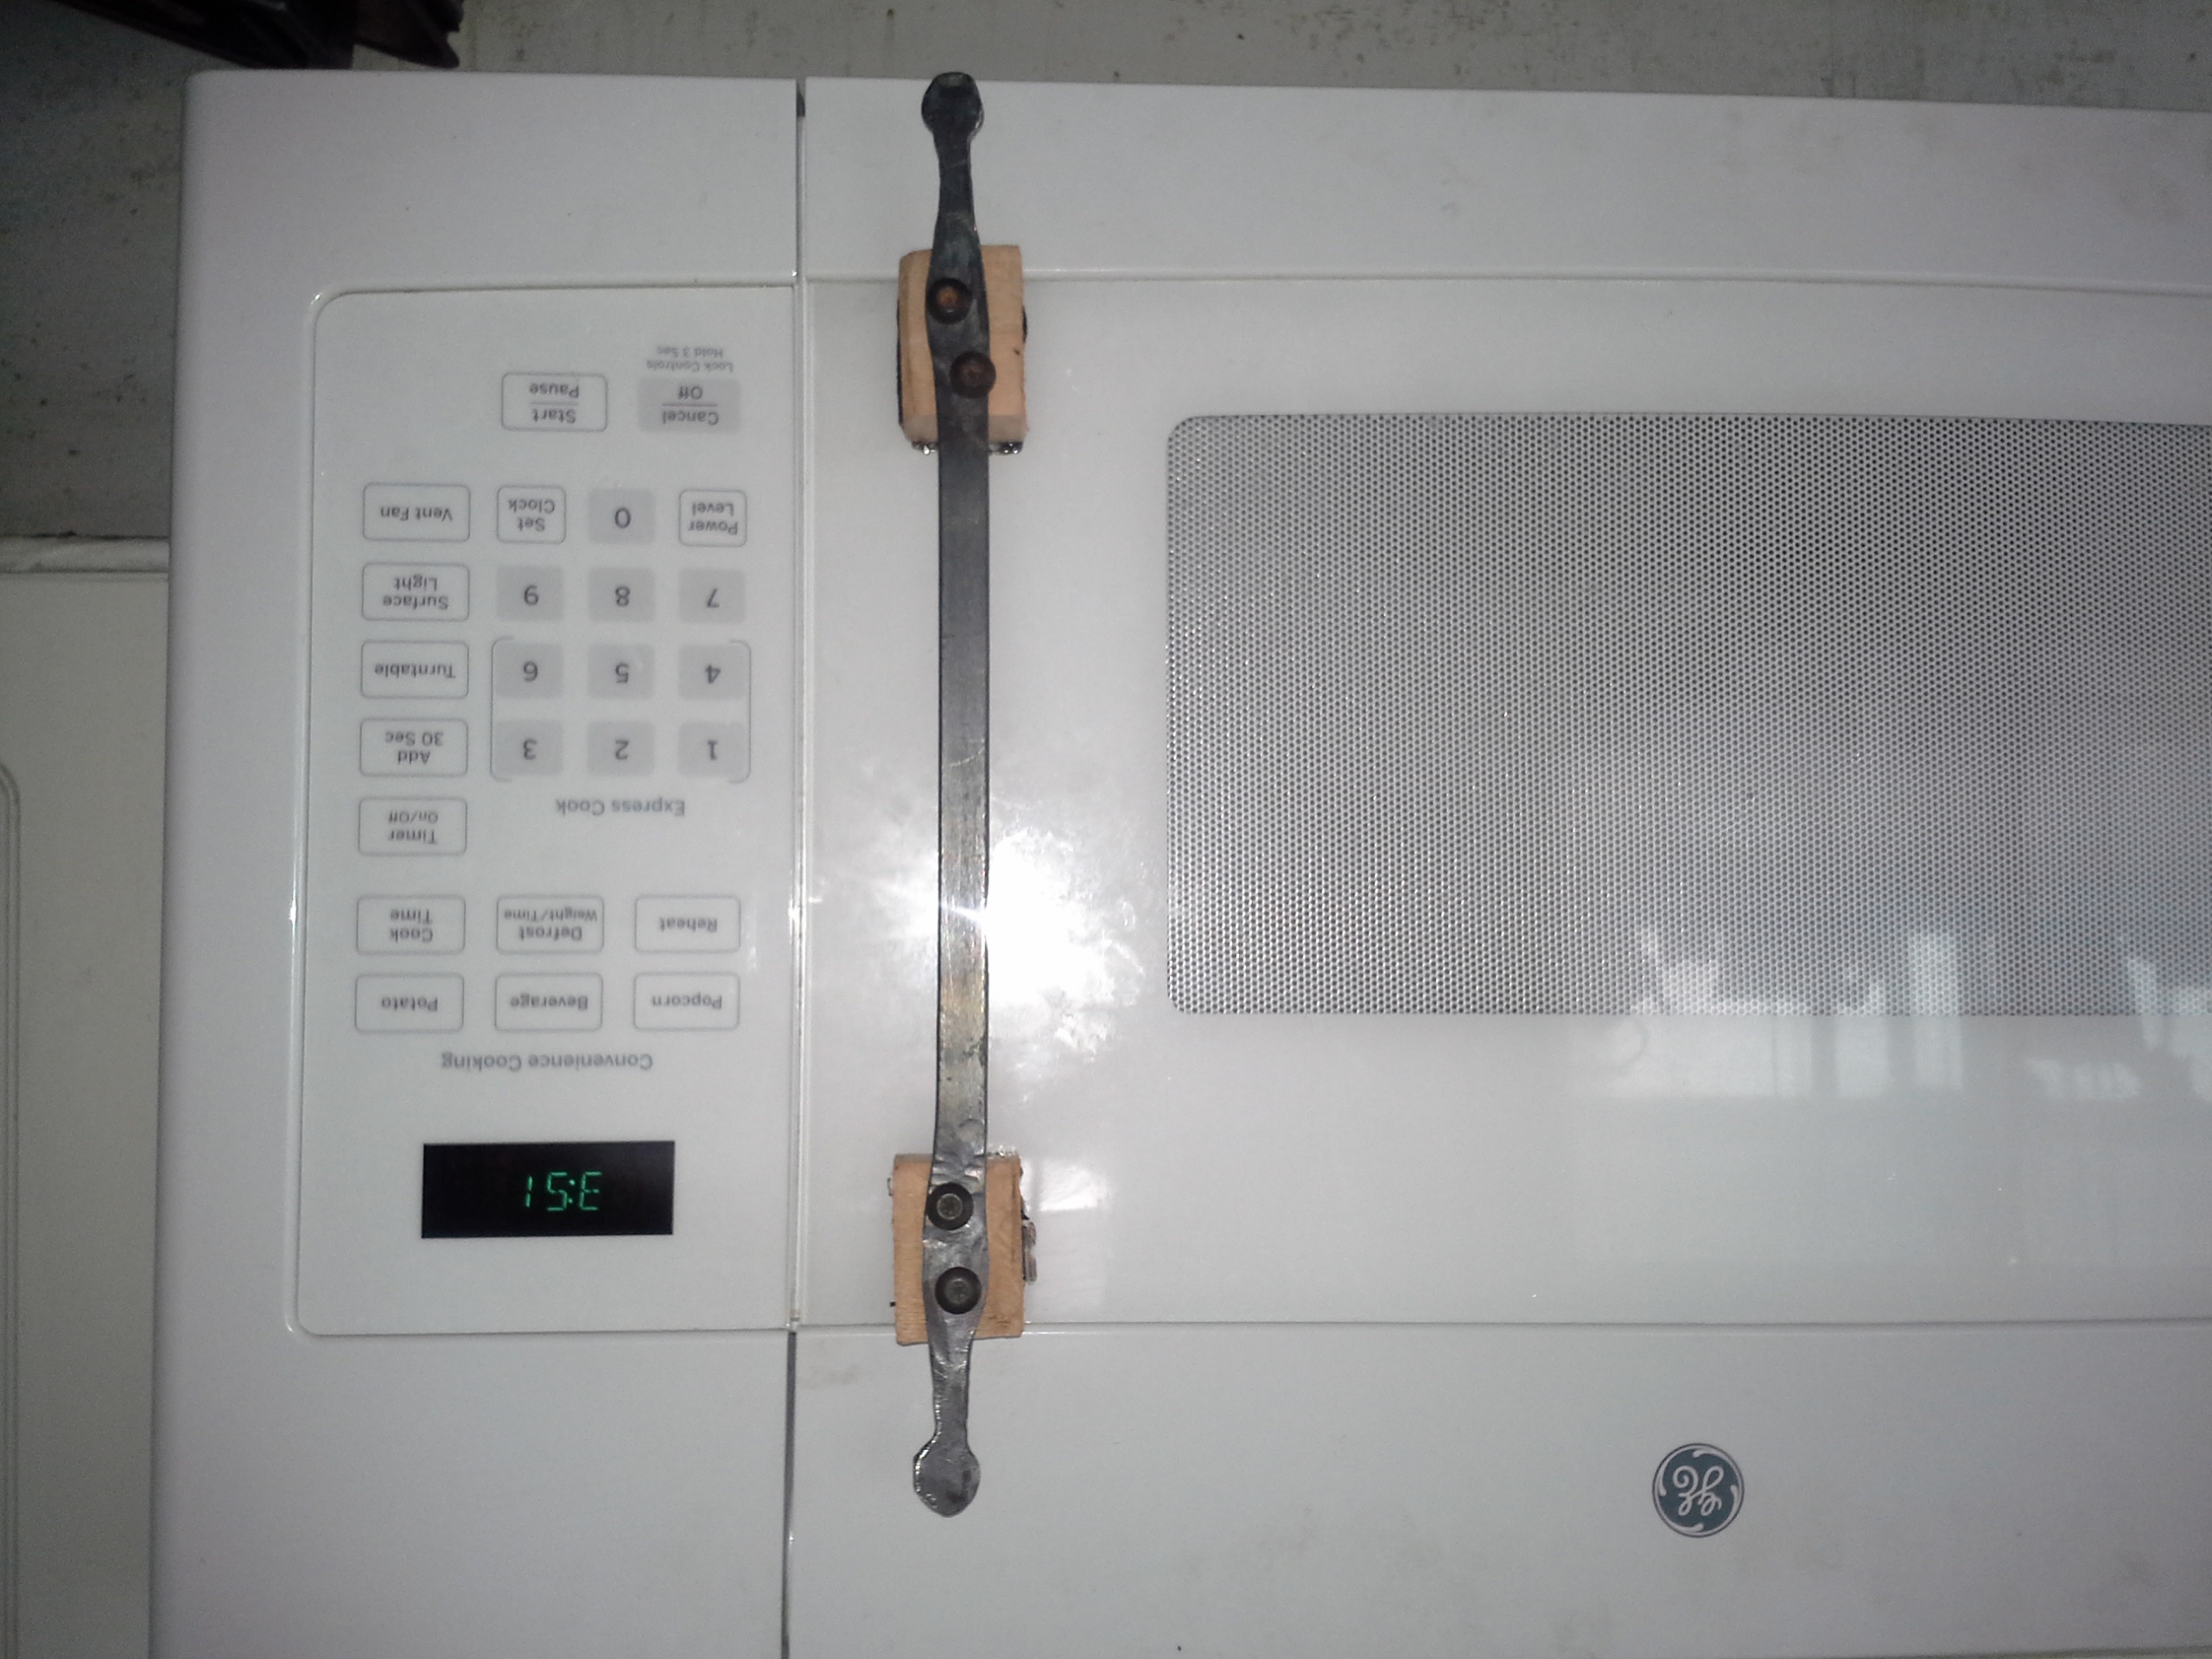
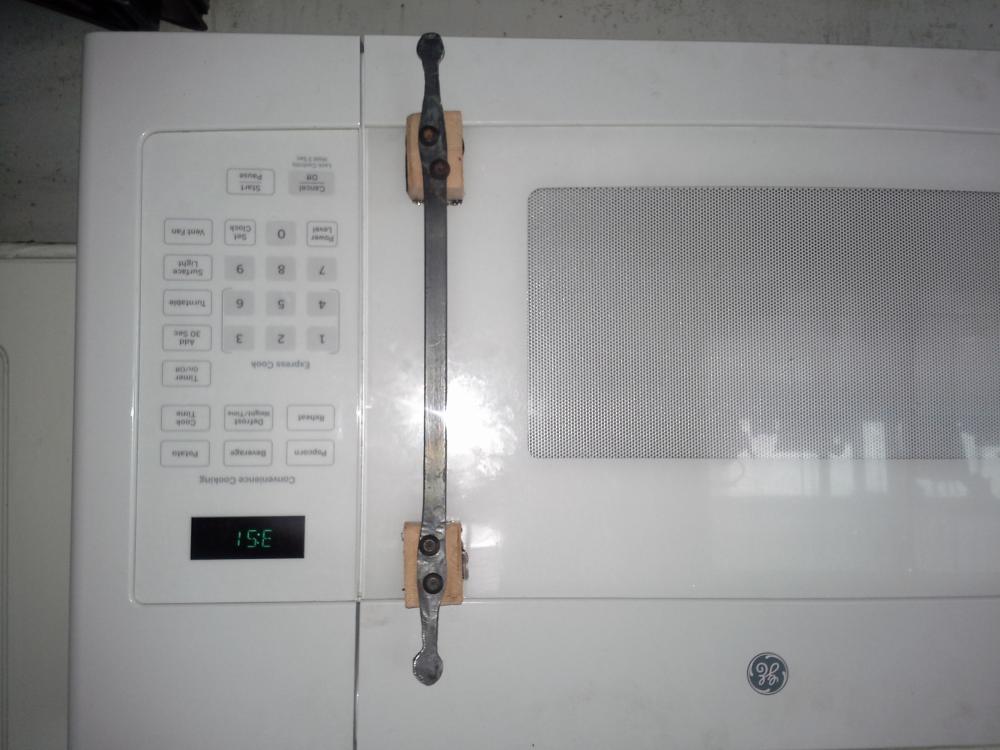
That's strange. It was right side up on my phone. The phone has an accelerometer which can sense the orientation. The quality of these appliances has really deteriorated. The plastic is really undersized and violates decent engineering DRC's. It has only lasted a couple of years and the top is breaking down as well. Probably won't get much more than a few years more out of this microwave oven, but at least the handle will last. The wood is apple off a backyard tree. It's really tough stuff. The family can't get by very long without the microwave.
-
The flimsy handle on the microwave oven broke. It was really hard to get to the other end to undo the screws. The manufacturer really wants you to buy a new one. This piece was forged in a rush with a field expedient forge (can of perlite and a propane torch). People are dependant on this appliance. Please excuse the odd screws. They are from a broken dishwasher.
-
Anything will do if it is steel and heavy. The medium carbon is hardenable. You can slice off a piece to give you a straight edge which you will need anyway. How big is the round?
-
I tried the sugar. It didn't work. Or, to rephrase that, the tap I made successfully cut only one nut, so the project was successful. But the case hardening was a failure. It just is not in contact long enough. Any carbon bearing compound will work, but the time must be hours, not seconds.
-
Blade welds? Fluxes without metal particles are preferable, so the forge borax would be great. It is also not too pricey. For general welds, like drop tong welds, the metal bearing ones like ez weld are supposed to be better.
-
Sparks from blocks do not look like high carbon. Disk might be med carbon.
-
Brass does release zinc fumes if overheated. I once cast a couple of brass hammers in a shop class. We had a nice dedicated shop area with vent fans, but I used dirty brass from used valves from a repipe job. They got a little overheated and I had not properly choreographed the pour, and I ended up getting a lungful of the fumes. The instructor was yelling at me to breathe and pour and had a pretty good laugh when I expressed concern about fume fever. He told me that nobody gets sick from a little whiff like that, but if you mess up, you will be reminded of it for a long time. It turned out he was right. There were a few surface voids in my hammer that I get to keep looking at. He was very strict on safety and gave us aprons, face shield, gloves, spats, hardhats. Turns out he worked in a local foundry before they all started going out of business. One thing that he insisted on was doing it right. I had to make the pattern at home, including the core for the hole, and the body had to be split type with core prints. He said "no shortcuts".