Bearded Guy
Members
-
Joined
-
Last visited
Everything posted by Bearded Guy
-
I'm with ya on that one. With limited work (8hrs a week) for the past 4 months, and officially laid off for over a month now. I figured I would be spending every possible moment forging and working on projects, but motivation can be a purdy big hurdle sometimes. Also looking for a new place to move because this lovely double-wide I'm in now is too expensive (so the girlfriend decided to buy me a house instead of renting). Making excuses that I need to pack up some stuff, then I get sidetracked looking at IFI and watching videos about forging and building power hammers instead of packing. Vicious circle that is sometimes hard to get out of.
-
I have a surplus of grounding rods as well. I have forged a couple hooks out of some of it. If you do not taper it down too small, it will retain a little of the copper coating. I started with 3/8 so didn't feel the need to go too small. Also it does work like rebar. Some is easy, some forges alot harder. Im trying to upload a pic, but it keeps giving me an error. I ended up using most of my grounding rods for spinning target frames, to me a more practical use and less headache than trying to forge it.
-
Shipping food is actually pretty easy... I'm from texas and have family down there that ships me kolaches, fresh h-e-b tortillas, hot sauce, and occasionally Whataburger(plain, otherwise it gets soggy).... chapel hill sausage and other frozen meats too. Cheap $10 plastic cooler (small), wrap food in tin foil (for warm stuff), frozen stuff just fill cooler, add a couple frozen 16oz water bottles, tape it up tight, put it in a box and spend $40 to fed ex or ups overnight it. You can also check with your local pharmacy or feed store for styrofoam coolers/boxes that some medicine is shipped in. Most of the time they still have the freezer packs still in them and give them away so they don't have to crush them. Sometimes it is well worth the price of admission for a good taste of home. I bootleg food back everytime I am back home. I take an extra suitcase and fill it with food to put on the plane. My recent easter trip, I brought back 2 doz kolaches in a small cooler and they were still warm after a 6 hr airport/plane expedition.
-
All by hand... power intervention would have been nice, but a 4lb'er and the edge of the anvil actually made quick work of it. Also a small coal shovel to get the small bits from the corners and hard to reach spots of the table.
-
When i built mine, i kept the control panel in tact and cut off all the unnecessary plastic bits. I used the pressboard platform that is under the belt to make a box to mount it in. That way you can have a variable speed set up for cheap. I left the incline motor disconnected from the board, but i did debate on using it for the belt tensioner... i will snap some pics when i get home. Mine was only a blue, red, and green wire (i think) coming from the motor to circuit board, and same from the circuit board to the control panel. I set my desired speed and grind away, but it does automatically stop after an hour. I guess its a built in safety feature, which is a good thing.
-
Like Latticino said above, I have found that twisting the cable tighter before welding helps tremendously. I have over 300ft of cable to play with and I am still trying to figure it out. But i have found that twisting helps alot. Heat, flux, welding heat, wire brush, twist tighter, flux, welding heat again.... etc.... that is what has been working for me (most of the time).
-
Norton & Sait wheels are what i prefer. I've tried the PFerd wheels/disks from my other local welding supply and the cut off disks just dont seem to work right. They last longer, but they feel and smell like you are burning metal as opposed to cutting it. They do not cut well after about 10 min. Now PFerd does make a hybrid type flap disk that is more aggressive than a typical sander/flap disk. I love em, they are a good inbetween of an actual grinding wheel and a 80grit flap disk. Good for fast material removal without the big gouges from a regular grinding wheel.
-
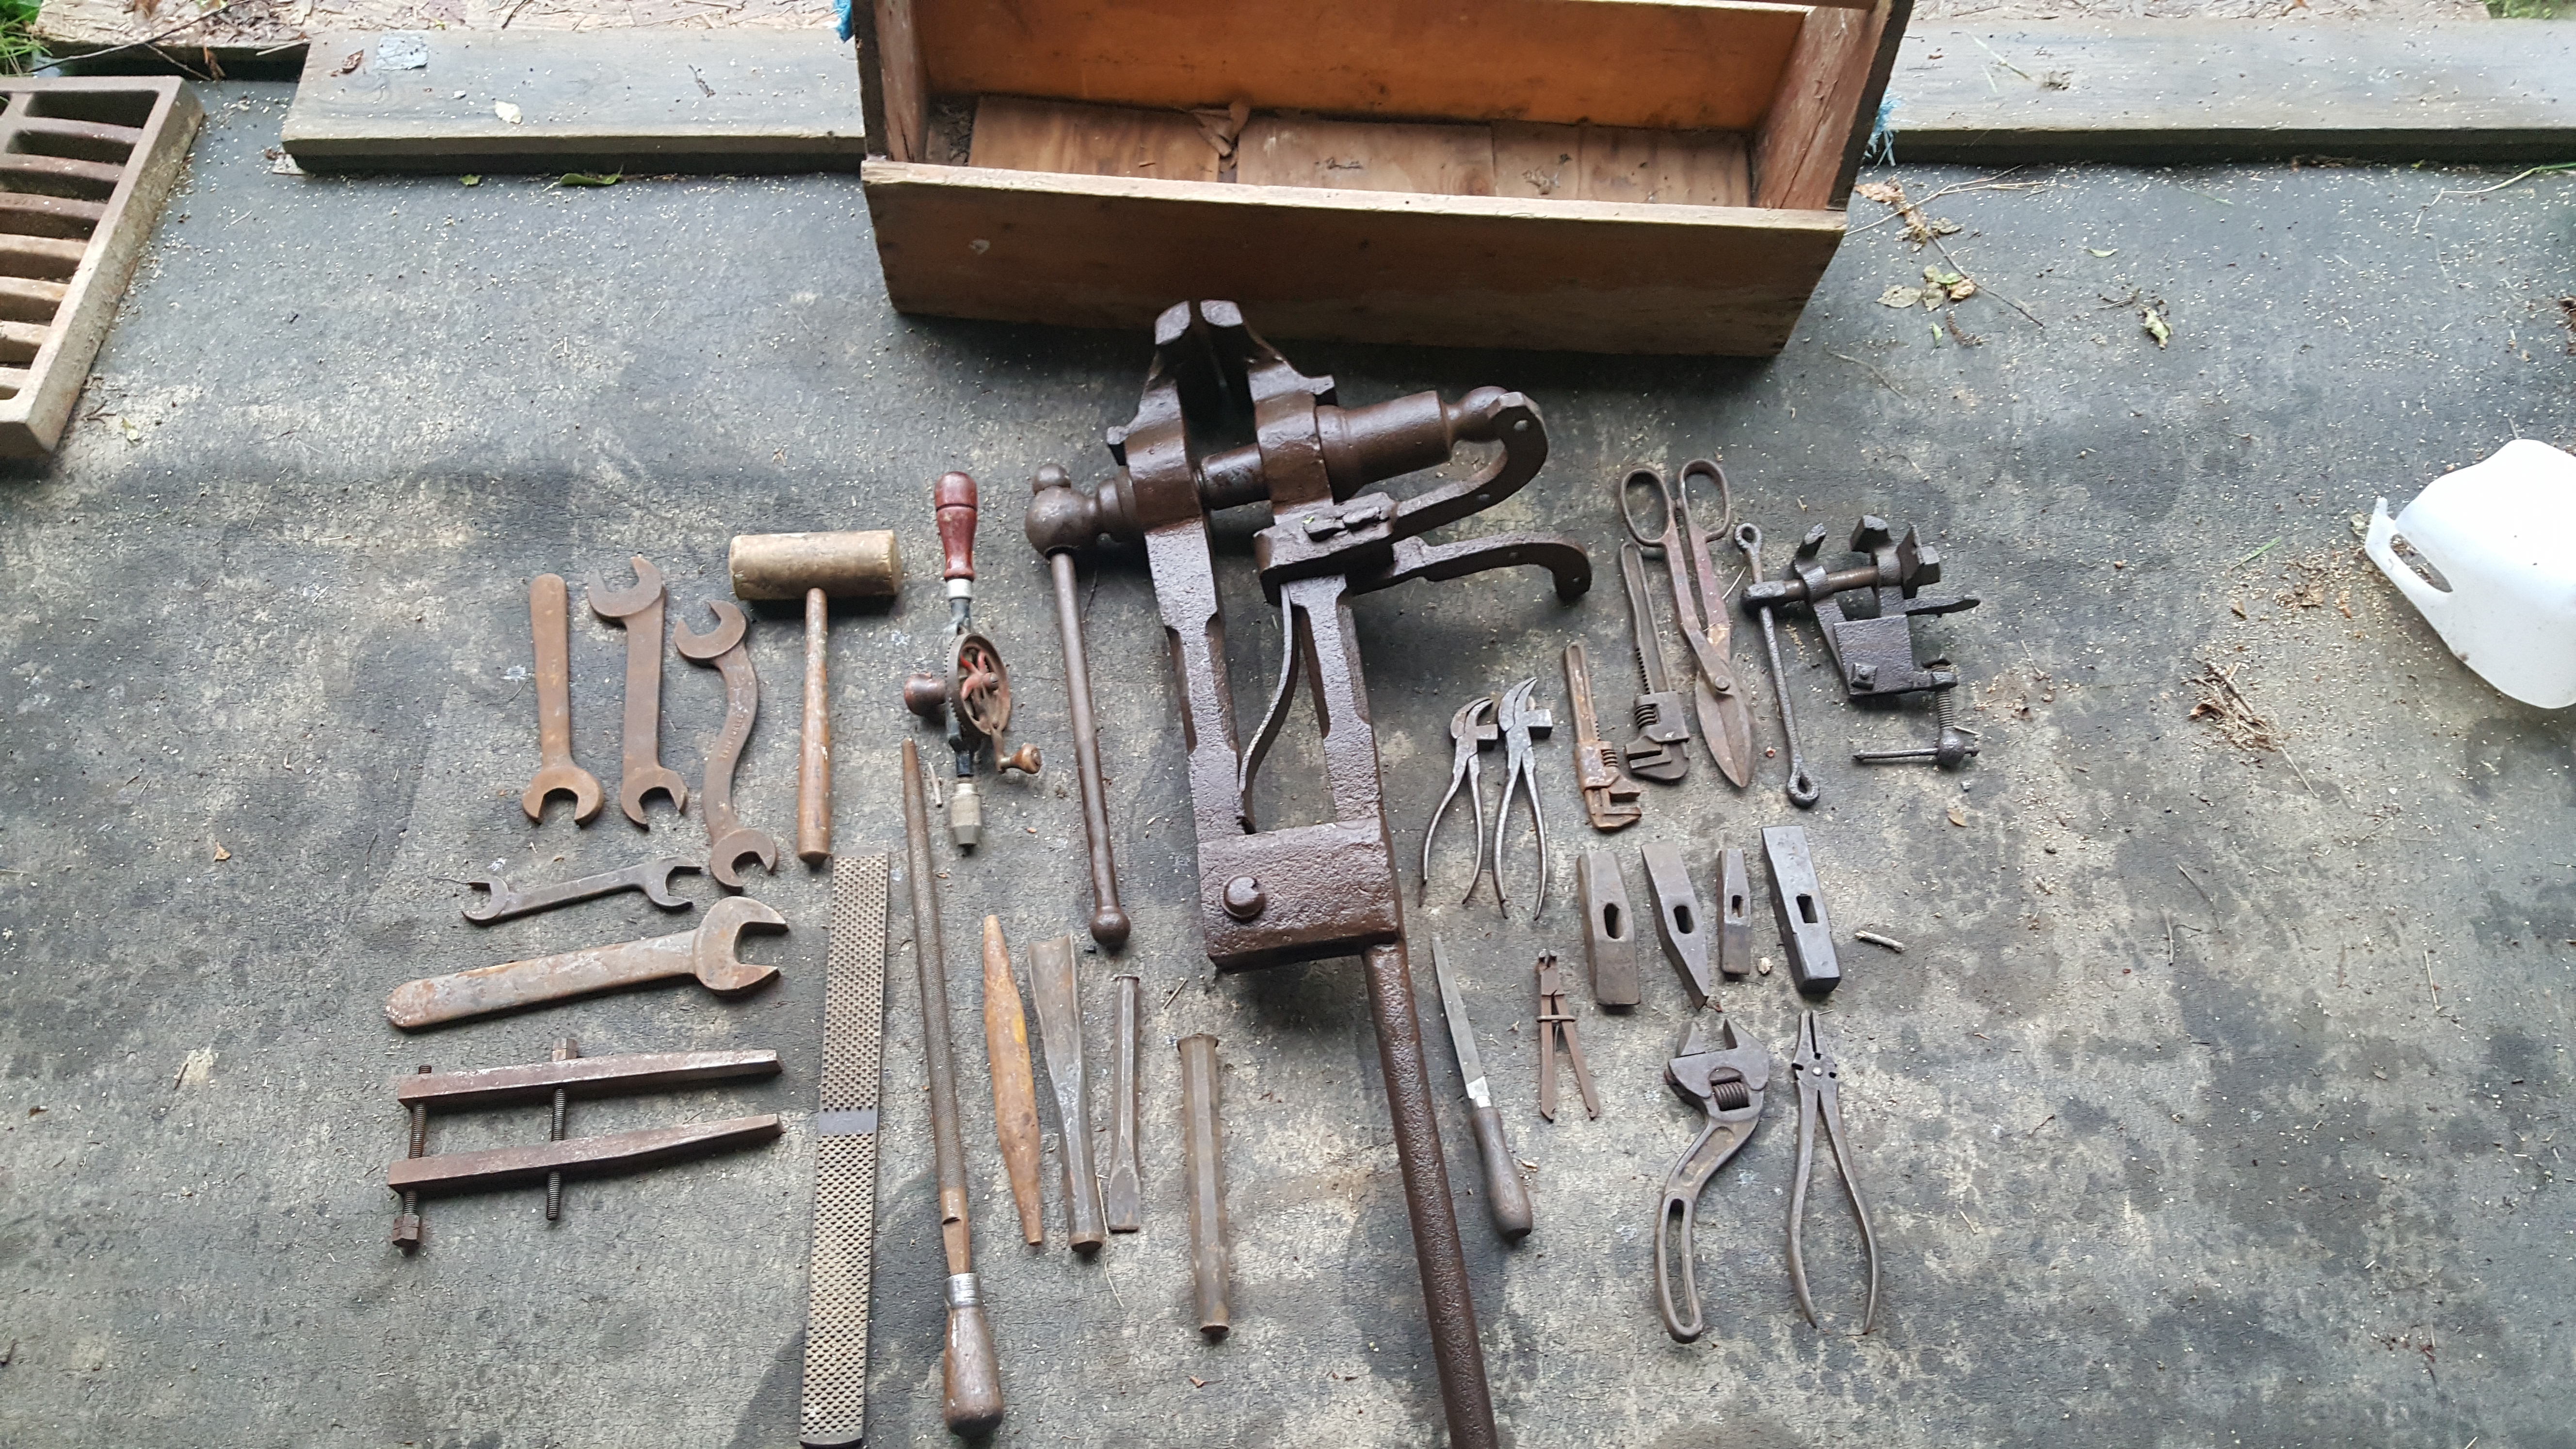
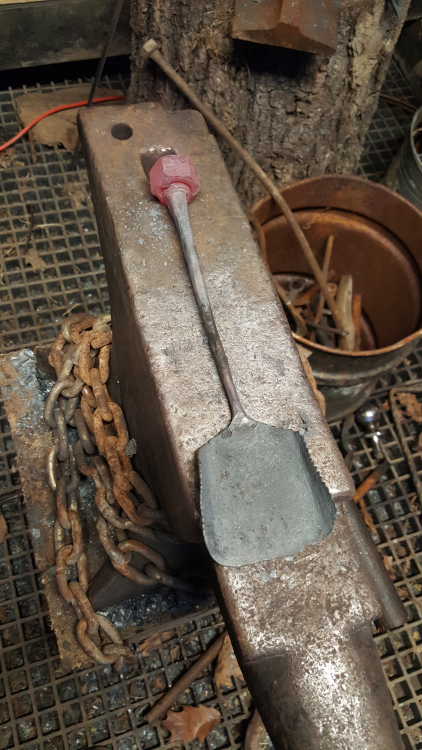
Thanks Das, it is a wooden mallet. I figured for $1, it will be better than the oak branch i am currently using hahahaa. That lil vice is cute. I might mount it on the coffee table for the kids to use in the winter time to play with the solid copper wire they hammer on.
-
I had a friend stop by yesterday and drag me to the dreaded pike days festival that das mentioned. Been here 4 years and never been before, so i figured why not. It was crappy weather and most everybody was packing up early, so i didn't have to deal with too many people. I did spot a table full of tools in one yard and decided to stop. Thats where i found the mini vice and a few other random items. Talking with the guy, i said i was looking for a real post vice. He said follow me. Drove a mile off the main road to his house and there was the 4" post vice mounted to his work bench. Also scored all the little hammer heads from his garage for $10, and the nicholson file for $10. I figured i can't pass that up for that price.

-
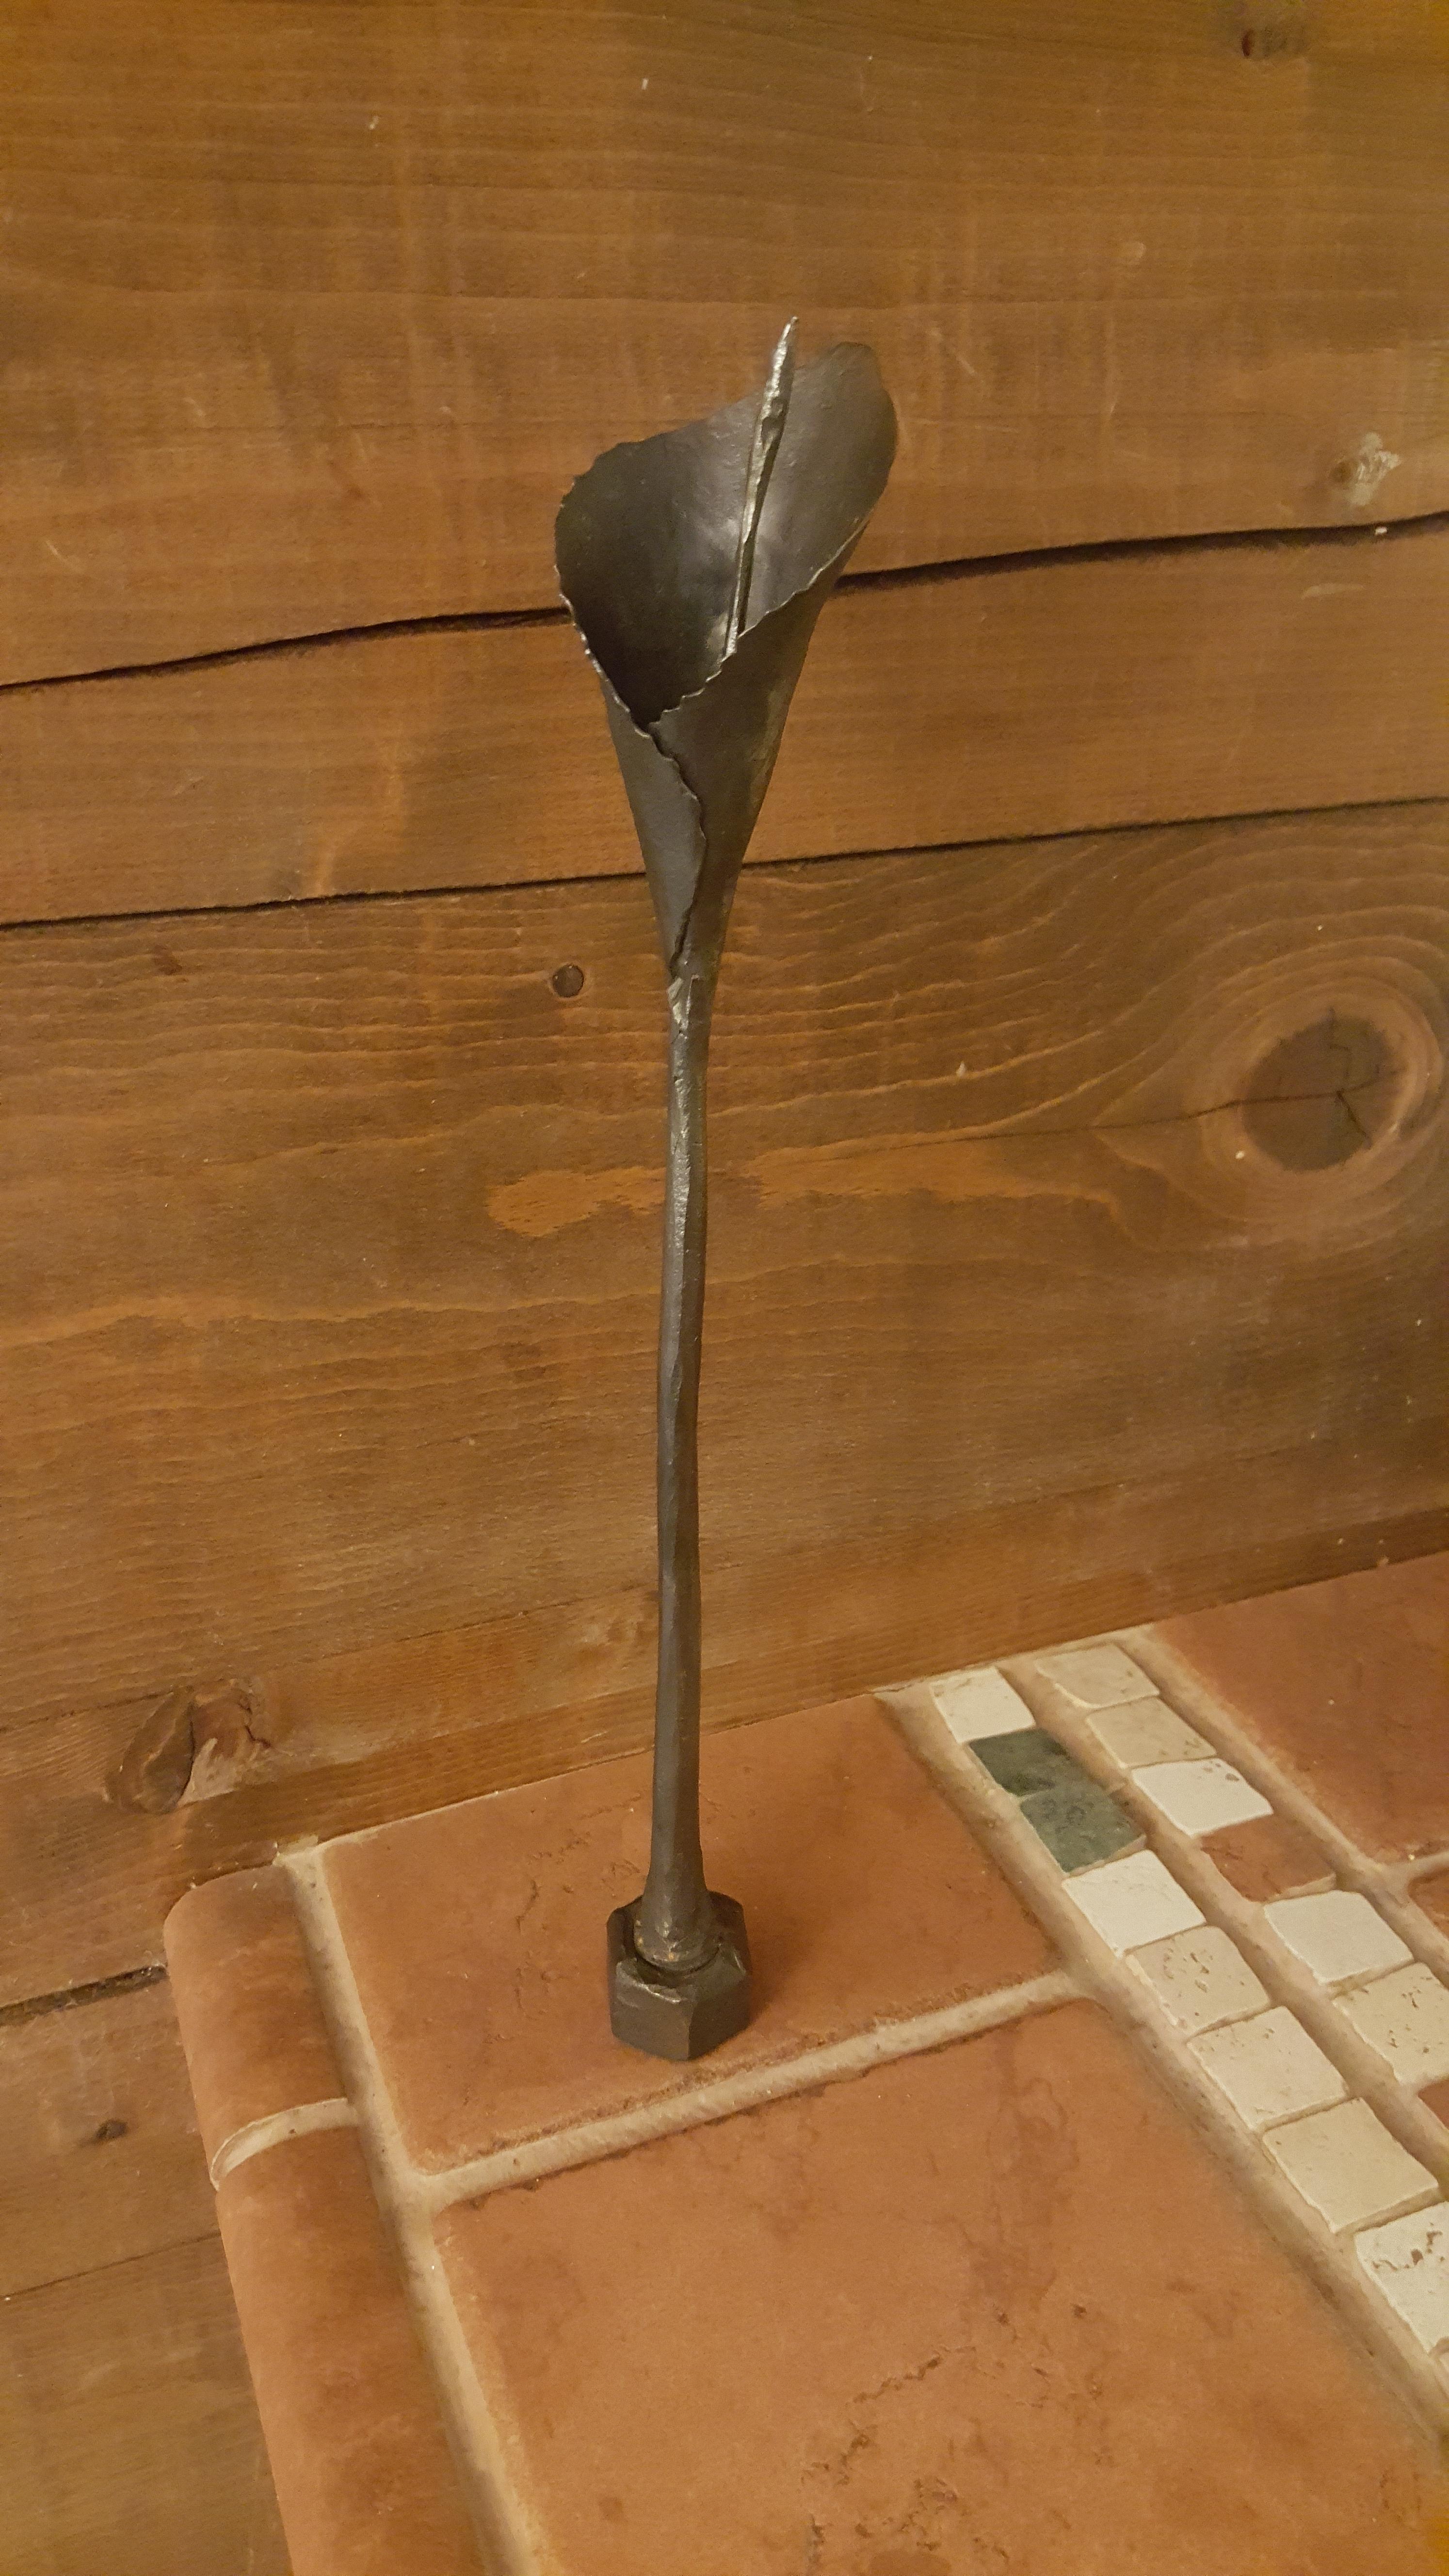
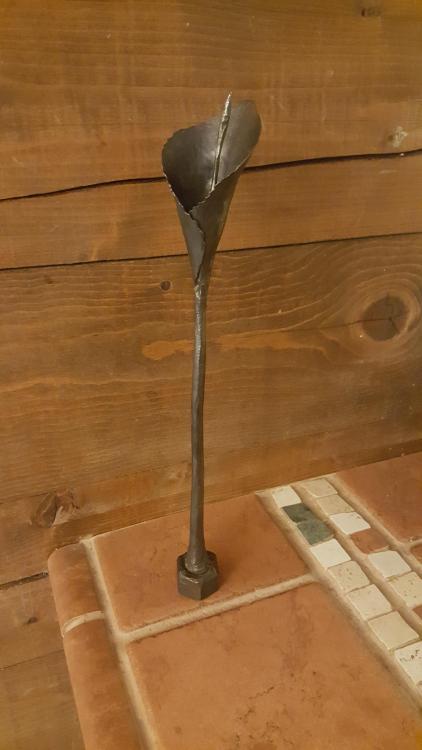
How about a calla lilly for mom....
-
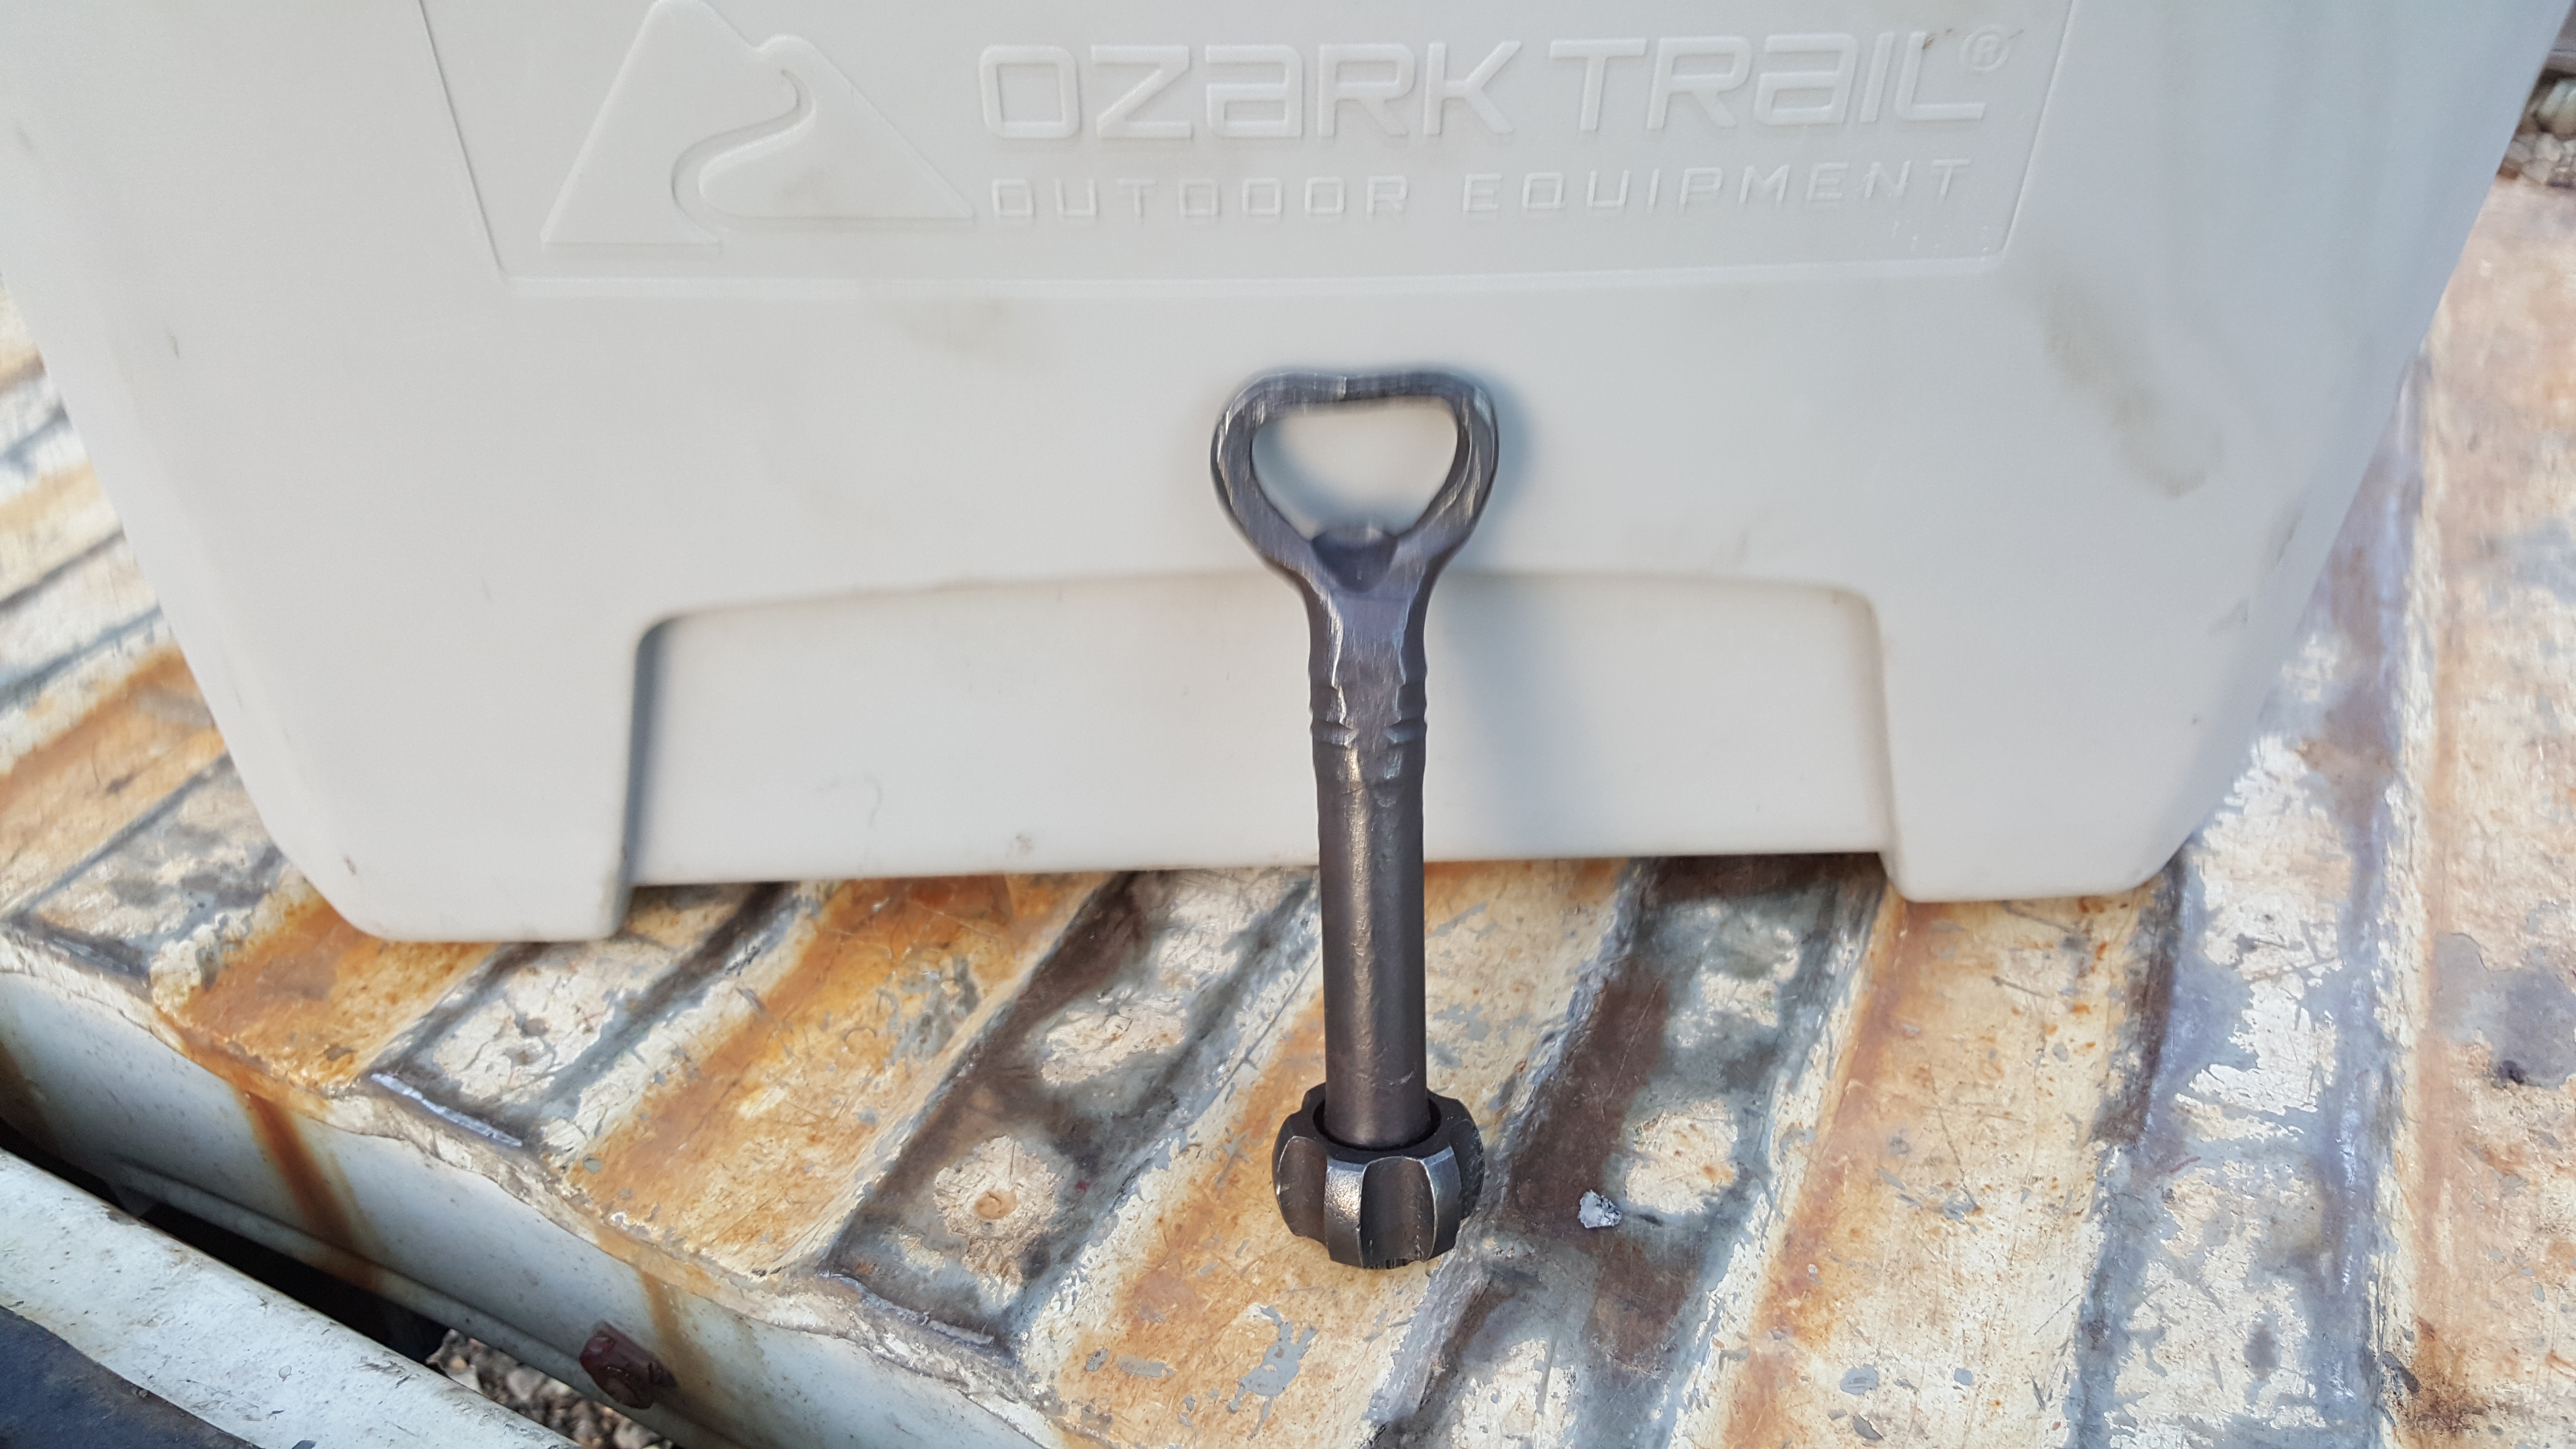
Made for my buddy, he gave me 2 broken cv axle shafts off his side by side. Figured i could at least make him a bottle opener out of 1 of em.

-
That looks good. How big is the fire pot? One suggestion i have would be to trim a small section of the angle iron flush with the table top. That way you can lay your workpiece level into the sweet spot in the fire. That's just my opinion. Now, show us a couple pics of some hot steel in it.
-
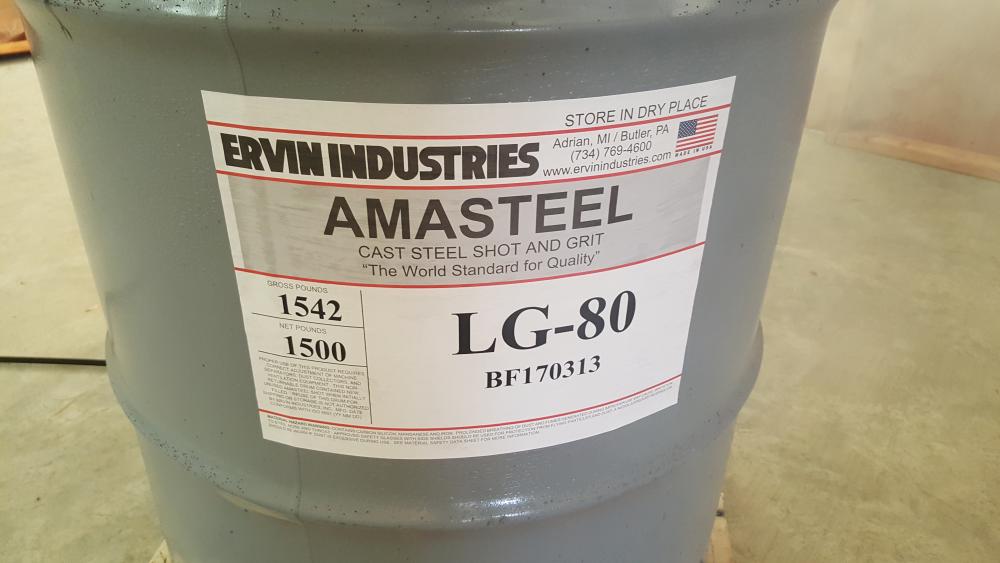
Picked up a 1500# drum of high carbon steel blasting media for work. A couple gallon jugs are getting filled up to take home. The manufacturer puts it in the 1080-1090 classification. .96% - .98% carbon content.
-
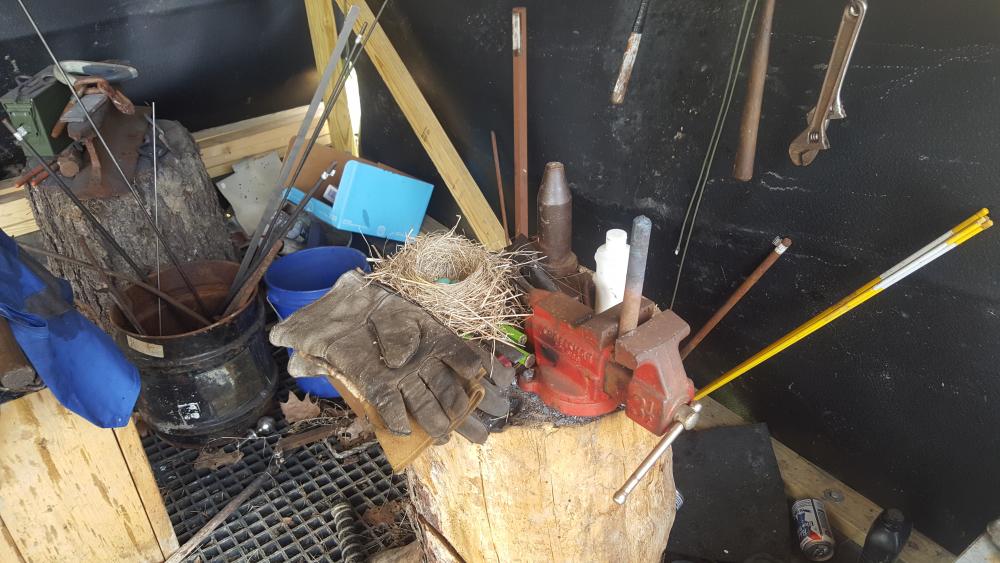
Thanks for wire idea Thomas, i will have to keep that in mind for the future. Unfortunately it is only a 2 sided shop with a roof & thick 60mil plastic walls to block the cross breeze at the moment. A temporary structure just to keep the elements away for now.
-
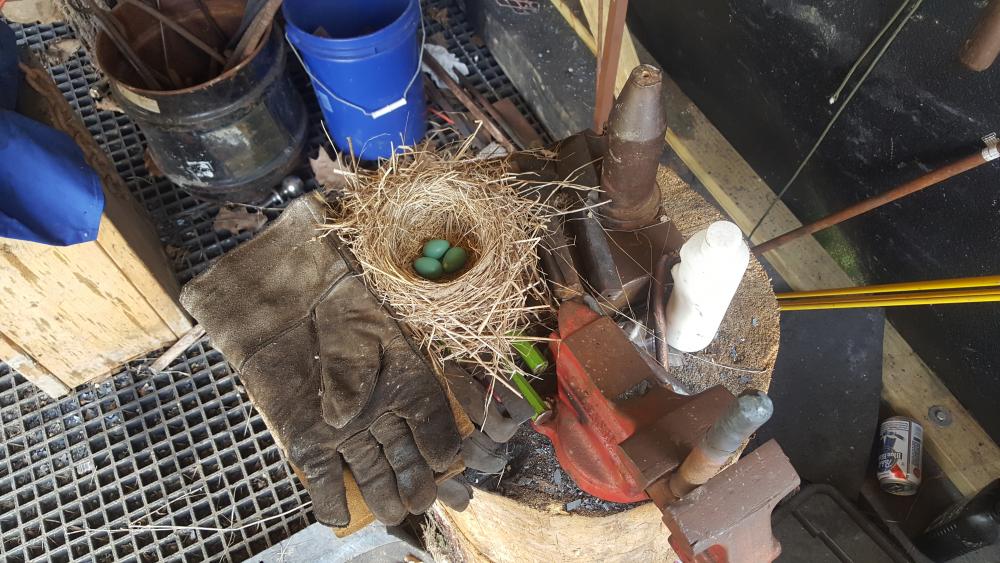
So, i go out of town for a week and come back to see this.... i relocated it very carefully with gloves on to about 3ft away in a separate spot in the smithy... hopefully the robin wont abandon the eggs. If she does, the nest may just end up in a plexiglass box filled with polyurethane sitting on a shelf in the living room. Also found another nest in the frame rails of the 4x4 samurai...
-
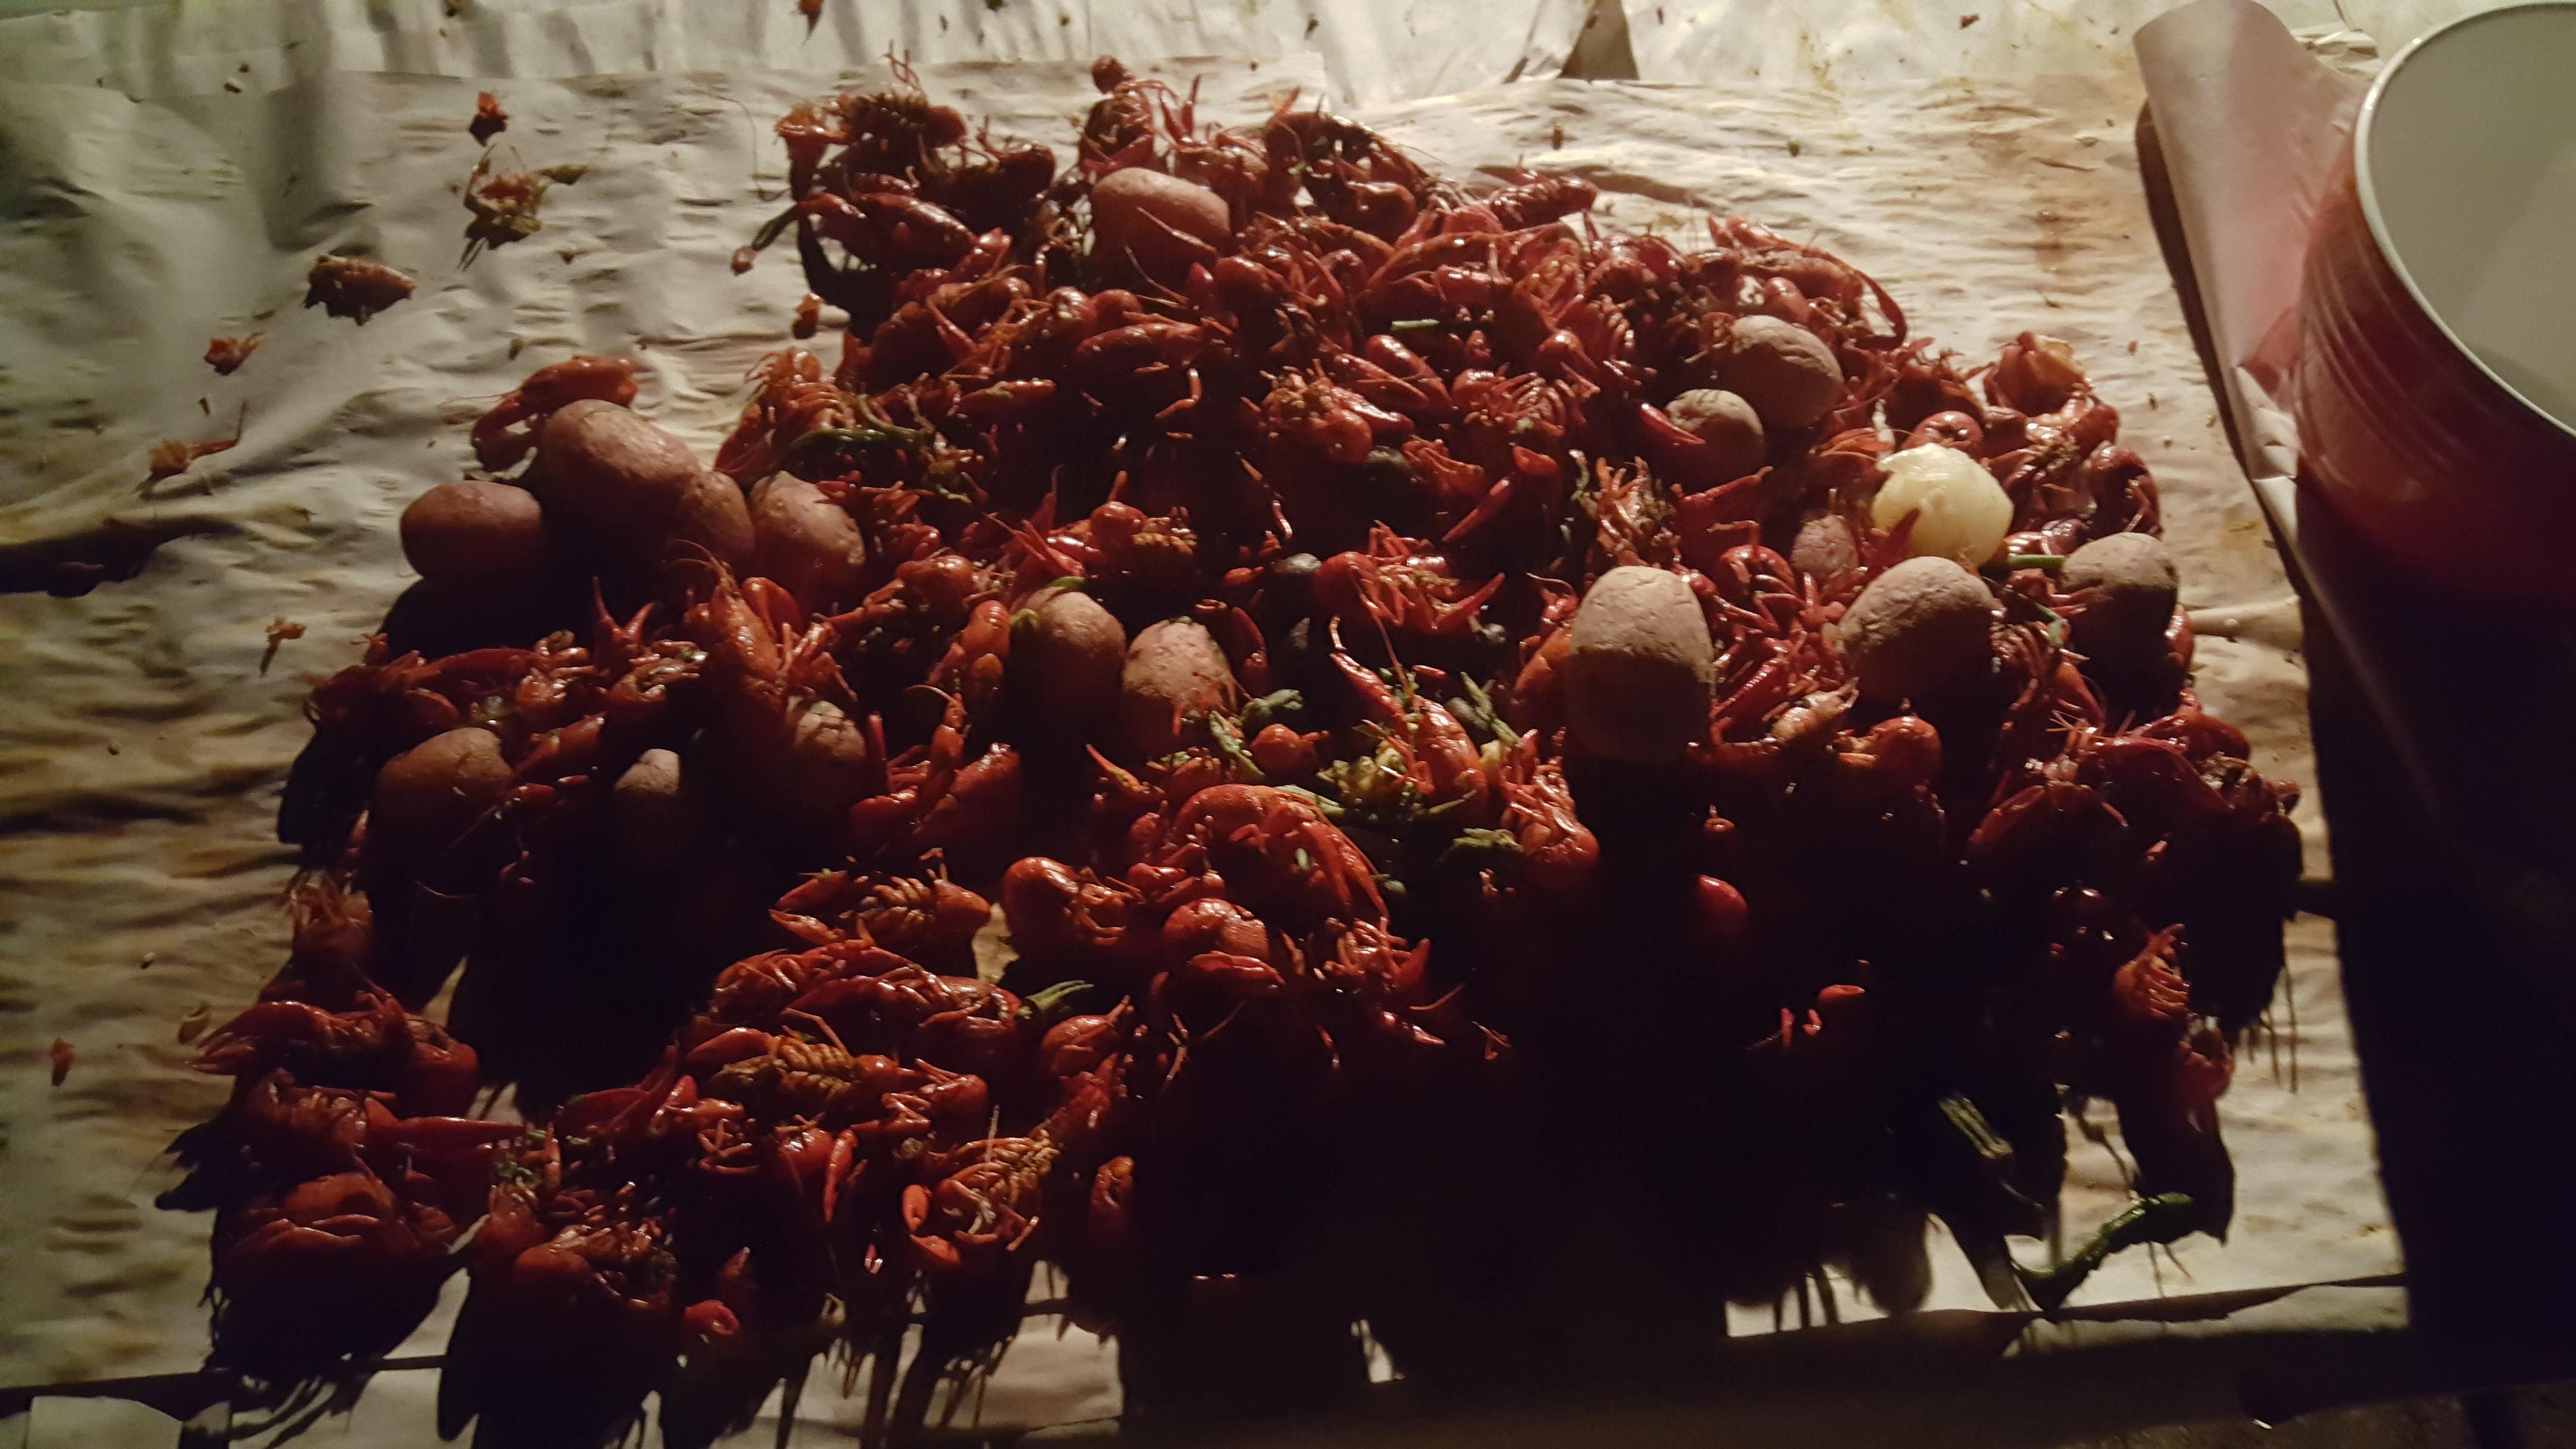
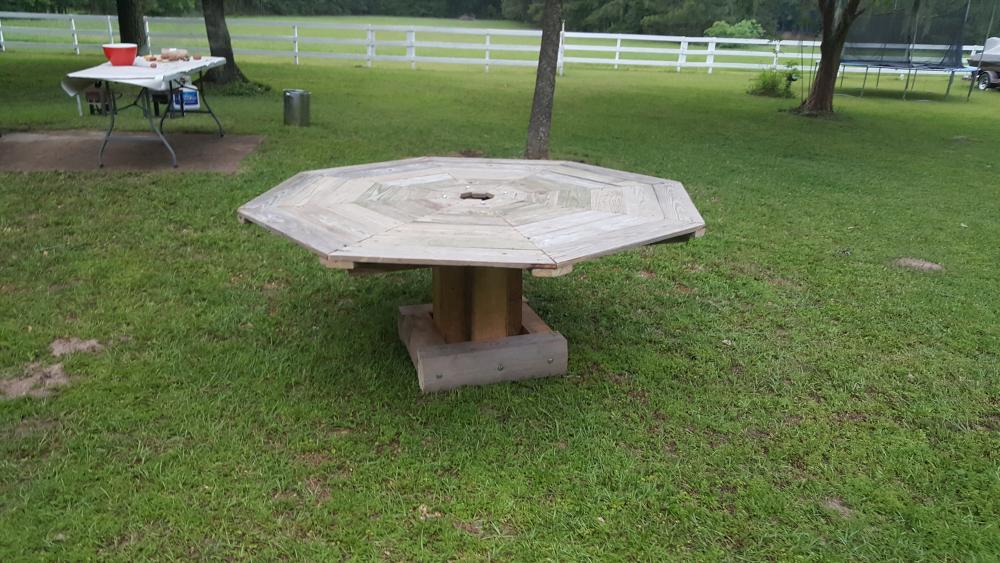
That shifter knob is awesome 58er. LBS, slow down a little, yer makin me feel like a chump. If i have half yer skill when i finally deciide to grow up, i will be pleased. Made the table (6ft) for a family friend that is letting my sister, her husband, and my mom stay at his place until they find their dream house. Cooked a bunch of crawfish for the family and friends, and this is what they all left me to deal with at 10pm. Will make some good red beans & rice or etouffee. There was still 2 more batches to cook after i took that pic... alot of mud bugs left... IT IS GOOD TO BE HOME (just for a visit)... hahahaaaa

-
Yeah, finally got it to upload. Hope this helps for a reference for now.

-
I keep trying to upload a pic for reference, but it aint lettin me.... i will take some measurements and upload a few pics when i get back home next weekend. Im currently stuck in Houston helping my sister move and don't fly back home til Saturday night.
-
Thanks for the compliments guys, i got over 300ft left. Shoot me a pm with a city/state and i bet i can hook ya up cheaper than $15 a foot.
-
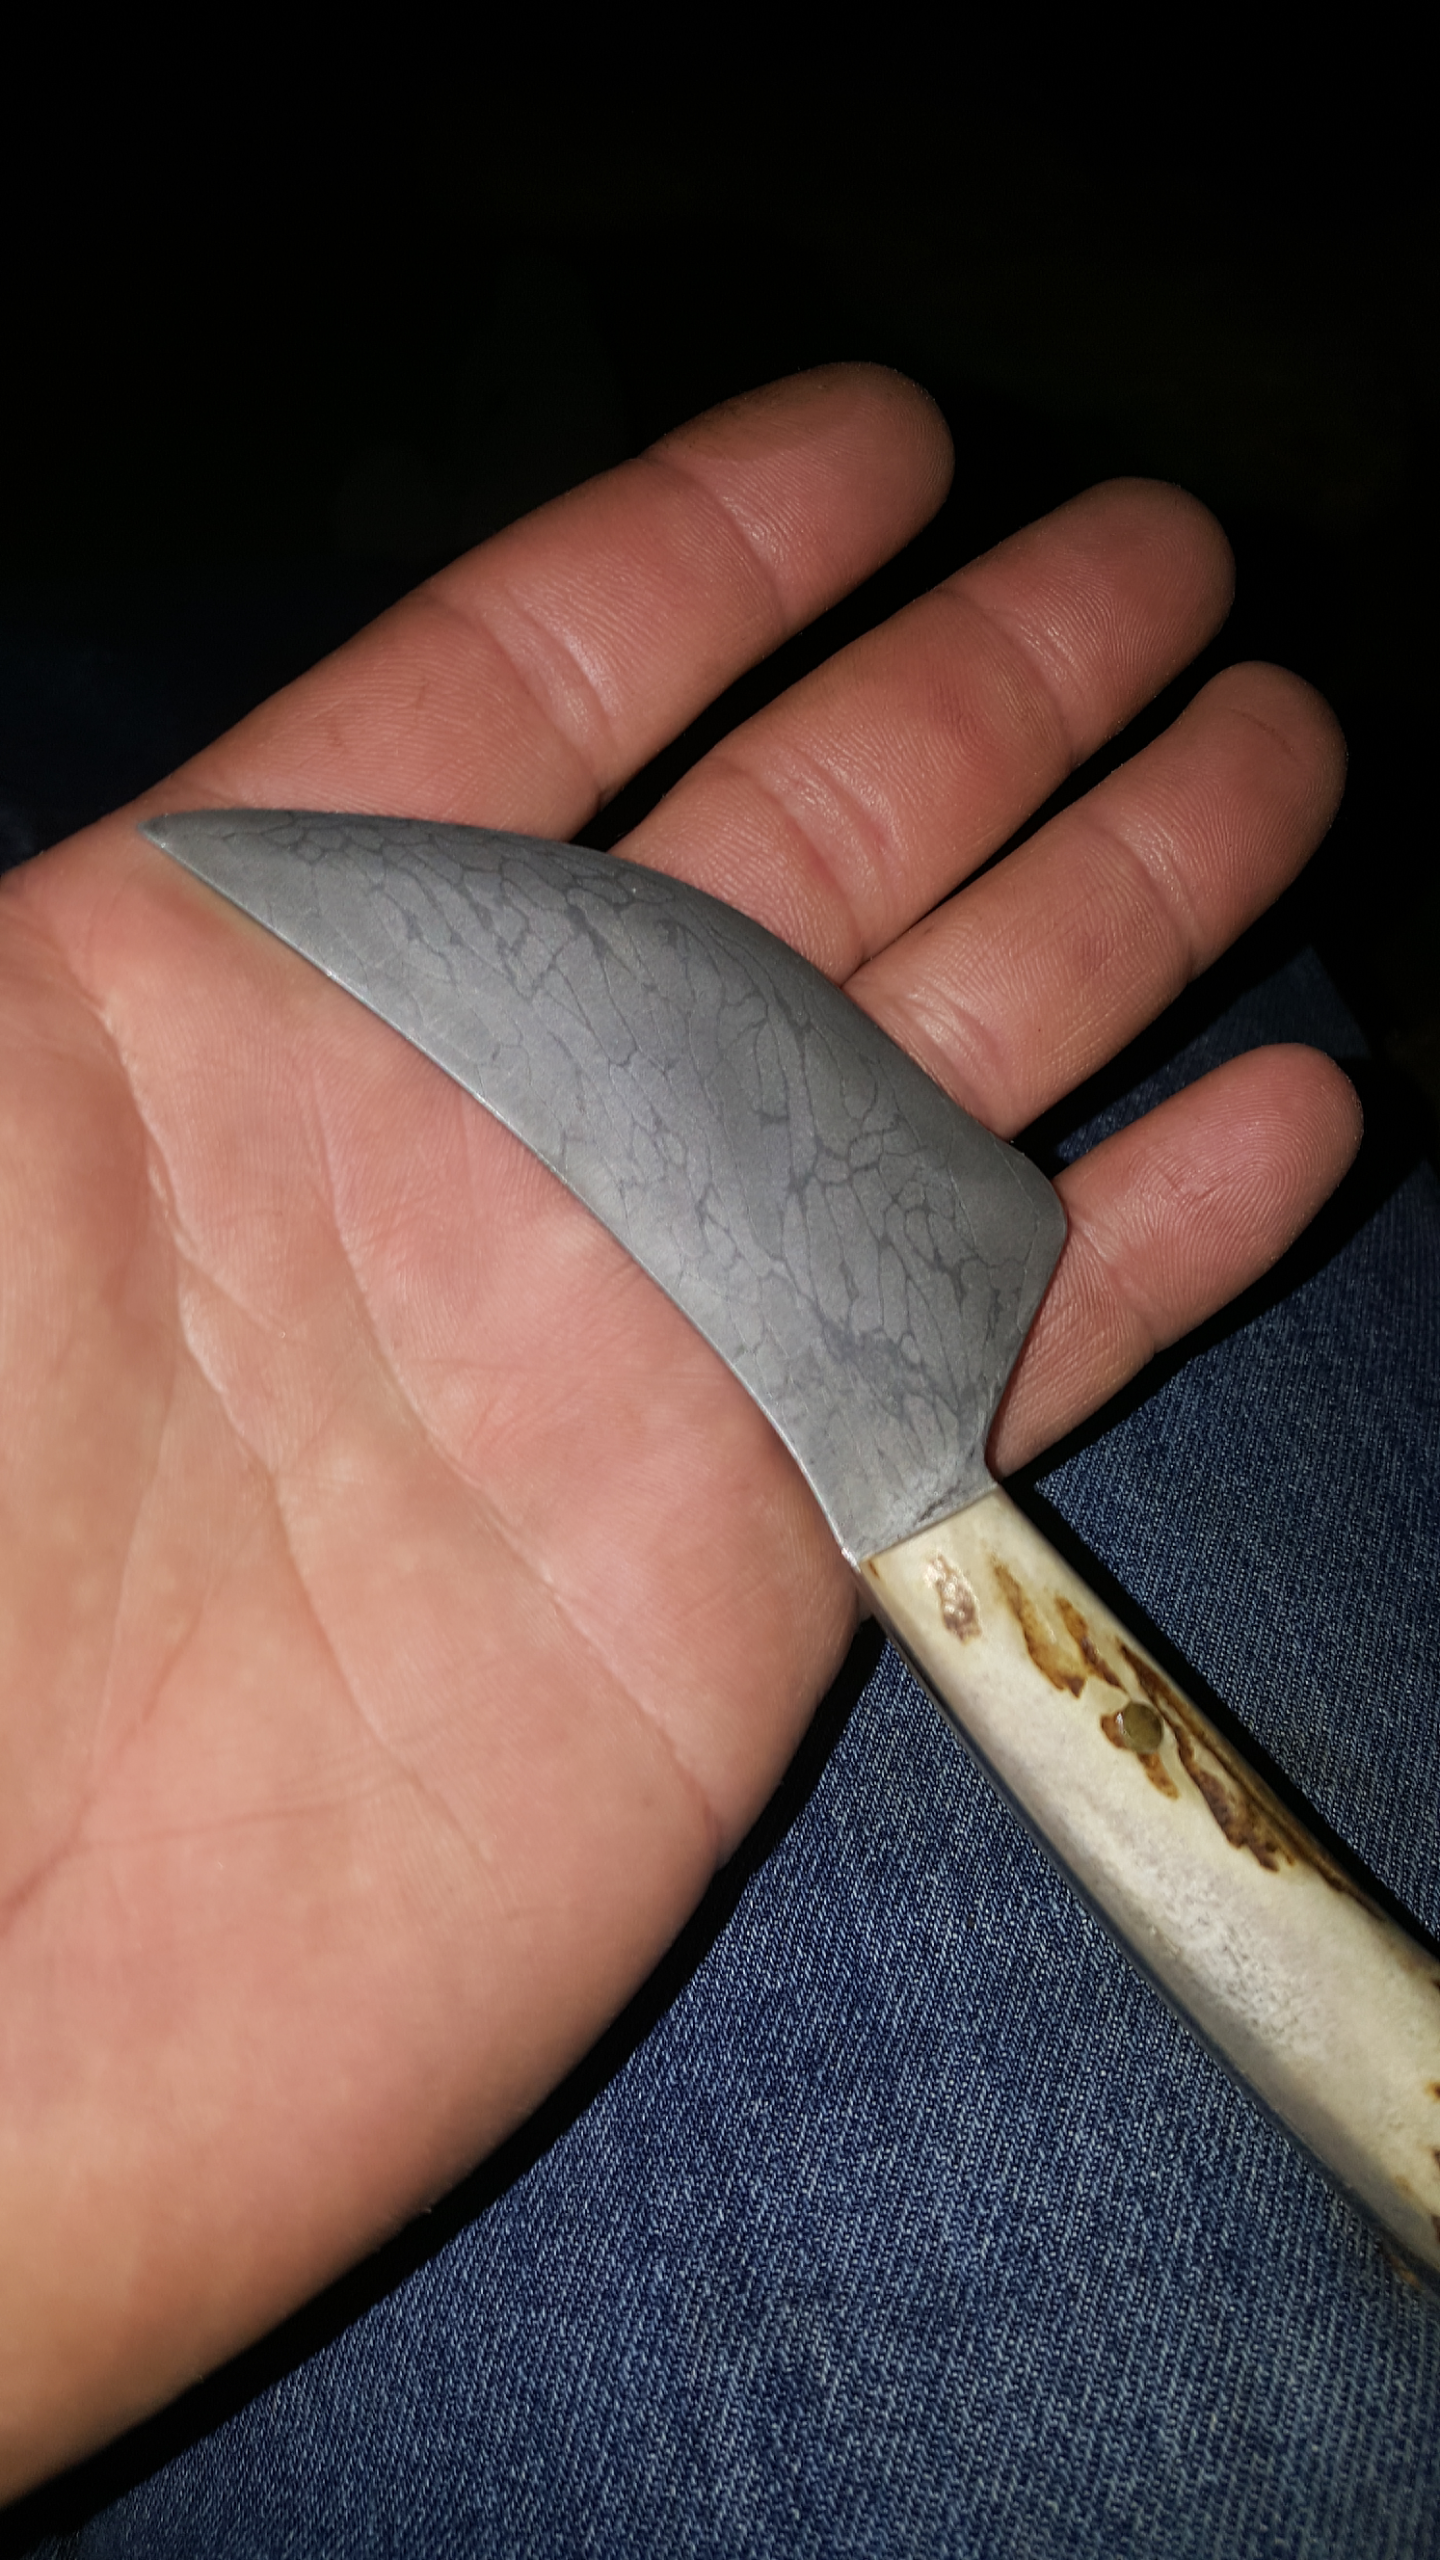
That looks awesome, I'm diggin the recycled piano parts. Great lookin blade for a 1st attempt. I got over 300ft of cable to play with and I'm still trying to figure it out, sometimes it works, sometimes it dont.....
-
Great looking knife, glad i could inspire someone. I still got lots of learnin to do myself. The blade isn't too big in my opinion, just needs bigger critters. Hahaaaa. Good job. Keep at it and if ya want, i can post some dimensions of my cable skinner if ya want. Copy away, it ain't gonna hurt my feelings none. I probably copied it off someone else anyway.
-
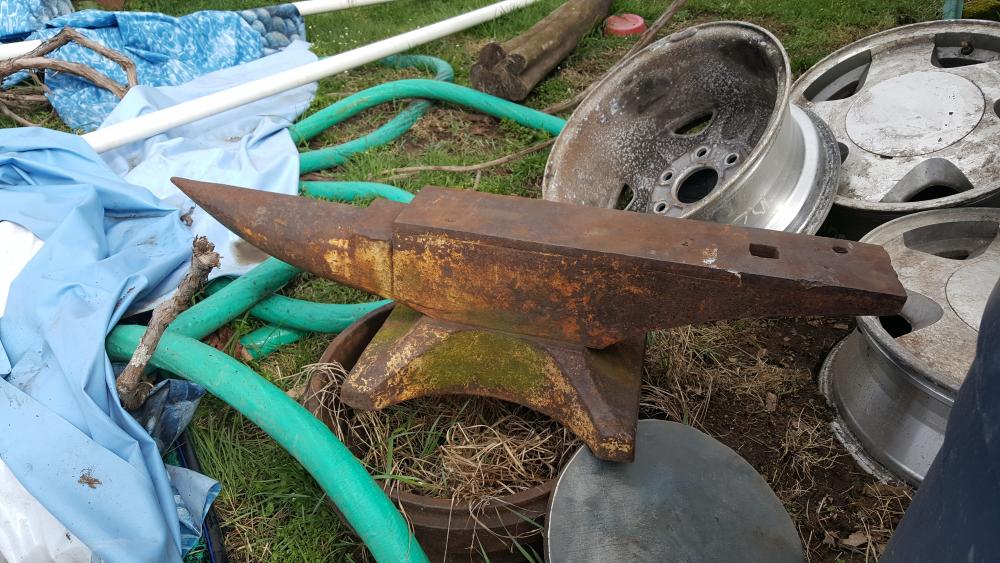
Thanks for the info guys. I will pass the info along to him. The face is in like new condition with sharp edges and all, but there is a few spots that i didn't snap a pic of. It looks like someone used it as a cutting torch table or drilled a few holes in something and gouged the face once upon a time. Nothing too bad, but a few random spots and deep holes that didn't make sense, except abuse. Again, i appreciate all the replies,
-
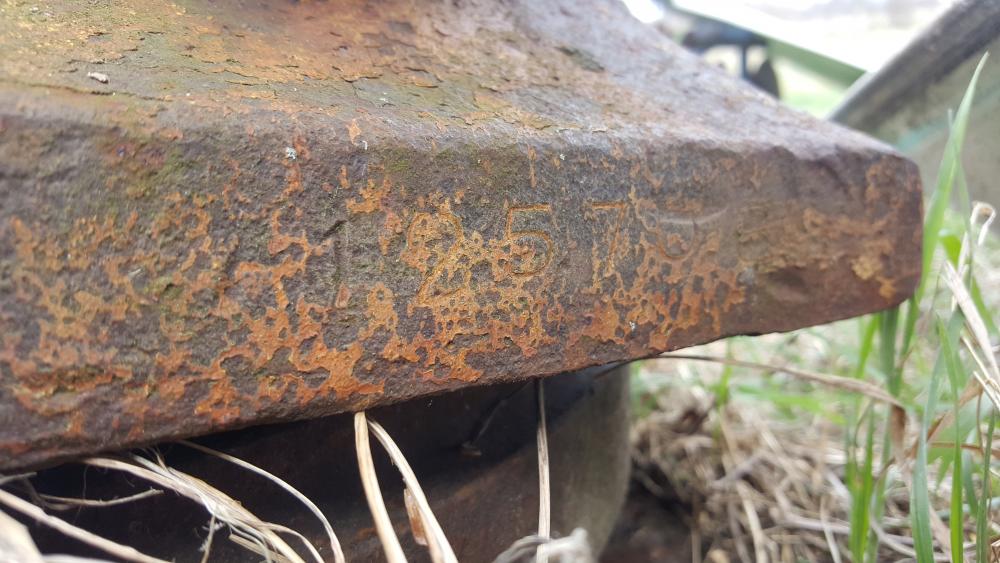
Hey fellas, trying to help a friend identify his anvil, was hoping the vast knowledge and expertise here could help a little. I was at my neighbors picking through his sawmill scrap pile, and we started talking blacksmithing. He has been interested in starting, but hasn't had enough time lately. So he offers me a look at some of his acquired equipment. This thing appears to be 2 pieces bolted together. I didn't get any pics of the bottom, (didn't want to flip it over because at 200+lbs, i was worried i couldn't flip it back upright). The base had a depression in the bottom, and i could clearly feel 2 square bolts going through to the main body of the anvil. It almost looks like the base does not fit the particular anvil. The numbers on the heelside of the base are left side 243 and right side 125708. Any help would be greatly appreciated.
-
Thanks das. Gergely, thanks for the compliment. A doublewide is a trailer house that is basically 2 stacked side by side and attached in the center to make a larger more comfortable mobile home. Bigger than an average caravan/travel trailer. They put them up on concrete blocks to level the house and make a foundation. Most of the time they take the axles and wheels off after it has been placed on the foundation supports. Search the Internet (google) for a "doublewide mobile home", and/or modular homes, that might explain a little better. They are cheap to purchase and set up, compared to a traditional style house.
-