swedgemon
Members
-
Joined
-
Last visited
-
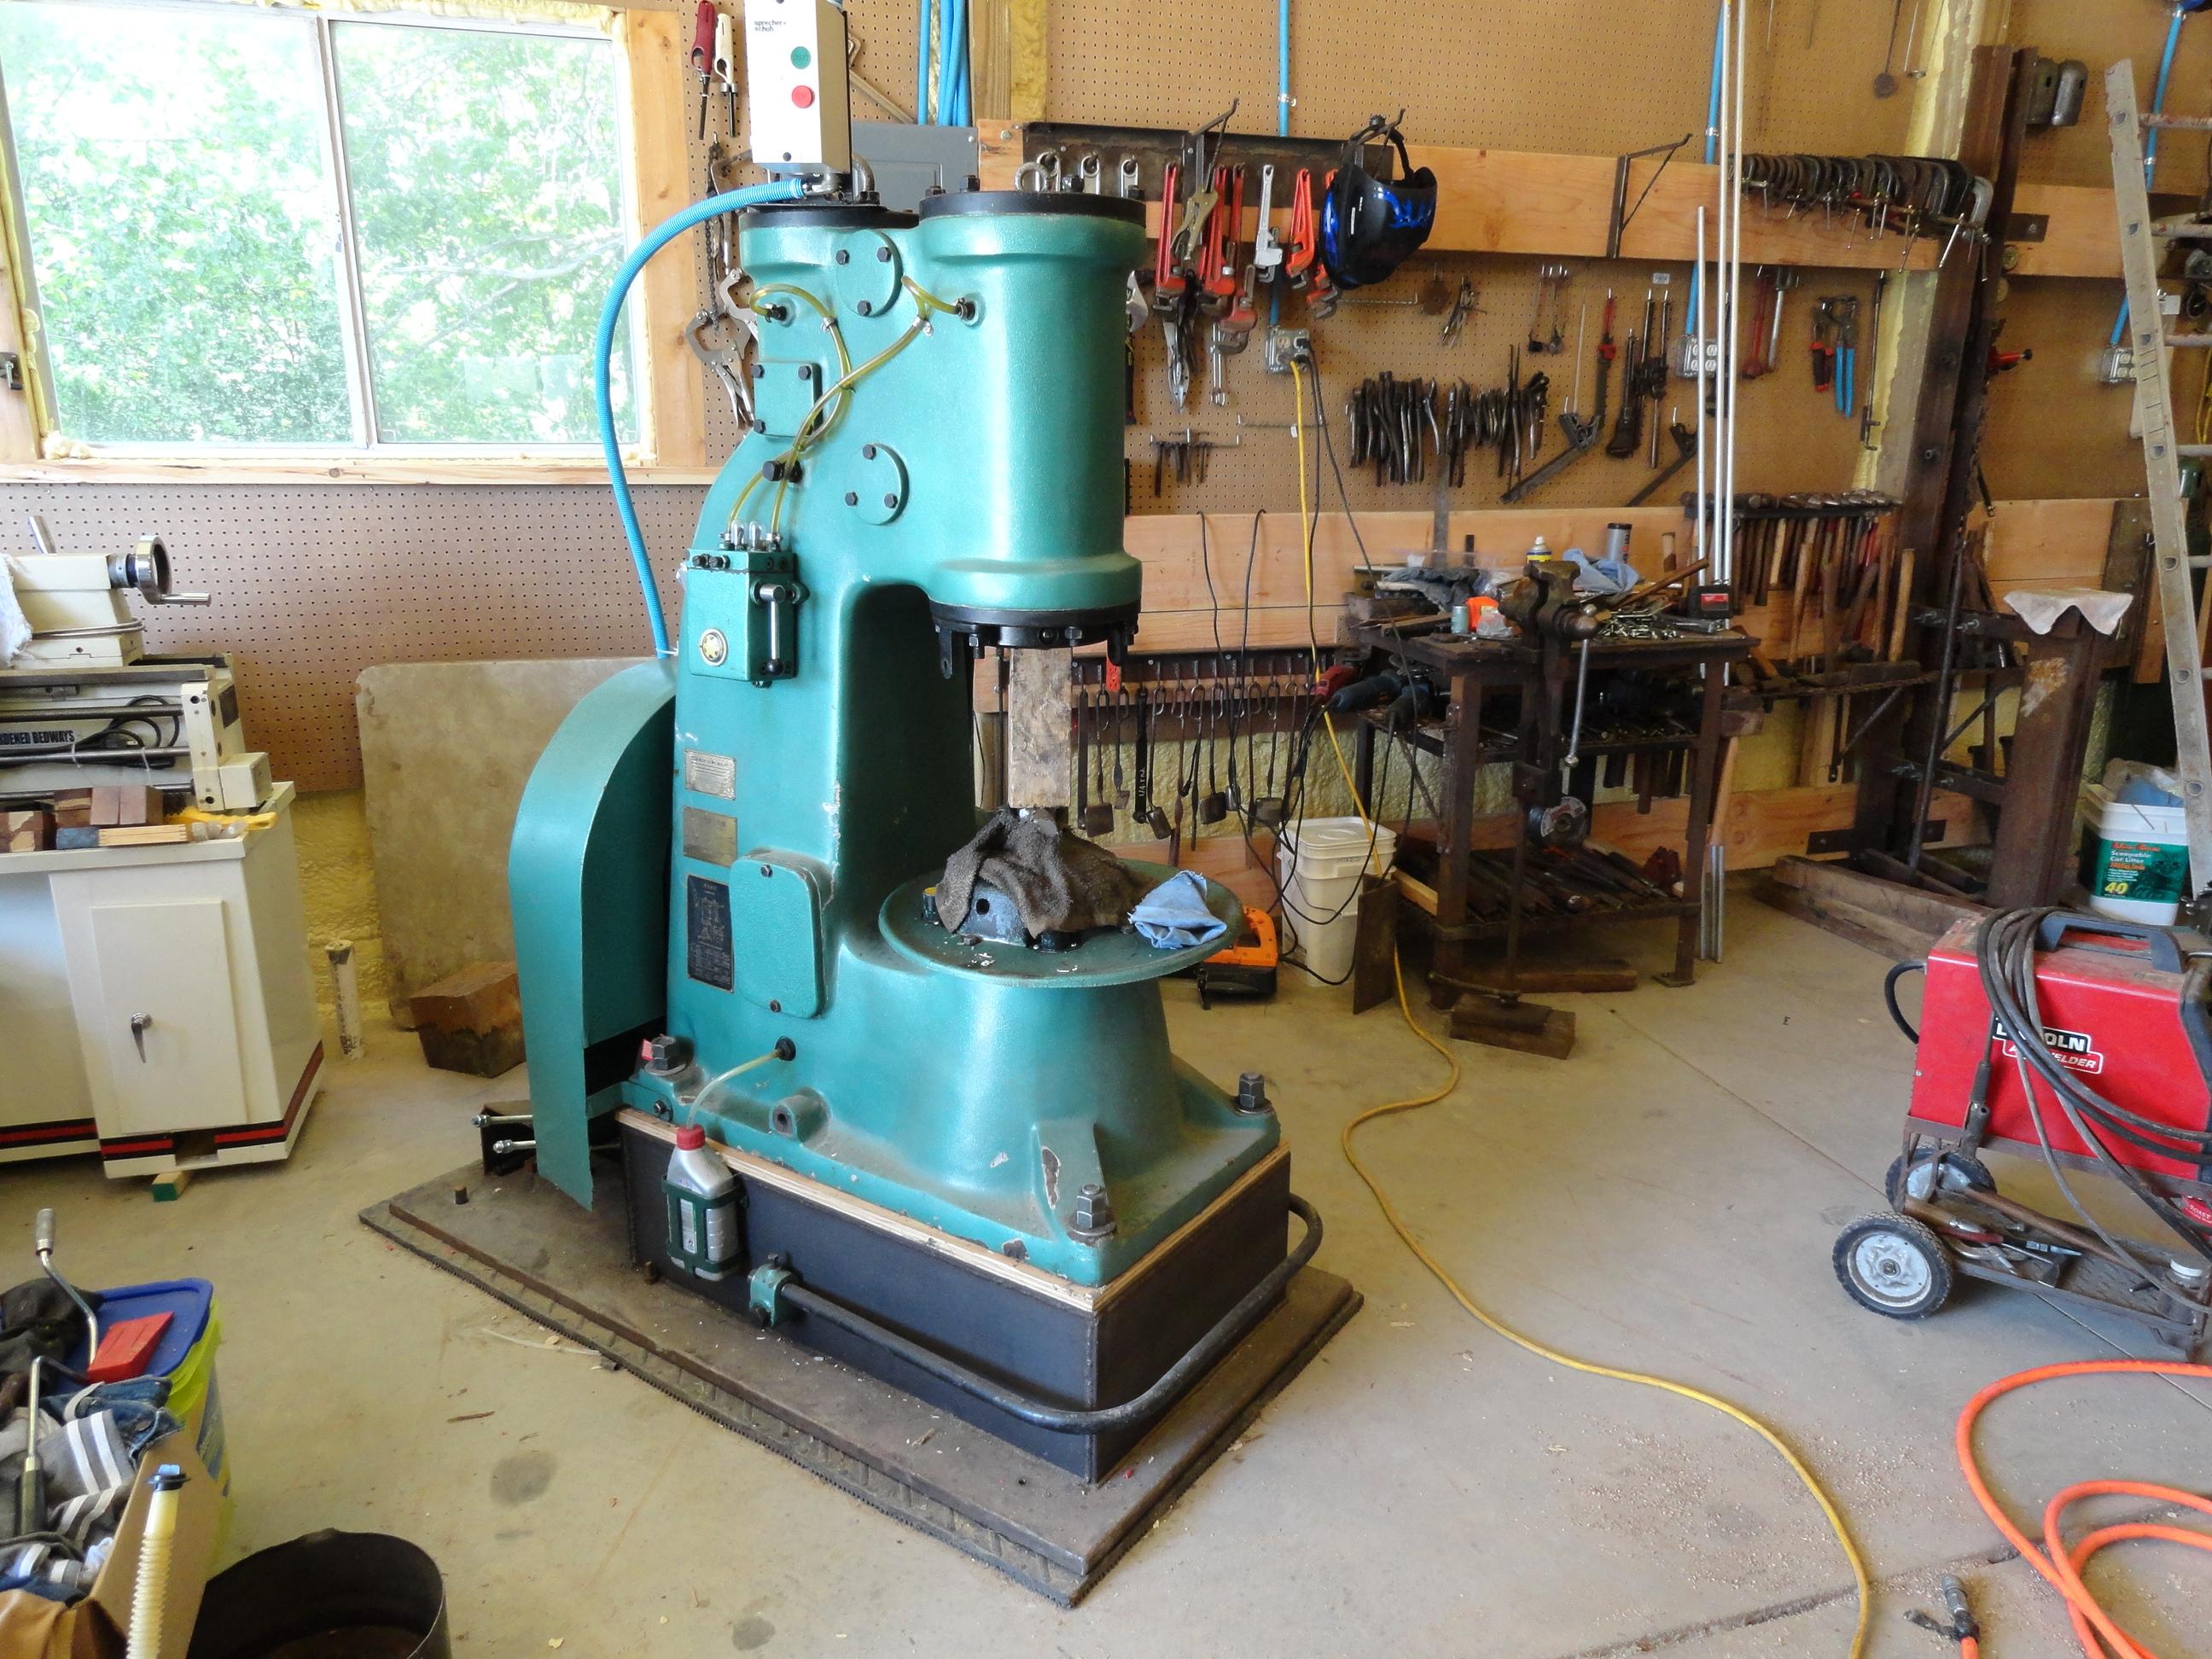
Hello DC, I, too, have a Striker 88 - Striker has been out of business for maybe 15 years. The webite referenced above by TBinKC has the best coverage of all the details of setting-up and running these hammers. Like yours, my hammer goes BAM, bam, BAM, bam, BAM when it gets overheated - don't know of any corrections other than take a long break. Heavy oil feed will lead to oil dripping onto the bottom die...ignoring the oil leads to oil droplets being splattered in all directions - I try to keep the excess oil mopped up between heats - also I check that an air bubble has not formed in the oil line going to the rear cylinder (I need a new check valve). Use a 220 VG (viscosity grade) turbine-quality oil (I use Mobil DTE BB)...do not use recycled crankcase oil from the hammer sump - it will have very small wear metal particles in suspension. PM me with quetions/comments/industrial humor/guidance for a happy life/etc, but nothing to do with politics. Best regards from the colonies. Swedge

-
-
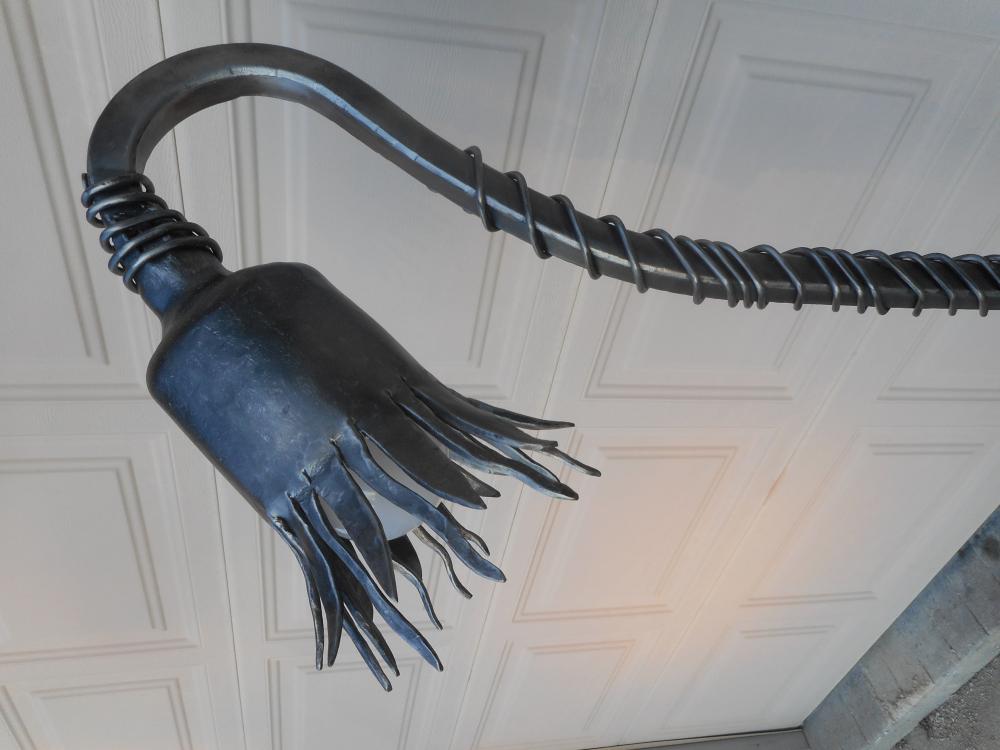
If mama is happy, the whole houseis happy! Yes, she likes it! Bending the tube - it was still filled with sand and capped. I clamped the tube in the vise and used a rose-bud torch to heat it section by section. It took a while and I had to correct it a few times but it worked out well. I used a fairly hefty bending fork for leverage...that tube does not bend easily.
-
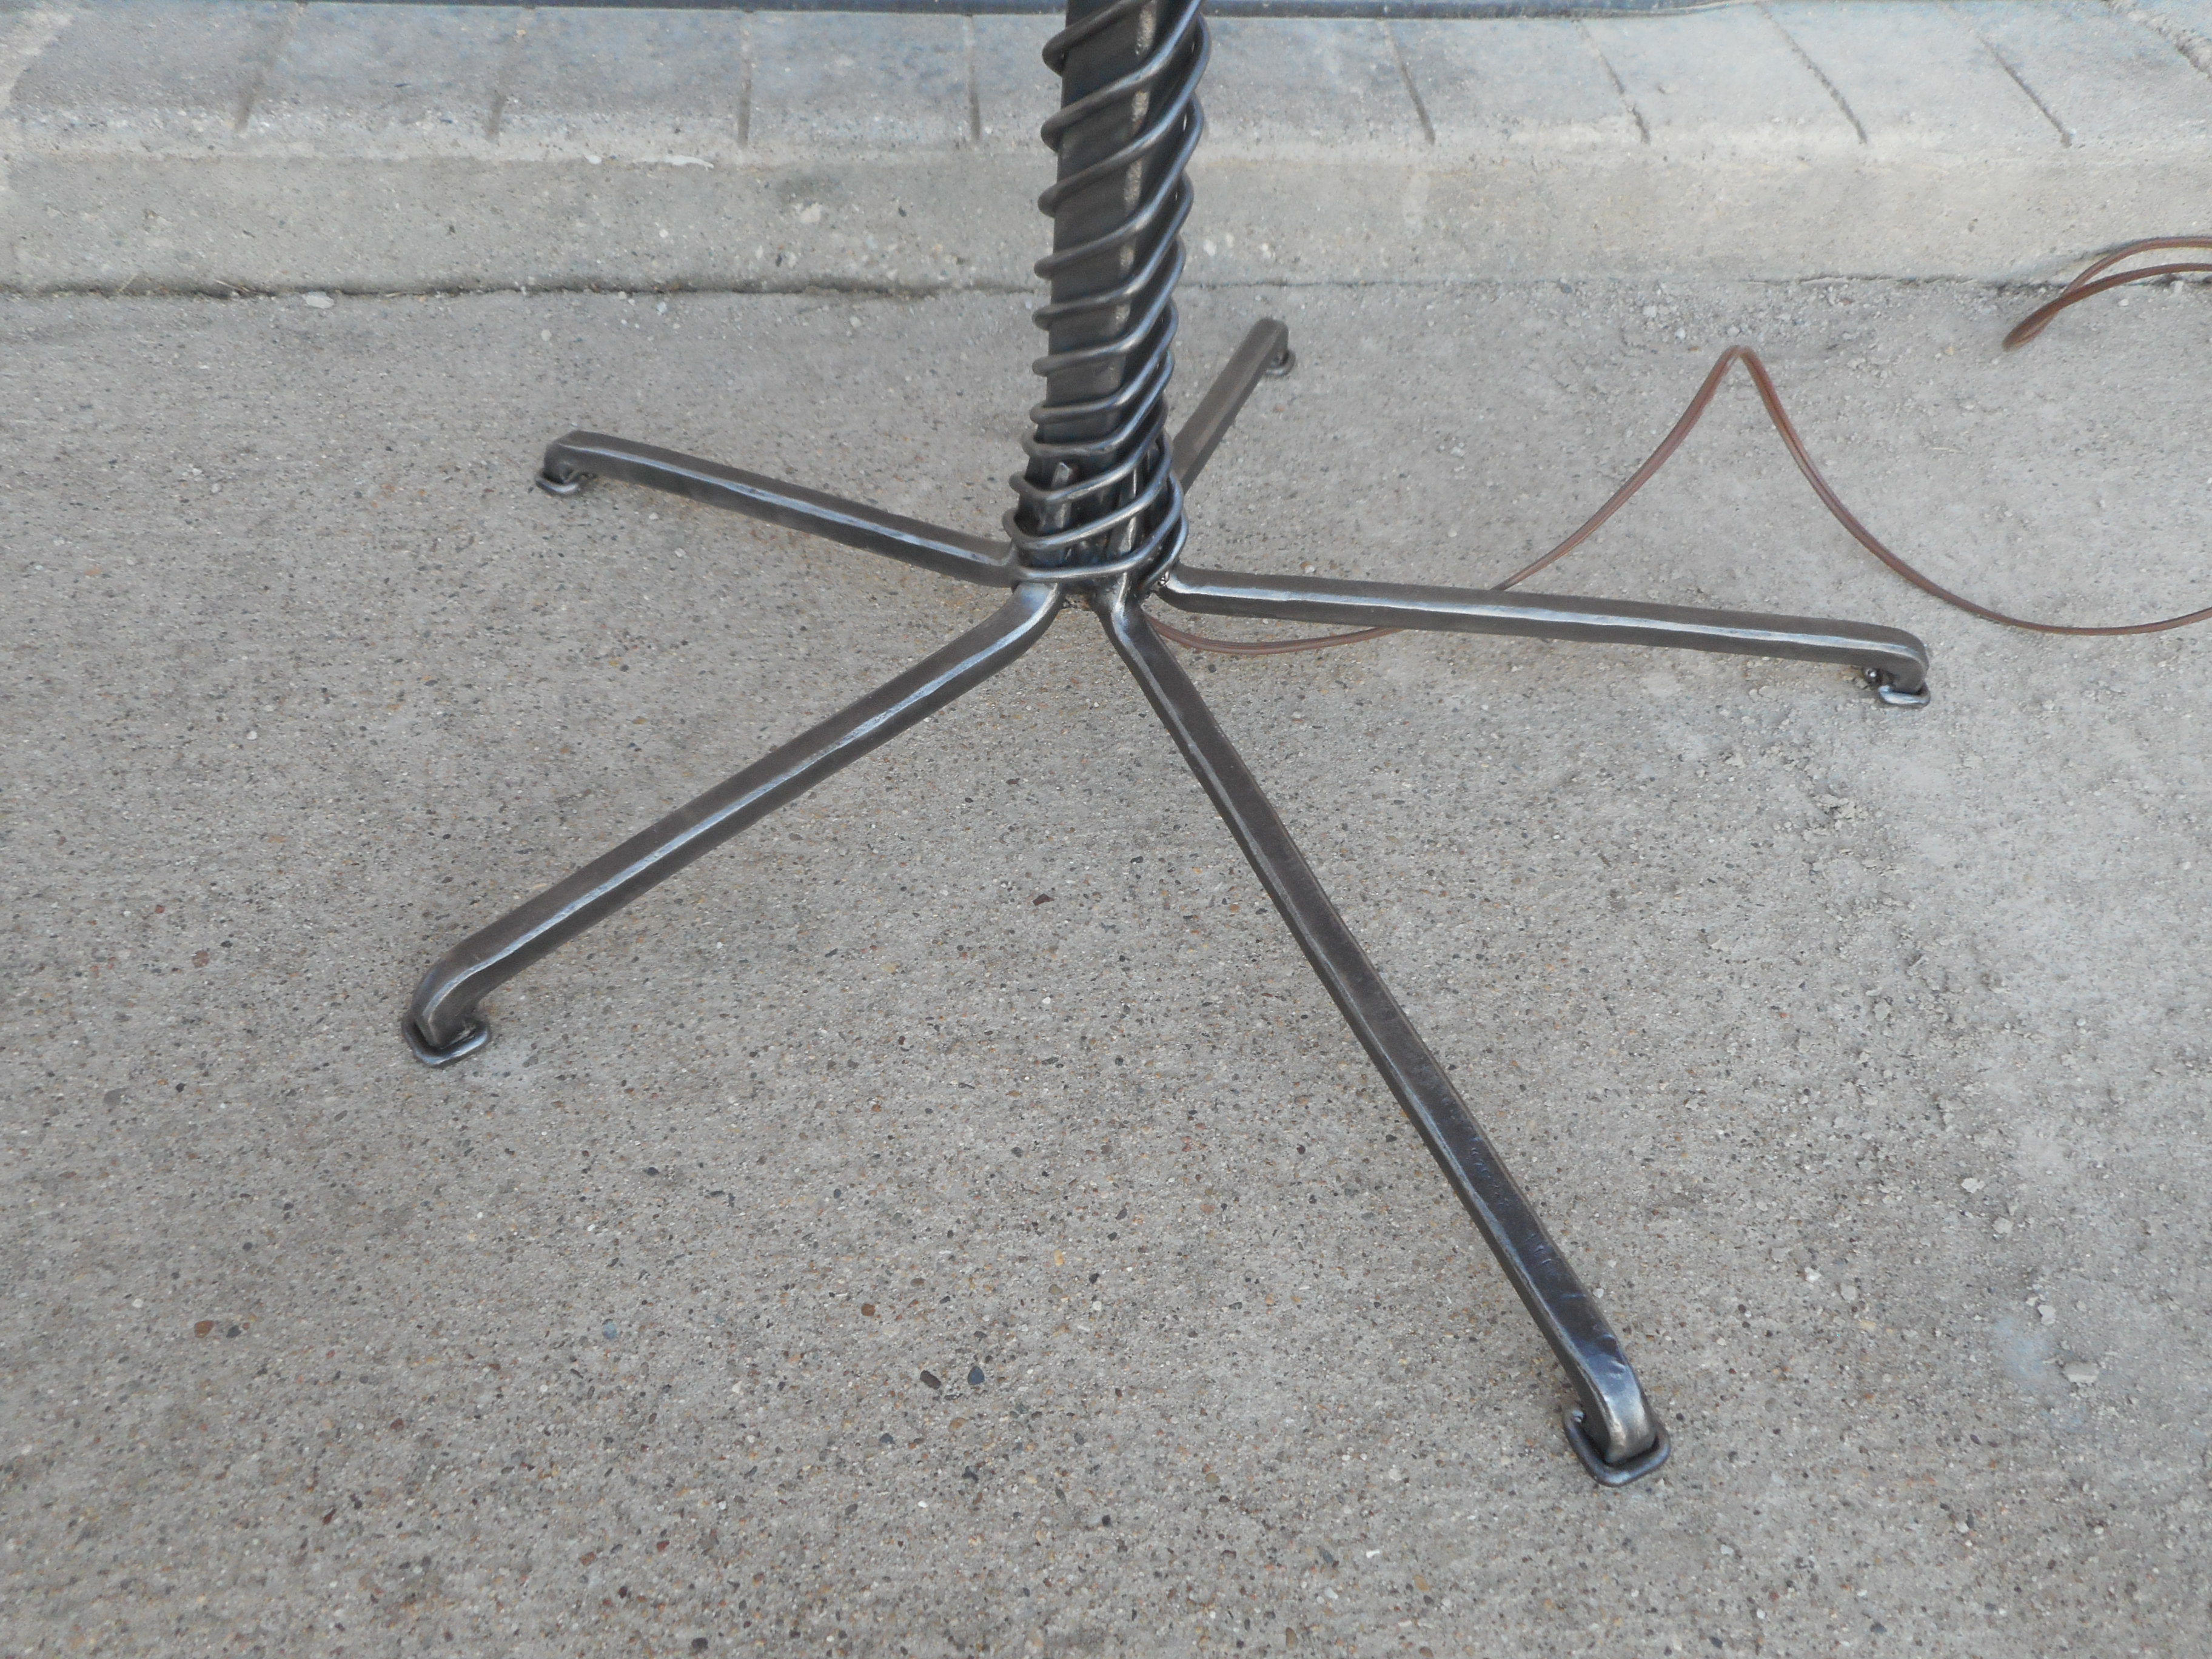
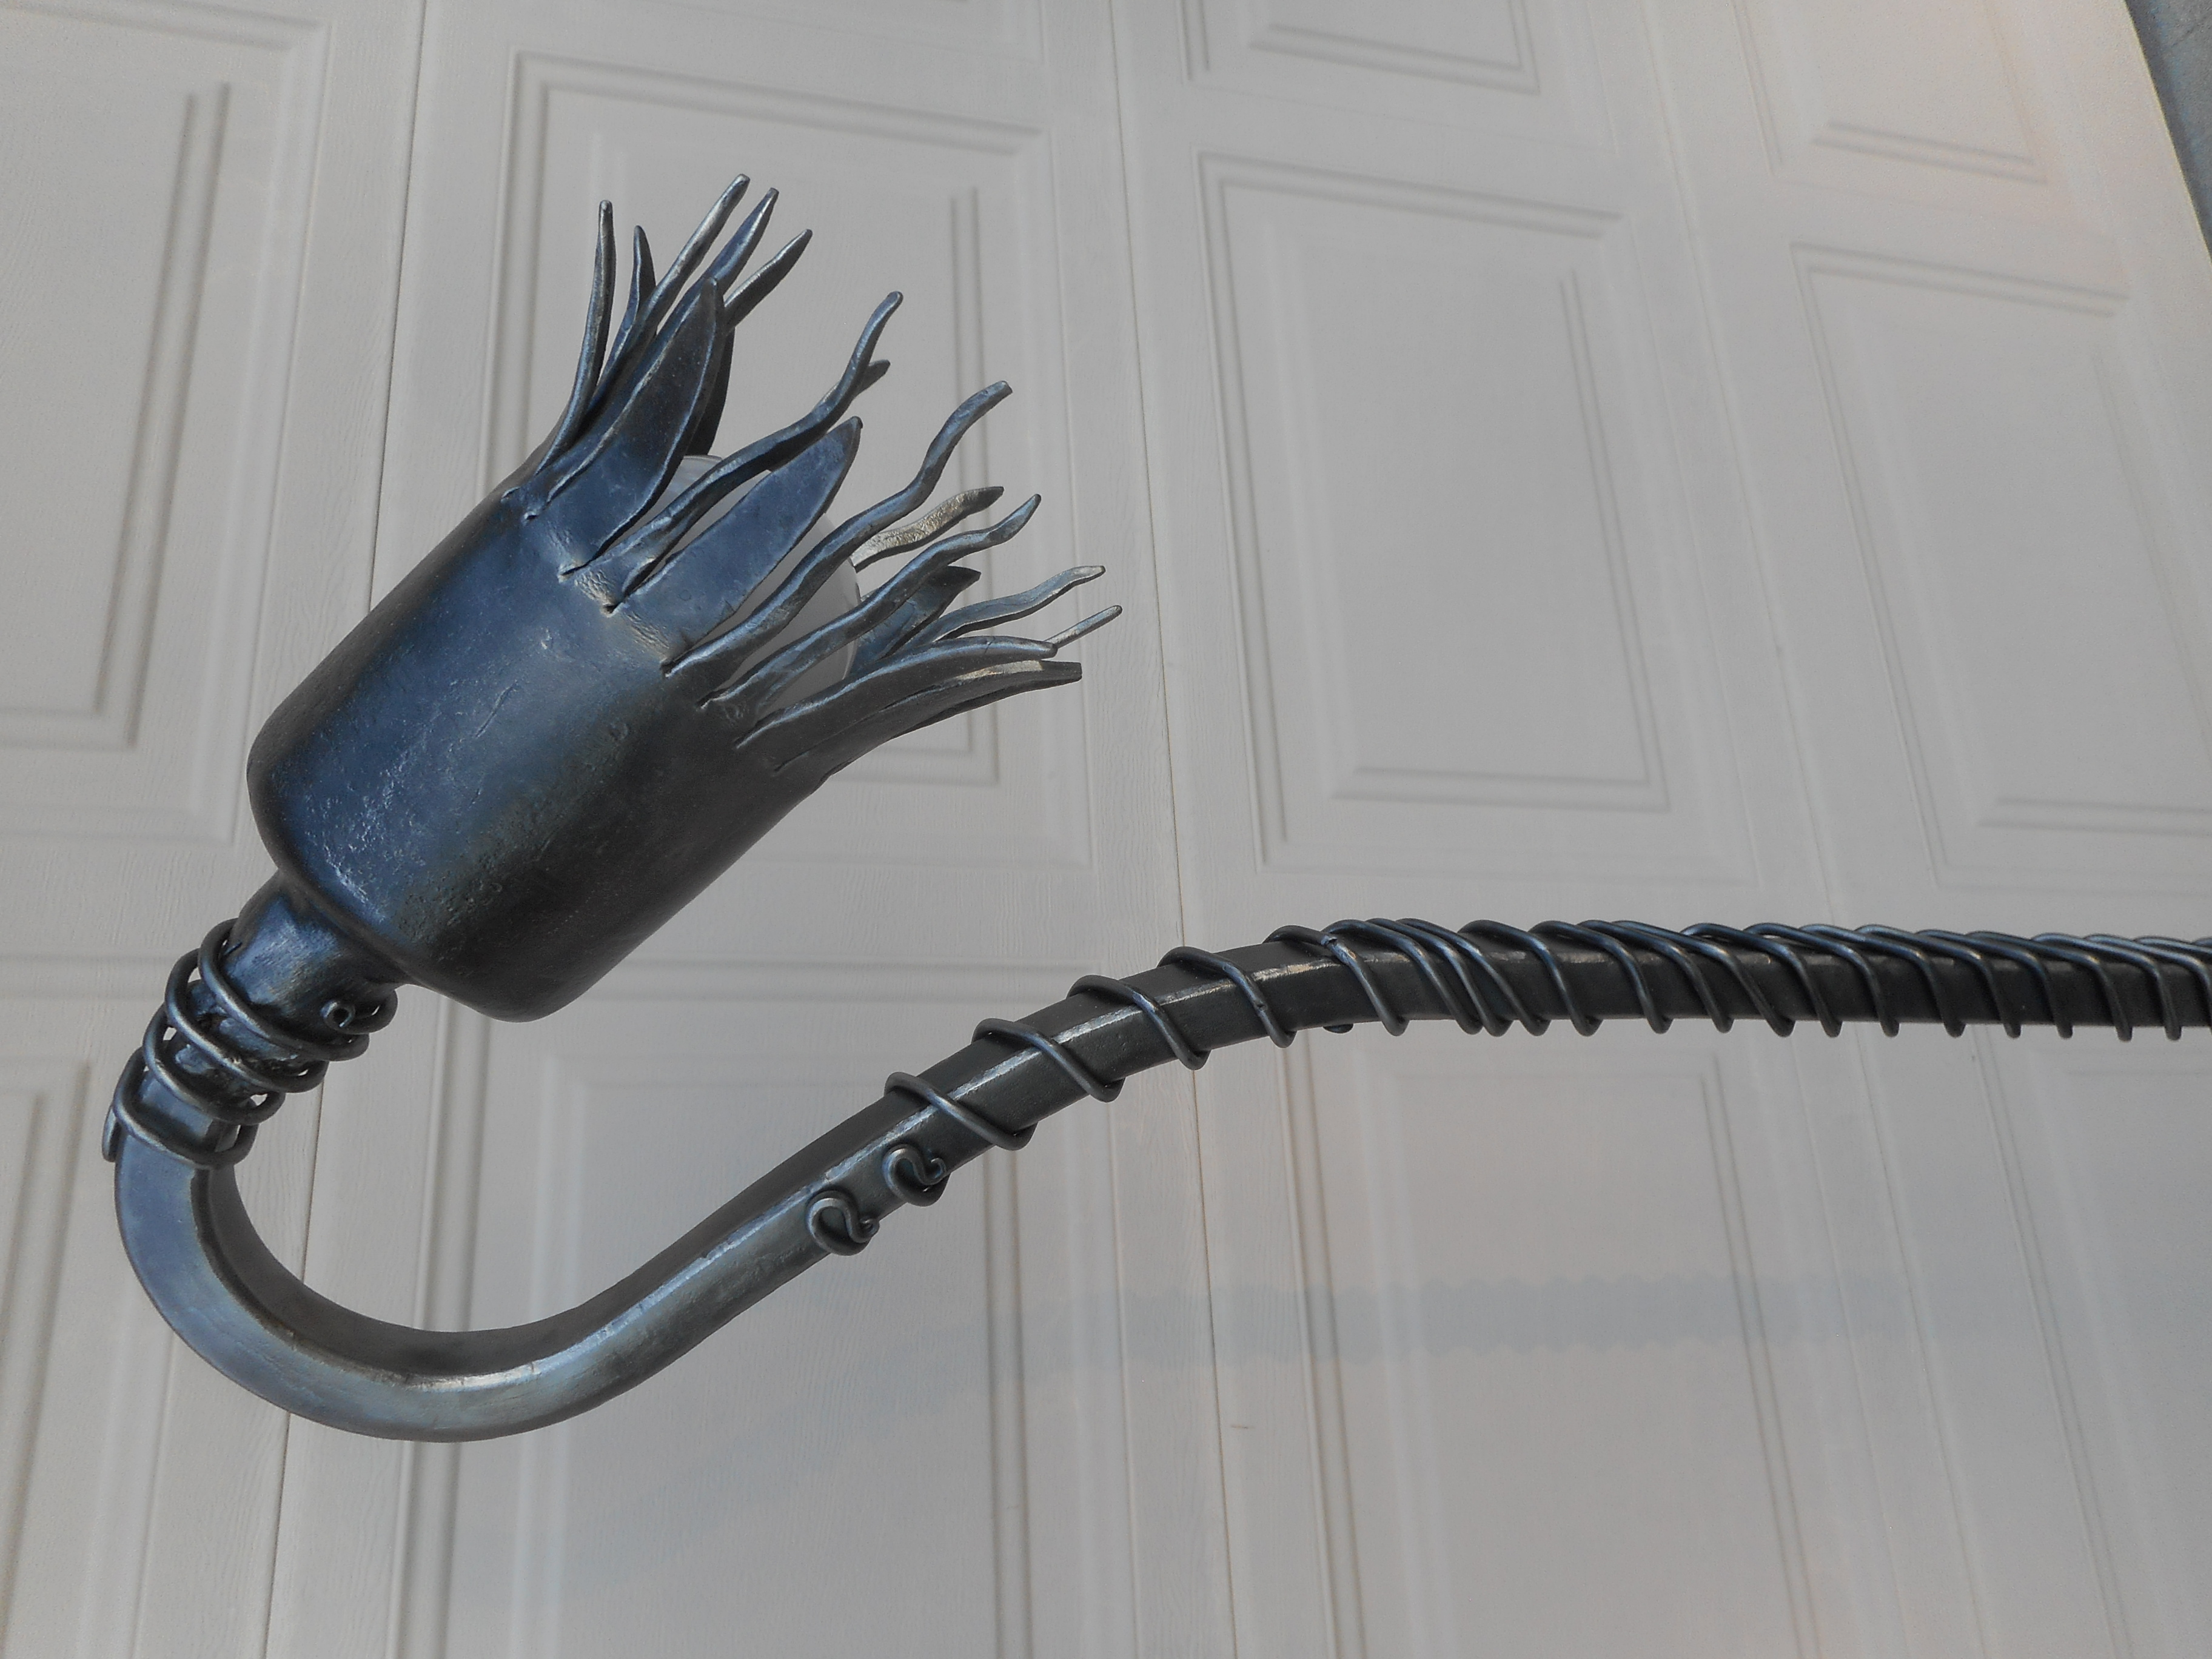
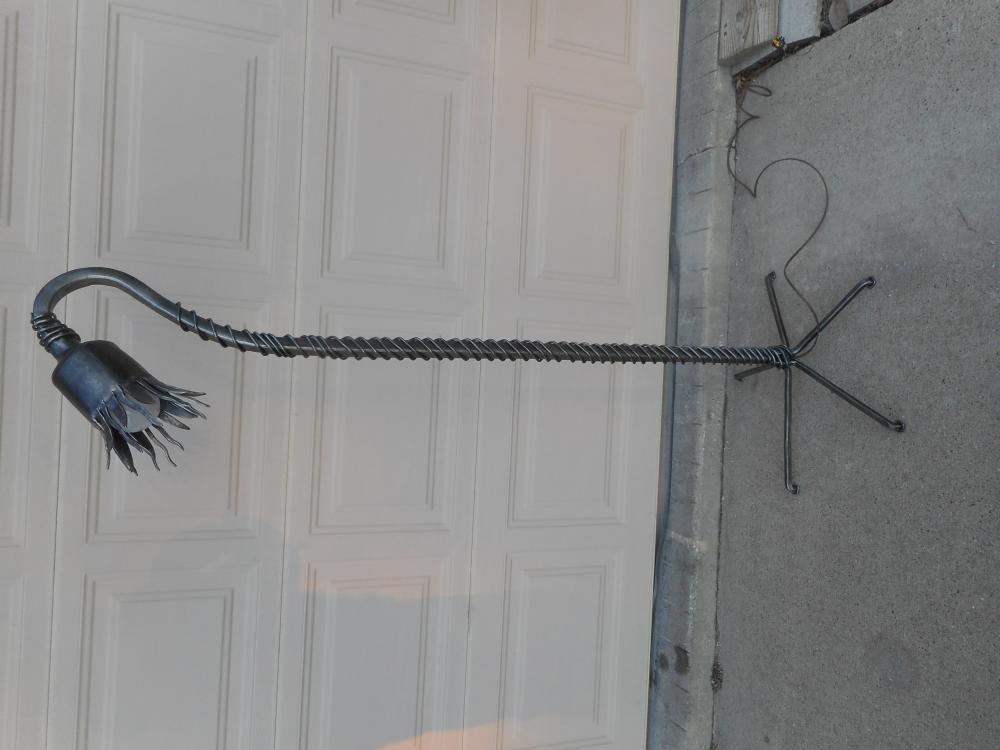
Just finished a goose-neck floor lamp for DW. Feet are 1/2" square, post is ruffed-up 1" square tube (power hammer), vine effect is 3/16" CR, Lamp shade is a piece of 4" pipe forged down to 1 1/2" on one end with forged leaves and stems on the other. The tube was bent by filling it with DRY sand then welding the ends shut (small vent hole drilled on each end). Project used lotsa LPG and Oxy.


-
-
-
-
-
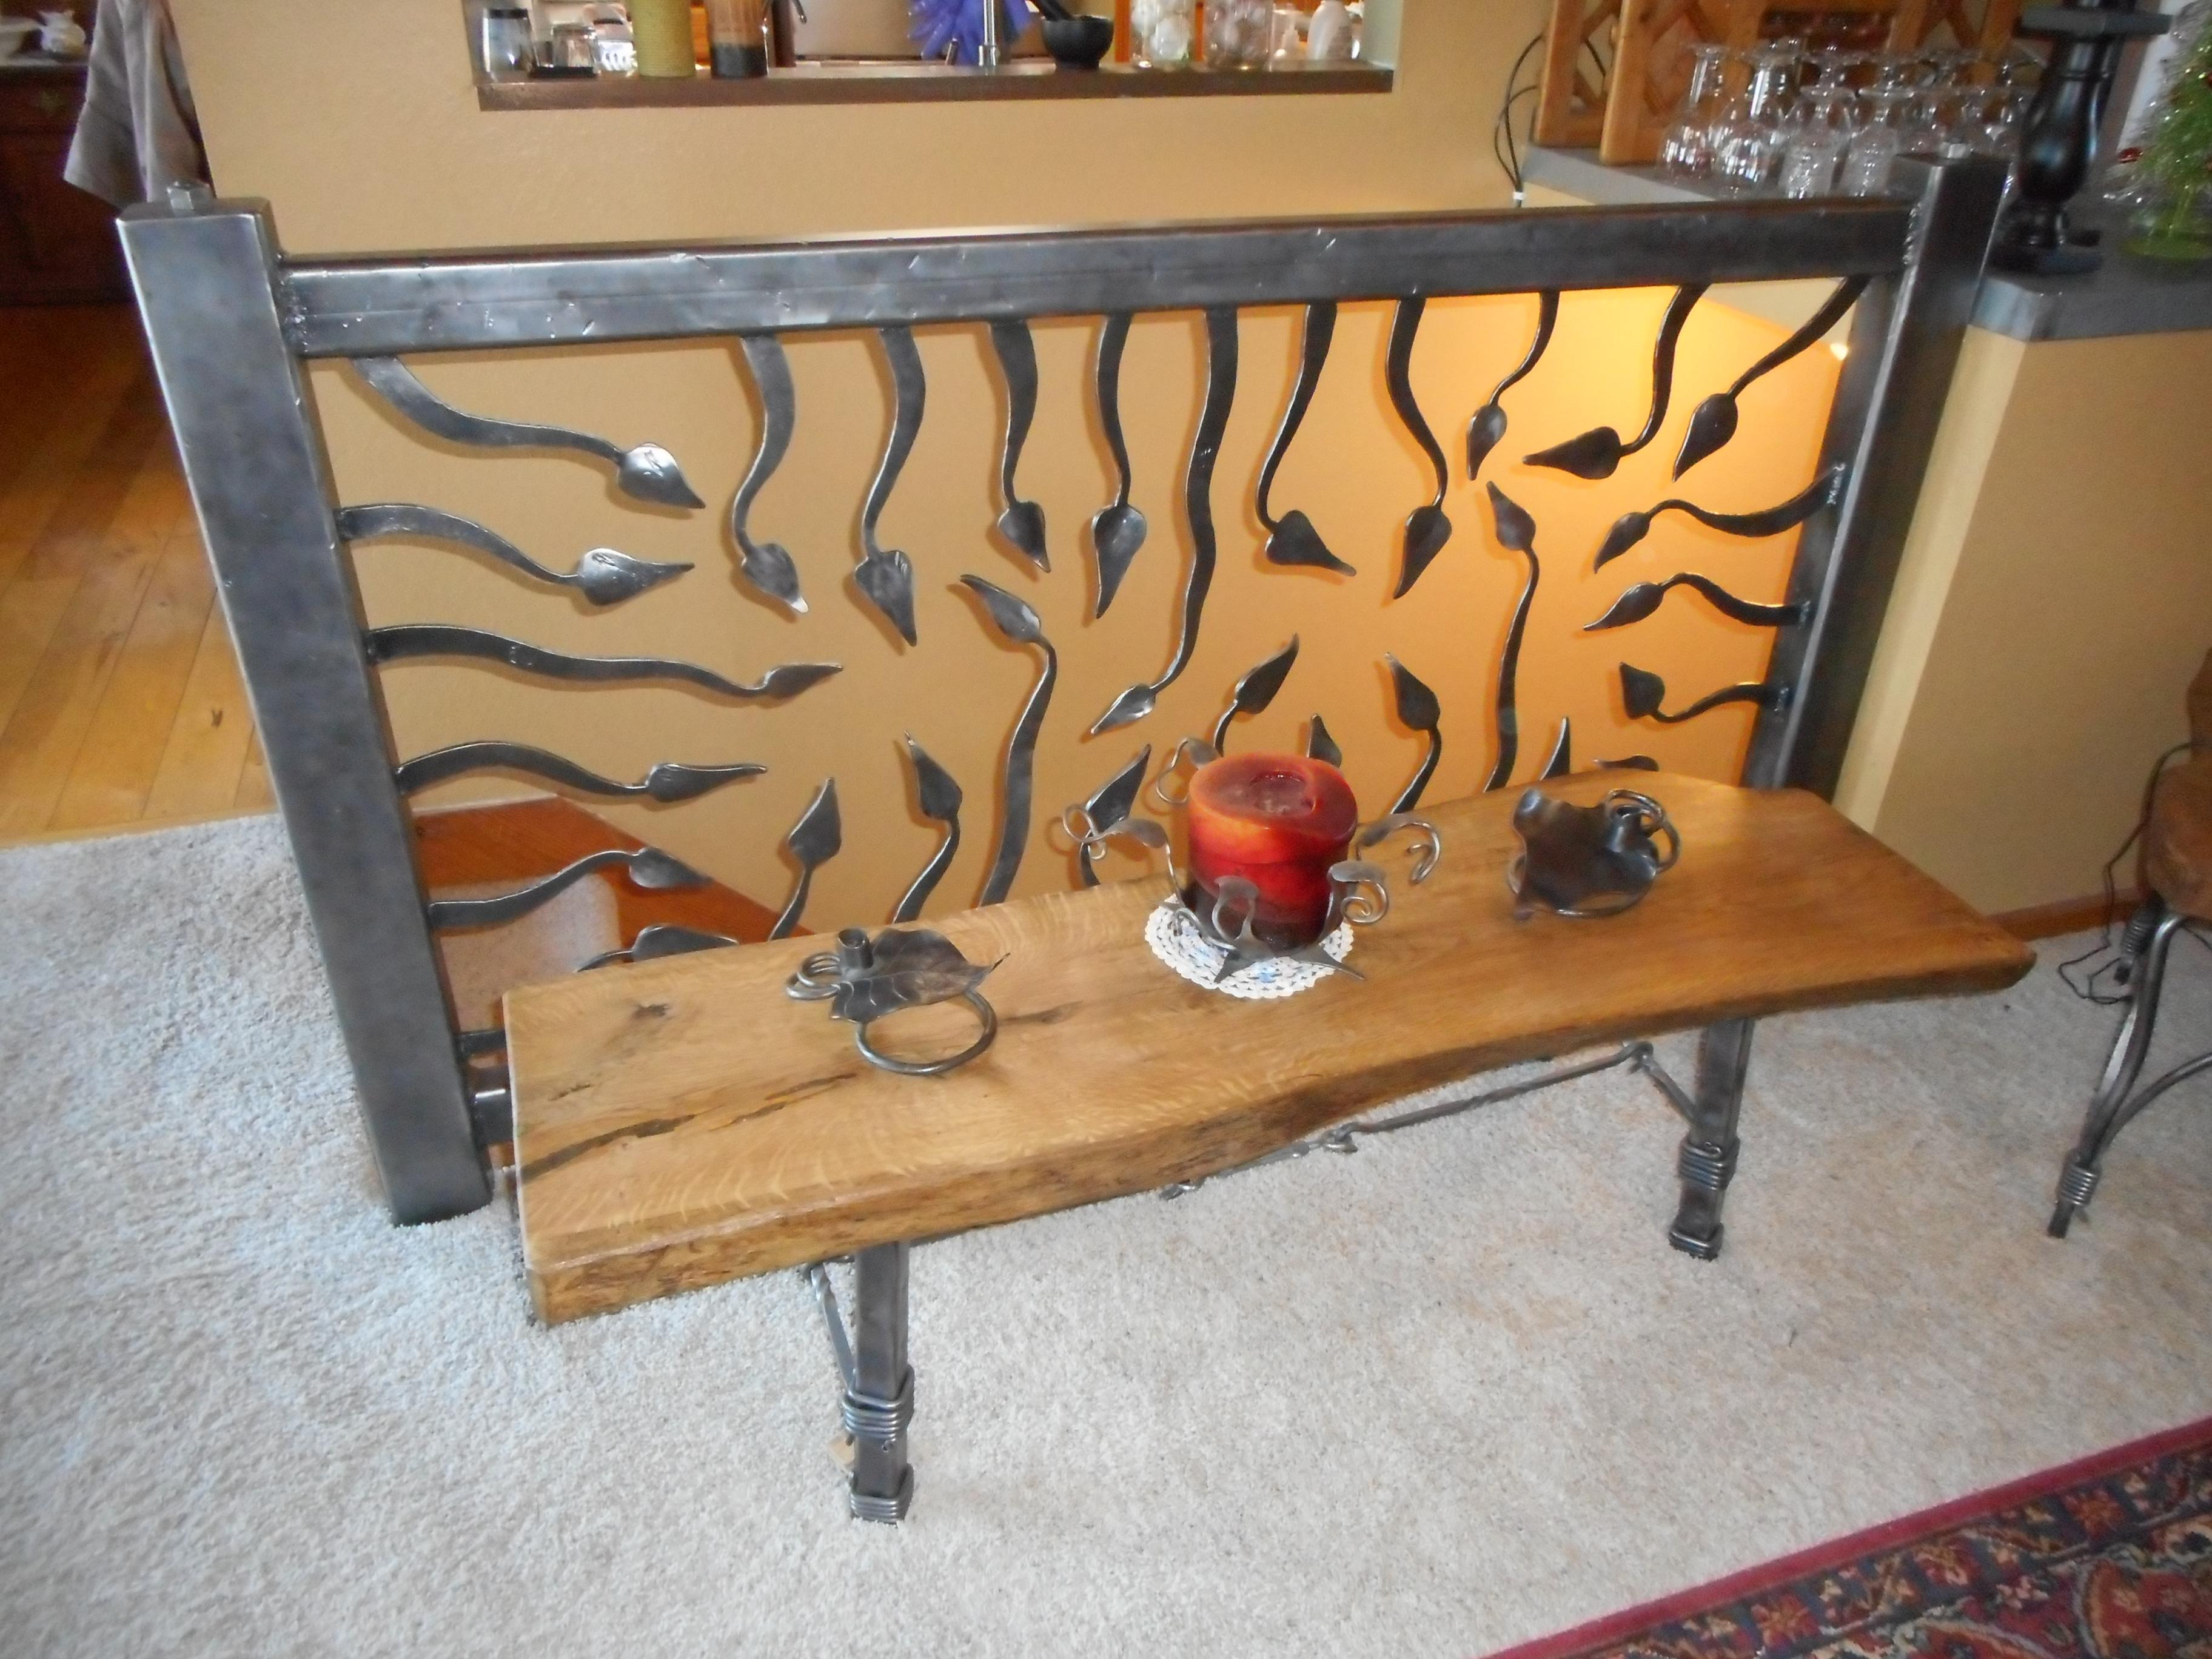
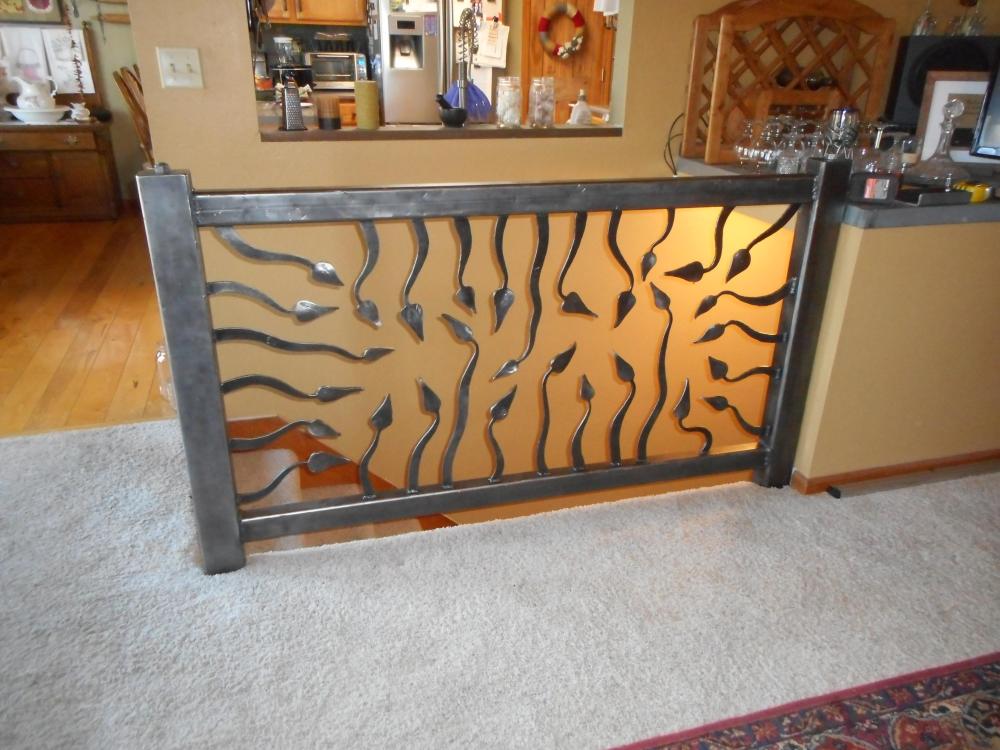
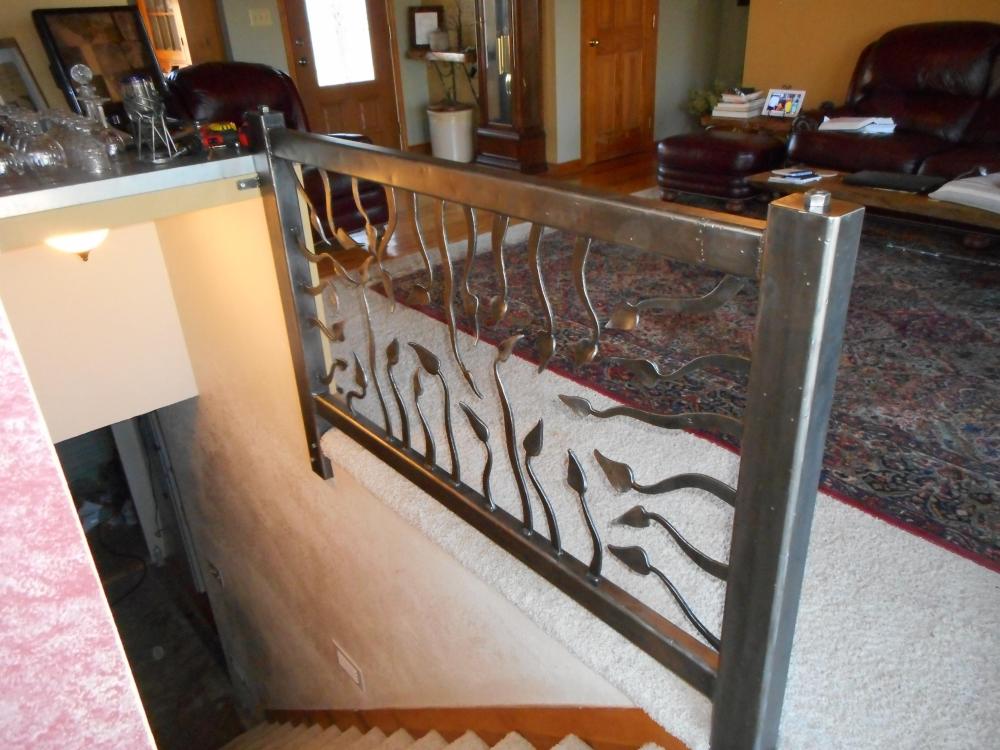
My neighbor is a farmer - I raid his scrap pile for pieces I can use. The leaves/stems are 1/4" thick, forged from broken bale spears and old farm machinery axles...the verticals and horizontal pieces are 1/4-wall 4X3 and 1/4-wall 2X3...they cost just under $400 (ouch, ouch, ouch). 1/4-wall in those sizes were what my local steel shop had on hand. I got 4 young local fellas to help me move it and bolt it in place (weights about 250#) - that cost me a few beers and 4 pieces of chocolate bourbon pecan pie, but generated much laughter. Wife is most happy and I am most happy!
-
If your dies are tight enough without shims - good for you! The shims on mine are about 1/2" high and maybe 4" wide (the width of your dies)...on mine the bottom die shim is a piece of water heater shell (the white sheet metal) about .020 thick, top die shim is .015" steel shim stock. A shim is placed in one side of the dovetail when installing the die, with the locator pin in place, then drive the wedge until it is fully seated. If the wedge goes too deep, remove the wedge and start cutting shims. Make a wedge driver so you don't miss the drift and hit your hand (cuts your hammer adventures short for the day). Some of your oil mist might becoming from using 10-weight (ISO VG 32)...the manual recommends ISO VG 220, industrial circulation-type oil. Some folks use chainsaw bar oil but having worked in the industrial lubes business for 35 years, I can tell you that bar oil can be a mix of almost anything, with a dose of Paratac (the sticky stuff) thrown in. Paratac is temp-sensitive and starts breaking down around 120F, leaving a dark brown deposit on cylinder walls, valves, etc. I use Mobil DTE BB, available from most industrial supply places, lubes distributors - Chevron, Shell, Texaco and other major lubes suppliers all have a VG (viscosity grade) 220 - take your pick. If oil is pouring out the work piston seal area and dripping almost non-stop down on your dies, you are feeding too much oil...excess oil into the power cylinder will end up in the crankcase...neither piston requires all that much oil to be lubed sufficiently. My lube valves are barely cracked open once the hammer starts running. Open both valves up a good twist or two and work the handle a few times before starting, then close both valves and crack them open maybe 1/8 turn, then adjust as needed...watch for an air bubble to form in the oil lines, as mentioned previously. Send your mail address to me at [email protected] and I'll shortly get around to finding the manual and copying it for you...you can buy me a beer if you get to the Des Moines, IA, area. Swedge
-
Metalflea, I have owned/run a Striker 88-lb hammer for about 20 years now...it is very controllable until it gets hot after about an hour of steady use - then it will start doing the bam, BAM, bam, BAM, bam, cycle, but by then I'm usually ready to go lift the lid on an IPA. I don't know where your oil mist is coming from...there's no mist from my hammer - you may be feeding too much oil. The oil line going to the rear cylinder on my hammer will occasionally develop an air bubble, meaning no oil is feeding to that cylinder...use the oil pump handle to get rid of the air bubble and slightly increase oil feed to that cylinder. Pay attention to the shims/wedges in the top and bottom dies - the shims slowly peen out of shape/position and need to be replaced periodically. I keep some shim stock in .015 and .020...I have found that using several pieces of thinner shim results in loose dies fairly quickly. If the top die is "loose" you will hear it rattle as the ram tups in front of your face. The wedge for the bottom die is easily visible...I keep a "wedge driver" and a BFH handy to reset the wedge. I did have the top die get loose, broke the locater pin that's up inside the piston/top die space...the top die, wedge and shim worked their way off to the side and needed repairs. A machinist I know made up several locator pins for me, some reassembly and I was back in business. Some folks get into huge concrete bases...my hammer sets on a 4" concrete shop floor. I built a steel base on a piece of 1" steel plate (800 lb empty), filled with sand, setting on a "cow mattress" from Tractor Supply...3/4" plywood between hammer and steel base. Drill some locator pins down into the concrete to keep the hammer from "creeping" If you need a copy of the original Striker manuals/prints, get in touch with me and I'll send copies. Best of luck to you! Swedge
-
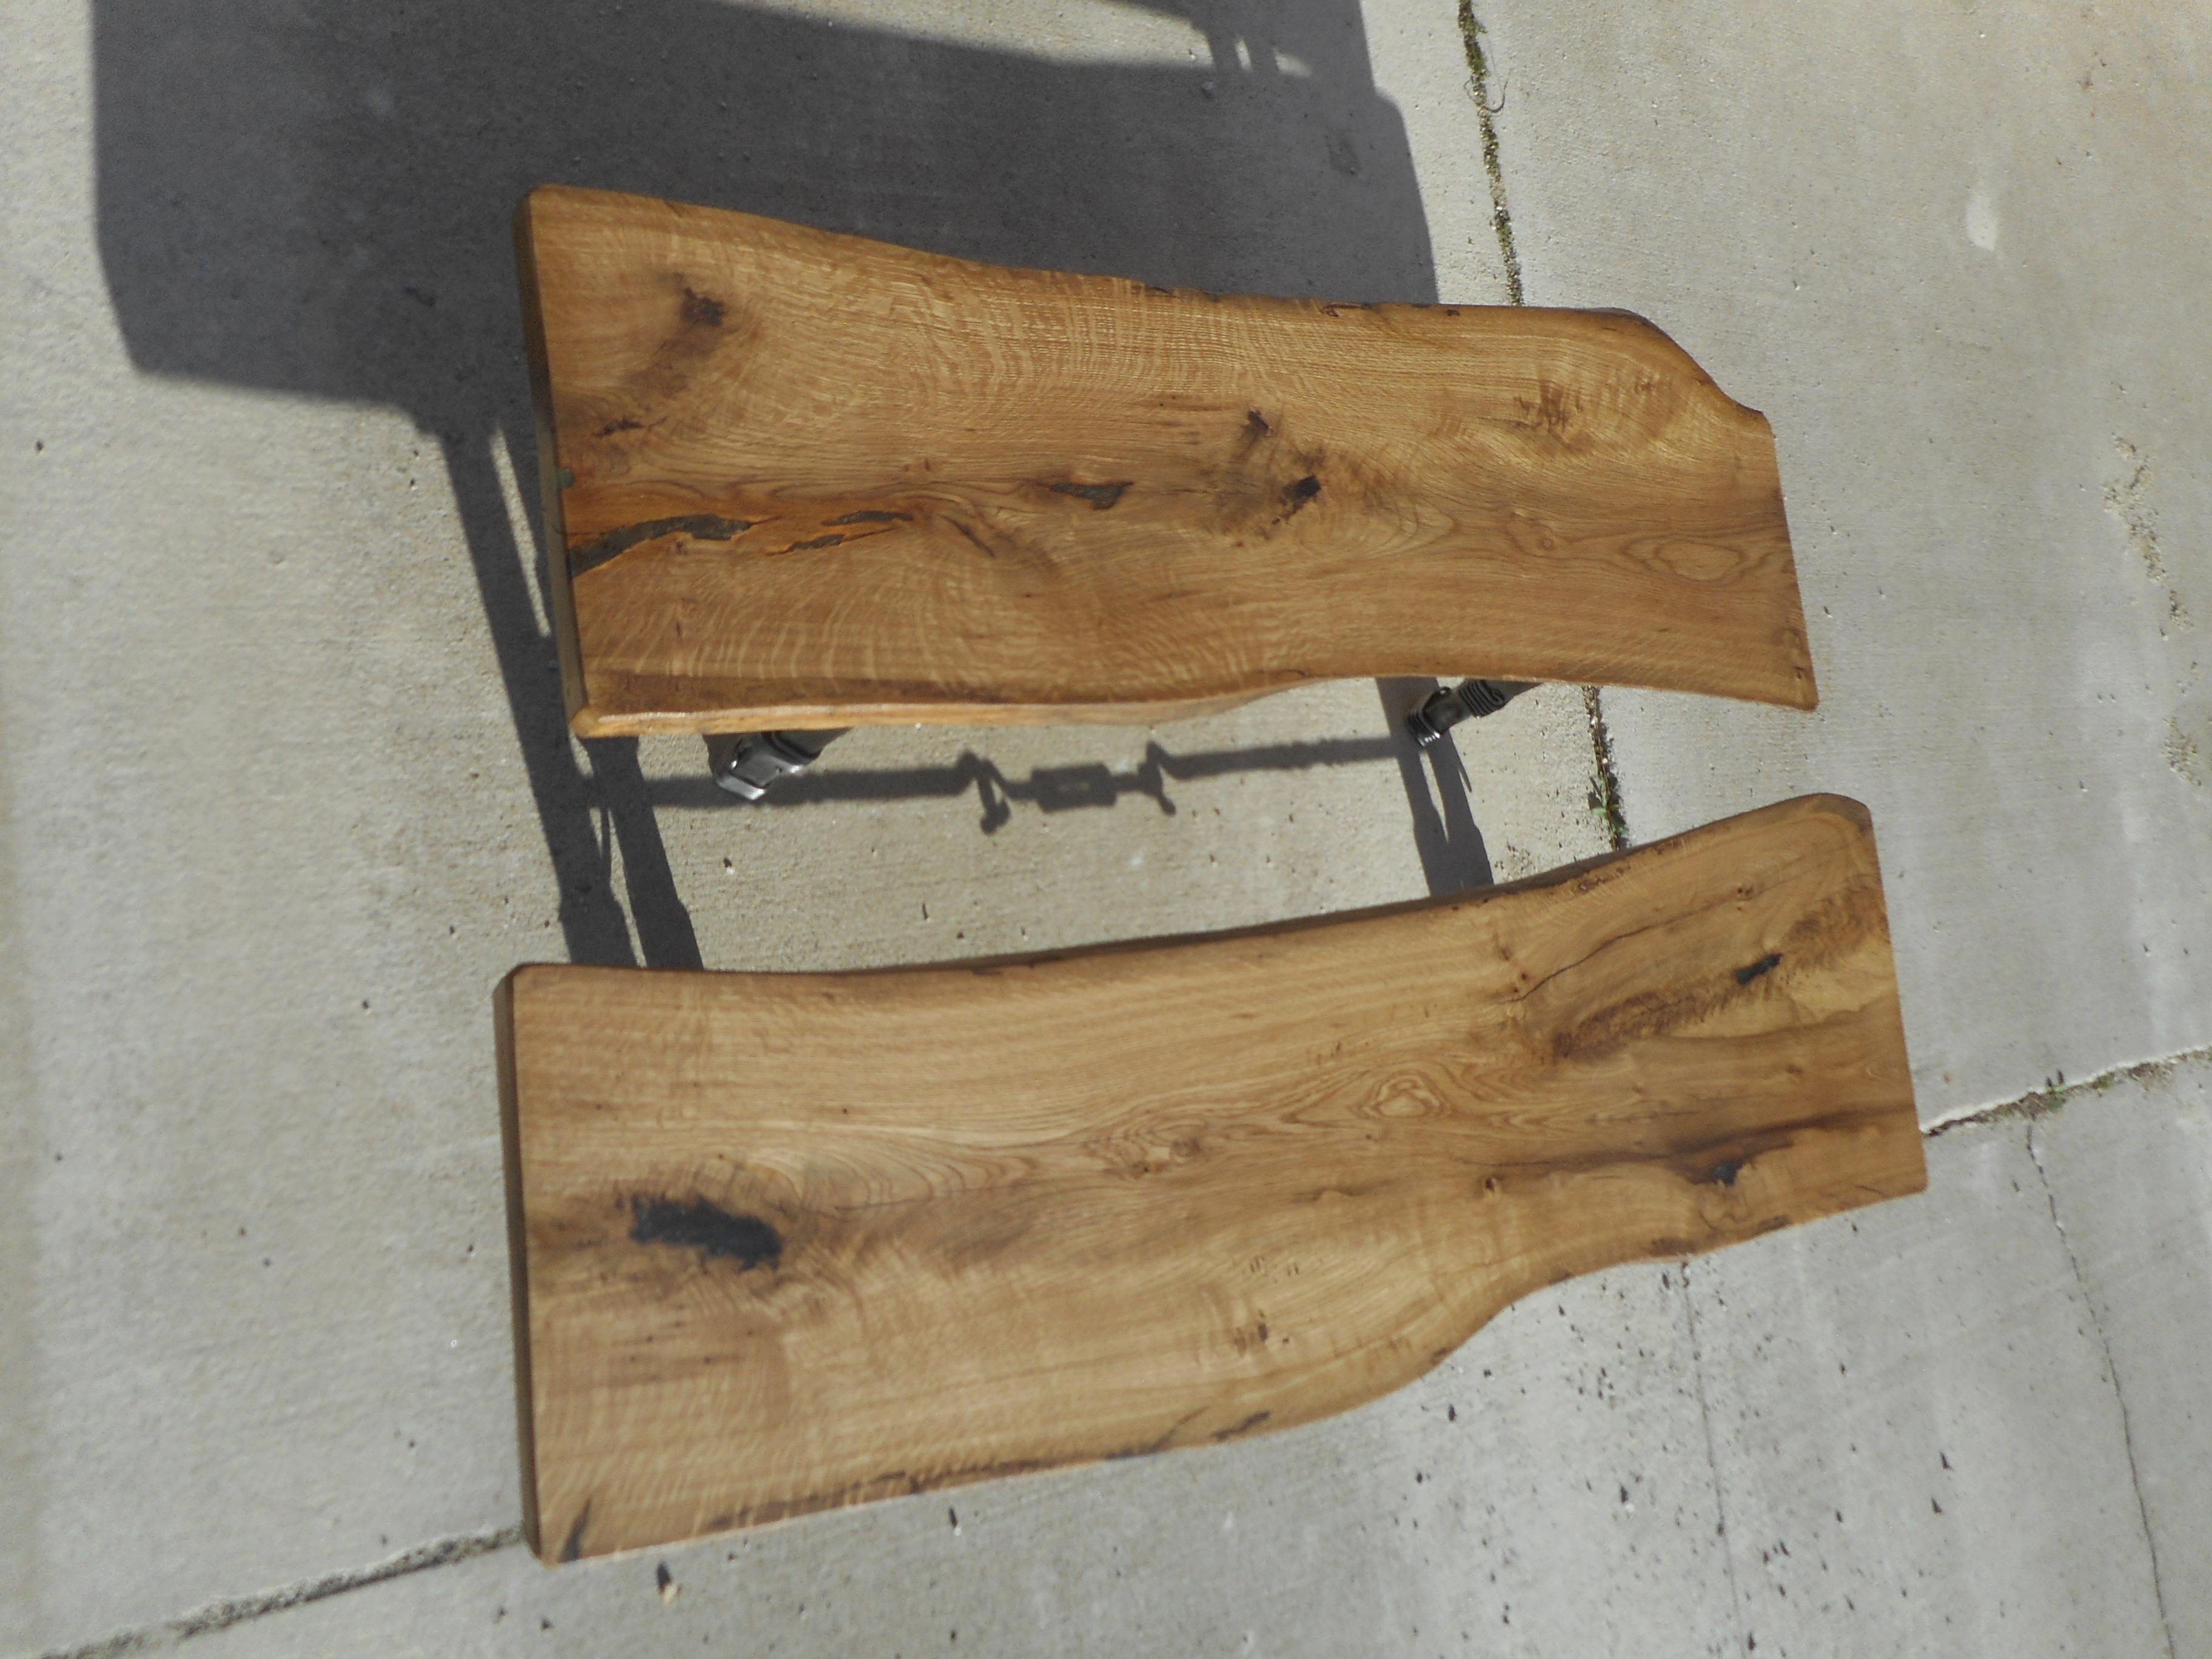
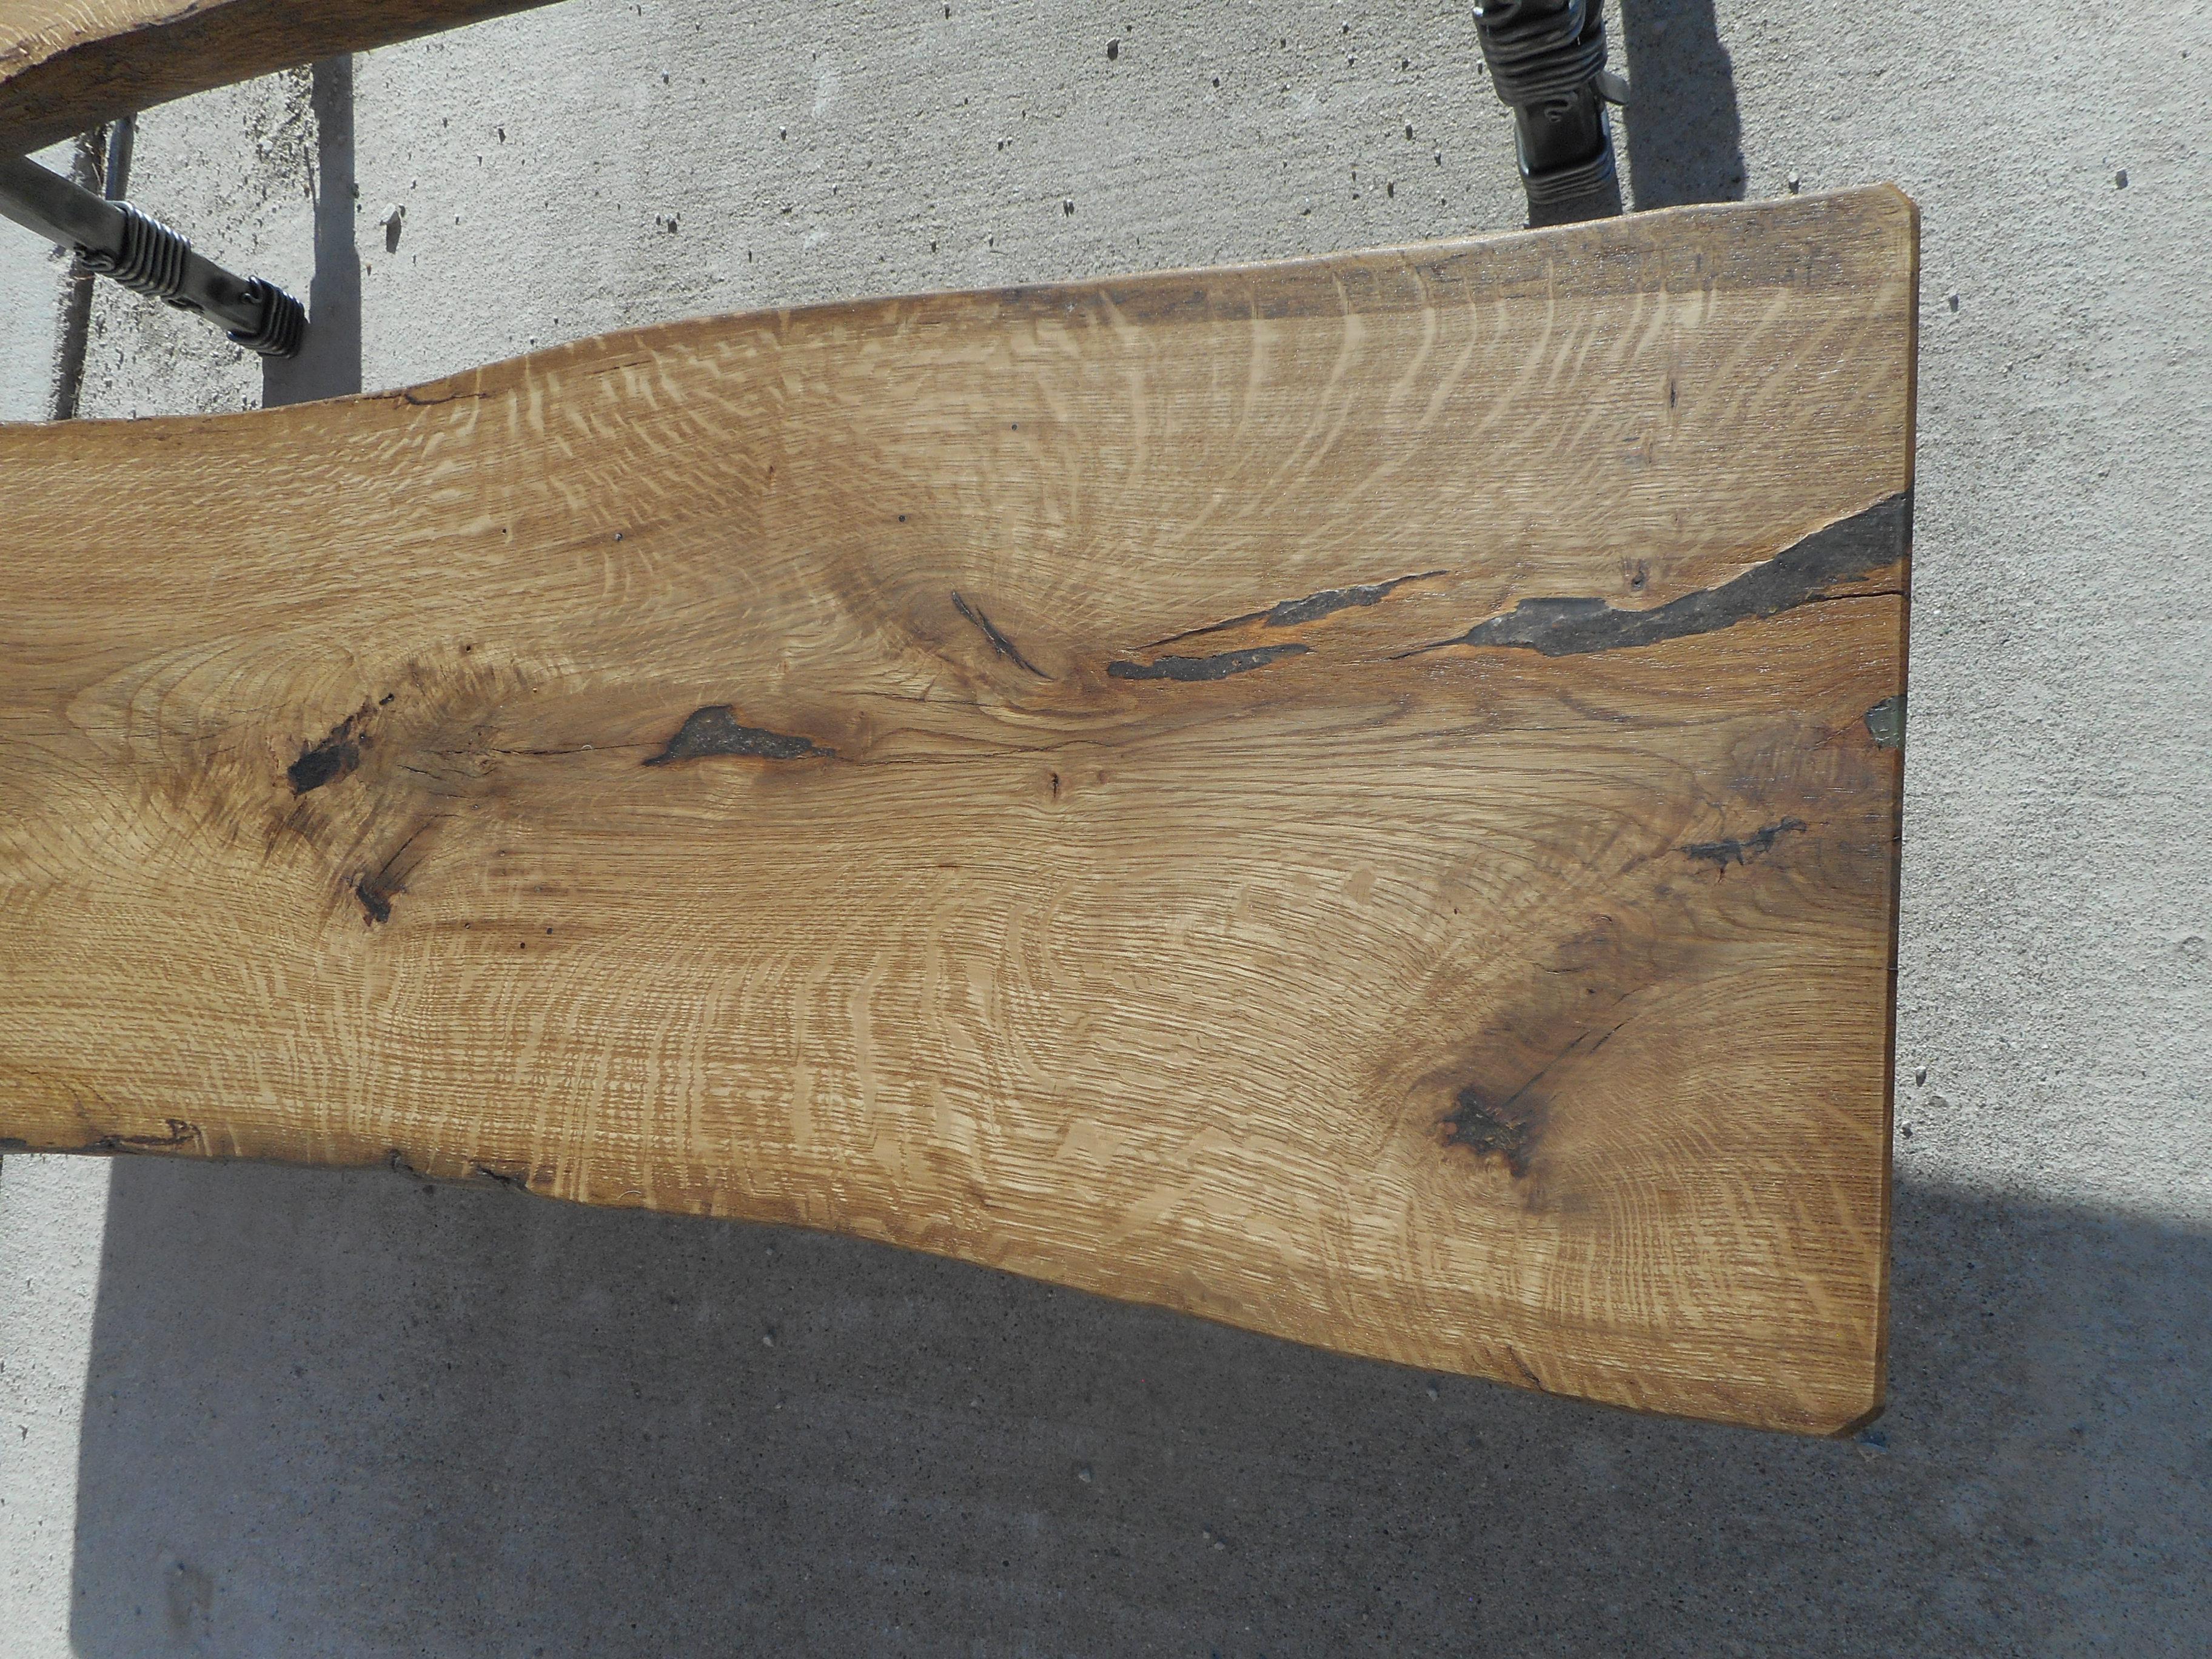
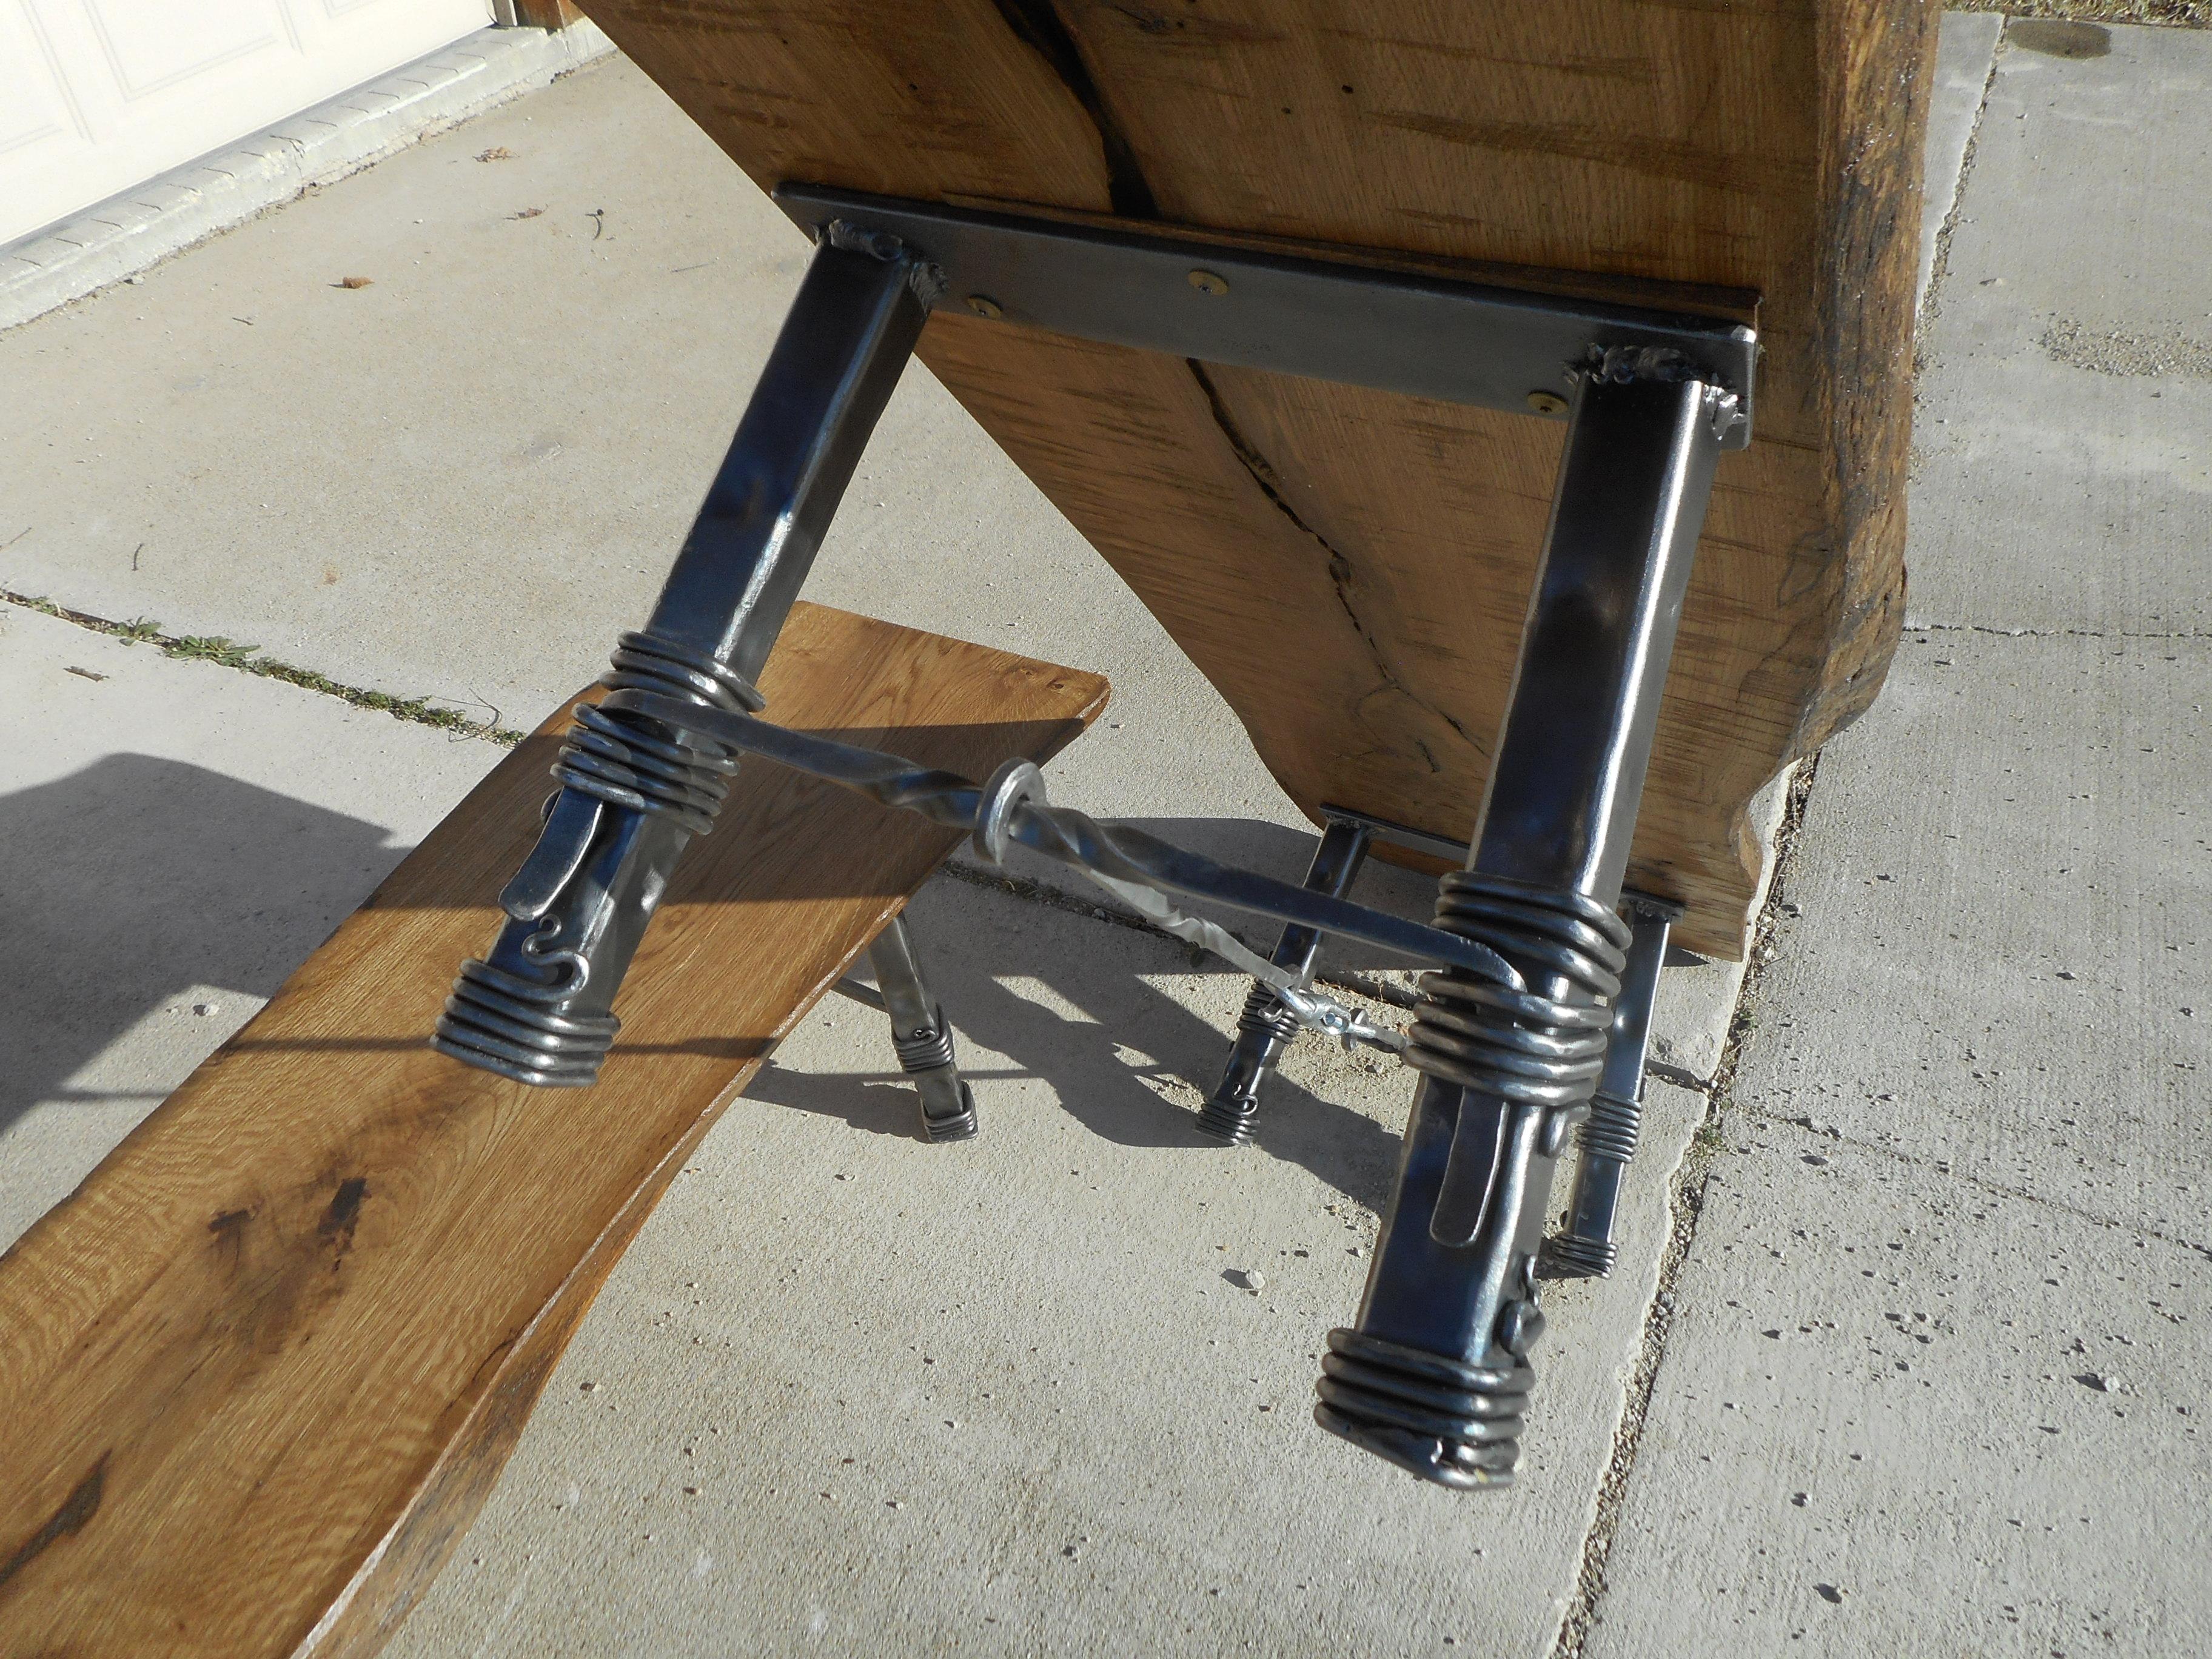
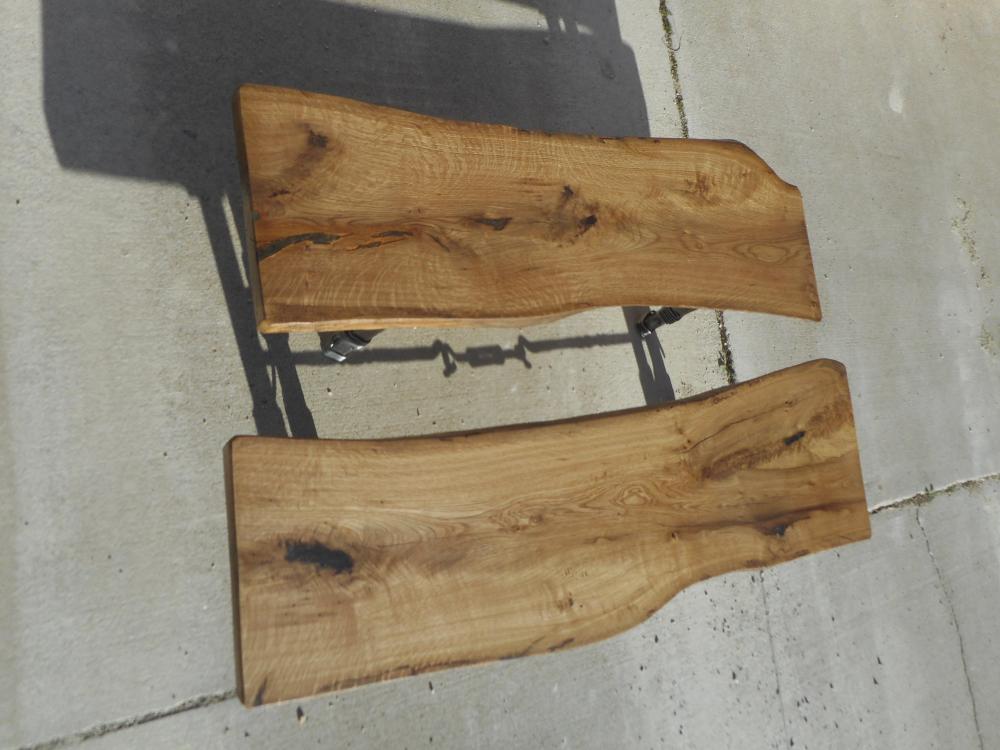
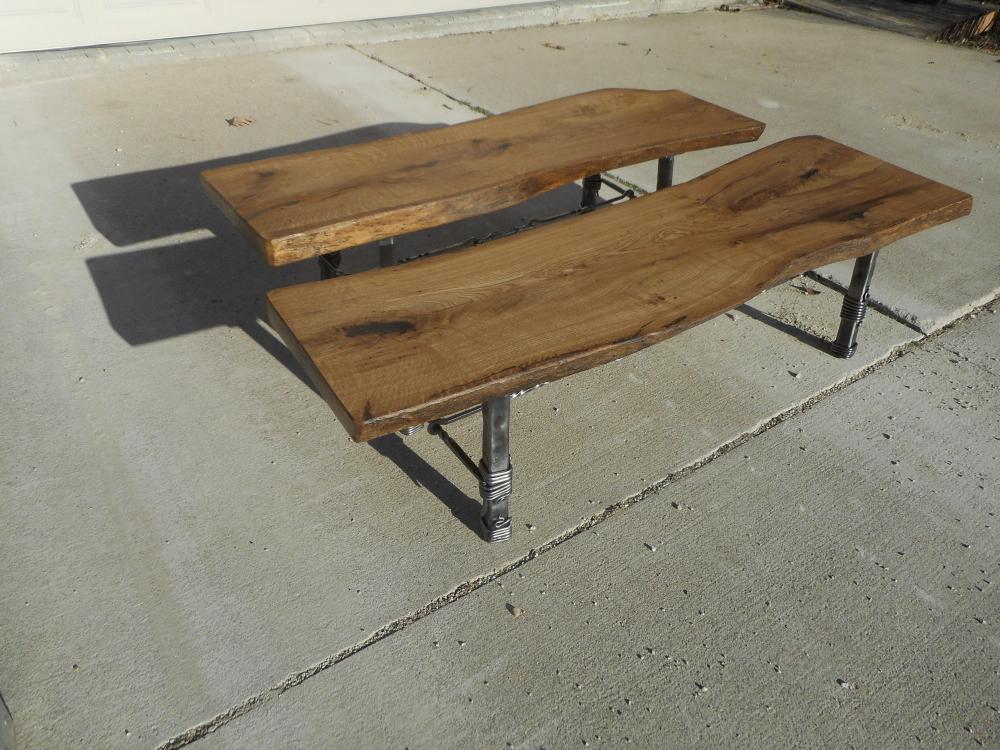
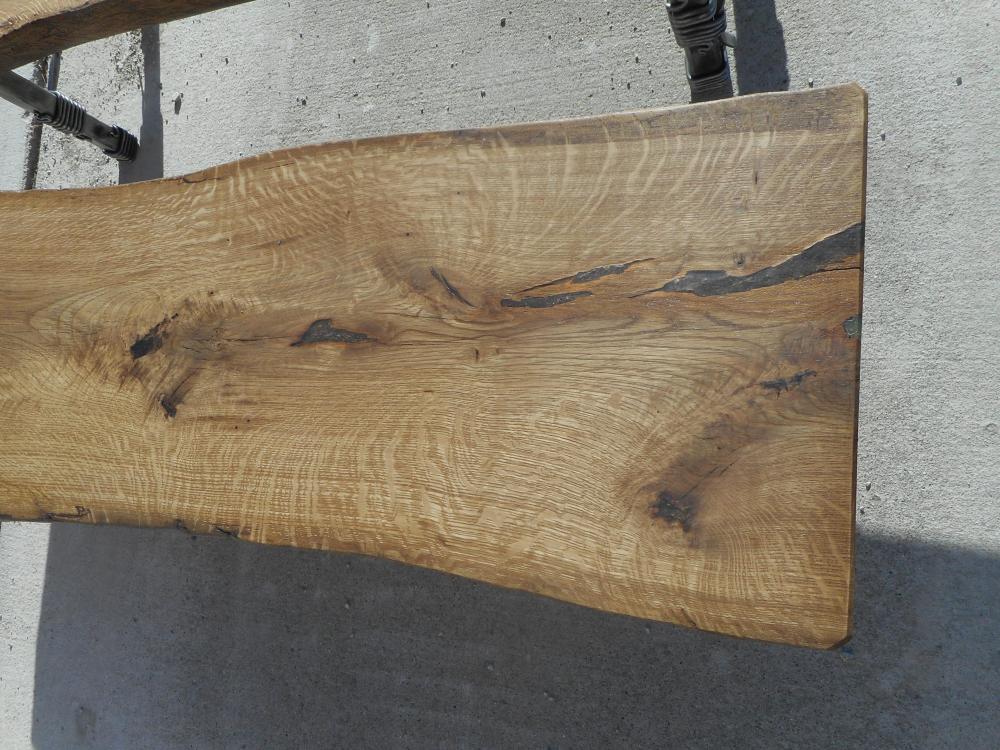
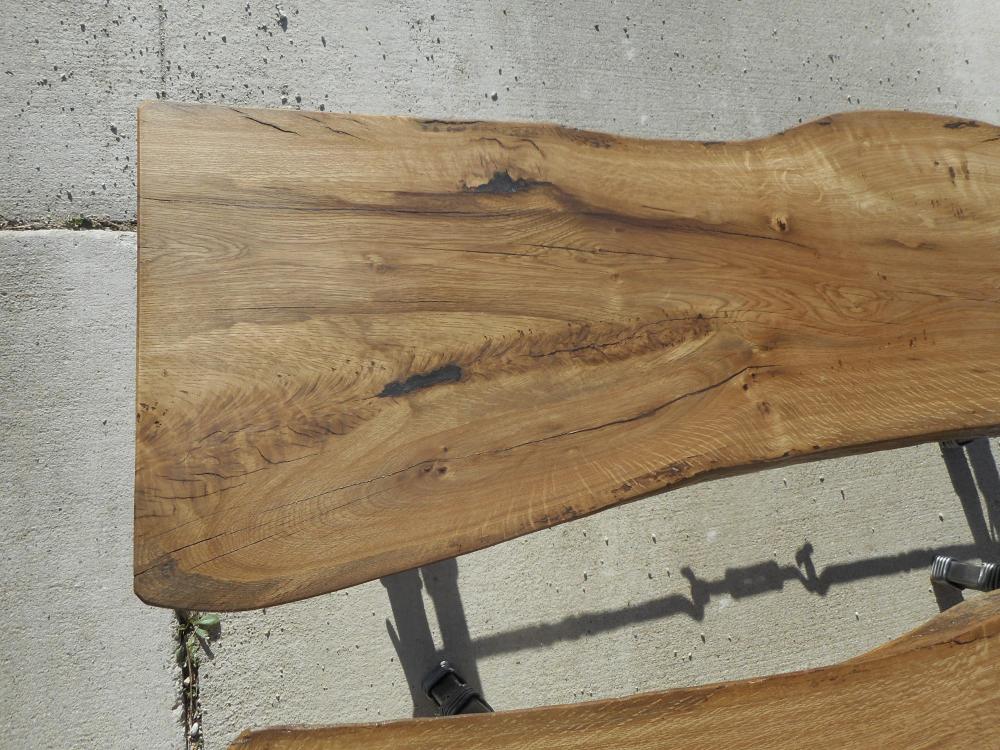
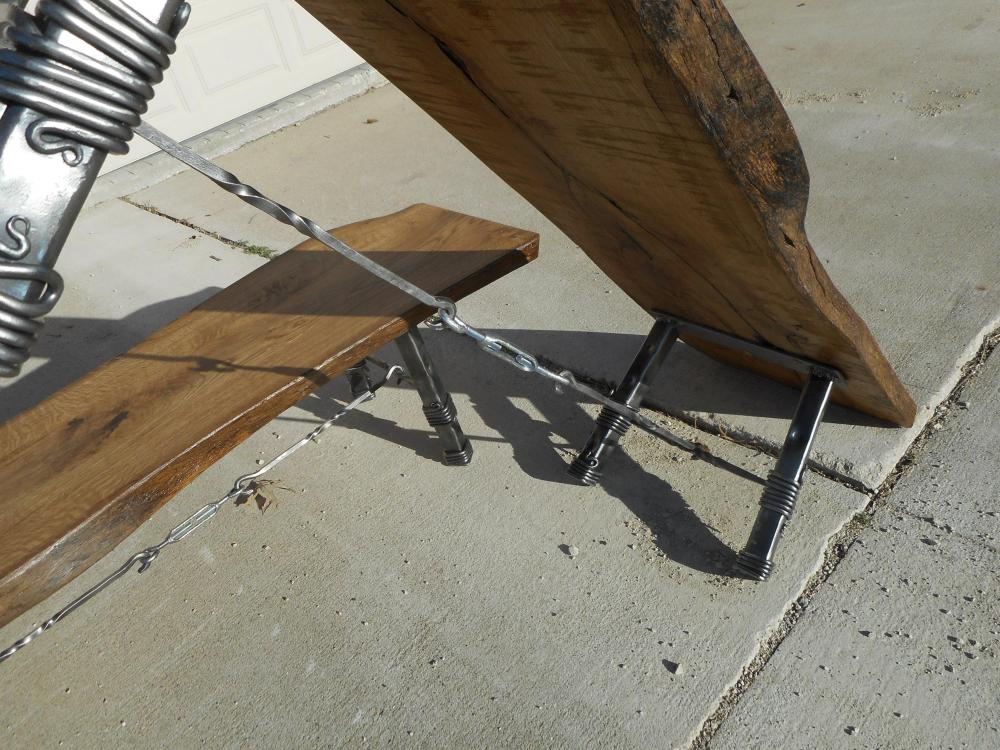
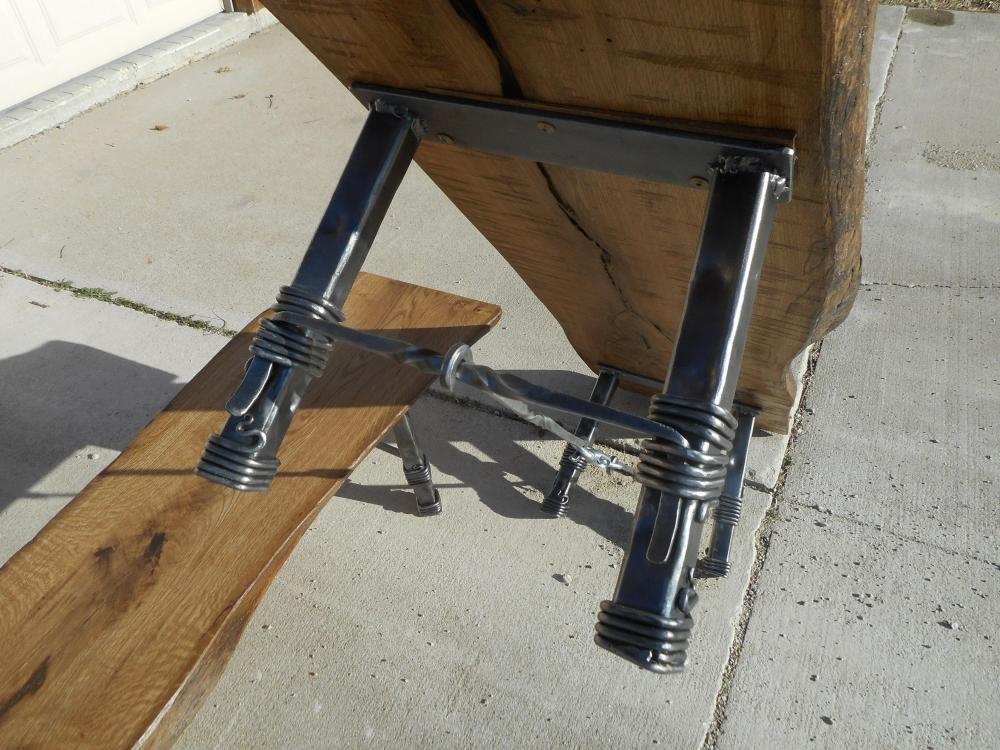
My DW has been asking for a coffee table for several years...a few good pieces of oak finally came out of my firewood logs. After a lot of planing, sanding, forging, some welding, wire-brushing, etc., I came up with two (I usually make things in "2's") that have a good "wow-factor". The larger table is 61"L X 16" to 19"W X 14.5"H, the shorter table is 56"L. The oak slabs are a bit less than 2" thick...they both have great grain. The black splotches are where I filled various holes with clear epoxy. Wood finish is a coat of polyurethane, sanded with 320-grit, then a coat of Minwax Golden Oak...DW put some kind of furniture polish on them for a dull glow. The legs are 1.5" square tube, battered and beaten under the power hammer - they are set at 5-degrees apart and a few degrees "out". Notice in the photo of the legs I used a shim to soak up some wobble. The legs are welded to pieces of 1/4X3X14 flat bar. The end braces are 1/2" square. tapered and twisted, the tie rods are 3/8" square, twisted and "hooked". The turnbuckles are from the hardware store, beaten and battered. Leg wraps are 1/4" round, tapered on both ends, wound on with a rosebud, pliers and a small hammer. Metal finish is wire brushed then a few coats of Rustoleum Clean Satin Enamel. Moving these things is a two-person event, but I would guess the load rating is around 1,500 pounds. DW is keeping the larger table...happy wife = happly life...maybe I'll find a buyer for the shorter one.
-
-
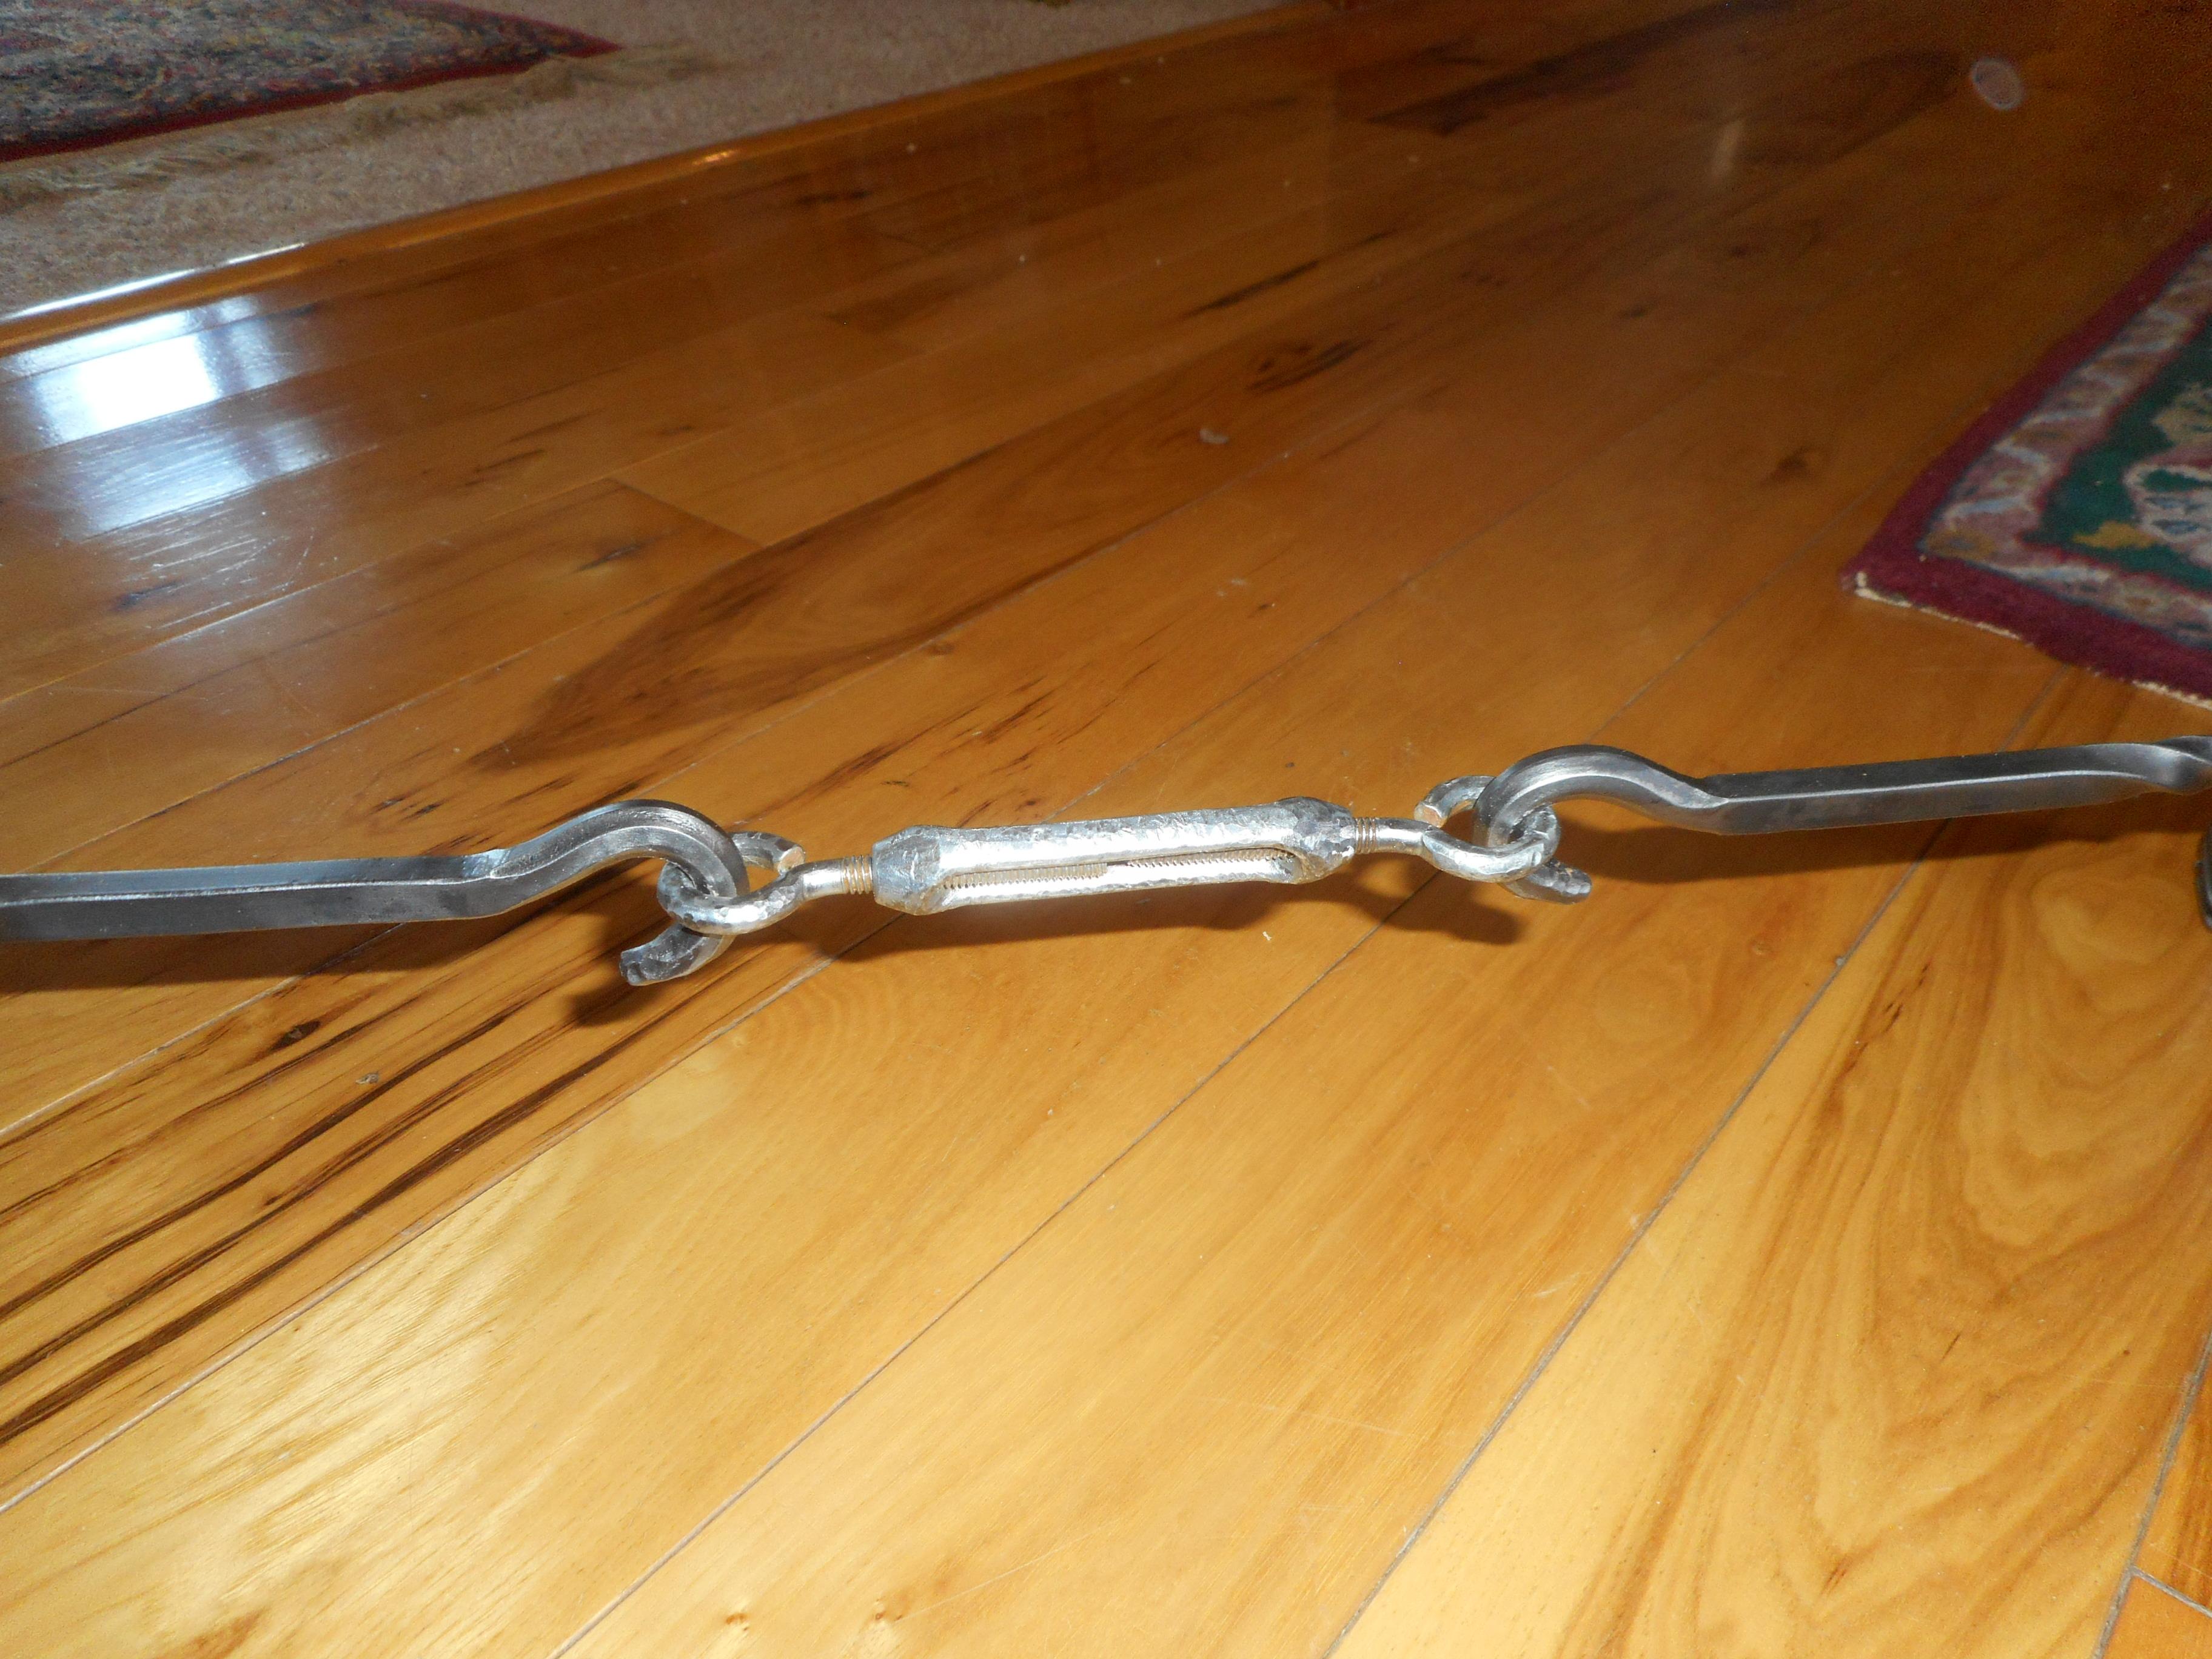
The screw-eyes appear to be steel, maybe some kind of shiny plating - the "tube" is most likely die-cast pot metal. I beat the snot out of all three pieces, then hit them with some clear satin Rustoleum. I think, and, more importantly, the wife thinks, it looks good. And now, to work on her coffee table... Again, thanks for expressing your opinions and guidance - us old guys need all the help we can get!!

-
Many thanks for all of your comments and guidance - since the turnbuckle is easy enough to remove, I'll try wire-brushing and/or heating it (don't know whether it is galvanized, but I can put it in a fire outside to be sure)... When discussed with DW, she liked the idea of being able to remove the turnbuckle linkage completely so she can slide a woven tray of magazines under the table...happy wife means happy life...who knew??