Will W.
Members
-
Joined
-
Last visited
Everything posted by Will W.
-
So that tells you its probably not cast. I would recommend testing it before putting all the effort into a blade. That's, ultimately, your call though. Most high carbon and even mid carbon steels do not move as easily under the hammer as mild does.
-
-
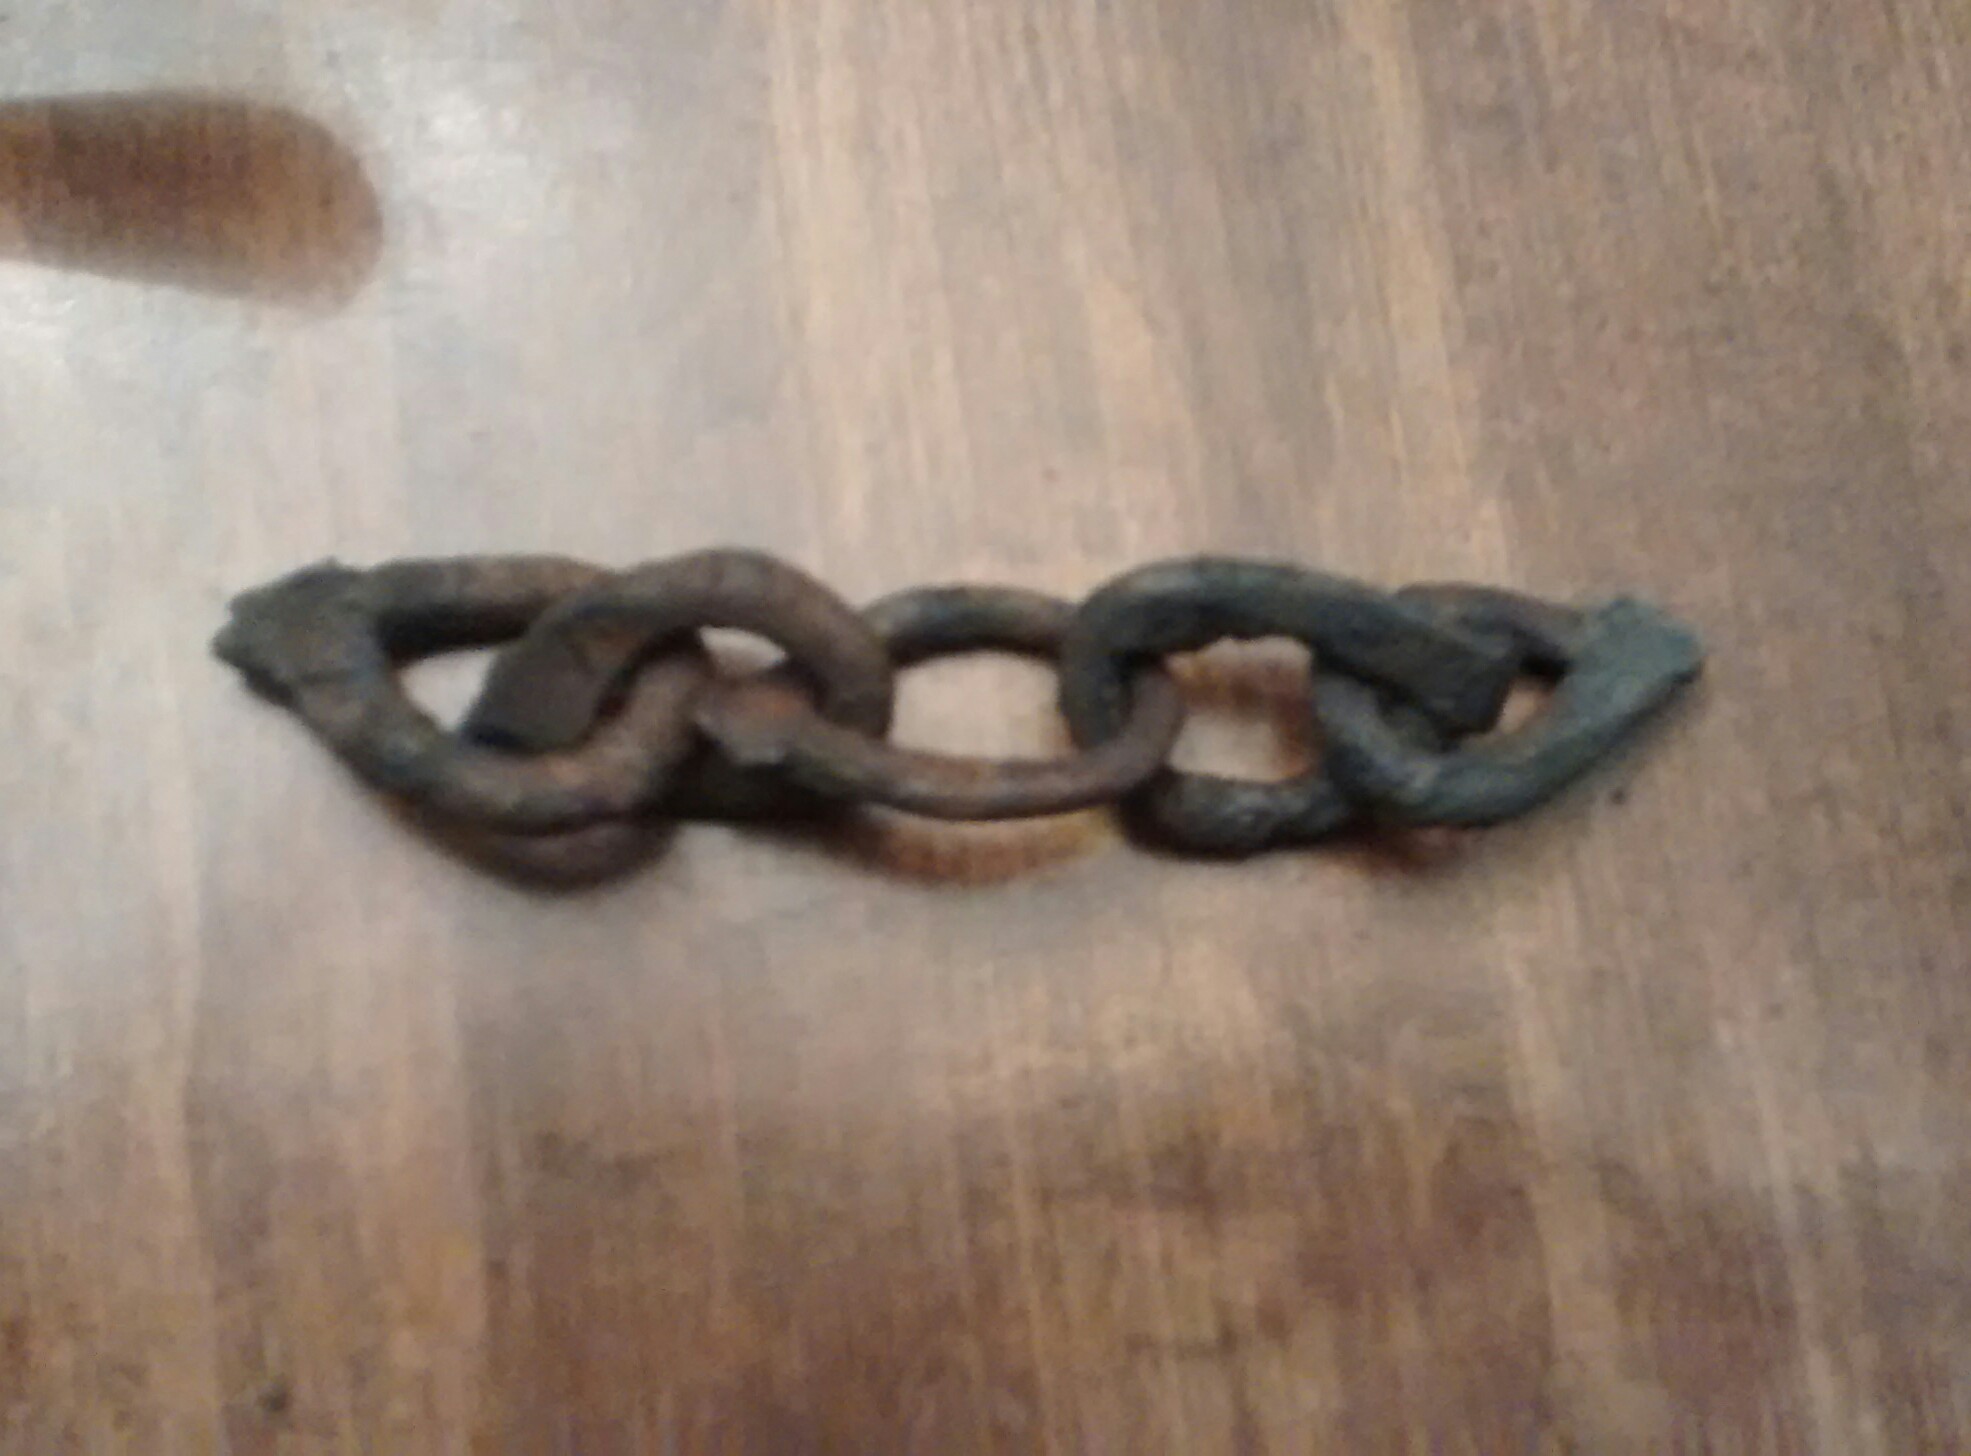
Attempt #2! I need to work on my scarfs and consistency, among other things. I plan on making this a longer chain, so it shall be interesting seeing the quality (hopefully) progress from link to link. JHCC The link (no pun intended) didn't work for me for some reason. No clue why. Those are good looking chains, both Michael and arkie. Nice work guys.
-
Thomas Now that I want to see! From a safe distance, of course (in case a link pops.) Glenn I think I'm on the same page as Michael Cochran. I would think you would want it normalized to releive stress and provide decent ductility. I wouldn't imagine you would want it hardened and tempered. I definitely don't know for certain though.
-
-
I've never forged with them before, and i dont know exactly what they are, but I own many rigid pipe wrenches, and I'm fairly certain they are cast iron. Have you spark tested it? Cast iron has a distinct spark, very short and non branching. That would at least point you in a general direction. You could try heating a piece to critical and quenching it, though I have no advice in that area, I have no experience heat treating cast iron. In my experience welding cast iron, it does not like rapid temperature changes (pre heat and post heat are needed) so take that for what it's worth. A more experienced metallurgist should be along shortly.
-
That's quite the find. You made off very well, I would say. That shovel looks really well made too, I couldn't touch that quality. I'm with littleblacksmith, how about a pic of the axe?
-
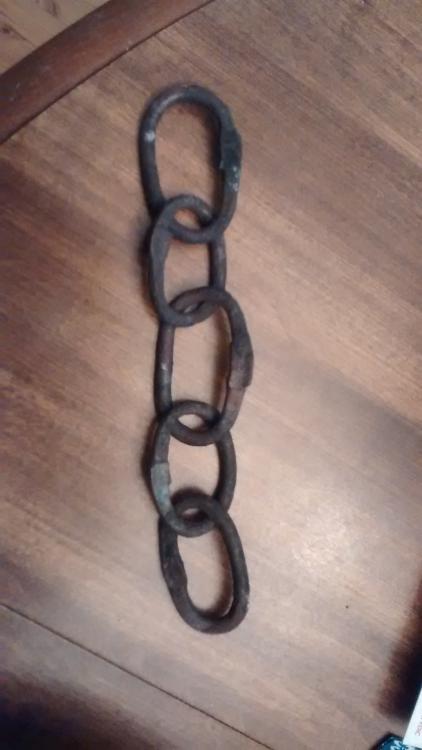
Good day. I forged this out a little while ago. I wasn't even planning on making chain, it just happened haha. I burned a few of the links a little bit, but all in all, I learned SO MUCH about forge welding through this little project. The links are kind of odd shaped too, but this is my first go. Show me your chain! I would like to see what others have made. Shoddy picture, sorry.

-
My thoughts exactly. It must move metal pretty fast though!
-
Amen to that. Lego's were my entire childhood, and probably the reason for what little engineering skills I have now haha. Beautiful blade by the way. Looks really clean.
-
Hardening using cyanide?! Wow. That's interesting, alright. I'll have to keep my eye out for some textbooks like that. Sounds like they would make good reference guides.
-
This is the first time I've noticed any trash. I have never looked for it before though. I'm definitely going to keep a closer eye on the stuff now. If it turns out there's a lot of junk in there, I may have to switch brands (or just forsake anthracite completely.) That makes sense about the coal dust though, the fact that it was definitely black when it went in the forge is what puzzled me. Thanks for the reply.
-
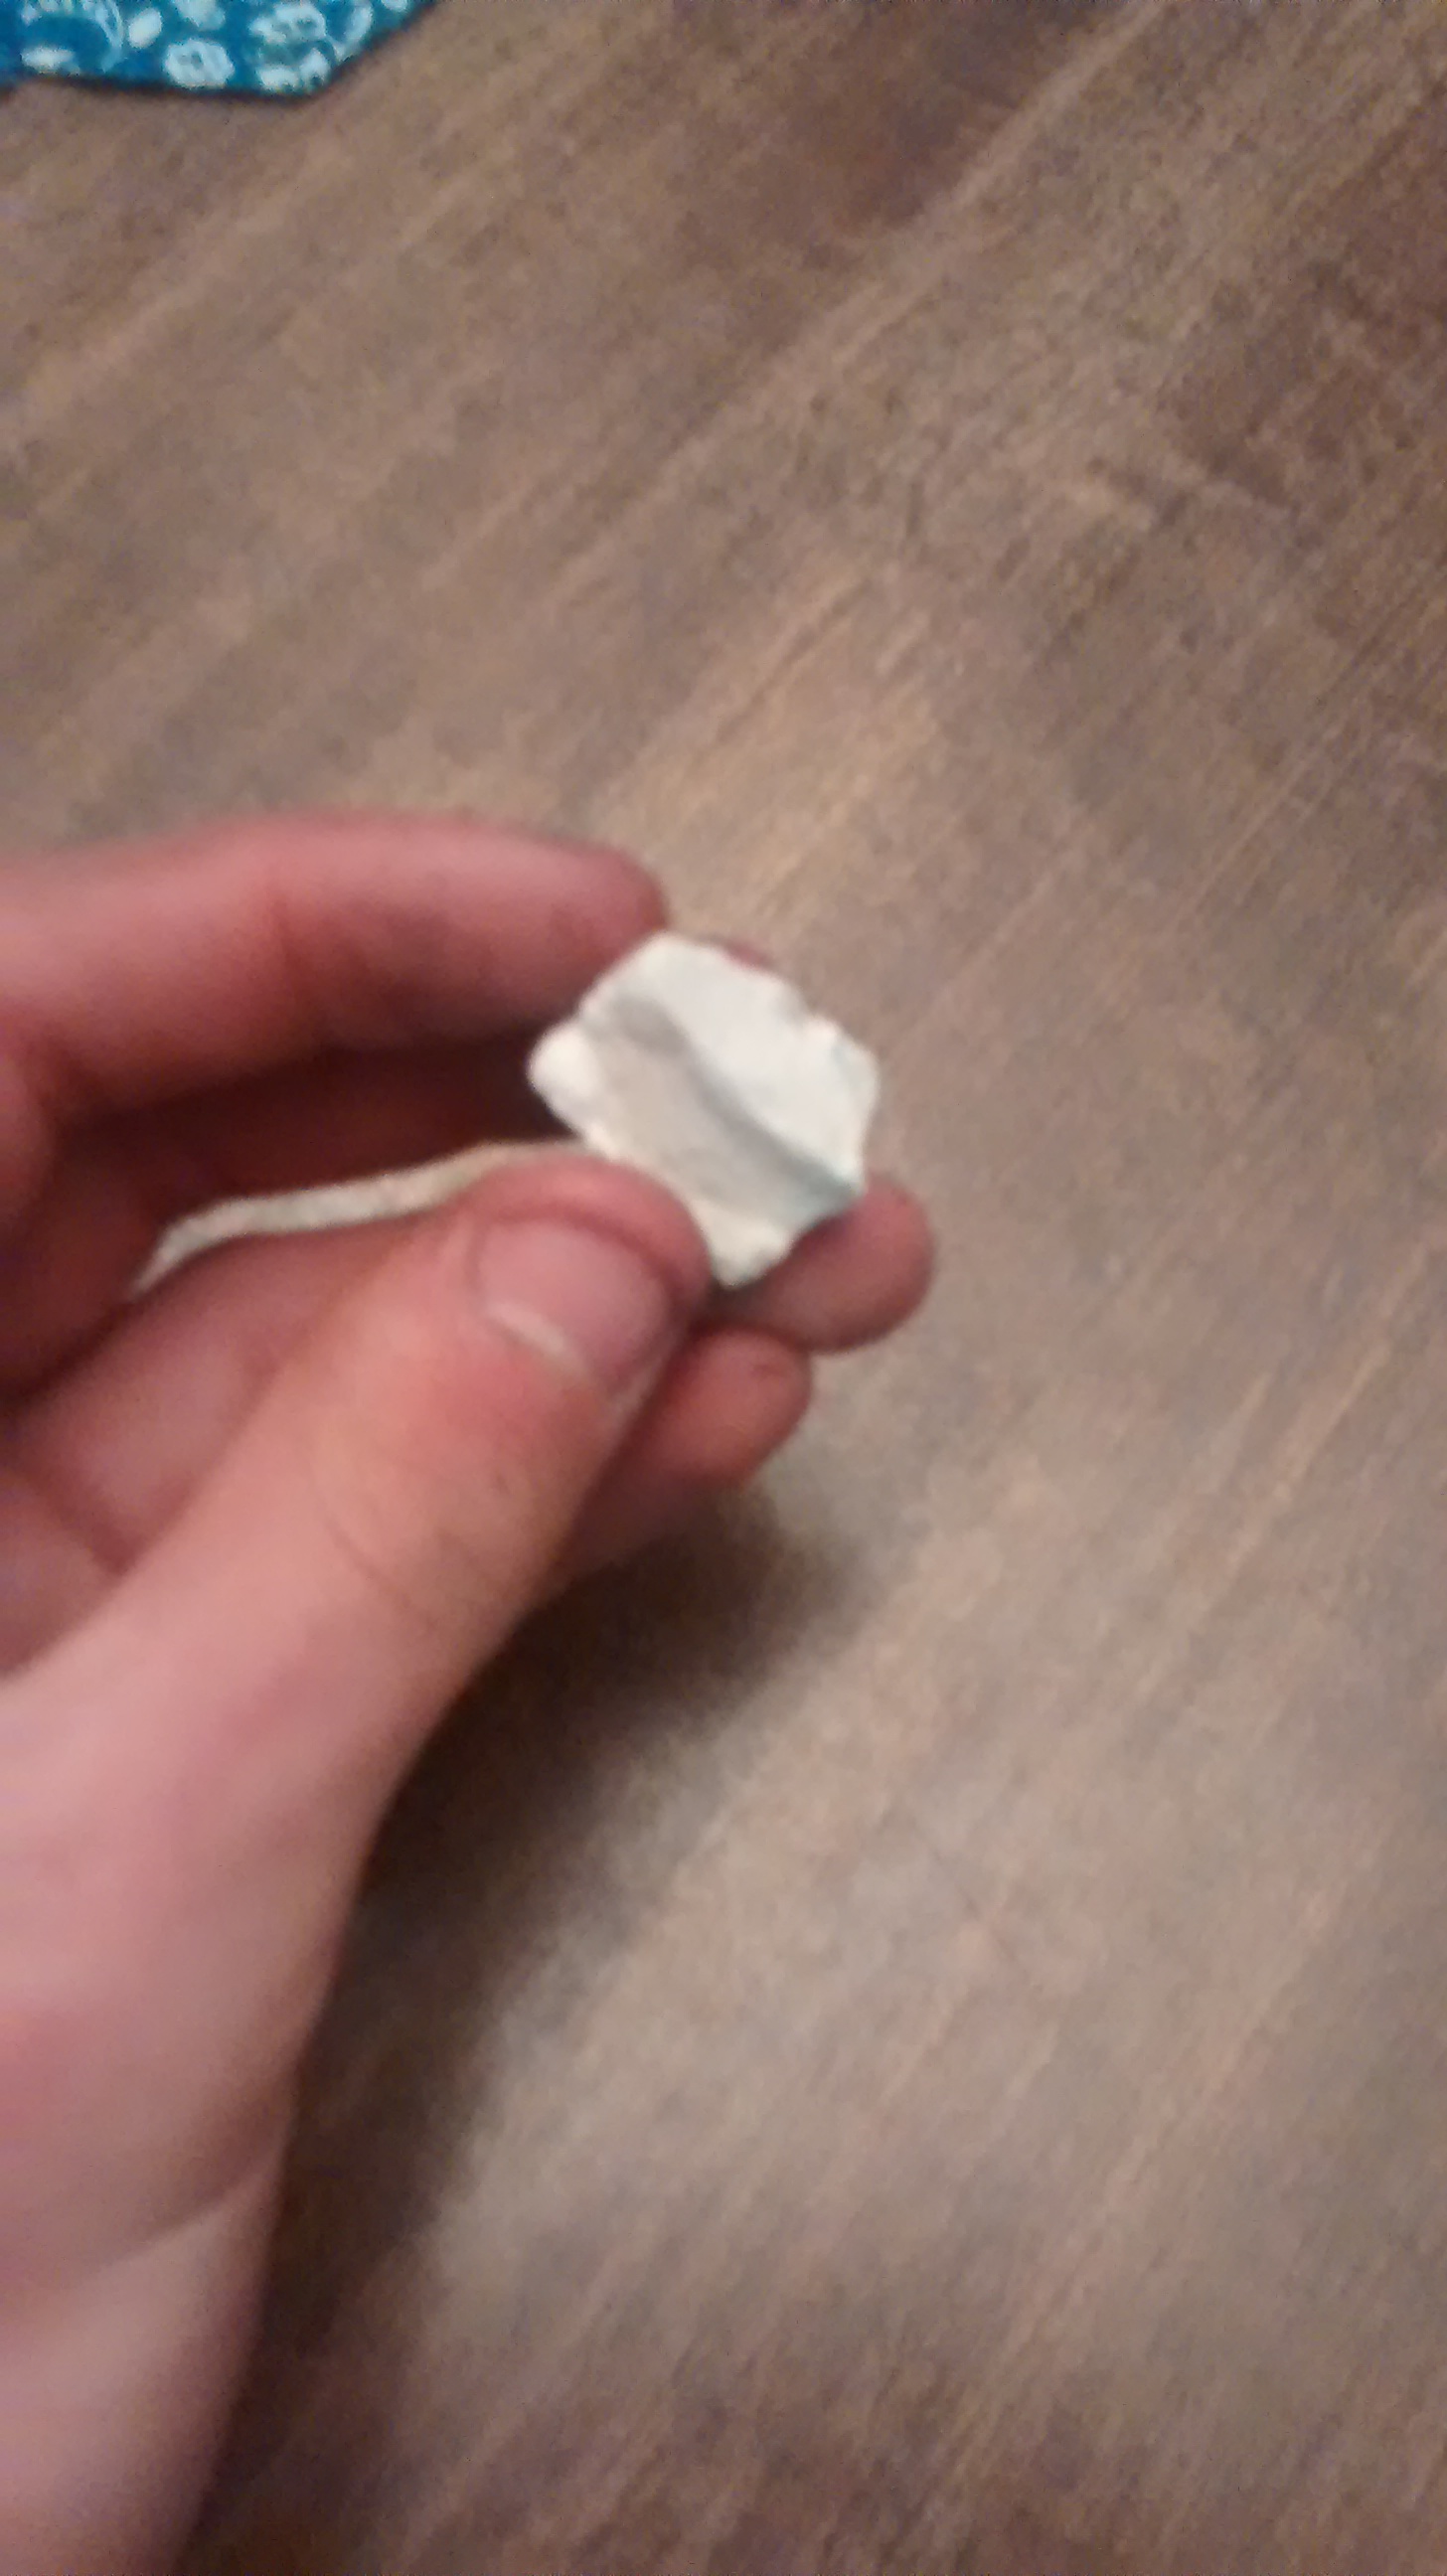
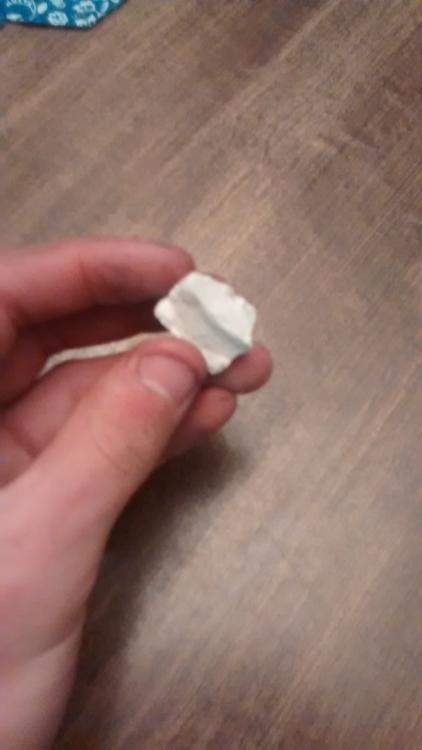
Good day. Let me explain my setup briefly. I burn primarily charcoal, but I throw a few pieces of anthracite in on my grate above the tuyere before adding charcoal to keep the small pieces of charcoal from falling through (I designed my grate back when I knew nothing and as such, the openings are too big.) When I was cleaning it out the next day, there was an interesting looking piece of (presumably) coal left over, so I took it out and played around with it. It was white, like charred coal, but it just looked strange. I broke it apart and it was white all the way through. Usually the leftover coal is still black in the center, ALL the other ones from the same fire were, and they were similar size (nut coal). I asked a friend who knows far more about geology than myself, and he said he is confident that it is sandstone. Its very soft, like sandstone, but i cant break it with my hands like burnt coal. I know that all the pieces were black when I threw them in, so what gives? This makes me question the quality of the rest of the coal that I have. The brand is Franklin Anthracite if that helps. Poor quality pic, sorry, but it's one of the chunks left from when I broke it.
-
Gote I'm not trying to make a world class, traditionally made, japanese masterpiece. I just wanted to try that style. I didn't put any pics up because I was just trying to solder two pieces of mild, and they are in some random scrap bin by now. The fit was tight. Both metals were pretty clean. It "took" onto the blade and guard. The guard was hot. By heating from the tang, I meant that I slowly wove my flame from tang to guard, right in the corner where they meet, to heat evenly. I tried to solder it three times and it broke off from the guard once and the blade twice by just tapping the guard with a hammer. Had it broken from one or the other every single time, it would have pointed me to where the problem originates, but it seemed random, hence me asking on here. Will52100 I think this is likely. The flux is cheap, and frankly, so is the solder. It's meant for copper pipe, not mild steel. Honestly though, I figured it would work. I've read up on the stay brite, and it sounds more like what I'm looking for. I'll give it a try sometime. Along with the sharpie trick. Like you were saying, I have sharpies everywhere haha. Thomas I will keep that in mind. Thank you. Frosty I assume you meant to heat the guard in the oven? So as to cause it to expand? That's fascinating though. I can honestly say I would have never thought to put a guard on this way. Haha.
-
Frosty I agree. I enjoy improvising, when it is appropriate. I assumed from the start the solder I was using was incorrect, but it's all I had, and I wanted the opinions of the people who have far more experience than I on the subject. I also did read through a lot of what I could get my hands on regarding soldering the guards on. That's where the small bit of knowledge I have on this subject came from. That's why this great archive of info is here, after all. I was just looking for specific answers regarding this specific situation. I meant no disrespect.
-
Yeah, my files are pretty dirty. No doubt in my mind that they should be cleaned out. I never even thought that stuff trapped in them could create deep gouges like that, honestly. The moment you think you have something simple like files figured out, there's always more to be learned. My research said to use a single cut file. I assume a double cut would also create gouges using this technique, seeing as how you have teeth going the opposite way? Interesting. Thanks for the info JHCC. I'm definitely going to try this in the future.
-
Michael Cochran I should have been more specific. I do have files. I use them to fine tune the general shape mostly. The files leave gouges, and I lightly clean those gouges off by using a flap wheel (sandpaper wheel) on my grinder (if I had been more patient and cleaned it with sandpaper, this problem would have been avoided). When I did my final few passes, I got a little careless and made the line a little wobbly. I tried to fix it but I didn't want to remove too much metal, it's thin as it is! Lesson learned: slow down even more. Also the third pic, I just noticed, makes it look like there's a grind mark right above the plunge line. That's just a reflection. No way I would leave that haha. I need to get a better camera if I'm going to post any more pics of anything. Thomas I just did some research on that. I've heard the term, but the technique is new to me. I'll try it in the future. Thank you for the tip.
-
-
Gote I did not know that actually. Japanese techniques and styles are pretty foreign to me (for lack of a better term.) I just wanted to try one. Thanks for the clarification though. Will52100 I figured the solder and flux were probably improper. Naturally though, it was all I had around the shop at the time. I'll try some different solders in the future, like the one you recommend. I appreciate the in depth response, thanks.
-
The one in the first pic is captivating. They all look really nice though, well done.
-
-
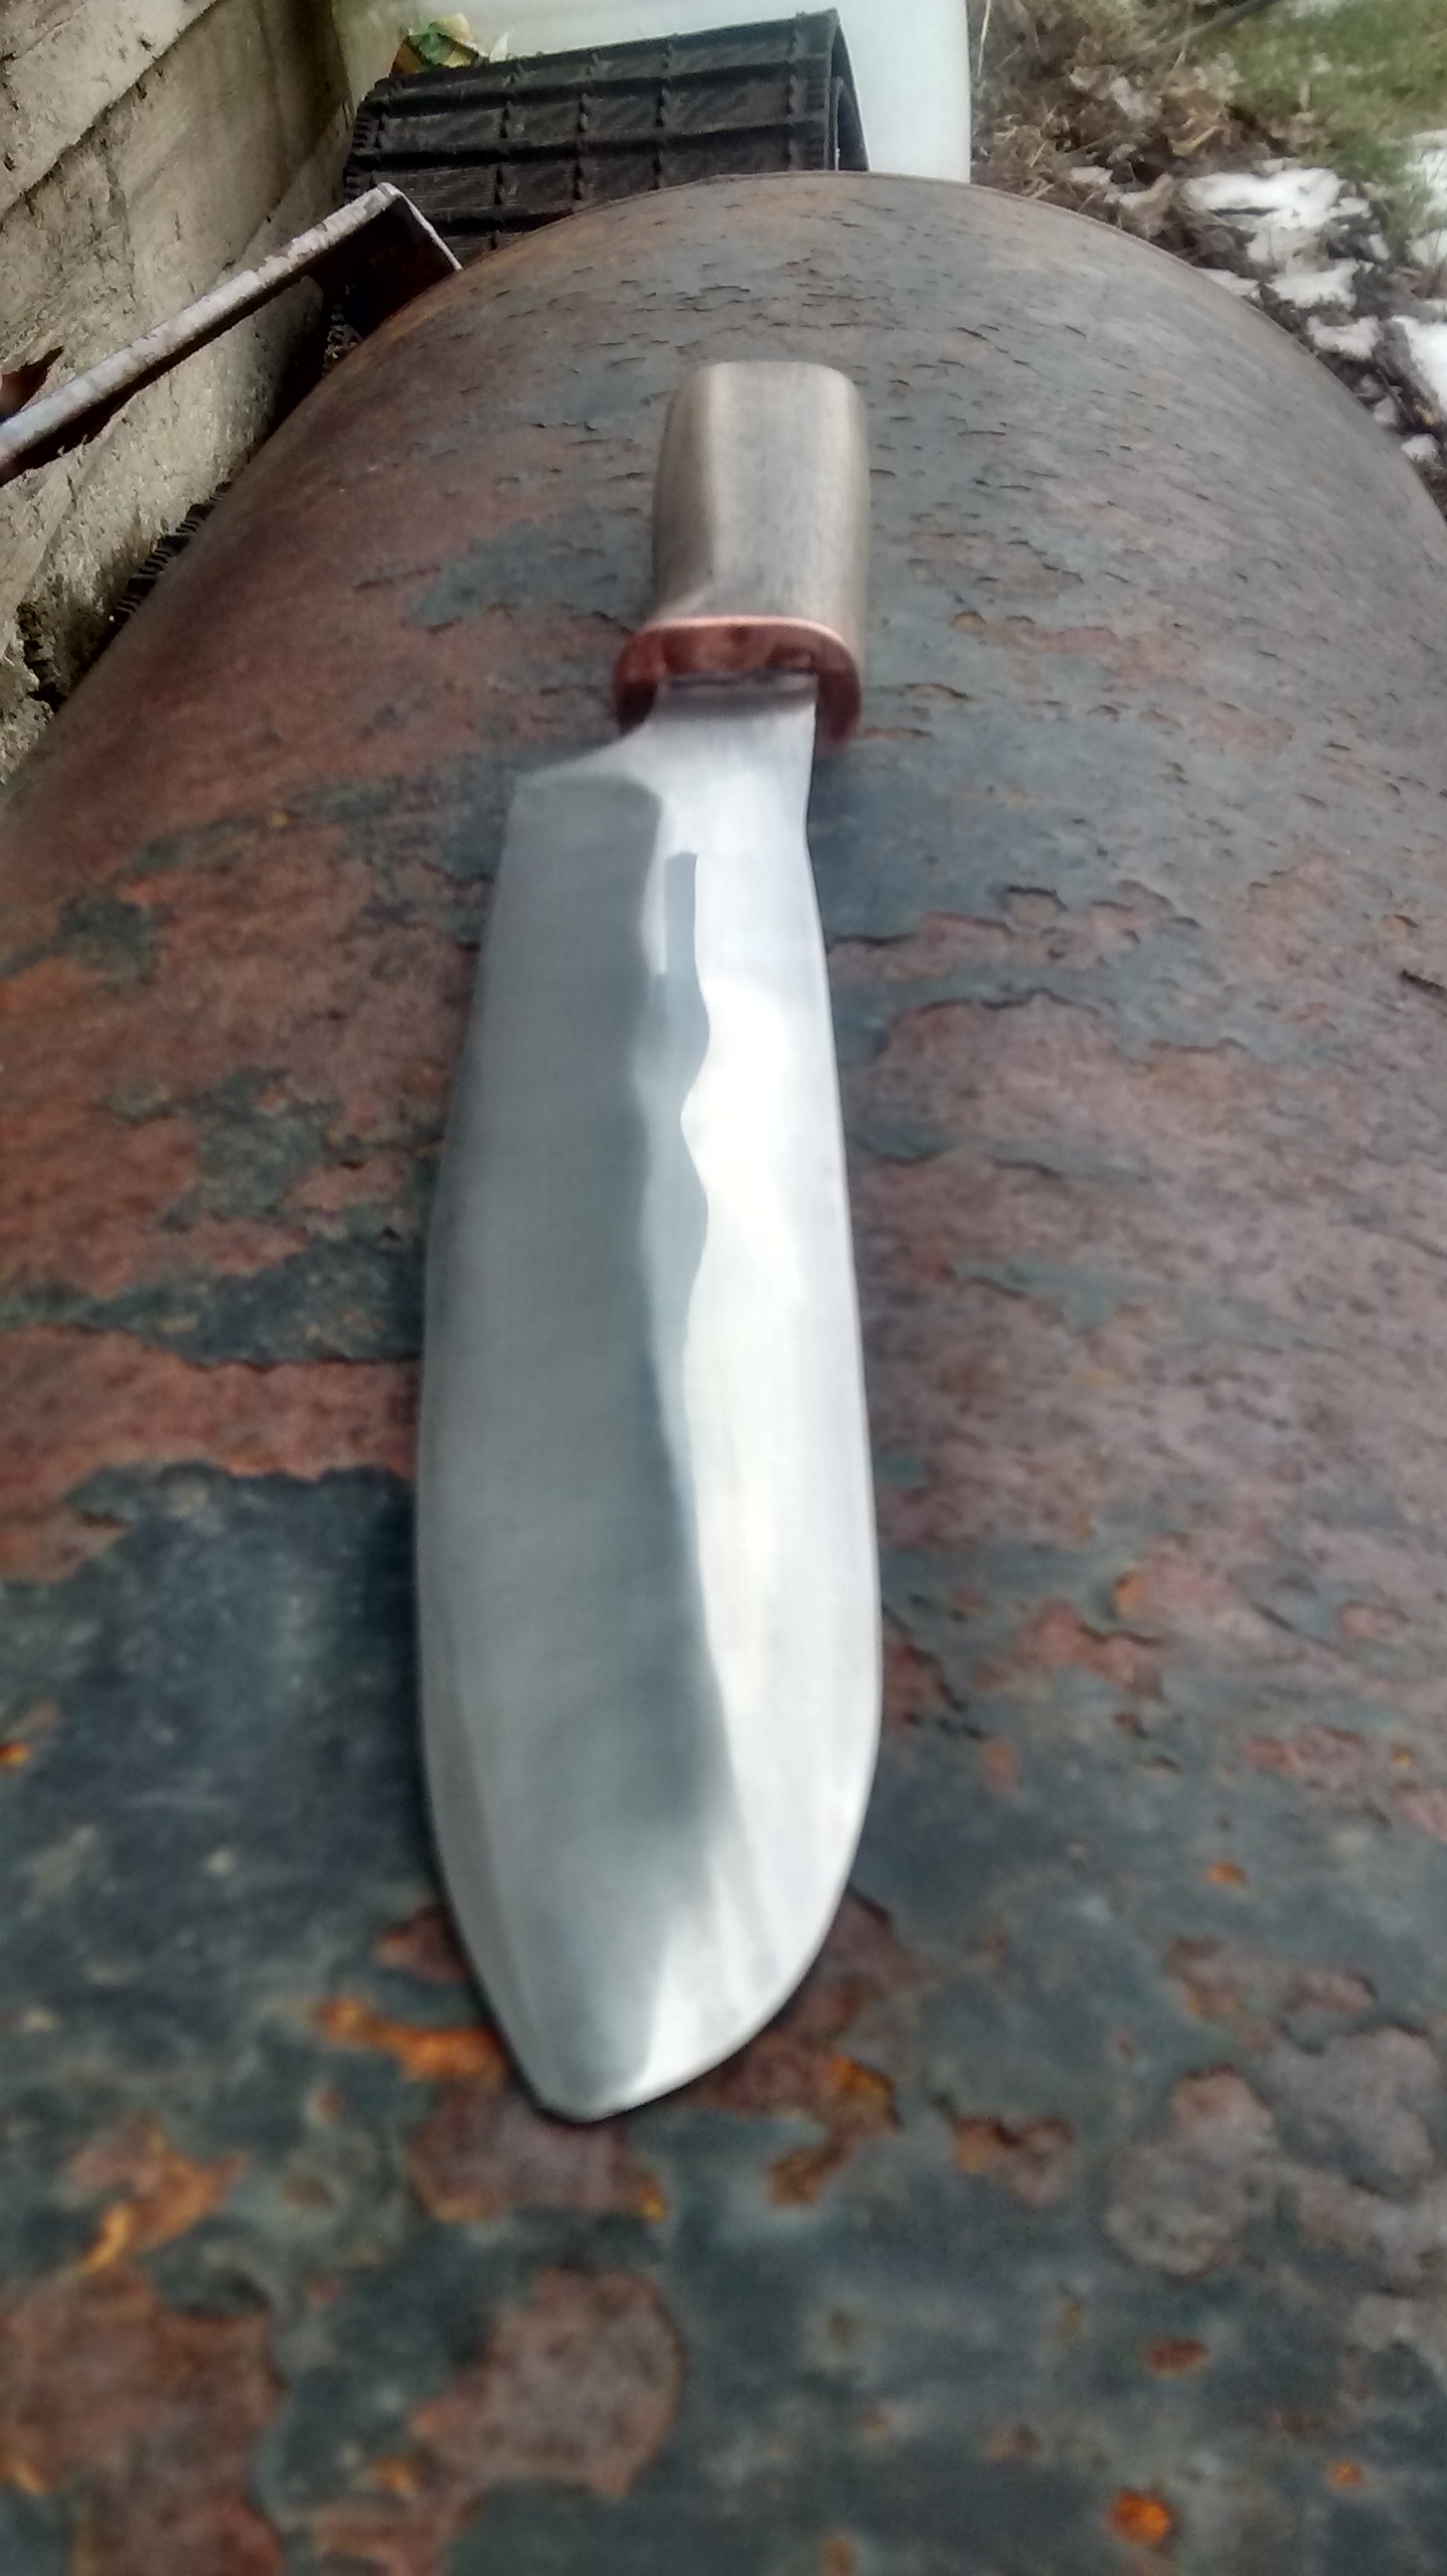
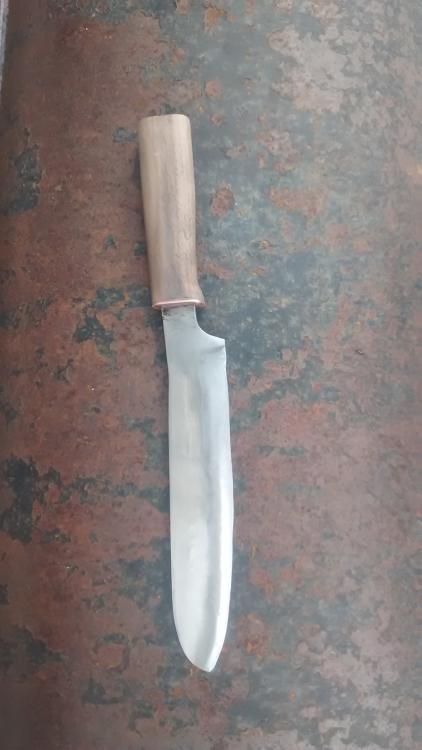
Quite well. So I would say it fulfills it's purpose haha. Functionally, all seems well. I don't really like how the plunge line got a little wobbly on both sides. I only have my darn angle grinder to work with, and it's hard to control that precisely.
-
Looks awesome! Great work.
-
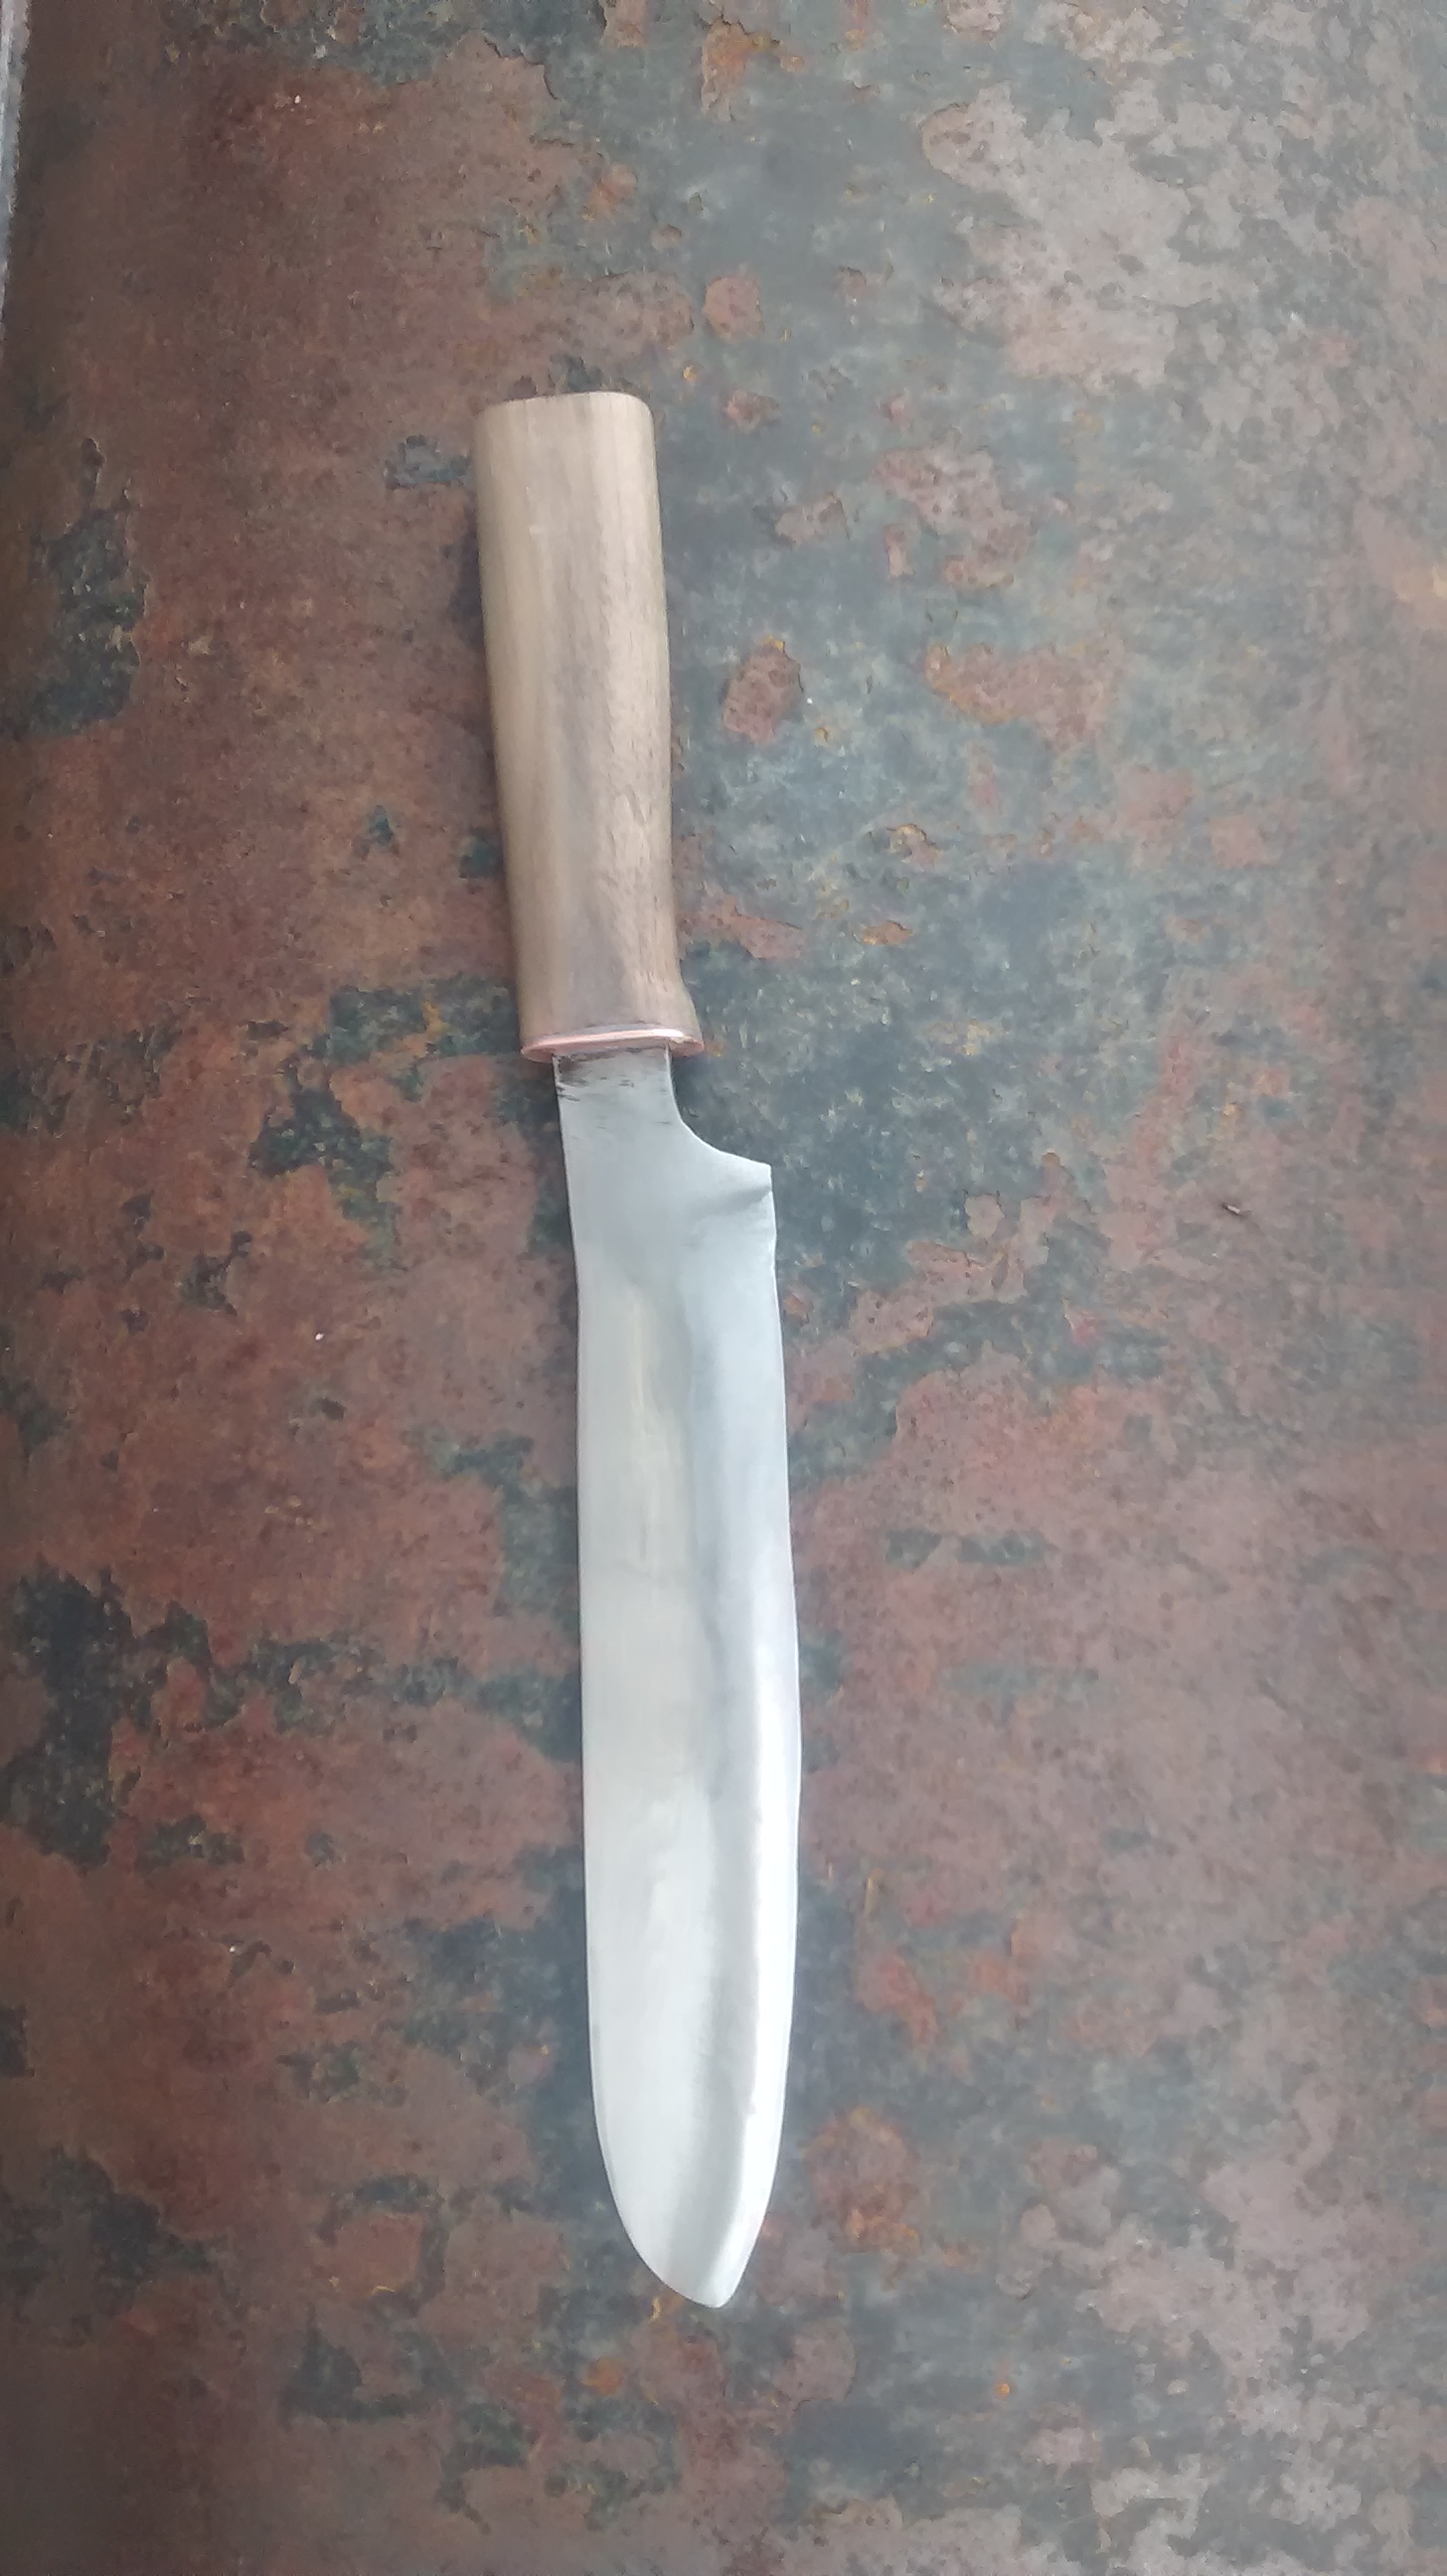
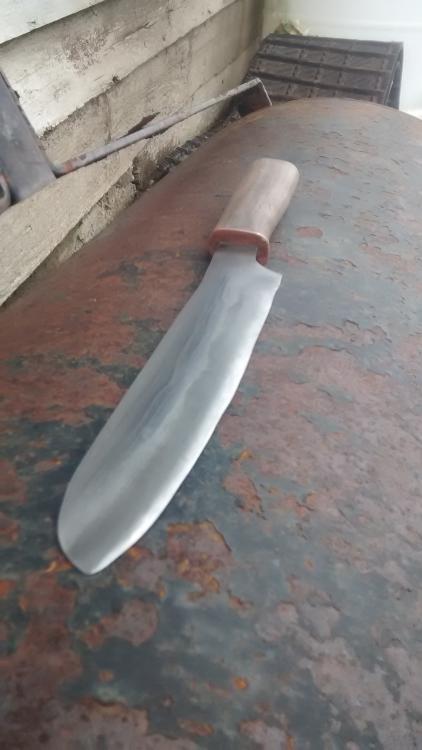
Good day. This is the first hidden tang knife I've made, and also the first pinless knife. Overall length 13" (33mm). Blade is 5160, tempered for a single cycle at 375° for an hour, to attempt to save as much hardness as possible (it's not going to be cutting firewood after all). The bevels are at a ~10-15 degree angle, so it is very sharp. The handle is black walnut, sanded down to 1500 grit, and it feels really nice and smooth. I made sure to fit it very tight, and epoxied it on. Being my first hidden tang, I decided to follow the KISS prinicple on the design of the handle. It has a small copper bolster (hope I'm using that term correctly) which was also epoxied on. The handle and bolster both feel very solid. I made sure to take my time with this one, and frankly, I like it. Despite my best efforts, my camera refuses to take decent pictures. Any thoughts? Thanks. Will W

-
I concede your point. Thinking this through, adding salt does in fact raise the boiling temp of water (that's why it's added to pots of water when cooking) and lowers it's melting point (that's why it's added to icy roads.) I was mistaken. For some reason, I thought it was reversed. Disregard my last post.