
JHCC
-
Posts
19,403 -
Joined
-
Last visited
Content Type
Profiles
Forums
Articles
Gallery
Downloads
Events
Everything posted by JHCC
-
I wasn't on IFI last year, but even so, this wouldn't have made a difference. My wife and I have our money budgeted to the penny, so those quarters would have already been given jobs. As for coffee, nothing beats a good French press.
-
Not knowing your skill level, it's hard to estimate how much time this will take you. That said, starting with dimensional stock will save you a LOT of time over squaring off all that rebar.
-
I learn so much on this forum....
-
For starting a fire with the anthracite, I've been starting with a balled-up newspaper piled over with hardwood charcoal. Light paper, turn on the air. When the charcoal starts to glow around the edges, add a layer of coal. Working fire in about five minutes.
-

Coal at local Tractor Supply
JHCC replied to Technician.Austin's topic in Solid Fuels: Coal, Coke, Charcoal, Wood, etc
If your first post on the forum is an offer of generosity, you'll do fine. Also, if you add your location in your profile, you'll be surprised how many folks in your area will crawl out of the ironwork. -
The shame of it is that it's a rather pretty blade on the end of a totally inadequate tang. Have you thought of grinding a half tang from the lower part of the blade, making the whole thing shorter but much more useable? Or does he insist on keeping the full blade? If the latter, I'd suggest brazing a mounting lug onto the back of the blade and permanently fastening it to a wall plaque.
-
Pictures?
-
I was given a Peter Wright Anvil but...
JHCC replied to Worshipdrummer's topic in Anvil Reviews by brand
Picture? -
My old woodworking teacher taught me the soapy water trick as well (and it doesn't have to be Dawn). He had some horror stories from when he had used kerosene as a sharpening lubricant, although in retrospect, I think his brain issues may have been caused by other varieties of better living through chemistry, if you know what I mean....
-
I think it was ThomasPowers who noted elsewhere the lovely polish that can be achieved on bone with sifted wood ashes, a woolen cloth, and some spit.
-
Ditto on that. I'd be worried about unstabilized leather splitting.
-
If you hammer the edges of the handle before you twist it (just a 1/8" bevel or so), you'll get both a comfortable handle and a prettier twist.
-
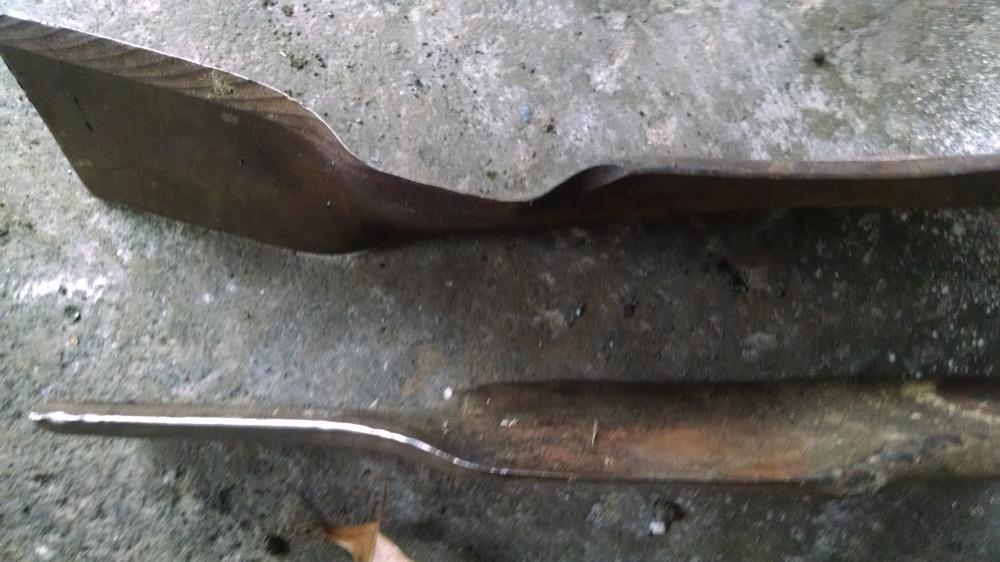
Although I now recollect that brush hog blades are single-ended.
-
Second cutting/grinding session.
-
I've got no suggestions on this one, but this has definitely helped make up my mind to do some more forge straightening on my first knife project before I start flat grinding and beveling. Thanks!
-
First cutting session. (Got a couple of nice offcut bits for hardening tests.)
-
And here it is.

-
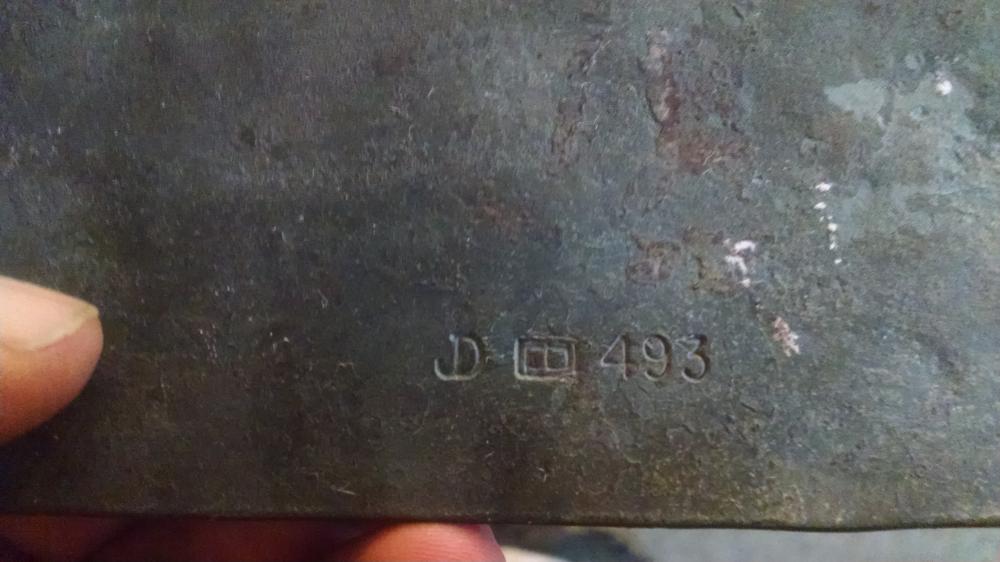
That is some great info, BGD; many thanks! (Especially since the folks at JD were completely unhelpful when I called.) Definitely planning to do some hardness tests with the offcuts. In the mean time, I'll be reading up on 5160.
-
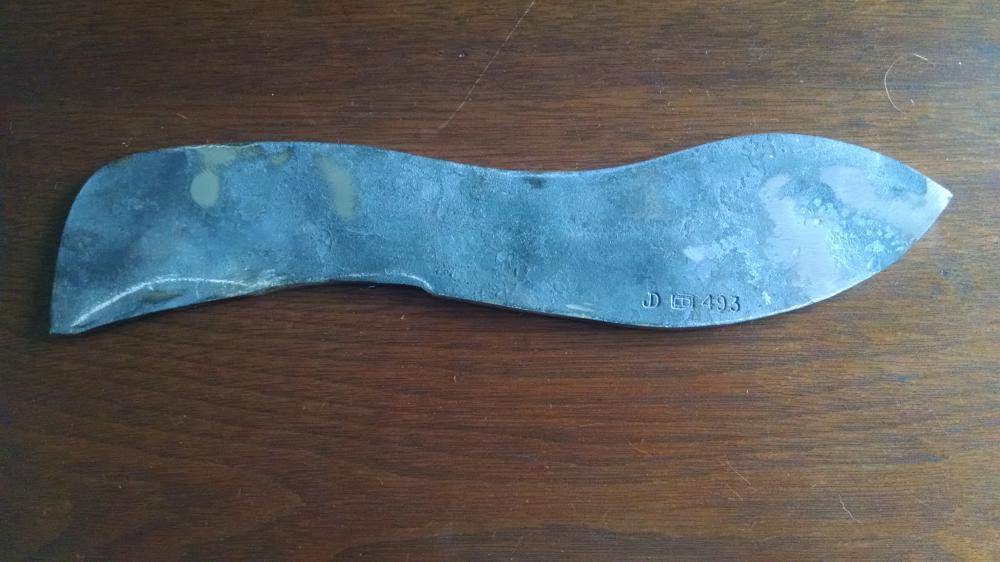
Stamp on the back of the annealed section.
-
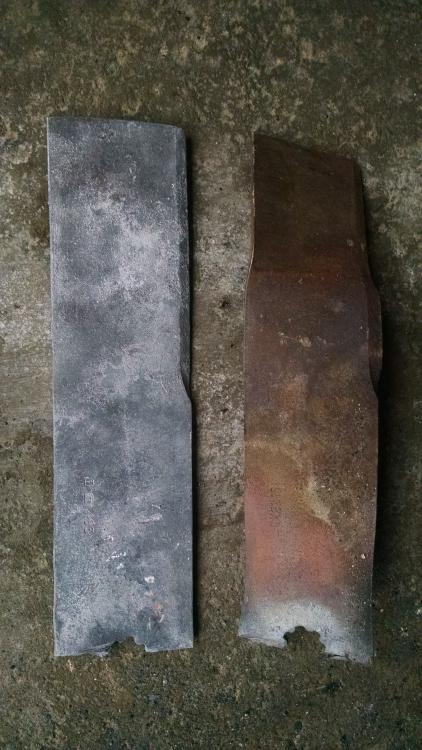
Here are the two halves of the lawnmower blade: unmodified on right, flattened and annealed on the left. And here's the unmodified half with one of the other, thicker blades.
-
That's very interesting. This one is definitely a lawnmower blade, but there are a couple of others that might be brush hog blades -- they're VERY thick and look like they've had some seriously hard use.
-
I'm trying to think of a pun on "clinker", but all I'm coming up with are clunkers.
-
He's tempting you to make an ash of yourself.
-
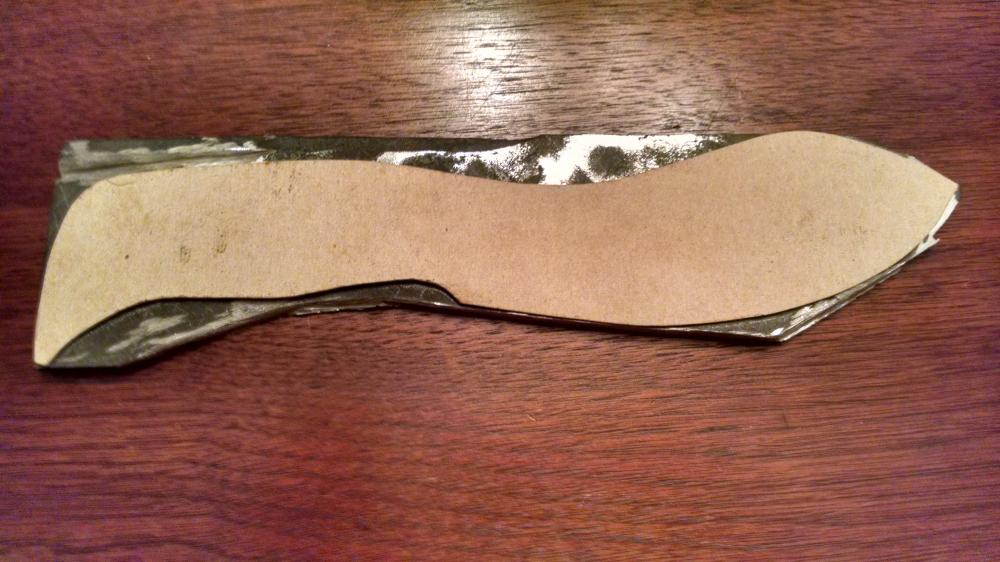
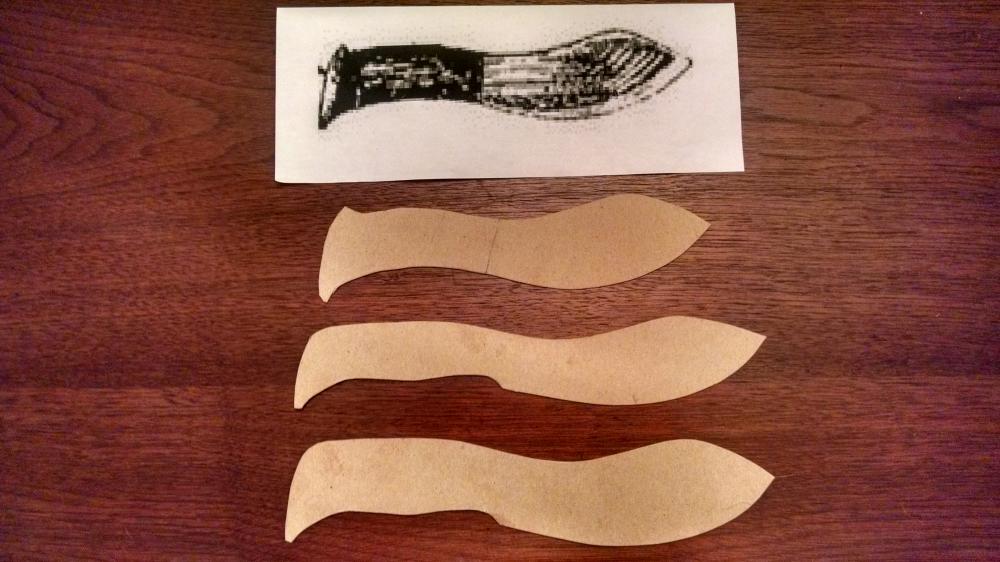
Well, I've decided to give blademaking a try, since the good folk at the local John Deere repair shop were good enough to give me a handful of lawnmower blades. (And yes, I know all about the problems with working with mystery steel. Worst case scenario, it'll be some good grinding practice on free steel. Who knows; I might even get a workable blade.) I've decided to make a Nessmuk knife, as described in George Washington "Nessmuk" Sears's 1884 classic "Woodcraft and Camping". The following photo shows (top to bottom) an enlarged scan of Horace Kephart's sketch of the original Nessmuk knife, a cardboard template of that profile, a scaled-up version (Sears was five feet tall; I'm a bit over six), and a modification of the scaled-up version that hews a little more closely to the blade profile of the original and fits my hand a bit better. You'll notice that the two modified versions have a little belly to the handles. I can't quite tell from the Kephart sketch, but I suspect that the original knife had a stag crown handle. This should make for a more secure grip. Not shown is the steel I plan to use; that's currently annealing in a container of lime. I'll post a picture of it later.
-
Pretty xxxx and not particularly, respectively. The TSC anthracite I'm using clinkers pretty heavily, but the new poker my son and I made makes removing them a LOT easier.