
pjh66
-
Posts
127 -
Joined
-
Last visited
Content Type
Profiles
Forums
Articles
Gallery
Downloads
Events
Everything posted by pjh66
-
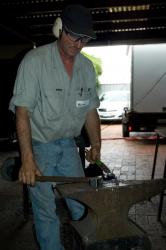
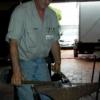
From the album: Pics
-
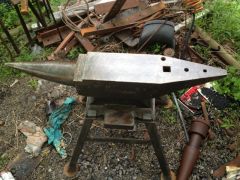
From the album: Pics
-

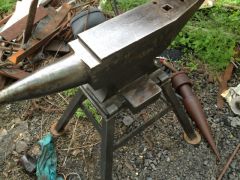
From the album: Pics
-
Looking good, Can't wait to see it finished. Just a tip for your drawing. When I print a drawing out that I want to use to compare my work with, I glue it onto a piece of thin sheet metal then cut it out with tinsnips, centre punch any reference lines on it. That way I don't have to worry about it burning or blowing away. Then you can put a hole through it & hang it up to use again.
-
on my portable forge my bar grate drops into a recess so when scraping or poking around in the fire it can't move. But I can lift it out when finished with the fire and the knock any stuck pieces out from either side. only a small 90 x 75mm grate out of 10mm square bar. I know I probably not explaining it properly but hope it helps someone.
-
 The chrome is a problem to watch for. In general the material for chrome rod base material is 1045 or 4140. At lest is is here in Australia. If you have a lathe you could machine the chrome off, instead of grinding or burning.
 -
I learnt the hard way to tell people to go away when using dangerous tools so that you don't have to worry about them and not take care of your self. Long story short trimming and cutting down trees for someone as a favour, saw movement out the corner of my eye, turned to see where they where and had saw catch on some wire netting ing the grass that I didn't know was there. Saw kicked back opened my throat from under jaw below ear to chin. 40 odd external stitches later learnt to tell people that don't know about the dangerous tools to rack off when I'm using them so I'm not watching them instead of what I'm doing.
-
mark, they are all useful and if you use them then it is not hoarding. just got to make some more room so I can put one in my shed.
-
A problem with this site is you keep coming across things that people have made that are useful and then you want one also. So now I have another item to add to my list of tools to make. It never gets shorter. Very nice idea can see the uses of it have to build one for myself when I get some time. Thank you so much for sharing it with us Jim. Peter
-
Making hot cut hardy tools
pjh66 replied to David R.'s topic in Hot Cuts, Anvil devils, metal cutting on the anvil.
If you mean that your tools are too small for the new hardy hole, why not make a sleeve for the hole so you can use all of your tools still? Or if your hardy hole is too small for the for your tools re-size the shanks of your tools & make a sleeve for your old anvil. Just a thought. -
Tensile strength of different steels when hot
pjh66 replied to Richard Furrer's topic in Heat Treating, general discussion
It would be great to find a chart with the yield strength. Some materials have a low yield with a high UTS, others the yield is very close to the UTS. It would be interesting how the compare at different temps. -
very nice blade. Well done. I bet you are now wishing you finished it sooner. What are the dimensions of your blade & what is your plan for it?
-
First No disrespect to you Dale just happened to be your post. I have seen statements like this through out the forum a lot. Why do any of us spend so much time on things when you can go to a shop and buy something that will do the job. In my humble opinion it is because we strive to improve, or to make items to suit our needs and wants. Think of all the time and effort that has gone into a hammer. I have seen a lot of discussion on here about hammers and the how to improve on what they had to start with. I think that 123samic is only trying to improve on the table to suit his needs, as we all do with things that we make. I have buit all of my own 3 forges. I copied a basic unit then modified it to what I had available. My first forge has been modified now to a long blade forge (24" of blade can be heated all at once). I have my main forge also which is a basic unit, and I have my portable forge that drops down to like a flat pack & only takes a couple of minutes to put together. Out of the 3 each has it advantages. So I say good on people who reinvent things, they will have set backs and find ways not to do things, but that is how we progress, improve and grow. Only a fool doesn't learn from what others have done before them though, so look at other builds listen to what people say, use other peoples knowledge to get to where you want to go. Peter
-
yes but would that be a problem? If done with square tube you could just have a right angle arm with only 1 slide
-
Mount the tubes that it slide in to the inside edge of the legs instead of under the table. an inch lower & out at the legs will make a lot of difference.
-
Just a couple of ideas for you to think about. You may need a bit more bracing under your cut outs in the table to stop in buckling from heat & use. IMHO all cross braces on legs should be at least 8" off the ground. This allows you to easily clean around & under the item also you are not kicking them with your feet when you are getting close to it. I would mount the slide points on the legs not your underneath table plate. This reduces heat transfer which can inhibit the slides. I am sure you will have fun making & use your forge. Peter
-
You could look at spending a bit more & get an inverter type MIG/TIG/Stick. One machine does all three. a lot of tigs are only DC. You need AC for aluminium welding. Watch out for a MIG that is sold as a Tig also but is only a scratch TIG Not as easy to use as a high frequency TIG arc. I know it is just getting more confusing. The other thing with some TIGS you can buy is a three in one. TIG, Stick Welder, & Plasma Cutter. Just to confuse things more for you.
-
G'day mate good work. It is great to build your own forge. Seems like you had fun with the project. One comment for you to think about, on the front of the table where you cut out the front which you need to do you may need to put a support brace across under it as I think it will bow over time. On my forges I have built I have a cut out on the back as well with a removable plate across it so if I have long stock to put through I can. just something for you to think about. Have fun & keep it hot.
-
How about a purple anvil? any takers?
pjh66 replied to Nick Esposito's topic in Anvils, Swage Blocks, and Mandrels
Thats so you don't trip over it in the dark. Certainly a eye catcher to get people talking looks good ( but not for me :-) ) -
Didn't your mum teach you not to steal? What a good score.
-
FInished a blade for someone I know who asked me to make them a machete. They wanted a blade that was robust and didn't look like it came from a store. Still a few hammer marks so thought it would suit. 1Kg all up 420mm blade, 200mm handle, widest part of blade 63mm, down to 38mm,6mm thick at guard.
-
Looking good now to get hammering & have fun. You got any one local to you to get you going? Check out groups near you.
-
great work love them all. you have luck family & friends. hope they all appreciate the work that went into them all.
-
My first anvil build - looking for advice
pjh66 replied to stromam's topic in Anvils, Swage Blocks, and Mandrels
G'day Stroman anvil is coming along nice. 1st - If you can have a clearline through the hardie hole I would. Makes life a bit easier if you happen to get something stuck in it you can just knock it back up from underneath. 2nd - I would leave the square area on the nearside for upset in the middle. I would suggest at least a 1/2" bevel weld prep, ( larger if you can) all the way around the middle block (J prep would be better for it but harder to do) Then where the square edge for the upset is it is also still welded just grind it back square. You are going to enjoy using an anvil that you made. Peter -
Looks good keep it up. Great your son is getting involved with you in it. I hope he keeps enjoying it. I would suggest a small project that he can do to take to school to show his friends. Even just a leaf key ring. Might be better then just a pic of his knife. Have fun in the joy & madness of smithing.