T.J.watts
-
Posts
305 -
Joined
-
Last visited
Content Type
Profiles
Forums
Articles
Gallery
Downloads
Events
Everything posted by T.J.watts
-
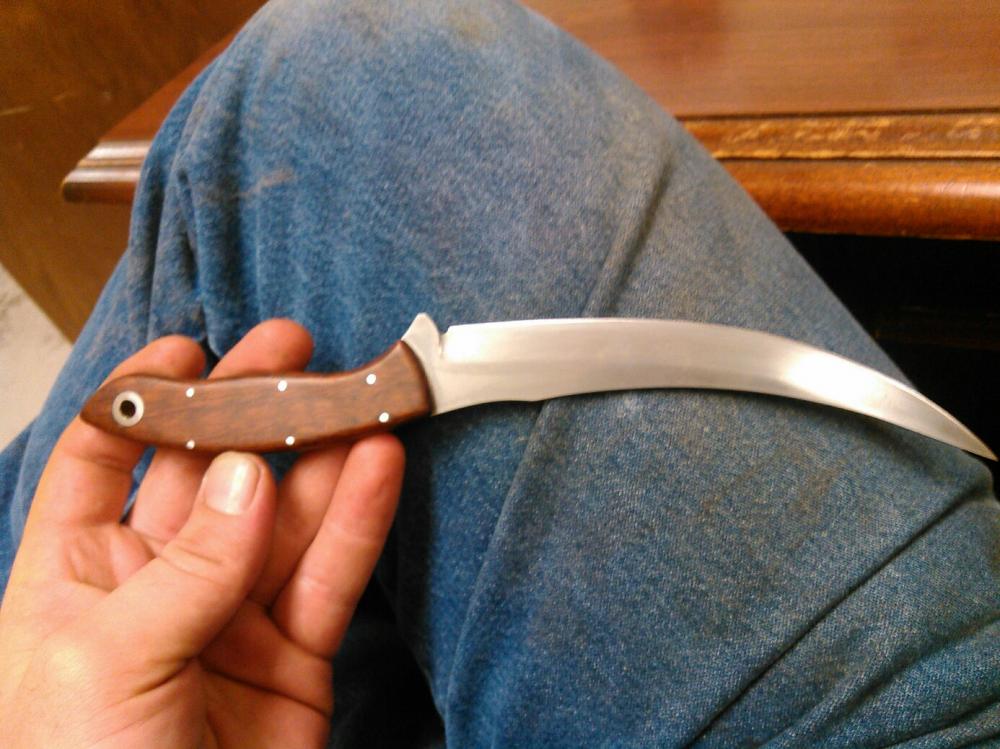
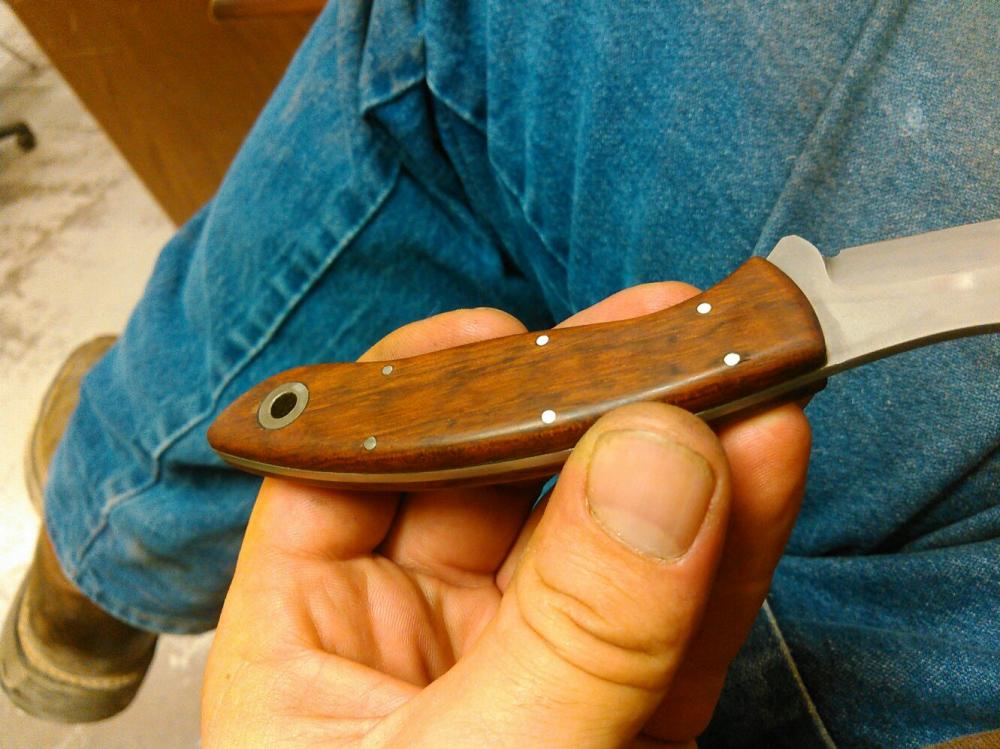
No Charles, I still need to fix it the snap ring fell out. Frosty I know it didn't need that many pins but I wanted the details.
-
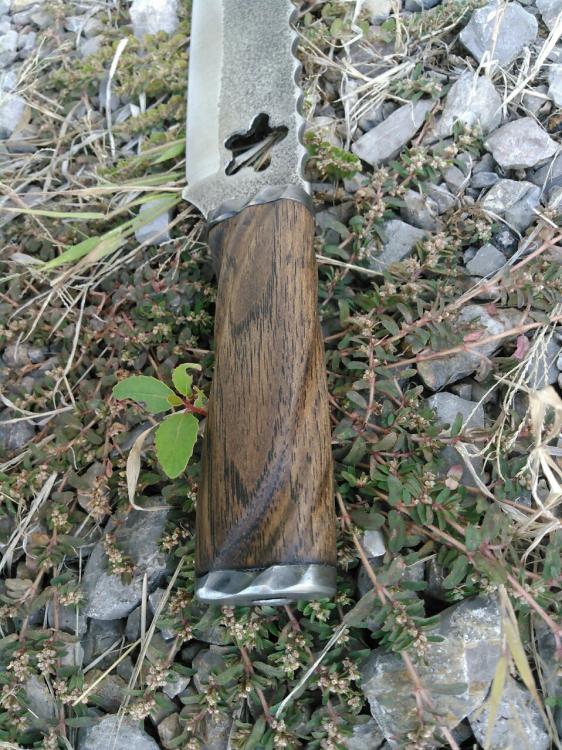
My mother in-law decided to take up taxidermy and needed a boning knife. She was going to buy an $80 one online and I told her to keep her money. The blade is 1095 tempered at 375 for an hour. The handle is snake wood with 316 pins and lanyard tube.


-
It looks pretty good. I have a bunch of lawn blades that friends keep bringing me so I need to find a use for them
-
Thank you for all the compliments gentlemen. I work in the oil field and its pretty slow right now so what better way to pass the time at work than to practice thing I like.
-
looks good, I like the fullers on either side of the eye.
-
Yes that's what I was referring to. I've had plenty of those days and plenty of those projects. I've seen some that instead of using a rod they used plates that hinged on bolts. I've tried the spring fullers myself with little luck but as long as they've been around there has to be a way of using them that eludes me.
-
Actually the WD-40 keeps the dust from sticking to the paper and helps with the finish. Kind of like the compounds used on grinding wheels to stop mineral build up. I'm sure you've seen videos or read about using polishing stones, as you polish the stone makes a mud with the water and helps with polishing.
-
if you just need to set the tang evenly in the center then you could make a spring fuller with scrap rod. Bend a u and either put a block for the anvil to hold it or a piece of strap to hold in a vise. A whole lot quicker than making a guillotine tool. A coffin joint is basically adding a piece of metal that the tang will fit into to allow for a full tang. Steve's book explains it much better than me.
-
Usually when I'm filling I get the heavy work with the coarse then move to a mill file to remove the heavy scratches. After that its my .25 strap with 220 grit paper and WD-40. I've noticed that if I sand down the length, then at an angle and back down the length it removes the scratches much quicker and makes them easier to see. If your table is to shaky you could just both it down with spacers and angle brackets to sturdy and level it out. That is if your some where you can bolt or screw it down with out the wife getting upset.
-
Very nice blade and the handle is beautiful. Gotta love the Damascus
-
looks like a durable blade, you might try putting a slight curve and a bevel at the front of the handle.
-
I think you've already got it figured out but I like the design and shape of the handle. The guard looks a lot better.
-
Just a few thoughts, using the angle grinder on blades be very careful. I have seen so many people that cant grind without putting dips in everything, that could be where the curve in the tip came from. With practice you can definitely use an angle grinder I'm not arguing that. If you do decide to use the backing pad with paper discs be very careful around sharp edges, if the disc catches a corner it will fly apart. Two ideas for cleaning the handle, if you use the angle grinder be careful not to apply to much pressure and try one of the finer wheels instead of the braded wheels, or heat the handle to a light red and use a hand brush. With most of my blades I will use a grinder for heavy stock removal but other that that its belt sander, file, and a steel strap with sand paper wrapped around it. Draw filing can remove a lot of material and help keep the bevels flat. Your blade looks like it might make a good thrower.
-
its hard to tell from the pic but is there enough to draw the tang out? if not you could do a coffin joint or like you said add a piece of rod.
-
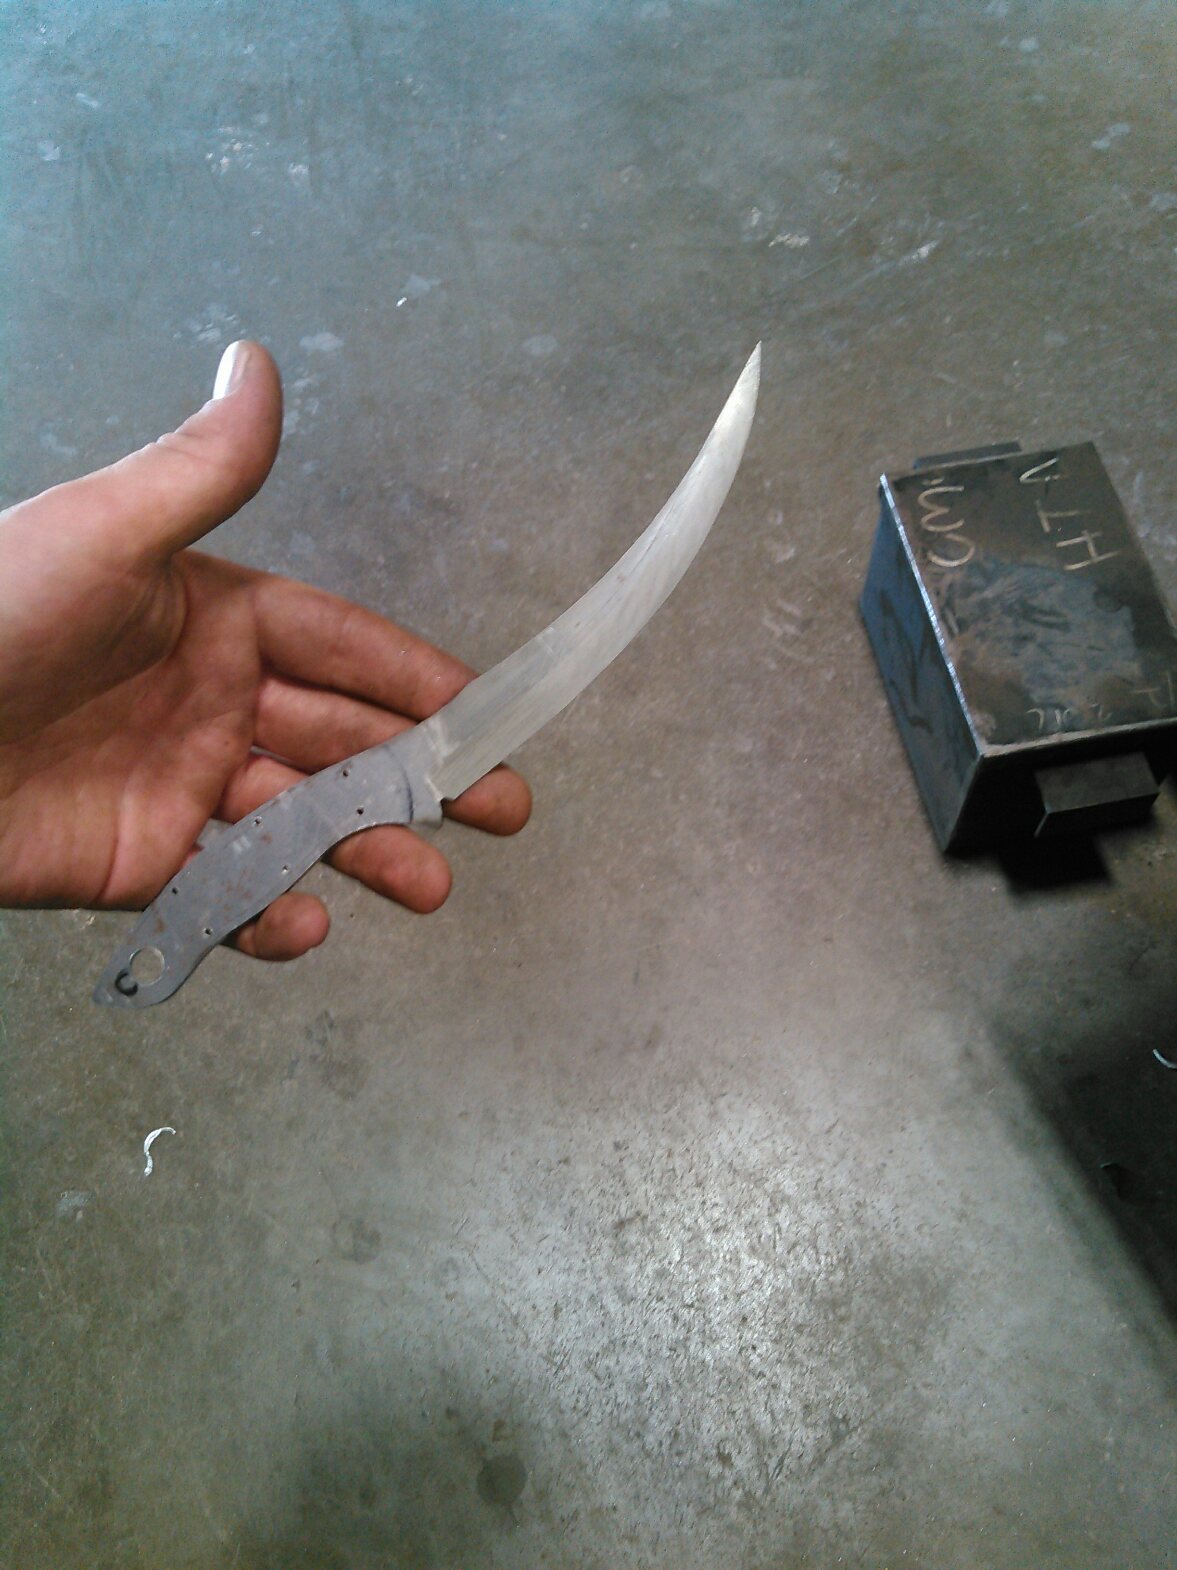
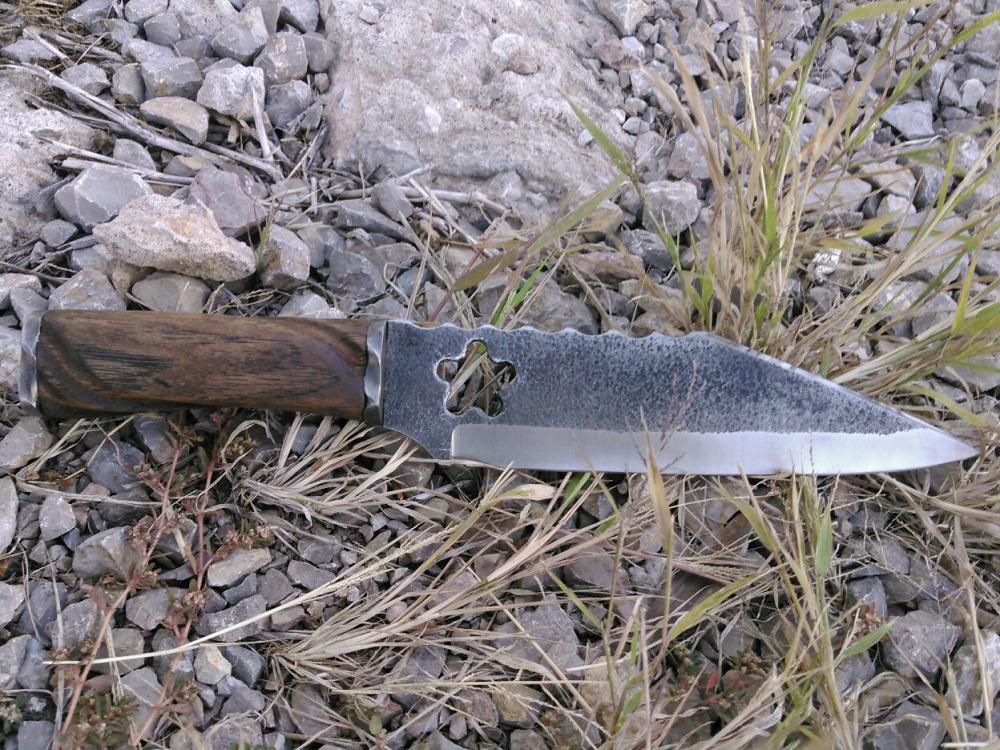
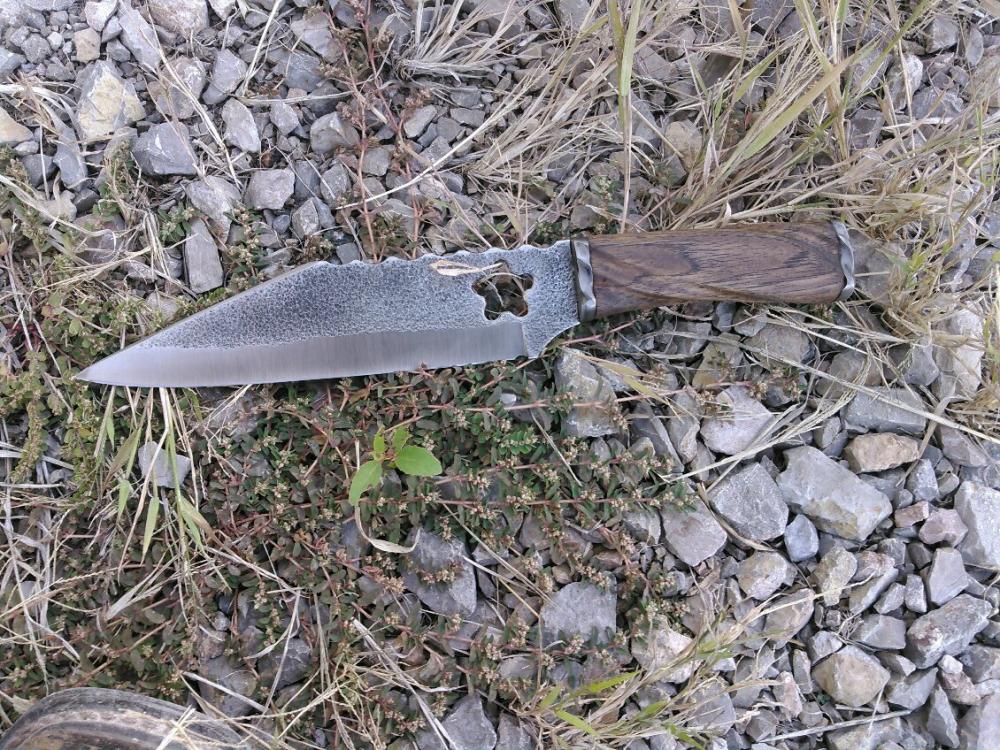
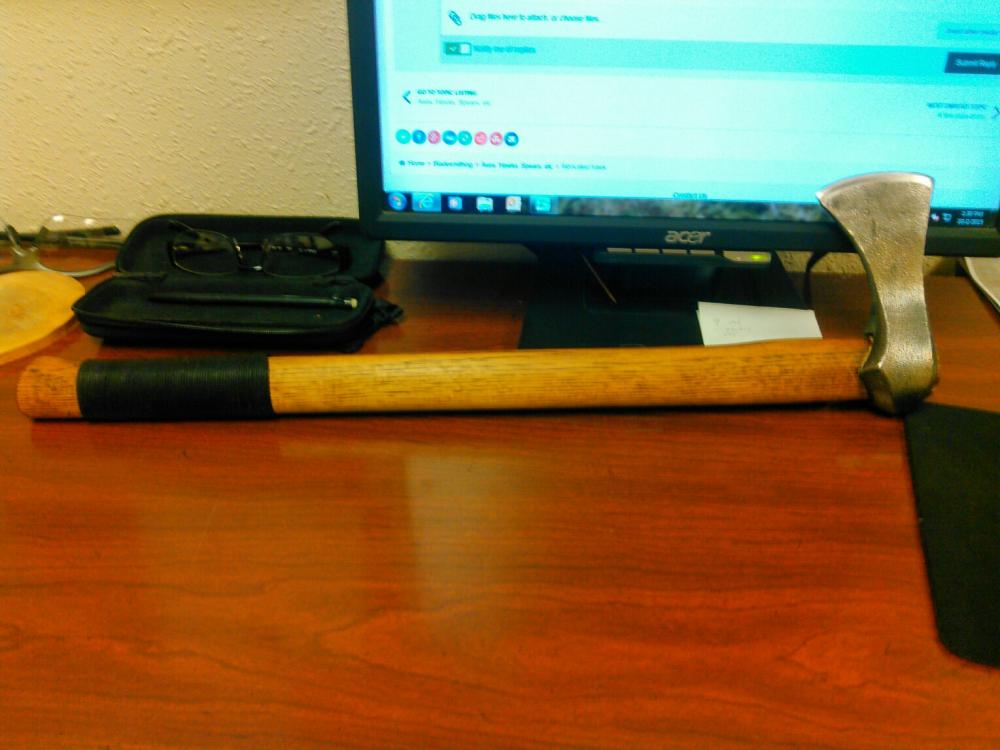
It was suggested that I should make a sax to match the axe I made recently so here it is. It didn't turn out the way I imagined but it was good practice, the blade is just an old lawn blade, the handle is the same as the axe ( sledge handle), and the hilt and pommel are from .5" square bare that I twisted and flattened to get the ridges. After starting this I read more about lawn blades and found that they are not all usable. This one hardened some but not enough to snap easily. The blade is extremely tough and flexible so I went ahead and tried it. The dimensions are 4.375"handle and 7.75" blade.
-

The 10 Trials of the Master Bladesmith
T.J.watts replied to Shamus Blargostadt's topic in Knife Making
what books are theses so that I may get them. -
The 10 Trials of the Master Bladesmith
T.J.watts replied to Shamus Blargostadt's topic in Knife Making
I haven't met any ABS smiths in person yet but I have met a few that were very polite through email and phone conversations, then after asking me to visit were rude and acted as though I was an irritation when they invited me. Some people are just that way and some just have very strong opinions. I am a member of SCABA and I've been looking at joining the ABS. I love making knives and enjoy learning as much as I can from any source that is factual. If I do join the ABS and work towards the MS title it will be for my own satisfaction and sense of accomplishment. -
As these gentlemen have already suggested, replace the liner and use the felt pads with cleaner. As maintenance on my machine at work I blow out the liner and lead about once a month.
-
very nice, I have attempted this one time and failed miserably.
-
It was a bit of a guess because I wasn't sure how the welding would effect the blade so I heated to a bright orange and quenched in hydraulic fluid ( I know its not the healthiest but this was all done at work on free time so I'm kinda limited) For the temper I brought it to a purple/blue and that seems to have worked well. The edge will still cut with a mill file but doesn't dull splitting 4x4's . Just since Charles asked I'm going to make a matching seax, it'll be the first one I've done so we'll see how it turns out. I think I am going to try the welding method on some tools to test and see how well it really works. I would really like to get more feedback from everyone on welding the bit this way, if anyone has tried it and how it worked for them, or maybe I'm just a silly welder thinking crazy stuff.
-
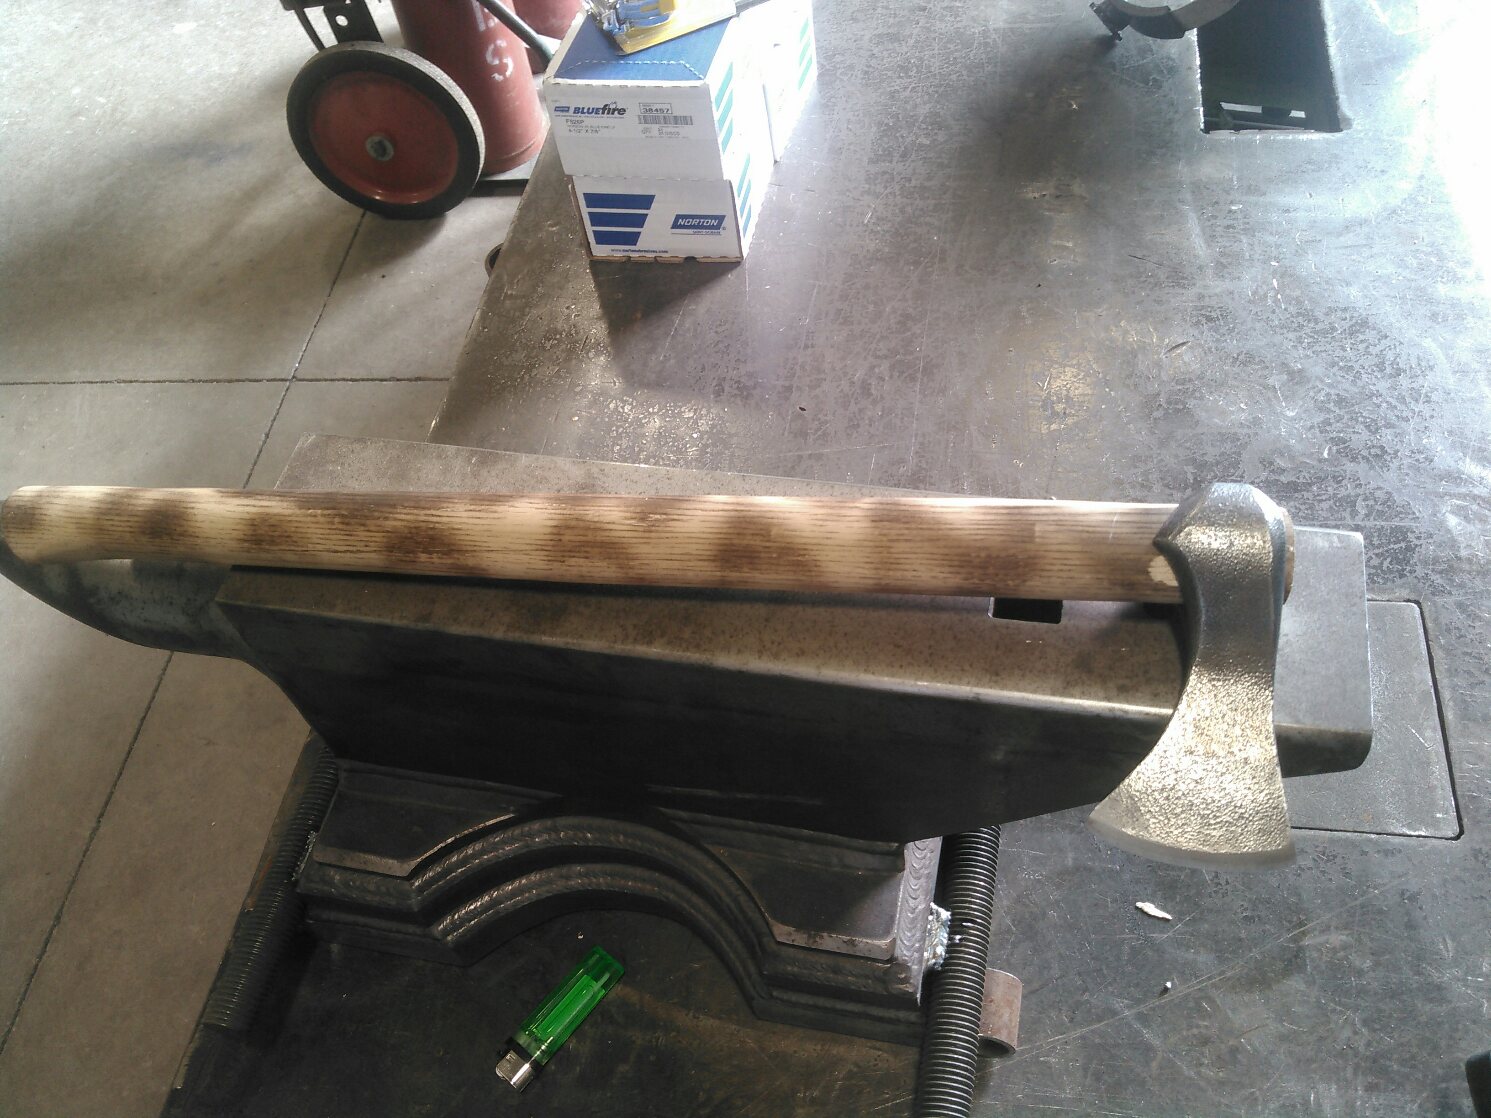
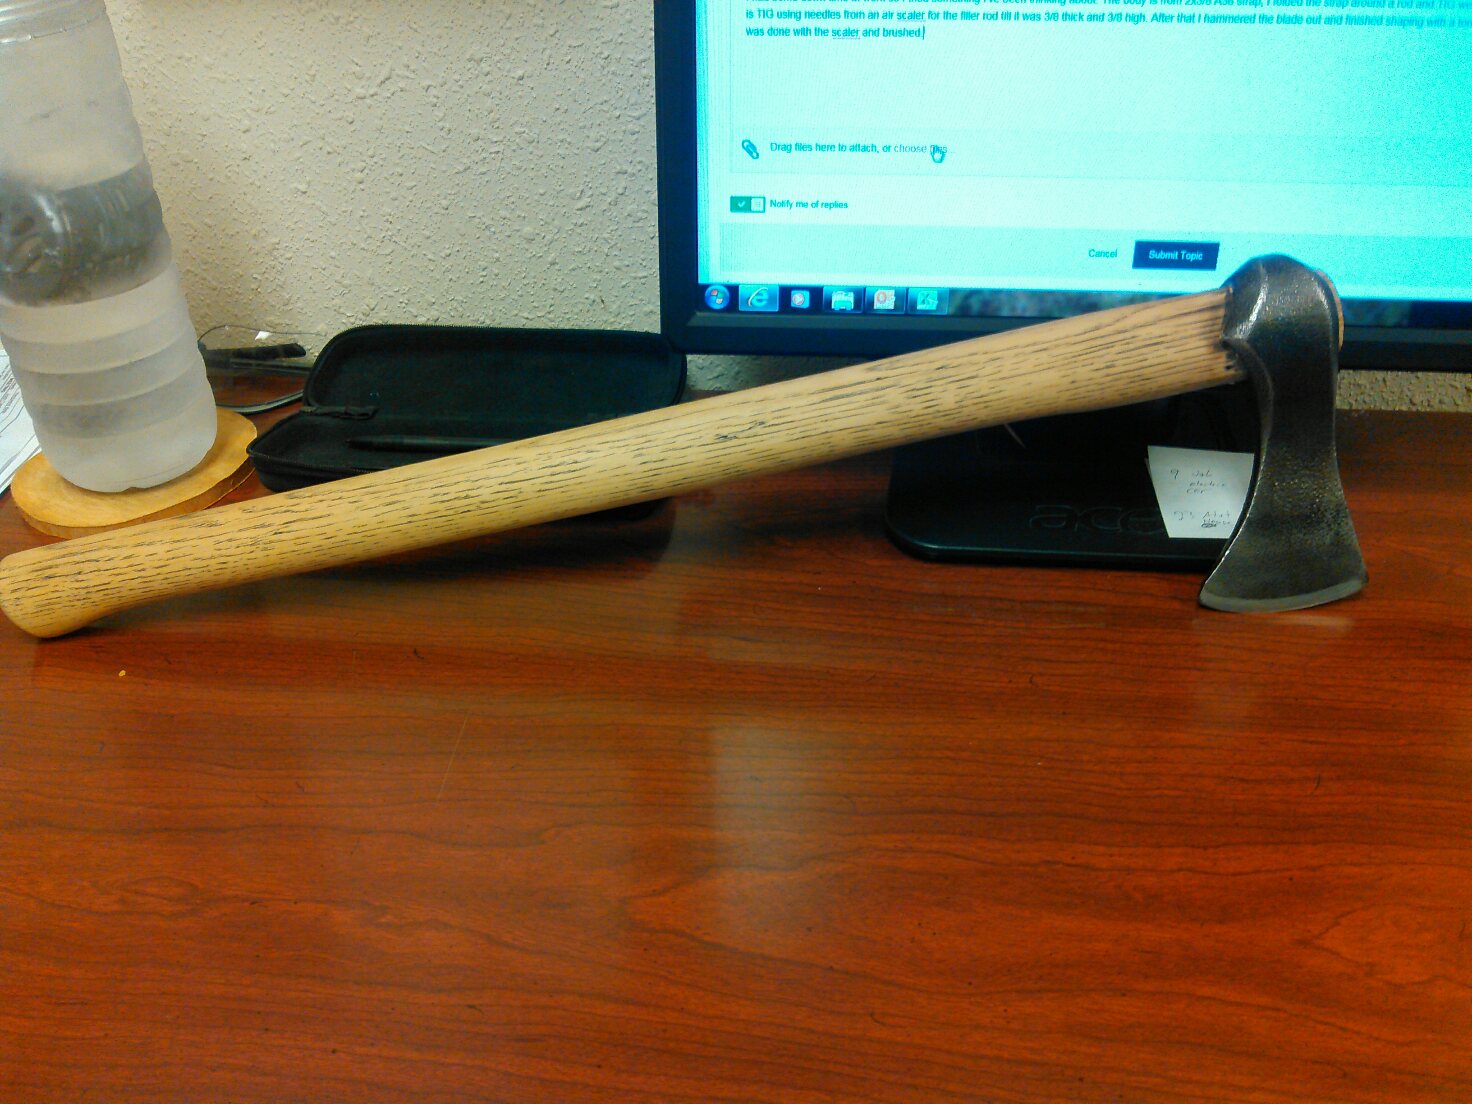
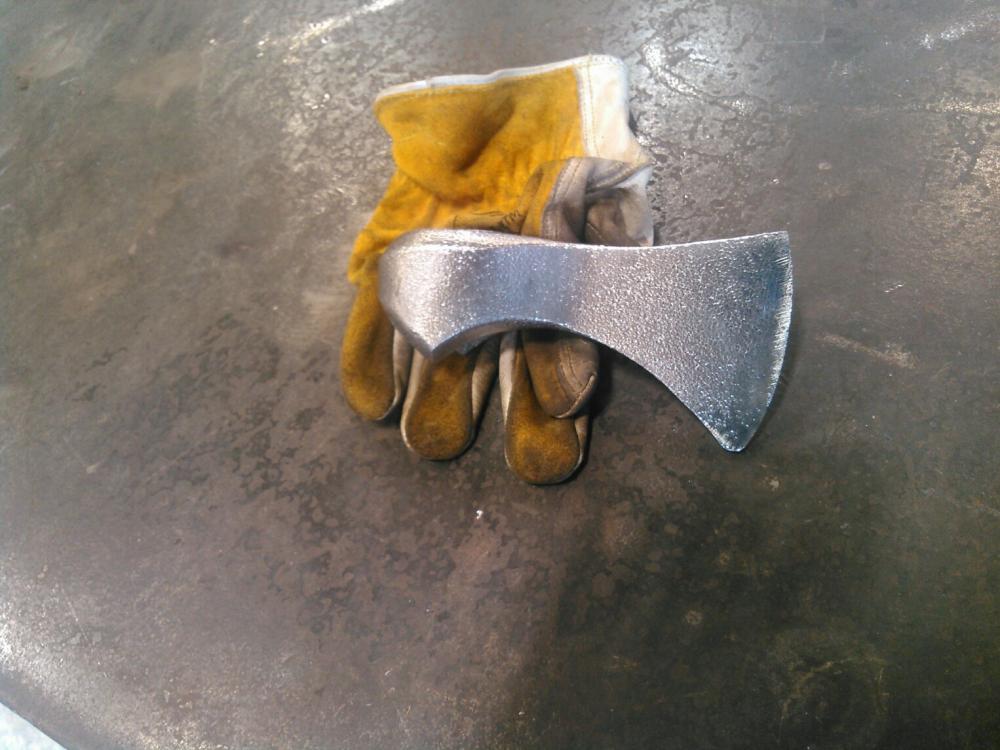
I still haven't decided on the matching blade but here is the finished axe.

-
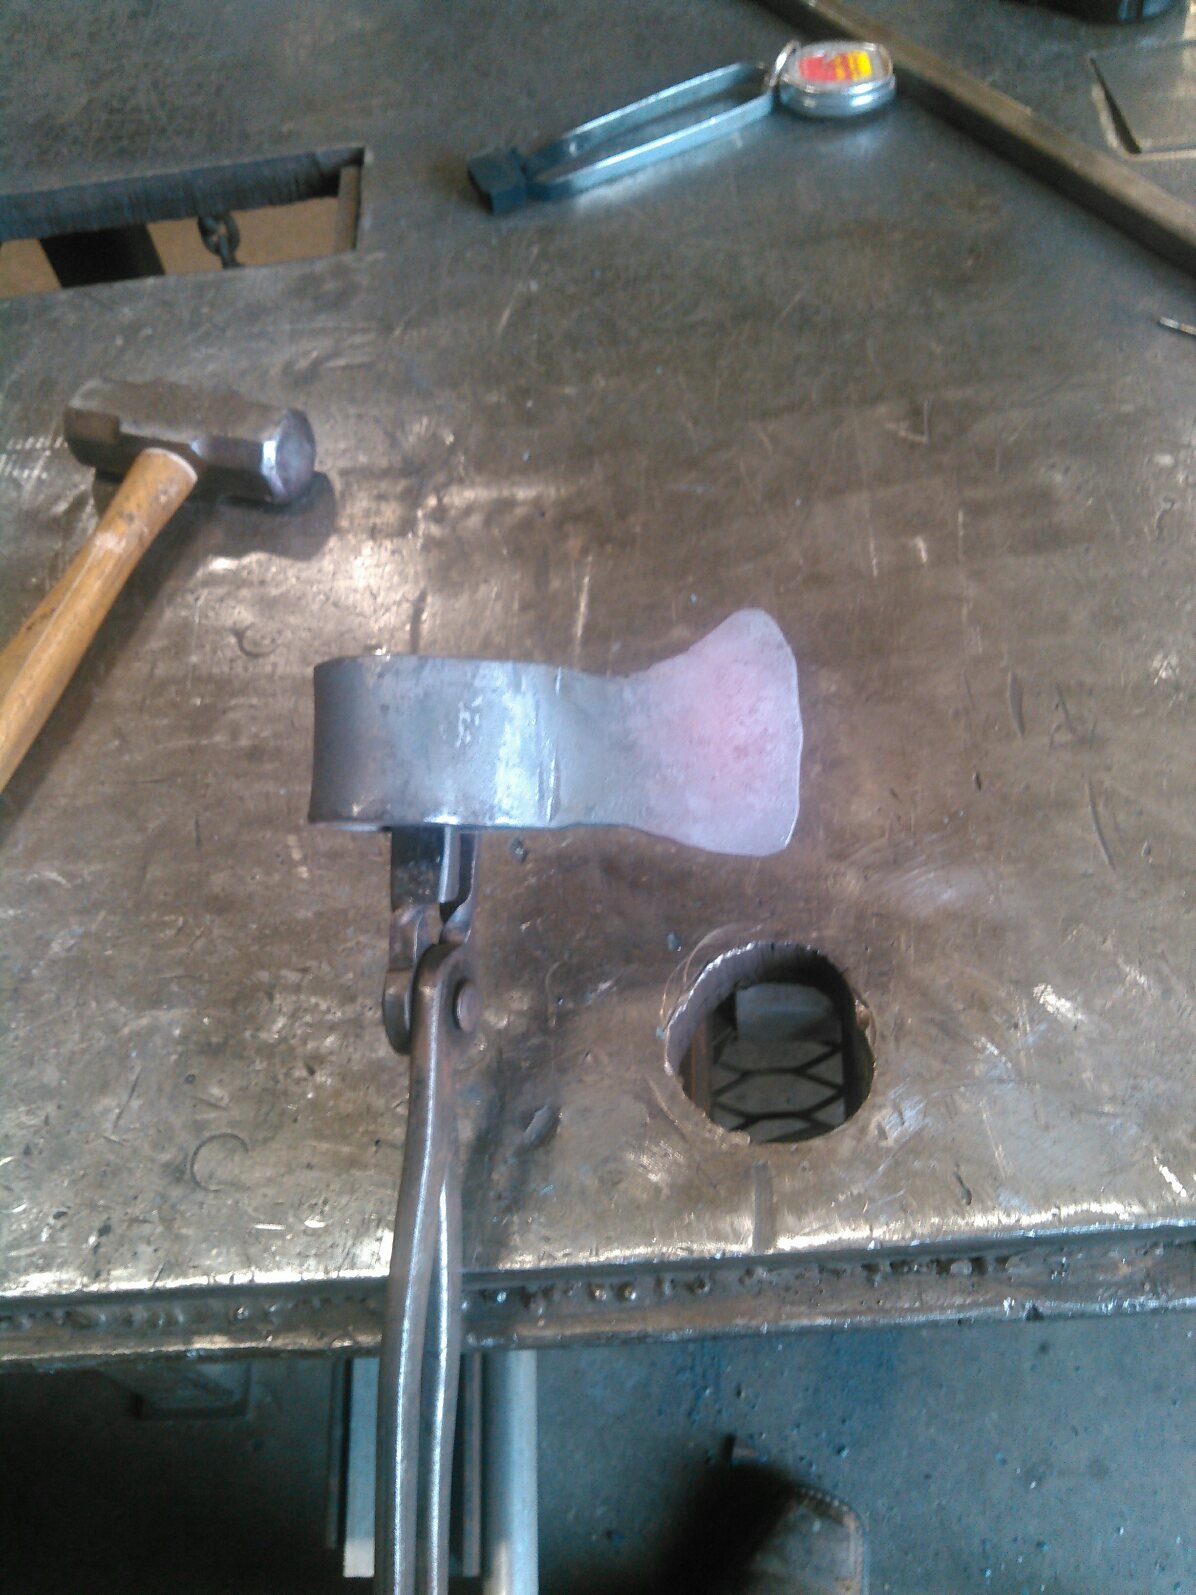
I had some down time at work so I tried something I've been thinking about. The body is from 2x3/8 A36 strap, I folded the strap around a rod and TIG welded the joint. The cutting edge is TIG using needles from an air scaler for the filler rod till it was 3/8 thick and 3/8 high. After that I hammered the blade out and finished shaping with a torch and grinder. The texture was done with the scaler and brushed. The handle is an old sledge handle, at first I just burnt the handle a bit for looks and I didn't like it so I painted it black then sanded clean to show the grain. I haven't decided if I'm going to do more or just leave it as is. I'm also thinking about doing a matching blade. It sure as heck isn't the Norse but I like it.


-
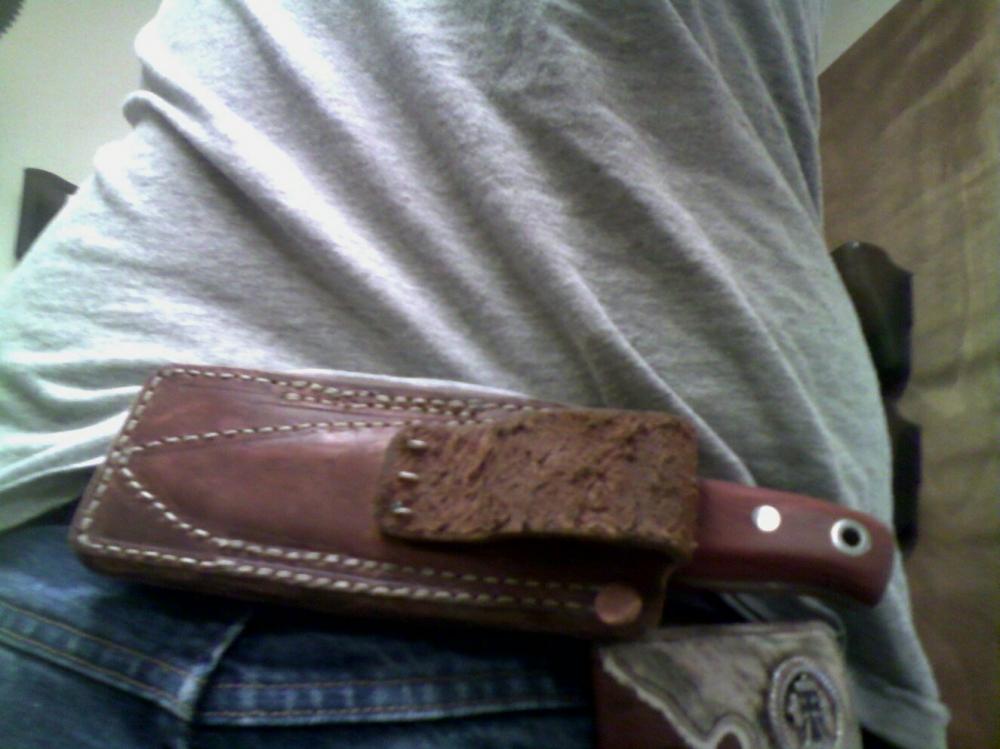
sorry for the poor pictures. thank you for all the compliments and to Charles for the sheath.

-
I've only got my wife on the forge a couple of times and she had fun, I even bought smaller hammers for her cause my 3lb. were to heavy. Now we have our son and it's a lot harder for either of us to do much, but it's definitely a good couple activity and in about another year it can be a family activity. Beware knife making is addictive
-
well I appreciate the minimum can opening