T.J.watts
-
Posts
305 -
Joined
-
Last visited
Content Type
Profiles
Forums
Articles
Gallery
Downloads
Events
Everything posted by T.J.watts
-
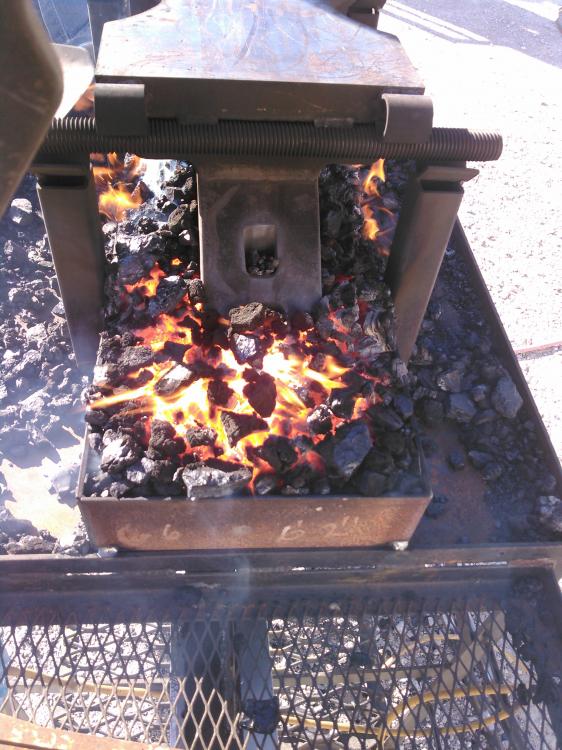
I'm guessing just a cool spot cause its only about .75" and the other corner is fine and it was the same before the temper.
-
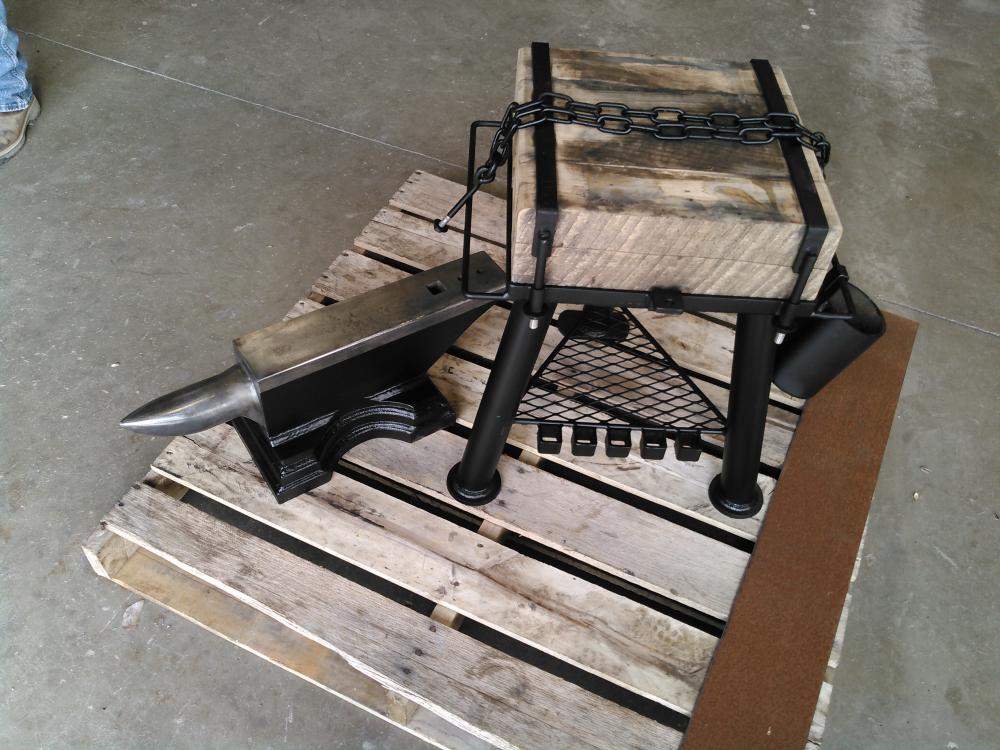
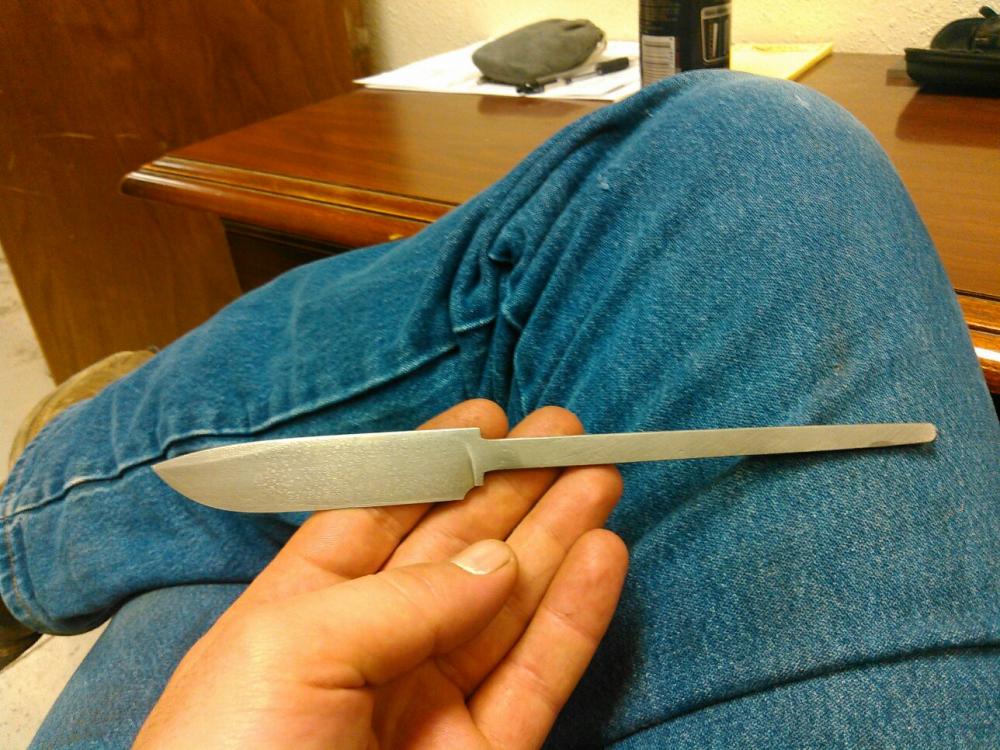
It's finally done!!!! It took 4.5 hrs to heat treat. Then after a 400 degree temper the top averages mid 60s exept a small spot at the corner of the heal at 35.


-
I'll try not to forget pictures
-
Hopefully I can get it set up this week and get it done.
-
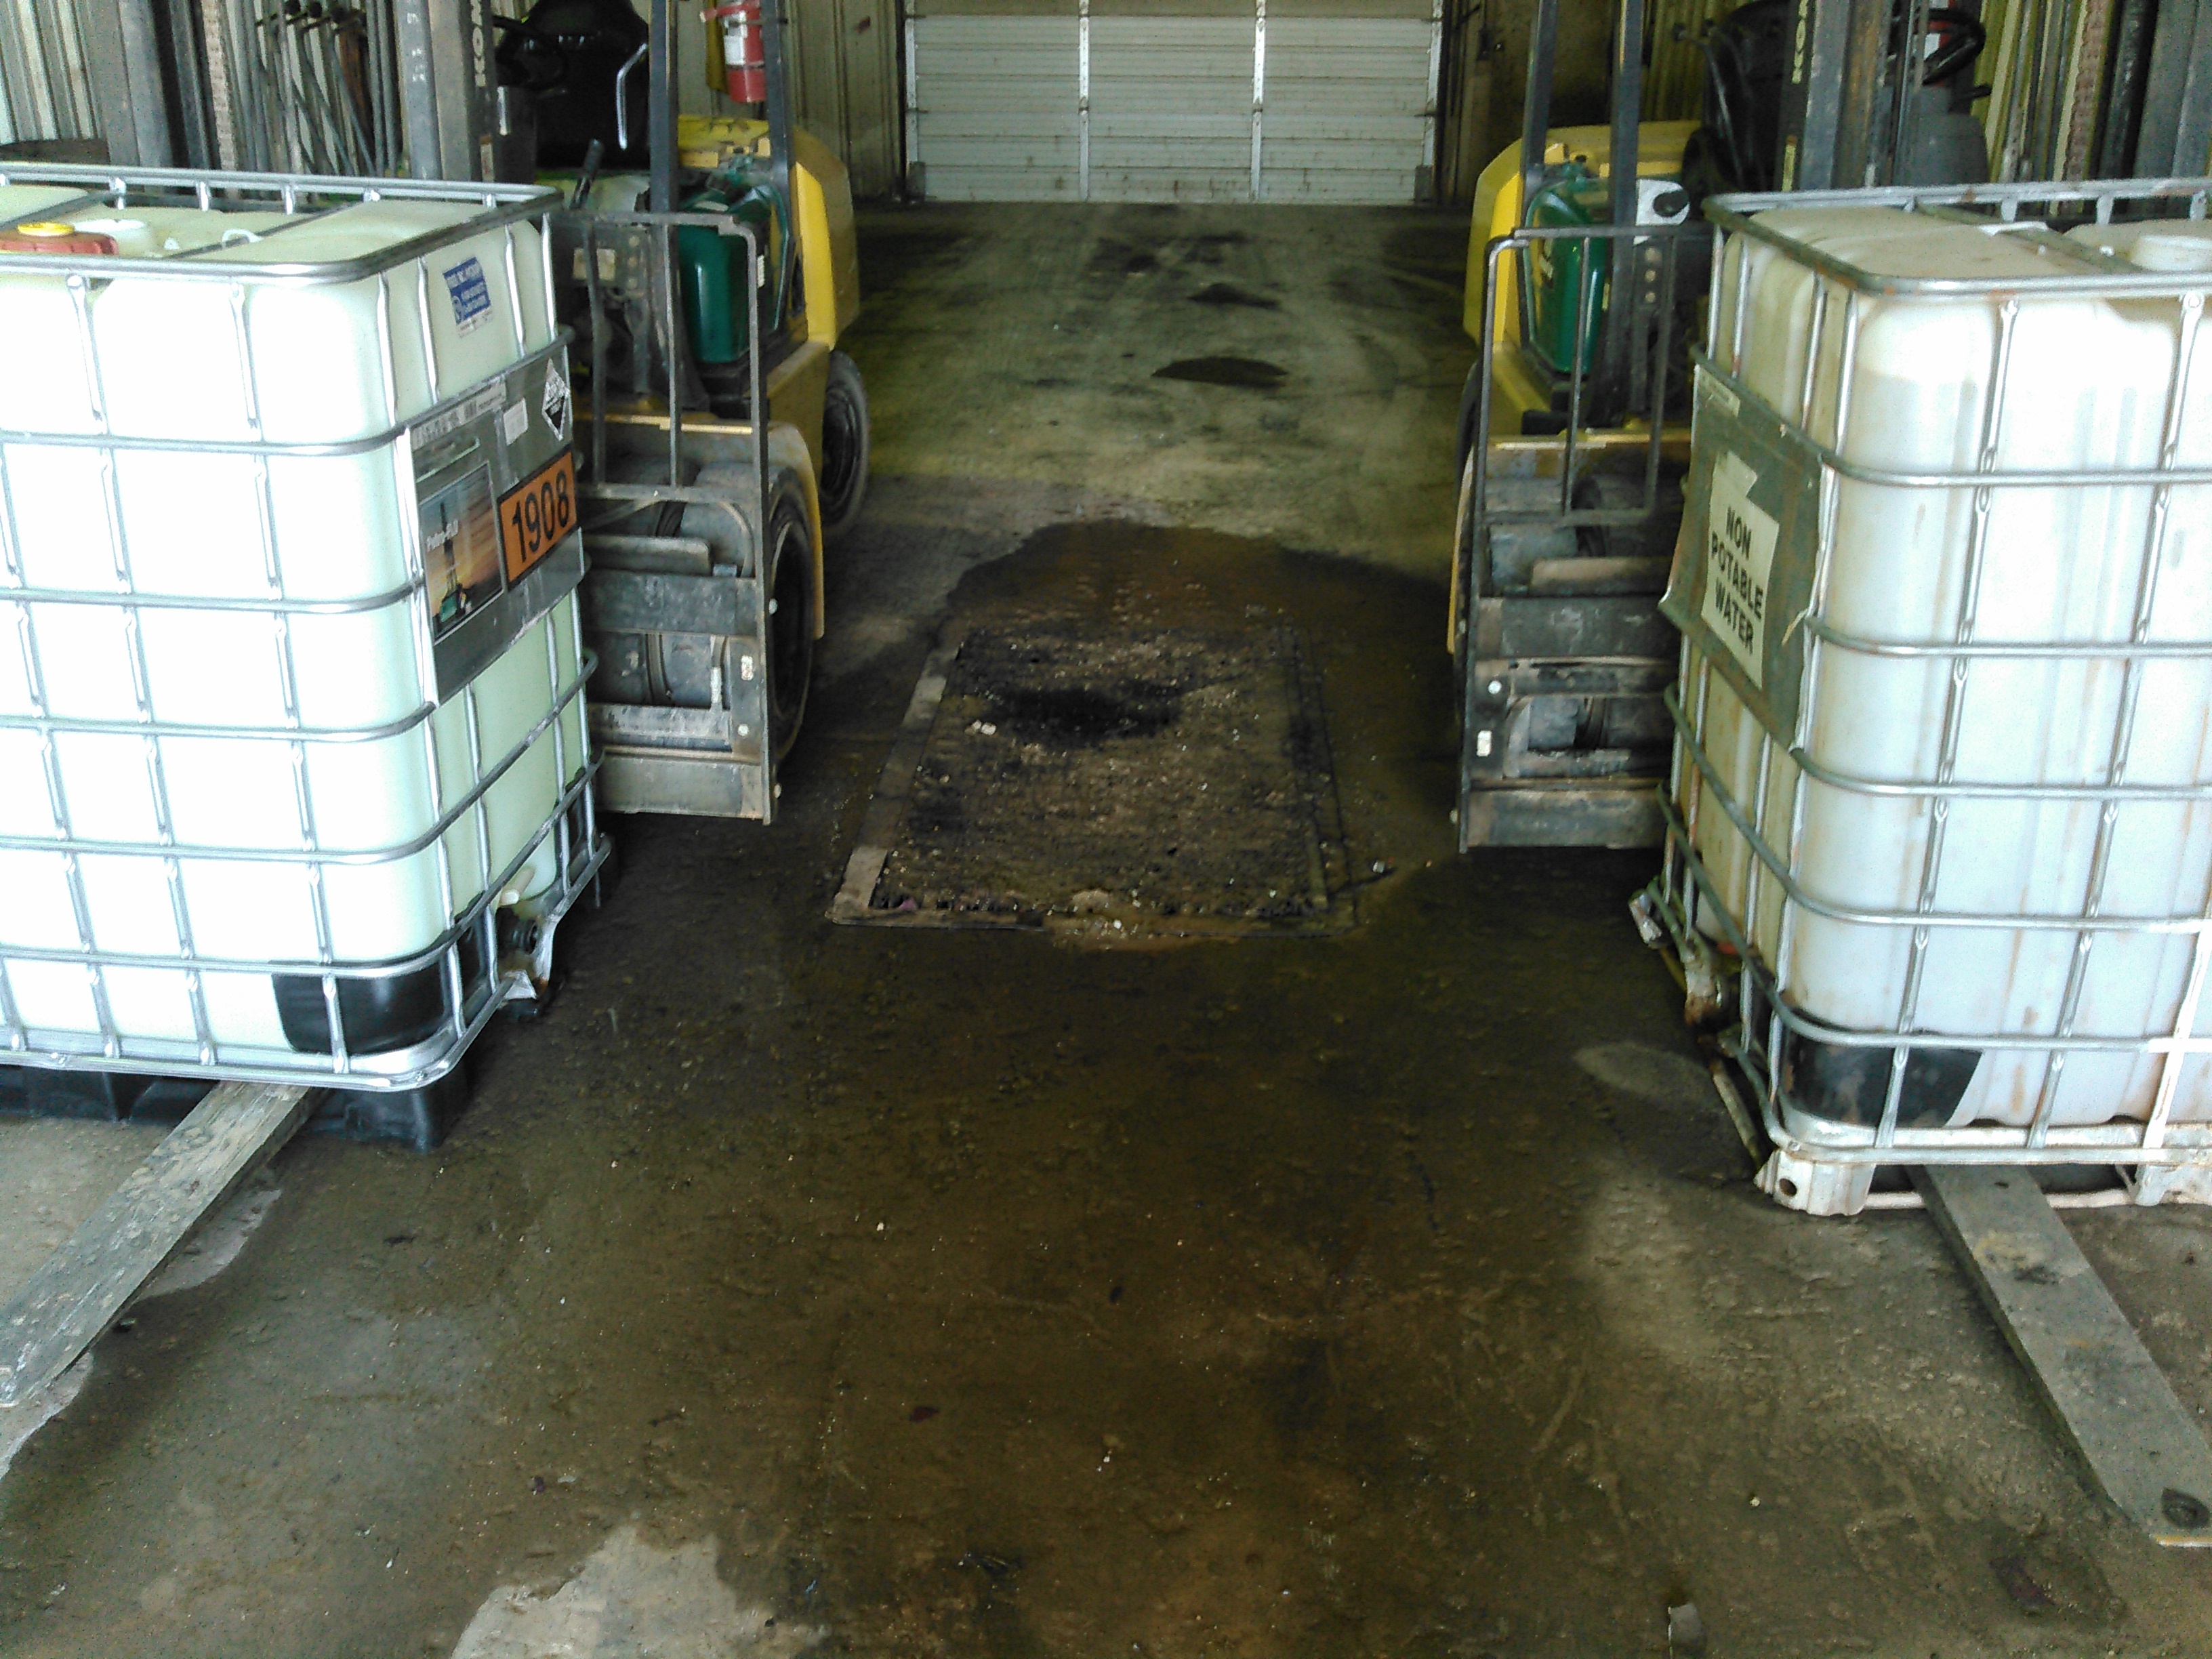
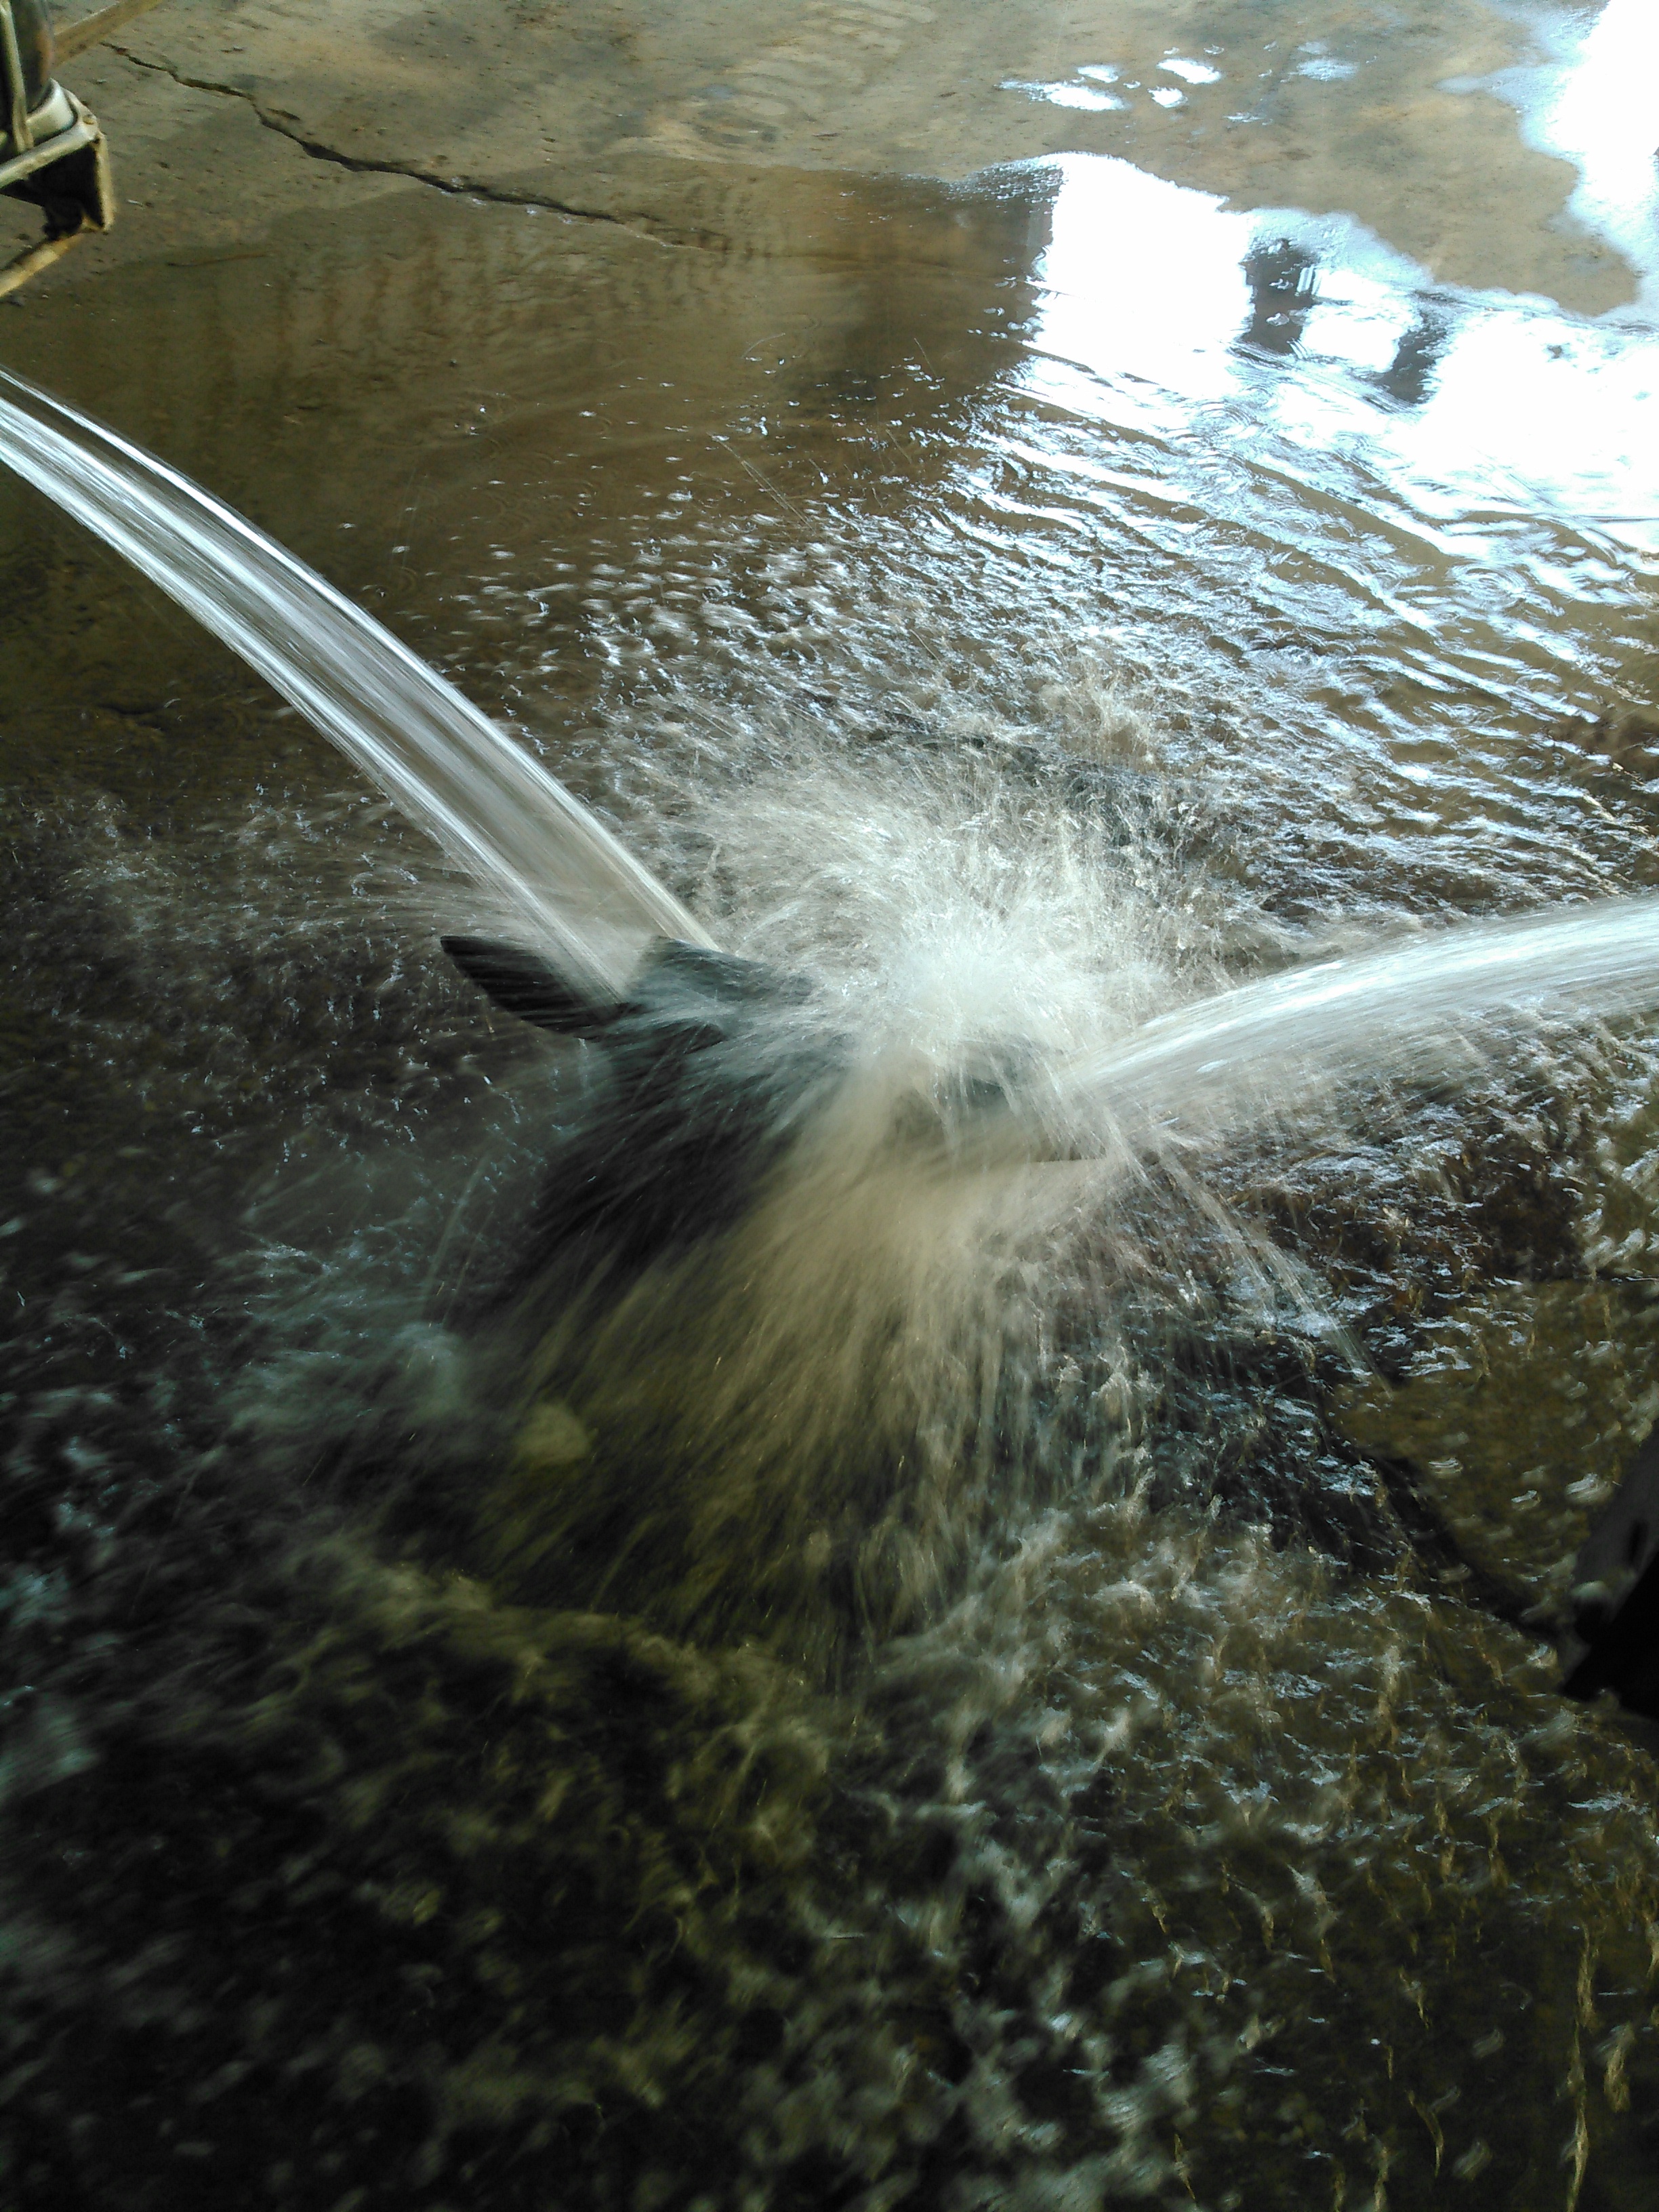
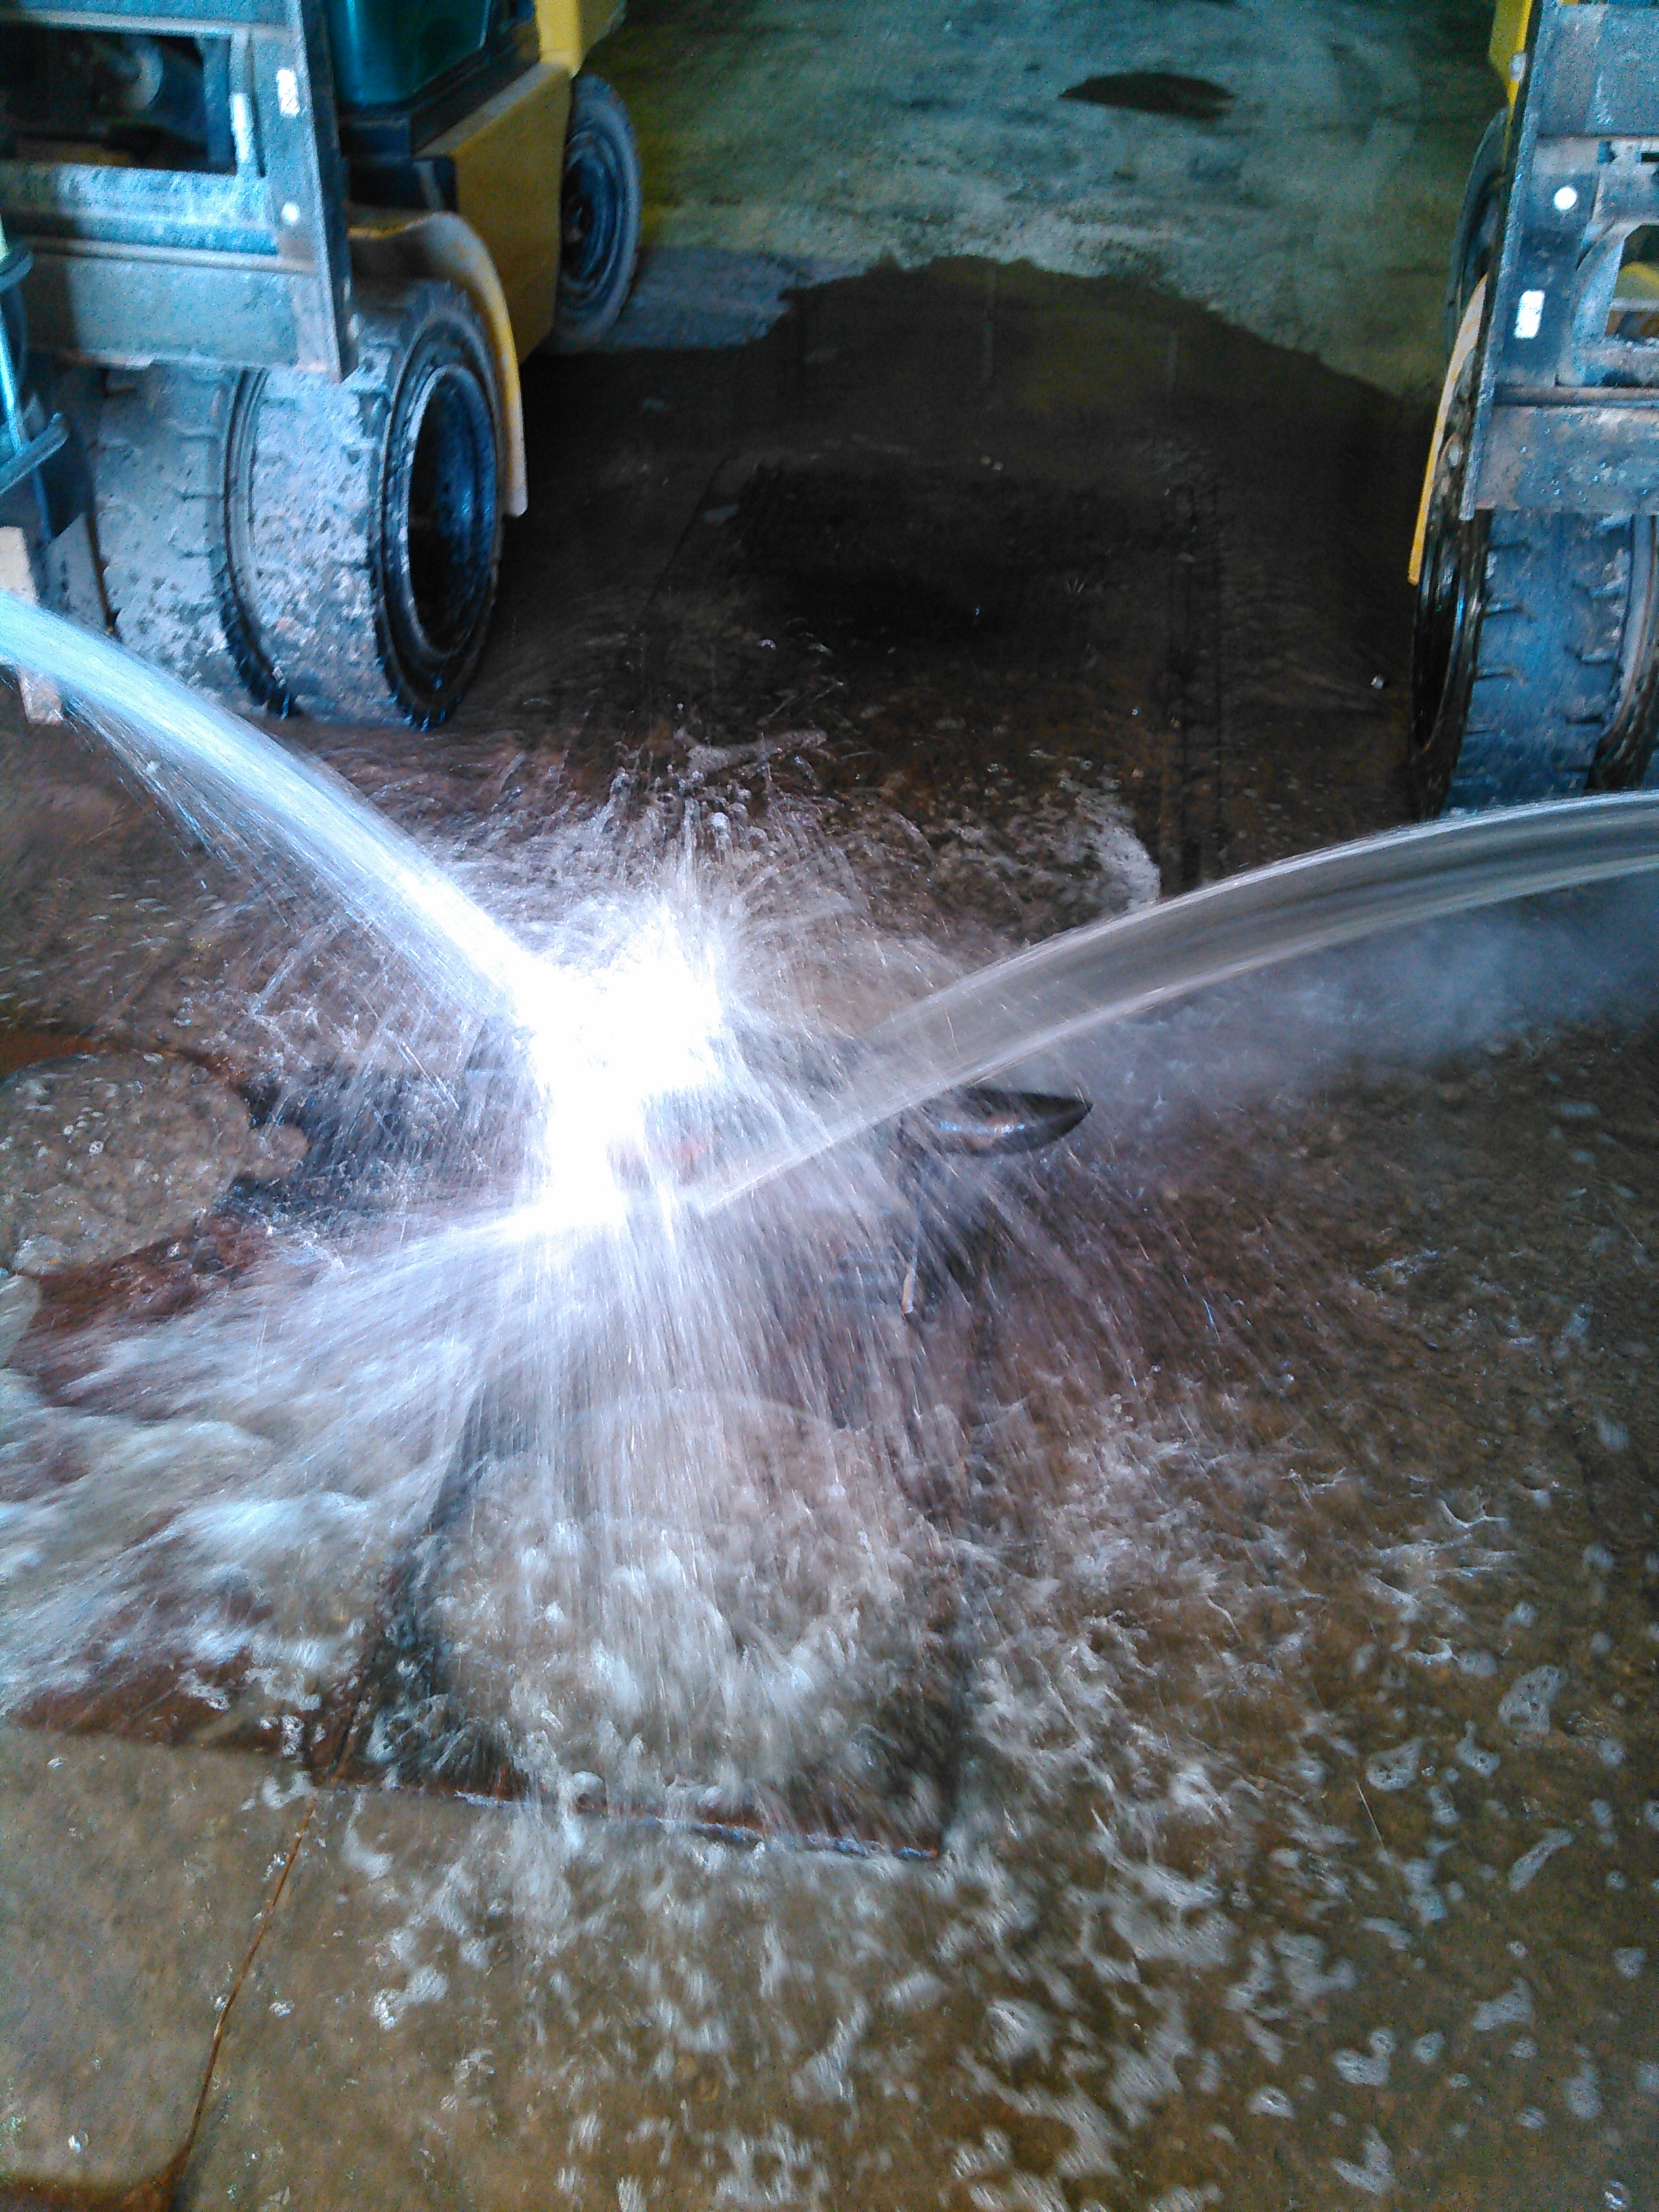
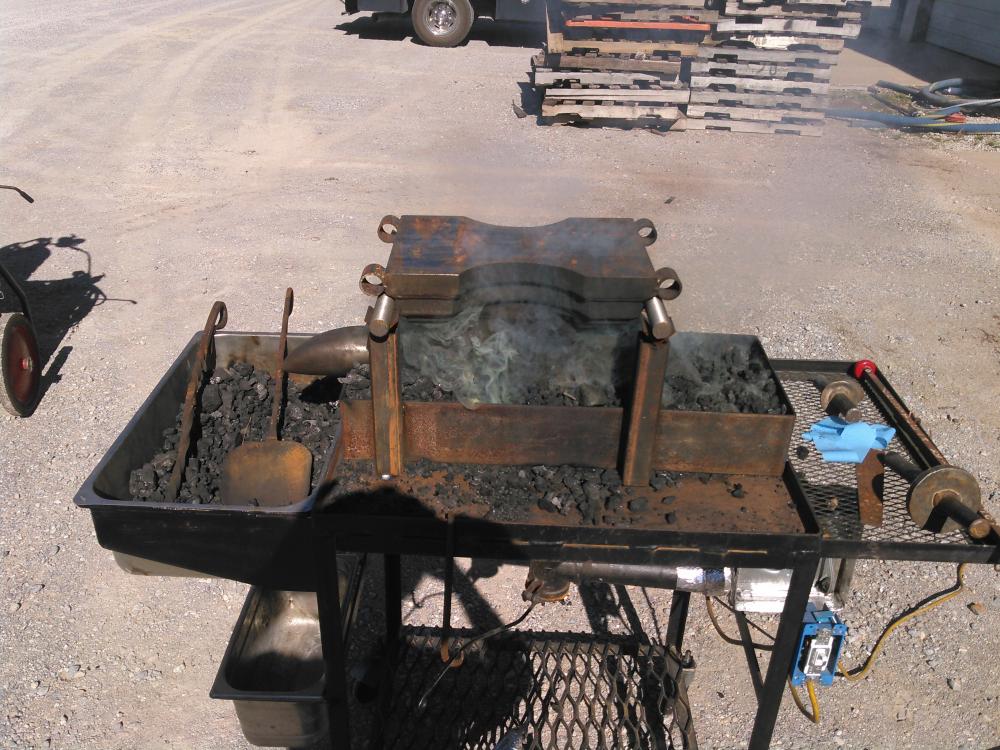
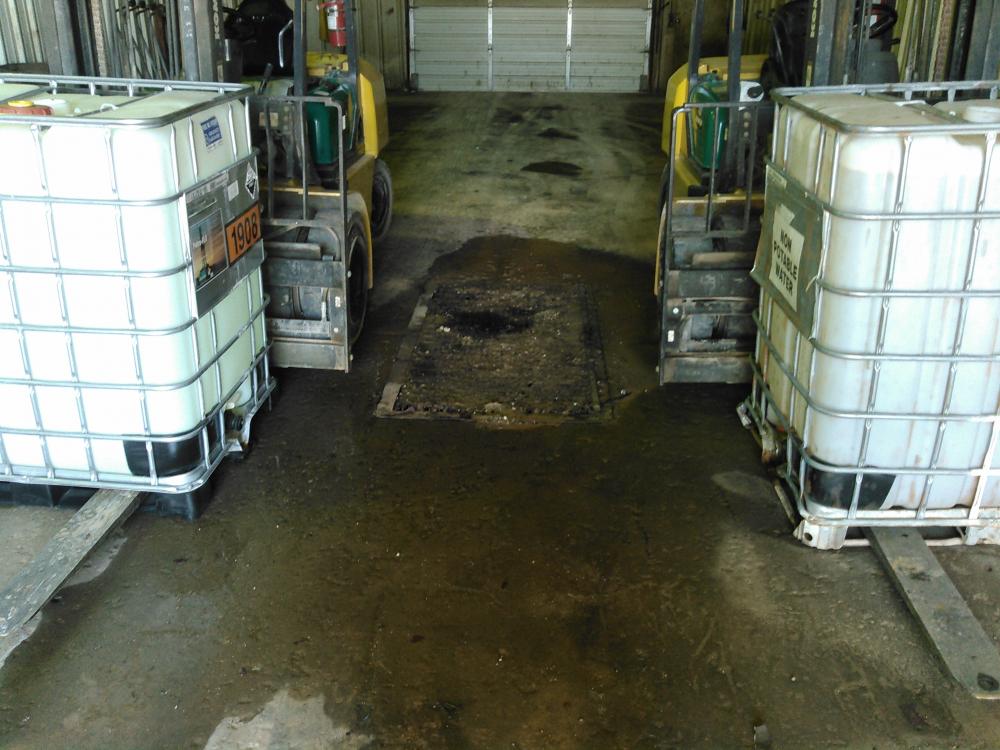
I've already talked to the fire chief and he agreed to come spray it for me. I was just wondering if the pressure washer would work because I'm doing the heat treat at work in the wash bay. Just thought it would make things easier. Charles, I'm going to go ahead and try to get it done next week since we have nothing going at work. I just hope all goes well and nothing catastrophic happens to all the work I have in it so far. And we have machinery at work to move the thing
-
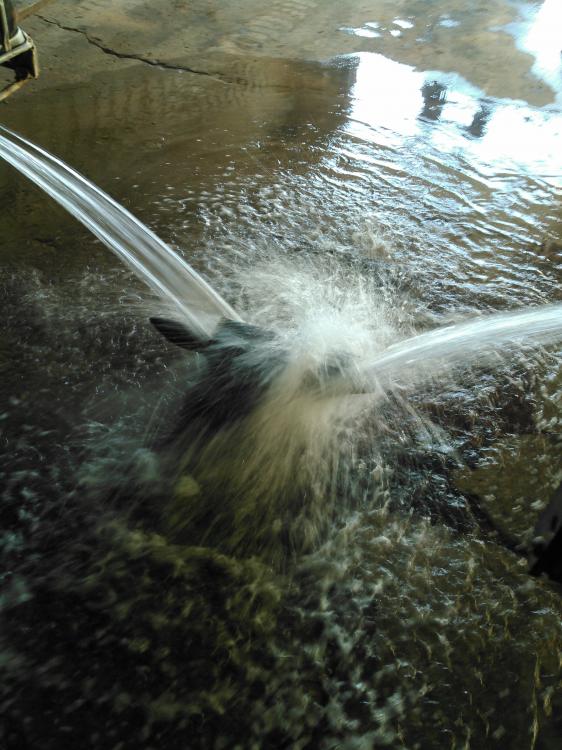
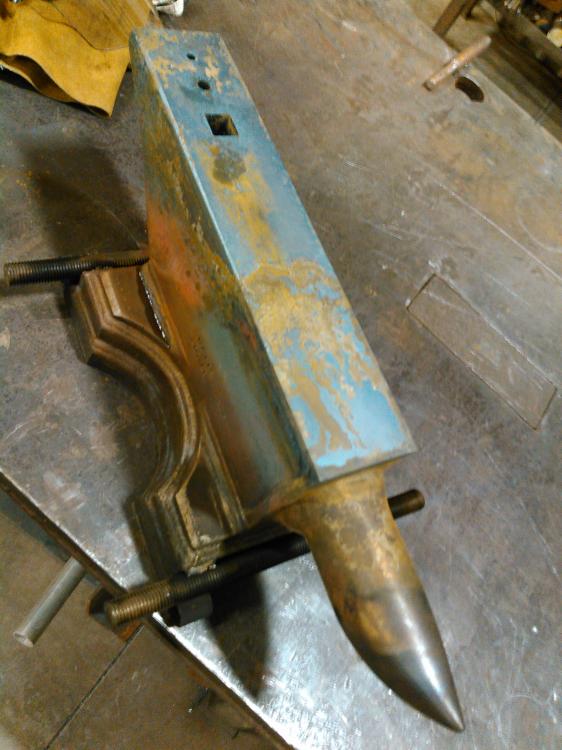
I'll check out that video, the anvil is 207lb so the pond probably wouldn't do it, there needs to be enough pressure to break the steam pocket.
-
I am finally going to get my anvil done, I convinced the manager at work to let me do it there when we are slow. I am wondering if anyone has ever used a pressure washer for the quench on an anvil. I have seen it mentioned before but only as theory. Do you guys think it will work or should I go another route.
-
Trophies of your skills as they escalate, and a reminder of your beginning.
-
Very cool piece ,awesome work
-
I need to make a new one with a larger plate, the small one is difficult to use after you've started the bevels.
-
I bought the springs for my 2x72 at ace hardware. If you decide to draw file, use a scribe to mark the center of the edge and the top of the bevel, file away then go to your jig for the cleanup before sanding. Calipers work very well to scribe lines with.
-
looking good
-
I looked in to the snap temper more. I had it backwards, the snap temper is meant to help prevent the blade from cracking while waiting to be tempered. Thomas I need to talk to some of the farmers around here and see if I can go scrounging in some scrap piles.
-
I have one piece of wrought from rebuilding my post vise, and was thinking about using that for the next attempt. Lesson learned, I just used the A36 cause it was under my table. Probably won't do that again.
-
From what I understand the snap temper is kinda like the dry ice quench, it helps force the hardening process to finish. Don't quote me on that I'm probably totally wrong .If someone else can explain it better that would be great.
-
I wasn't sure if rewelding it was an option, I'm not very skilled with it yet. Do you guys think the snap temper or the hydraulic fluid caused the crack?
-
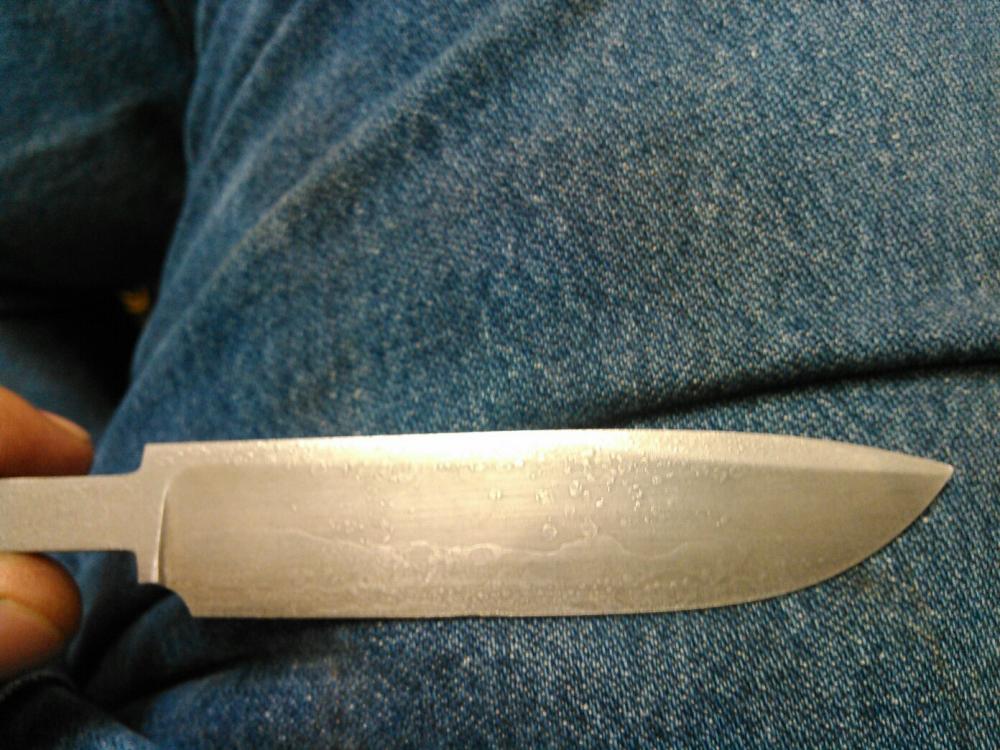
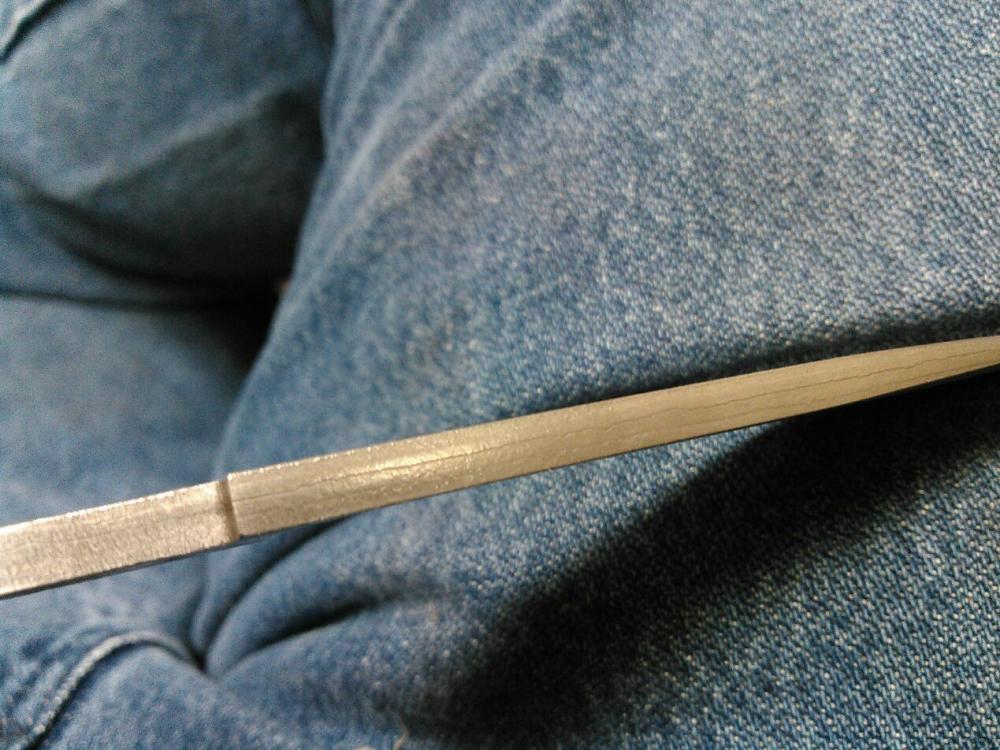
The pictures aren't very good but you can see the layers and the crack is right through the core. I thought about grinding the crack but it goes in to the tang so I wouldn't even try to save it. the quench was in hydraulic oil then put in a rod over for the snap temper, I hadn't made it to the actual temper yet when I found the crack. The plan was to do two temper cycles at 375 for an hour each when I got home but I didn't make it that far. I wish I could save the blade but I cant think of a way to do so without leaving a detrimental flaw. I'll try again and have a nice pattern to work with.
-
The plan was to use 4140 for the hilt, copper spacer, black buffalo horn, copper and black ash burl then copper, bone, copper, hilt. I'll try it again just because I was really liking the blade and the idea for the handle.
-
That was just what I had at the time, but I'll probably try this again with 1018 or maybe 50k.
-
This blade was so I thought my first successfully forge welded blade. Three pieces, A36 with a 1095 core. Everything was going great and turning out how I wanted, then I quenched, snap tempered and bead blasted.(very fine media) There is now a crack down the center of the core, not the weld. I am unsure what caused this, maybe different contraction rates during the quench or maybe drawn too cold. Has anyone ran in to this and figured out what happened? This is extremely frustrating and disappointing to say the least in a polite manor. At the very least I now have a nice pattern to use in the future.
-
I have every intention of buying Steve's book. I never really got the feel that Steve would have issues sharing knowledge as he is always helpful. If I upset or irritated Steve than I apologize it was never my intension but I think if I had he would have no problem telling me so. I understand your point and will be more careful of what I mention.
-
I've even used black spray paint, then sanded clean and it shows all of the grain.
-
Cliff, the first I read of a coffin joint was in Steve's book. I borrowed it so I can't look back to be sure but from what I understood its about the same thing but usually used for larger blades. Steve can you clarify this please. Are these all your blades Cliff? they are all very nicely done.
-
Cliff what exactly is the point in a frame or coffin joint. Is it just for esthetics or it there another purpose.
-
I've seen both, its modled after a commercial one she already had. With changes of course.