anvil
-
Posts
3,246 -
Joined
-
Last visited
Content Type
Profiles
Forums
Articles
Gallery
Downloads
Events
Everything posted by anvil
-

Issue with marks in the blade
anvil replied to Yann Kastell's topic in Knife making Class General Class Discussion
Come to think of it, it might have been potatoes, not tomatoes. Details lost in the halls of time. ;) -
They were pretty commom in small ranchs and farms back in the day.
-
Issue with marks in the blade
anvil replied to Yann Kastell's topic in Knife making Class General Class Discussion
I made a damascus blade once and cut tomatoes with it and "lost" my pattern to tomato patina,,, -
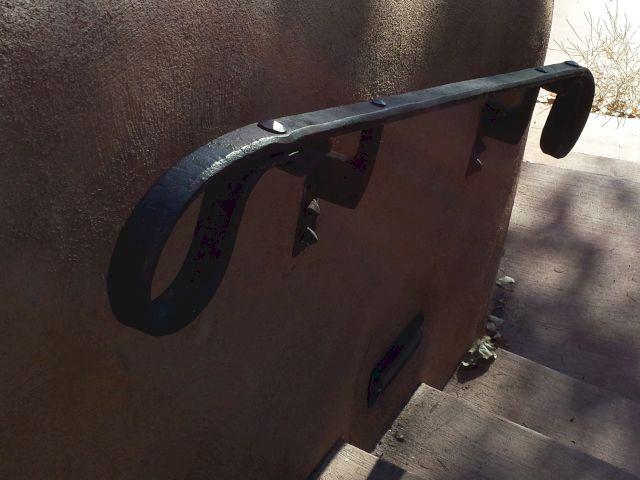
Heres a pic of the nuts from the die above. I didn't do the install, but it is similar to your question, just in the vertical. They used epoxy to secure the studs in the wall. I did this back in the late '80's and there were about 200' of hand rail. The railings are out of 1-1/2" square stock forged on the diamond.
-
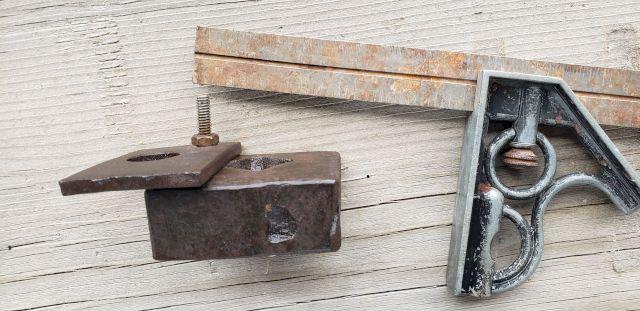
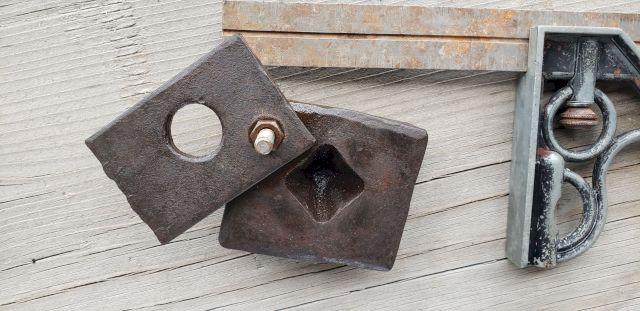
I've always used Red Head wedge anchors. They are great quality. To be fancy, I normally make a hand forged washer, cut the excess threaded stud off, and make a decorative nut. I've even made special wrenches to work with the decorative nuts when needed. Edit Heres the tools I use to make cap,crown,acorn nuts. The nut is forged to rough shape on the end of a 1" square bar. Then brought to a good yellow heat and upset in the tool to get its final shape and to make them all the same. After it cools, Cut it off to fit the die. Replace the lid and tighten it down. Now you can easily find the center of the nut. Center punch, leave the lid on and drill and tap. With the lid screwed on, the nut will stay put when clamped in your drill vice. I make the tool in reverse. Forge your cap nut on the end of the bar out of mild steel. Then heat the block to a good yellow and hammer the nut into it. Take as many heats as needed and keep the end cool and the block hot. When done, make the lid and drill both pieces for the screw. done. Everything is mild steel and no heat treat needed.

-
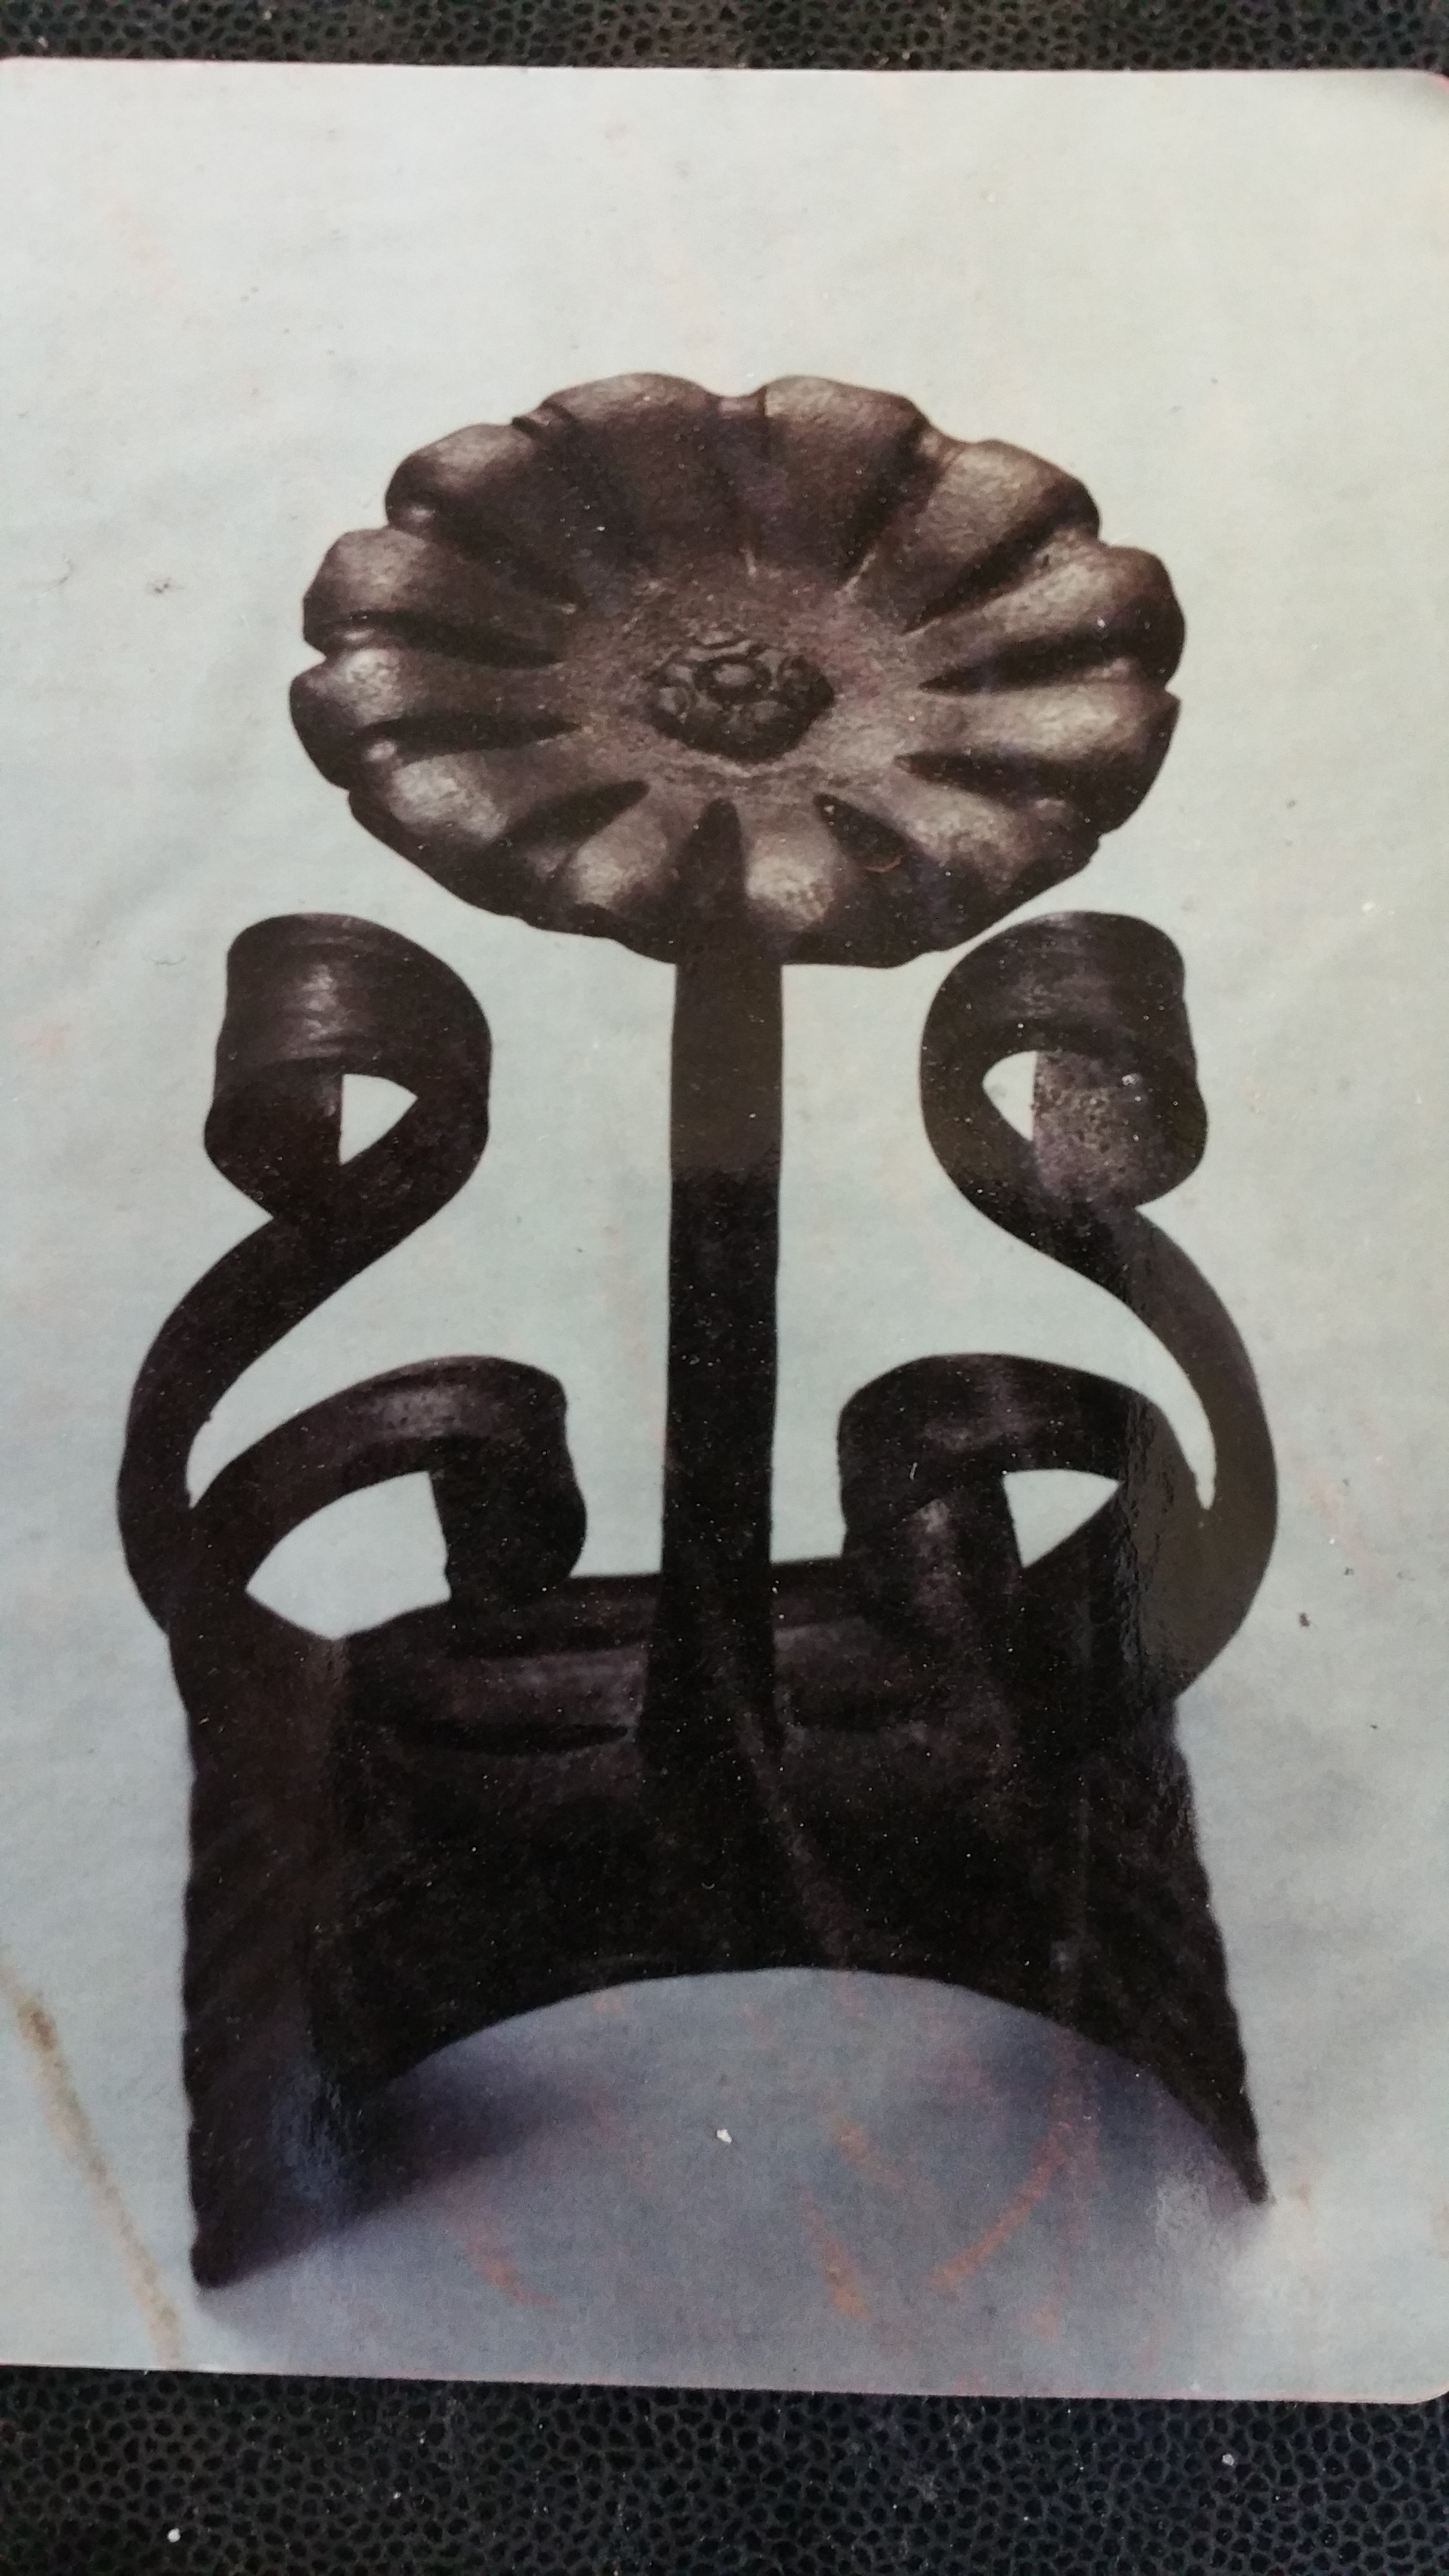
I'd keep one of the forge welded eyes as a fine example of blacksmith work from the long ago and hang it on the wall.
-
I just saw your post. Ill do a setup and pics tomorrow.
-
Beautiful,, and clinch nails to seal the deal!
-
Heat Treating in a propane forge.
anvil replied to emtor's topic in Heat Treating Knives, Blades etc
Altho its not dealing with a propane forge, I solve your problem in a coal forge with a wet cotton ball or piece of wet sponge to control the heat flow. -
Is that your railing?
-
Very Nice!! Is that tilework? A crab for a crab,,, Prolly work foe me as well.
-
Nice. Heres a set of leaf tools that I really like. I make them in a set of 3, a left, right, and a straight. And I make these sets in in different lengths. i call it a teardrop tool and make them out of coil spring. Notice on leaf tool 1 the ding marks on the inside of the tool on the right but not on the left one. . Lol, thats where I learned what a rounding hammer is used for. a rounding hammer is is used to round and make clean concave surfaces more or less like its mate.. Also the raised detail on the candle holder scrolls is made with a similar tool to the straight teardrop tool. They are easily made and very versatile You hit it on the head, your stress cracks came from over working the steel and at too low of a temp. No matter the steel, "Get it Hot"! Or more colorfully stated. "When its yellow, its mellow and when its red its dead!" Mild steel and especially wrought can easily be worked at a light welding heat, sweating, not sparking. A red heat is a finishing heat, not a forging heat. Best used for cleaning up missed blows and developing a nice matte texture. I always stress pushing your heats to the max and learning this basic early on. Being cautious so as not to burn your work is self defeating. Forging at a red is prolly one of the most common mistakes and its hard to break bad habits. I have another tool I like for leafwork and will post it tomorrow. Its for doing curved lines and will bevel the outer radius and leave the inner radius more vertical.

-
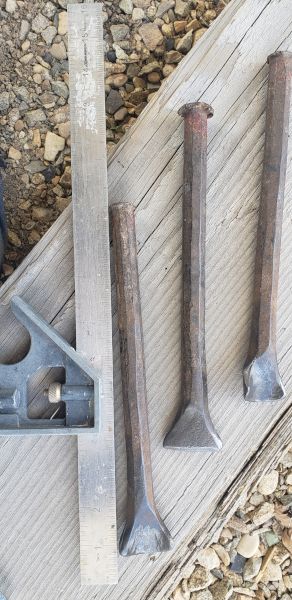
nice vice. Also, smaller vices don't hold as well as larger ones. That very well could have been your problem. You said you were making tenons and came up with the vice problem. Heres a pic of mt tenoning tool. I use it under my 25# lil giant, but you can hand hold it and use a stand and a weight to hold your pickets level and secure on your anvil face to free up your hammer hand. Theres multiple holes, not only for different size tenons, but when you make them, start at the largest and use each to step down your tenon. On the longest tool, the holes are 5/8" to 5/16" in 1/16" increments. So a 3/8" tenon out of 5/8" starts at the top and is forged down a 1/16" at a time. If you need pics of the setup with a stand and a weight, let me know.

-
Very nice!
-
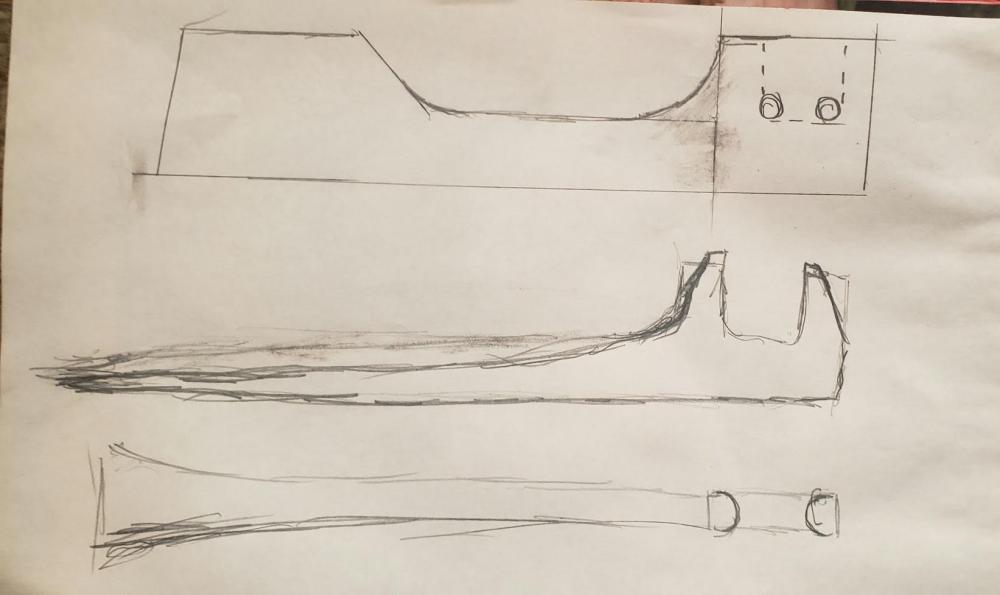
Heres a rough sketch of how I do my grader blade bending forks. Its based on Francis Whitaker's method. The top pic is cut out with a torch and I use a grinder to remove the burnt edges. . I don't remember if he cuts the actual forks with a torch or not(dotted lines). I have torched them, hot cut them, and hand hack sawed them. I prefer the latter. When hacked, the round holes are drilled to give a slight radius in the bottom corners. Here less is better, but a little is critical to prevent stress cracks. However, weigh this with the need to keep your stock parallel to the forks to minimize twist that you will have to remove later on. The mass on the left is forged and I have used both a hand hammer and my 25# lil giant. The rounded areas are to prevent stress risers and are forged to that shape with my rounding hammers( lol, thus the name "rounding" hammer ) The middle and bottom pic show the finished forging. The forks are tapered at the top so that I can get into tight spaces. The opening between the forks depends on material you are bending. Make them just a little wider than your stock. The tighter the fit, the tighter the bend you can make. Handle length is basically the longer the better. You can choke up for lighter stuff and move outward for heavier stock. The bottom pic shows the inner shape of the forks. The pic is crude, so round as needed. Flatter than in the pic is better. These radius are filed. Make sure to remove edges to prevent dinging your work/ I normalize after forging and filing and the initial material is taken inbetween the square holes on the non beveled part of the grader blade. Have fun.
-
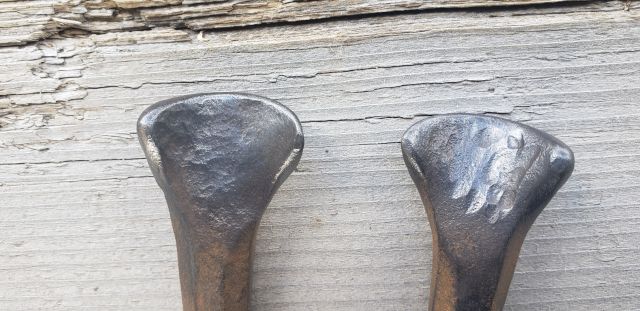
My experience as well. Cuts easily with a hack saw and files easily as well. I forge them with my 25# Lil giant.
-
heat treat newly forged hammer
anvil replied to Scott 78's topic in Heat Treating, general discussion
Frosty, thats actually a good critique on my tenoning tool. Thats the closest pic I could come up with to emphasize my point. I thought of one this morning. Even tho I don't have a pic, Francis made his daily driver. Sheesh, I have no idea how many hours over how many years he has in that hammer. All his hammer demo's were made like this hammer and all, including his daily driver were made from W1/1095. -
Looking good! It's always satisfying using your own tools and getting results. I have done a similar pattern for cap rail out of 1/2"x1", but used only a top tool. Lol, not to beat a dead dog, so to speak, but the amount of work after detailing between the two different techniques will blow you away. No matter what, the experience you are getting is well worth it. I've done it both with my 4# hammer and with my treadle. The treadle hammer works really well.
-
heat treat newly forged hammer
anvil replied to Scott 78's topic in Heat Treating, general discussion
with all due respect, Francis Whitaker's demo and advice work for me, and have with my hammers as well as my other tools for a few decades. Oil quench and draw to a purple creates a tough steel out of W1/1095 that won't chip. But hey, just passing on good advice from a rather good smith and my own experiences. And most importantly, I'm offering this advice that directly answers the question,,, how do I heat treat a hammer I have made from 1095 steel. If the question had been "whats a good steel for a hammer" I would have suggested using 1060 or O1. -
I've never been too particular about the shape/length of a hammer. For me its the weight and working faces that matter. Latticino's hammer fits my bill for a good hammer. For me a square faced hammer is more efficient than octagon because the most work done is drawing out and a straight line or edge does it all in one blow. If its octagon, you have to tune up the facets. Same goes for the cross peen. A flat face with slightly radius'd edges moves all material under the hammer in one blow to the same depth. With a radius, only the centerline of the cross peen is at final depth, and you have to do multiple blows to turn that round depression into a flat.
-
A lot of questions. Most important, follow your local building codes. A coal forge should not cause a fire hazard at the pass thru. If in doubt, follow your local codes. A straight run is best. If you can;t use 45* angles. A 12" flue is best for a coal forge. Single wall that you lock together is cheap and locking two 6" will give you an inexpensive 12" flue' The higher your chimney outlet is over the roof, the better the draw, no matter the flue diameter. 3' is, depending on code, the minimum ht above the roof top. So if you keep your 6" and have a draw problem, extend the height over the roof peak. Cool building!
-
heat treat newly forged hammer
anvil replied to Scott 78's topic in Heat Treating, general discussion
Speaking from experience both with Francis first hand and following his example in my own shop with W1/1095 tools, your concerns are not a problem. As an example, All of the tenoning tools in the pic are made from W1/1095 tool steel and have 30 some years of work, mostly under my 25# Lil giant. No chips, mushrooming or any other problems. Just a lot of years making a lot of tenons hassle free. They may not be hammers, but they sure have been hammered on. Lol, the steel for the big tool on the top was in fact a gift from Francis to make the tool.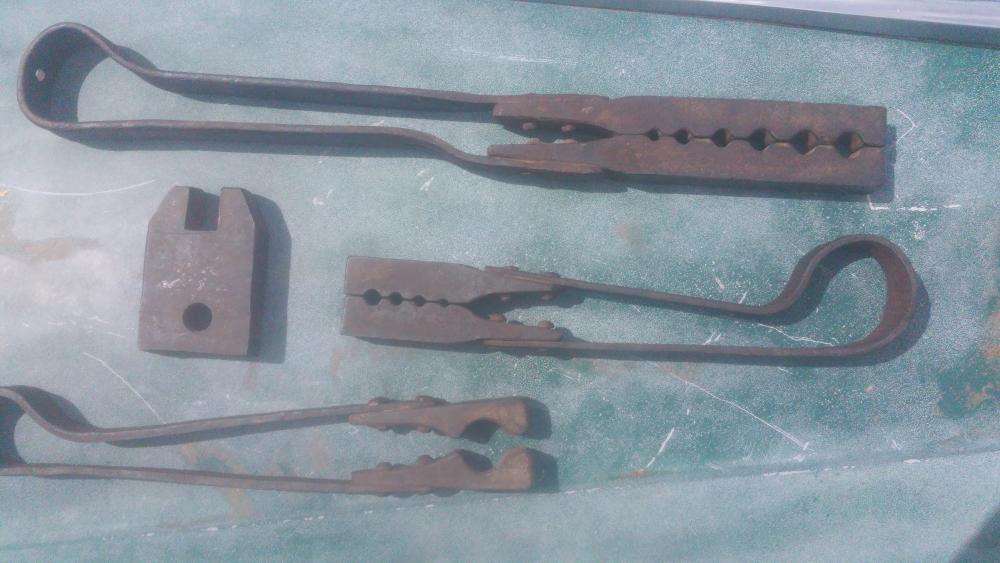
-
Heres some input on your collar "texturing" bottom die. It looks like your die is rounded. It should be flat, not high in the center. I learned that on an aspen leaf key chain veining hardy tool. Lol,,, seemed like a good idea at the time. However, I did use it at many crafts fair demos and learned how to use it. And I still have it, but I learned that my tool design was not good. The most important side of a collar structurally is the bottom or inside face. If its not flat, you will play "hades" getting it to do its job without loosening up. You have better control doing this with a top tool to detail your collars, not a bottom one. A top tool doesn't care what your collar width is, as long as the collar is wider than your tool, so its far easier to preserve the raised outside edges of the collar. And if they do go a bit wonky, its easy to turn the collar material on edge and true them up without messing up your collar detail. Personal aesthetics here,,, Thats a lot of detail in a collar. I usually detail my collars first and before they are cut to length. Use a handling length and thus, minimize the need for tongs. Then I cut them cold with a shear or hacksaw, then bevel the ends for the overlap. You lose the detail, but the bottom one doesn't matter and you can "set" your collar tight and restore the lost detail with your top tool. Hope this makes sense.
-
heat treat newly forged hammer
anvil replied to Scott 78's topic in Heat Treating, general discussion
I thought I'd add this about what Francis said above. Please realize this is my interpretation of what he said. The idea of "best steel" is really subjective and differs by situation. His "job" was selling architectural iron. I have no doubt that if his "job" was selling custom tools, he would have used the best designer steel available for each tool in his catalog. My personal "one liner" on this is if I'm making a spring for a spring fuller, an old buggy spring and my forge are all I need, and it will last me my lifetime, but if I'm making a spring for the landing gear on the space shuttle, my steel and forge fall far short. If your great joy as a smith is playing with the myriad of special use tool steels, then go for it. Thats my belief on whats the "best" steel. And, I have no doubt that Francis Whitaker would agree with that 100%. -
What did you do in the shop today?
anvil replied to Mark Ling's topic in Blacksmithing, General Discussion
Goods, Lovin your "S" hooks.