anvil
-
Posts
3,246 -
Joined
-
Last visited
Content Type
Profiles
Forums
Articles
Gallery
Downloads
Events
Everything posted by anvil
-

heat treat newly forged hammer
anvil replied to Scott 78's topic in Heat Treating, general discussion
For what its worth, Francis Whitaker made and demonstrated hammer making and always used W1 or 1095. He recognized the benefits of the "designer steel" era we live in and the fun of experimentation, but practiced the KISS principal and suggested we smiths use one or two basic steels for our work. His go-to steel was W1 or 1095. -
I don't think you could stretch it without having a HUGE amount of power. Prolly not economically viable in most home setups. That goes for heating it with a rosebud as well. You want to draw it out to a 2' length? That certainly fits the definition of a "long drawn out" experience. Do a quick and dirty calculation of the mass(weight per cu inch)o of the part you want to draw out, and then figure out a comparable thickness of material that is 2' long. Pretty slim pickins when done. You could always improve your hammer control and draw it out with no hammer marks. or use closed die forging to not have hammer marks. As for a melted look, thats tough as well. I believe you would have to heat it in an ox free environment or it will burn before it starts to melt. Dang, I hate being so negative,,, But, most important ---- have fun!
-
Awesome, it appears you have answered your own question. Good luck, you may need it.
-
heat treat newly forged hammer
anvil replied to Scott 78's topic in Heat Treating, general discussion
1095 is pretty hard for a hammer, but it can be quenched in oil as well as water, depending on use. If you oil quench 1095 it will tend to be a tough steel instead of a "hard" steel. which is doable for a hammer. So oil quench, not water. Draw your temper into the blue range, if I remember correctly. Definitely not to a straw. Danged memory,,, draw to a purple to enhance toughness. I agree with all the above, but hey, you already made the tool and using an oil quench will work. -
Take the screw out and do all the above whilst pivoting the jaw. Leave the nut on a few threads and tap the nut lightly with a hammer to loosen the bolt or use a lead or brass hammer so as to not mess up the threads. Use a punch and after heating the hole to a black heat drive it out. If this doesn't work,,, get a bigger hammer and be prepared to dress or remake the bolt, which shouldn't be a problem for a blacksmith if you have the proper threading dies.
-
Personally, I would grind off the broken stuff and bring it down to the original. Then make sure the original is smooth so as not to put ding marks in your hot or cold iron. A post vice really doesn't need hardened jaws. I us 1/4" jaw protectors on my post vice for this reason.
-
What did you do in the shop today?
anvil replied to Mark Ling's topic in Blacksmithing, General Discussion
Nice job on the tool and a great vid! Making them is worth it just for learning the process. I can see some pretty cool uses for a set of them. I've been looking, but I must not have, a pic of my scrolling wrench. It's Pretty simple. Basically its a set of them made from one piece with two open slots for twisting. When the snow melts, I'll get a pic. I've still got 2' of snow on the ground between me and the shop. My first twister was a pipe wrench with a handle welded on and the teeth filed off the jaws. I found when using them that the jaw opening tended to change during use and that became a pain in the,,, forge. -
Lol, what George said.
-
What did you do in the shop today?
anvil replied to Mark Ling's topic in Blacksmithing, General Discussion
JHCC, Nice twisters. The problem with those is that it is really hard to not edge bend your stock with a one handed twister. I prefer, for that reason, a two handed type that fits two different sizes of stock. -
After the first blow on a new anvil, about a 100 years later its still "state of the art". From the first moment you turn on your brand new "state of the art" 'puter, its already obsolete. Still fun to play with, tho. Welcome back.
-
Trying to get back into smithing
anvil replied to Jason L's topic in Blacksmithing, General Discussion
Great wrought iron score. Thats about the only thing I add to my scrap pile anymore. Good stuff and its actually very forgiving. -
I would turn them hot over the horn or over the edge of your anvil. If you have a lot to do, I can almost guarantee you that when done, they will all match and be far quicker to do than with any jig. Great opportunity to begin mastering a basic skill. I suggest this because you are already on a really good forging roll. As for sequence of steps to best match your two sides I would : 1:Cut to length 2:lightly centerpunch the center 3: champfer edges and forge tapers. Check for twist and that all lengths on both sides of the center punch are the same. 4: Turn scrolls on one side of the center punch and match to a sample piece or chalk drawing on your table, preferably to your test piece. check for twist 5:Turn scrolls on the other branch, match to sample and check for twist. 6: make the center bend with proper sized scrolling wrench and bending forks. Done Have fun.
-
I prefer a wood stump. If its a permanent location, bury the stump about 2' into the ground. Trace the base on the top of the stump and inset it into the stump. inset it deep enough so you can put a couple of inches of fine sand in the recess. This makes it easy to level your anvil and deadens the sound. If the fit is tight, you won't need anything to hold your anvil secure.
-
inspirational, Thanks.
-
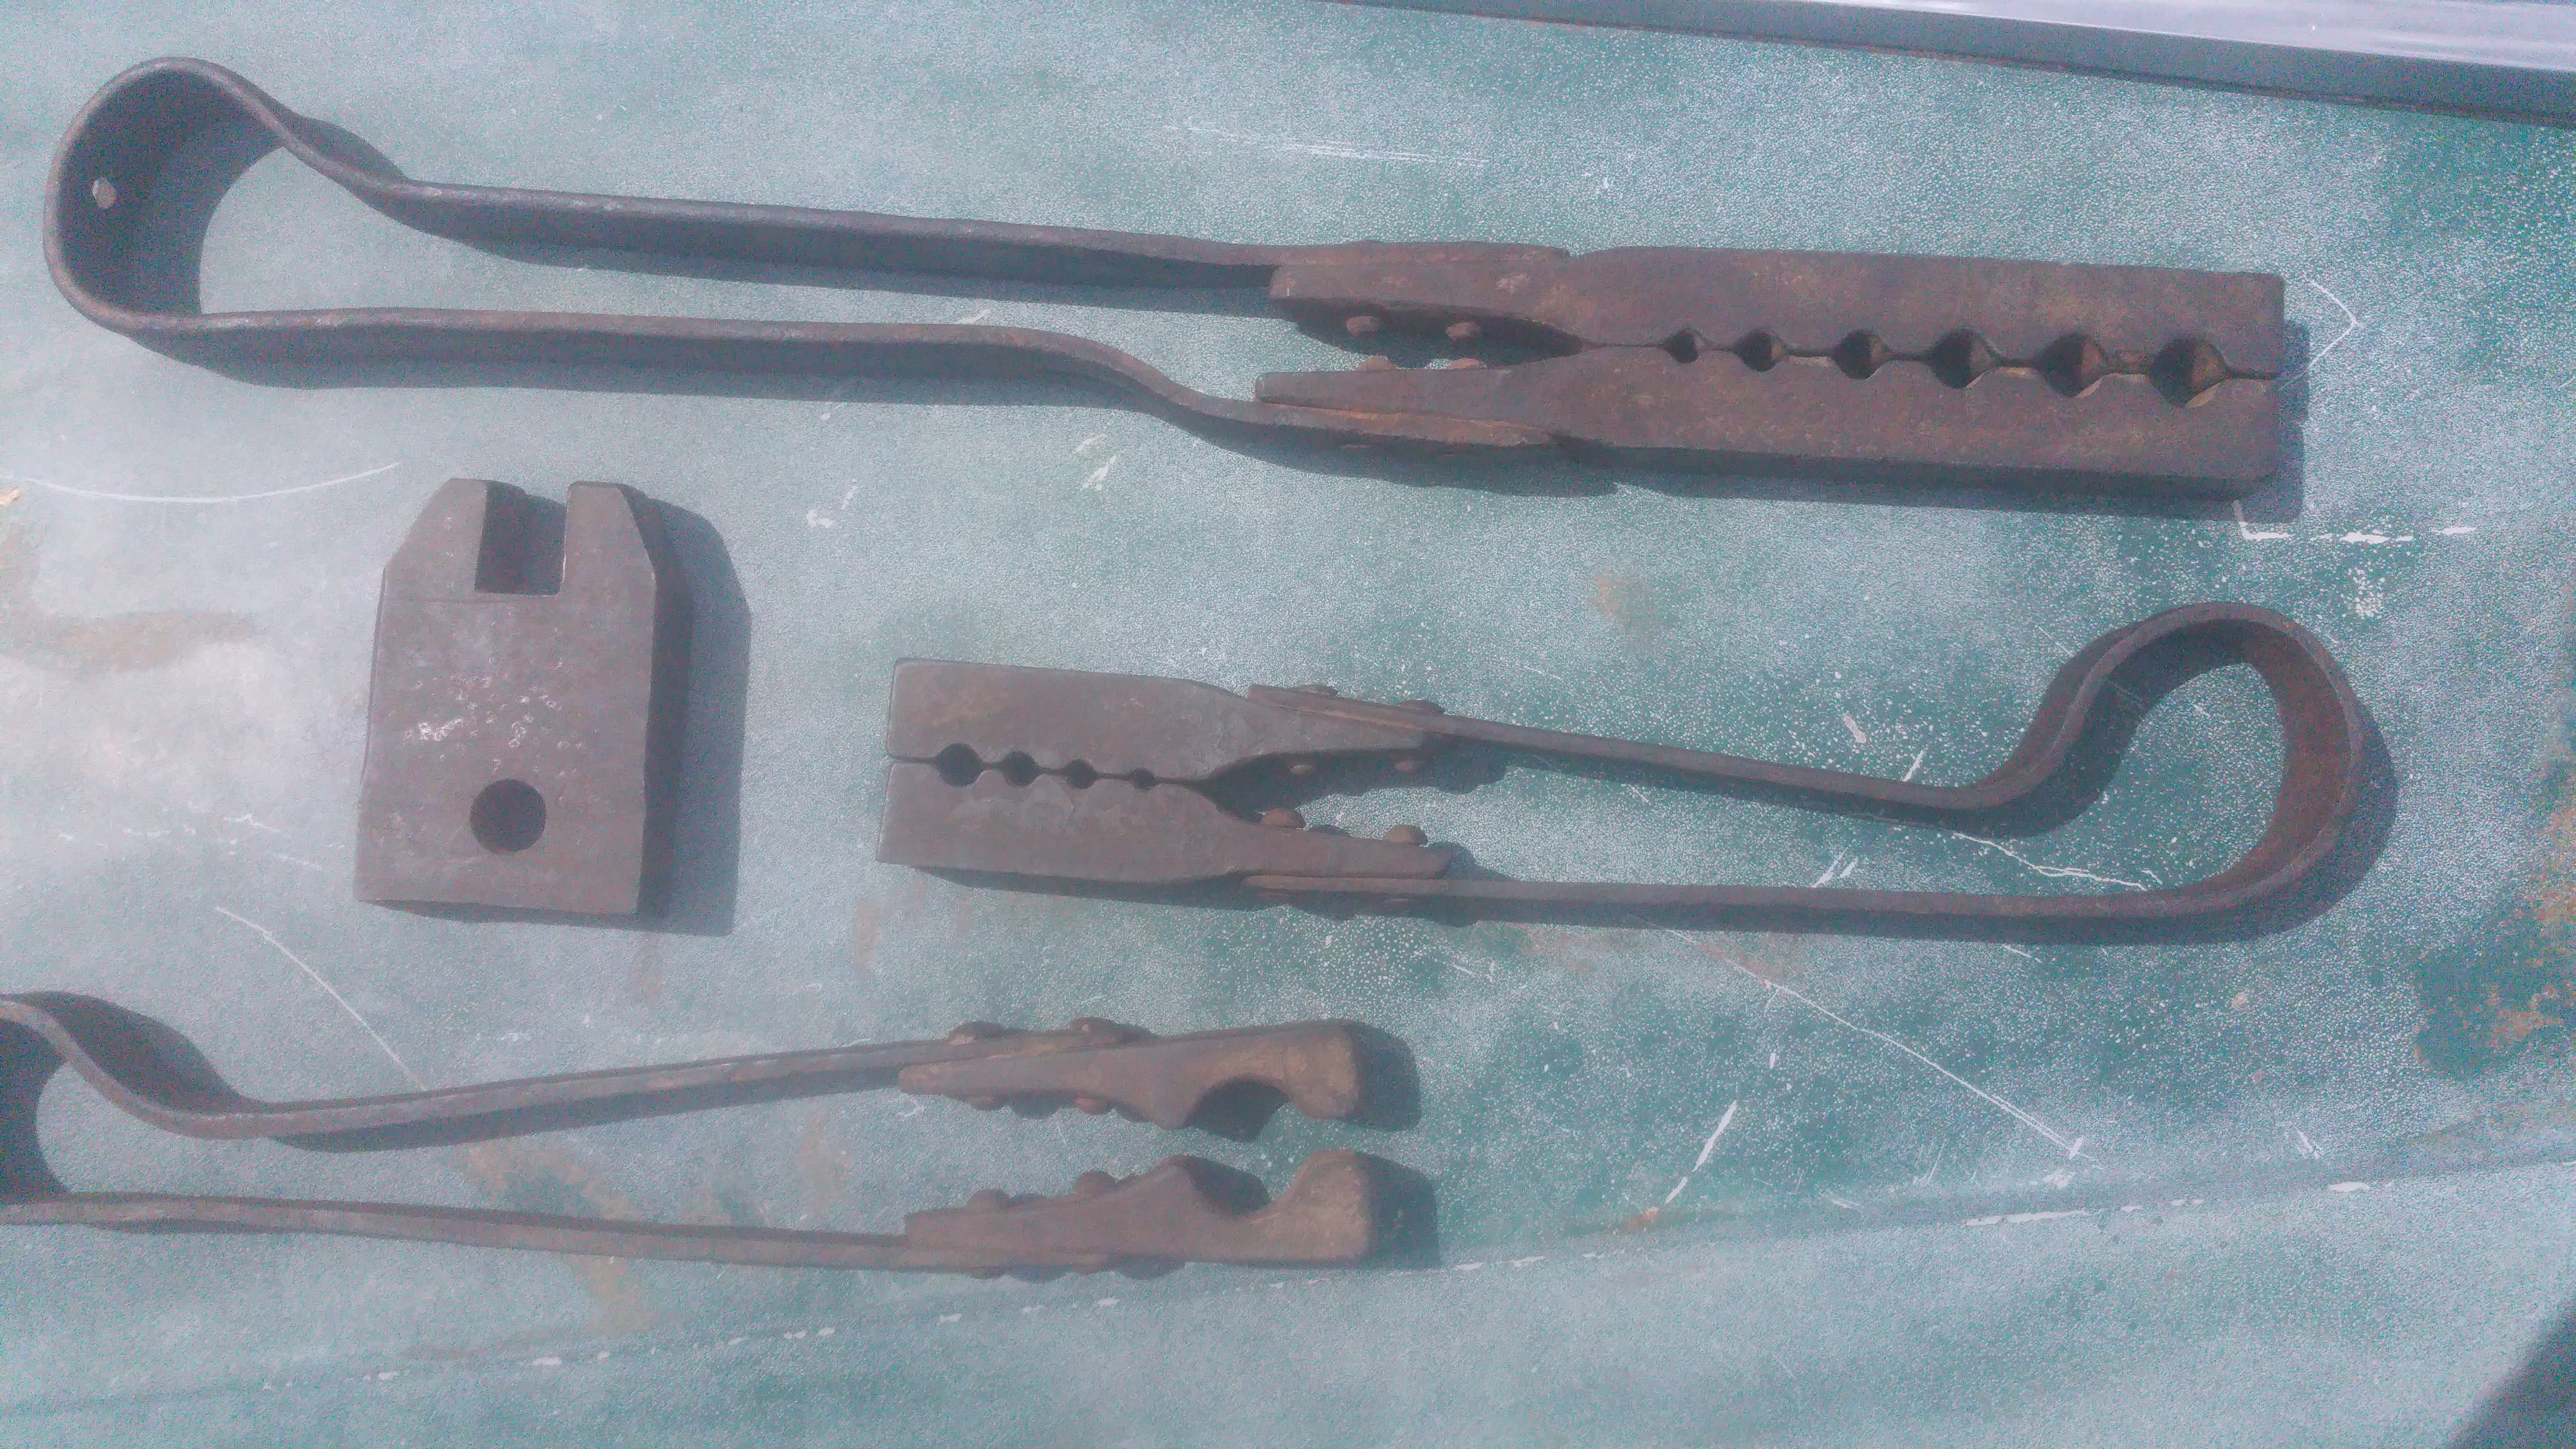
I have no clue as to the brand on the grader blade, but there are many types. For what its worth, the suggestion for using grader blade for scrolling wrenches and forks came from Francis Whitaker. Once normalized, which is all the heat treat I do, I've never had any problem cutting it with a hand hacksaw, filing or forging it. The springs above are old buggy springs and the top and bottom tenon dies are W1 tool steel. The first one I made was a match for the top one and I rivited on a square shaft that fit my hardy hole. It didn't hold up and the tool steel broke. Most likely a combination of the sway in my anvil, which I fixed and it was my first large piece of tool steel and I prolly blew the heat treat. Learnings never free. I water quench all my W1. Once you get the hang of it, you can beat it all day with no problem. The tool above is about 30 years old.
-
Trying to get back into smithing
anvil replied to Jason L's topic in Blacksmithing, General Discussion
I agree with M3F. I would pick up some 1/4" hr square and make some "S" hooks. There is always a need for them. Then perhaps some 1/2" hr square and do some wall hangers or simple brackets. Good luck and keep it up! -
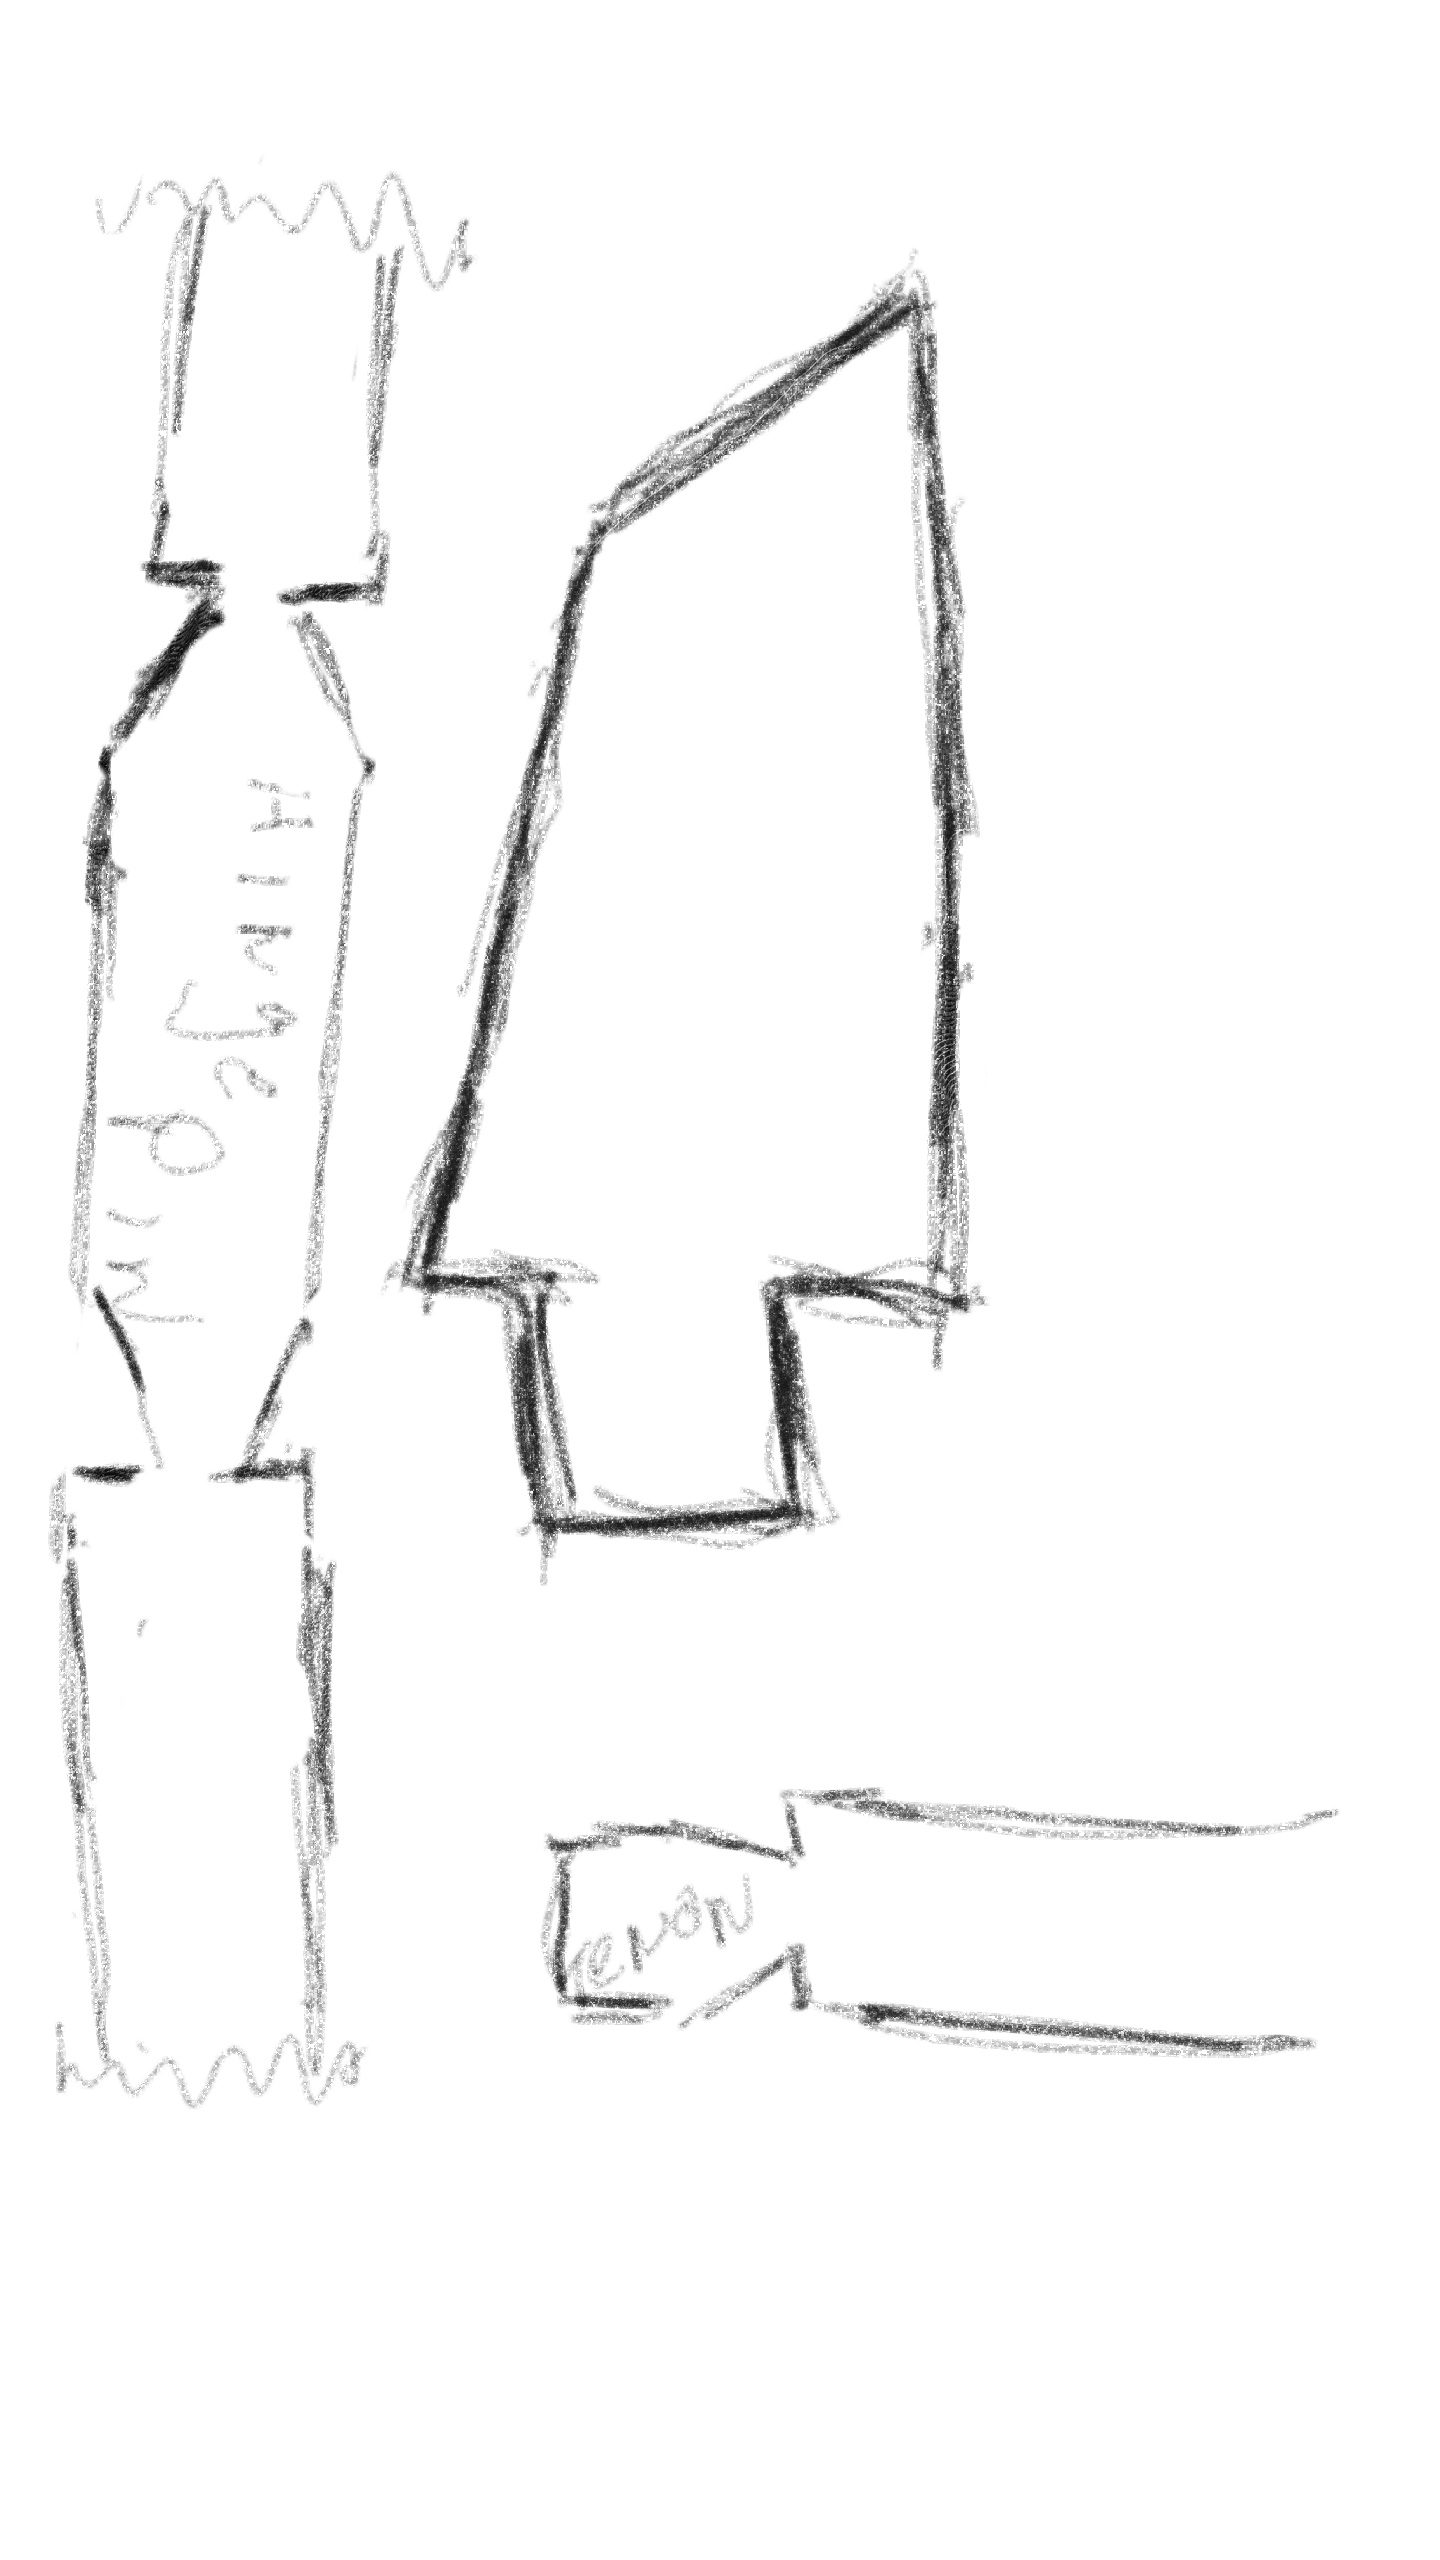
Actually I remember a very early hot chisel I made that looked very similar in my very first forge setup with Beelers book in hand. . So early I was just beginning my farrier business. Looked about as crude as well. And I used it to make my first tenons. Thats why I suggested it may be what it was used for. Who knows, really. These are my tenon tools plus a monkey tool and my 25# lil giant. Pretty crude drawing of my hot cut, but hey, works for me. No need for a kiss block. By the way, the bending fork is out of brand new store bought grader blade,,, work in progress.


-
Heres an IFI thread on grader blade that might be useful. I use grader blade for all my scrolling wrenches and bending forks.
-
Lol, won't be the first time. Where did I lose you? Was it separating the mass or the vertical cut? When you make a tenon, you separate the mass of the tenon from the parent stock. the vertical cut is on the parent side and the angled cut is on the tenon side. Hope that helps. A little crude on my words, but so is the tool.
-
Very cool! I am in awe at your artistic creativity! Old means,,, hopefully,,, better.
-
Looking good!
-
Nice designs. It's great to make suggestions, so here goes. I would do the "X" out of square stock and do a slit and drifted pass-thru. This is different than how its done in, I think the level 2 or 3 abana exercises. They use a slot punch which removes material. A slit chisel does not remove material. Its far easier to work to dimension using a slit chisel and you get a cleaner, more structurally sound detail. Using 1" material as an example, you get a full 1/2" thickness around your frogs eye. If you remove material, you can't. . I could explain how to do it to dimension, but instead, I recommend "The Blacksmiths Cookbook" by Francis Whitaker. His explanation is far better than mine for both a round hole and a square one. I would use an angled tenon to join the "X" to the horizontal pieces. Your upset ends on the horizontal bars is great. I love simple and elegant and use that ending quite a lot. Looking forward to seeing this develop.
-
Lol, heres the clarification. You do show a pic of scrolling tongs. The bending forks are the "H" shaped tools at the top of the pic. Both tools are sized for specific stock, added to your tool collection as you progress. So for 1/2" stock the opening should be a little larger than 1/2". What I meant is that I don't often use scrolling tongs. I forge my finials over the edge of the anvil and use " forks and wrench" for the rest. Those tongs are a great tool to have and I use them for minor corrections. Just differences in use. I don't throw tools away, so you can see the evolution of how I make these tools. The large fork is the first one I ever made. Now, I make them with parallel inside edges and a tapered outside edge. Being parallel minimizes twist when scrolling and the tapered outside edge allows me to get the tips into tight places in order to correct flat spots etc.
-
It also could be used to separate the mass on a bar where you want a vertical cut on the side thats not forged. Think tenon as an example.
-
What did you do in the shop today?
anvil replied to Mark Ling's topic in Blacksmithing, General Discussion
M3F, nice. I make my monkey tools out of drill rod. It has a hole down the middle which can be drilled out bigger if needed. Its a tool steel and just needs to be normalized. Also, heres a "secret" to getting a tight fit around the edges. Slightly round the working end of your monkey tool. This will make the tenon face slightly concave. When you set the tenon, the outside edges crush and form a tight fit with no gaps.