Clam River Coal Forge Posted March 5, 2010 Share Posted March 5, 2010 Hey All I was trying to drawout some 1/2 inch round stock and asw I started to make the point it just started to splinter like wood! What did I do wrong? George Quote Link to comment Share on other sites More sharing options...
Nakedanvil - Grant Sarver Posted March 5, 2010 Share Posted March 5, 2010 Were you forging it square or round? S-O-R, square, then octagon then round. Otherwise it was too cold. Quote Link to comment Share on other sites More sharing options...
bigfootnampa Posted March 5, 2010 Share Posted March 5, 2010 Grant is likely right that it was too cold but it also sounds like wrought iron stock (you have to forge it MUCH hotter). I have found it prone to the type of splitting you describe even when I try to keep it very hot as I work it. Generally I will allow the forms to be blockier and more rusticated when I am working with wrought iron. At least for me, it seems not to forge out into as finely pointed tapers and edges without crumbling. I do kind of like the rustic shapes that it seems to prefer being. I think the problem may be that as my shapes get thinner or flatter it becomes pretty difficult to keep the heat at yellow temps. One other possibility is that you worked the end down at too gradual an angle and maybe with too light blows creating cold shuts in the center which crumbled apart when you tried to forge them to a point. Quote Link to comment Share on other sites More sharing options...
Frosty Posted March 6, 2010 Share Posted March 6, 2010 One of two things are most likely. #1 you tried to draw it round instead of drawing it square, then when to size rounding it up. SOR, Square, Octagon, Round. #2 you worked it too cold. I coulda saved myself some typing if I'd just said "Ditto Grant." I forget the correct and polite term for what happens is round stock is drawn down round but it breaks the center in a sphincter looking pattern. This Ahem Hole shape comes to the surface of a point looking like simple splintering. Frosty the Lucky. Quote Link to comment Share on other sites More sharing options...
Nakedanvil - Grant Sarver Posted March 6, 2010 Share Posted March 6, 2010 "sphincter"? You can say that? Isn't that actually the muscle that controls the anal orifice? Or what the coopers call the bung hole? Digestive exit? Flow control nozzel? I guess the books call that a pipe, Frosty. Quote Link to comment Share on other sites More sharing options...
Clam River Coal Forge Posted March 6, 2010 Author Share Posted March 6, 2010 I guess it may have been too cold, but if I understand what you are telling me even if I want the round stock in a point that I first square it and than form a octagon and than back to round! George Quote Link to comment Share on other sites More sharing options...
pkrankow Posted March 6, 2010 Share Posted March 6, 2010 "sphincter"? You can say that? Isn't that actually the muscle that controls the anal orifice? Or what the coopers call the bung hole? Digestive exit? Flow control nozzel? I guess the books call that a pipe, Rfosty. It is a muscle that controls an orifice, so your mouth, your throat, your eyelids... Phil Quote Link to comment Share on other sites More sharing options...
Frank Turley Posted March 6, 2010 Share Posted March 6, 2010 One of my old students, Harry Jensen, started his apprenticeship in Denmark in the 1940's, working with wrought iron. A journeyman kicked him in the ***, literally. Harry asked what he was doing wrong. The journeyman said to form the point first and work back from it to help prevent splitting (and to control length of taper). Harry had been starting behind the point and was pulling the metal under his blows making the hammer go from behind to before. The journeyman's advice helps with mild steel as well as wrought iron. The MIDDLE OF THE HAMMER FACE hits the tip of the stock when you begin to SOR. If when doing everything as best you can, you still begin to get a separation, you can sometimes forge weld it together if you're "quicker than a snake astrikin." http://www.turleyforge.com Granddaddy of Blacksmith Schools Quote Link to comment Share on other sites More sharing options...
John B Posted March 6, 2010 Share Posted March 6, 2010 To add to what Frank said, A lot of beginners we have get the "piping" or "Fish lips" effect because they work the first taper from four sides instead of two, this allows the 'top' side to protrude slightly in front of centre of the metal, then as it is turned over, then it is repeated again, and so the outer edges start to overtake the centre, leaving it hollow, this then shreds as you try to point it. I find the easiest way to prevent this is to work from the end towards the length of the bar making a short two sided steep taper, which once you get the point established you can draw the square back longer, and centralise it, then take off the corners until round. Take care not to burn this thin end off if you are using a coke forge. Also working at the right heat helps. Quote Link to comment Share on other sites More sharing options...
Frosty Posted March 6, 2010 Share Posted March 6, 2010 "sphincter"? You can say that? Isn't that actually the muscle that controls the anal orifice? Or what the coopers call the bung hole? Digestive exit? Flow control nozzel? I guess the books call that a pipe, Rfosty. Ayup, right you are Grant. I used sphincter instead of the more common term for rectum to get around a word not appreciated by the moderators but NOT lose it's meaning. Piping is another term and probably the one the industry uses, I'll be more than happy to use piping from now on. Heck, mill type roll forging is a method of making seamless pipe which is then drawn over a mandrel and ground to finished dimension, DOM pipe to be specific. I think so far we've been talking about two similar but different things. Piping and fishmouthing. Piping being caused by forging round and a general movement of the surface overtaking the center. Fish mouthing being generally a cold shut over the end of the stock. Once drawn to a fine point the resulting failure, (splintering of the point's end like it were wood) looks very similar but the causes are slightly different. Frosty the Lucky. Quote Link to comment Share on other sites More sharing options...
Frosty Posted March 6, 2010 Share Posted March 6, 2010 Some years ago this topic was under discussion on theforge list and coupling that thread to my limited experience I put a slew of 2s together and then condensed it into my first reply. What Frank is talking about isn't quite what I was thinking but is probably more likely what happened in this instance. Please correct me if I get this wrong but this is just another way of wording Frank's description. Starting a taper back from the end and drawing it round does two less than ideal things. First drawing a round taper uses generally lighter blows which do NOT penetrate as deep and so causing a shearing effect close to the surface. This would result in "true" piping or what I'm trying to come up with an acceptible word for previously. The other effect of starting back from the end makes piping even worse. So, forging a taper square means you can hit it harder so the metal in the center moves too and helps prevent piping. Fish mouthing is a cold shut caused by the surface moving faster than the center and if you've started back from the end the surface layers simply overlap the center at the end. Forging a taper round exacerbates this by making you use lighter blows that do not move the center. Starting a taper at the end and square means the heavier blows penetrate deeper and seeing as there is no surface metal beyond the blow towards the end the surface can't move faster than the center, the surface is actually driven back towards the bar while the center is extruded out of the end. The center also holds heat longer and remains more maleable so the center moves faster and no piping occurs. You can see this by hitting the stock two or three times and then looking at the end, if you got it right the center will be bulging out farther than the surfaces. Heck, it'll look JUST like a short taper! Okay, this is just my understanding of the causes and effects of this particular phenomenon, Piping that is. Having the end of a taper start to break from forging too cold is a given but looks different that piping does early in it's failure. Oh yeah, one more thing I do to prevent piping is use a straight pein once I move back from the end of the bar for it's much deeper effect. I start a taper by drawing a short steep taper on the end with the hammer's face, then work back using the straight pein. This is all done square till the taper is nearly as I want it, then I round it up using lighter blows for a smoother more uniform surface texture. I call this "dressing" the taper and a little shearing of surface layers at this stage has almost no effect on the finished product. Frosty the Lucky. Quote Link to comment Share on other sites More sharing options...
John B Posted March 6, 2010 Share Posted March 6, 2010 Hi Frosty, I think we are back to a terminology thing here also. Fish lip effect was a descriptive term I use to describe what the edge looked like when viewed, Piping is also a term used when steel is cast into ingots and the centre shrinks/ settles inwards causing a depression in the ends whch can cause problems when the ingot is being rolled into blewoms or billets, to try to reduce this effect, the hot ingots were turned as they came from the initial cast. This saved a lot of material that otherwise would have been waste and have to be remelted. Quote Link to comment Share on other sites More sharing options...
easilyconfused Posted March 6, 2010 Share Posted March 6, 2010 I see that most people say to start the taper at the tip and work back but Hofi shows the method of starting behind the tip to conserve heat by preventing the tip from getting too cold. I've usually only had splits using both methods when I work it too cold or it's actually wrought iron and I can see the split after I look. Could it not be said that the important point here is to start by squaring the round using good heavy blows and adequate heat? To increase your force and penetration, you can use your hammer like a fuller as Hofi and Brian have shown us? Quote Link to comment Share on other sites More sharing options...
JNewman Posted March 7, 2010 Share Posted March 7, 2010 It sounds like Clam River's problem relates to all the answers above. There is one other thing that can cause this problem and that is getting some leaded steel. I have a piece of steel in the rack that I bought for a little 1 hour job that ended up taking me all afternoon on a saturday. A guy came in with some clips that he needed duplicated the stock needed was 7/16" round. My steel supplier had no 7/16 hot rolled in stock but he had a shorter piece of 7/16 round cold rolled in a misc. stock rack. As I was drawing it down to a short square point it kept splitting. My first reaction was to work it hotter then I tried not taking bites on the anvil and working it down on the flat of the anvil. After some words not suitable for this forum I finally tried working it a little colder and this worked some of the time. To get 6 points on 7/16 bar I must have drawn down 20-30 of them. I thought the steel was just bad at the time but I later realized that it was probably leaded steel Quote Link to comment Share on other sites More sharing options...
Frank Turley Posted March 7, 2010 Share Posted March 7, 2010 I asked Hofi how he controlled length of taper using his hammering method, and he answered, "With experience." I understand pipe to be an internal, lengthwise rupture. A forging example would be if you flattened, say, a round bar on the end until it was a capsule cross-section. Then you mistakenly give it an eighth of a turn instead of a quarter turn and hit it. You are hitting it while holding it diagonally under the hammer. It can't be a solid blow. By not giving it a quarter turn, you may cause some pipe, especially if you are using a power hammer. That is one reason for square-octagonal-round. Another is that the square is a point of reference. It gives you a known value. You know you can get round from that point. If you don't square the stock first, you are just hitting willy nilly helter-skelter, hoping that someday it will become round. http://www.turleyforge.com Granddaddy of Blacksmith Schools Quote Link to comment Share on other sites More sharing options...
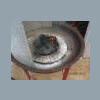
Clam River Coal Forge Posted March 9, 2010 Author Share Posted March 9, 2010 ok I have looked at the end and it is hollow which confirms that I was forming what you call a piping effect the outside taking over the inside. I am not sure what type of steel. It was a pip of some sort the was rounded on one end and had threads on the other. I have tried the the pointing squaring first and than going to octagon and than rounding it down and this seemed to work ok just a bigger hook for the wifes bird feeder. Thank you all for the support. PS I am really glad that you are back with us Frosty George Quote Link to comment Share on other sites More sharing options...
Adam2519 Posted July 24, 2010 Share Posted July 24, 2010 Hello all I have been reading everything I can get my hands on. Out of the 10 or so books I have finished so far the only one to mention this problem of the end splitting is in the Elementary Forge Practice, by Harcourt. Page 32, Drawing out, bending and twisting. It says that any shape stock should first be hammered square to prevent bursting. Even round bar should be squared, then made octagonal and then rounded. If this is not done it results in internal cracks and shearing of the surface away from the core. And when working it to point the end will split or burst. It shows a figure similar to a badly cracked cross section of a tree stump or similar. In all the books I have read so far or Youtube videos I have watched, this is the only source that has said this. I would tend to think that people have taken it for granted that everyone learning Blacksmithing already knows it or assumes that you are learning from a Blacksmith that will tell you, so have not added this information into recent publications. All the books say when starting out, a beginners exercise is to square the round stock, taper and then make it round again, but from memory not the why. So not so much hammering cold although I imagine it compounds the effects described above. But the technique used itself. Hope this makes sense. And just a big thanks to everyone. I am slowly making my way through the forum threads and learning so much from you all. Adam Quote Link to comment Share on other sites More sharing options...
thingmaker3 Posted July 25, 2010 Share Posted July 25, 2010 Adam, remember that Harcourt was writing about the bursting of wrought iron, not mild steel. Wrought iron has up to a quarter million ferrous silicate stringers per square inch of cross section. Mild steel does not. Many of the books from the late 19th and early 20th centuries deal with proper technique to avoid similar phenomenon in wroght iron. You-tube videos deal primarily with our modern homogenous steels. Quote Link to comment Share on other sites More sharing options...
fciron Posted July 26, 2010 Share Posted July 26, 2010 but if I understand what you are telling me even if I want the round stock in a point that I first square it and than form a octagon and than back to round! Yes! That's what they're saying and if you were trying to draw round that is almost certainly the cause of the splitting. Let me try and clarify. Most of my books cover drawing square before rounding things up and the need for this is not limited to wrought iron, it is just as applicable to mild steel. When you hit a round bar with the cross section deforms to a flat sided oval, ideally you will then rotate 90 degrees and smash that oval down into a rough square. If you attempt to draw it out round you will be using most of your energy chasing that oval around the bar instead of reducing the cross section. By working on alternate you ensure that the bar is being forged by your blows, not simply twisted. Piping (aka fish lips, an ***hole, or just dangit!) is caused when the outside of the bar moves but the center does not. On large bars it's clearly visible, on small stuff it is usually less obvious, in both cases it can cause internal cracks in addition to the obvious fish lips. It sounds like an extra step to forge square and then round it up, it is less work because it makes more efficient use of your hammer blows. I also find that when drawing in only two planes it is a lot easier to see what your taper looks like and where to hit it to correct things, when you try to work round you have no reference points to work from. Here's a video from the Society of Mechanical Engineers that shows some ridiculously large stuff being forged SOR just as the boys have been telling you. The advice about starting at the end is right on IMO too. (The hofi blob is a neat trick, but I always seem to wind up cutting the extra material off the end which eliminates any heat savings.) http://www.youtube.com/watch?v=tLRkOupbARM Quote Link to comment Share on other sites More sharing options...
ThomasPowers Posted July 26, 2010 Share Posted July 26, 2010 I teach doing tapers square in cross section and then converting and I think several of the books I have read mention it; I'll have to check. Expecting You-Tube to be a definitive source is not a good idea; *ANYONE* can post on it with no check on skill level or veracity---I could post that your were the love child of Margret Thatcher and Elvis Presley on You-Tube. What I haven't seen mentioned is that it can be a lot faster to cut the end off at a sharp angle and then work the taper. For something like a tent stake you can generally do the cut and pointing in one heat! I make stakes in multiples of 2---cut to double length, then hot cut at a sharp angle in the middle. Quote Link to comment Share on other sites More sharing options...
bajajoaquin Posted July 26, 2010 Share Posted July 26, 2010 ....If you attempt to draw it out round you will be using most of your energy chasing that oval around the bar instead of reducing the cross section. By working on alternate you ensure that the bar is being forged by your blows, not simply twisted. I've been working SOR because it's what I was told to do, but that's probably the first explanation that's given me a real "feel" for the reason why. Thanks. (I hope it's accurate, since it seems to make sense!) I don't know how many books recommend tapering the tip prior to drawing out, but every book I have covers square-octagon-round, for both round and square stock. Quote Link to comment Share on other sites More sharing options...
fciron Posted July 27, 2010 Share Posted July 27, 2010 Thanks, I am glad that helped. We need to know why things work if we want to be able to apply them to new problems. I am sure that some engineer could quibble with my explanation, but the basic principle is sound. The conversation had gone off on a tangent, even though Grant hit the nail on the head right away. The OP's second question got kind of lost in the fun, so I tried to answer it. Quote Link to comment Share on other sites More sharing options...
Hofi Posted July 27, 2010 Share Posted July 27, 2010 Can any one tel explain me the meaning of the words ''THE HOFI BLOB'' and how it is conected to the ''Hofi NEAT TRICK'' Hofi Quote Link to comment Share on other sites More sharing options...
fciron Posted July 27, 2010 Share Posted July 27, 2010 Can any one tel explain me the meaning of the words ''THE HOFI BLOB'' and how it is conected to the ''Hofi NEAT TRICK'' Hofi Sorry if I was unclear. Someone had mentioned the technique of leaving a small piece of unforged metal (a blob) at the end of your taper to be forged out as the last step. If I understand correctly it acts as a heat reservoir and the internal friction will actually heat the bit up as it is forged so that the tip of the taper has plenty of heat in it. (Lot's of folks have trouble with sharp points because the point cools quickly and then splits when you're trying to finish it.) The heat management aspect works as described, but I find the difficulty of matching the size of the taper to the reservoir (blob) to be difficult and I also find it hard to get consistent results from piece to piece. If the reservoir is too large I have to trim off excess metal at the end, which costs time and can interfere with making matching parts. So I say it is a 'neat trick' because it is really cool to see the blob on the end go from dull red to bright orange in a couple of hammer blows and it looks almost as though the smith has gotten an extra heat without returning to the fire, but I have not found it useful in my work. I don't use it when I teach and did not think it would help the original poster with his question. No disrespect was intended. I've gotten a lot of value from the forging demonstrations that I have seen from Uri Hofi and his admirers. He has been a very good influence on the American smithing community in getting people to stop doing thing the 'old way' and start thinking about how to do things the smart way. Quote Link to comment Share on other sites More sharing options...
Hofi Posted July 31, 2010 Share Posted July 31, 2010 Fciron thank you for your explenation and suport when Frank Turley said before asking me how I control and maintain the length of the point my my full answer was ''some knoledge in geometry and experience'' the squar steel is having 21.5 % more matirial then the round in the same dimention . means that if you round a piece of squar steel it will be longer 21.5 % 1/5 but while rounding the steel after forging squar it swels a bit there for practicaly we calculat 13-15 % longer in this operation. In every rond steel a cone is hiding and in the squar steel a piramid is hiding .The proportion in both of them between the full matirial and the cone and the piramid is 1 to 3 that means that if one leavs a ''blob'' of 1'' and start the forging from the behind towerds the point or with the hammer tilted or put the blob on the far end of the anvil you will always get a 3'' point !!! The beuty is that geometry is working in All diameters the same 1-3 many people thinks that if the steel is thicker you need a smaller blob to start with and this is wrong. and why did I start with the proportion between the round and sqar ? if you forge the point on a round steel there is 20 % less matirial and you forge squar piont you will get the point shorter but when you will forge to octagon and round you will get it to the right designed length. If one is forging a point from squar steel then one will have to start the blob a bit sorter 15% to get to the intendent length After having this geometry knoledge one needs some experience to master it. the longest point I forged in one heat was 10'' IN 5/16 AND 3/8 with my trick system Hope I made it clear enough Hofi Quote Link to comment Share on other sites More sharing options...
Recommended Posts
Join the conversation
You can post now and register later. If you have an account, sign in now to post with your account.