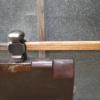
August 27, 200916 yr Here's my new traveling anvil for making hammers and hardy tools. It is made from a block of mild steel, 10"x4"x2 1/2". It stands at 27 3/4" for striking height. It weighs 75 pounds, stand and anvil.
August 27, 200916 yr how did you put the heardy and pitral holes in that? i got a peace of metal i would like to put those in to be a more effective anvil
August 28, 200916 yr But . . . but . . . Where's the . . . horrrrrn?!? I'll be interested in how it stands up under a striker at 75lbs. Another nice piece of work Brian, thanks for the pics. Frosty
August 28, 200916 yr Author how did you put the heardy and pitral holes in that? i got a peace of metal i would like to put those in to be a more effective anvil First, I drilled a 1/2" hole, then I had to heat it up and drift it. It would have been better to drill a 3/4" hole, then drift, but 1/2" was the best I had. It took more heats than it should have because I didn't drill it to the optimal hole. Then I planed the piece with a 7" grinder with a new hard disk with a 36 grit sticky disk glued to it, then progressively went down from there until I had a flat nice surface. Then I drilled the pritchel hole. After I finished the face by draw filing it, then sanding it with a 2" strip of metal and progressive sand paper, I heated it up to almost orange then quenched it in a 2" pan of water that I kept a hose running to cool it off as fast as possible. It did harden up a bit, but it would be better to start with a piece of tool steel. We tested it out today, and it preformed as expected. It does need to be anchored, but so does every anvil, in my opinion.
August 28, 200916 yr Very Nice Brian, I like it alot.I like the stand. My anvil stand is also three legs and it works really well. Gaylan
August 28, 200916 yr Look great. But does it have sufficient rebound? Perhaps when using a striker a lot of rebound is not necessary. Frank
August 29, 200916 yr Author Ruben, I drilled and tapped it for 1/2" bolts from the bottom side. You do need lock washers or the bolts will vibrate out with the hammering. I don't like to weld tools to my stands.
August 29, 200916 yr Hi Brian. This is a really nice piece of work, and it looks very functional. When I put a 1" hardy hole in a 3/4" plate, I had plenty of time to think about drifting it hot while I was chiseling and filing. At least I learned how to use the cold chisel effectively. How long did it take to get hot through and through? As for rebound, it is overrated. Most blacksmith forging is done in the coefficient of restitution range of .1 to .2, and the influence of rebound is much less. Up into the .8 to .9 range, which is finish forging, it becomes a lot more important. Same for the hammer anvil ratio for heavy forging. As long as one isn't hitting cold metal, or hitting over a thin spot (more of these with a smaller anvil), it is not so bad. I saw a nice new anvil get dinged by a striker who missed and hit the edge. It removed a fairly sizable chip. I took a look at one of the Brazeal mild steel easysmith anvils at a demo. Even though lots of participants were being invited to use them, they were relatively ding free.
August 29, 200916 yr Author evfreek, the first heat took about 25 minutes, then the other heats took less than 5 minutes. The angle of the legs on the stand make a huge difference as to the backing of the anvil, and then mounting it all to the Earth as best as possible adds to the mass.
January 11, 201016 yr Have you tried getting it on a plane yet? (Back before the "troubles" I remember having a 90 pound carry-on, full of scrap metal, they didn't weigh the carry-ons...)
March 20, 201016 yr Hi Brian, I just wanted to ask something about the anvil, because I'm in the process of making one. In the new pictures I saw a chain around the legs. Is it to quiet the ring? It also seems like it now has a weld in the front and back. Is that so? The legs are angled at 15 degrees? Thank you. Rubén
March 20, 201016 yr Author Hi Brian, I just wanted to ask something about the anvil, because I'm in the process of making one. In the new pictures I saw a chain around the legs. Is it to quiet the ring? It also seems like it now has a weld in the front and back. Is that so? The legs are angled at 15 degrees? Thank you. Rubén '' Yes, the chain is to quiet it, and the welds are to keep the bolts underneath from vibrating out. I'm not sure what the exact angle of the legs is, but I don't like them splayed out. I want them to back the anvil. I'm not worried about it tipping over because I mount it to the floor or ground.
March 20, 201016 yr Author That last picture was of Jeff and Alan Lee from Austin, Texas doing a forge welded bundle at the LAMA Conference.
March 20, 201016 yr Maybe it`s because you always anchor it somehow but you`re not worried at all about the legs bending and climbing out under heavy hammering? I see the 3 legged stands with angled legs and wonder why there`s no lower stretchers tying the legs in.They`d make a handy place for a shelf or rack if nothing else.
Join the conversation
You can post now and register later. If you have an account, sign in now to post with your account.