j.w.s.
-
Posts
642 -
Joined
-
Last visited
Content Type
Profiles
Forums
Articles
Gallery
Downloads
Events
Everything posted by j.w.s.
-
Why not use a photoscale virtualization weights and measures app for your phone? Simply place an object of known size in the picture and select material. Viola, done! You guys really like doing things the hard way.. J
-
You could just order the appropriate stainless steel pipe with the correct I.D. for your burner, drill and tap for a set screw and simply make one. Wait, on second thought maybe you should get the complete package from a professional. J
-
Setting up your shop on the cheap (real time)
j.w.s. replied to Crazy Ivan's topic in Building, Designing a Shop
Guess that means I need to finish it today. I'm probably going to start a new thread with all the pics I took, I just want everything 100% first. Lol. So far so good. I'm running for coal now, even though we still have 200lbs, barely looks like we burnt any this week... Weird how that works. Lol J -
Um, what's a "jig"? One of you guys tells me there's an easier way to do this than the way I've been doing it for 20 years and I'm gonna start swinging.. lol Seriously though, for the price is it worth it? Or could you just take 45 minutes and design what works best for you? -J
-
Passing on to Future Generations
j.w.s. replied to rthibeau's topic in Blacksmithing, General Discussion
My inner curmudgeon says to just pass on future generations. that being said, I get dozens of students through the doors every year and some of them have some real potential. I'm not sure if my 16 year old son has enough drive to carry on for me, I'll keep hope alive - and there's always my daughter who's only 10 months and ripe for molding into the perfect torch bearer.. Lol J -
The best 2x42, or the only I've used worth it's salt, is the Jet 41002. Don't like the construction on the newer craftsman model or the palmgren model. At $439 you're better off coming up for the extra $36 for the Grizzly 2x72 - it's decent for what it is and able to take modifications nicely - plus that long arbor on the left side is nice for an expanded wheel, conditioning wheels or buffing wheels. Your grinder should have not just mass (which a decent bench can help you with) but also rigidity. The last thing you want is a springy platen or an arm that has elasticity or sway. Admittedly, I have an older model Delta 1x42 that I've made some decent blades on, but the plastic wheels are horrible, the tracking is wild and the platen is virtually non-existent. If I actually used it for something other than sharpening I'd have to drop some money to make it right and by that point I couldn't justify the overall expense. J
-
What's the ratio of loss during the process? Also, were you removing each puddle between pieces of wrought? Looks like a fun process. How's the end result? J
-
Yup.. lol It's kinda like making sainthood.. except instead of 3 miracles, you need to utterly obliterate 3 peoples hopes and dreams of setting up a shop with either scrap parts, cheap Chinese tools, free anvils, special hammers that still will never make them a better smith and pathetically undersized grinders.. It's kind of easy though, considering that no one searches for their answer anymore on the site, they just post a new topic and roll out the red carpet.. lol -J
-
Ok, you're not going to find a good metal working grinder with the name craftsman or dewalt attached to it. You want a 2x72 So save your pennies until you can afford one or you're going to be paying a huge "graduation tax" as you move up.. There's reasons why those of us who do this for a living don't use the smaller belts and there's probably about a hundred topics already covering it. Personally I'm not going to spoon feed you encouragement by helping to justify what youre thinking of getting. Pony up the money and do it right the first time. J
-
Try it and let us know your results. Just don't buy a ton of it yet. J
-
control circuit for pneumatic hammer
j.w.s. replied to ironmutt's topic in Power Hammers, Treadle Hammers, Olivers
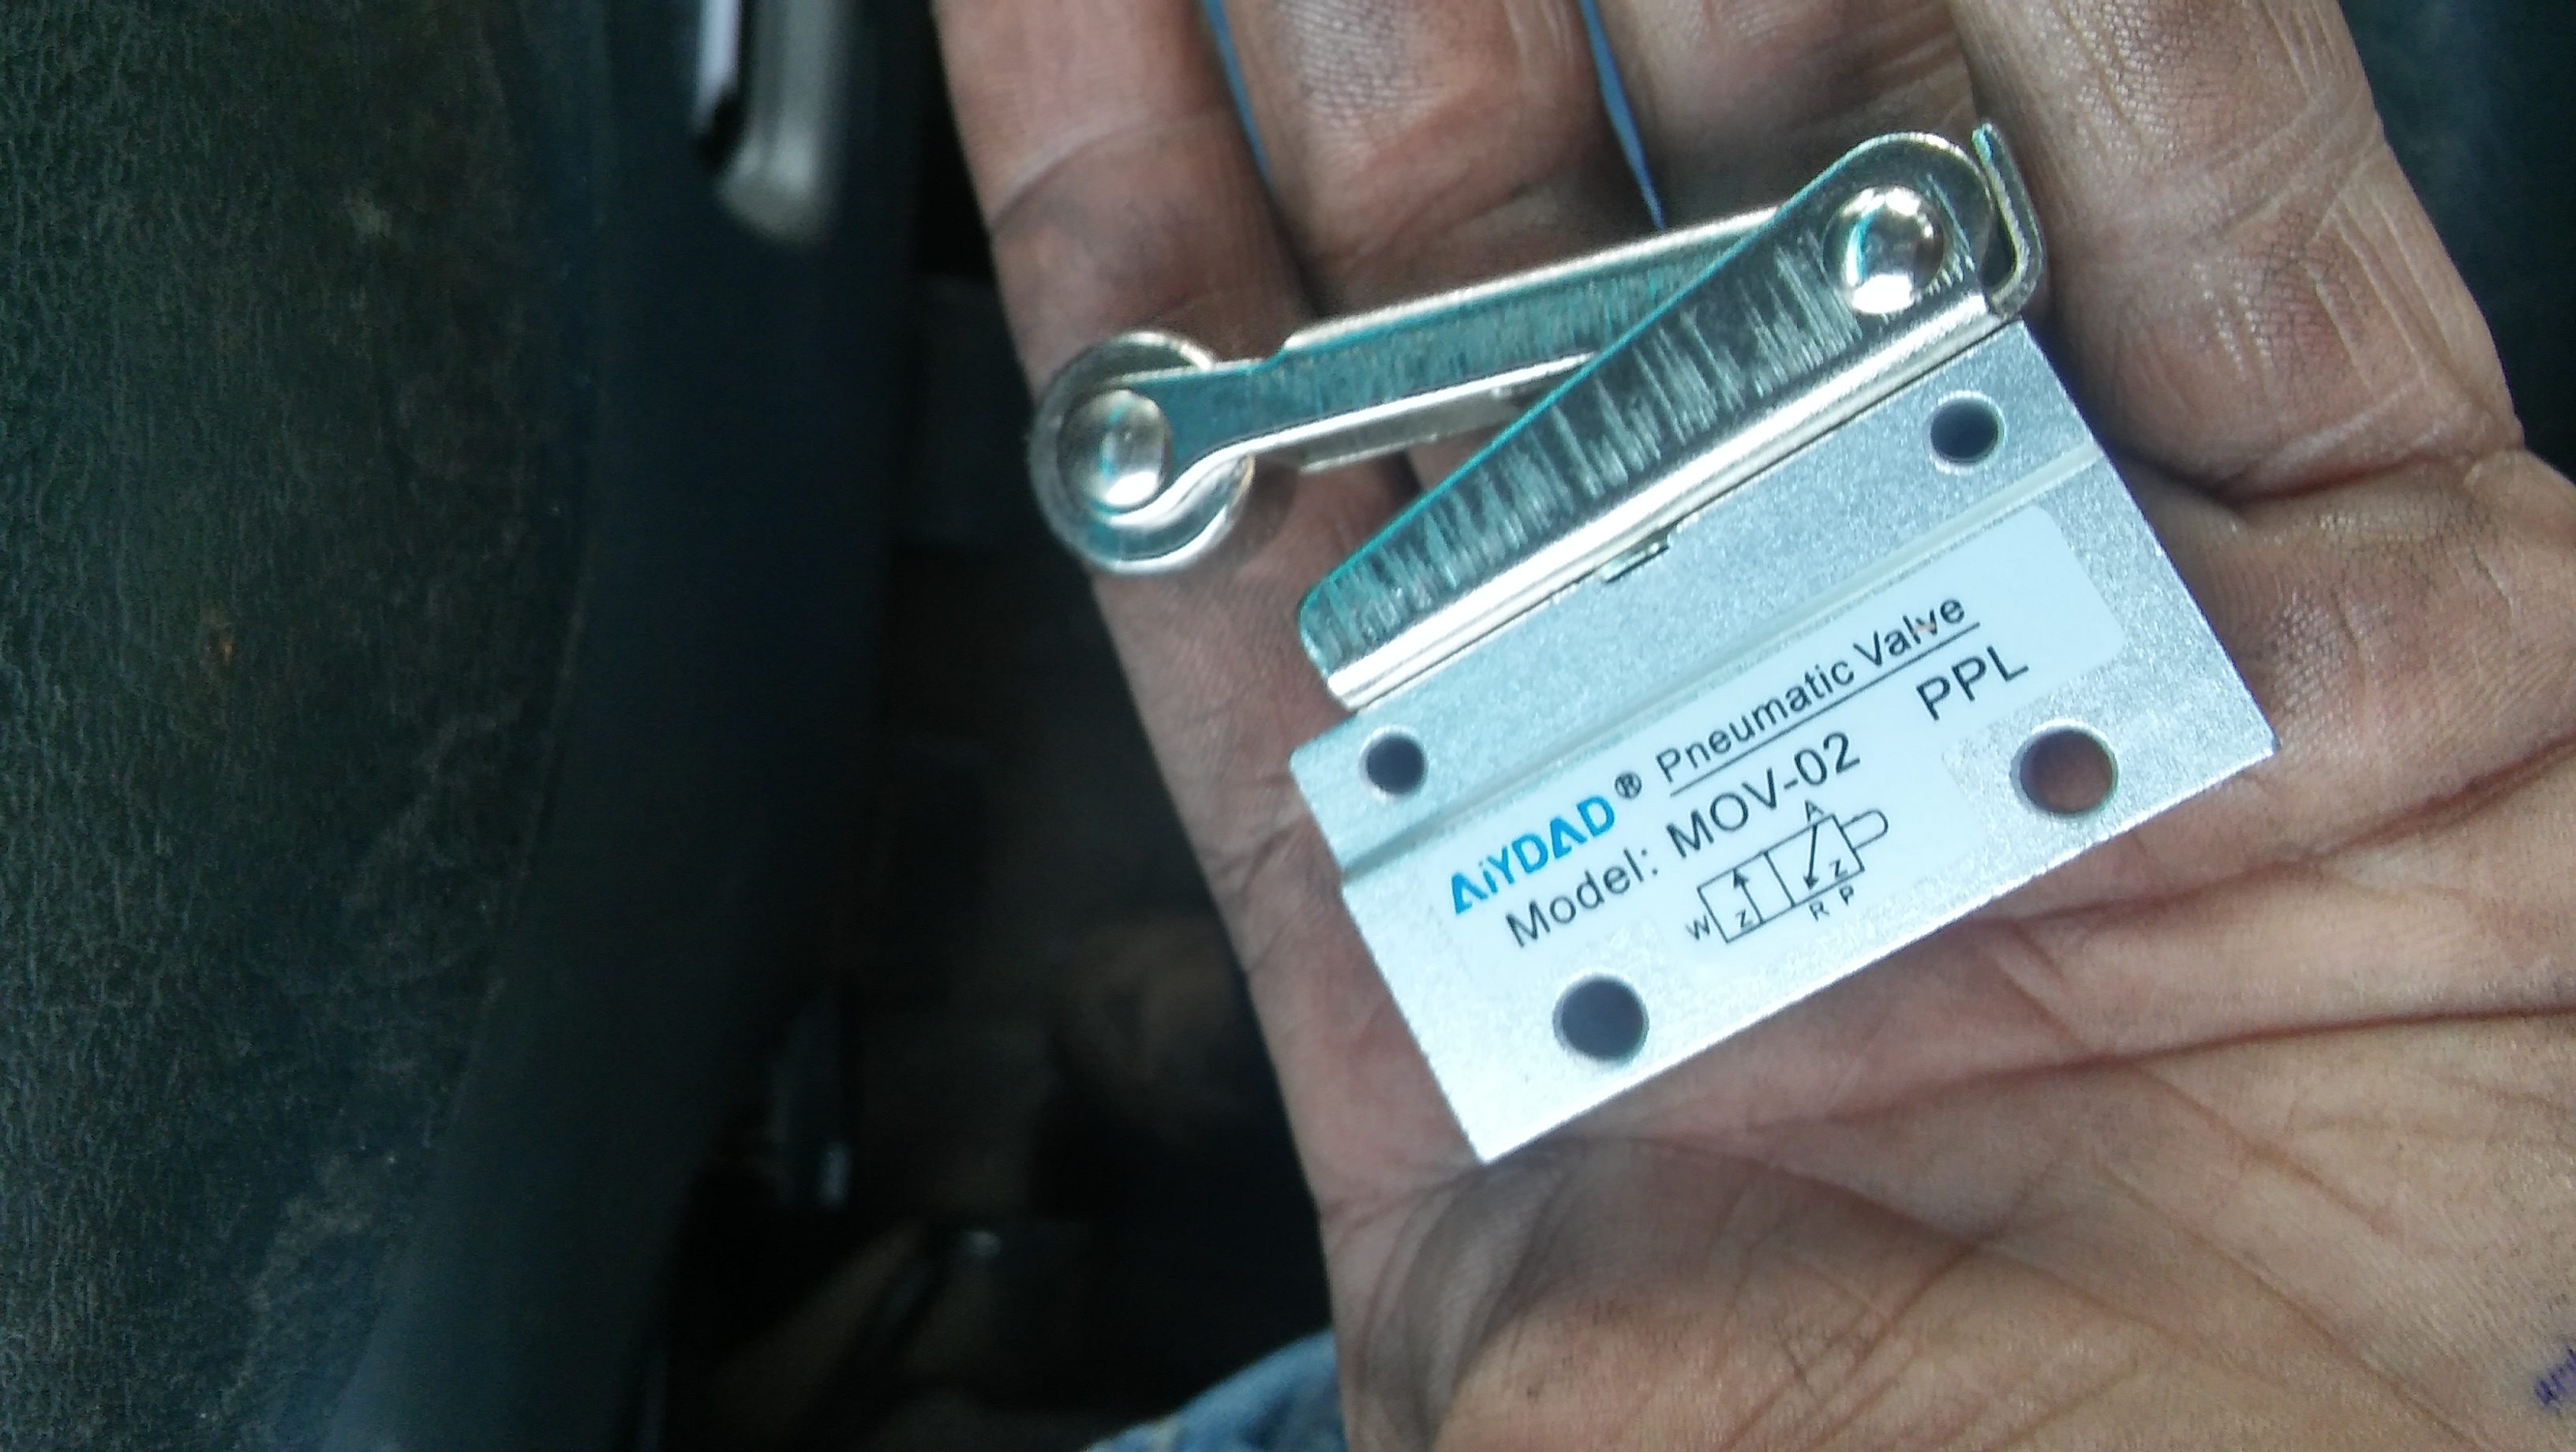
Only two ports on the limit switch are needed. Mainline air supply (P) branched from the same that supplies your shuttle and the exhaust port (A) which will go into your pilot port. Exhaust is all handled on the shuttle and by using a ball valve the flow rate can be changed which controls the speed of the cylinder. On the design you drew a single pilot/limit switch would work. It would go on the up stroke to switch the shuttle and allow it to drop the tup. J Here's an example of the switches I use.
-
control circuit for pneumatic hammer
j.w.s. replied to ironmutt's topic in Power Hammers, Treadle Hammers, Olivers
And you're going to have no control of the tup cycle. There's a reason limit switches are used versus timed circuits. This isn't a static machine with cyclic rotation, it's dynamic as is the nature of the work piece under it and therefore needs to be controllable. J -
Need ventilation advice- lungs hurt
j.w.s. replied to Cardinal Knife's topic in Blacksmithing, General Discussion
My guess would be the excess ammonia and organic sulfur (sulfur dioxide gas is rather poisonous and used as an industrial cleaner) left from years of waste. And for gods sake, don't hose it with bleach! Bleach + ammonia = chloramine vapor! Chances are there's some fun molds playing around in the wood there too, some of which will cause reactions with just a few minutes of exposure. I'd say it's not the propane but what the heat is doing to the atmosphere within the coop. A slight temperature change will change the fluidity of gasses drastically and stir up whatever is causing your reaction. Pour a concrete floor, treat and seal the walls properly, insulate, drywall, add an extractor fan or two, run some plumbing, 100amp electricity, perhaps a wifi extender and enjoy a really nice shop once it's taken care of. J -
control circuit for pneumatic hammer
j.w.s. replied to ironmutt's topic in Power Hammers, Treadle Hammers, Olivers
You need a 2 pilot shuttle either air or electric and a limit switch at the apex and another at the lower stop. However there are still problems to overcome like supplying power, mechanical cycle limits etc. You could use the existing single dc pilot shuttle you pointed out and using a contactor and auxiliary keep the pilot active until it hits the stop and turns off to reverse the shuttle. As for your sway bar question.. Probably not as they're typically rigid as the application is to stop sway. Why reinvent the wheel if you don't have to? J -
Asking for design help for an anvil stand
j.w.s. replied to JHCC's topic in Stands for Anvils, Swage Blocks, etc
It's a little narrow of a footprint unless you're going to lag it into the pad. How about a 3 leg design? -J -
It's what happens when you sketch an idea on a block of wood and let the bladesmith standing next to you (who views everything in terms of ergonomic functionality) take your basic idea to the grinder at 190mph.. and then hands it back with a bunch of 80 grit paper and says "here, you can hand sand it" lol -J
-
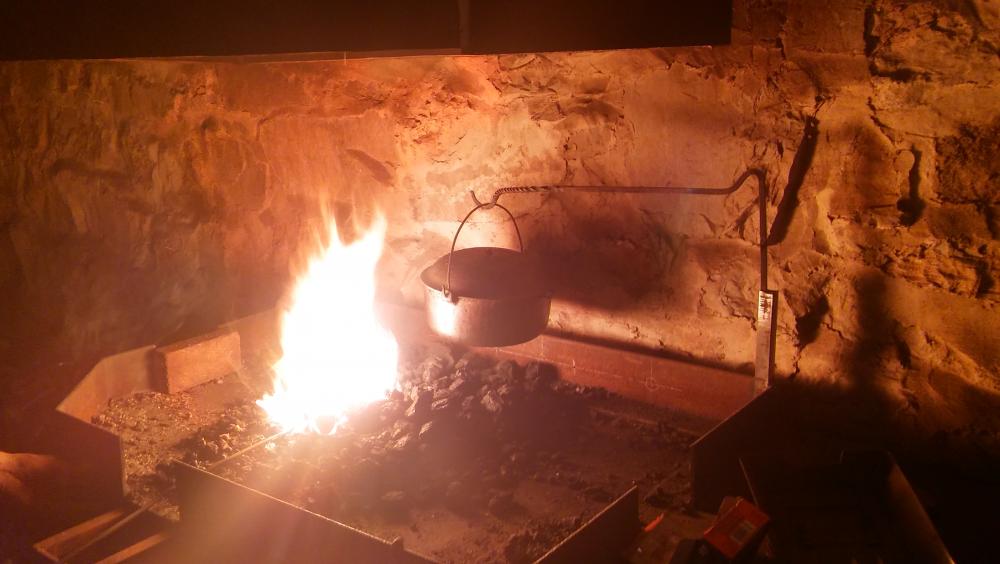
I have to admit, I've cooked a lot of meals over the forge - from steaks over hot coals after working for the day, fresh pizza, to whole lobster in the gas forge (after it stopped showing color) and even making grilled cheese on a hot bar of steel fresh from the forge before my demos..Today Nick Oh joined Crazy Ivan and I at the shop and this was the goulash simmering away while we worked. J
-
Setting up your shop on the cheap (real time)
j.w.s. replied to Crazy Ivan's topic in Building, Designing a Shop
Hey guys, lets keep it on topic, this is afterall how Pete is setting himself up not about how you would have done it better. And both of us were half a case deep and just screwing around at the end of a long day so I think it was well worth the "effort". -J -
Setting up your shop on the cheap (real time)
j.w.s. replied to Crazy Ivan's topic in Building, Designing a Shop
We discussed using them for the drive on the hammer build we're planning.. Lol -J -
Setting up your shop on the cheap (real time)
j.w.s. replied to Crazy Ivan's topic in Building, Designing a Shop
That belongs to the yard.. Trust me I've tried.. Lol J -
Setting up your shop on the cheap (real time)
j.w.s. replied to Crazy Ivan's topic in Building, Designing a Shop
Here's a video of Crazy Ivan pulling some spring for making some smaller (0.25") tooling. (won't let me submit an embed so I figure I'll try it this way) -J -
Setting up your shop on the cheap (real time)
j.w.s. replied to Crazy Ivan's topic in Building, Designing a Shop
Tap tap tap, is this thing on? -
I have a steel I cut from 0.25" a36 18"x21" on the bottom shelf of my has oven that I've been using to turn out the perfect crust for years. So much better than a stone and really improves heat distribution. Just lightly oiled it like cast iron. J
-
Nope.. lol j/k.. Auto-catalytic plating using an aqueous solution of copper. I simply plated the nickel layers with copper knowing that it favors adhesion to nickel over steel. J I'll try to do another piece like it this week and attempt take some good pictures if I have time.