j.w.s.
-
Posts
642 -
Joined
-
Last visited
Content Type
Profiles
Forums
Articles
Gallery
Downloads
Events
Everything posted by j.w.s.
-
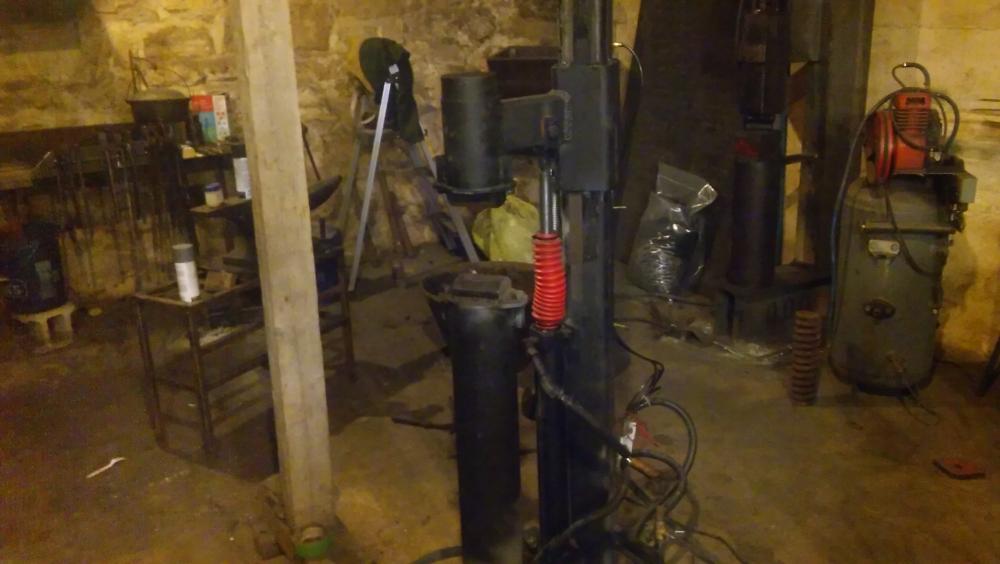
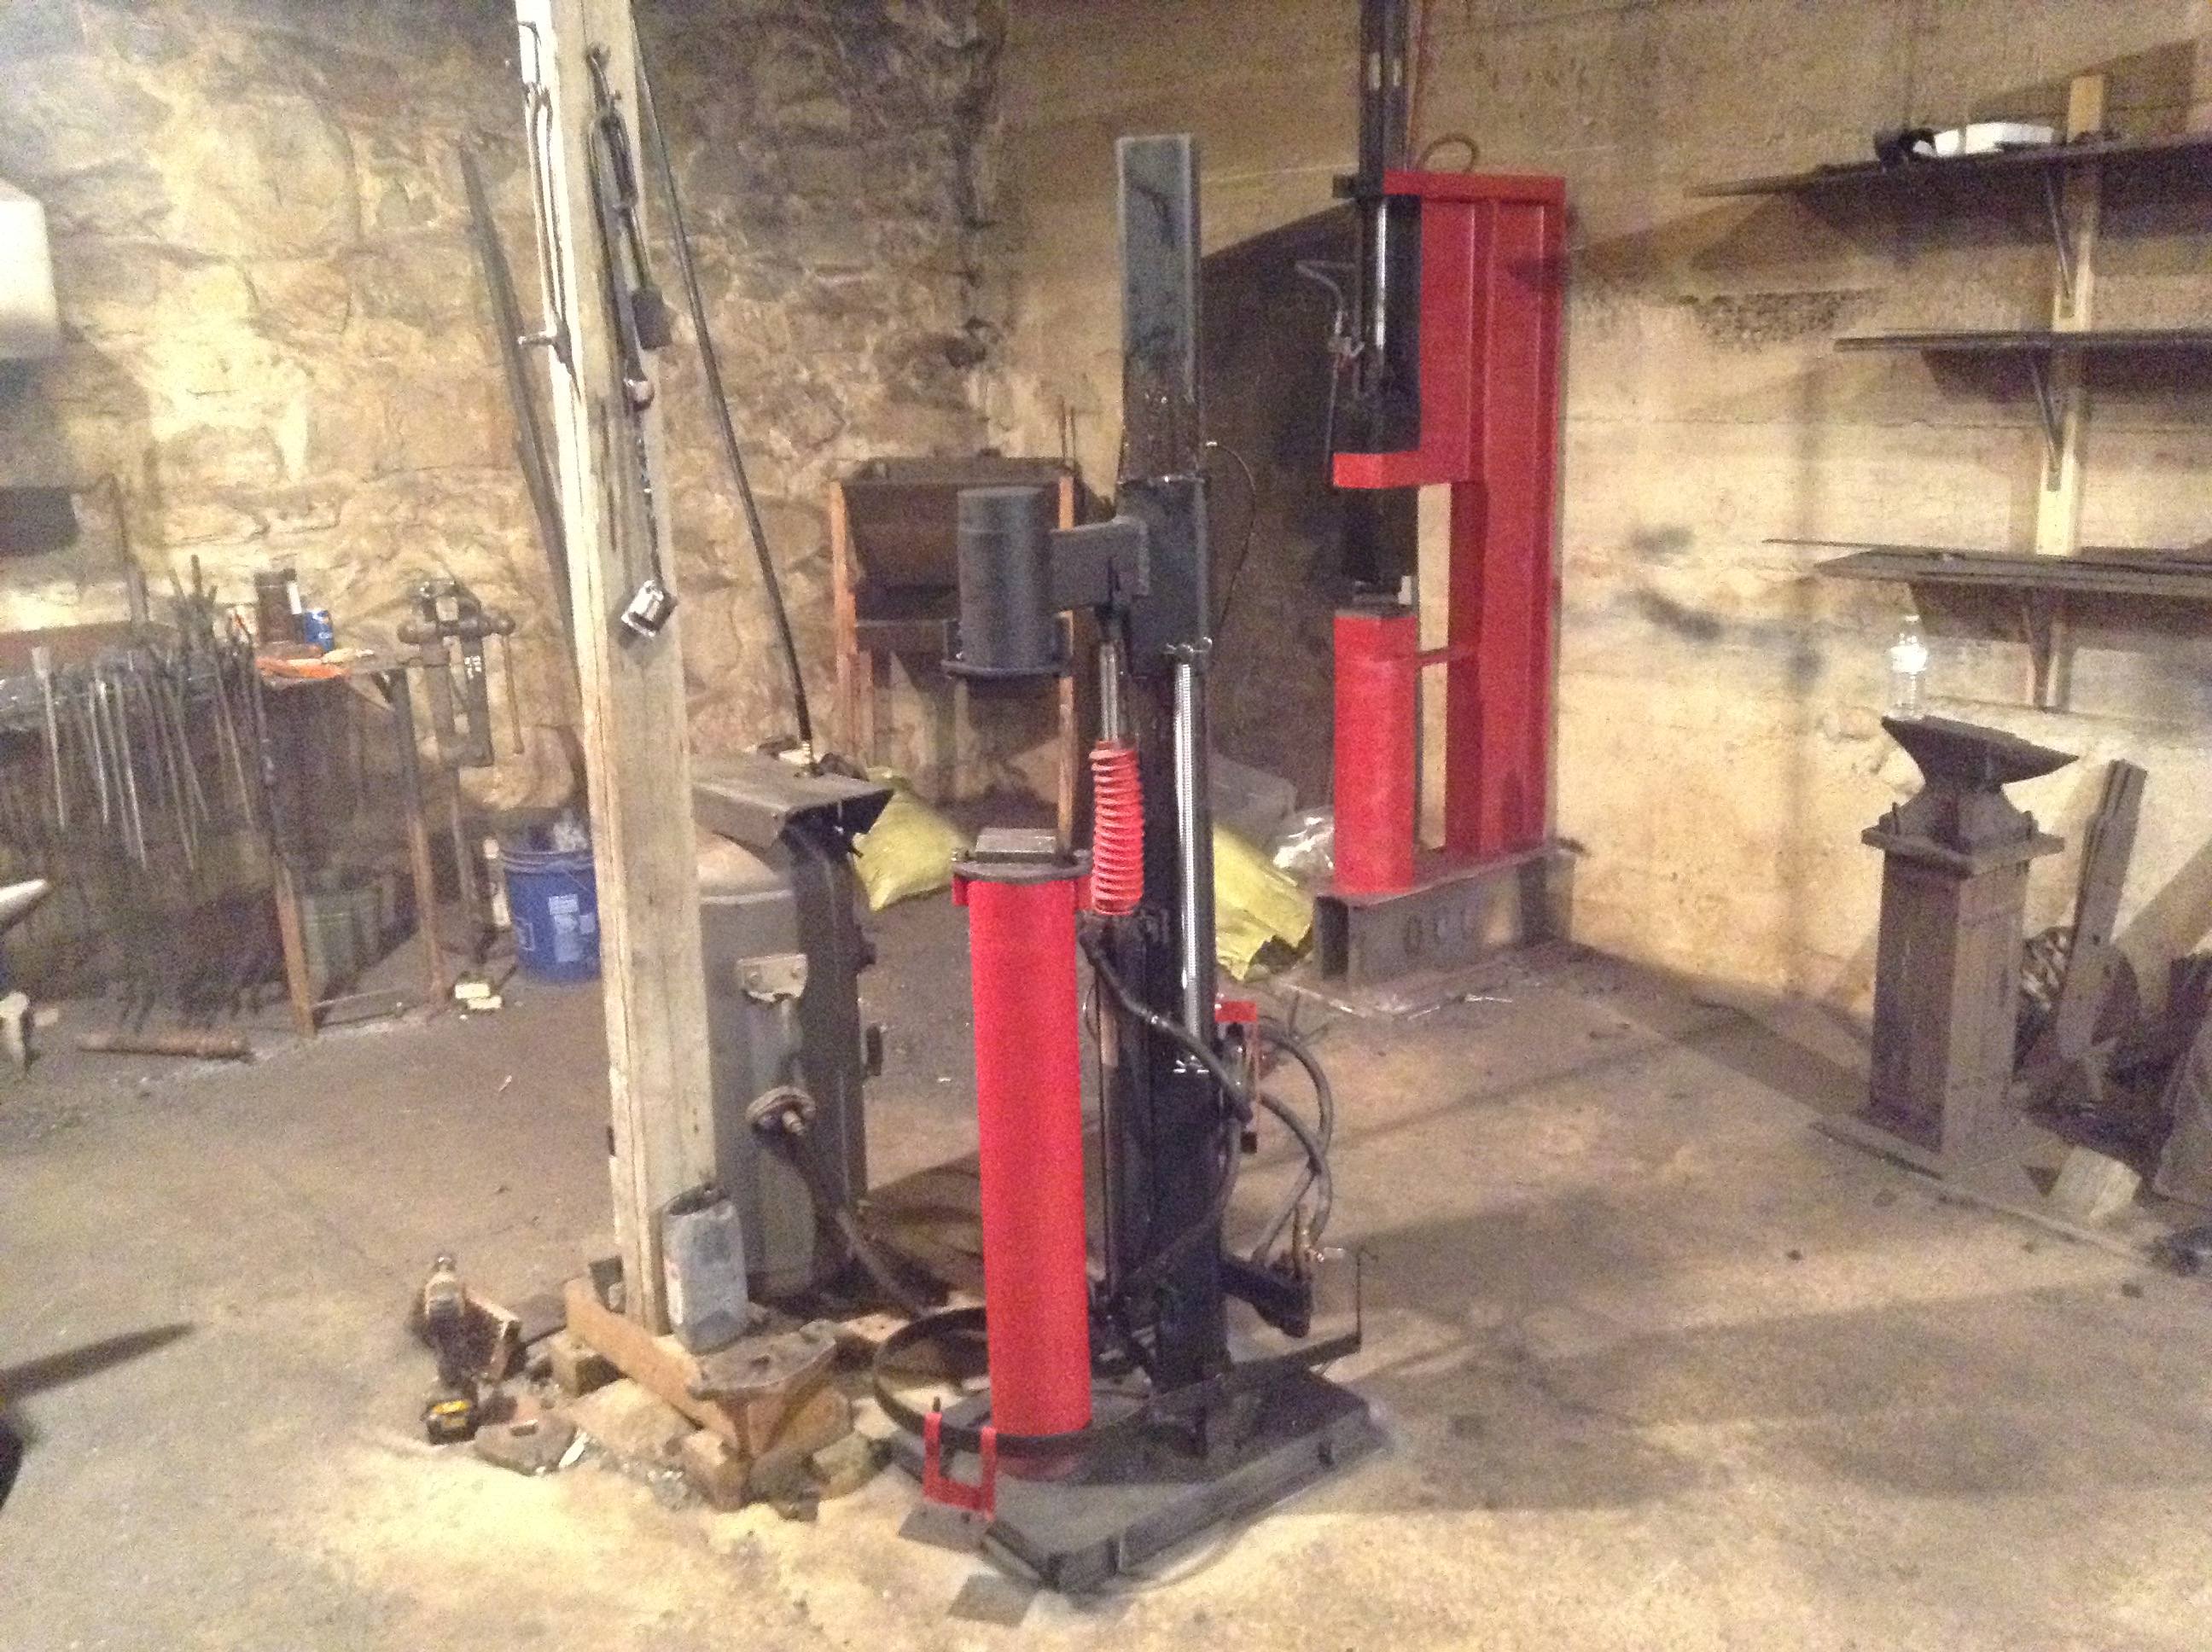
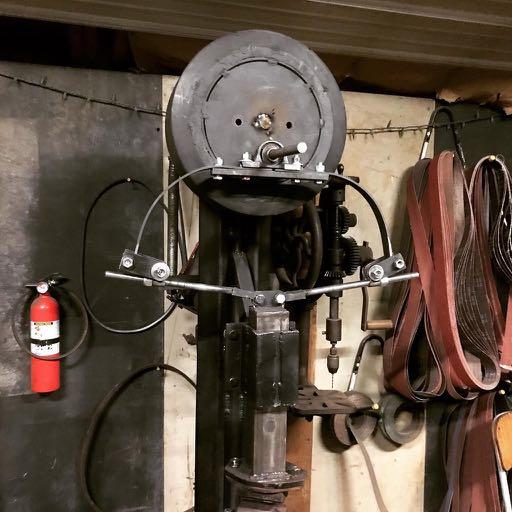
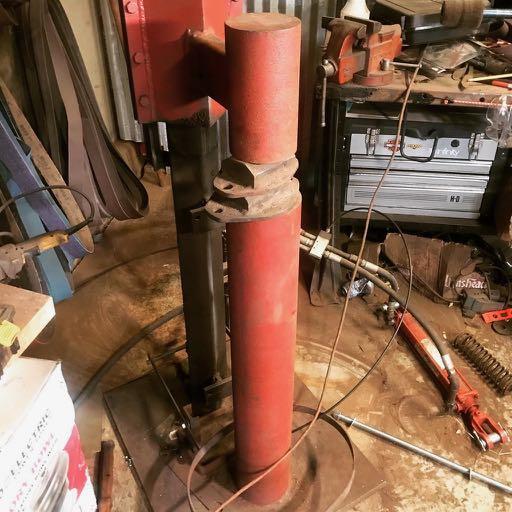
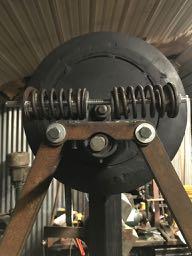
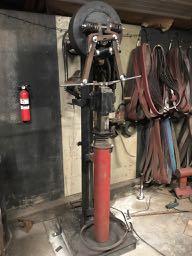
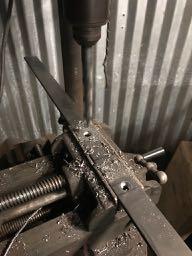
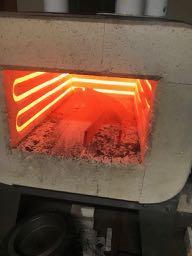
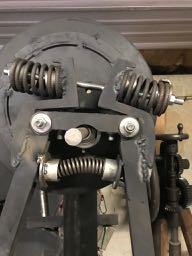
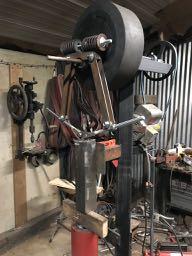
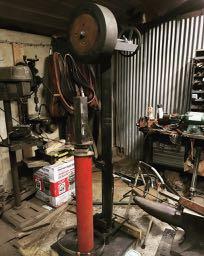
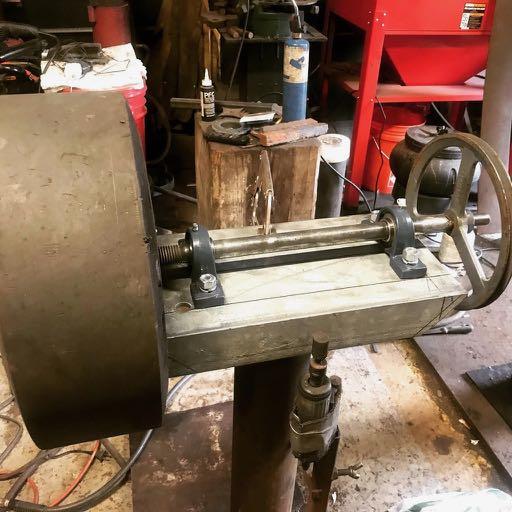
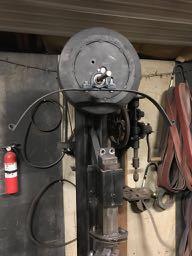
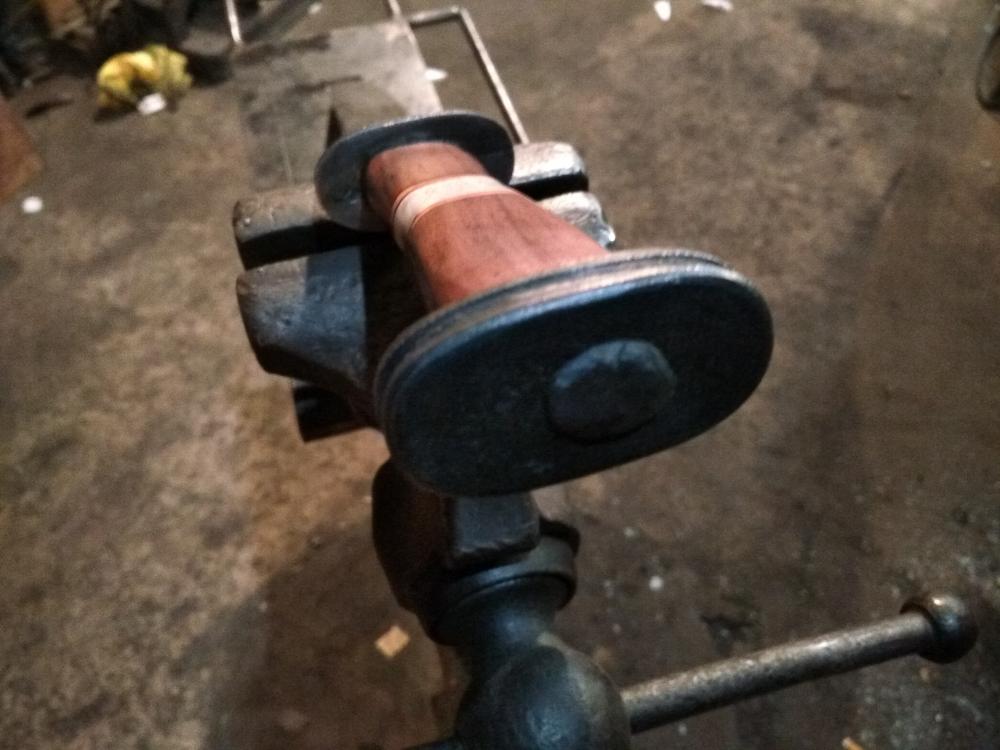
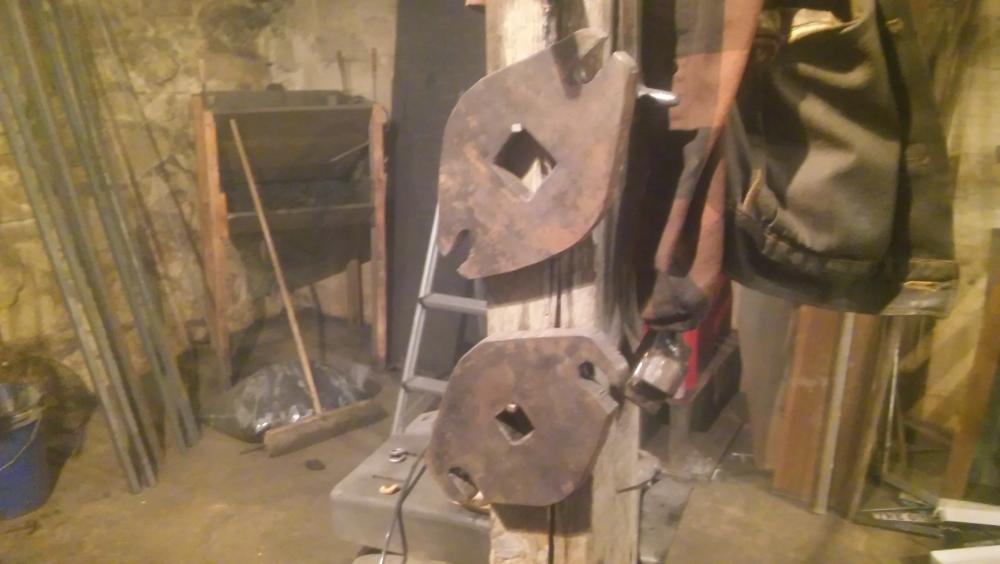
I think it's been a few years since I've been active on here. I've been lurking, mind you, just haven't been signing on or offering my 2 cents. Hope everyone is enjoying their lockdown! So here's a little fun project I decided to throw together since I haven't been able to teach classes here at the forge for the past few months. Firstly, it's picture heavy. Second, it's not my first rodeo with building a hammer. In the past I've built Kinyon style hammers, this is my first mechanical hammer build though. Third, you're right, I could have just bought the plans from Clay Spenser instead of wasting my time doing things the hard way, I even spoke with Clay on the phone but still decided to remain stubborn. I like the challenge of the build, exercising my mind, the tool at the end is just a bonus. So here's my adventure thus far. It's still a work in progress, but very close to the finish line! It all started with a forklift tire... I'm blessed to have a neighbor who has a 40 acre industrial scrap yard about 100 yards way from my forge. I've been handling the lockdown by taking a few walks back there, just wandering and wondering what sort of inspiration might hit. Then I found a pile of these. So I grabbed a few. Looked like a decent flywheel in my own humble opinion. I had an extra pneumatic hammer project just laying around, instead of reinventing the wheel, I figured it'd be a decent spring board to work off of. For the tup, I had a some A2 bars. Played around with the configuration, found one I liked, ran with the idea and used set pins for alignment before plug welding the whole thing together. The center channel is for alignment within the tup guide. Instead of using the tire as the clutch, I wanted to use a slack belt configuration, the tire is just a flywheel for the potential. The first choice as far as spring configuration goes was a Bradley inspired design, as opposed to one placed between arms. This actually worked great for about 12 hours, but with the fulcrums being as short as they are, the design would be better off with rubber springs like those used on Bradleys.. They run about $90 each for what I needed. Yeah, I probably could have found some out back, but I chose to abandon the idea just because finding springs of my desired resistance/length/i.d. was going to be a bit of a pain in the future. Great for a one time project, but what if I actually had to repair it down the road? The solutions became cost ineffective and a little restricted on the supply side. So, I tried the next idea. Eliminating the springs entirely was what happened next. Or, I suppose, more correctly, I eliminated a greater number of mechanical moving parts by replacing them with a single two-part spring I made of 1075. Let me just say, while this is a much simpler mechanical design, it is not a simpler technical design. You have to know and have faith in your heat treating abilities/capabilities or else you've just created something entirely dangerous/potentially deadly! There are extreme forces at work here, even a short 5" throw with a 35lb tup is generating some very awe-inspiring short term numbers! I'll just say this so no one blames me later, DO NOT make your own springs, catastrophic failure can result in catastrophic injuries! My own warnings ignored, this is what I ended up with. Here we have the hammer as she sits right now. I'm actually writing this to take a break from the cad work I'm doing for the CNC parts I need to make tonight. Everything between the springs and tup linkage is getting remade. I only pieced this hack together to make sure it would work before I invested the time and material on my table. I really like the action I'm getting from this design, however there is a point when the frequencies of rotation and oscillation meet and that does stall the hammer. To fix this, I tried reducing the distance between the tup arms. It delays the action and reduces it as long as I keep the hammer under a certain speed. Personally, it's not entirely acceptable. Why have a >50lb hammer if you can't do at least 270 bpm? My current thought process is working on a spring loaded bumper between the pillow block on the flywheel and the top of the tup to stop this travel based stalling from happening in the first place, but I'd be interested in anyones input. (except for Frosty, that guy can make up an answer for anything! lol You know I'm joking, Jerry!) So, there you have it! Again, it's a project based around my sick enjoyment of the problem solving process. It works well as is, but there's still more progress to be done! I'll update this thread accordingly over the next few days as I work out the kinks. -J


-
Like the time I learned about intergranular corrosion and stabilization in steels like S5 and S7 - not something that needs to be done on large pieces, but when getting into detailed shapes it's a plus. Either way, reading is good. -J
-
The issue with 52100 is the fact that it contains 1.3-1.6% chromium, the oxide produced even in such a small percentage like this is going to create issues similar to forge welding stainless. The less oxygen the better. Just grab yourself a $13 piece of 15N20 flat stock and be done with the scrap metal woes. While we assume your ball bearings are 52100, there's also a chance they could be 440C, ACD34, SV30, 316SS, 4320 or even microplated 1070M - A scrap shoot is a crap shoot and you can't learn metallurgy by making a bunch of guesses and assumptions. By the time you're done throwing money at consumables and fuel, you could have spent less and with a few clicks had the right materials sent to your door - not to mention the fact that with exact details others on here can give you exact answers, something not true with mystery metals. That's my $0.02, now back to the shadows before anyone realizes I'm here. -J
-
Braided cable Steel Damascus
j.w.s. replied to Matty Smash's topic in Blacksmithing, General Discussion
As a person who teaches classes on this, do yourself a favor, learn to crawl before you try running. Learn the in-depth workings of a known monosteel such as 1075 or 1084, get a few dozen blades under your belt and then learn how to forge weld on solid materials. My advice, there is no real cheap way to become a bladesmith and cheap or free scrap material is just that, unknown grades with unknown problems and surprises; $20 spent through Aldo for a new bar of steel will teach you more faster than you can imagine, primarily because you know it's xxxx grade and not "this part should be this but that month this company got a better deal on xxxx so they switched alloys and ht process for a few weeks to save some money". Save that cable for later, like for when your skills catch up to your dreams. -J -
When did you stop calling yourself a begginer smith?
j.w.s. replied to Mark Ling's topic in Blacksmithing, General Discussion
I never did. But when people I had looked up to started valuing my opinion on something I knew that I was going somewhere beyond beginner. Doesn't mean I've filled my cranium or ever will, but it's a nice start. 24 years in and I'm still thankful that I'll get to learn something new tomorrow. -J -
No, just a flat weld, San Mai. -J
-
build an anvil handcrafted with recycled materials
j.w.s. replied to angiolino's topic in Anvils, Swage Blocks, and Mandrels
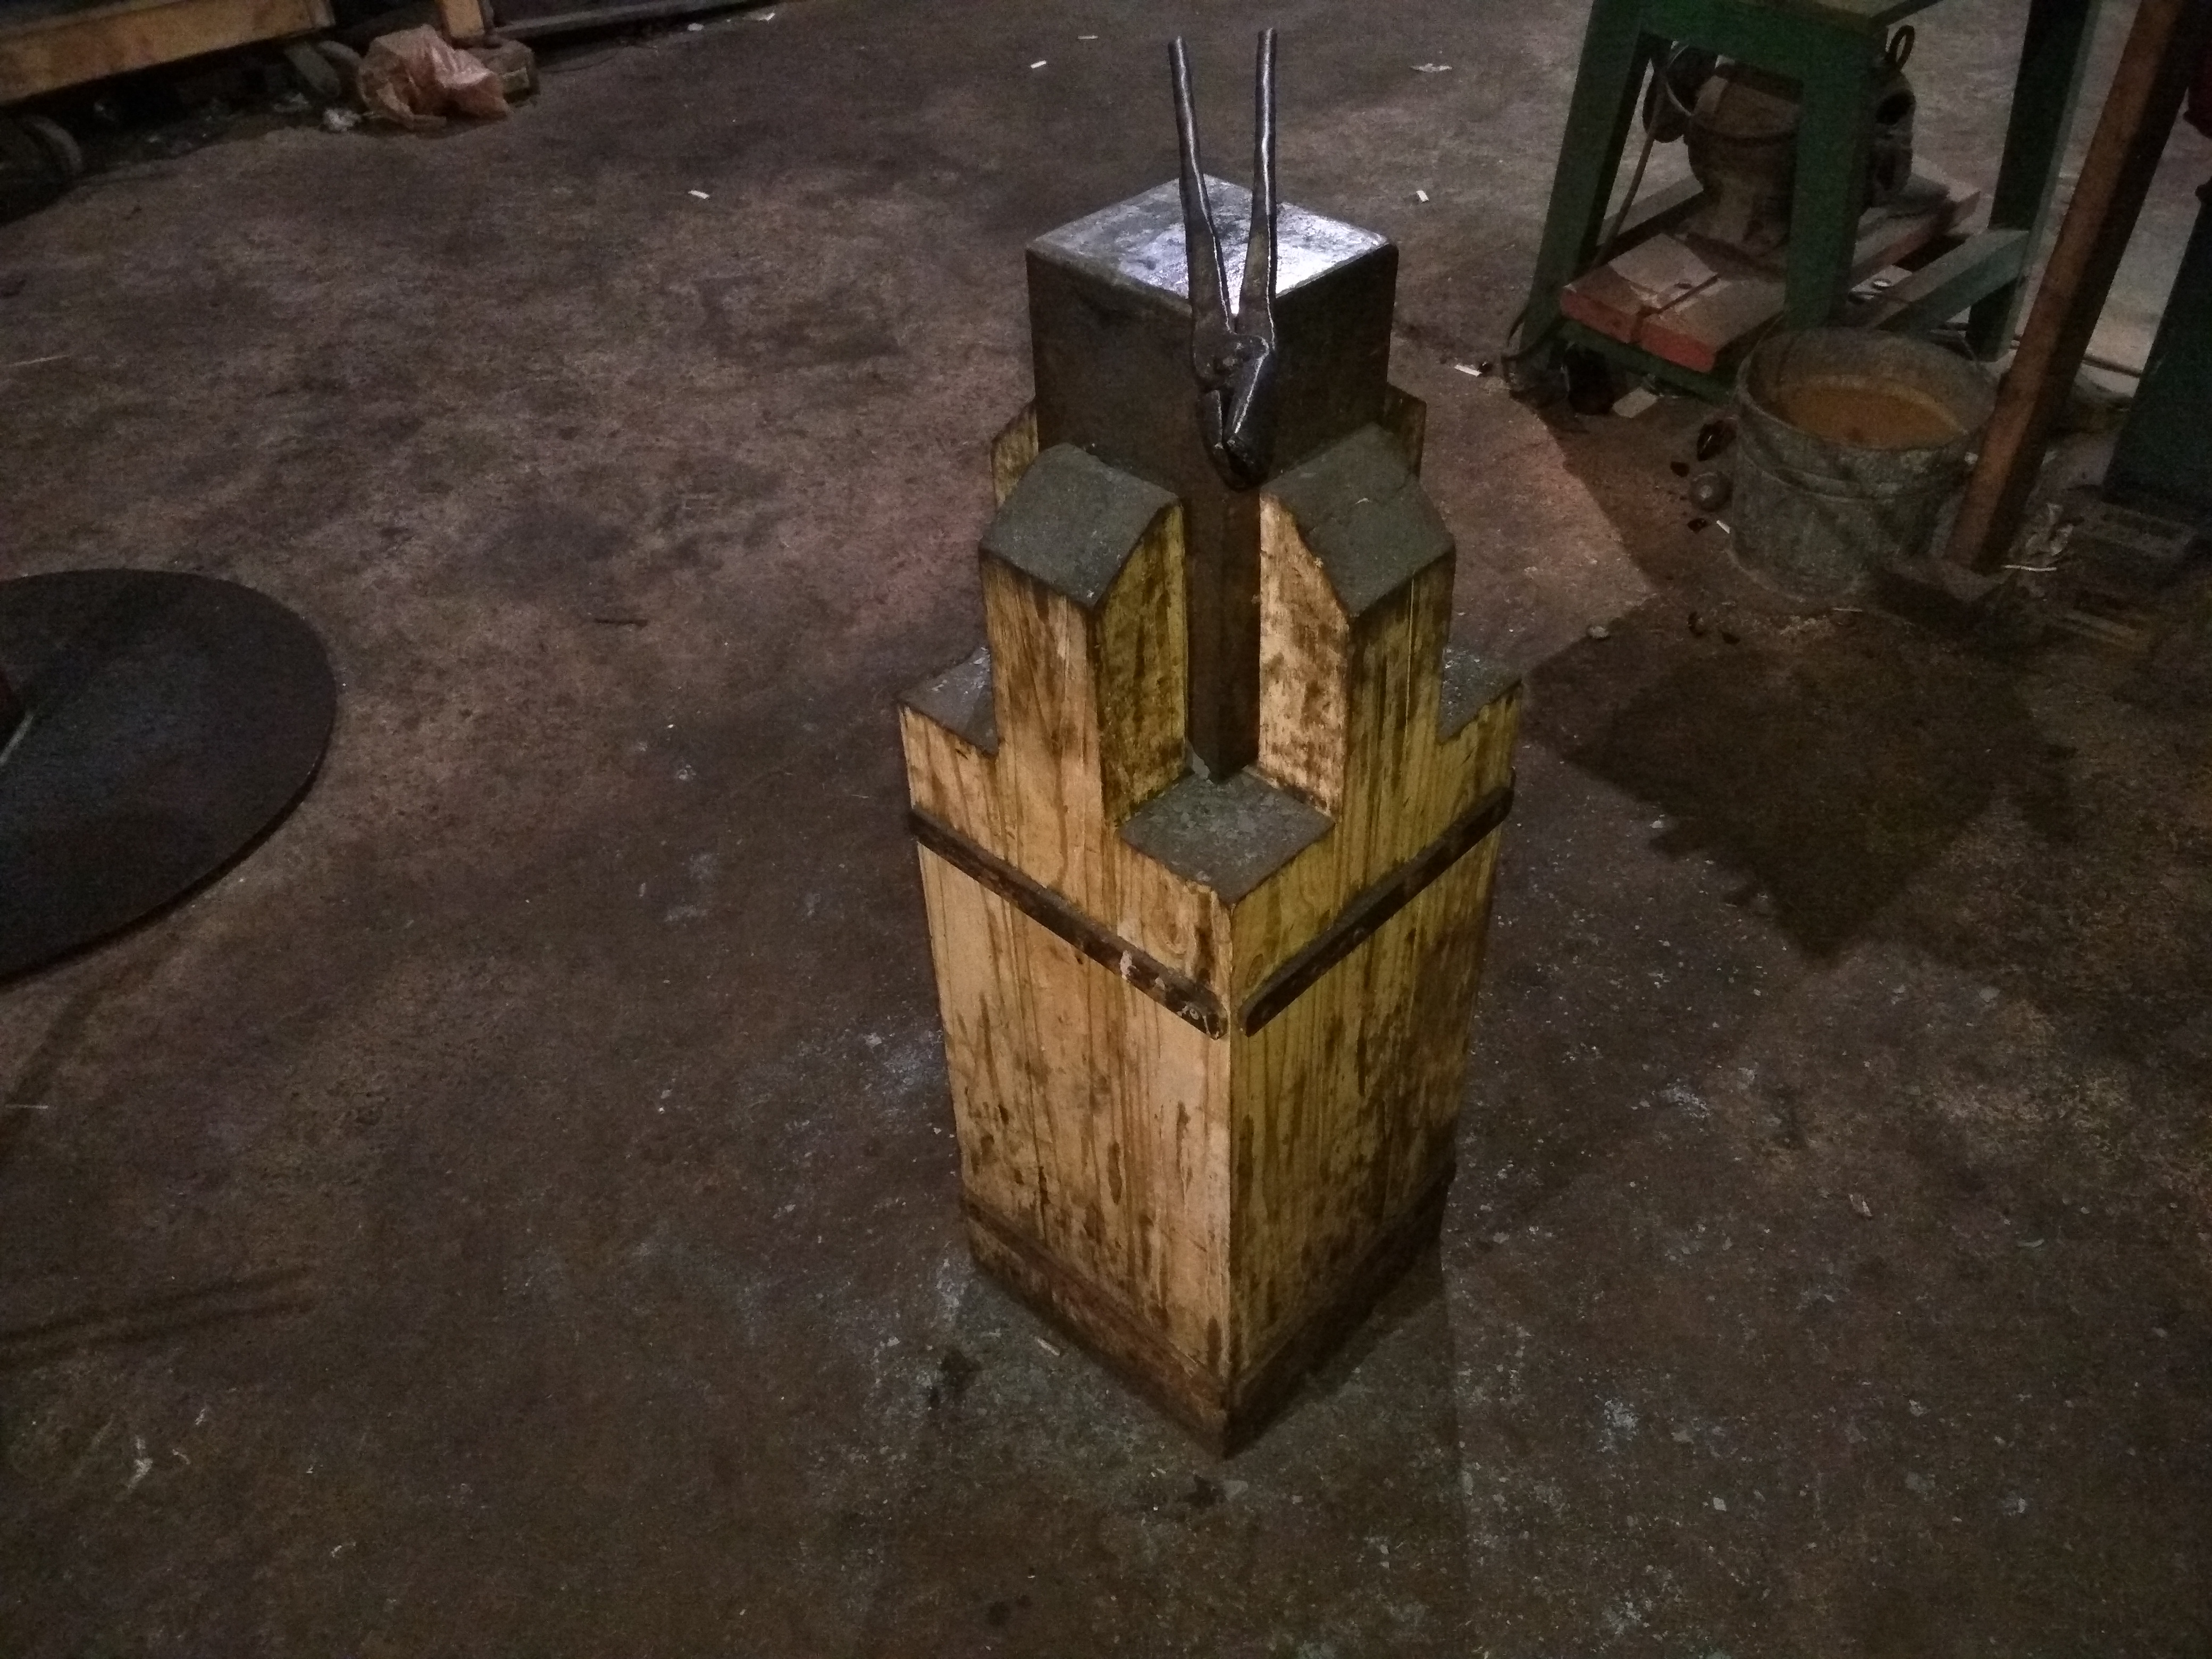
I get drops for $1/lb on tool steels. Best part about A2 is we can harden it here in the shop. Granted, it's almost 2 hours to bring to temp, but after that it's fairly easy. -J And yes, London pattern anvils are overrated. Bick tools can easily be made for and hardies work well in a post vise. -J -
build an anvil handcrafted with recycled materials
j.w.s. replied to angiolino's topic in Anvils, Swage Blocks, and Mandrels
$85 in A2 tool steel, 5.5"x6.5"x11". About another $50 for the stand. Doesn't get any simpler or simplisticly useful than this. -J
-
Thank you! Between Crazy Ivan and I it's been a bit busy around Underhill Forge lately. Forging tools, hammers, blades, teaching classes, building power hammers and drinking beer, if it wasn't for the long skinny end we wouldn't how to drink a cold one.. OK, that's a lie, we could be armless and have our mouths sewn shut and still manage to drink a beer. -J
-
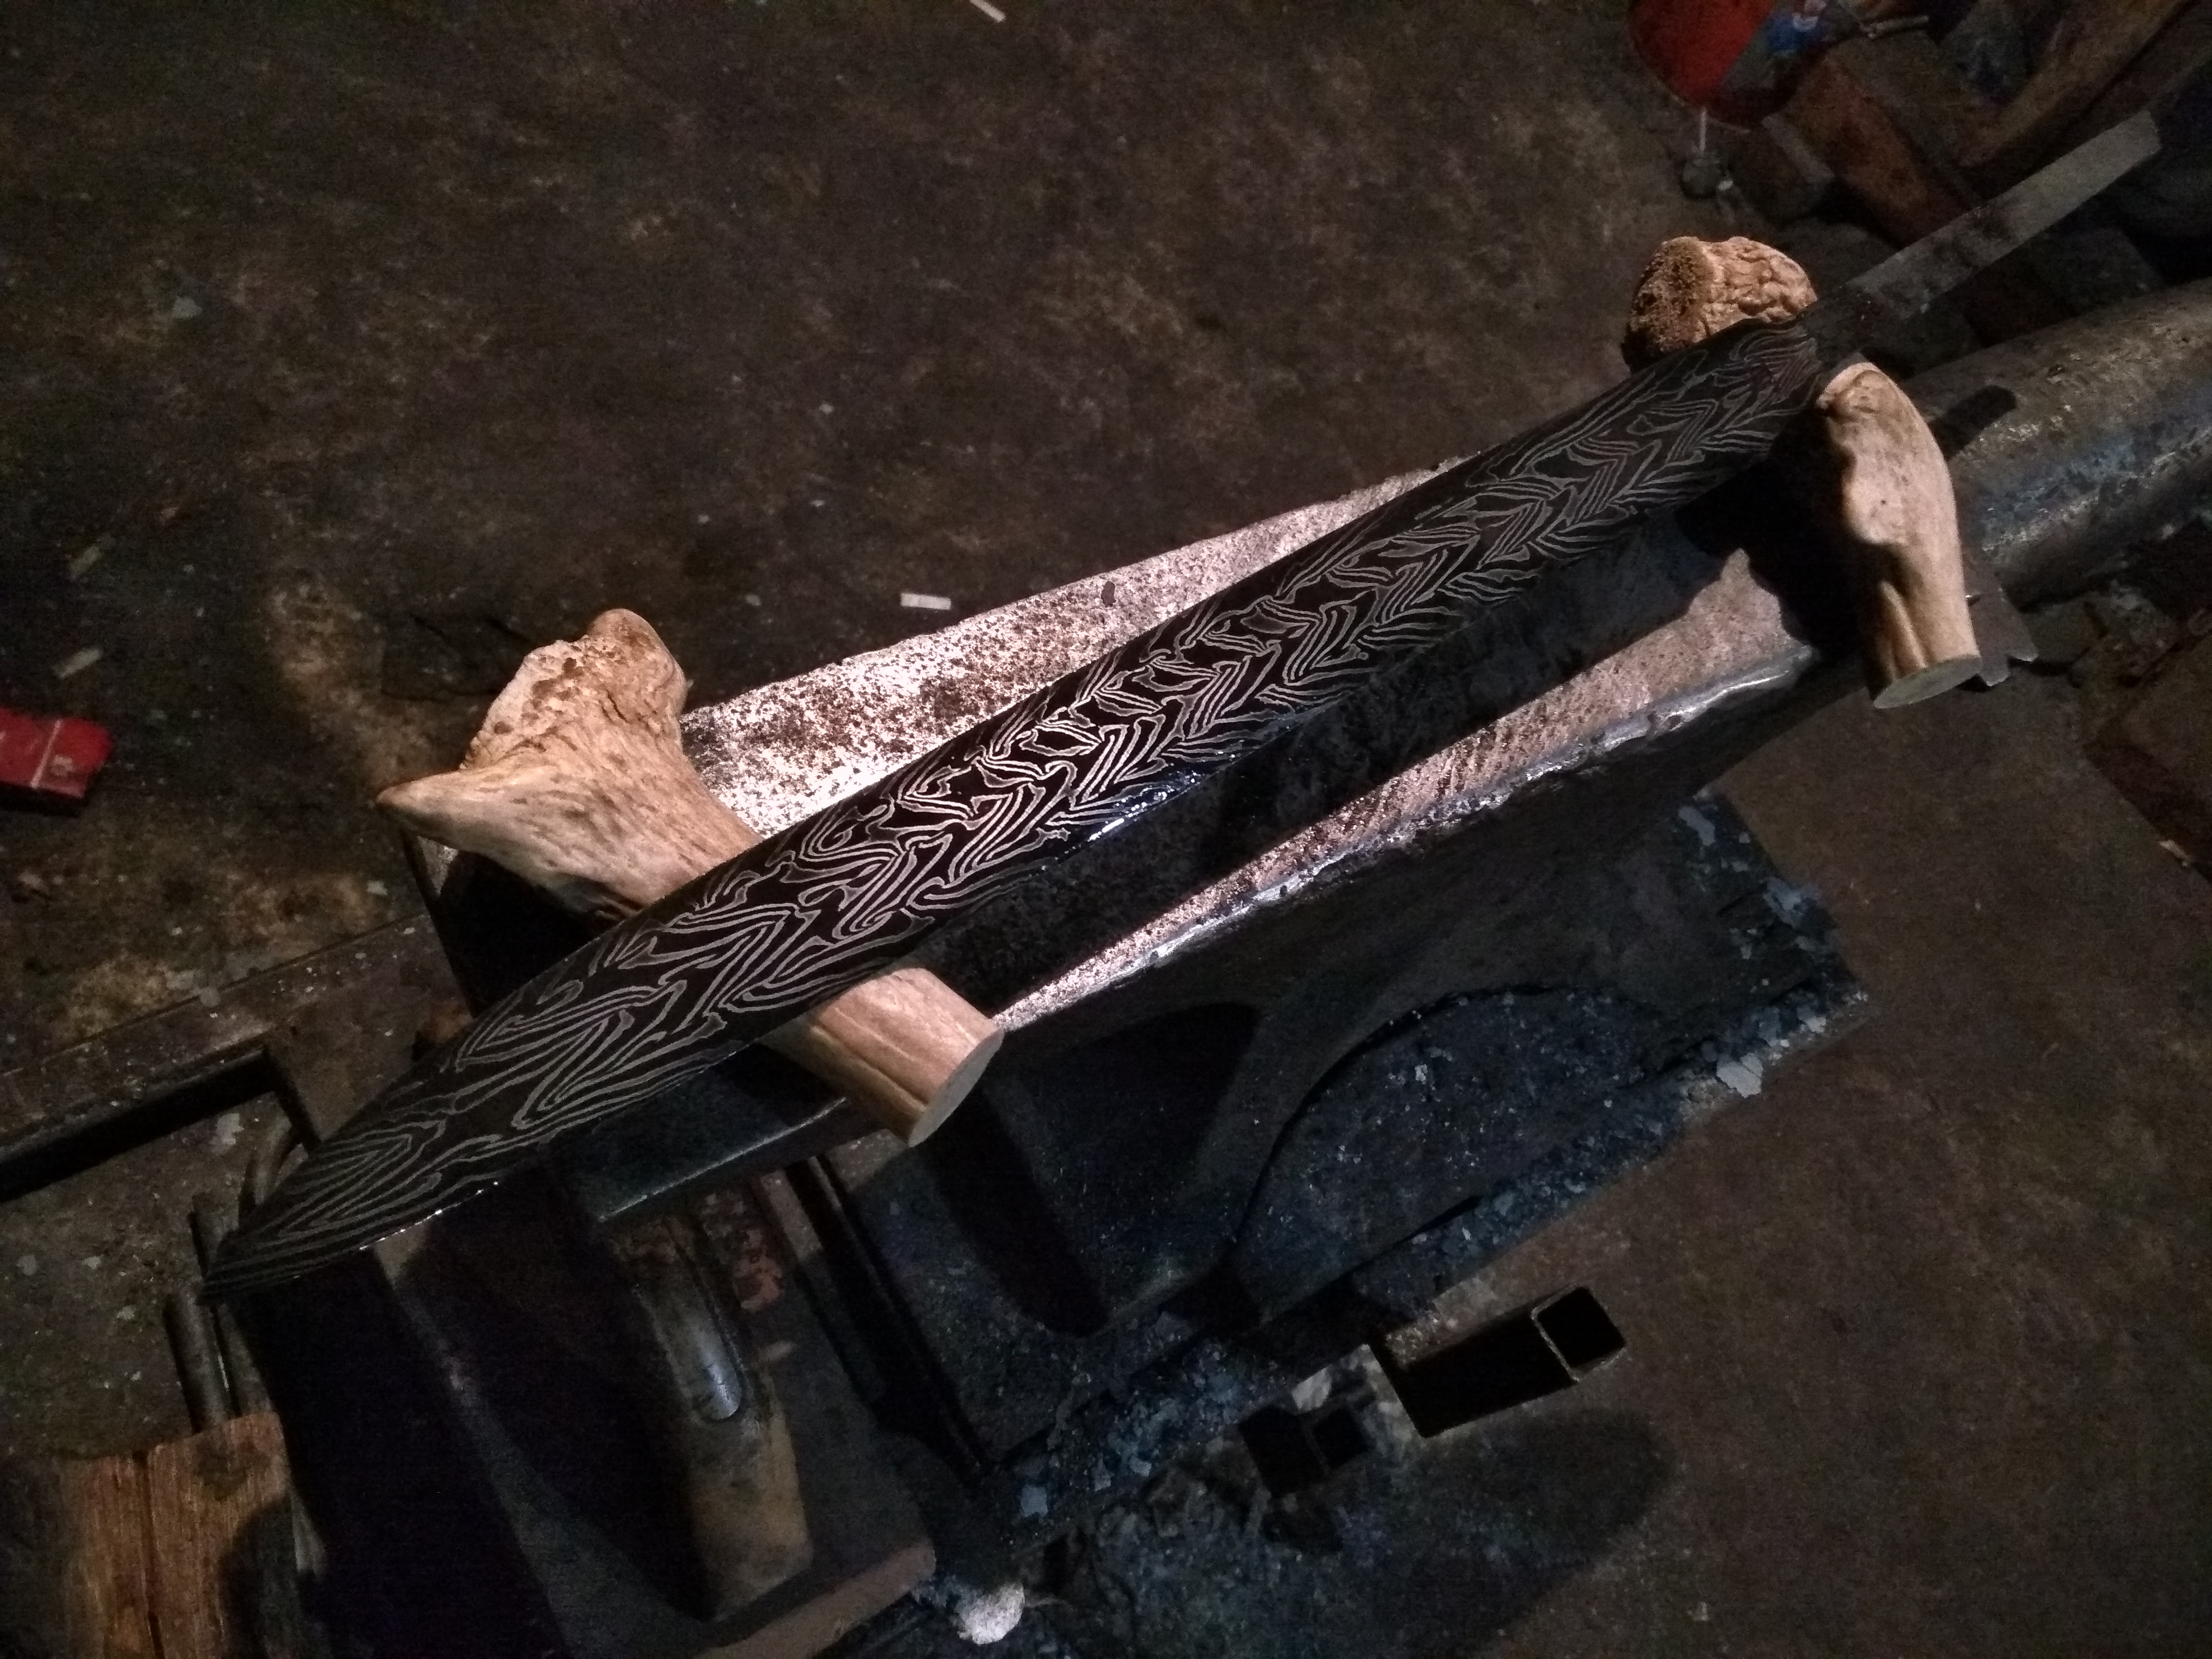
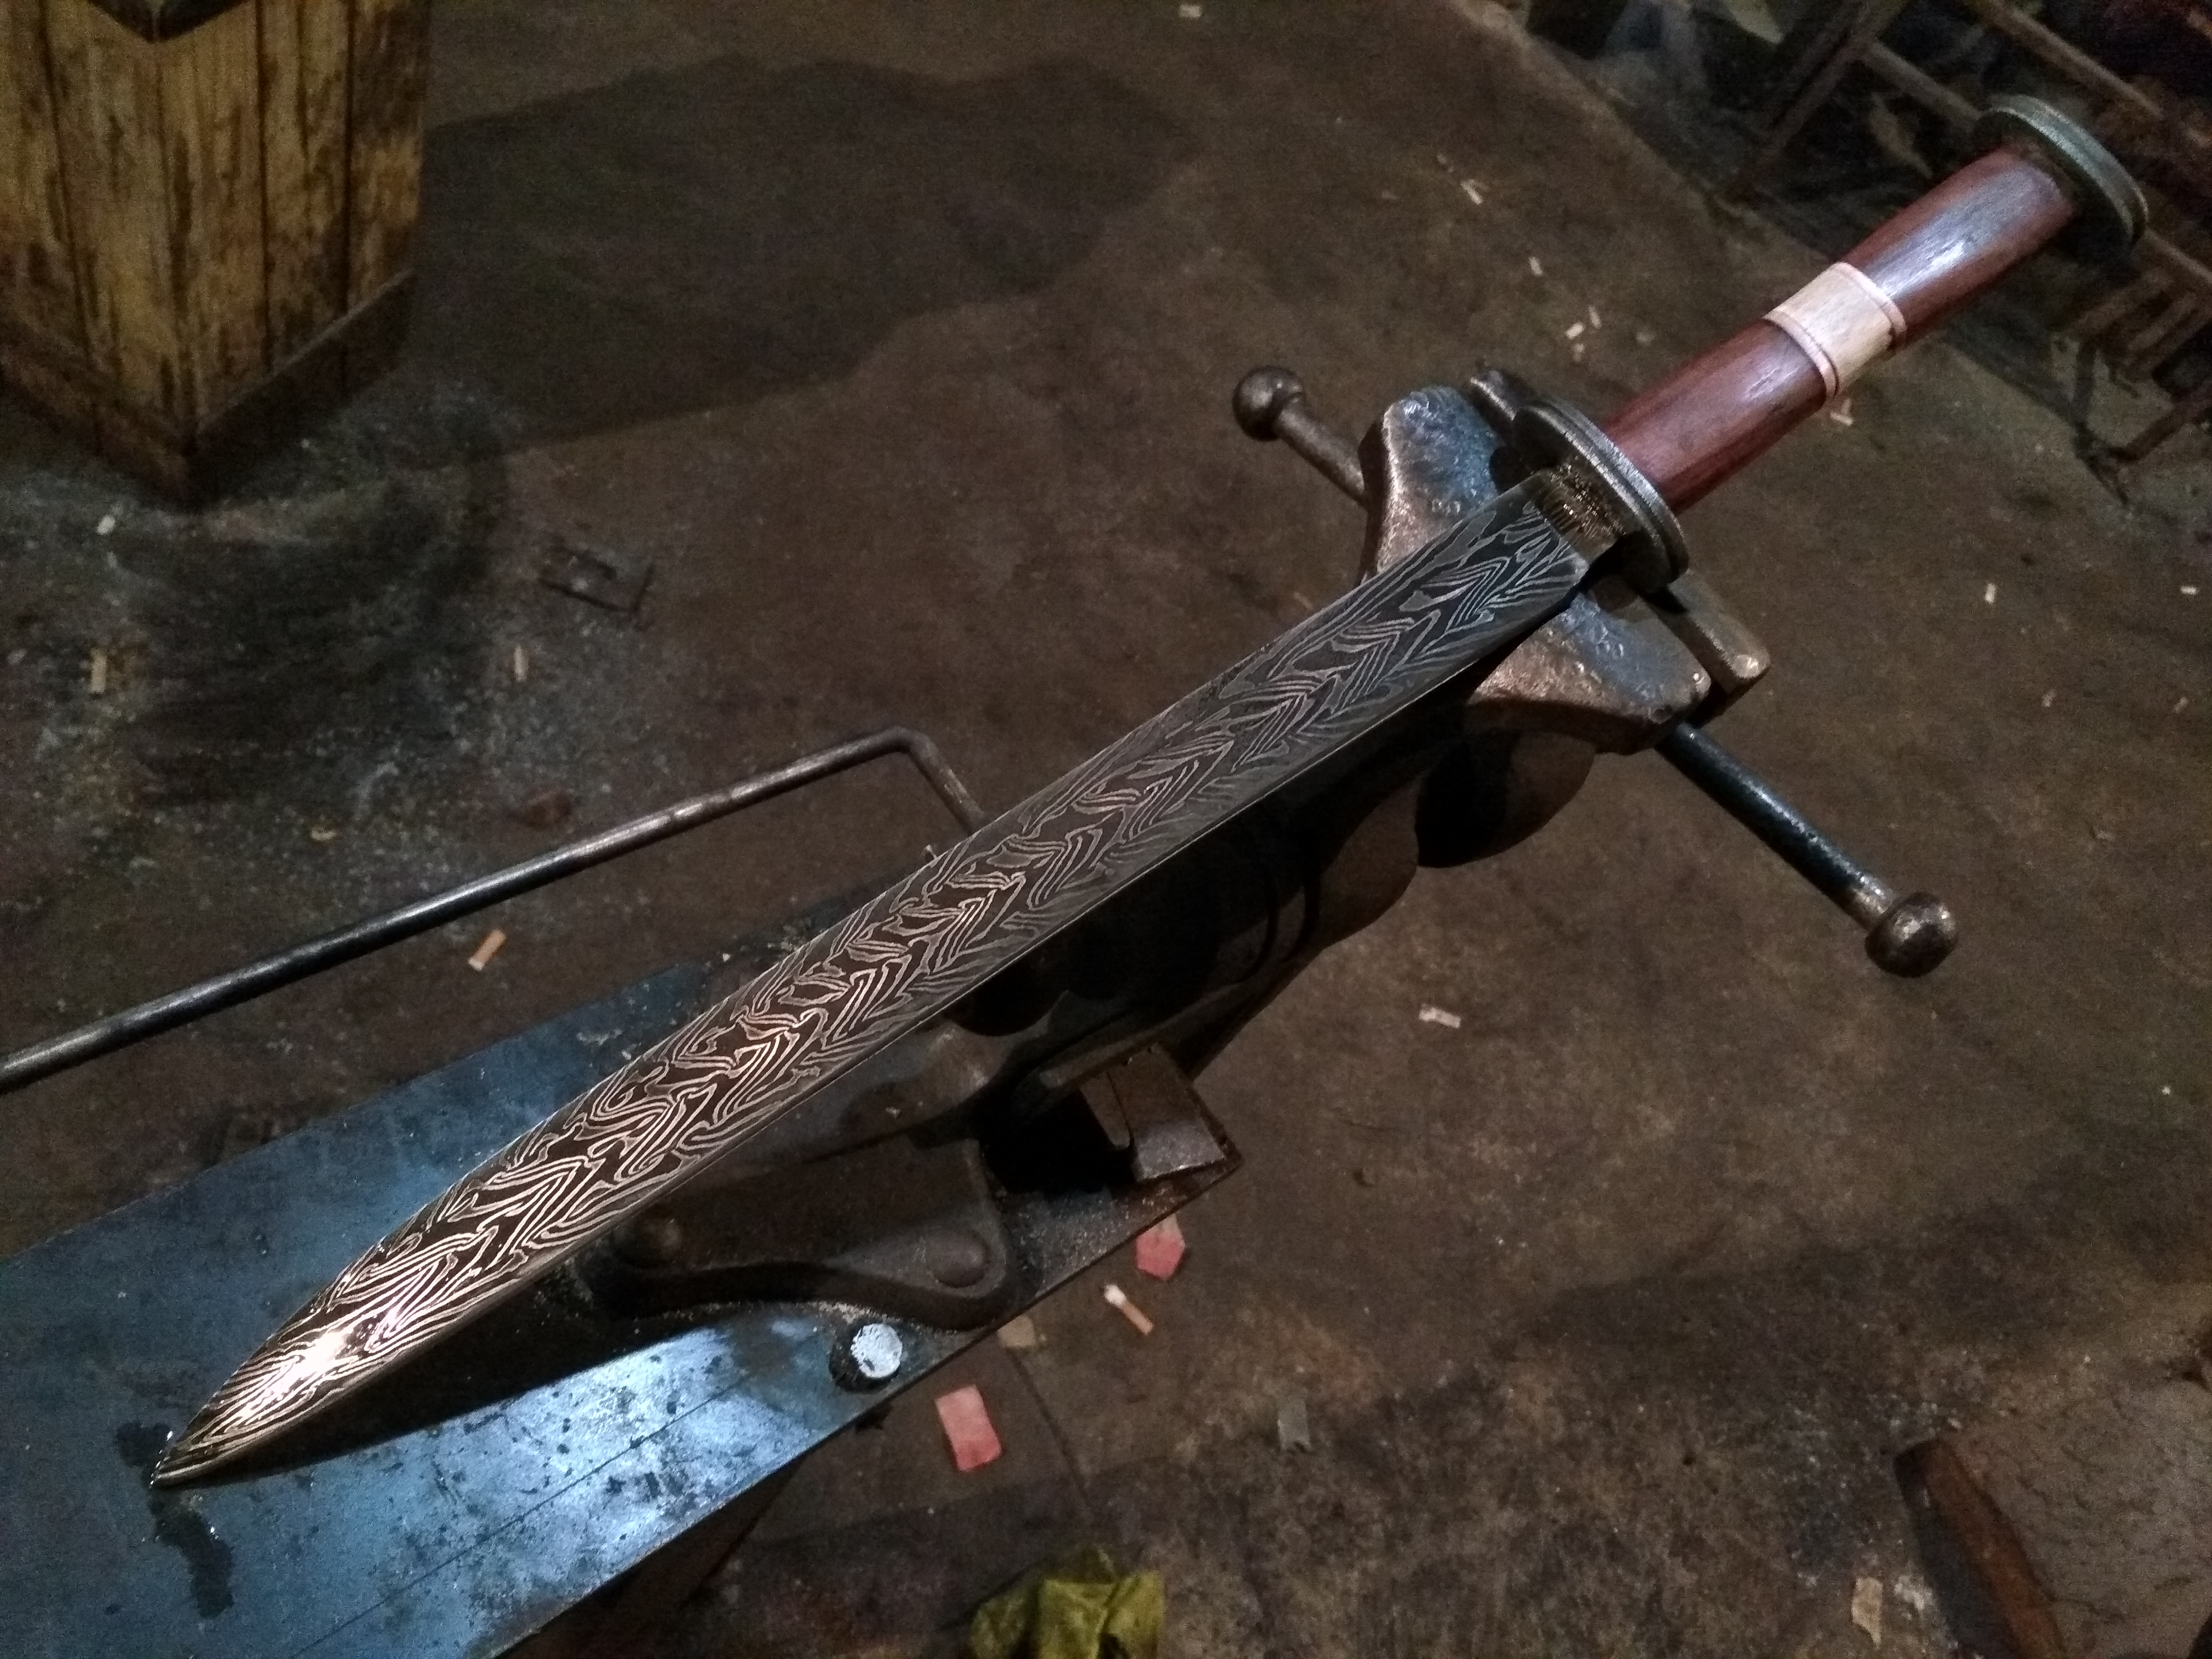
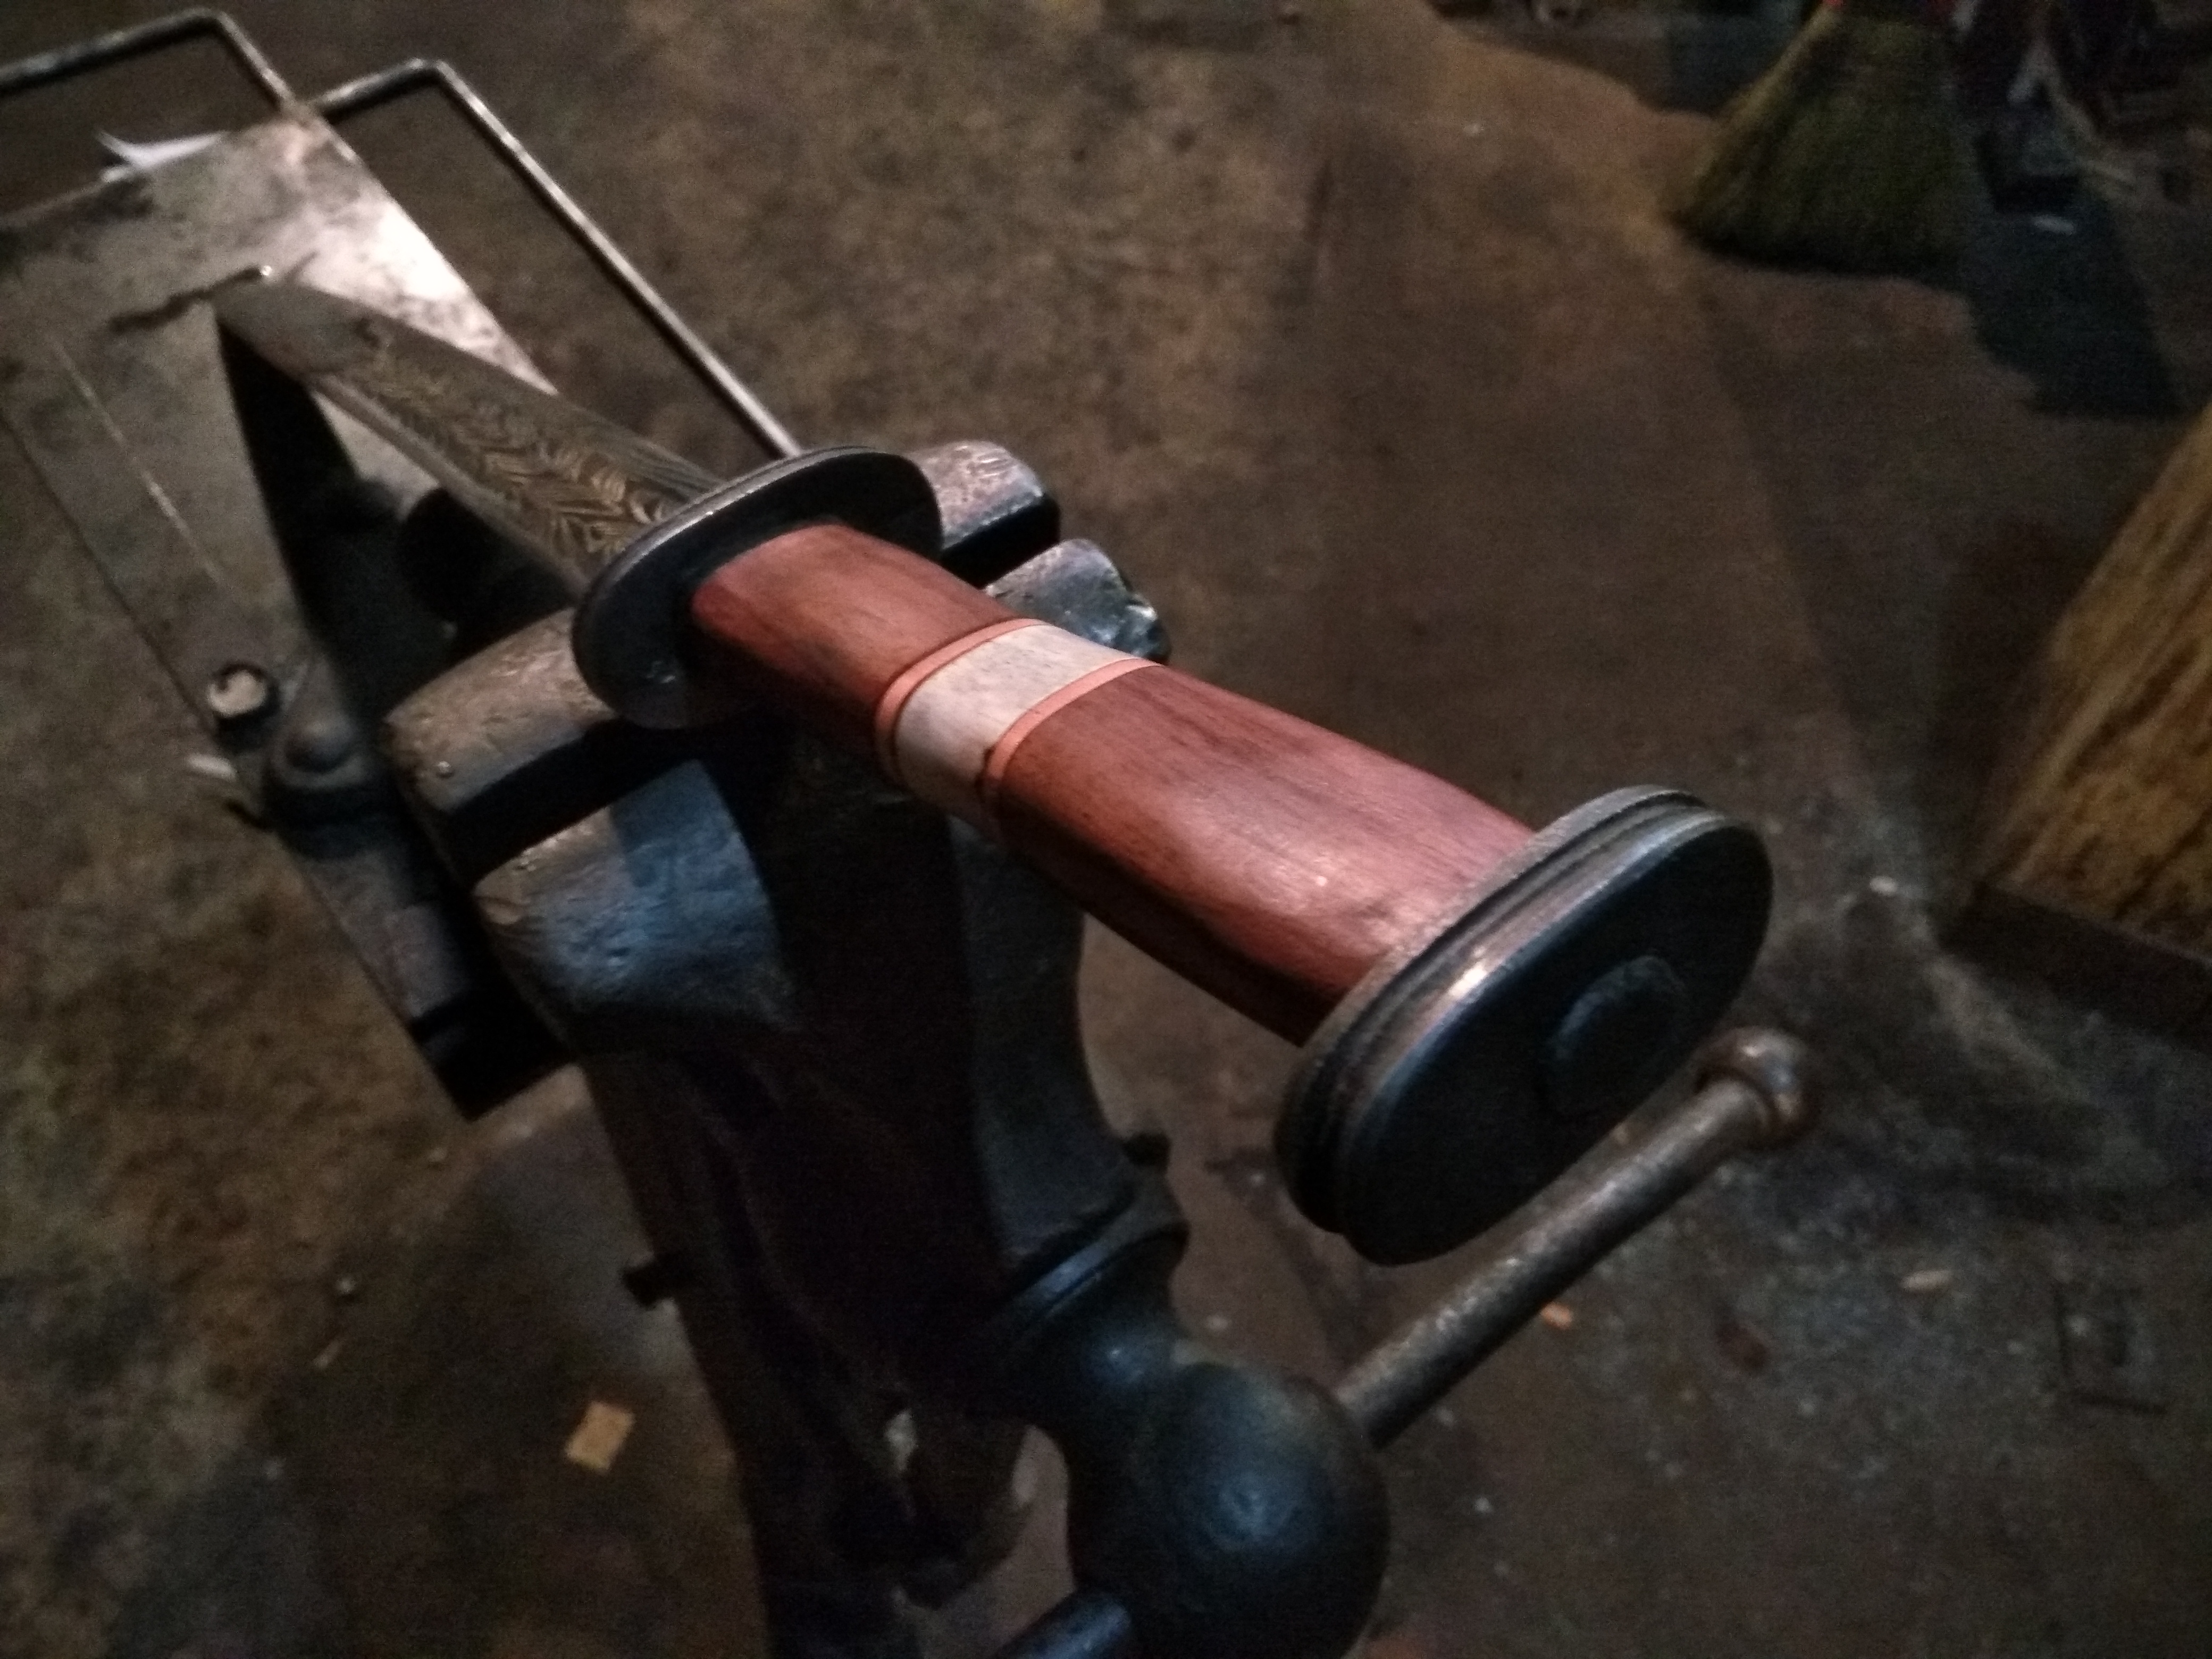
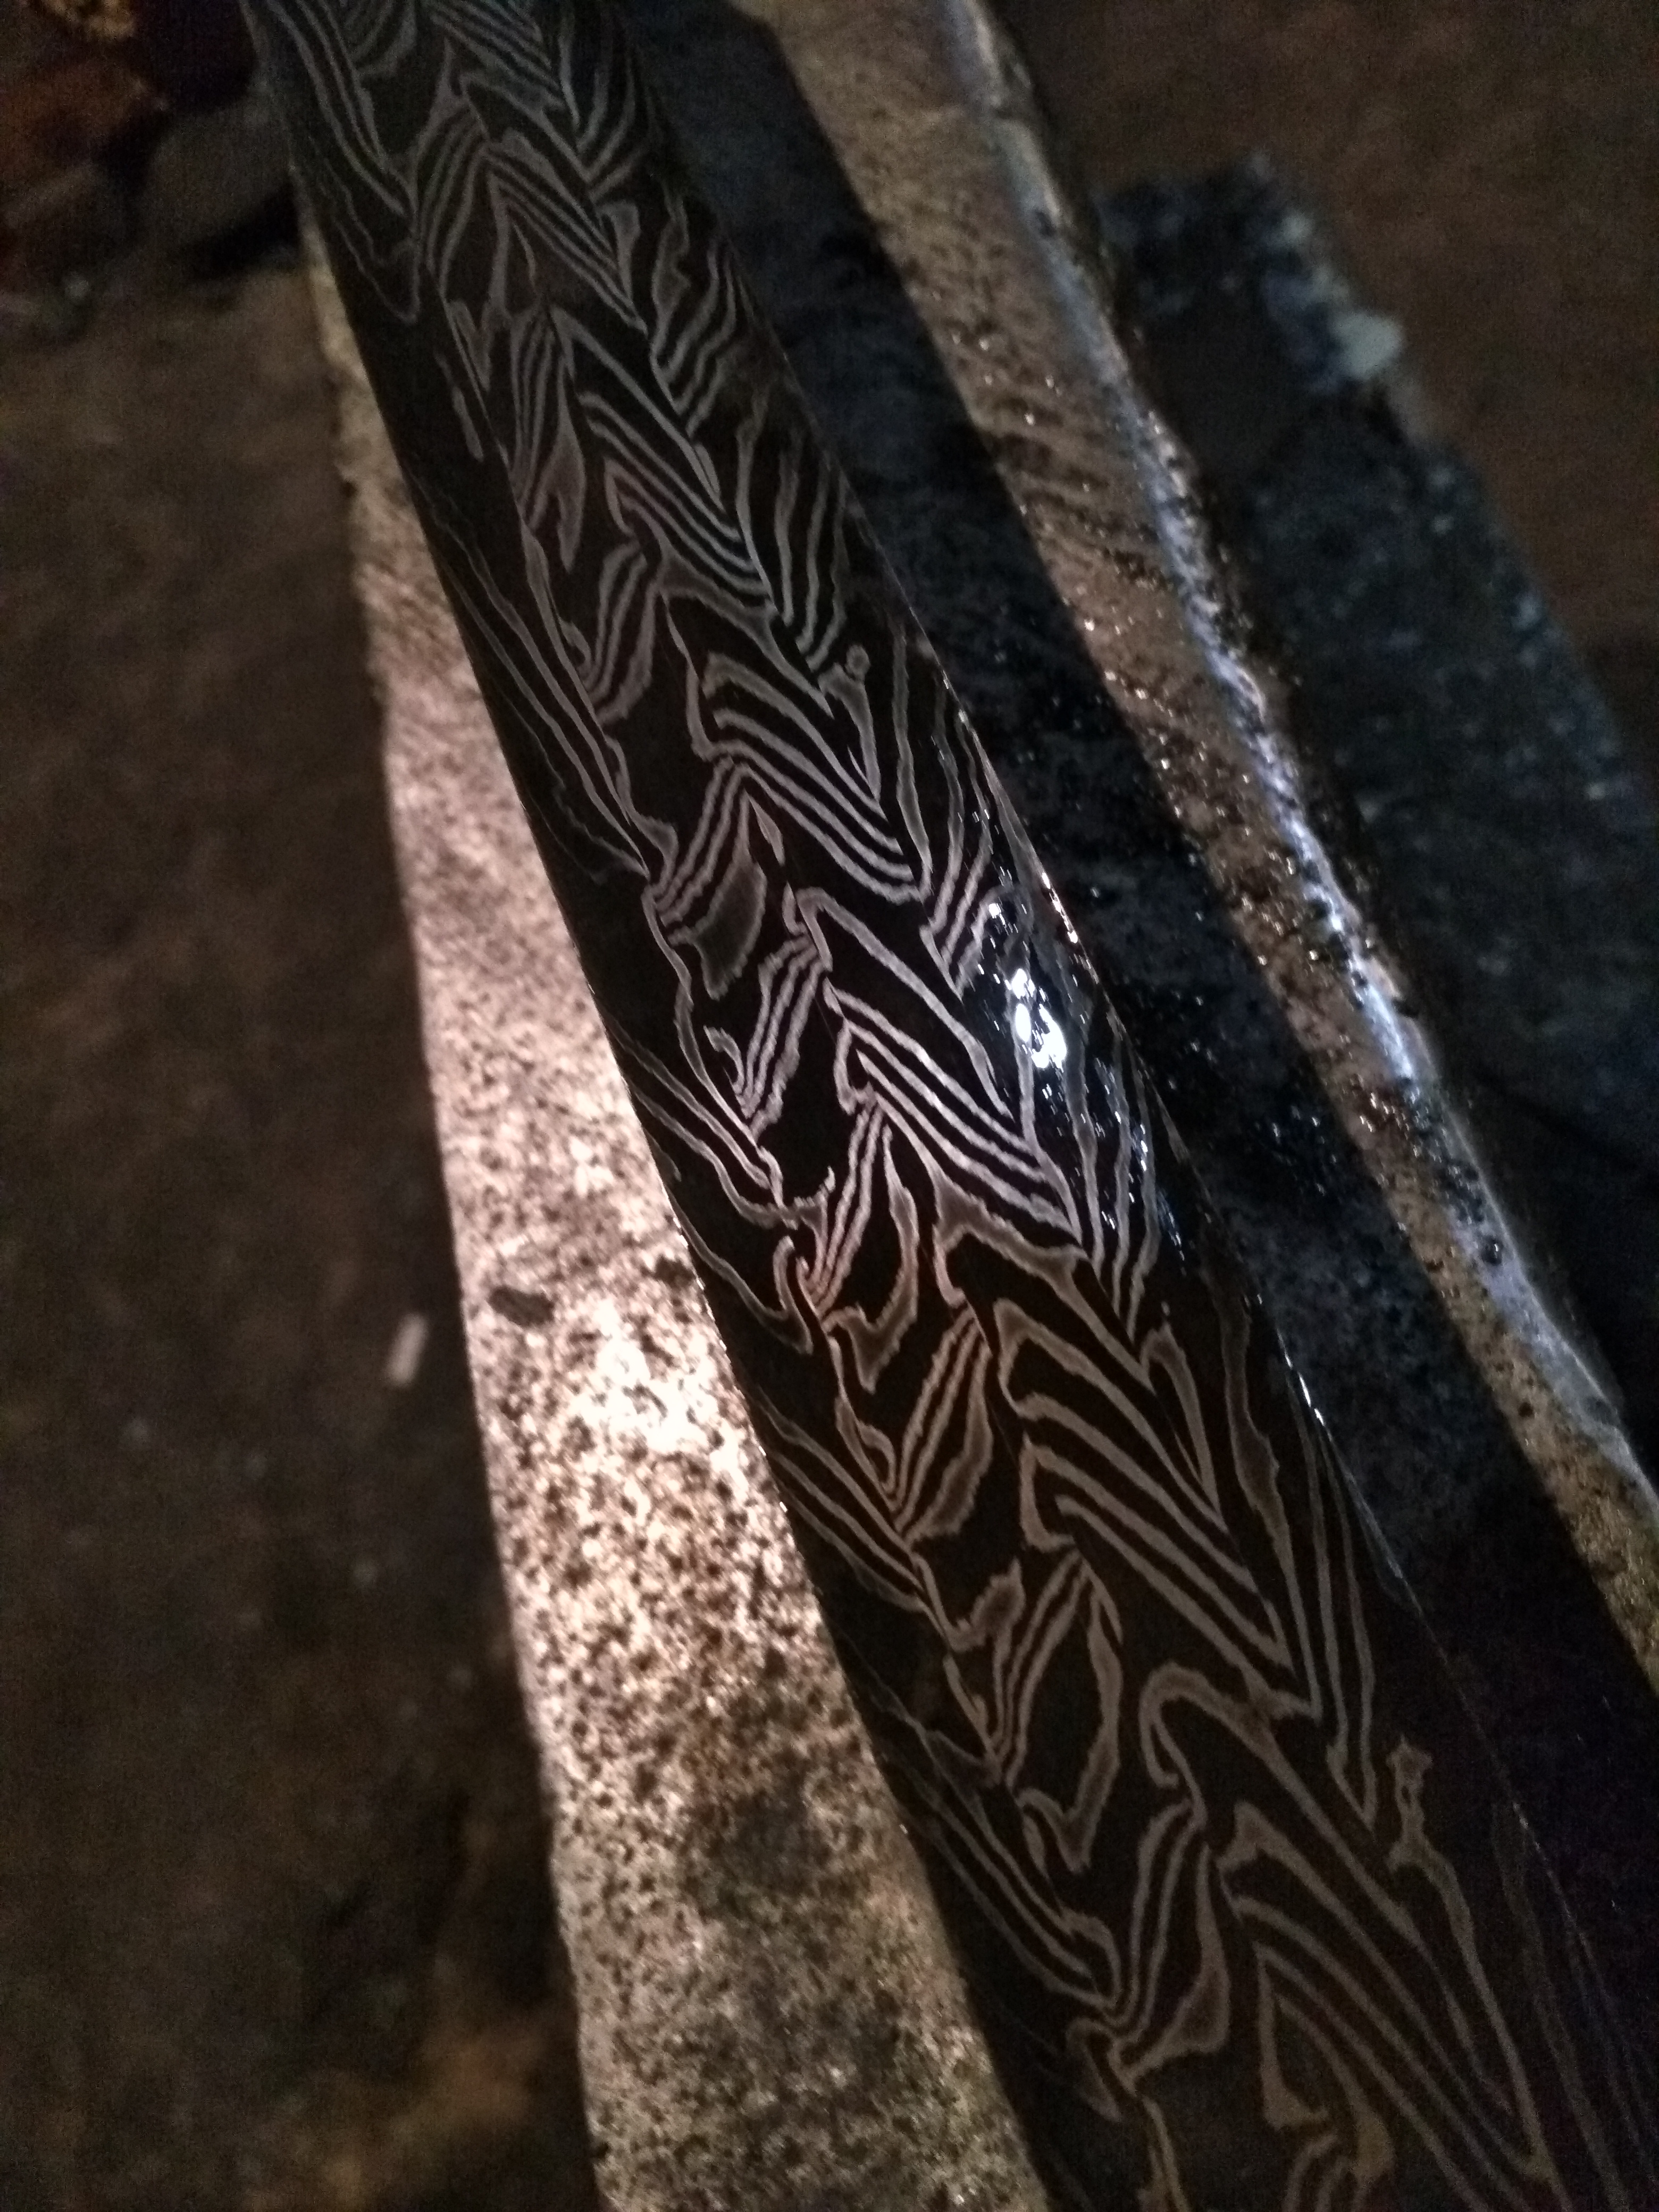
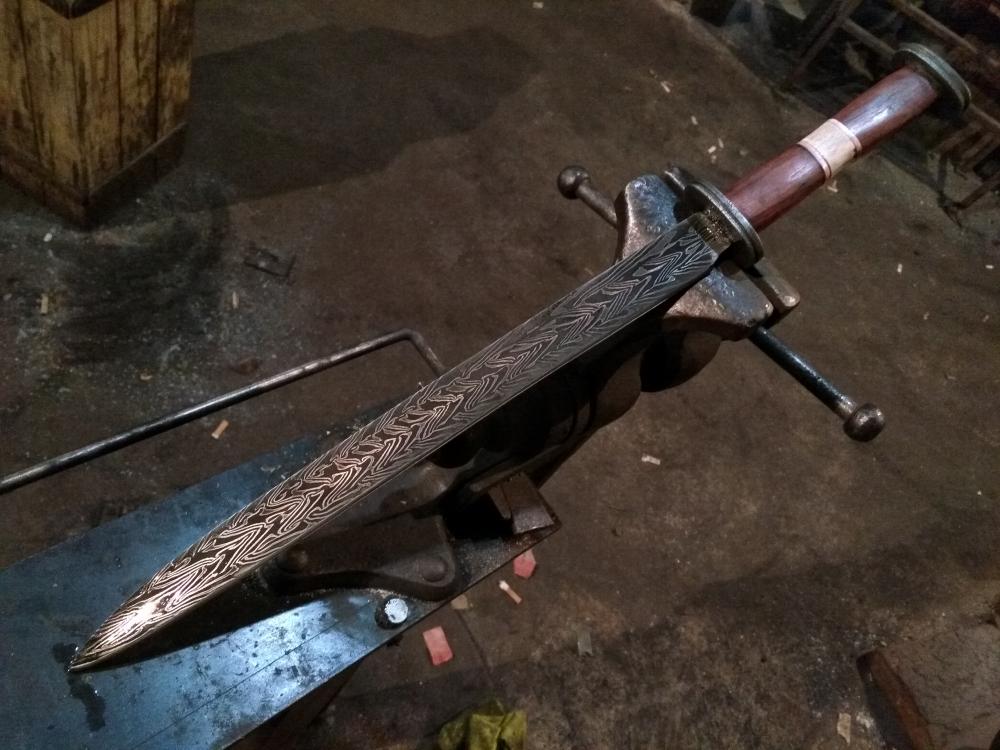
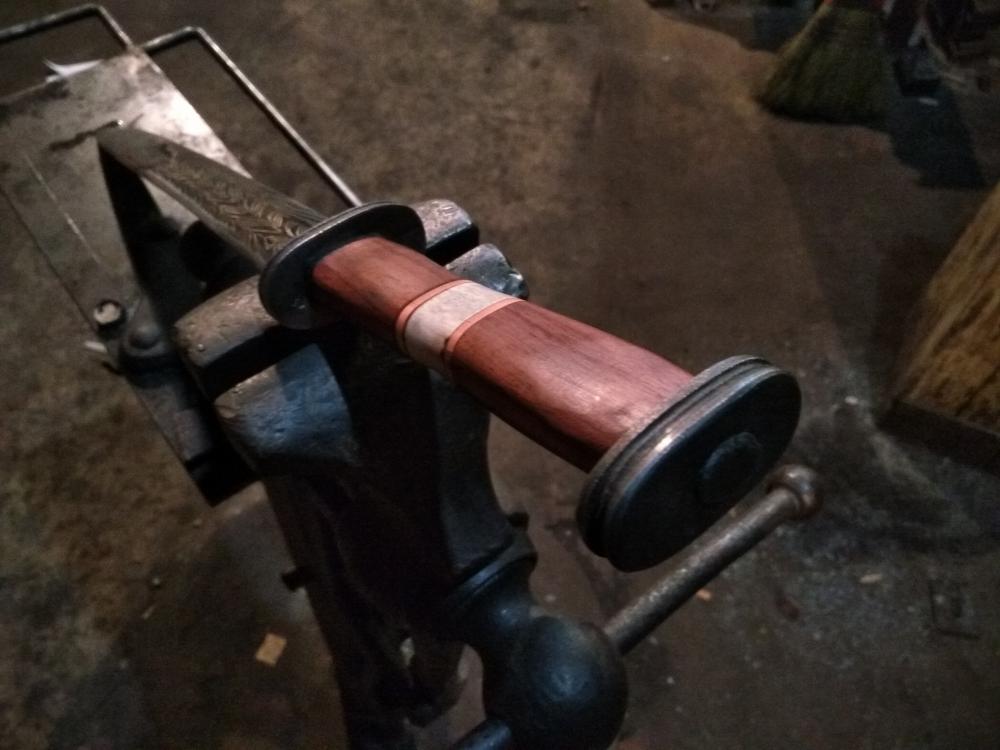
Well, Mr Sells was wondering if I was OK since I haven't been active on here for about half a year.. truth is, been very active but not very social. Here's a piece I started last Wednesday and finished up Saturday. 1095/15N20, herringbone pattern seax. 16.5" blade, 200 year old wrought for the fittings, cocobolo, copper and elk antler for the handle. -J


-
Hand Forged Knives with My Own Impregg Handle Material
j.w.s. replied to TheoRockNazz's topic in Knife Making
I do the same thing with resin. Permeable materials are better than solids in my experience. When I do something like wood chips or even coffee grounds I have to do it in a vacuum to get the saturation of resin. Other materials like shredded felt and construction paper work fine though with just a few tons of pressure and are easier to achieve an abuse-withstanding bond. -J -
Yes, very sad news. Doug was a great guy and always interesting to talk to. He will be missed. -J
-
Yeah, I do 3 students at a time in my knife making classes and it's a little easier than one on one sometimes. People tend to feed off the input of those around them and it's always cool to see encouragement happening among the group. Takes some of the pressure off and when it comes to one on one instructions the other two often watch and ask questions I don't immediately think of volunteering. - J
-
Yeah, check out the video of Crazy Ivan and I drifting the holes in the block of S7 for a striking anvil over in his thread. That's my Soderfors under that 65lb block, no babying required. J
-
That would probably be some of my misc tools and punches floating around in the tray on the anvil stand. J
-
Lol
-
Yeah, it amazing how people can always tell what I do without them asking. They just look at the hands, clothes and coal dust. Lol J
-
We just do it under the power hammer thanks to some tooling and have never had a shank get stuck as the metal contracts as it cools. J
-
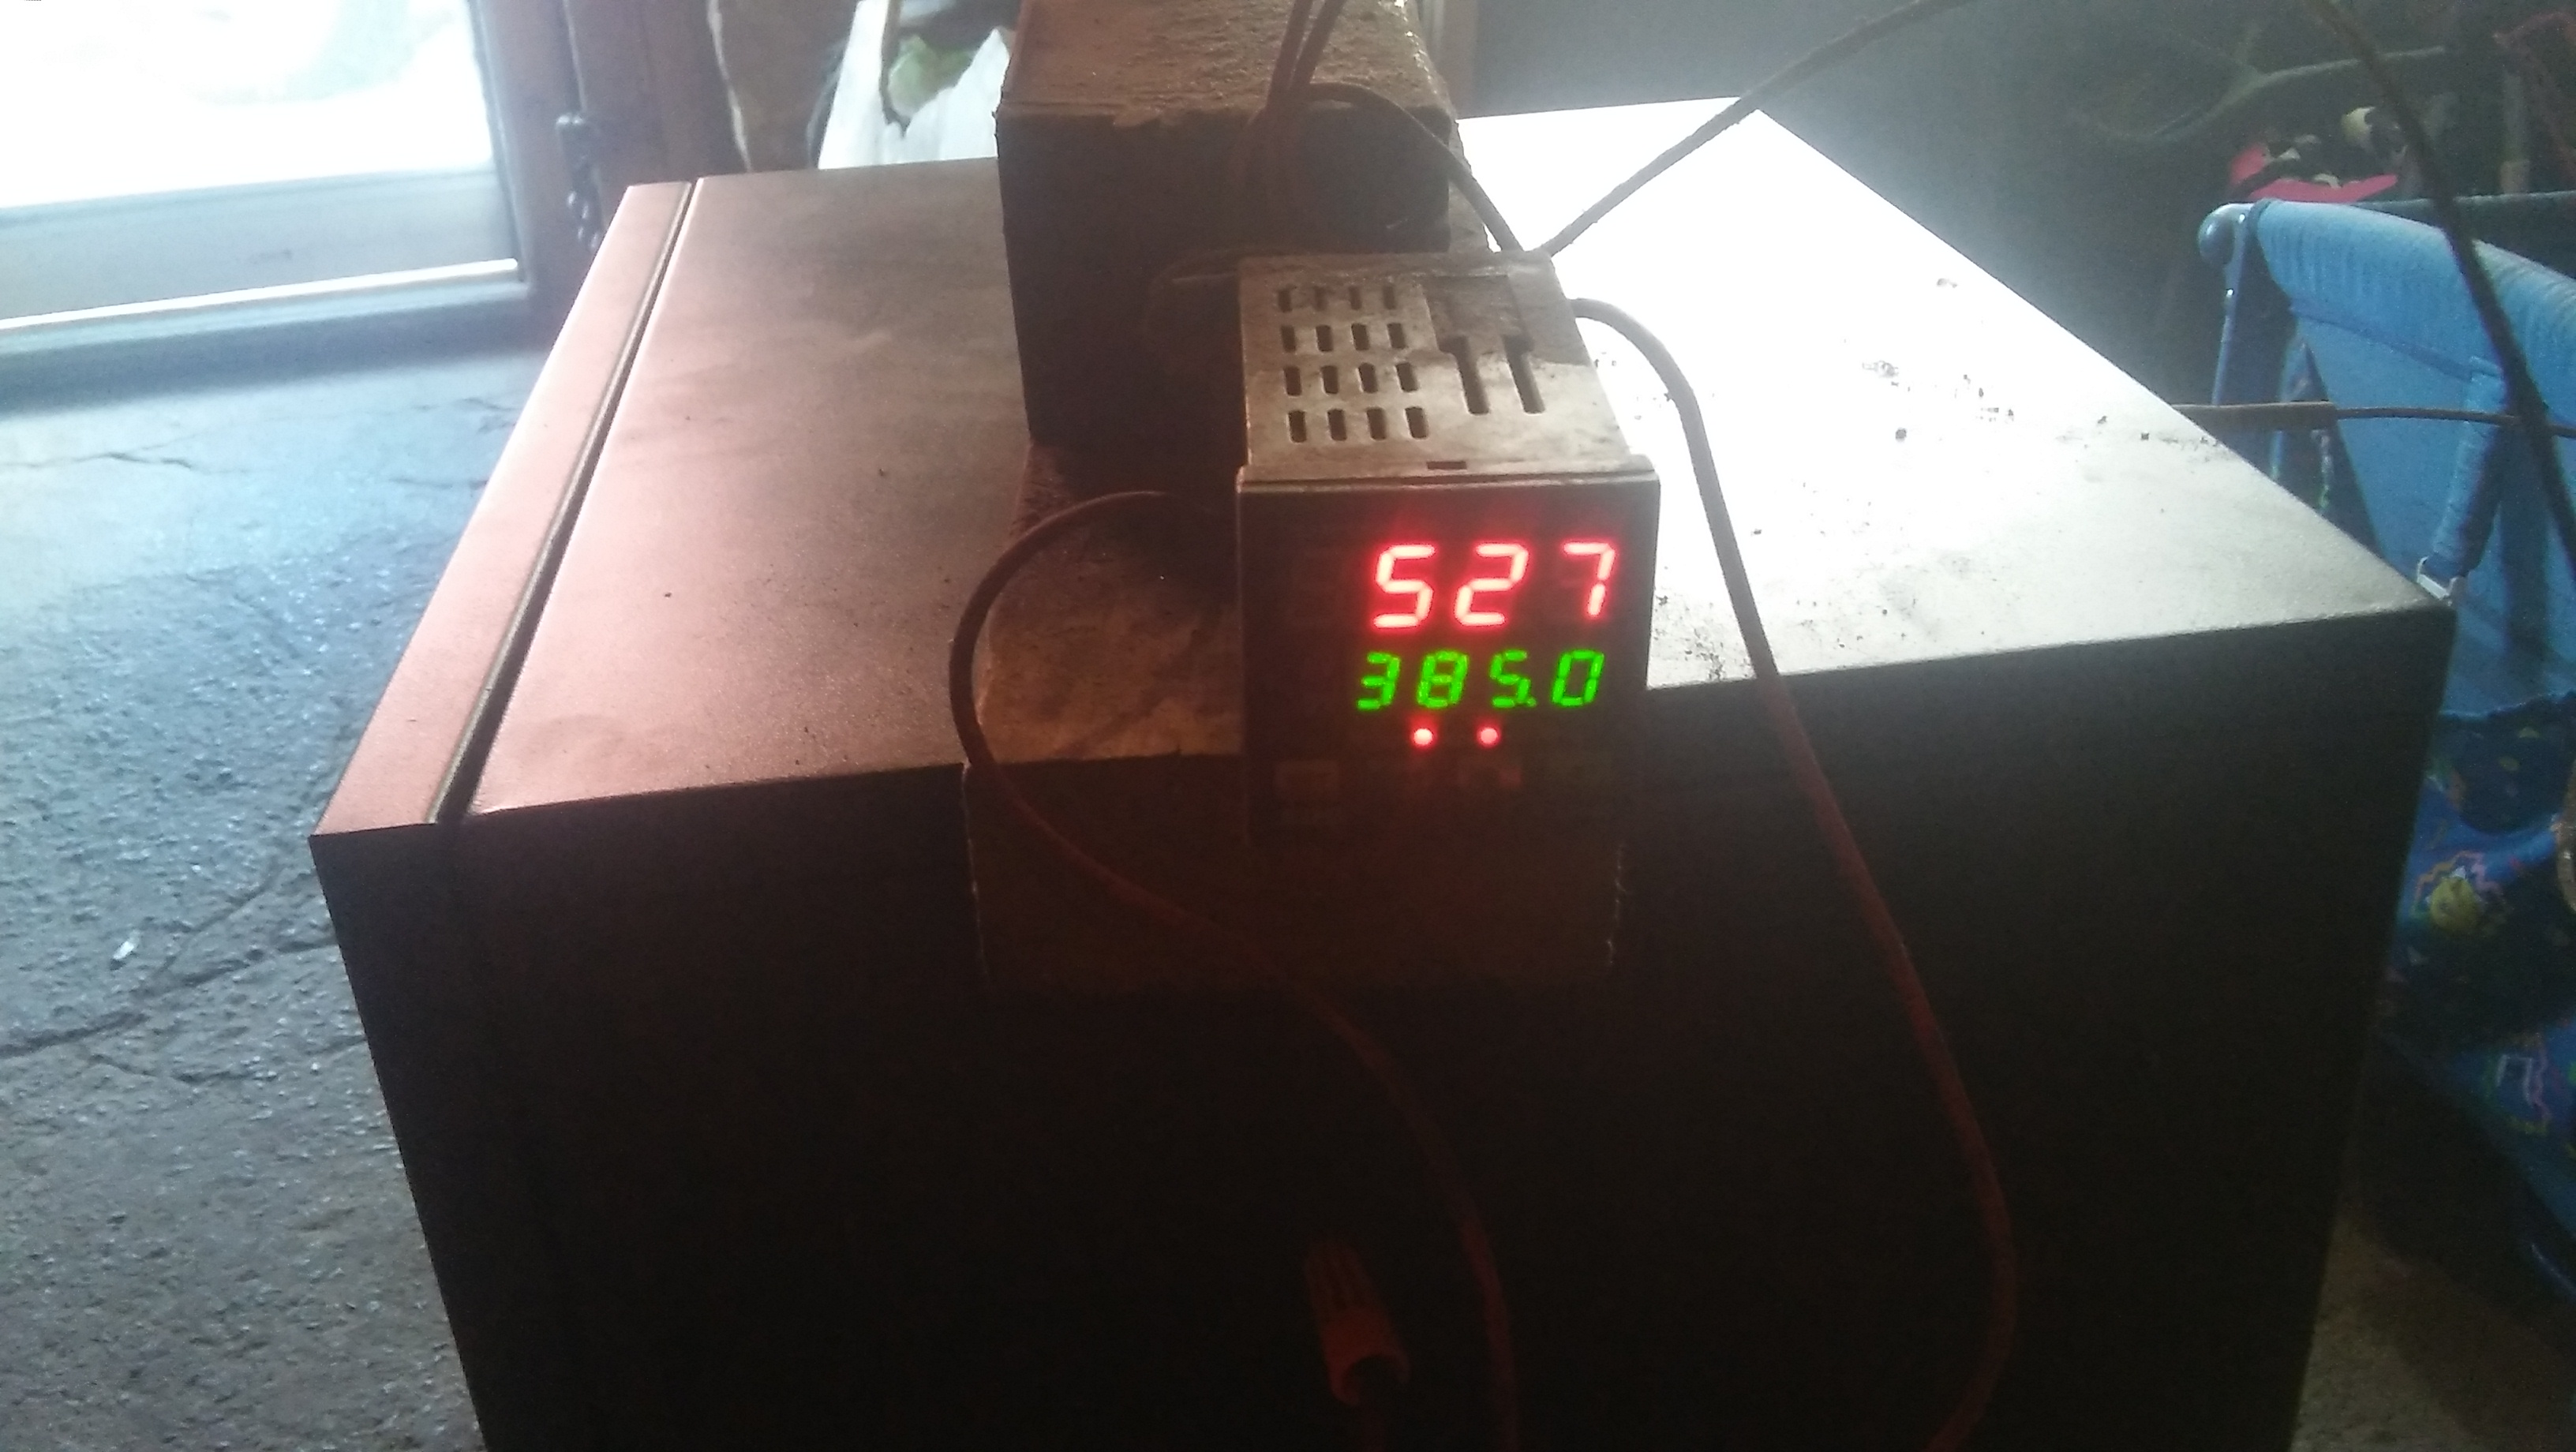
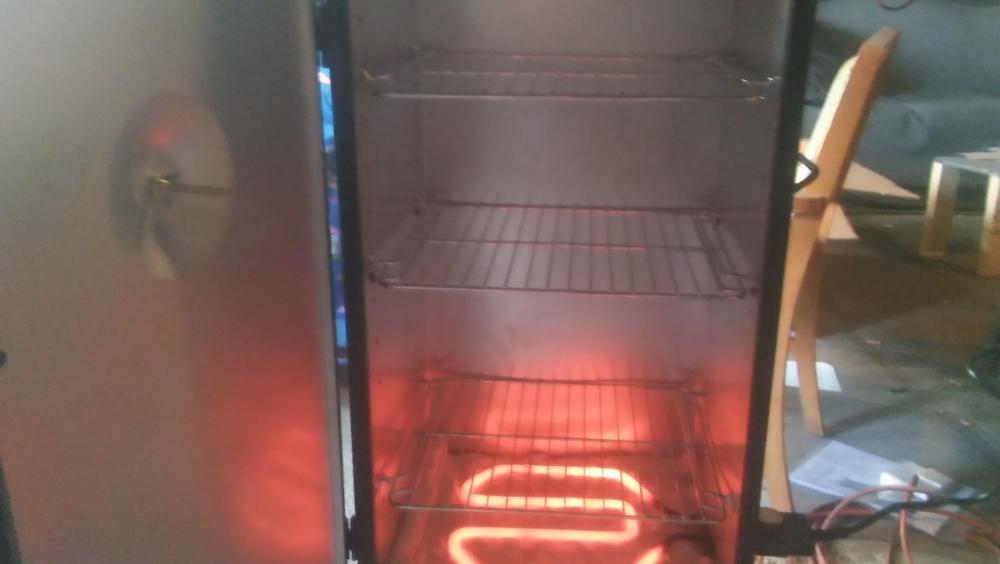
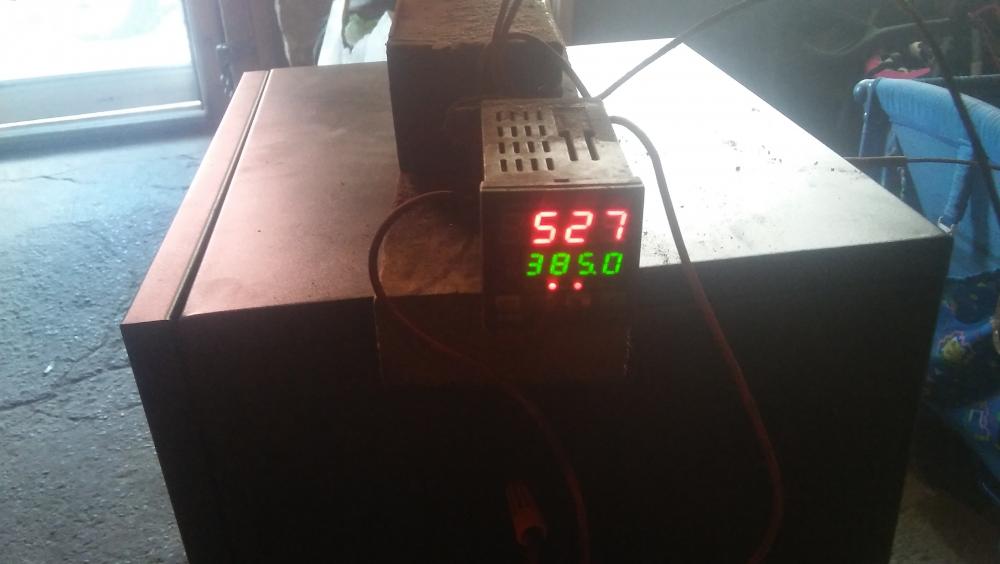
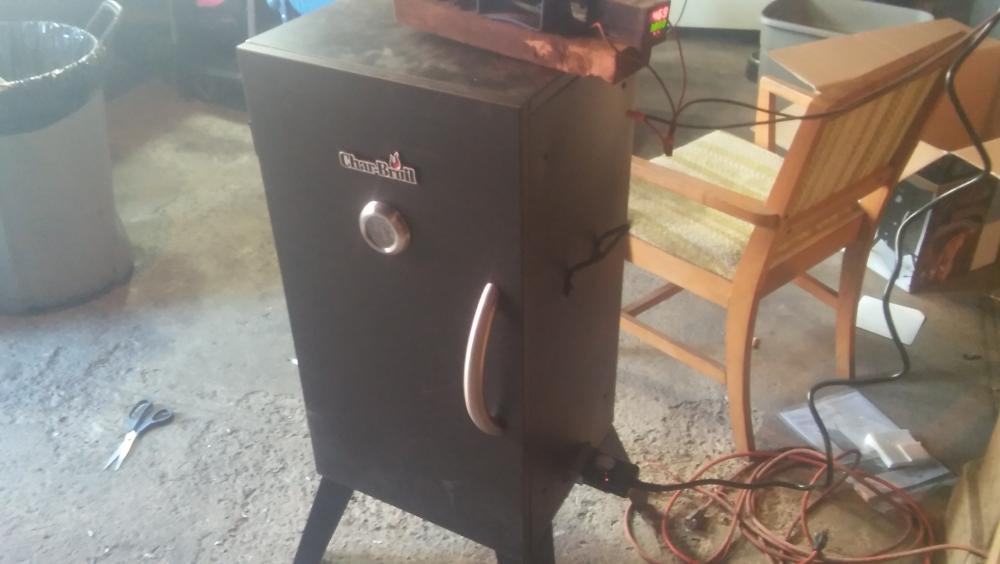
If you're just looking for tempering and not an oven that can ramp up to 1750°F, which has never been an issue for me because I use one of my gas forges for hardening, here's my cheap $150 505 cu in tempering oven. I can do about 40 blades and Pete could throw 9 hammers in this thing all at the same time. Was walking through Ollies, found an electric smoker for $119, insulated the bottom with some scrap kaowool, added a PID, type K thermocouple (it has a port for one already even if that wasn't their original intent) and wired the factory controller through a relay (2 wires) - viola! Simple, spacious, gets the job done very well and even looks good. Only things I'll be adding in the future is a convection oven fan for more equal heat distribution ($60) and a panel box on the side for the electronics. Proving once again that you don't need to over complicate things. J
-
If you do ya better plan to swing by the shop as both Pete and I will be teaching that day. He's doing a full tong making class and I'll be finishing up the second day of a private knife making class but we'll have a cold beer to wash the road dust out of your mouth on hand. J
-
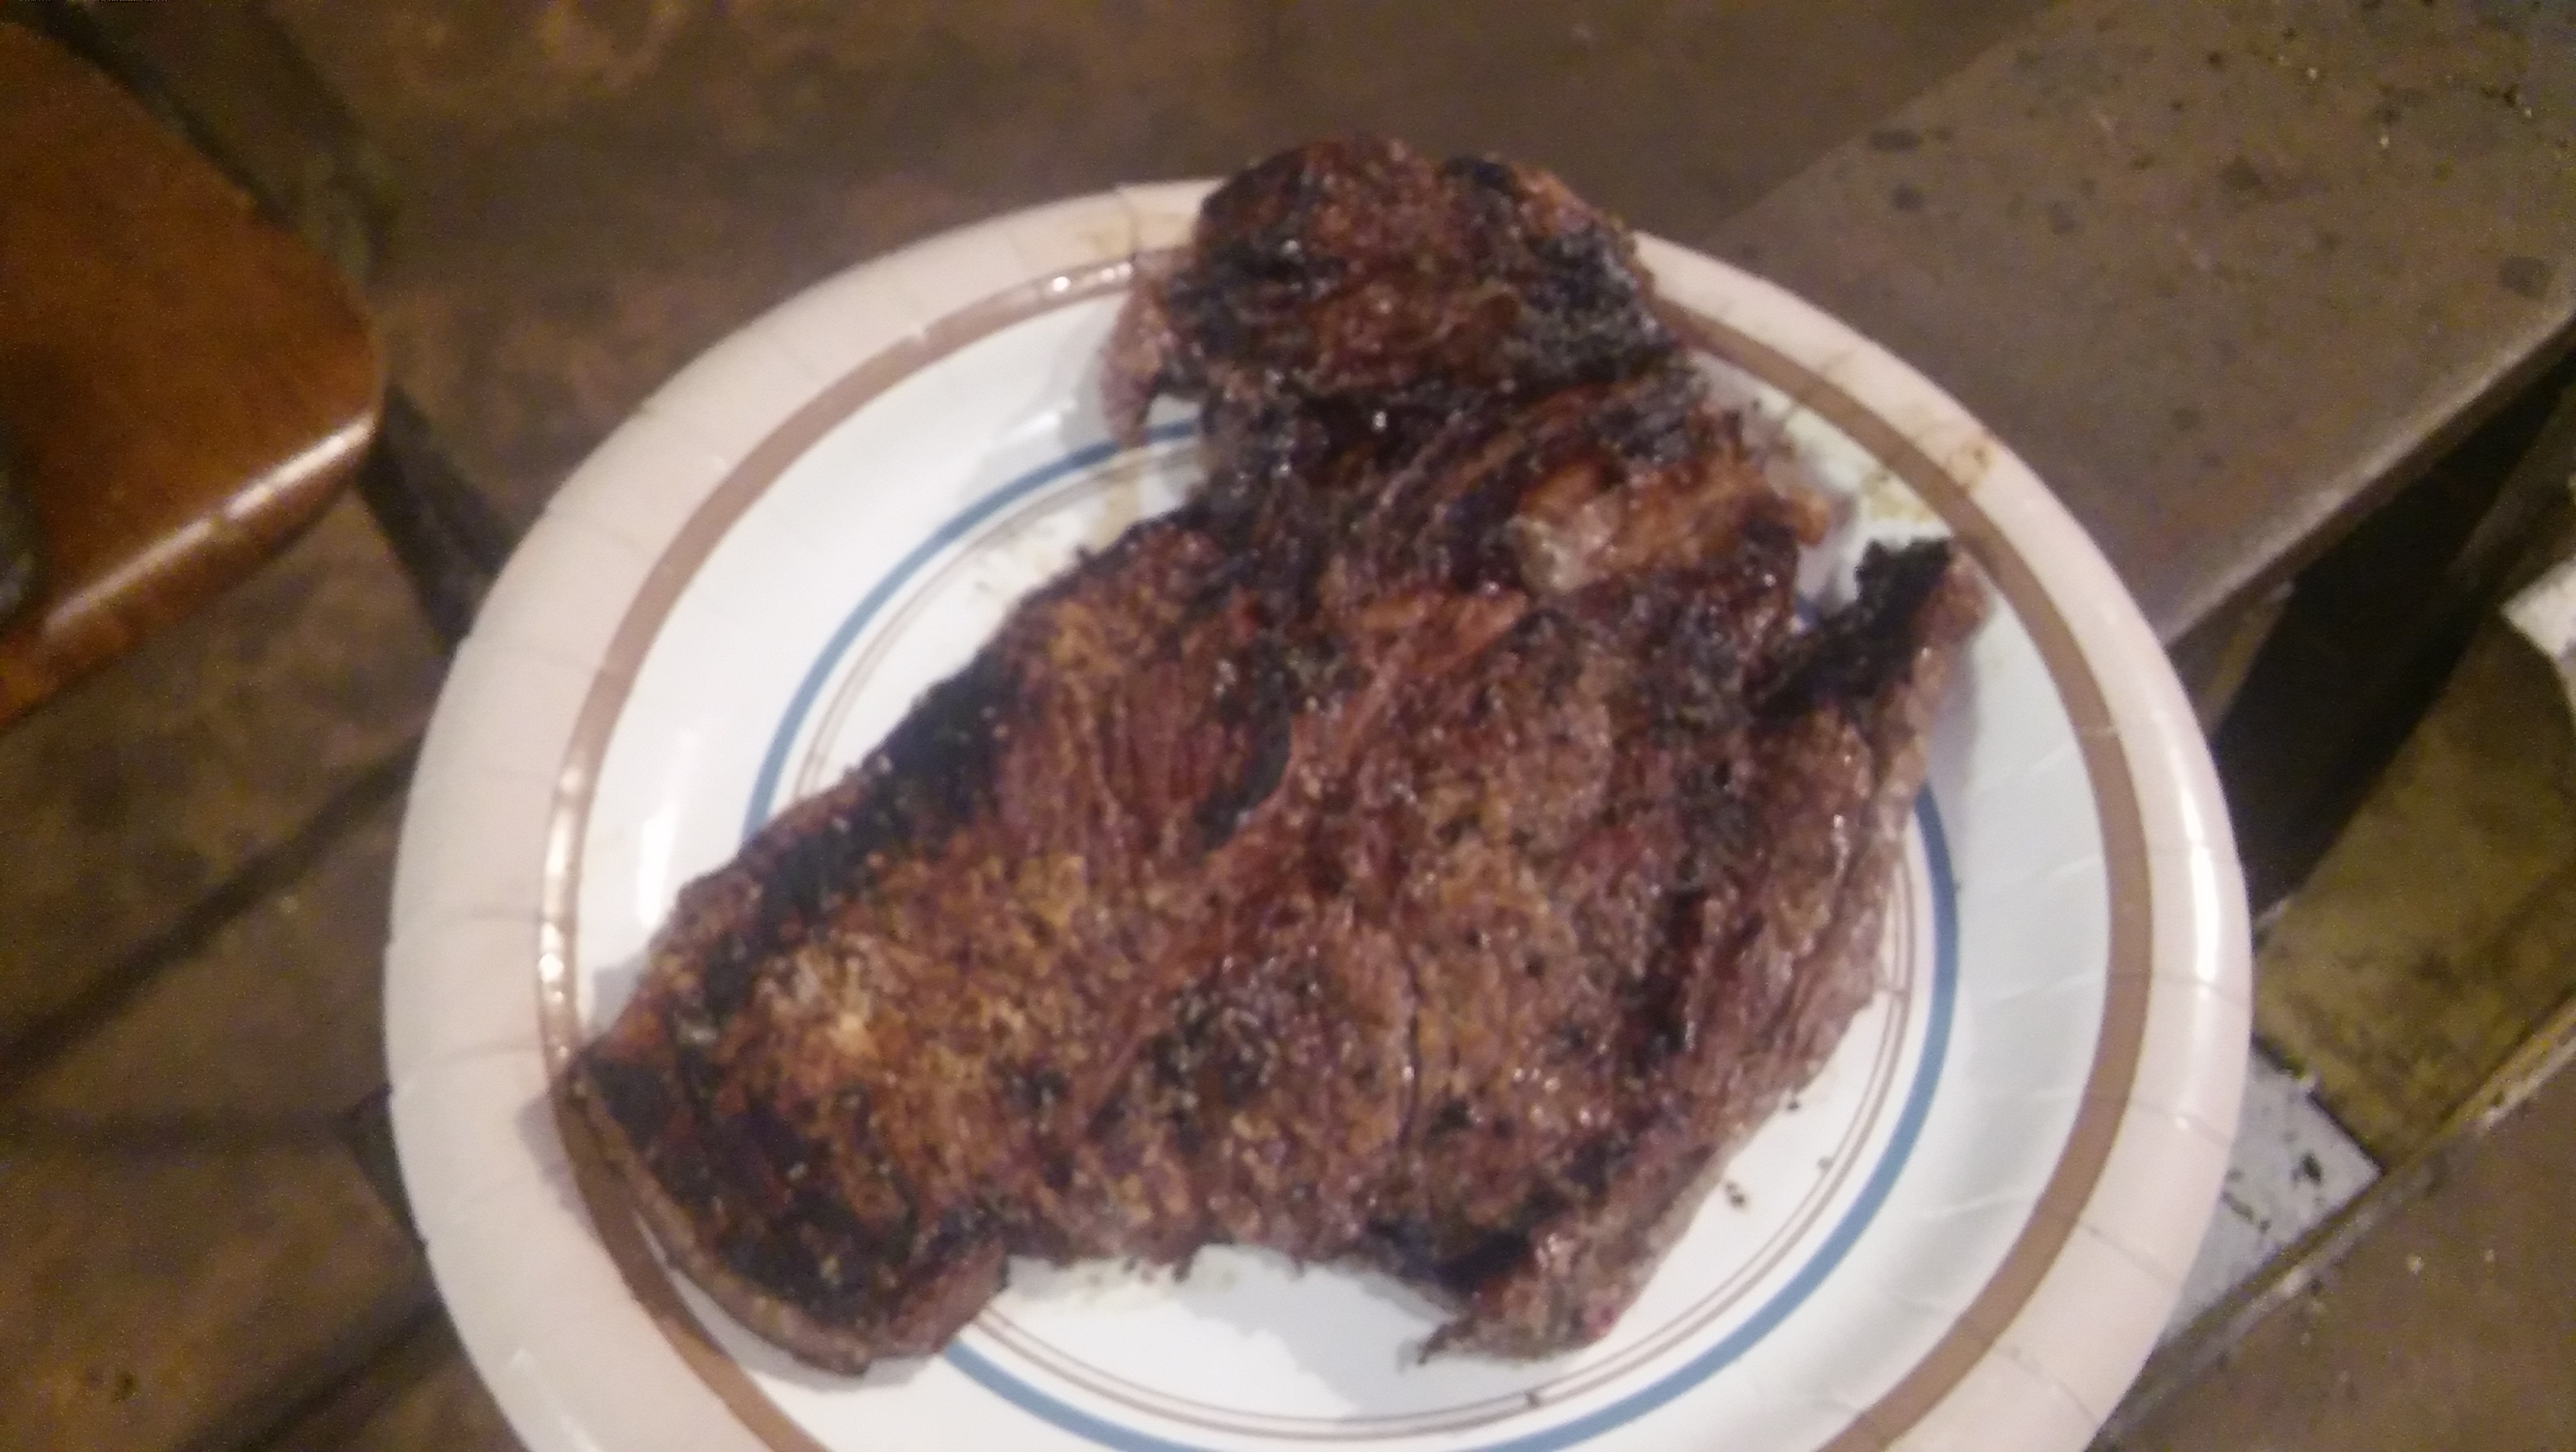
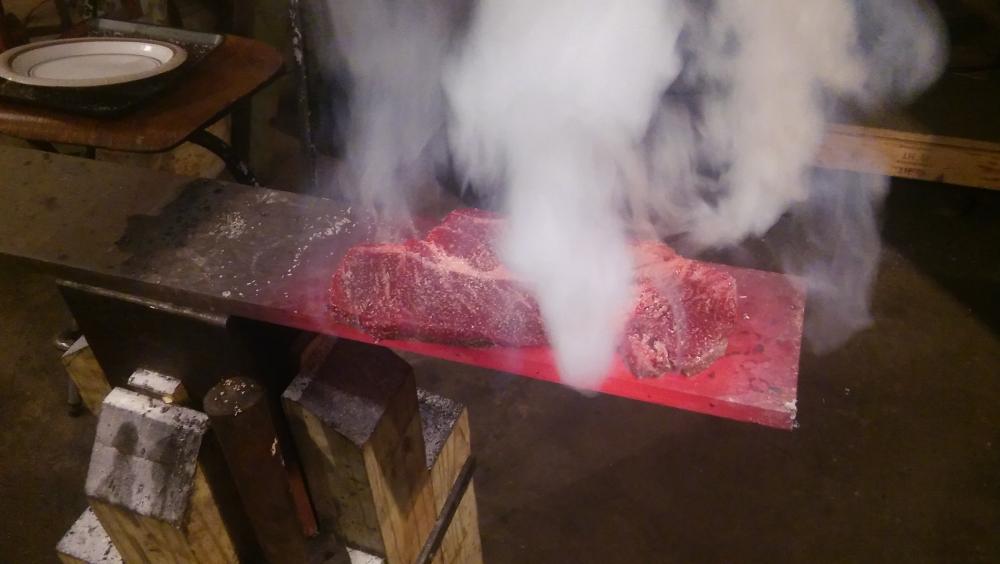
Lunch today for Pete and I. I'll let the pictures speak for themselves. This is the true meaning of Pittsburgh Rare. J

-
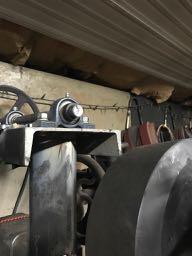
To add a little more to what Pete said, it was kinda a tough call between a wood ring going around the the base of the steel ring to give the control, but this system really gives us 180 degree on the fly vs anchoring something into the concrete which limits future positioning of the hammer. Either way, the ring itself was nice but didn't offer the control we were looking for so the pedal on the treadle is really kickin' J
-
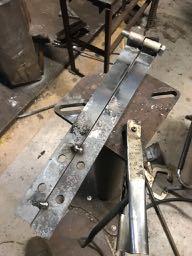
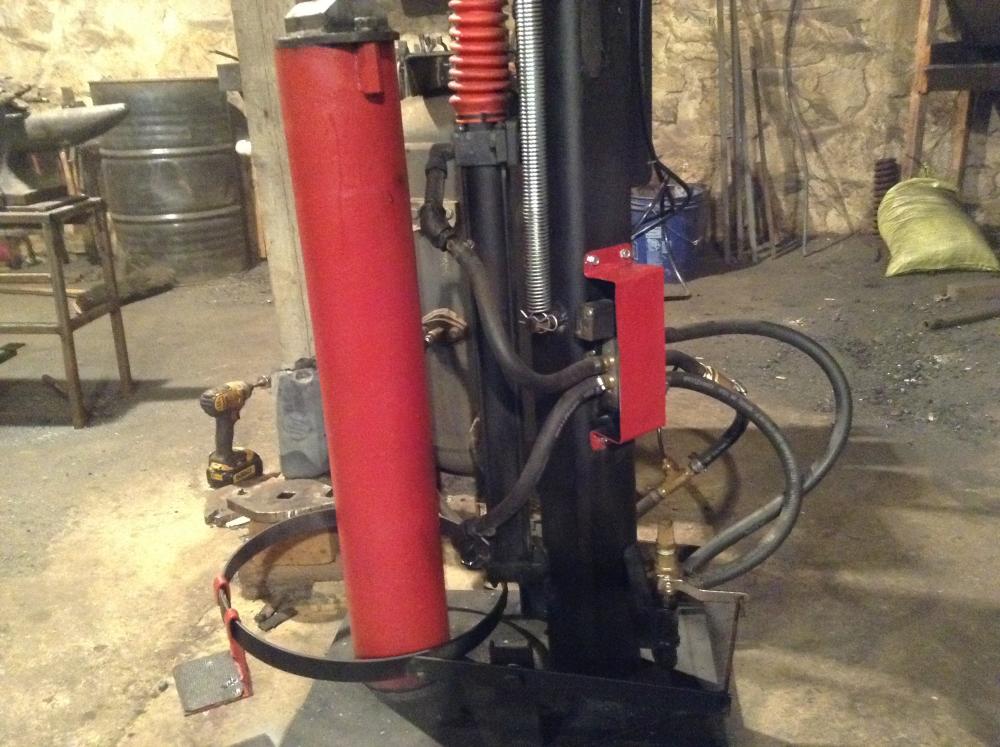
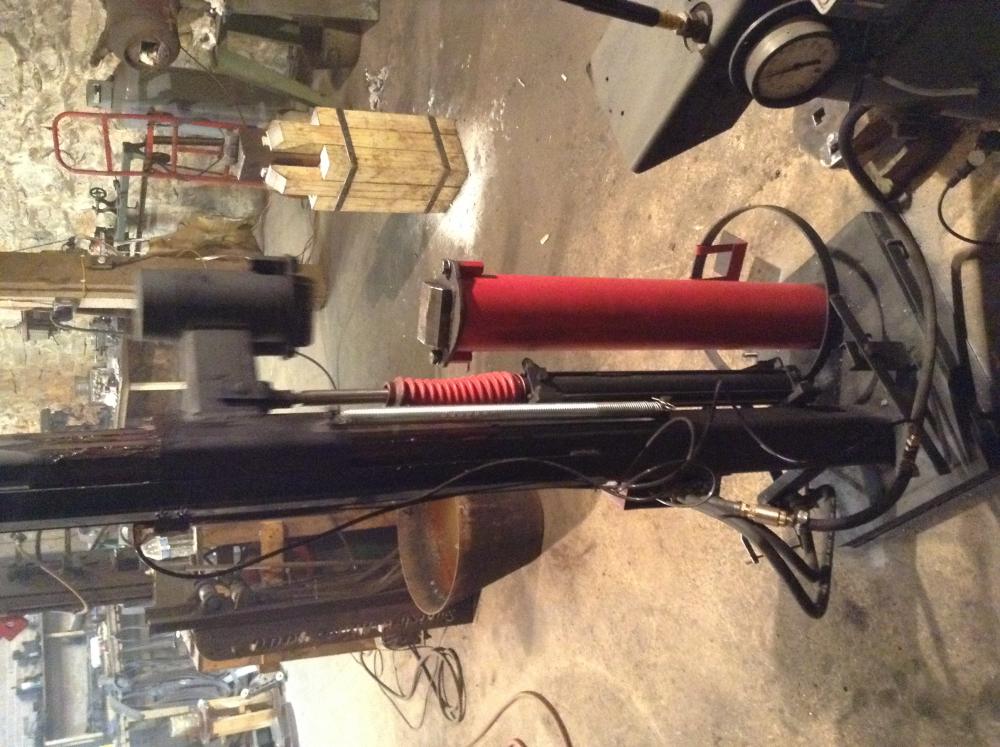
Pete (Crazy Ivan) and I have been working on a new air hammer here in the shop over the past few days. Most recently we've just been running it through the paces and tweaking where it needs to be tweaked. We're still working on a video of it in operation but probably still a few days off until I have time to edit our footage together into something informative and entertaining. Anyway, I figured I'd take a few pictures and show ya how she's looking. Tup is near 65lbs with a max throat of 13.5", plenty of room for top tools. Speed is 124 bpm, but it might be sped up with some compressor system modifications I'm considering that would benefit the entire shop. Don't worry, there'll be plenty more details in the video. The design and planning were our own, but drawing inspiration from the work of Ron Kinyon and Tom Troszak, the simple air hammer and bull hammer styles respectively. I've never seen one of Tom's bull hammers in person or really seen how they operate but I managed to find a few 20 second YouTube videos and stills which gave me enough concept to work from. The whole design itself requires a fair amount of rigidity, and without Pete's masterful welding I don't think we'd have pulled it off. That being said, can't wait to share a video with you guys, but until then enjoy some stills. J


-
The best I've found is from Yoyodyne Propulsion, Inc. They have a Spacial and Dimensional Research department that's putting out some interesting things on the engineering front. It's one of John Whorfin's projects and he's sort of a tyrant for perfection so you know they're going to get it on the money before they release it from alpha testing. J
-
Setting up your shop on the cheap (real time)
j.w.s. replied to Crazy Ivan's topic in Building, Designing a Shop
For those wondering how that new hammer is coming along, here's a pic. Expect a new thread with video soon! J