Hefty
-
Posts
288 -
Joined
-
Last visited
Content Type
Profiles
Forums
Articles
Gallery
Downloads
Events
Everything posted by Hefty
-
I honestly don't know if the melting would work. Maybe if you put some undercut grooves in the surface of the tang? The melted plastic might key into these undercuts and grip, but I don't know if it would be strong enough to grip well. I had a similar thought about using epoxy with undercuts on the sides of the tang and the inside of the PE scales to lock them together. Again, no expert, just brainstorming.
-
Polyethylene is a tough material that should withstand the punishment handles can sometimes take and corby bolts should definitely help as a mechanical fixing, but gluing it is always a problem. It is almost as difficult to glue as polypropylene and PTFE. I am by no means an expert, but I'm not sure if even many of the high end epoxy adhesives would do it. It CAN be glued, but you'll need to either research suitable adhesives or do some testing of your own. A quick search found a page with 3 recommended products: Gluesmith Repair Glue System, Permabond POP plastics primer and Tech Bond basic poly kit. Hope this helps Jono.
-
This one has possibly been posted before but I heard it on a cooking video I watched recently and figured it would also transfer to the blacksmith's shop: "A falling, sharp knife has no handle" or "A falling, heated workpiece has no handle" Cheers, Jono.
-
What did you do in the shop today?
Hefty replied to Mark Ling's topic in Blacksmithing, General Discussion
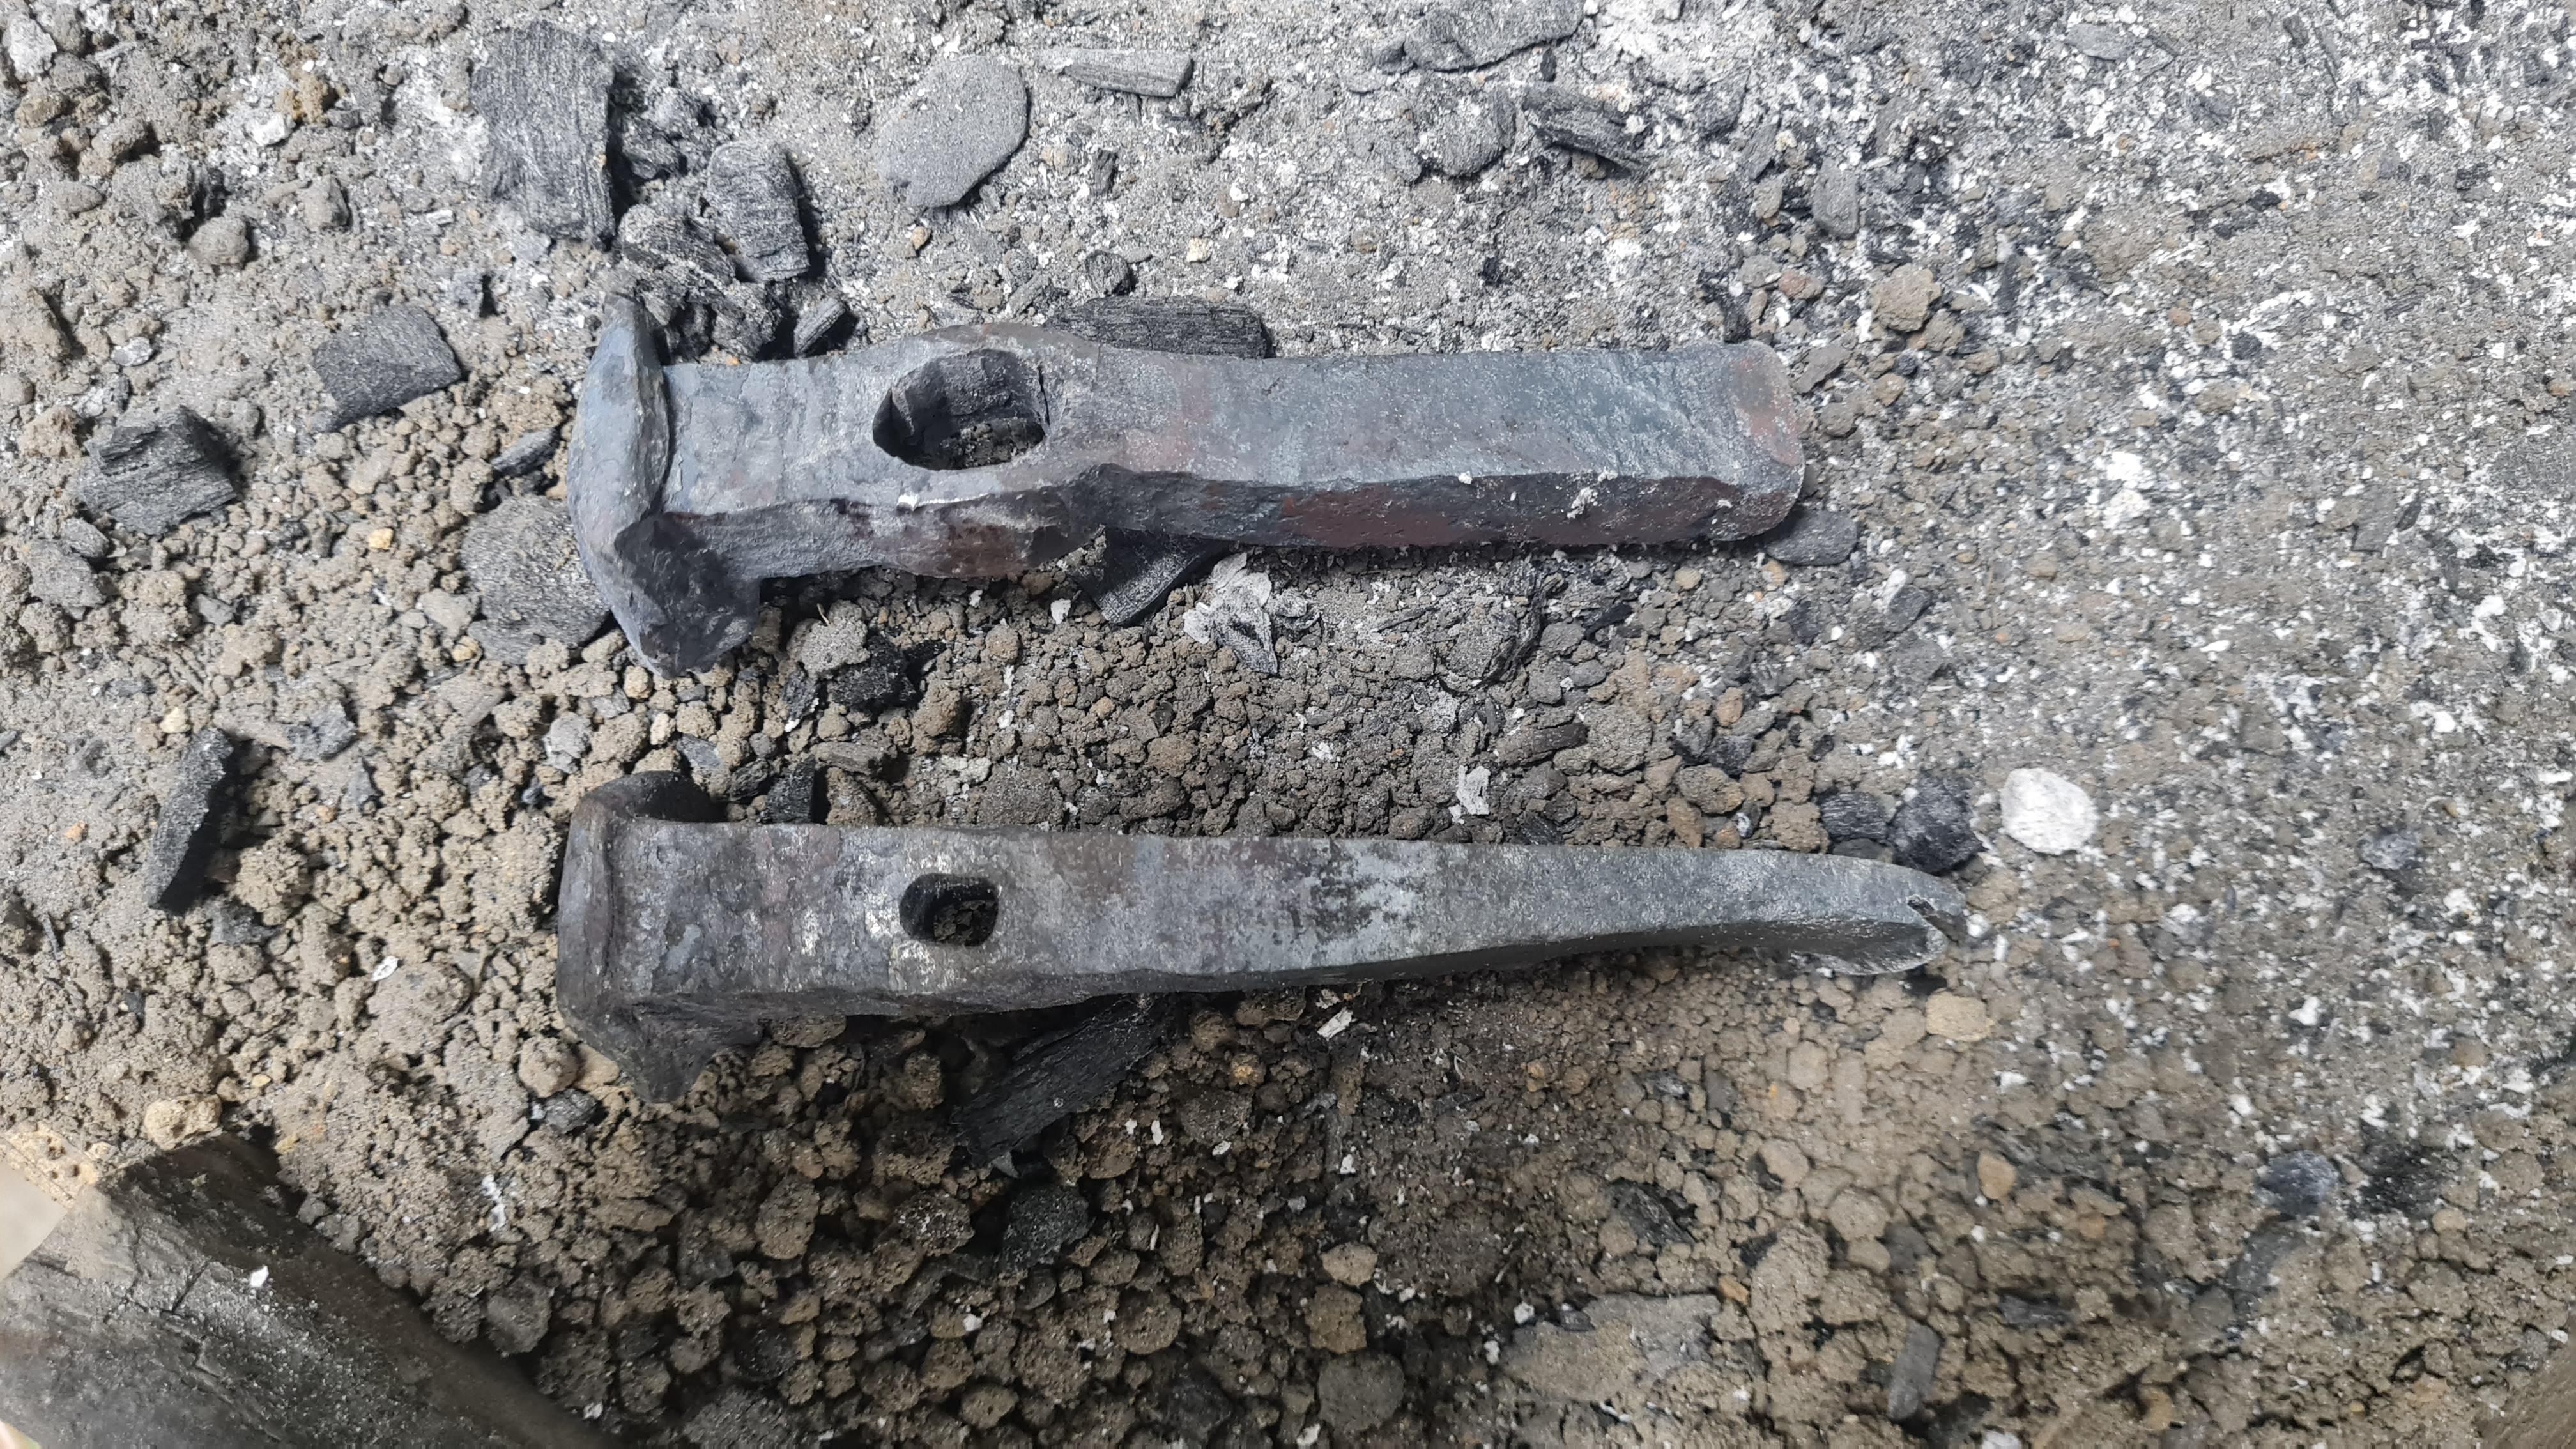
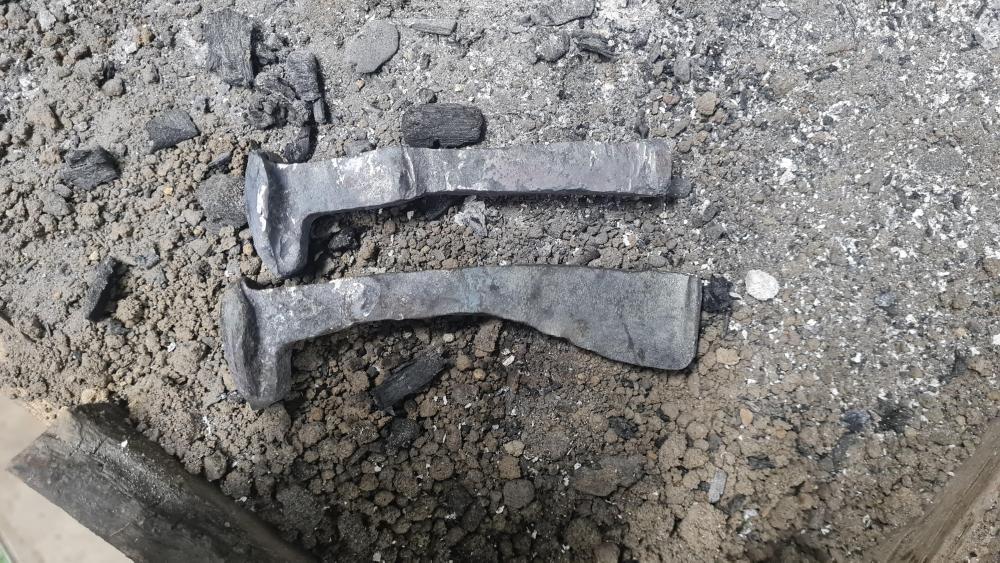
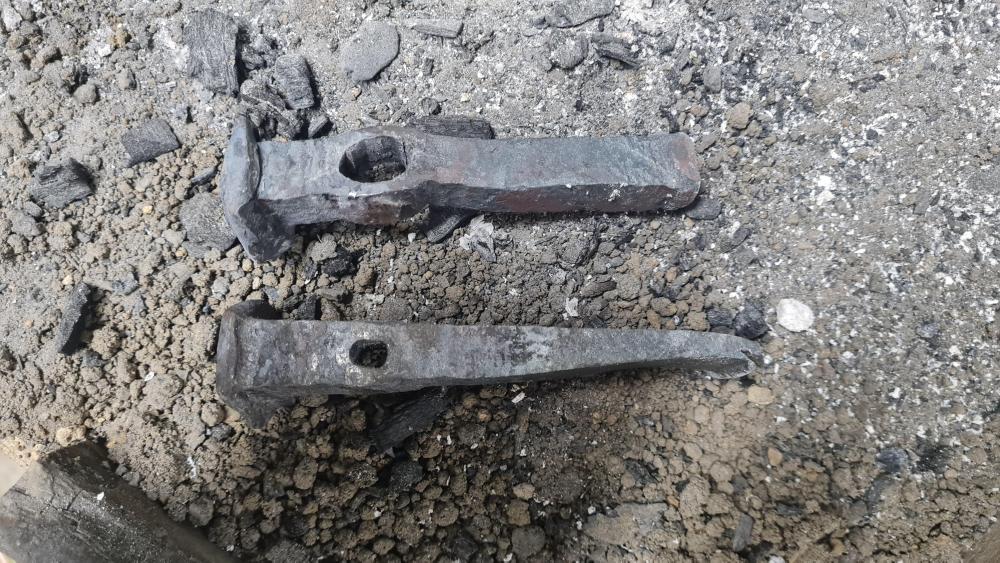
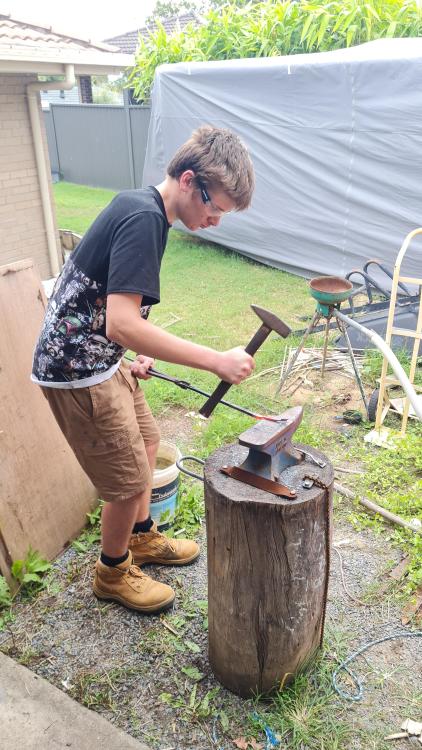
Had a productive day in the shed. My son joined me and worked on a leaf key ring for a bit I continued working on a knife for my Head of Department who gave me some coil springs. I'm working on a superglue finish on the handle but I keep sanding through it in certain spots. And I kept working on a small RR dog spike hatchet idea. The spikes appear to be WI. I've got one that I've tried to punch, drift and prep for a steel bit entirely hot at the anvil and vise and one that I've drilled, slit and drifted and I'm trying to upset the end a little before prepping for the steel bit. Both have pros and cons so I'm interested to see how they both turn out. The slit and drift has opened up much more easily. Mods, sorry if the photos are too large, I wasn't sure how to reduce them because I'm posting on my phone. Cheers, Jono.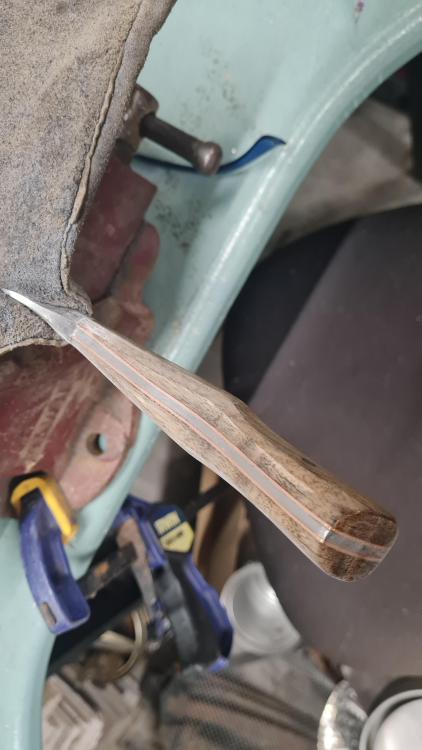
-
Ingenious Cambodian blacksmith
Hefty replied to arkie's topic in Axes, Hatchets, Hawks, Choppers, etc
Old thread, I know, but I just love the simple ingenuity of his blower! An old pedestal fan and an oil bottle! -
What did you do in the shop today?
Hefty replied to Mark Ling's topic in Blacksmithing, General Discussion
A further question: Do you have a picture of your actual firebox and tuyere/connection to the bellows? It looks like it's folded/welded sheet/plate with tabs to drop it into the table. If so, this is similar to what I'd like to create to eventually replace my JABOD. Cheers, Jono. -
"By the end of the day we're gonna have a wedding!...or a hanging!...Either way we're gonna have a lot of fun, huh?"
-
Love it! "Unlike other Robin Hoods, I can speak with an English accent!"
-
Oops, maybe that's why Thomas said don't ask "Why a spoon?". Sorry! Jono.
-
"Coz it's dull, xxx xxxx! It'll hurt more!!" Prince of Thieves is still a favourite of mine!! Cheers, Jono.
-
Mikey, would it help to lessen the cracking/crumbling of the wool if I sprayed/spritzed the rigidiser on before pushing it into shape and firing it? IE, will the liquid rigidiser soften the bonds from firing the fumed silica or does it become impervious to water once fired?
-
Thank you for confirming that! I've trawled through a lot of the pages in forges 101 and other threads in the gas forges section and that's the first time I've found that stated so plainly! I actually suspect part of my problem was not having quite enough rigidiser for the amount of wool I used. The wool, rigidiser and castable were sold together as a kit intended for this size of propane tank or helium tank but the wool was one 2" thick layer. I had read your advice (Mikey), and others, to split it into two 1" layers to fit and shape it better and get more rigidiser into it but I think this may have stretched the provided rigidiser a bit too far. I'll stock up on rigidiser and more duracast and see what I can make happen! Pnut, I like the funnel idea. Did you literally use little plastic funnels, or just make a funnel shape out of something? Cheers, Jono.
-
Ok, that sounds achievable. I get what you mean about doing a third at a time and I can visualise how this would work for the first and second "thirds" (or in this case probably the floor and the second "third") but even once cured, wouldn't the weight of the first two "thirds" cause them to fall out while I'm trying to shape the last layer? Any recommendations for how to support the previous sections while the last one cures? Also, how neat/accurate do I need to be for lining the flame entry holes into the forge interior? Obviously, I don't want them to interfere with the flame but should I cast around a small cylinder for each? Should I step the hole so the castable fits neat around the burner tube and then steps to a more "nozzle-like" diameter? Cheers? Jono.
-
Hi all, I've made a gas forge using two 3/4" frosty Ts into a party balloon helium tank (about the same size as a 9kg/20lb propane tank) with 2" of ceramic wool and a cast floor from a castable refractory called duracast. I've rigidised the ceramic wool, including spritzing the outer layer before installing the inner layer and then started with some shorter burns first and then built up the time. My intention was/is to apply several thin coats of satanite (I can't find Kast-o-lite in Australia) but I have used the forge for two 1 hour actual forging sessions so far and run into a problem. First session was great and it felt really good to use a working gas forge. But, I had to cut the second session short when the burners started sputtering unusually. I looked inside and discovered that the inner layer of wool has separated from the outer layer and sagged down from the top. I think the edges of the hole where the burner flame enters the forge may not have been accurate enough and the flame may have been impinging on them when I didn't realise. I know that this is harshest part of the forge environment, I guess I just didn't realise how quickly it would damage the wool. Is there any way to salvage this ceramic wool given that it sagged when hot and is fairly rigid again now that it is cold? I was hoping I might be able to gently push it back into place and use the satanite to reinforce it but I suspect it will crack or crumble if I try to push it. Cheers, Jono.
-
What did you do in the shop today?
Hefty replied to Mark Ling's topic in Blacksmithing, General Discussion
I've never had welder's flash myself, but I have one friend who is a fabricator for a racing team and another who is a mechanic. The mechanic got the fabricator to do the TIG welding on the motorbike-engine-powered-go-kart he was building and spent the day looking the other way in the shed while each weld occurred. Similar to NoDebt's story but this was reflection from the wall on the other side of the shed and it was still so bad his wife had to drive him to hospital when he woke up at 3am sobbing from the pain! Cheers, Jono. -
Frosty, when you say rivet punch, do you mean a hand held top tool to shape the top of a rivet when setting it (like the same as a rivet set but on top?) Or a punch for making specific sized holes to put a specific sized rivet in? I'm just trying to get my terminology right for different tools. Cheers, Jono.
-
What did you do in the shop today?
Hefty replied to Mark Ling's topic in Blacksmithing, General Discussion
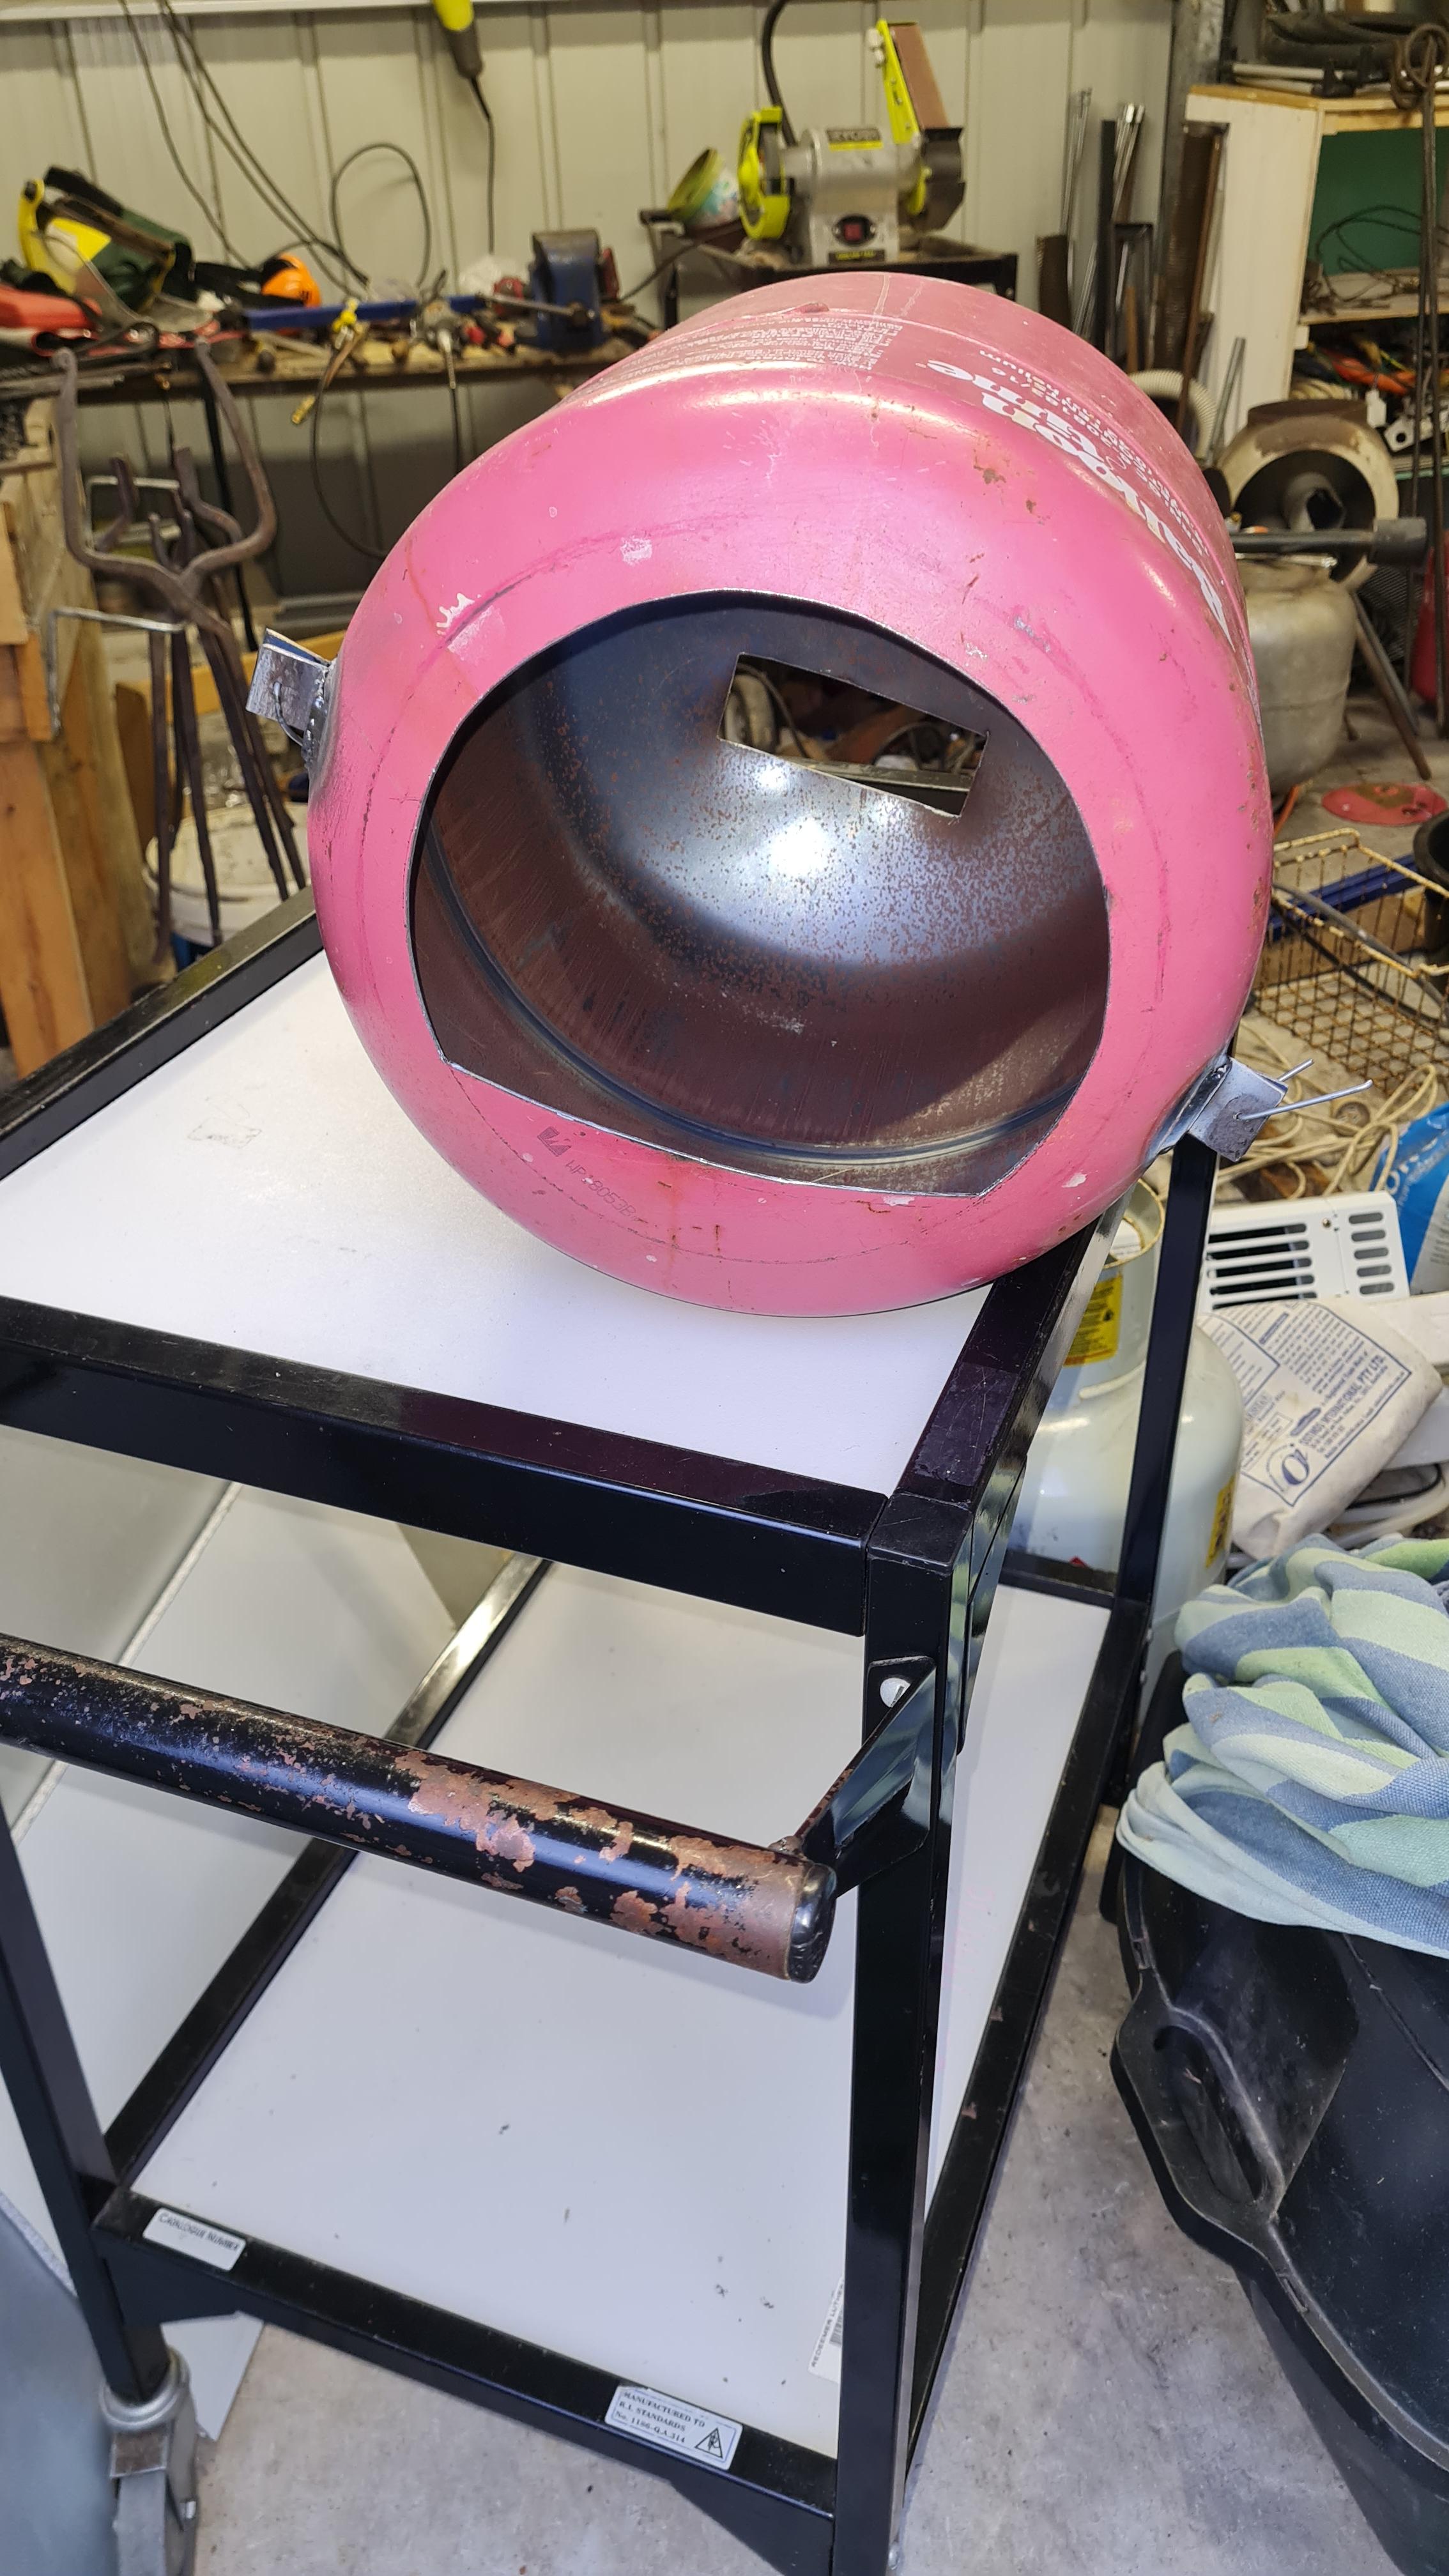
When it comes to gas forges I've probably been the slowest on the forum to start. I think my first questions about gas forges were over 2 years ago and I've bumbled around with burners in between. But yesterday I finally made a start!! I've cut the front opening and the rear pass through and also cut the whole front end off just before the curve and welded some tabs on so I can bolt/unbolt it for ease of lining and future re-lining (just wired together for the photo). I also recently got an old overhead projector trolley that our school library was throwing out (haven't used them since I was a student there but they still had them stored away!) so I'm hoping I can mount it on there for versatility. I've got kaowool, rigidiser and duracast ready to line it and I'm about to start holidays! Excited!! Thanks for looking! Jono.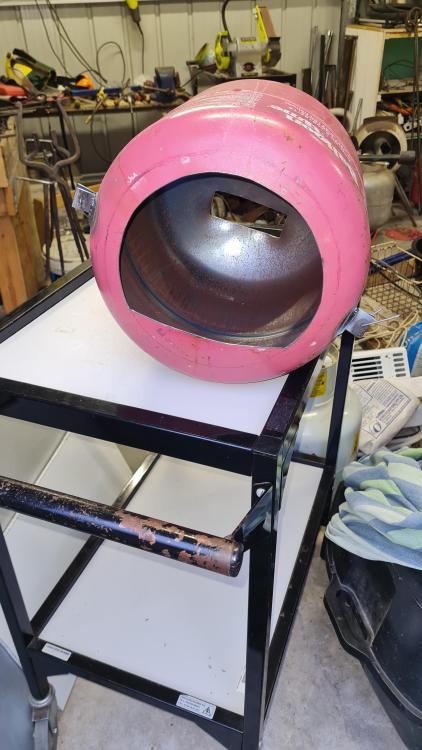
-
Safely Removing Chrome Plating from larger objects?
Hefty replied to Hefty's topic in Blacksmithing, General Discussion
Fair enough. I may have a use for one of the baskets as is but otherwise I'll scrap it and make use of the castors. Thanks for the advice everyone! Cheers, Jono. -
Safely Removing Chrome Plating from larger objects?
Hefty replied to Hefty's topic in Blacksmithing, General Discussion
Yep, I did physics but not chemistry! I just did a little further reading and discovered that I had incorrect knowledge of the difference between galvanising and zinc plating (or "electro-galvanising", hence my confusion!). I also did some searching for this type of trolley and everything I've found online so far suggests that it probably is actually chrome plated. I'll cross my fingers for galvanised or zinc plated, do the vinegar test and see how it goes. If nothing else, at least I get some nice lockable castor wheels out of it! -
Safely Removing Chrome Plating from larger objects?
Hefty replied to Hefty's topic in Blacksmithing, General Discussion
Thanks, George. Being so particularly shiny I thought first of chrome. Do gal coatings get that shiny? I guess I should do some more research before asking forum members to be my research! -
Hi all, I've been given an old broken trolley made out of some form of thick wire mesh, kind of like an old shopping trolley but with two shallower baskets and much cheaper joining methods. Judging by appearance it is most likely chrome plated. The baskets would be useful for many projects I have started/want to start, but I know that for safety reasons don't want to do any heating, cutting or abrading of chrome plating. Is there a safe way to remove chrome from larger objects easily without spreading chrome fumes or dust everywhere? For smaller applications I would use hydrochloric/muriatic but I'm not sure I can handle enough volume to cover any decent amount of either of the baskets at once. Or, is there an effective way to remove it in a localised area to allow for cutting or small welds that won't spread much heat? I'm just trying to figure out if this will be useful stock or a white elephant. Cheers, Jono.
-
What did you do in the shop today?
Hefty replied to Mark Ling's topic in Blacksmithing, General Discussion
I had a similar experience recently, having dinner with the extended family at my sister's place. I was walking, with my dinner, from the kitchen to the outdoor table on their deck when I asked everyone/no one in particular "Has anyone seen my wine glass?" They all looked at me funny and someone pointed out "It's in your hand!" At least with tools you can blame working too hard. Losing the drink in my hand really shook me!! -
I found Alec Steele's video on his technique for drawing out stems for leaf key chains really useful for understanding how tapers on the near and far side of the anvil work. One of his earlier YouTube videos is a lesson specifically on forward and reverse tapers, as he calls them. I think the leaf keychain video is called "make 100 of these" or something like that. Alec learned under Brian Brazeal who also has good videos on drawing and tapering techniques. Search YouTube for "Blacksmith exercises for any level with Brian Brazeal" Both also talk about "unicorn horn" tapering. I can't find the video I originally heard this term in, but the technique deals with the fact that you will get grooves like you mention off of the anvil but as you continue drawing the taper, you rotate the stock as you move along and the section with the groove ends up on top and the grooves are flattened by the hammer. Then you rotate again as you move further along the taper and the grooved section is then smoothed out further by the anvil face. Hope that makes sense! Cheers, Jono.
-
Not sure about in the States or elsewhere, but in Australia you can get buy cooking oils (canola, olive, etc) in thin walled metal 5L (just over a gallon) containers with a plastic lid inserted into the top surface. I cut the top off an empty olive oil one with a can opener and then filled it up to a safe margin below the top with canola. I heat a piece of 6"x1 1/2"x3/4" mild steel preheated in the forge. I like the idea of putting a hook on it, though!
-
Frosty and Mikey, I hear what you're both saying about tuning one burner at a time. Yes, the two different types of burners have quite different flames. My post was more about making sure I was reading flames correctly. I mentioned adjusting the 3D printed one because it is easily changed and I thought it might help me clarify my understanding. When it didn't, I came here Frosty, is it the tuning that helps flatten the curve? The three images above are the same burner at three different pressures and it must be inducing at different ratios because it's becoming more neutral as pressure increases. I haven't taken much off this mig tip yet. Cheers, Jono.