Hefty
-
Posts
282 -
Joined
-
Last visited
Content Type
Profiles
Forums
Articles
Gallery
Downloads
Events
Everything posted by Hefty
-
So, de-tuning is intentionally aiming for too lean or too rich to compensate for other factors that would push the flame of the finished burner too far to the other side of neutral?
-
What do you mean by de-tune, Mikey? I've seen the term many times in several of these threads but because I wasn't building my own burners at the time, I didn't pay enough attention to it.
-
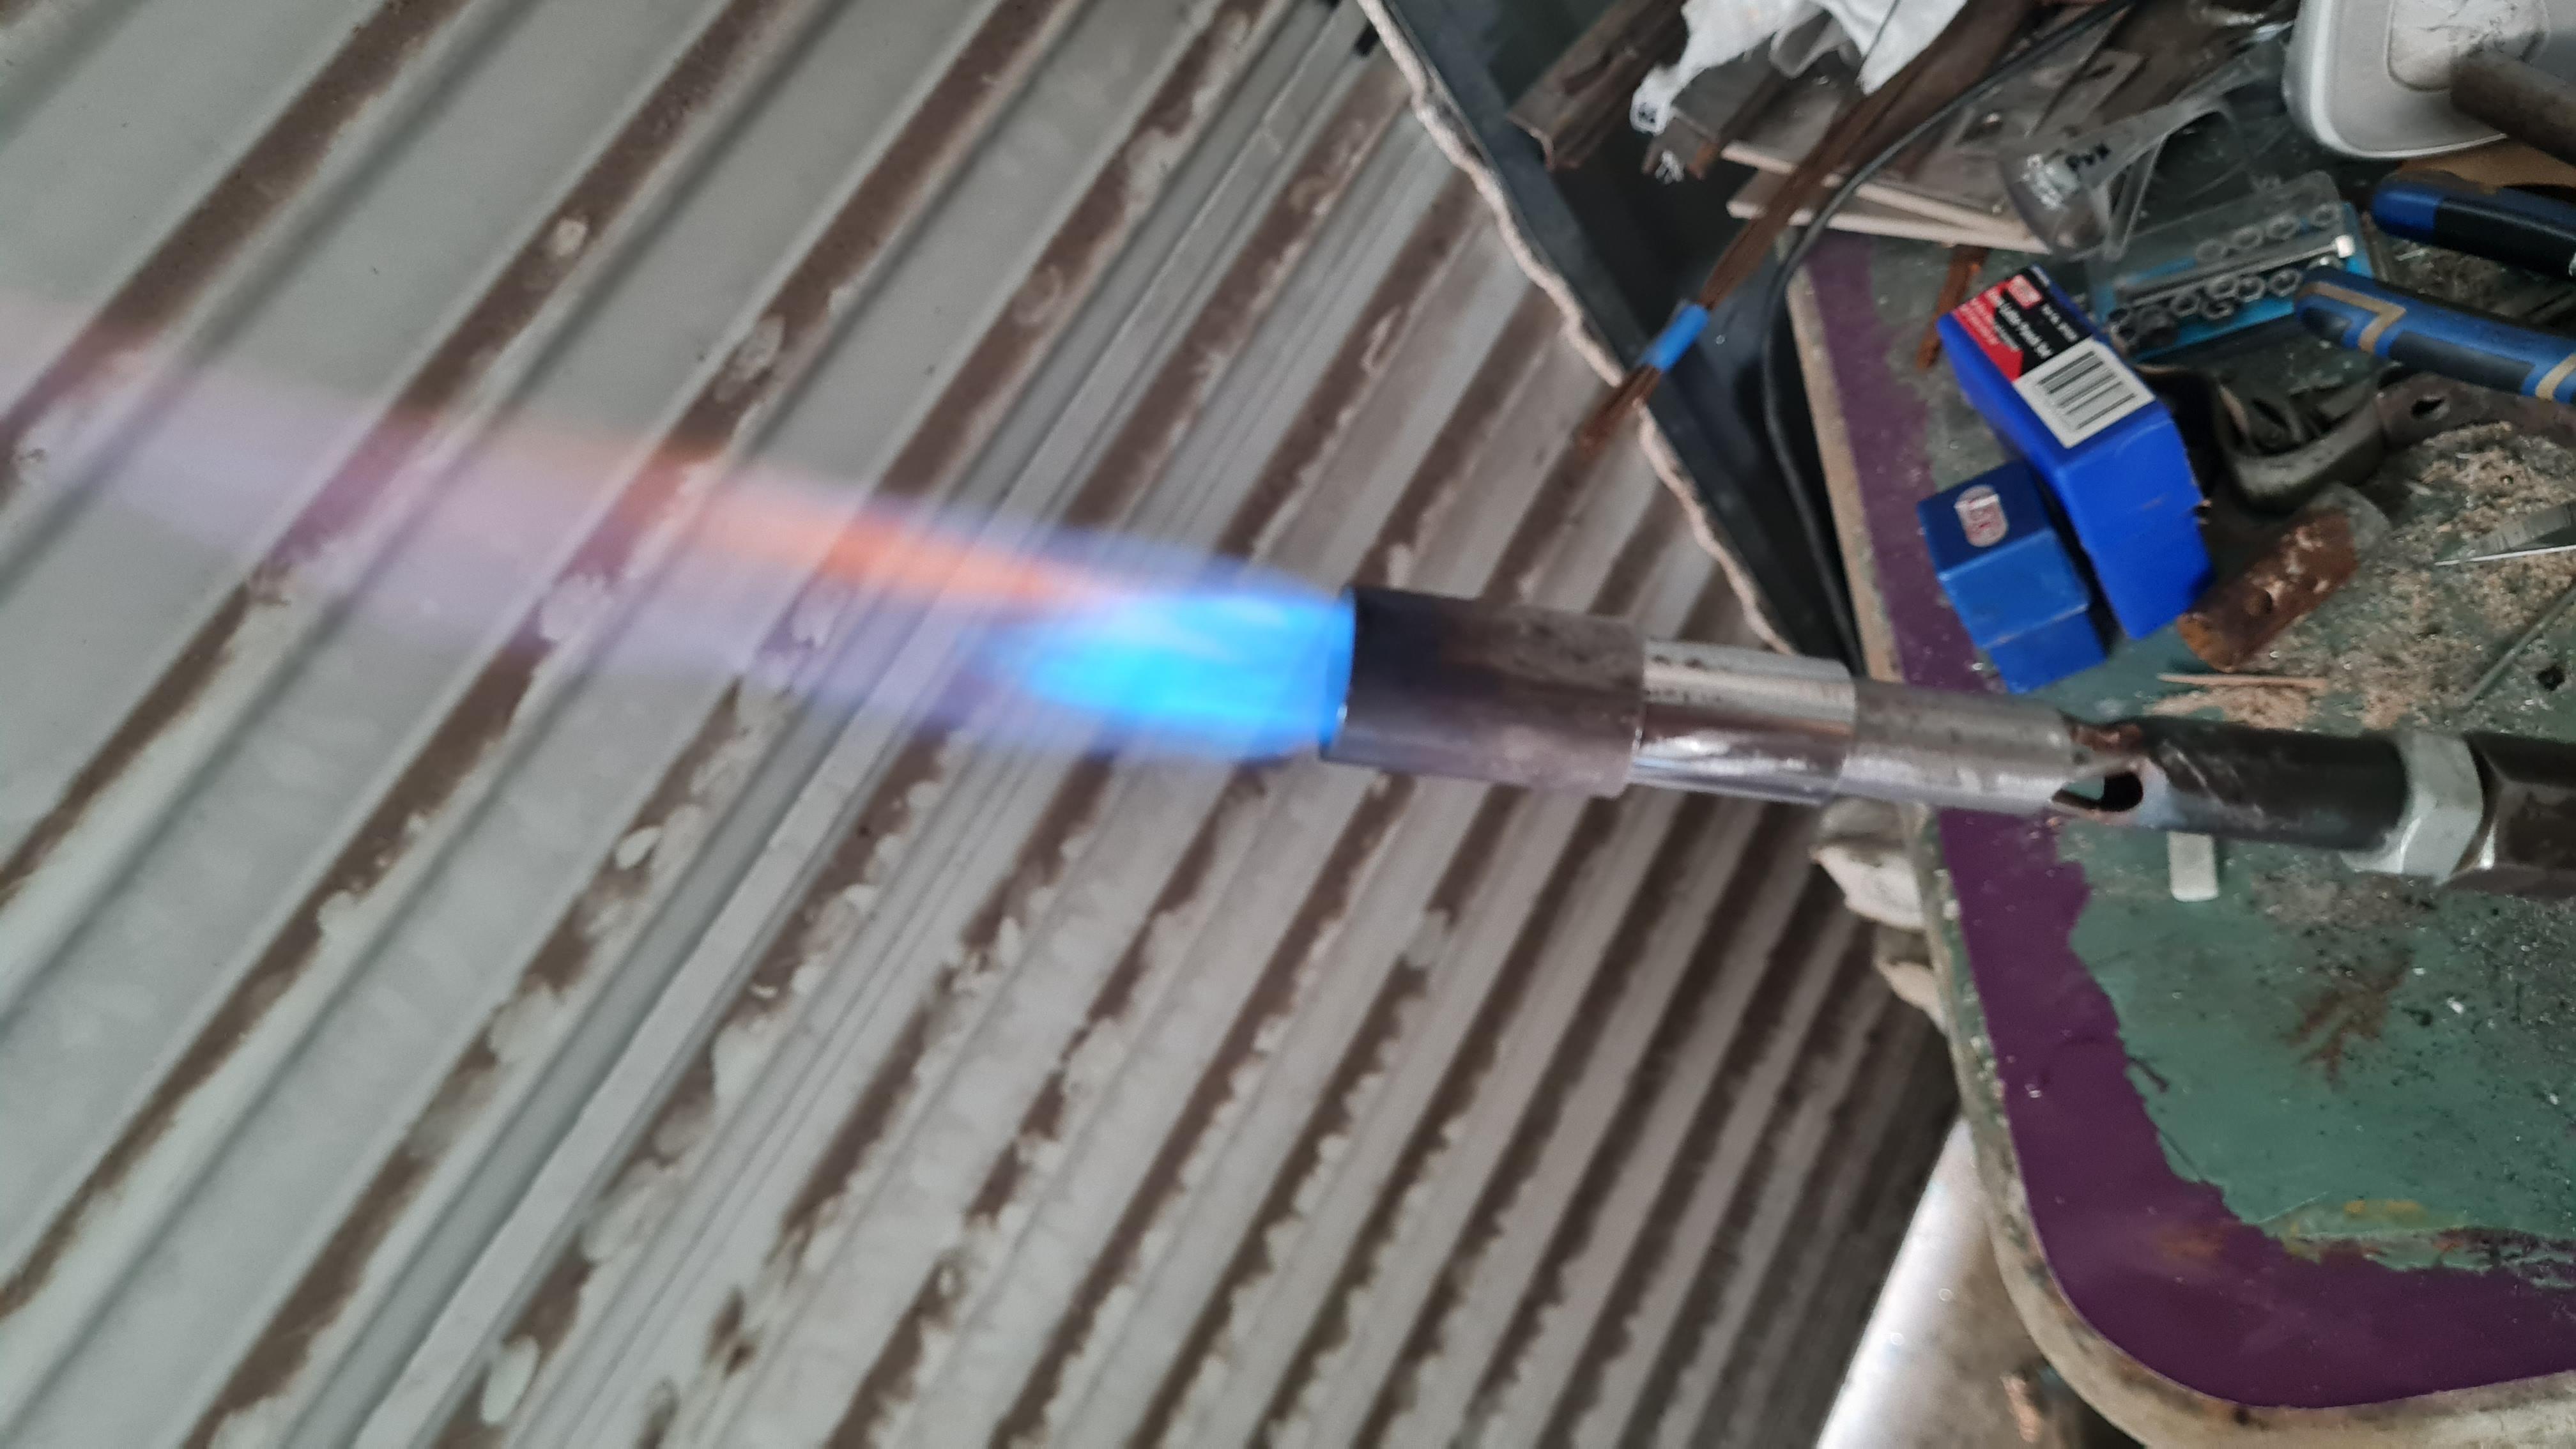
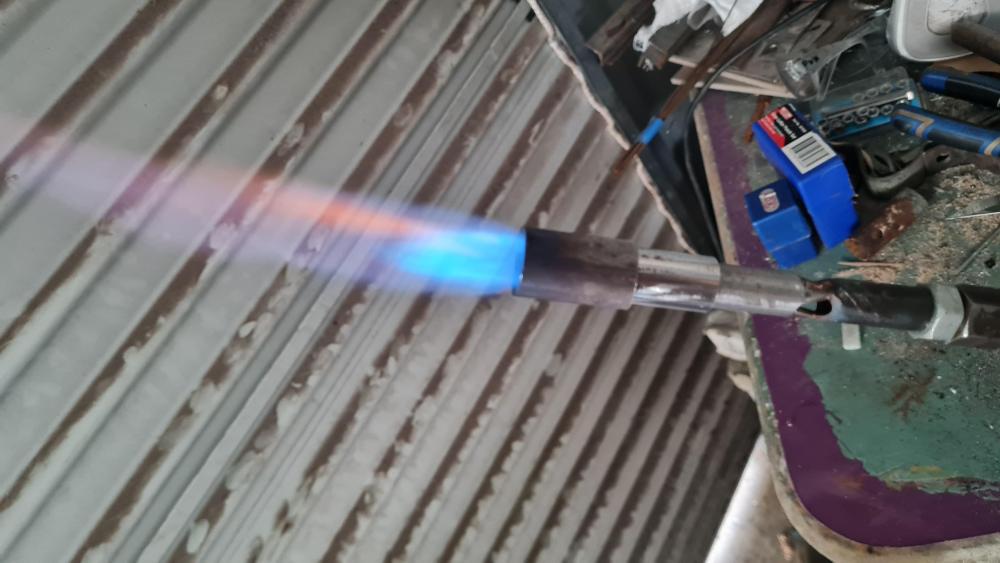
So, my daughter brought me an envelope today and said "oh, by the way Dad,I got this out of the mailbox for you the other day..." I could have had my tiny flame two days ago!! 0.4mm jet. Ignore the colour, it's not as rich looking in real life. My camera seems to struggle with blues: How does the shape look?
-
Ok, surprisingly, most of this makes sense to me. I've been building my 1/4"Mikey/Trevor variant but my 3d printer nozzles haven't arrived yet for the jet so I put in a 0.023 MIG tip. Way to big, I know, but it allowed me to test out the sliding step nozzle I made for it. Of course, the flame was rich through the whole adjustment range, but as I neared the too long end of the range, the edges became "fluttery" where in the middle of the range they were smooth and defined. So, that would be the greater length of larger nozzle diameter slowing the FAM due to the lower pressure it causes, thus softening the flame?
-
So are all fast flames hard and all hard flames fast? Or is it: all fast flames are hard but not all hard flames are fast? I should probably ask, instead, what is flame speed dependant on? In an NA burner initially it is gas pressure and throughput of the orifice, I suppose, but am I right in saying that the speed this lends the FAM is then affected by the type of motion in the mix tube and at the nozzle (turbulent, vortex, laminar, etc), hence the difference between a T burner and a Mikey burner, or any other burner type that needs comparing?
-
Mikey, I've seen you describe flames as hard or soft. Exactly what do you mean here, and what does it look like when evaluating a flame based on its appearance? Same question for fast and slow flames. I understand the benefit of a slow flame in terms of maximising heat transfer while still in a forge, but what do they look like? Is it the length of the flame envelope compared to the diameter of the nozzle it's coming out of?
-
3D printed plastic burner experiments (photo heavy)
Hefty replied to Another FrankenBurner's topic in Gas Forges
AFB, they stayed concentric (and nearly snapped!). They squashed right in tight and I had to untwist them. Think basket twist but they didn't bulge in the middle as they untwisted. I would have taken them back to straight but it looked like they would snap off. I honestly don't know if it will make much difference but still I have to solder/braze a fitting on and take delivery of these 3d printer nozzles before I can test it. -
3D printed plastic burner experiments (photo heavy)
Hefty replied to Another FrankenBurner's topic in Gas Forges
I know this is quoting way back into this thread, but I'll let you know if this works because I accidentally did it to the little 1/4" burner I'm making when trying to thread the end to take the gas orifice assembly . The three-jaw chuck of the lathe clearly gripped the mixing tube better than the upwind end so when I applied pressure while trying to turn it, the tap gripped and it twisted at the supports between the air slots! My 3d printer extruder nozzles should arrive tomorrow so I'll hook it up and see if it will still function. Thankfully I've got plenty of this pipe left so I'll definitely be making a few of these with slightly different mix tube lengths and flame nozzle sizes/styles to better my understanding of the whole process. I'll be sure to make one "vanilla" version (without the accidental twist!) as a control to compare to. Cheers, Jono. -
AFB, is this what you mean:
-
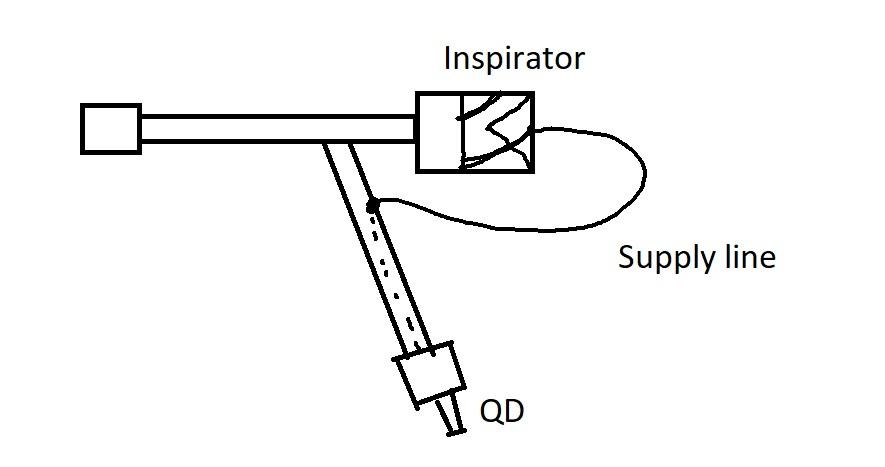
I will be re-printing, just haven't had time. Another one of my "fits-and-starts". Do you just print for a press-fit, or do you have other methods to secure it? I've got to check what the printer's tolerances are so I can allow for them in the printed hole. Part of the issue with the copper tubing was I had 3 set screws at 120 degree intervals around the inspirator but to maintain a strong alignment, they started deforming the copper and threading the plastic. I've recently bought a TIG welder and I'm getting used to the handpiece on that so I might make up a handle that is reminiscent of it. I like the magnet idea! I think I might have a quick disconnect somewhere in my box of fittings, so I'll see if I can include it.
-
OK, cool. The pipe I've got is reasonably thick walled with an ID somewhere between 8 and 9mm so roughly a 1/4". I'm keen to make one of your style and a Mikey (or possibly Trevor's variant) to get more of a practical/physical understanding of all of the things I think I understand from all this reading. I made a roughly half inch version of your burner and it was quite a stable flame but my system for mounting the MIG tip was copper tubing which had a bad fit with the printed part leading to misalignment issues. I need to find some smaller brass nipples somewhere local.
-
Thanks to you both for your replies. AFB, two questions (for now, haha): 1. Are the 1/4" and 1/8" designated measurements just the call-out dimensions of the mix tube pipe or are they accurate throat dimensions? 2. What is the refractory you use for the nozzles. I was considering sifting some of my castable to get the larger bits of aggregate out. Do you think this would hold up?
-
That should have said "different mixing tube lengths on each of them"
-
Knowing what I want to do with the flame is most of my problem!! Yes, I'd like to be able to make a small jewellers torch for finer heating, soft soldering (would a torch like this get hot enough for hard soldering/brazing on small parts?). I have some mild steel tube with an I.D. just over 8mm that I can play with and I've just ordered some 3d printer nozzles in .02mm increments up to 1mm, but yes, getting specific parts cheap here doesn't always work out so the 8mm sausage stuffer may or may not pan out. I've got access to pretty much everything I need to fabricate a Mikey burner or similar, but as I bemoaned earlier, I'm pretty time-poor so my tinkering comes in fits and starts with lots of time thinking things over in my head or asking questions on here in between. I think in typing this, I've made up my mind to try a small Mikey burner and maybe also print an 8mm throat version of AFB's printed burner and I'll compare the burners and also school myself on the effects of different mixing tubes on each of them. I'm sure I'll have plenty of questions asking the way!
-
Hmmm, I can find the 8mm sausage stuffer tubes on the main amazon site for $12.99 but with $10.64 shipping to Australia (not too bad for international shipping) but the Australian site only has 12mm ones as part of a 3 pc set for $14.99 with $6 shipping. Ebay has the same set for $18 and free shipping. Aliexpress has them for $13.57 (free shipping but probably a few months to get here) but if I go up to 14mm, I've found a 3 pc set (assorted sizes, smallest 14mm) that are trumpet bell shaped funnels and only $4.83 So I might follow your build but reproduce a slightly larger torch? Haven't decided yet.
-
Mikey, I'm starting to get my head around the changes in pressure and velocity in the mixing tube and nozzle and the effects they have. A different question I have but I suspect the answer will relate to the same kind of information: How do you control the shape of the flame without messing up your tuning? I don't want to go as small as a soldering "pen" torch but I'd love to be able to make a similar shape of flame in a small-ish torch, say 3/8"-1/2". Am I trying to jump to far in one go?
-
I love the stylised heraldic coat of arms idea! Or, what about a Rooster rolling up his feathers, like a sleeve, to show off a muscly arm, a la "Rosie the Riveter" (Or the "Hellfish" logo, if you're a Simpsons fan), maybe holding a hammer?
-
Another cheap and readily available source of phosphoric acid is the no-rinse, food grade, homebrew sanitiser "Starsan". There are some other similar named, similar formula brands too. It comes as a concentrate that you dilute with water. One bottle lasts for years. I haven't used it for rust-removal yet myself, but when I noticed a while back that one of the active ingredients is phosphoric acid, I did some research and, yes, people do use it for rust-removal. Cheers, Jono.
-
What did you do in the shop today?
Hefty replied to Mark Ling's topic in Blacksmithing, General Discussion
Only some light work, cold, on some 6mm round bar. Need some more time to heat up the forge. Maybe forge some leaf key rings, or something simple like that, just to get a feel for it. -
What did you do in the shop today?
Hefty replied to Mark Ling's topic in Blacksmithing, General Discussion
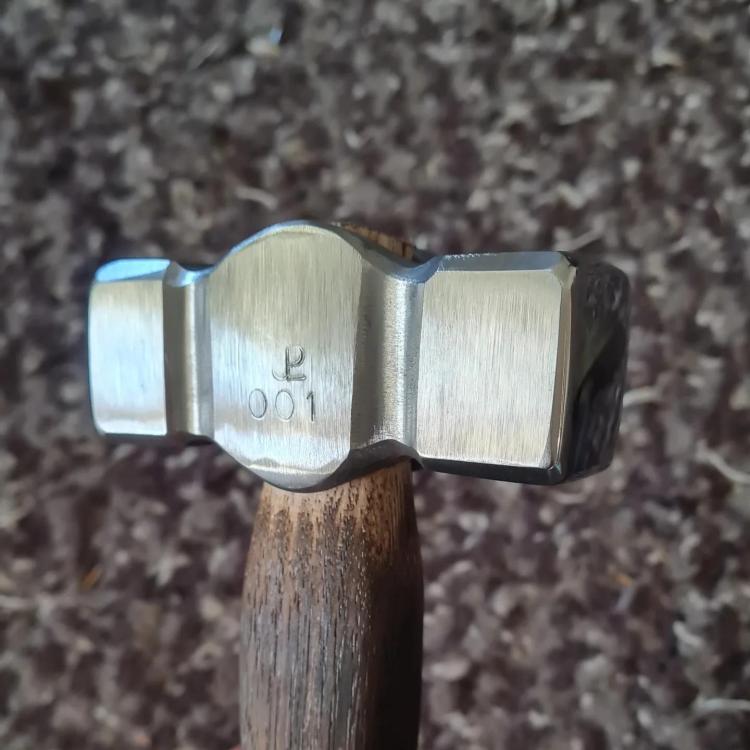
I like that Billy. If you needed to hang two off adjacent sides of one corner, it would lend itself to a stag's head kind of look. Not today, but I finally finished off my first rounding hammer over the weekend. It's been an on-again-off-again project, but I finally got some good consecutive hours in the shed to finish forging it and got it heat treated, sanded/filed/polished, and handled. I also experimented with what will be the basis of my future touchmark, with my initials overlapped. Man, it's hard to line up letter punches over the top of each other! I hope it's easier when I remember to do it hot so they can be a little deeper. By a happy coincidence it is only 20 grams lighter than my first, store-bought cross-peen hammer! Cheers, Jono.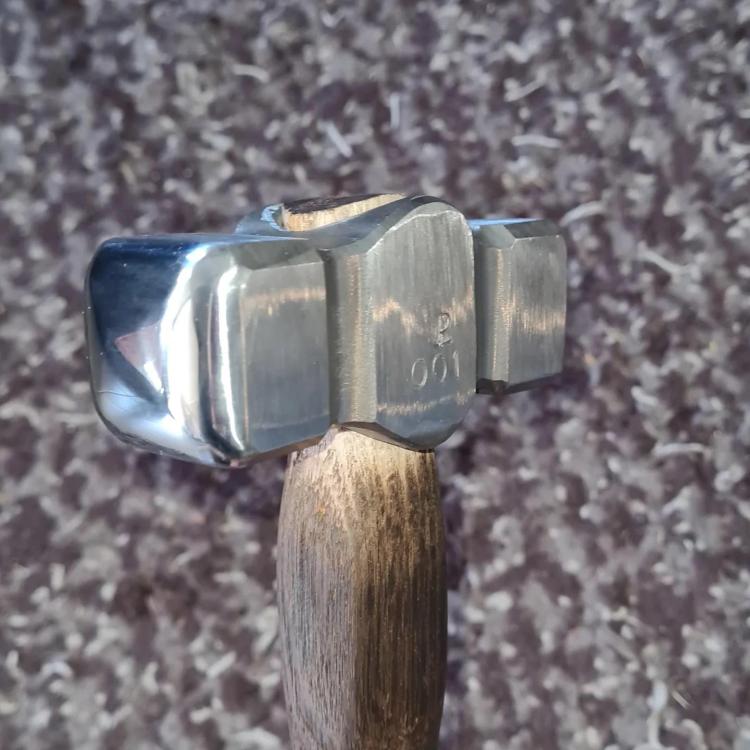
-
Sorry if this seems like a stupid question, but am I correct in thinking the towels don't have to be in contact with the kastolite, just generating the humidity in the bag?
-
Yes, and would be my eventual goal. I'm still at the point where I understand the basics and have the skills to recreate burners from known designs but I don't have the experience yet to recognise on my own, for example, that a vortex burner and a NARB plenum may not mix, but I understand why when someone more experienced, such as yourself, explains it to me. I'm not at the point where I have the time to experiment with modifying designs. The closest I come at the moment is combining parts of known designs and, as in this case, even that isn't always appropriate/advisable. Not a complaint, just acknowledging that these things take time. I can't be forging things, building a second forge, and designing a burner all at the same time.
-
That's a fair enough explanation. I was mainly hoping to do it because I had the 3d printed burner already. I can put together a linear or another T burner for a NARB easily enough. At this stage, it's still a round tuit job anyway.
-
Oh, I didn't realise they don't mix. I was actually thinking about basing a NARB on AFBs 3d printed vortex burner. So, would the further braking force of the plenum chamber cause the already comparatively slower vortex flow of FAM to burn back in the mixing tube? I guess I could just 3d print a linear assembly, without the vortex vanes.
-
Yep, no worries Frosty. I'm thinking maybe I should put the text of the first post into a PDF attachment so I can update it as these clarifications come up. Anything that makes this information easier to access and understand is good. I forgot that there's only a short window for editing a post. Also, any advice on terminology for main run and drop, or their equivalents, for the Y fitting on a Z burner. Is it just called an angled branch/drop? (P, D, F, Y, Z?!, it's alphabet soup around here!)