Fowllife
-
Posts
165 -
Joined
-
Last visited
Content Type
Profiles
Forums
Articles
Gallery
Downloads
Events
Everything posted by Fowllife
-
I understand completely. I was just pointing out that with a system with somewhat unknown components we are making assumption on max theoretical forces. If the unlabeled cylinder happens to be lower pressure the forces are much smaller and you safety factor on the tie rods is greater.
-
Man I hate going down a rabbit hole. This talk of threaded rod vs stress proof bolts got my mind a spinning. So, the pump is 3000 psi operating, 4000 psi max. What is the cylinder rated for? In a quick search all of the tie rod style cylinders I see are rated for 2500 or 3000 psi, some with a max surge pressure of 4000 psi but most don't list anything other then operating pressure. All the 4000 psi cylinders I see are fully welded. Hoses are another question also. If it was not used to it's full potential in it's previous life it might not have 4000 psi hose on it. I bring all of this up because what are we truly designing to? 18 ton @ 3000 psi, or 24 ton at 4000 psi? Or maybe even less if the cylinder will bypass a seal above 2500 psi. These number change the safety factor for the cylinder tie rods. As I have mentioned, I'm not a fluid dynamics expert. I'm just asking questions, partially to educate myself.
-
There are many different types of threaded rod rod that can be used in a lot of different applications. Many contractors use them along with epoxy for anchor bolts for large metal building. Those would typically be slightly larger with larger reaction forces, but stretch or breaking at the threads is extremely rare. I mentioned the cylinder I had laying around because it is basically junk. If they tie rods spec the same you could cut them down and re-thread for your application.....but then what is stronger, threaded rod, or your new cut threads?
-
9/16" would more then likely be what mine is also. All the talk of 5/8" above just made me bring it up. I don't deal with tensile strength much, more just shear, so I'll let someone else more qualified answer that one. If it were mine I would run with it for this application and just watch for stretch.
-
Once again, I'm late to the game and haven't caught up 100% Have you mic'd the diameter of the cylinder tie rod? I happen to have a 4" bore, 24" stroke cylinder laying in the barn and the tie rod bolts mic. out at 0.59x", so not a common size. This cylinder is only a 2500 PSI cylinder though. I partially bring this up because that cylinder is left over from a log splitter project and has a bent rod, so if the tie rods will work for your project...... I will say I have zero experience with an electric/hydraulic press. With a gas powered log splitter the operation & components are the same but the priorities are completely different. Seed is #1, wedge design #2, and power third so flow rates and working pressure are the opposites......I have a spare 2hp motor and a few spare cylinders in the barn, now my wheels are turning
-
We’re getting off topic, but I second the trailer. Arguably more versatile then a truck and way cheaper.
-
I’m a little late to the party here, so I’m going to back track a little. I have a 140a mig, and unless you’re a very competent welder I wouldn’t trust that for what I think you plan on doing. I have a stick welder also and use that for the vast majority of structural type welds. Having said that, I’m fairly competent with both, if you want a hand bring it on over. Sounds like you got a pretty good deal on your project. I’m interested to see how it ends up working out. I agree with Frosty, at that thickness your pushing it for some torches. I haven’t tried cutting anything that thick with mine, but I doubt it would be very clean.
-
how big of a shop do i need
Fowllife replied to lumettamichel3's topic in Building, Designing a Shop
As has been mentioned, it really depends on what you plan on doing. If you main focus will be small items and you will have minimal tools you can get by with a relatively small shop, say 8x8 or 10x10. If you plan on having more tools like a power hammer, hydraulic press, drill press, sander, lathe, ect. you will need more room. If your goal in ornamental work like large gates or sculptures you will also need more space to mock and weld things up. I work in an area around 400 S.F. which contains my anvil, gas forge, post vise, work bench, drill press, 4'x5' assembly/welding table, and its fairly roomy. The barn I'm working in is larger though so if I'm working on something bigger I can move some equipment around and utilize up to around 1,000 S.F. I was planning on saying somewhere between 8'x8' and 100'x100', but these guys already got a little carried away with the blimp hanger.....give us a little more guidance on what you plan on doing and what tooling you plan on having and we can help narrow it down. -
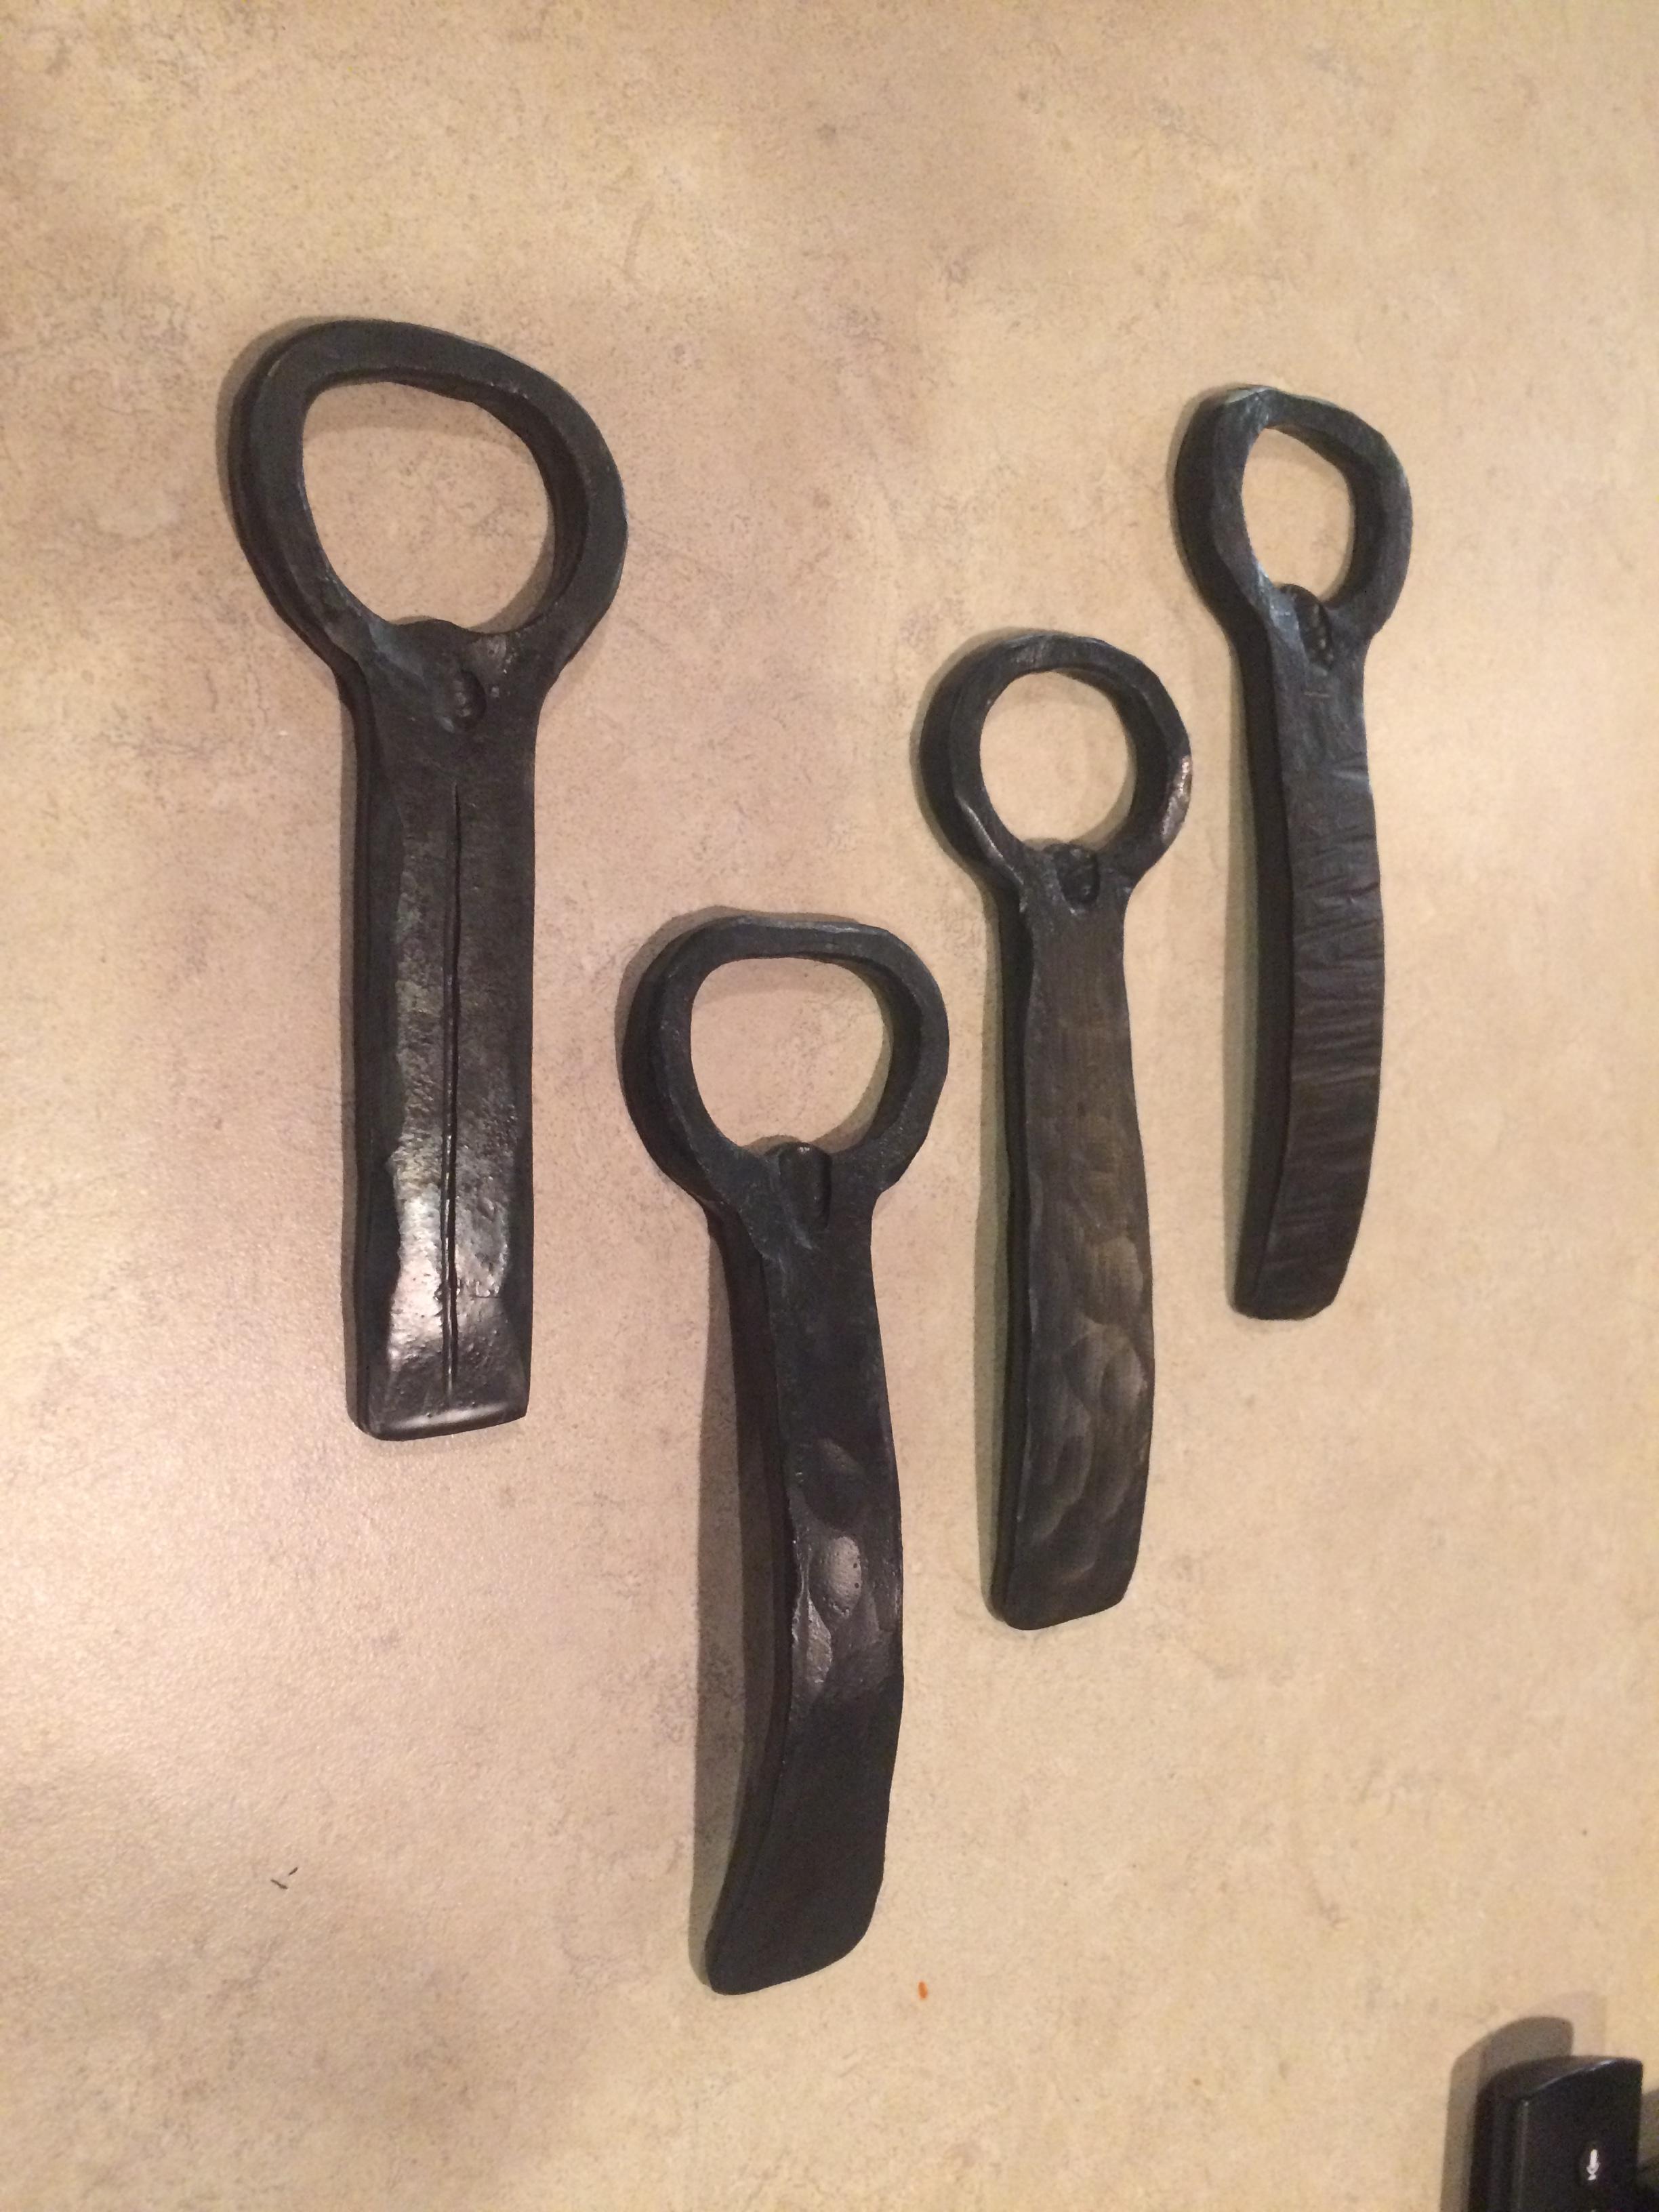
Show me your Bottle Openers!
Fowllife replied to Arbalist's topic in Blacksmithing, General Discussion
I made this one for my wife as a slightly belated birthday present. I don’t know if I would call it brave or stupid, but may have engraved a certain number into the handle. Being very witty she flipped it around and said it was cool I engraved the initials for the State it was made in.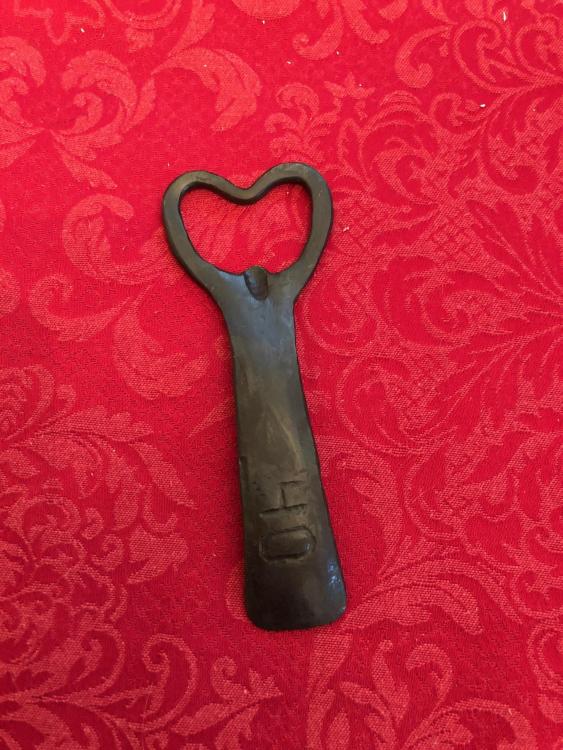
-
What did you do in the shop today?
Fowllife replied to Mark Ling's topic in Blacksmithing, General Discussion
I actually had the exact same thought. Beautiful work there Alexandr -
Daswulf asked the same questions I was going to. I also agree with him, for the money I would save up a little more and get a wire feed welder. My first welder was a 225amp AC stick that I think I paid $300 for new. About 5 or so years ago I bought a Hobart 140 MIG for around $400 new.I ran it with flux core wire for a year or so before I got a tank and went MIG. I still use them both, but the MIG gets used 85-90% of the time. I use the stick if I'm welding rusty stuff, 3/8" or thicker material, or 1/4"+ material in a critical location. I learned on a stick welder, but I think it's easier to learn with a MIG. Rod selection (both type and size) are pretty important with a stick, it's easier to dial in wire speed and heat for a beginner.
-
What did you do in the shop today?
Fowllife replied to Mark Ling's topic in Blacksmithing, General Discussion
Yeah, guardrail post for the base, and an old I beam for the upright. I finally had a few minutes to fire the forge up today. I’m ashamed to admit it’s the first time in probably 3 months or more, just been too busy with other stuff. After my second failed attempt at forge welding I decided to switch gears and make a second go at some bottle openers. Making some progress, but need a little more refining.
-
What did you do in the shop today?
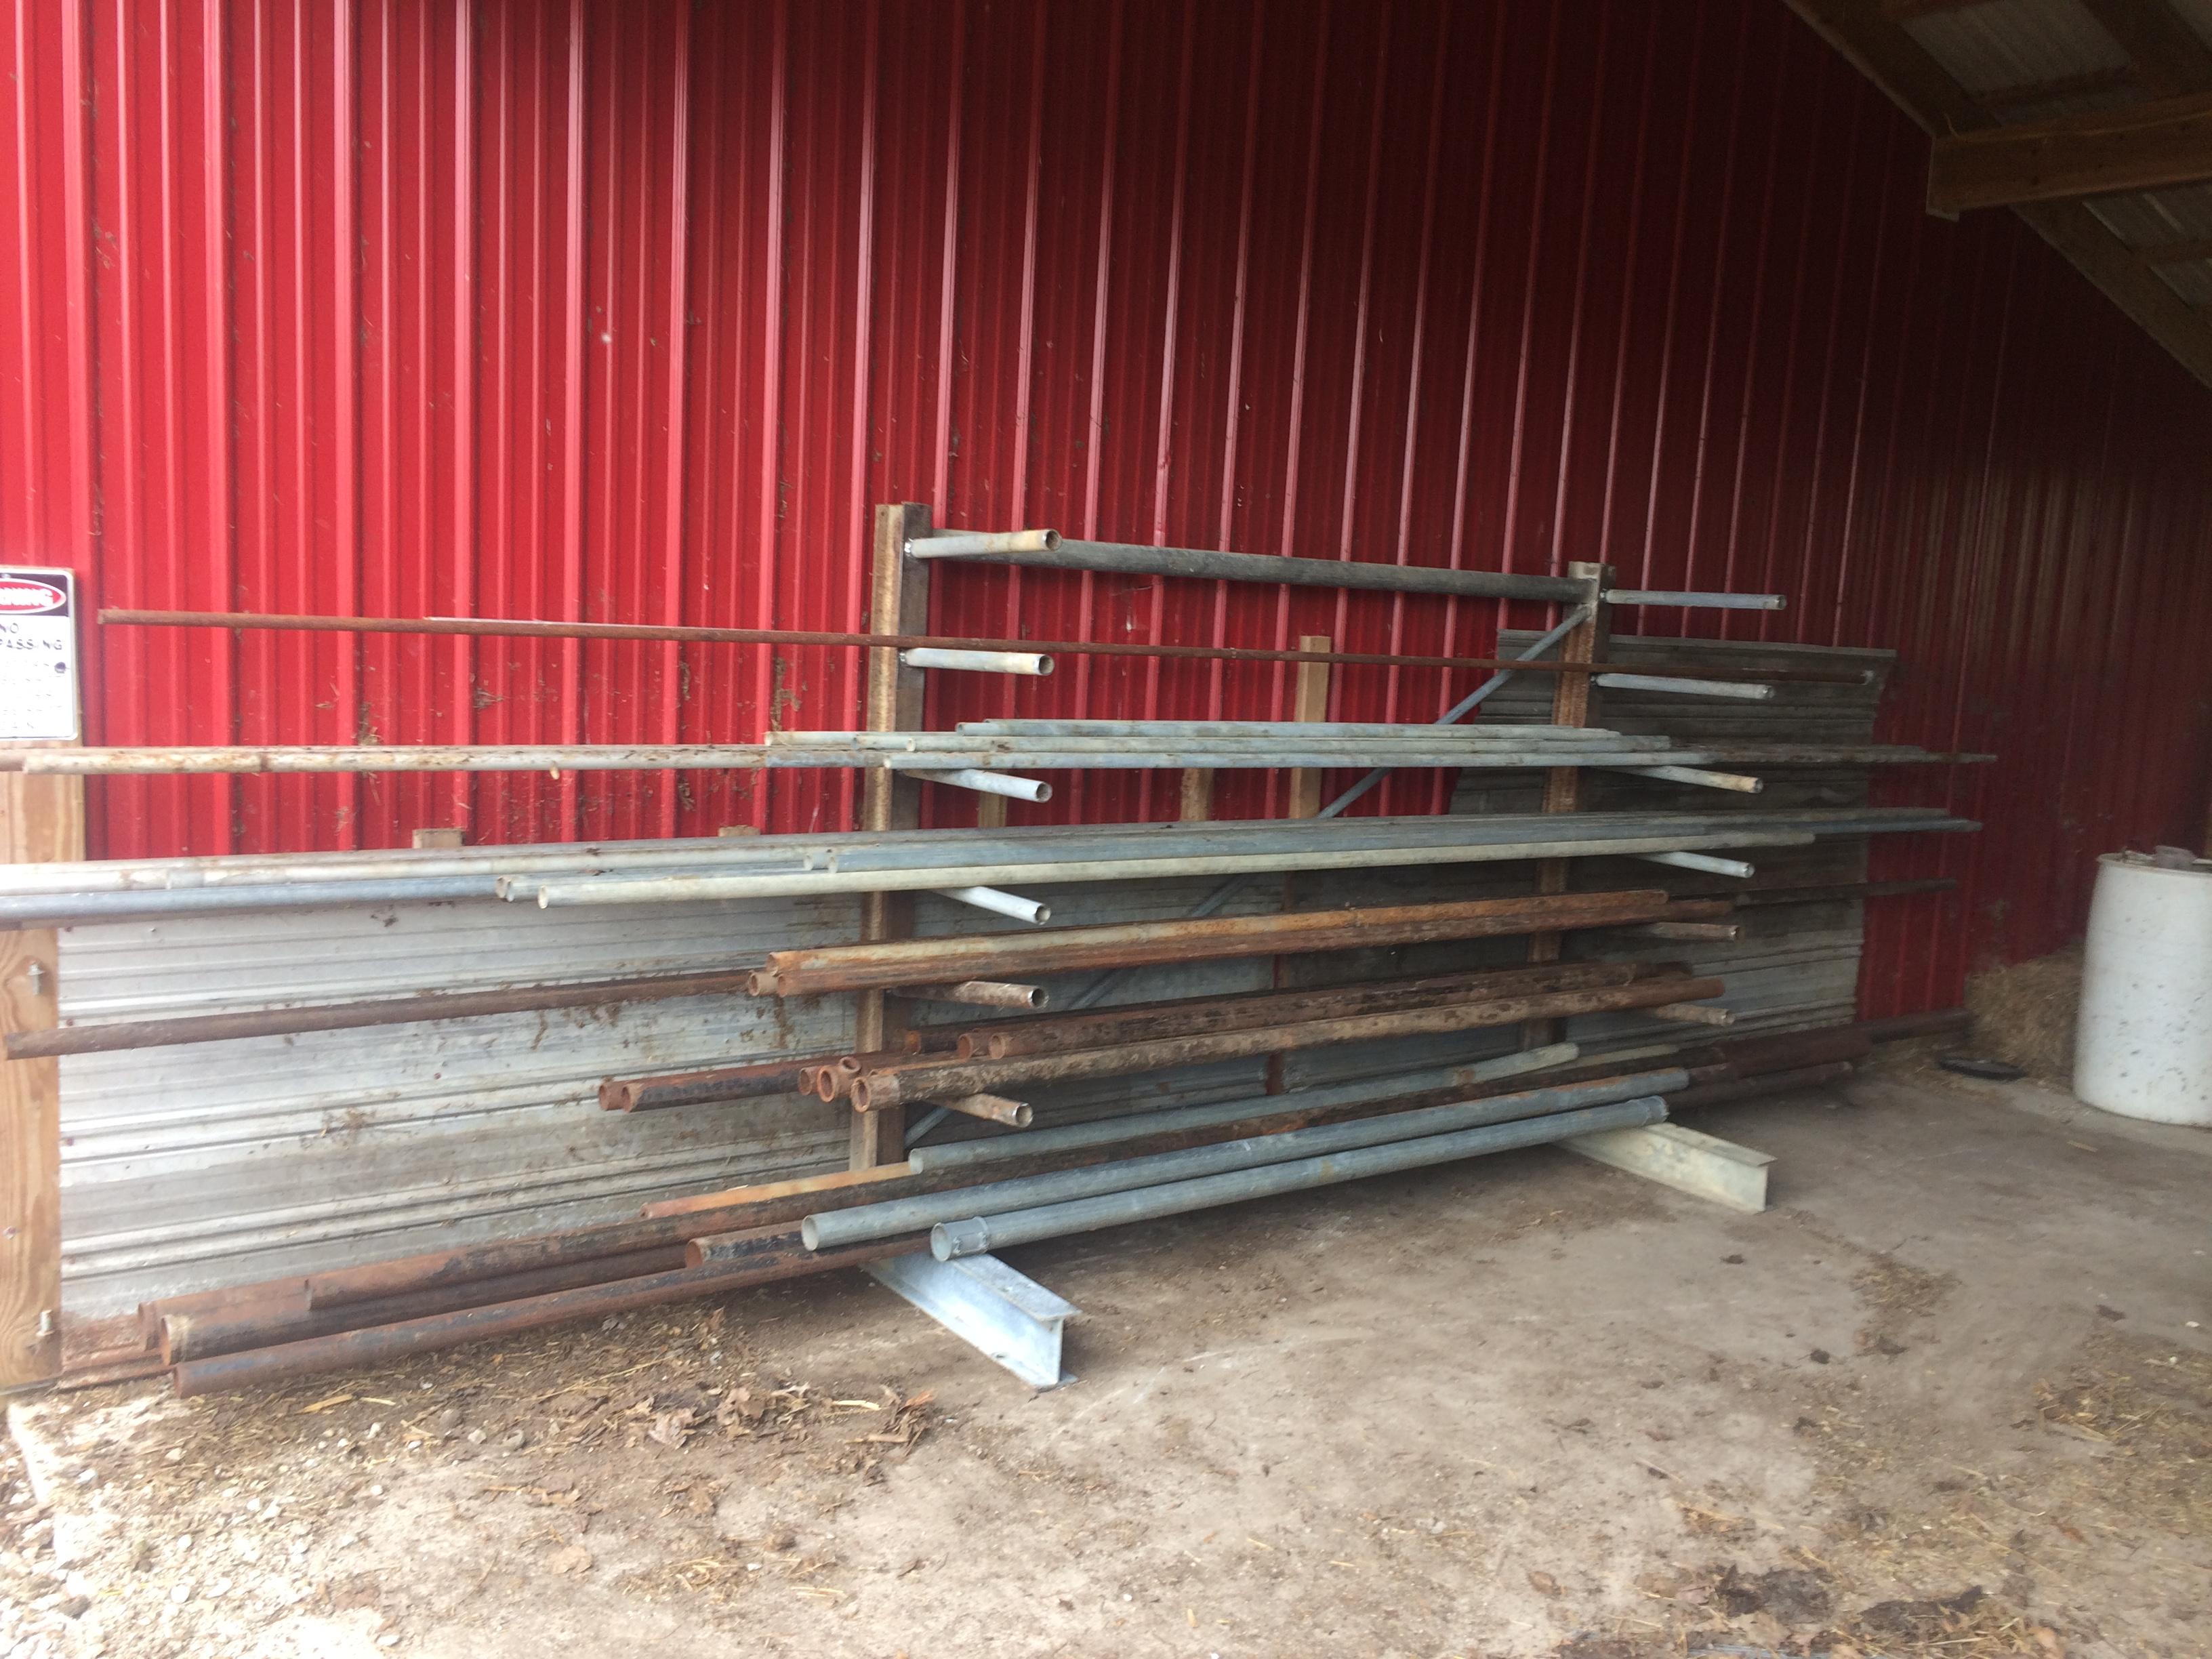
Fowllife replied to Mark Ling's topic in Blacksmithing, General Discussion
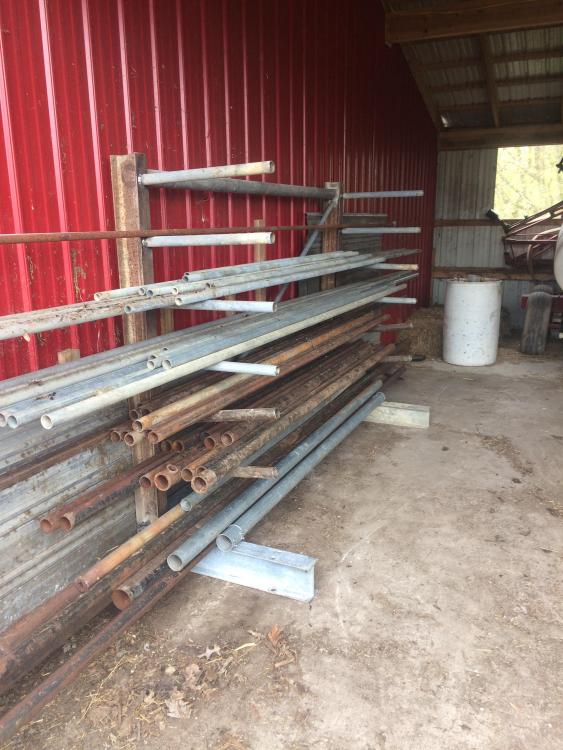
That’s a fine hammer John, and a nice letter opener. Great picture there Das, there’s always time for making memories. The wife told me a needed to clean up the yard, so I finally dug through the my pile of steel and made a pipe rack. I managed to get all the stuff in yard stacked, but I think I have some more out back in the old mink house. It needs a few finishing touches, but it’s usable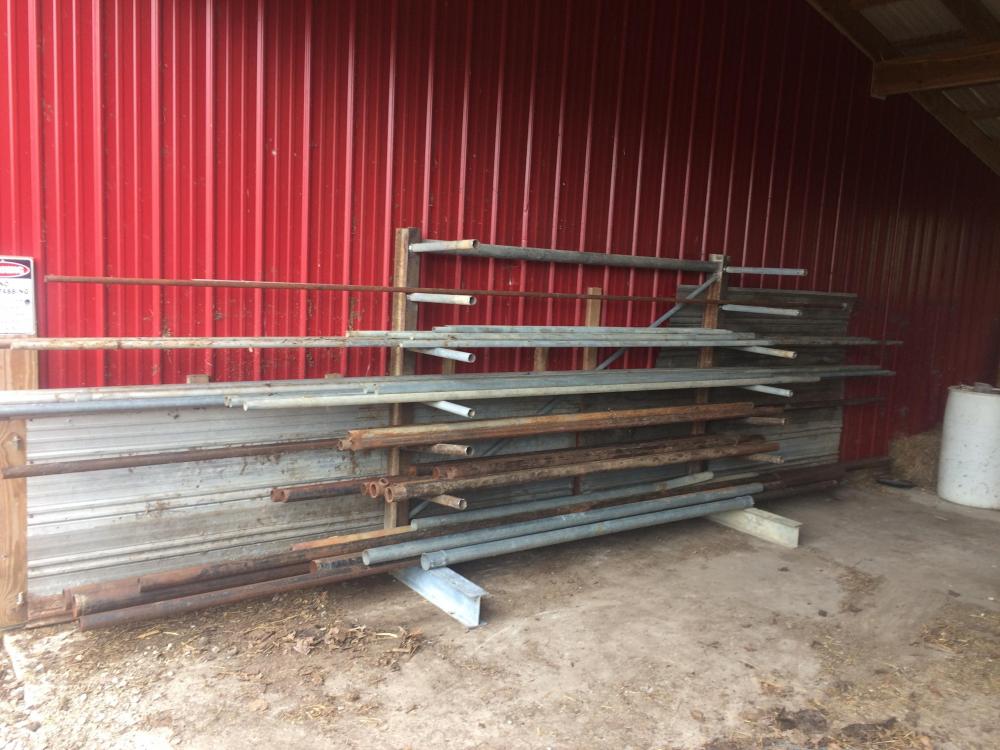
-
That’s a pretty cool, your mind works in wonderful ways. I love to see the different ideas you come up with.
-
First leafs I forged with my new built tongs
Fowllife replied to Bustapepper's topic in Blacksmithing, General Discussion
Very nice job on your first leaf. I would be proud of that as well. -
What did you do in the shop today?
Fowllife replied to Mark Ling's topic in Blacksmithing, General Discussion
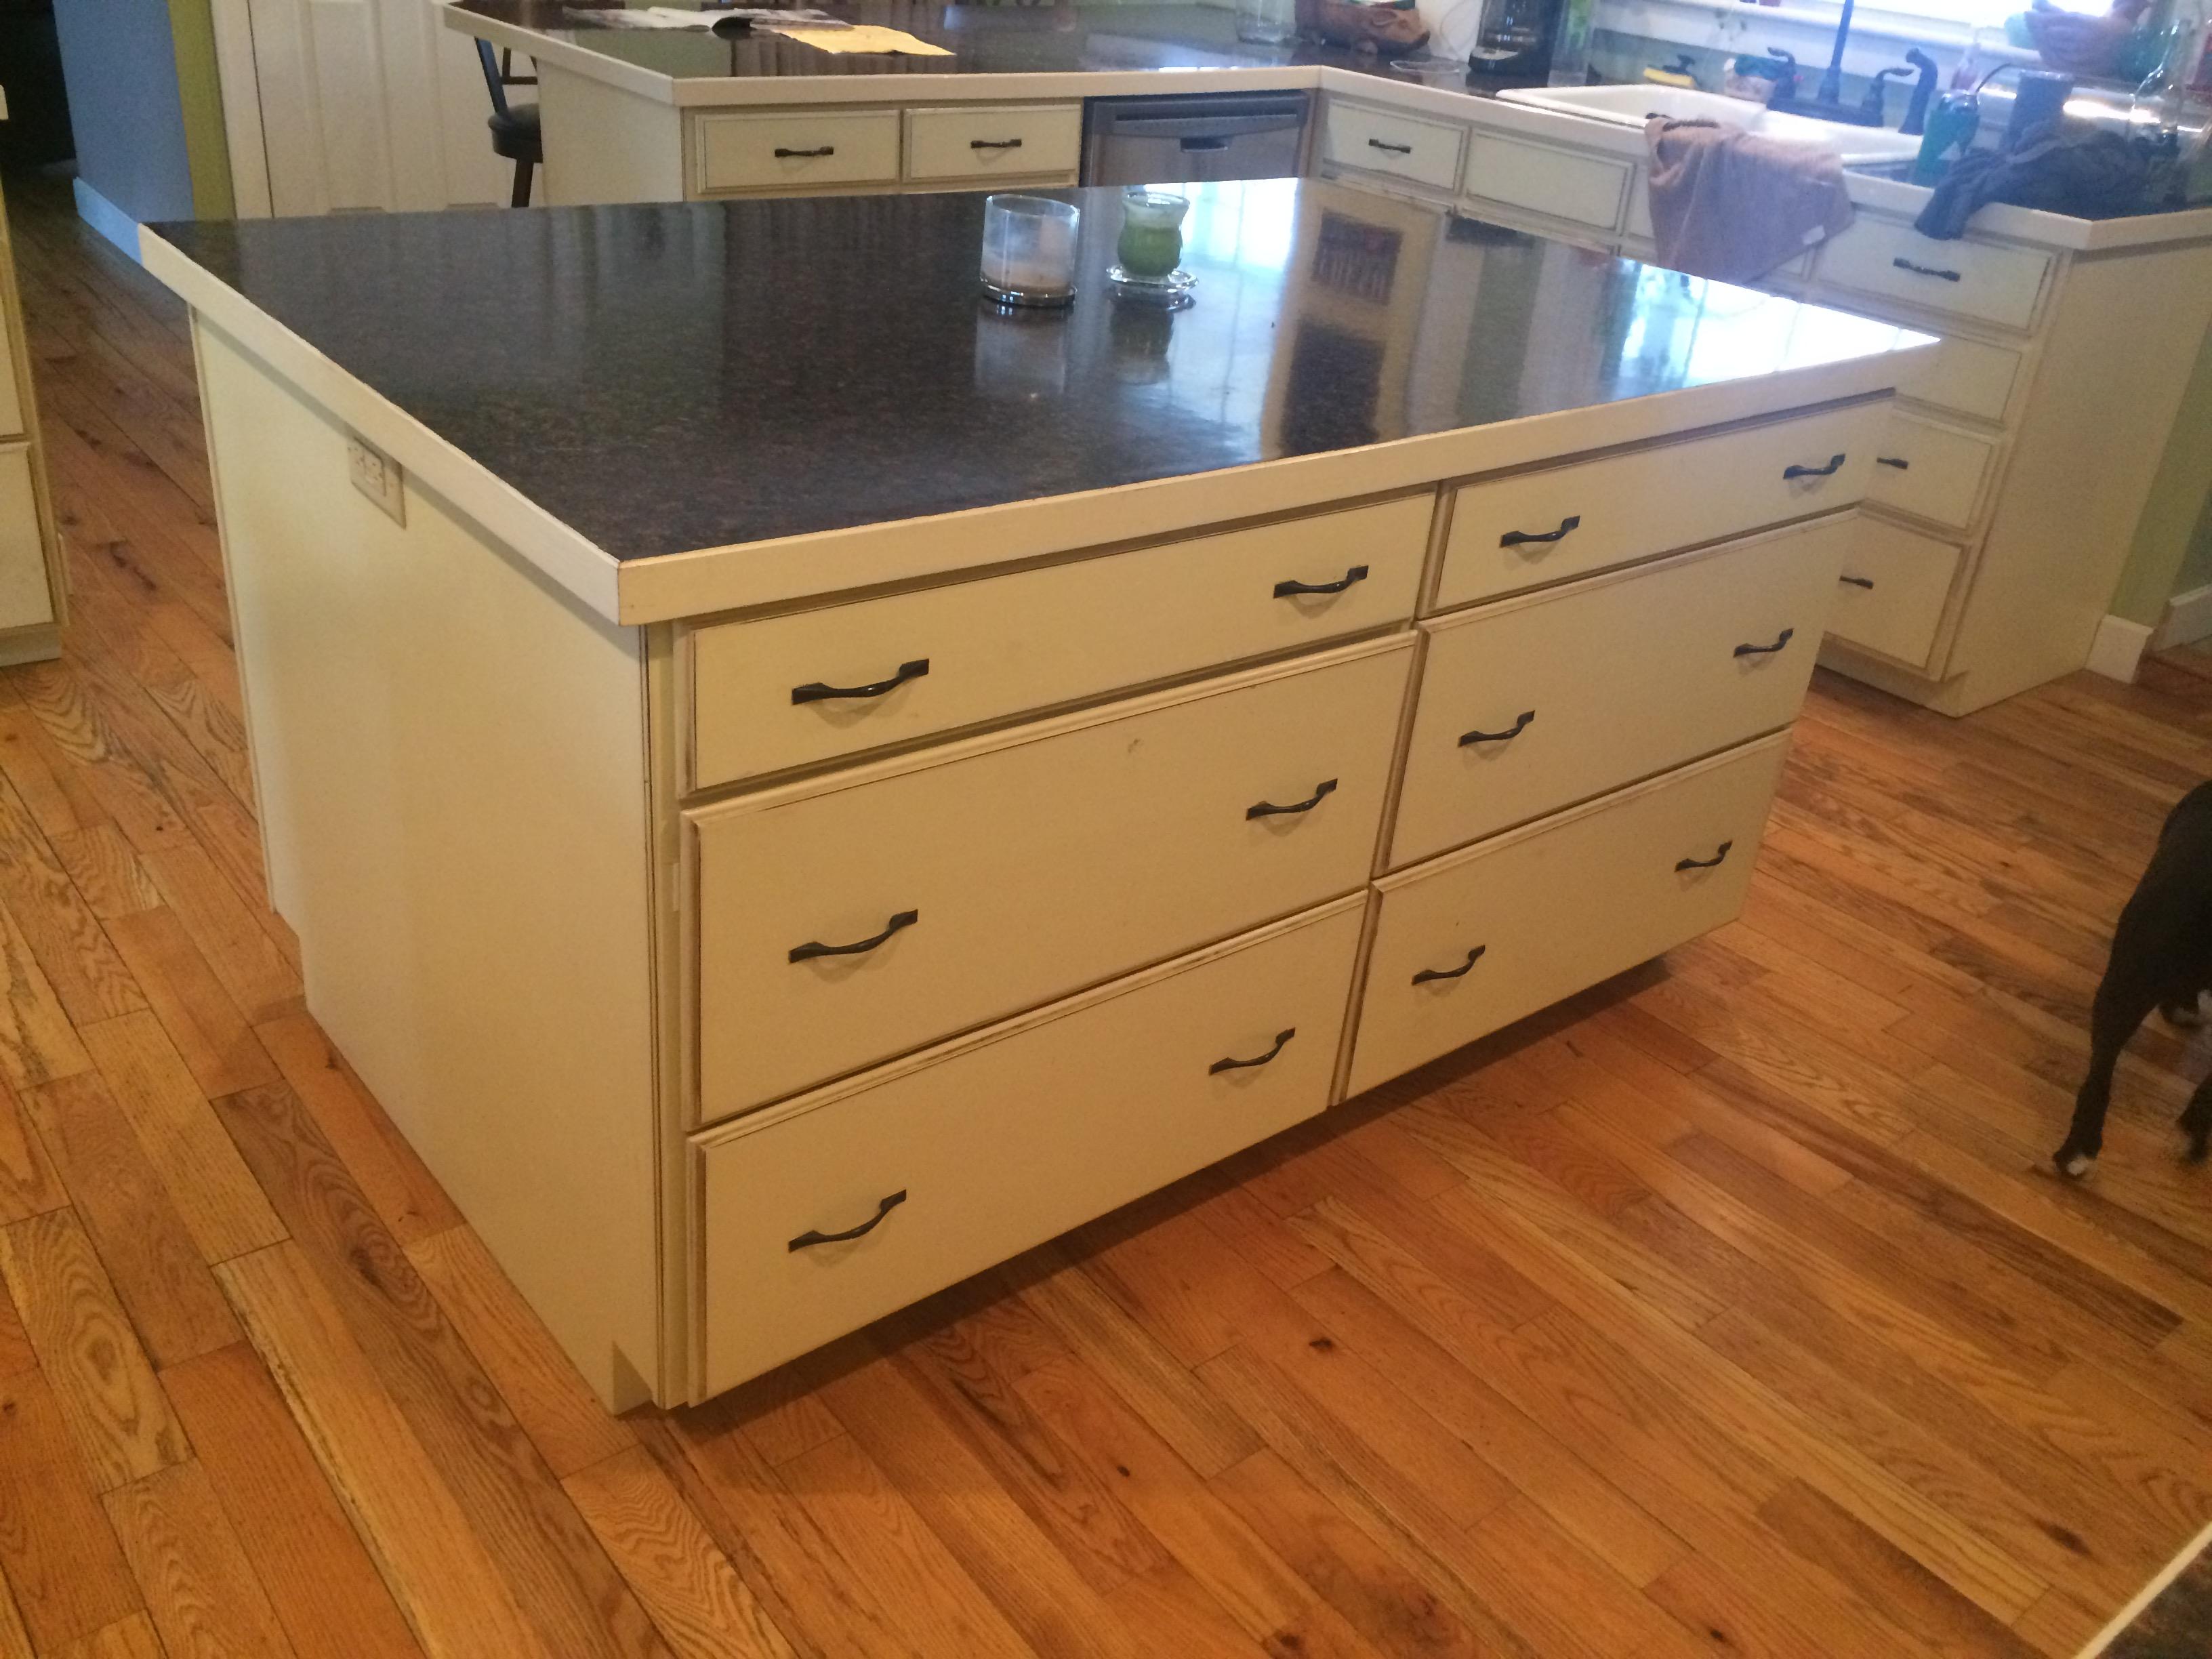
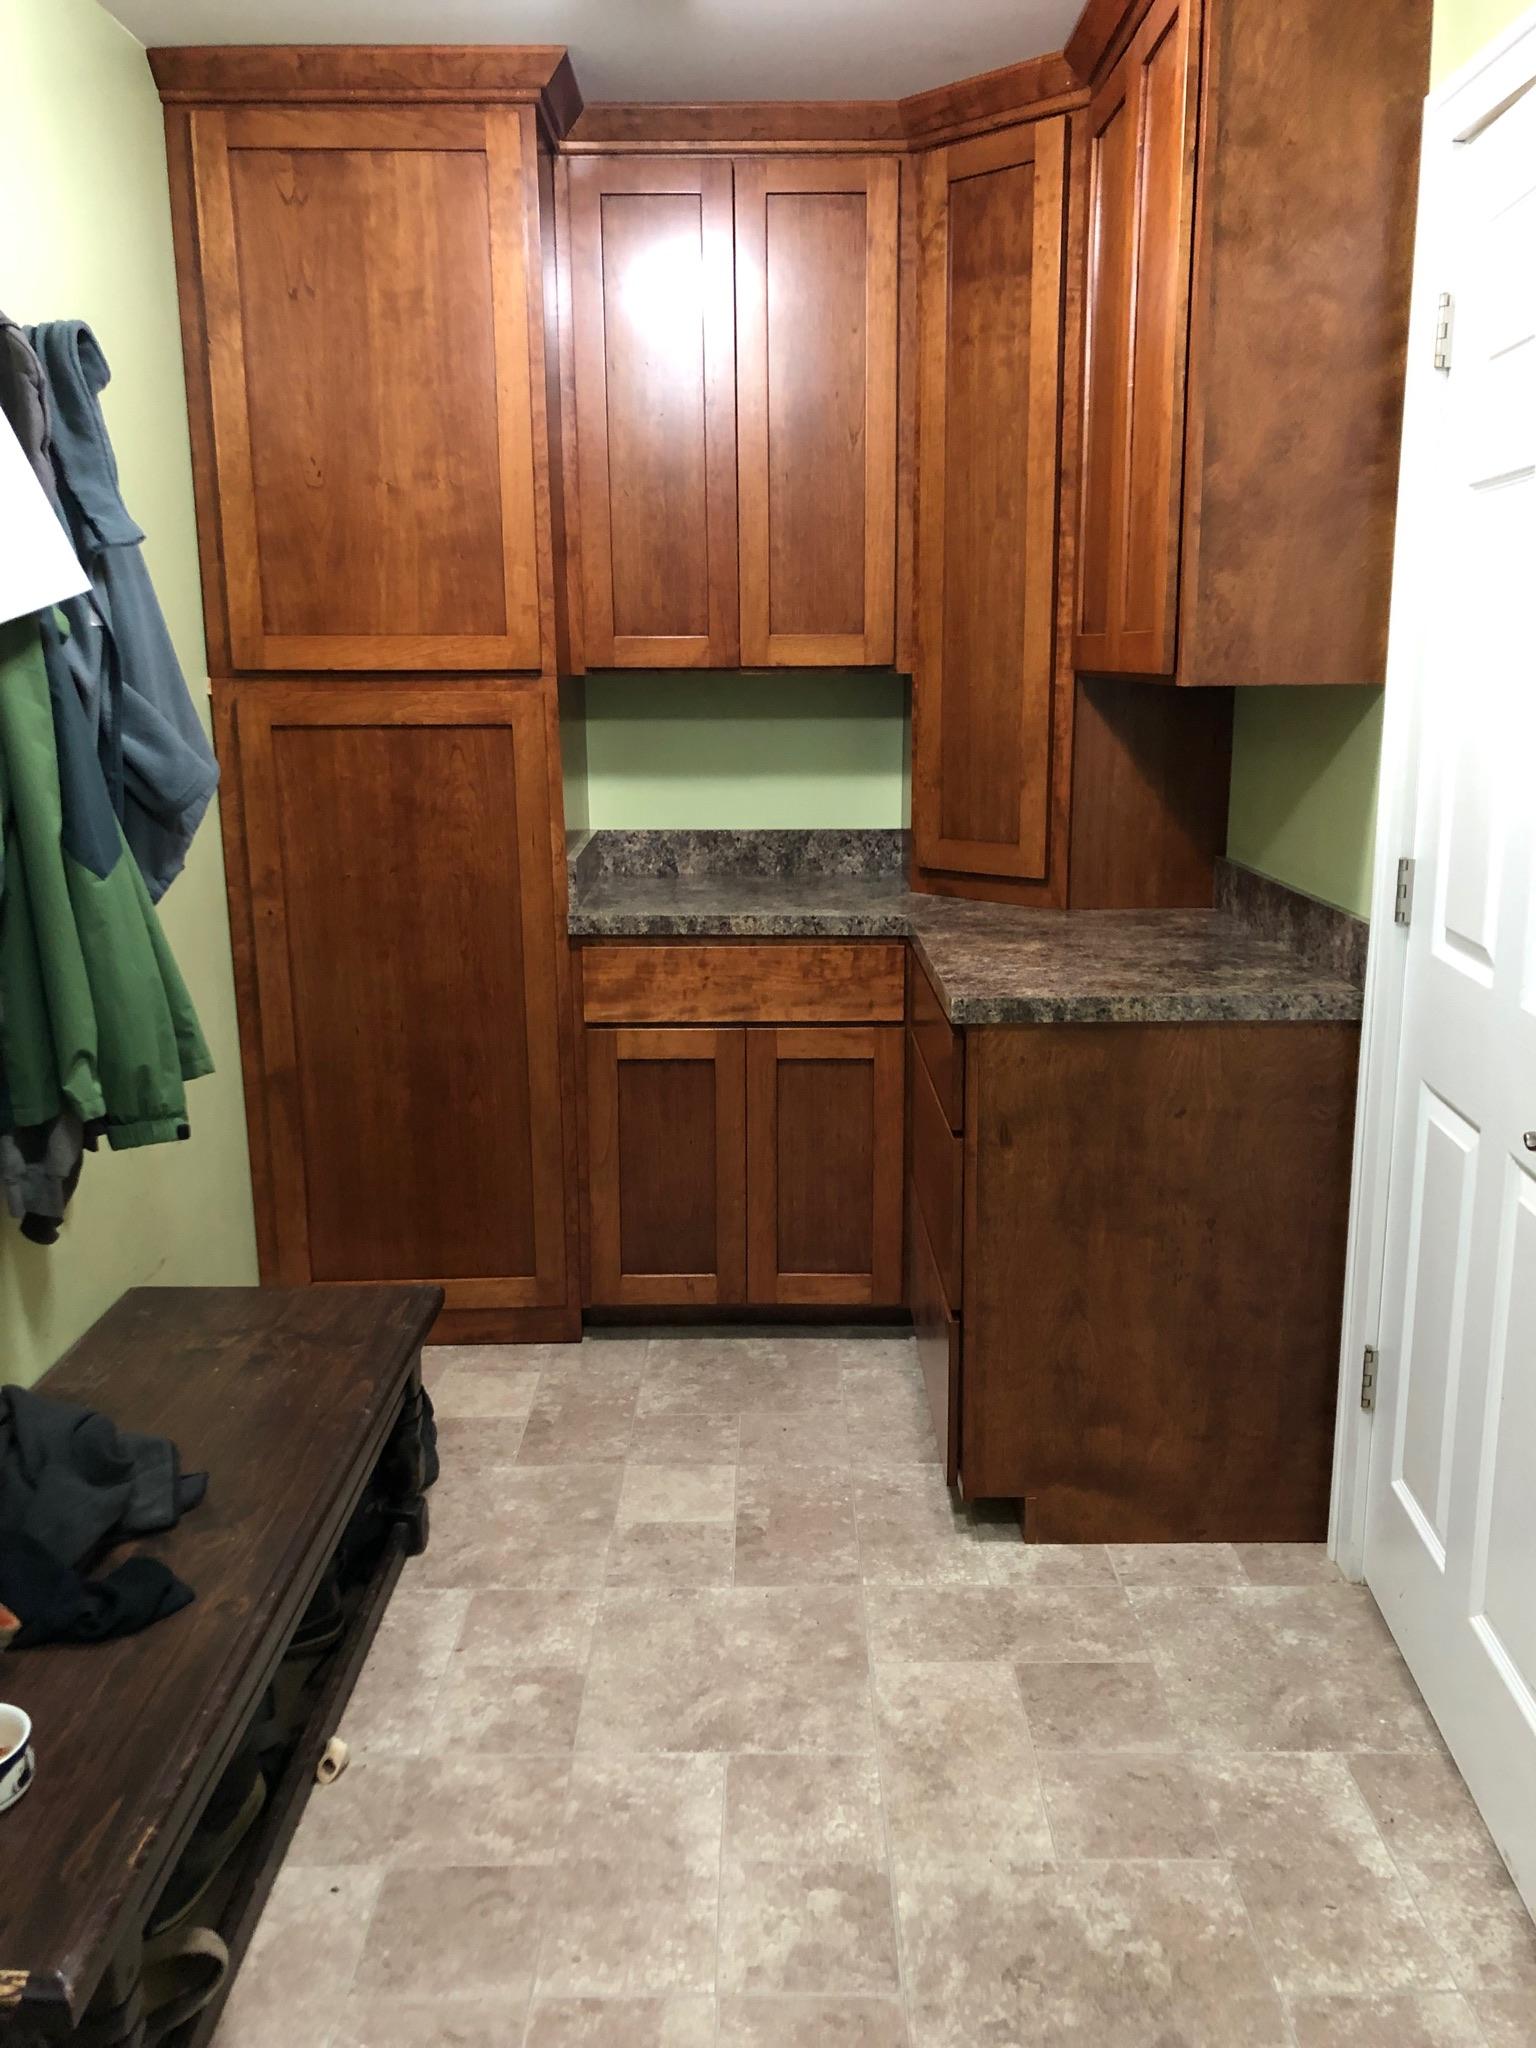
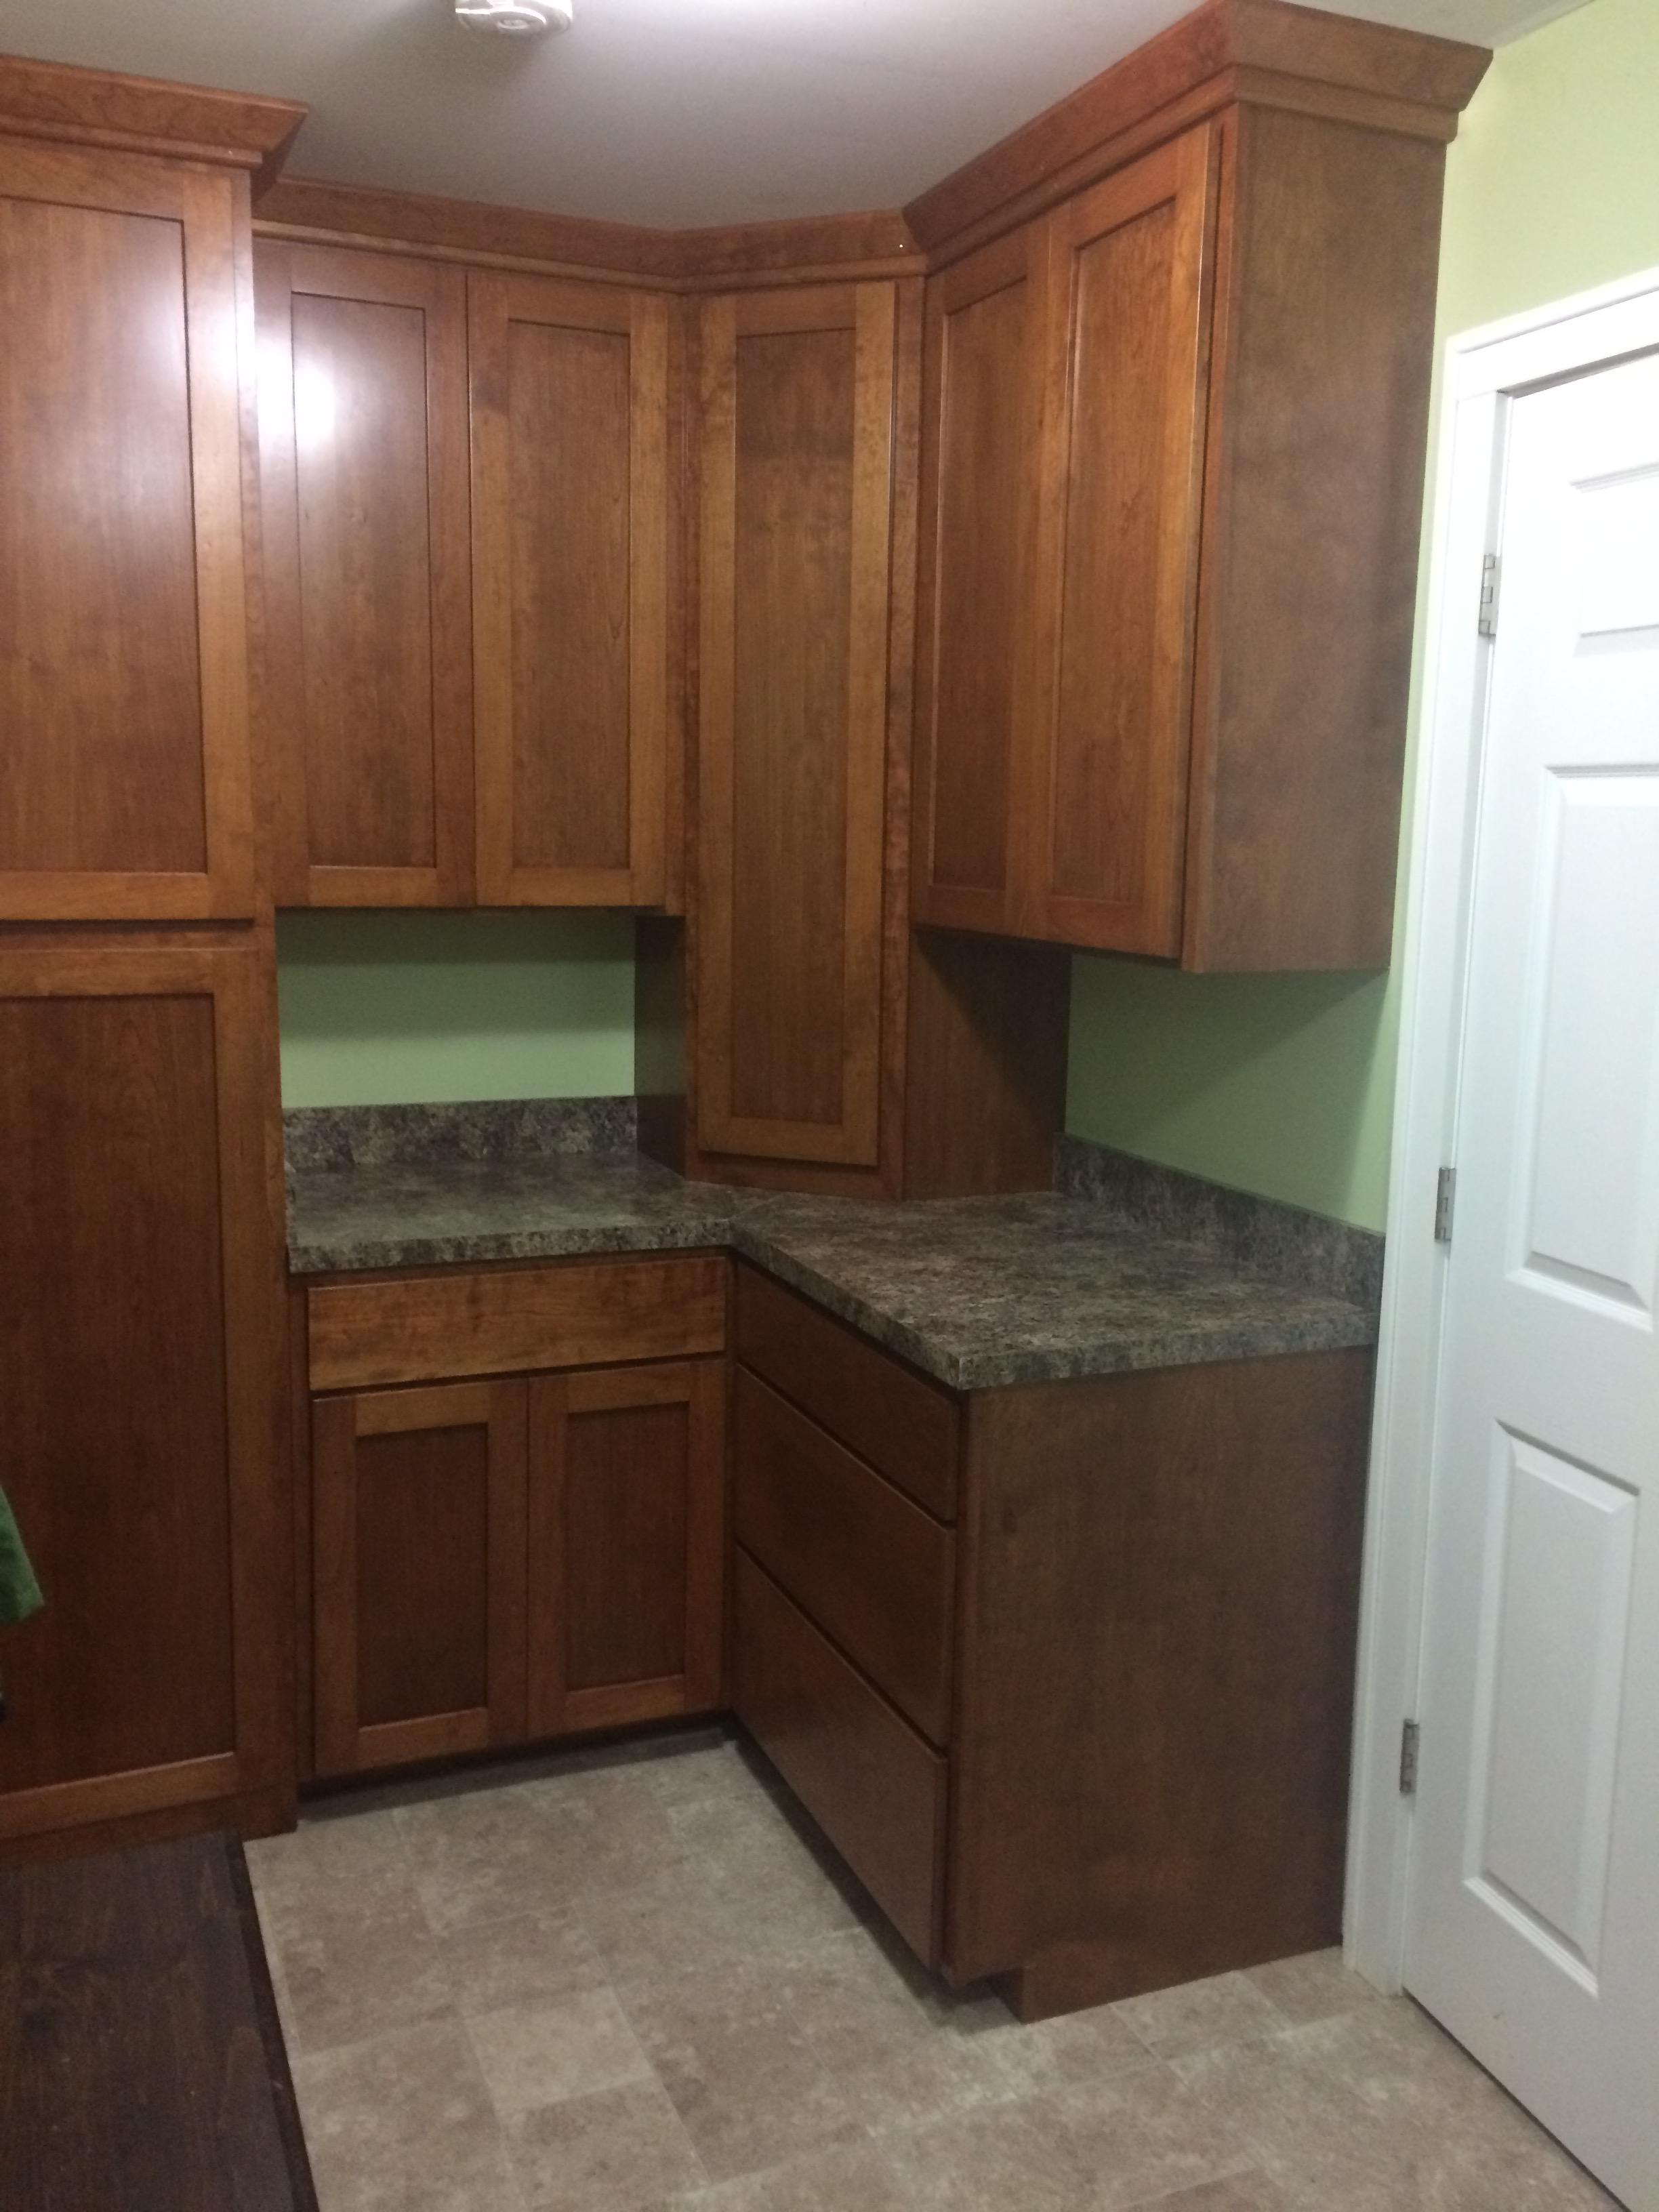
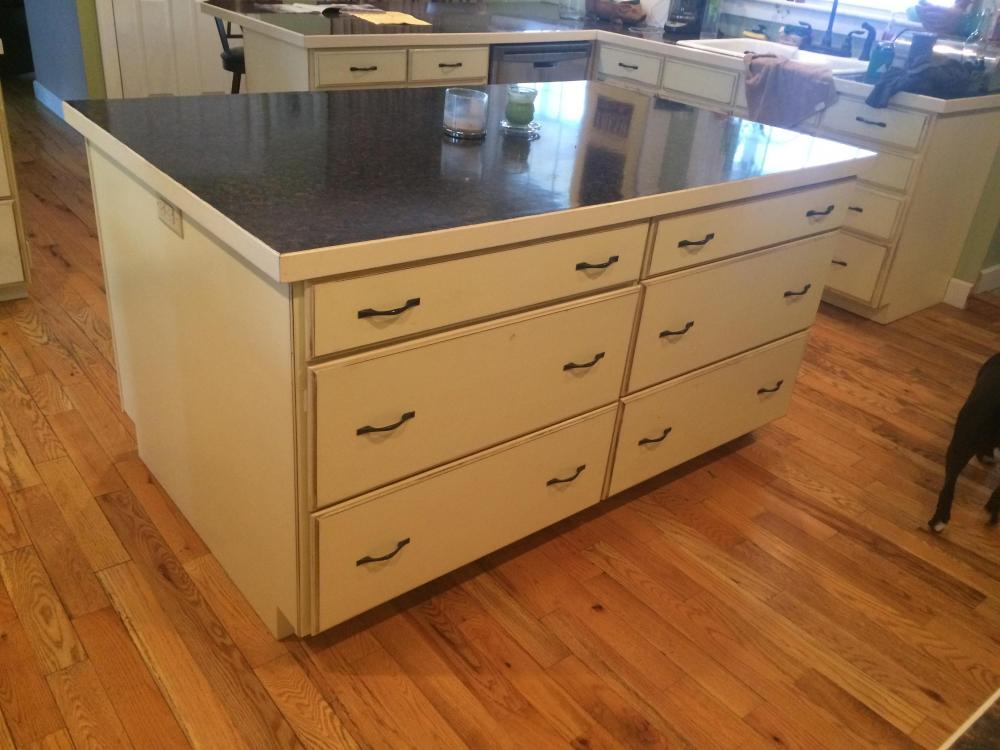
Thanks for the kind words gentlemen. I think I may have nicer cabinets in my mudroom then in my own kitchen as well. I was going to make then to match my kitchen, but I didn’t have any hardwood on hand for paint grade, I just happened to have enough cherry though. The mudroom is attached to the garage so I am under strict orders that if I have been around any of the livestock, or my boots are “nasty” they must stay in the garage. While some rules are made to be broken, I will only push the envelope so far on that one. As I tell my wife, we would have far less “nice things” if I were not able to build them. Building things is something I thoroughly enjoy, wood or steel makes not difference. I believe most true craftsman are capable of their craft because of there mind and ability and are not limited to materials. I would not consider myself a true craftsman, but I am capable of some craftsmanship. Below are a couple pictures of our kitchen I built a few years ago, a little more period for a 1840’s house.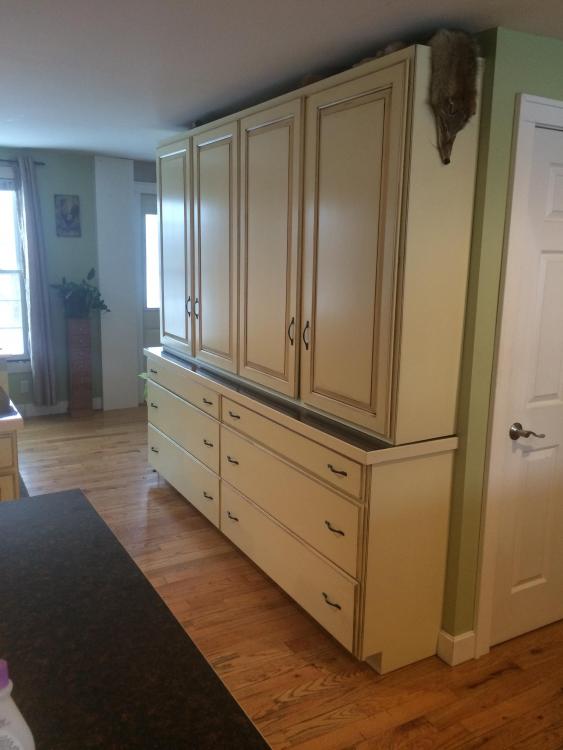

-
What did you do in the shop today?
Fowllife replied to Mark Ling's topic in Blacksmithing, General Discussion
Unfortunately I haven’t had a chance to light the forge lately as I have been busy in the “other” shop. I finished the set of cabinets for our mudroom in the house a week or two ago, then slide right in to making the third piece of our bedroom set. I think I might make some leaf hardware for the cabinet doors.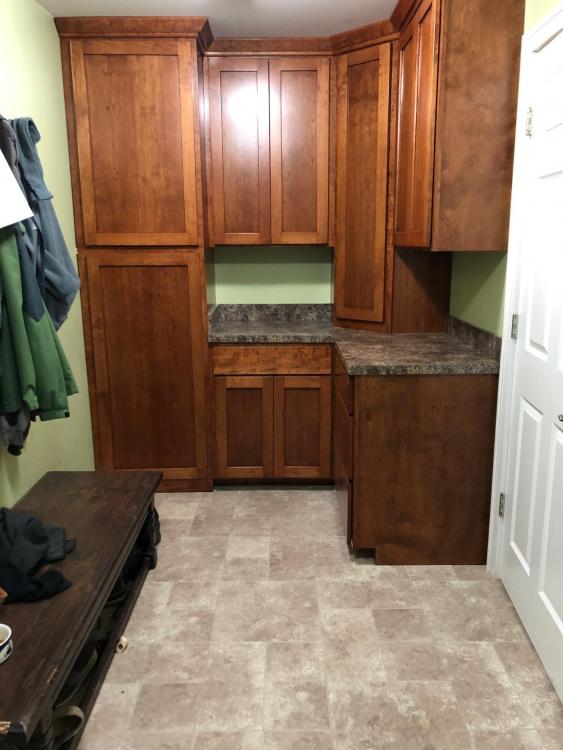

-
It looks like they have a 4 ton multi press for the same cost (actually $160), although it's 3 phase I would think that would be a better option for you. With either a phase converter or a new motor it would still be pretty cheap. A "pull" type press would take a lot of work to make useful. You could do some calculation based on motor size and guessing on cylinder size. I would guess they are in the 1-2 ton range?
-
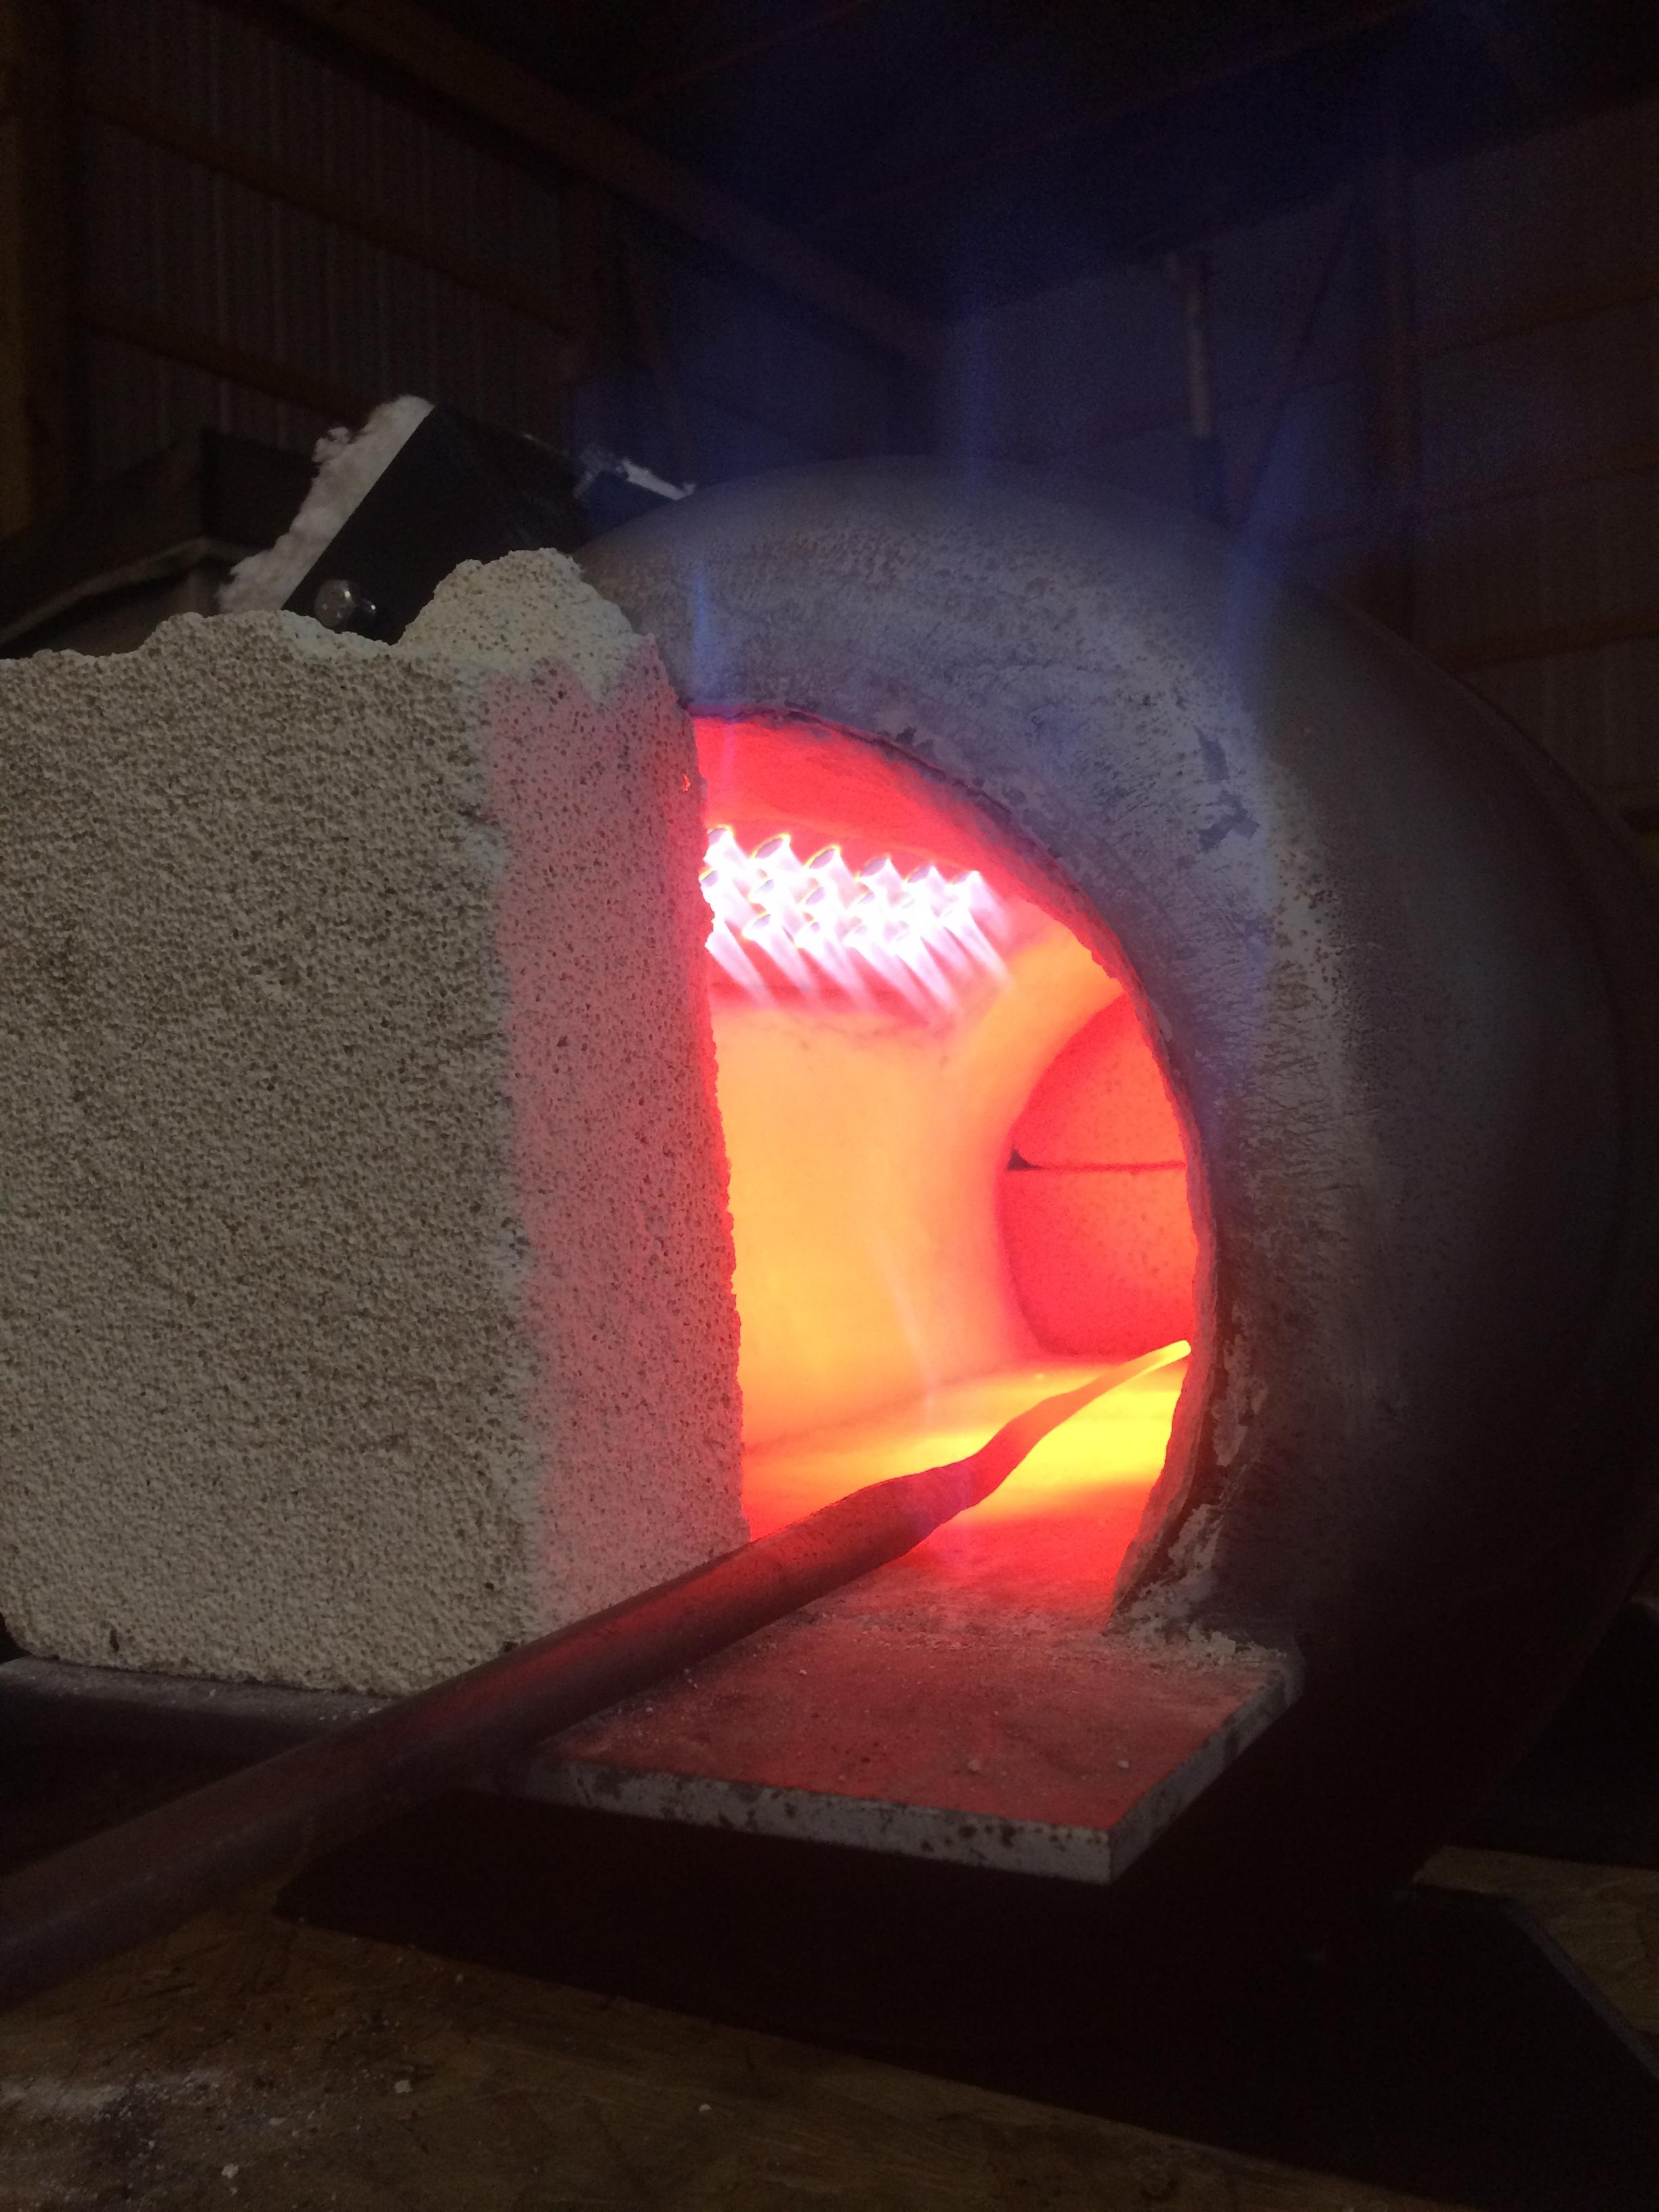
I had planned on buying a forge a few months ago, but after I started doing some more research I realized there aren't really any economical options that are good quality. Researching online is actually what led me to this site. What I decided to do was build a 20 lb propane tank forge with a ribbon burner. I think I have under $300 total into my forge, and so far I am pretty happy with it. It's quiet, good on fuel, and gets plenty hot. They really aren't that hard to make. I was nervous my ribbon burner would blow up in my face the first time I lit it, but that was not the case. I used the following references, I can email you some PDF's if you would like Frosty T-burner (sticky at top of page) NARB (Frosty's naturally aspirated ribbon burner - sticky at top of page) Wayne Coe has a nice set of plans on his website - You can also order most of your materials you need from him as well It really isn't rocket science to build a burner & forge. These guys have all the hard stuff figured out already, all you need to do is follow the directions.
-
I have dealt with similar things in other building aspects in the past. Mikey is right, your not going to get a UL cert number unless your willing to shell out $$$$$. My advise is to go over the inspectors head. Hopefully the inspector is not also the Chief Building Official, or whatever they call the head of the building department in your area. Call and try to get a meeting set up with the local head building official and go in there with a letter of approval from the local fire chief and explain your situation. This stuff is all going to be area dependent and even in my area it varies widely depending on the building department that oversees the work. Most of the US uses a form of the International Building Code, I'm not sure what Canada uses. In the IBC there is not such thing as being grandfathered in with a new building. Unfortunately I think your best route would be to remove the forges from the building until after your final building inspection. Hopefully these are not hard plumbed. You may even be able to just tell the inspector the forges will only be stored in the building and will always be operated outside. HERE at least the building inspector doesn't step foot in the building after your final inspection. Make him happy now and as long as there are no life safety issues and the Fire Chief is ok with it move them in after your have a Certificate of Occupancy. It's unfortunate, but sometimes there is no way around it when you have a by the book only inspector. There would be several codes to reference just for this one issue. HERE we reference the IBC, International Fire Code, International Fuel Gas Code, Iternational Mechanical Code, and probably the NFPA 58 (Propane Gas Code)
-
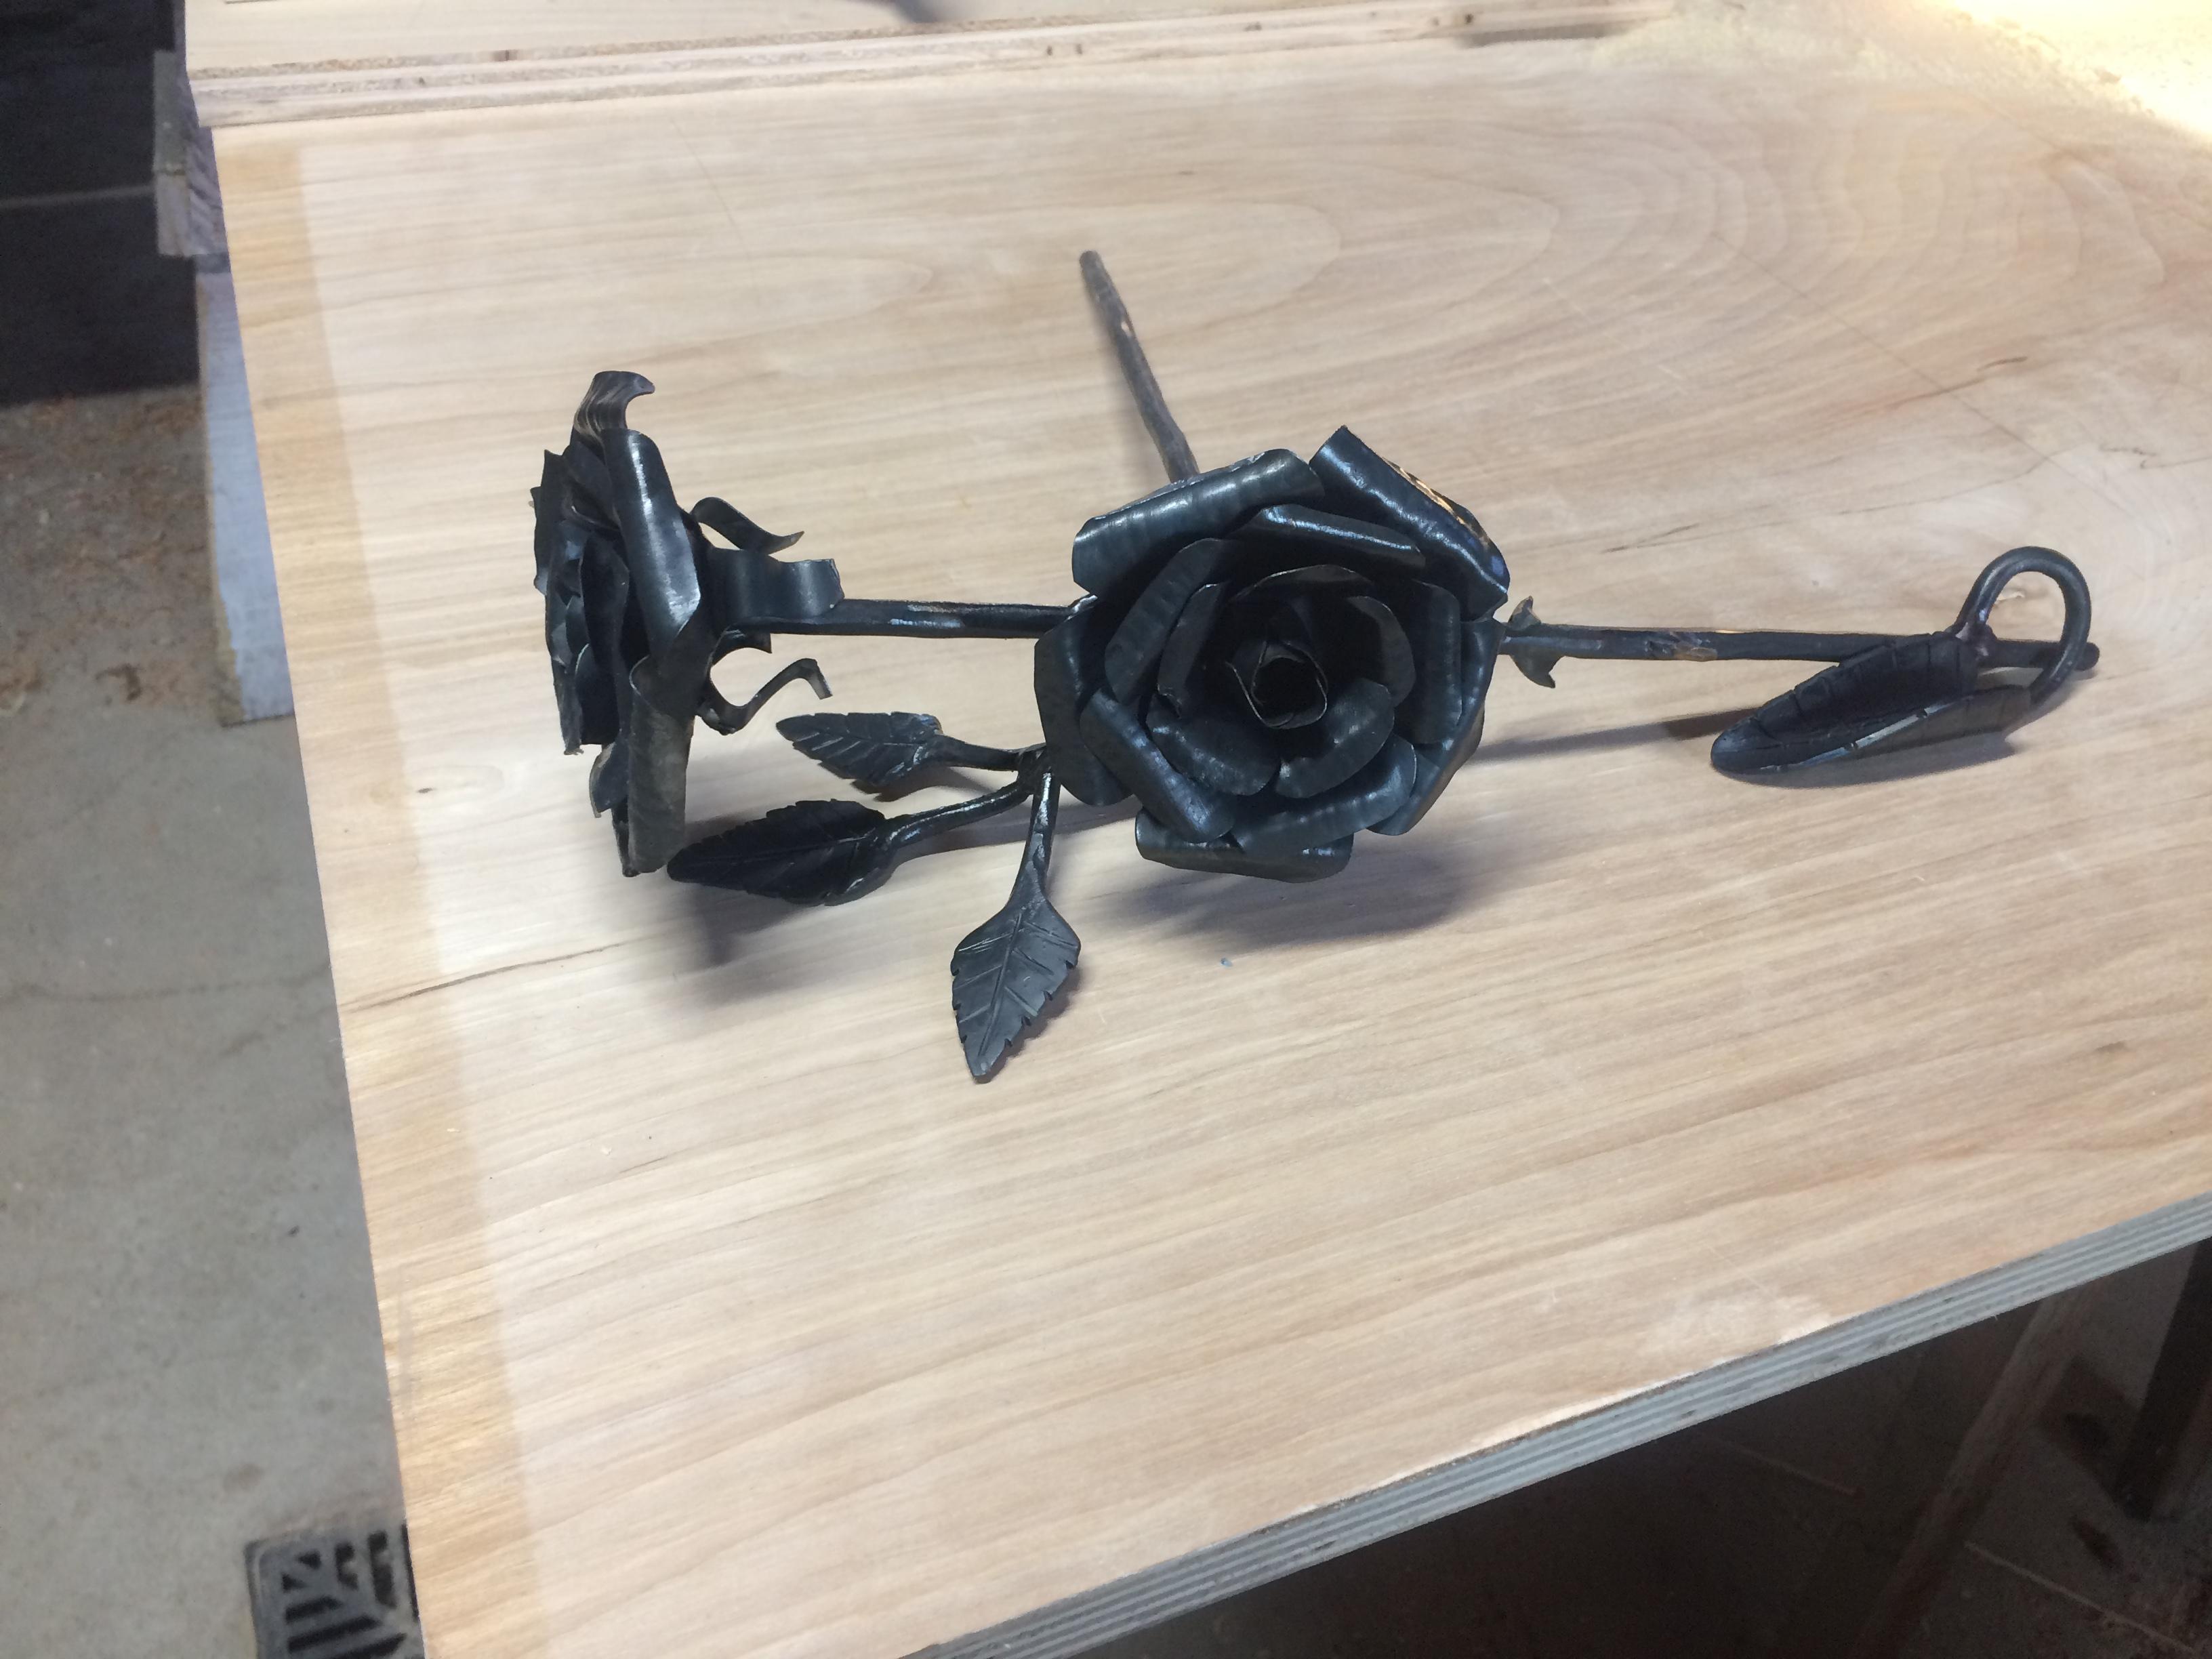
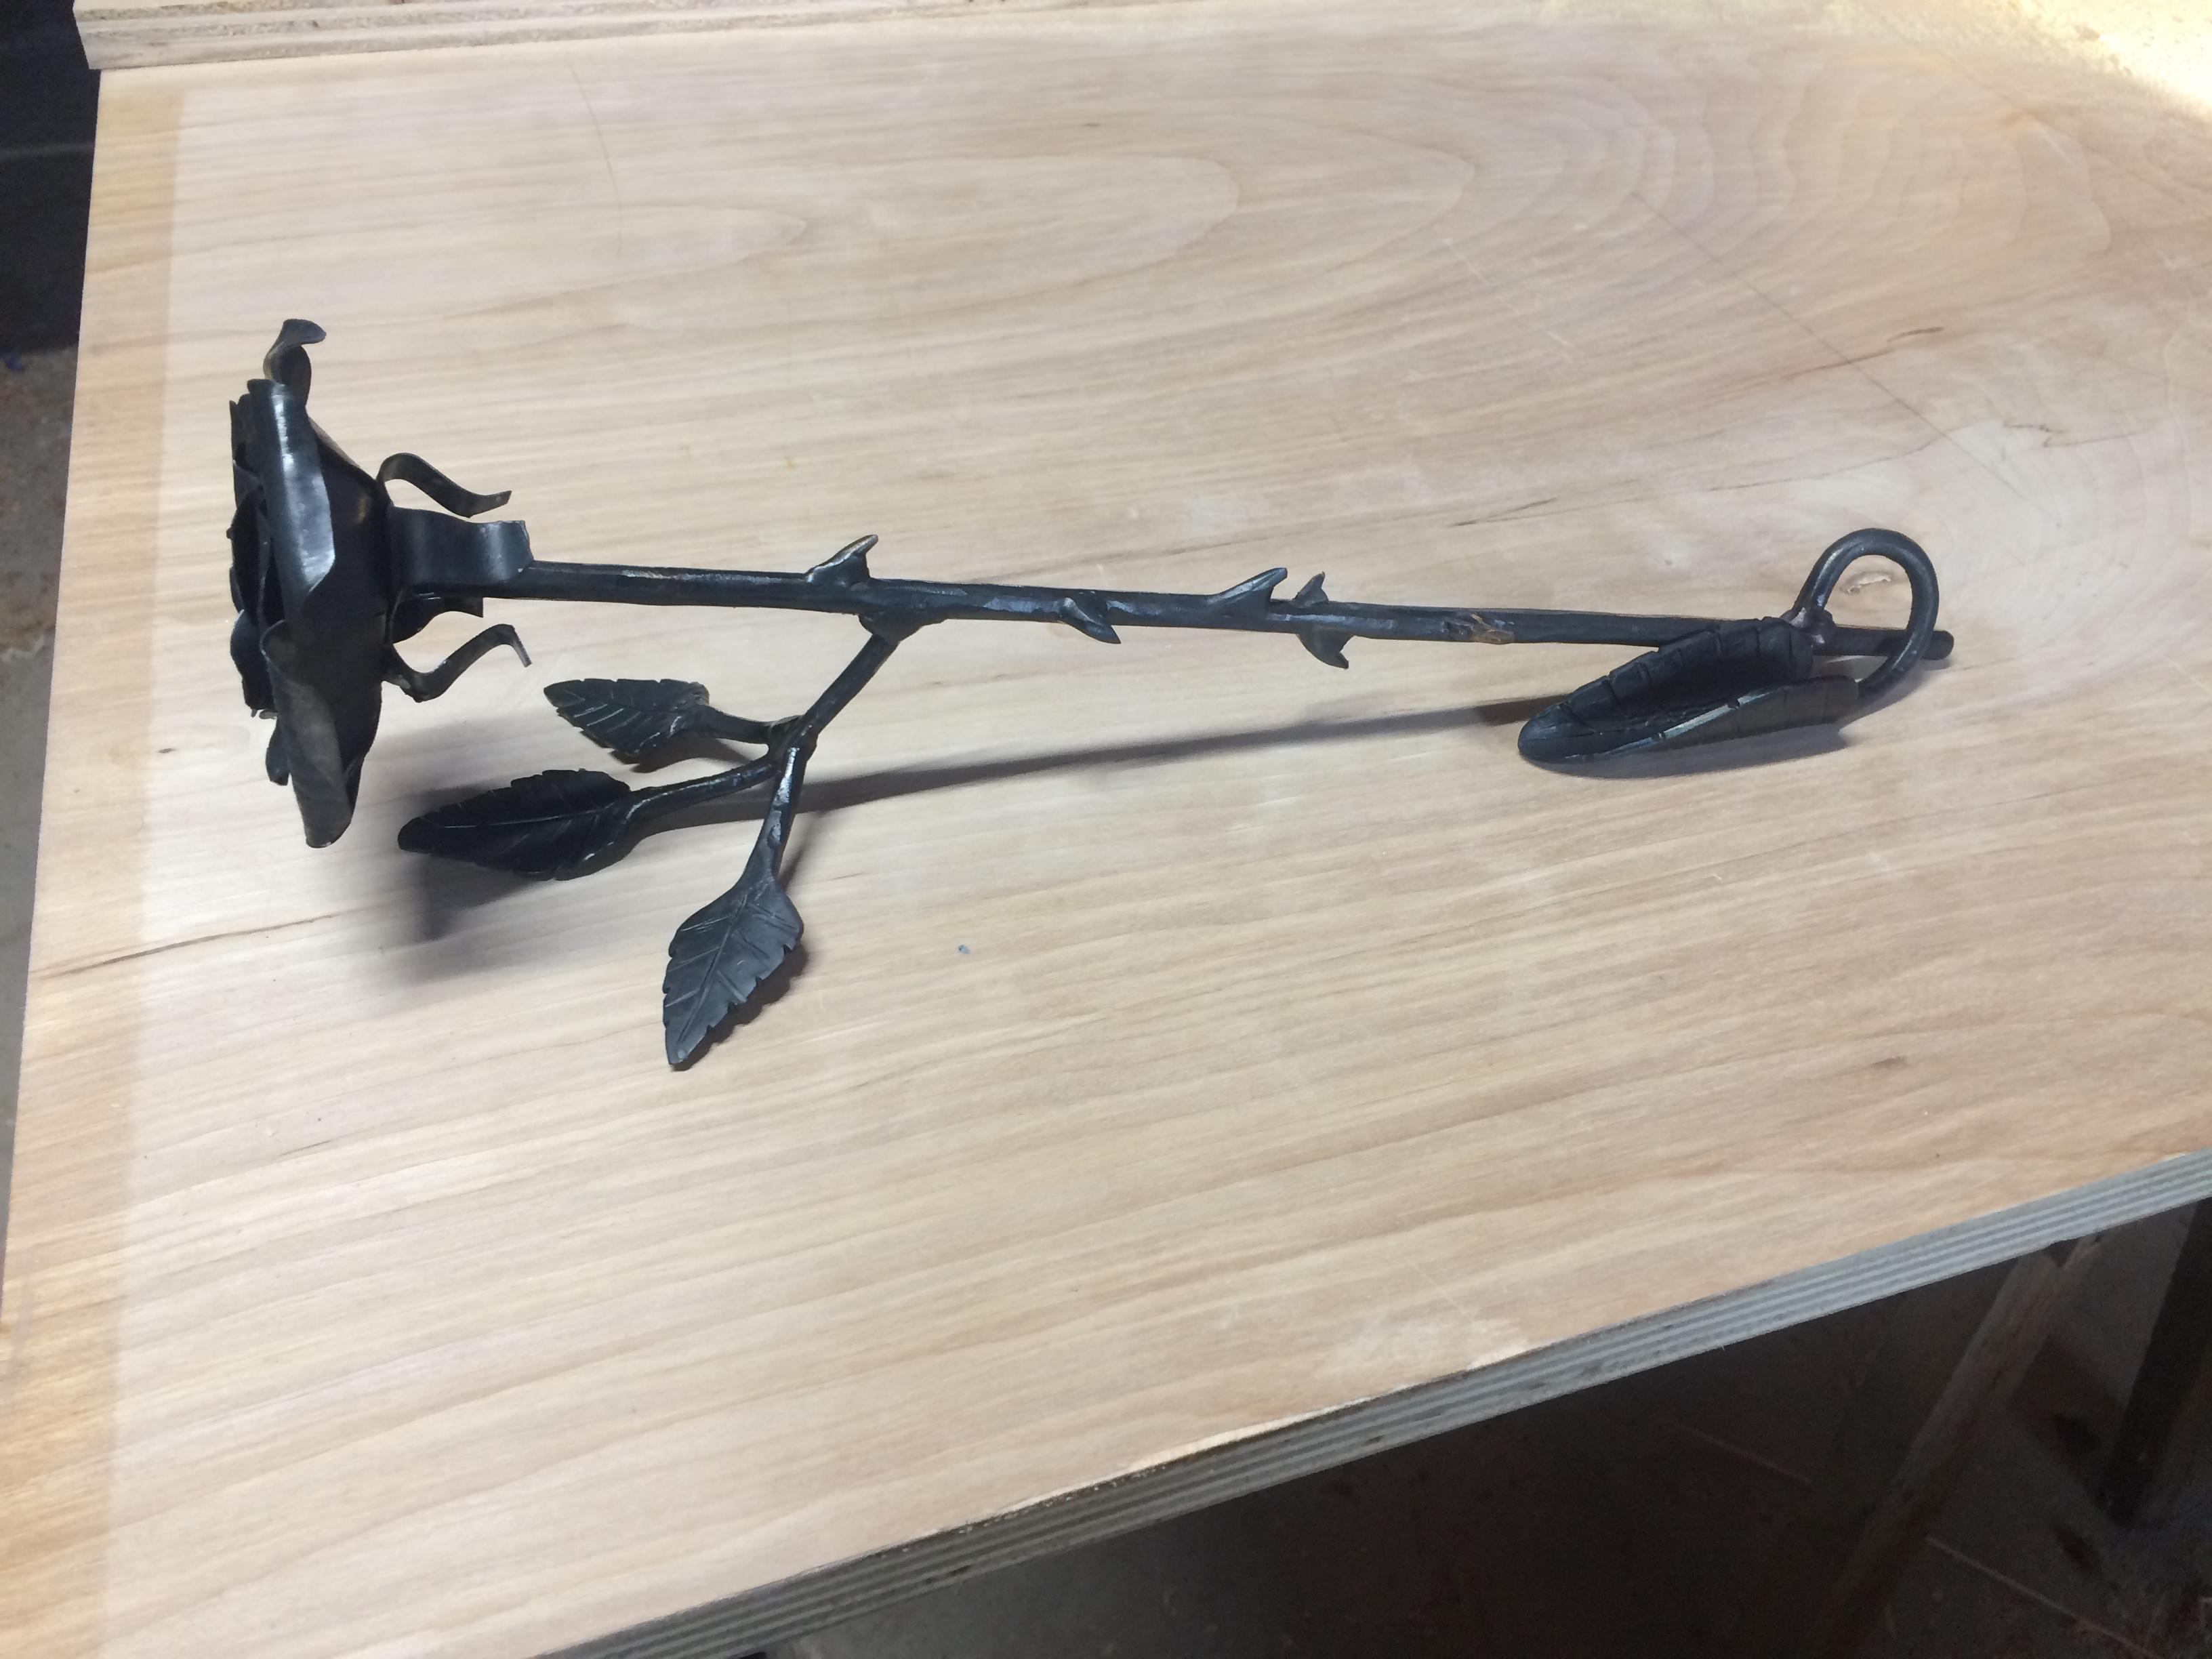
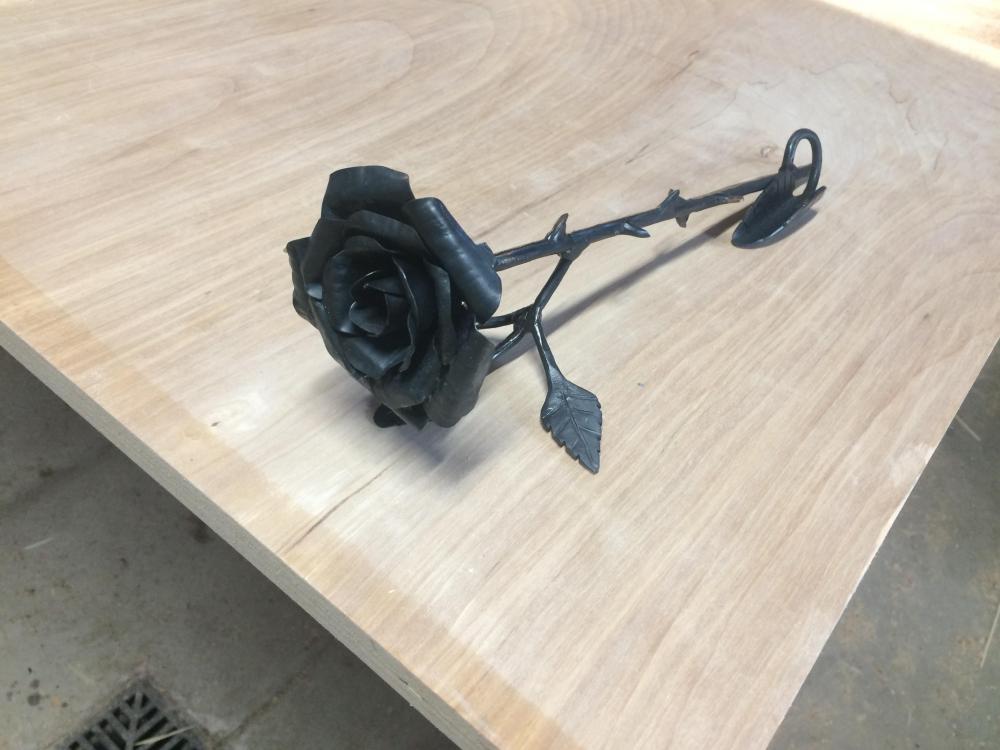
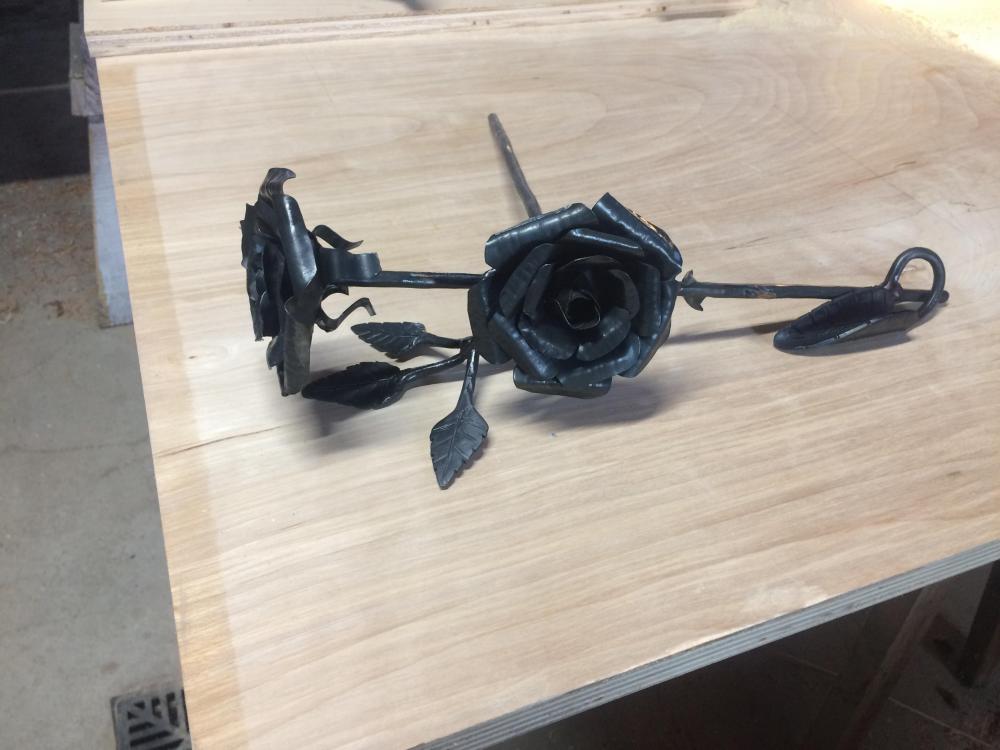
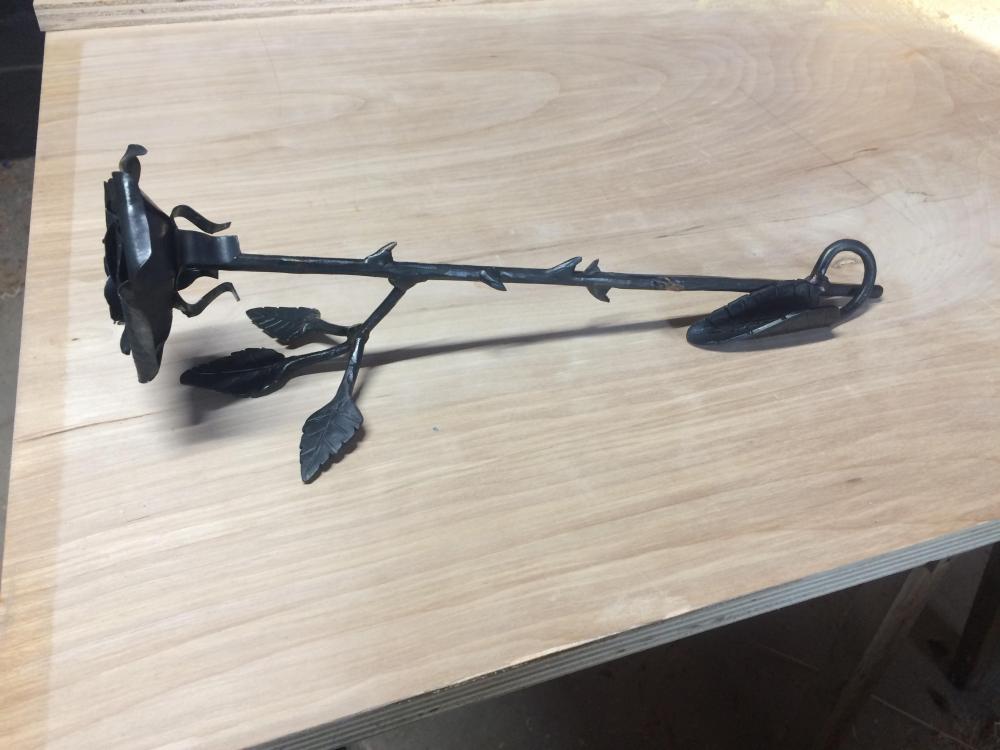
Nice sculpture tdriack Sorry Daswulf, your right I should have posted finished photos. I liked the more open face better so that is the one I ran with. I ended up giving one of the “practice” ones to my buddy to that was over helping cut some fire wood so he could give to his wife. I got them hot and finished them all with beeswax. I only ended up detailing the stems on the “good” one that I gave to the wife. It ended up being turned into a business card holder for her desk at work. I’m not a huge fan of the transition on the end for the leaf card holder, but it’s what I came up with with limited time. I still need to refine my leaf making, I’ve probably made less then a dozen so far. The stems are out of 1/4” square stock, small leaves out of 1/2” round, and the larger leaf card holder out of 1/4” plate. I use what I have.
-
Naturally Aspirated Ribbon Burner. Photo heavy.
Fowllife replied to Frosty's topic in Ribbon Burners
Well, from what I remember just a touch over an 1/8." Since I threaded the MIG tip into an 1/8" pipe nipple I was able to back it out a little to increase the air gap and didn't notice much difference. When I get a chance to get back out in that shop I plan on trying a shorter tip. -
Naturally Aspirated Ribbon Burner. Photo heavy.
Fowllife replied to Frosty's topic in Ribbon Burners
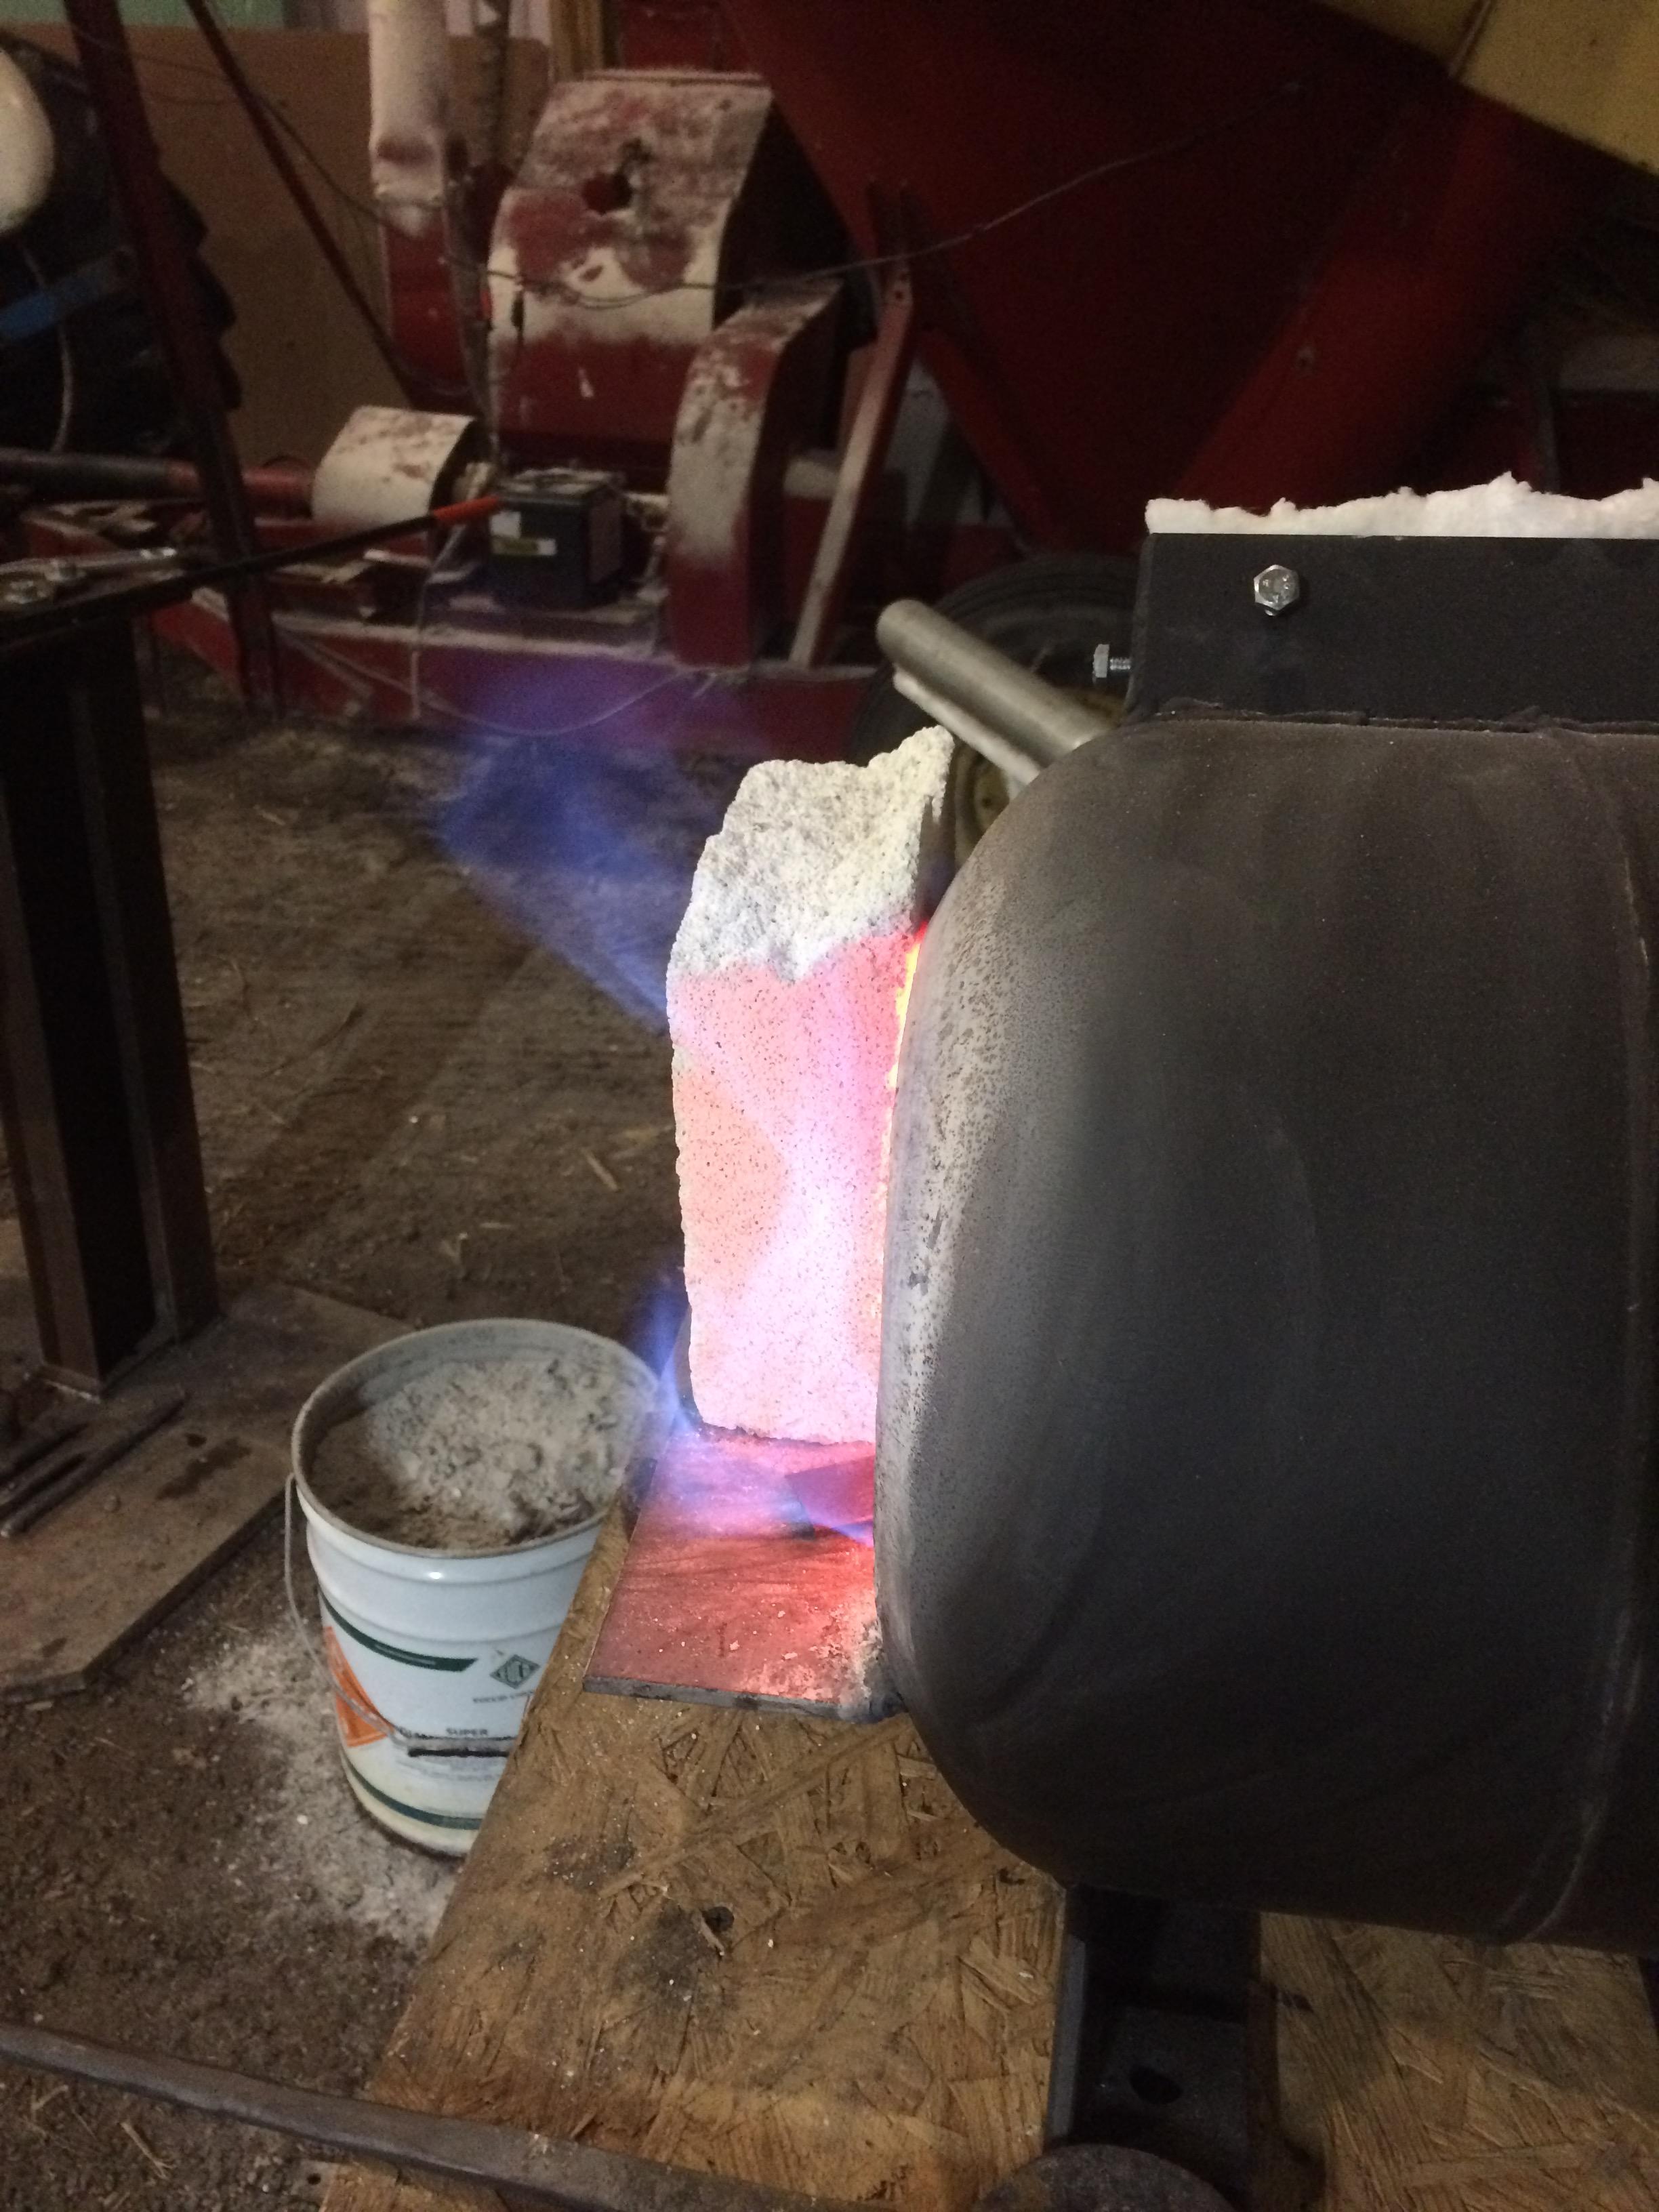
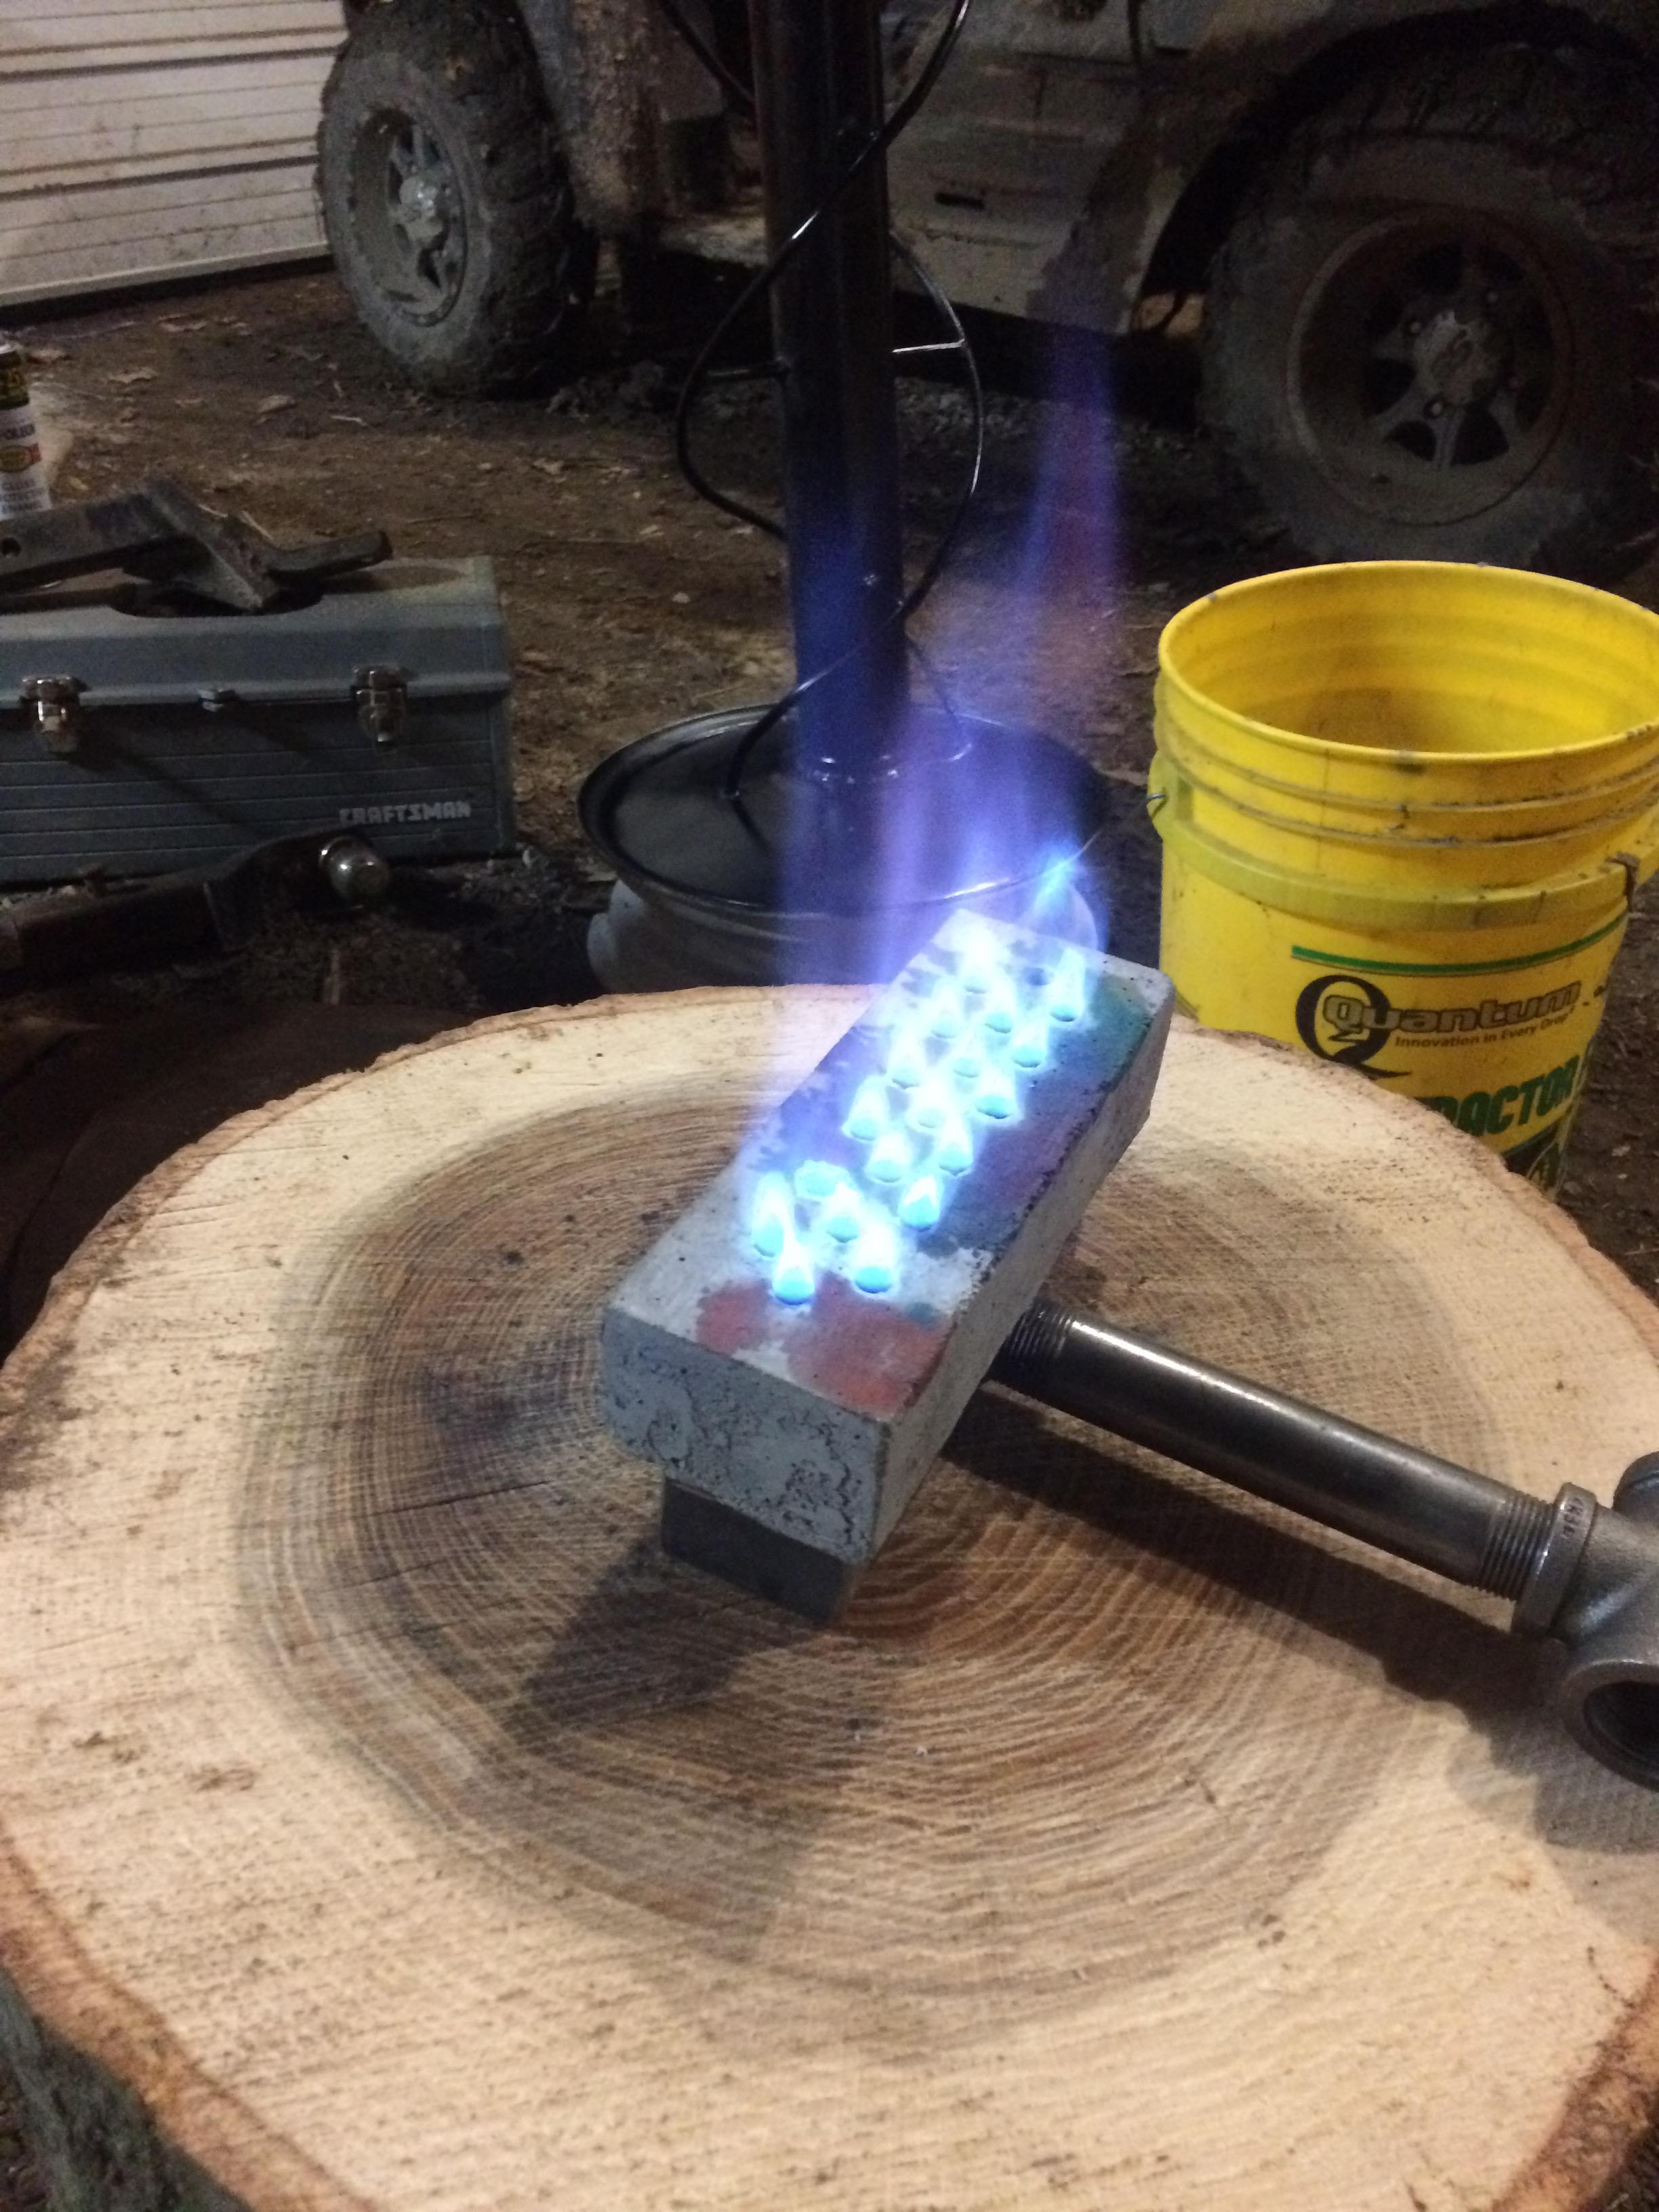
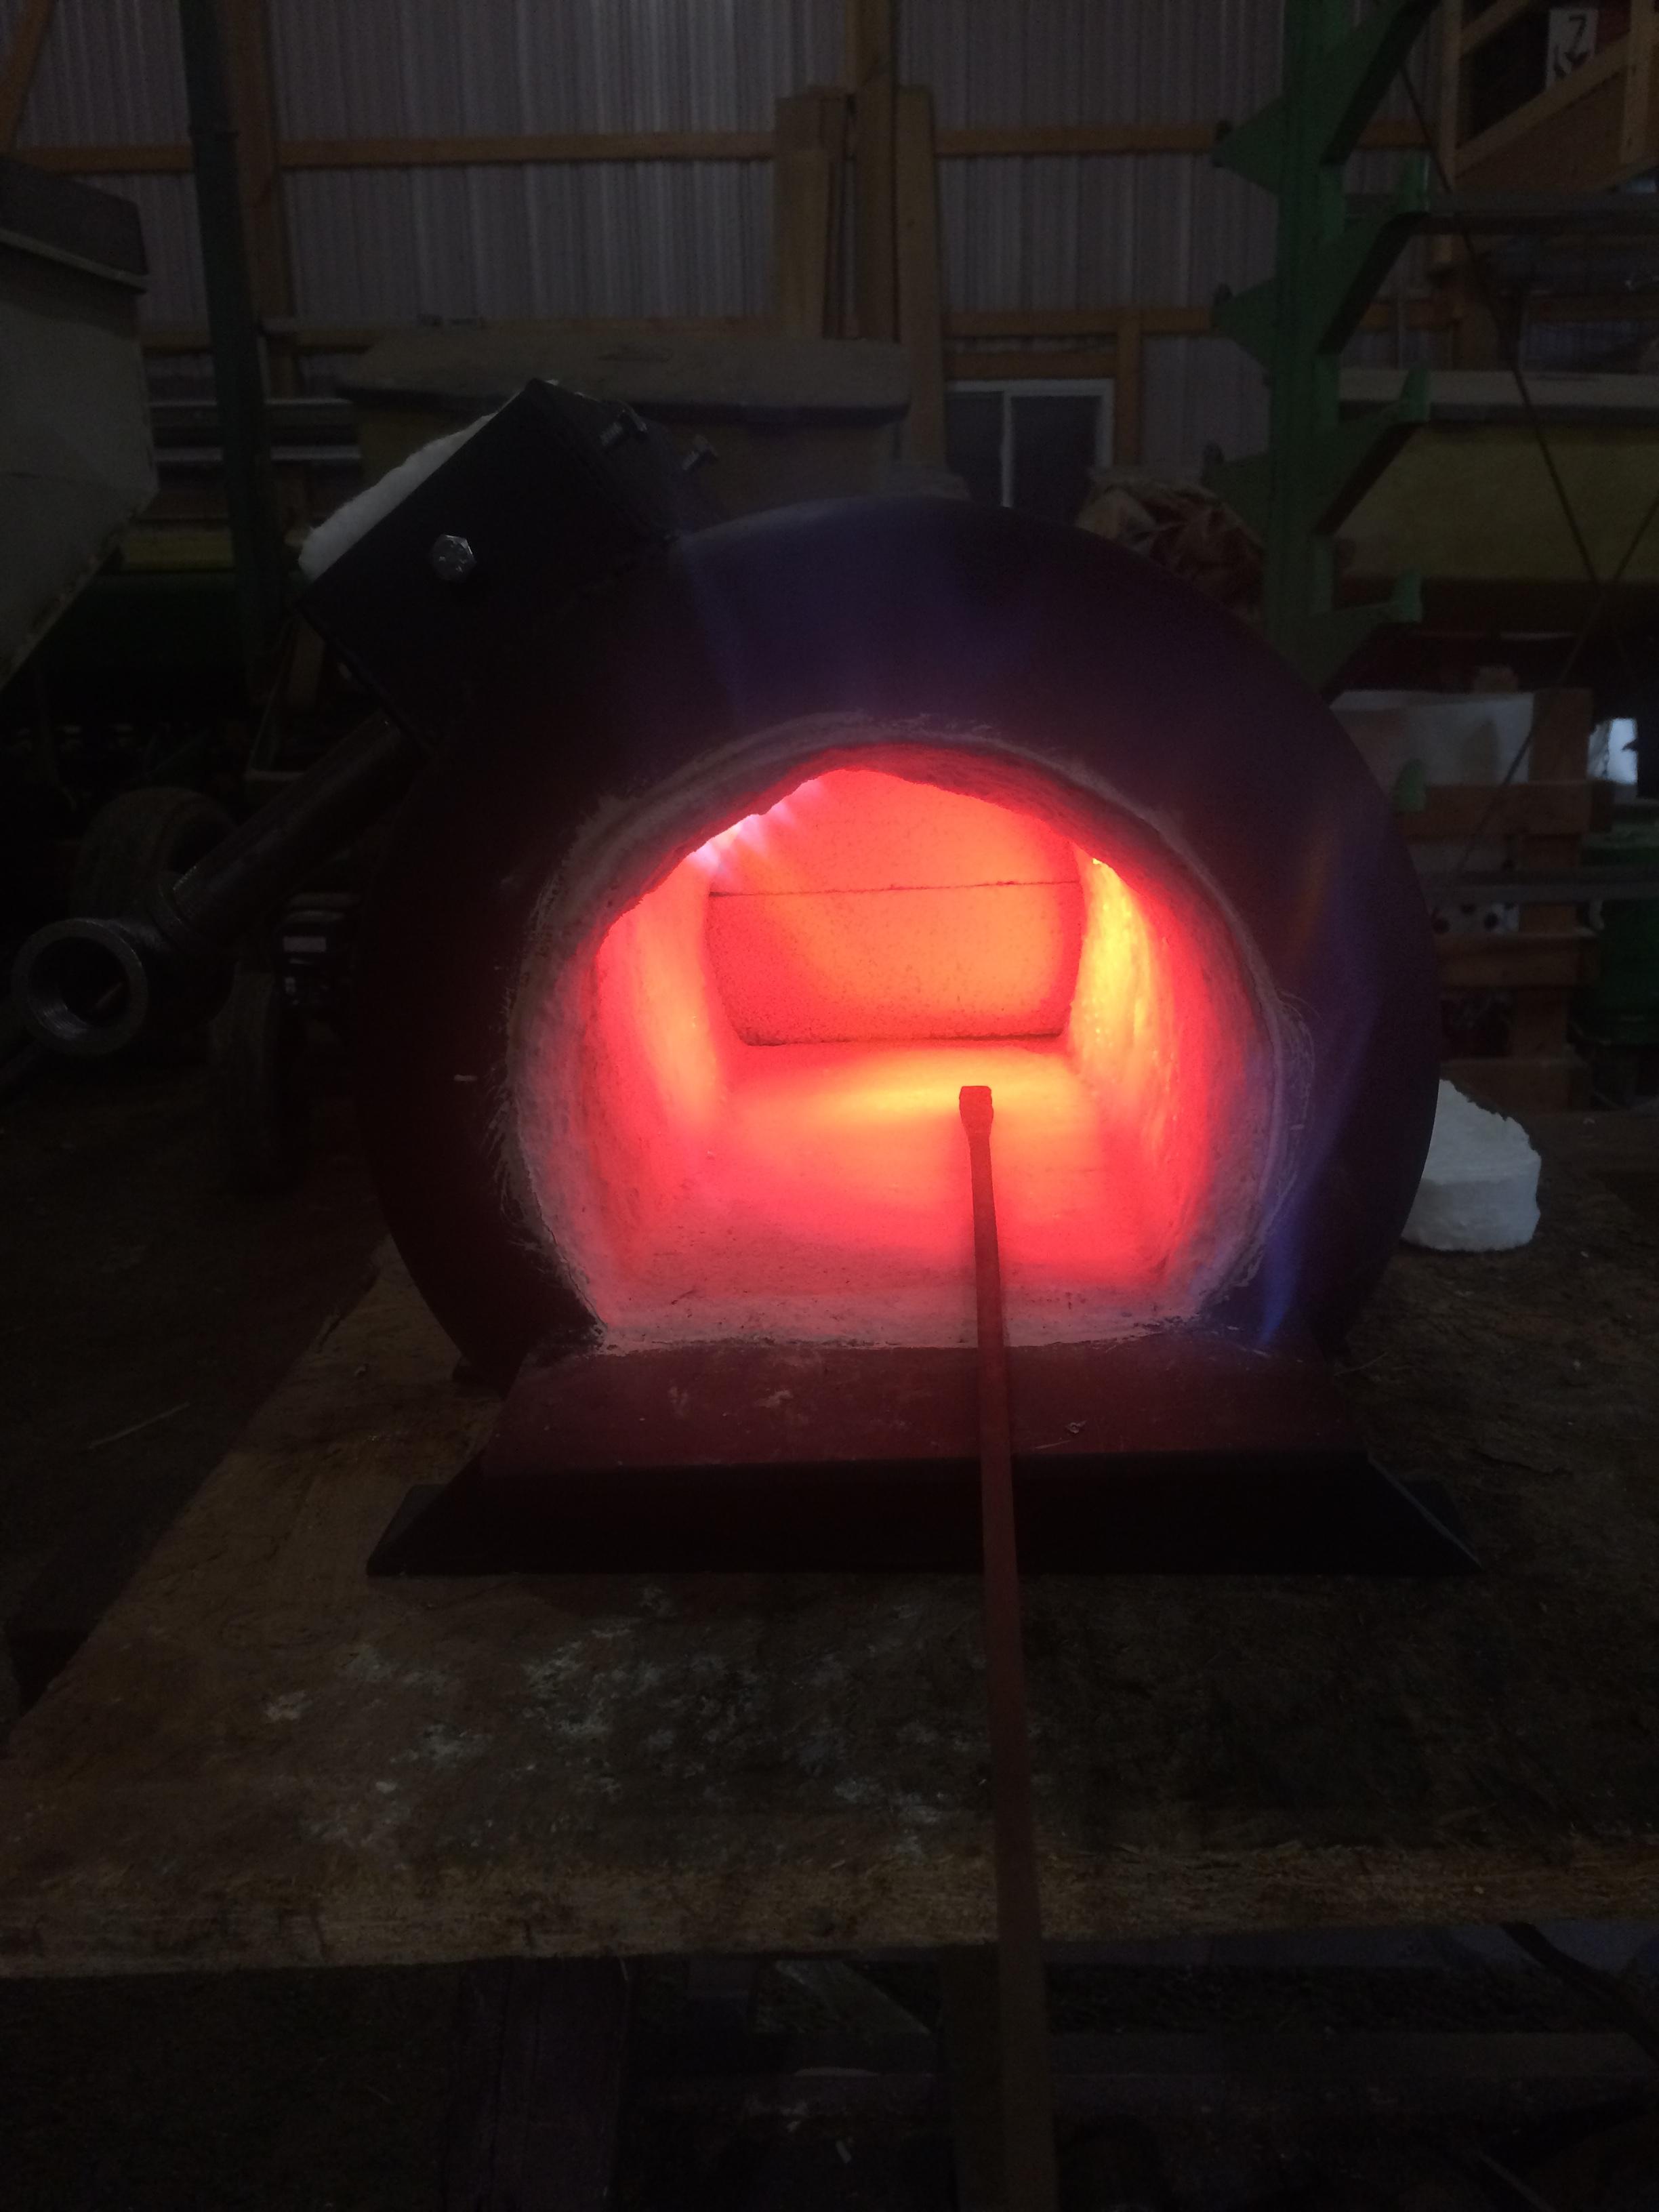
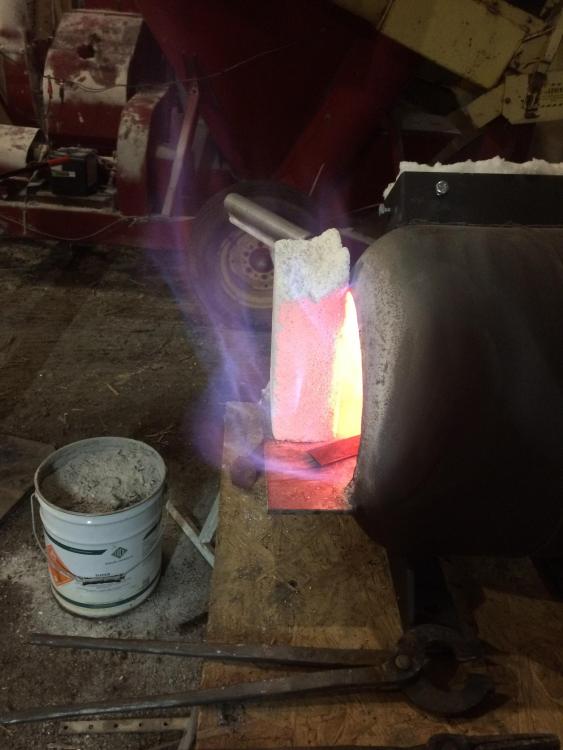
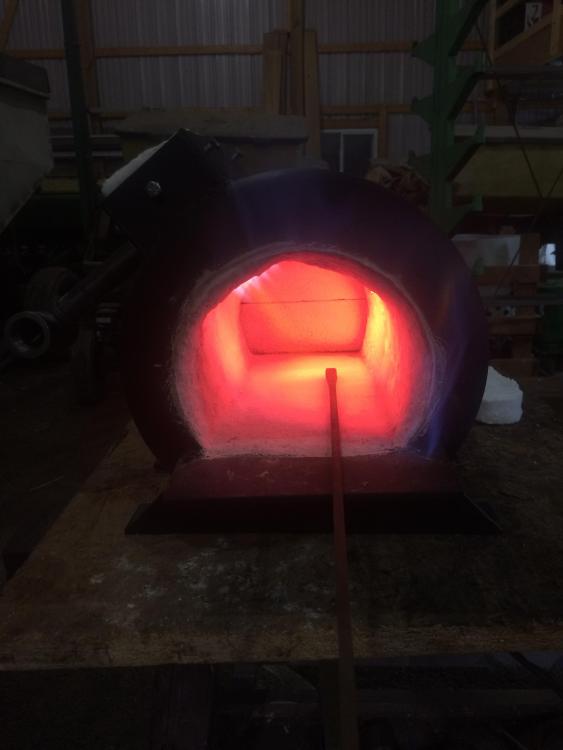
So, seeing JHCC’s pictures makes me think mine is running a little rich. The dragons breath out of mine is much different. The top 2 picture were at 2-4psi which is were unusual run the third one was closer to 15 psi. I’ve played with my jet length a little with minimal change. I’m wondering if my mix tube or a touch too short since I didn’t use the thread protected and just welded the pipe stub to the burner. The last two are the burner outside the forge at first light up, and the forge without the front fire brick.


-
I don't know what you local stores are, but our local Menards, Home Depot, Lowes, Rural King, and TSC all have a good selection of cross peen and engineers hammers.
-
I know it's not usually advised to buy new, but you can pick up a new 2 1/2 pound cross peen, wood handle Vaughn on amazon for around $25. There are several options in the 2 pound range for around $20 as well. I cant speak for the others, but I have a Vaughn and am pretty happy with it. 3 trip to the flea market would cost me more in fuel then spending $20 and having a hammer delivered to my door. Personally, as a newbie myself, I would start with a 2 pound cross peen hammer. I'm actually thinking of ordering a 2 pound Ames myself.