Desmond Redmon
-
Posts
55 -
Joined
-
Last visited
Content Type
Profiles
Forums
Articles
Gallery
Downloads
Events
Everything posted by Desmond Redmon
-
As a machinist I would recommend no less than a 100% solution of soluble oil, since it is thin to begin with and should not be used on mills due to it's thermal shock to the tool. In years by gone machinists (myself included) used cutting OIL to cool tools and remove chips from mill and lathe operations (broaches etc as well), but in today's terms "coolant" is a mix of water soluble oils and water which are NOT recommended for any tool with intermittent or significant thermal cycling. In a machine shop this means no use on interrupted lathe cuts or any milling tools due to the heat cool cycling since "coolant e.g. 3-5% oil 95-97%" water causes thermal cracking. Coolant has excellent heat dissipation rates which as I understand it would be good for W class steels but risks fracturing most other steels like 1xxx, O, S, A, or L class steels since their desired dissipation far lower than that of water. My personal trials quenching in up to 50% (I ran out of volume in a 5 gallon bucket) was that coolant is good for W steels OK for <1045 and hard on >1045 (test 5160, 1095, d2, s7, a2). Can anyone remind me of the term I am thinking of for the span of time a super heated object is inserted into a quenchant prior to the vaporization phase? I think that is the proper placement for the phase beginning with L?
-
In bulk I got it from a website called bulk apothecary. Of course that was after really odd questions at the pharmacy about why I needed it by the gallon... And the price was vastly cheaper.
-
Left coast, right coast thing. In the flyovers we call the local RR co and ask if we can get permission to walk the RR track and pick up old spikes, their response was stop by the office to pick up a schedule and give us a shout if you find more than one missing per plate while you're out looking. BUT if you are going to cross from the road to the tracks CALL them FIRST. No $2 spike is worth seeing what a 100,000 ton train will do to you.
-
Actually if you can find a local machine shop, ask them if they have any large pieces of scrap you can buy. Often they have to scrap out a part and are only getting a recycle price for it. Don't automatically turn down a piece of round steel if it has some good weight. You can clean the surface with an angle grinder and still have an OK anvil. If the machine shop doesn't have anything or won't sell it, ask them who they use to recycle their steel and go visit them. Most likely in IN your looking at Omnisource. I stopped at an auto salvage yard to get rid of some old bed springs and asked about anvils (I do any time I go to flee markets antique stores etc) and they had a Southern Crescent 80-100lb in nice shape for $3/lb I left it alone since it had a thin steel face on a cast iron body. So just keep asking and you'll stumble on one eventually. Most steel works easier the closer to the melting temp you get so dark orange might mean you are working harder than you need to.
-
Blacksmith Techniques - Drawing Out
Desmond Redmon replied to 19Branden86's topic in Blacksmithing, General Discussion
I'm not sure of 19Braden86's experience so for a bit of clarification... Heat it to bright white (to my eye) just below sparking or welding level. Also as well as the previously mentioned methods, use the edge of your anvil as a lower cross peen. Basically look at the pattern of movement you want the metal to take and then apply the appropriate directional tool. First stage once heated, I draw it by using the cross peen directly across the anvil from me at a comfortable angle working the whole length of the spike starting with 10-12 strikes adding a few more as the spike lengthens. Both the cross peen and anvil edge draw the steel longer and thinner and a little wider with each hit. Rotate 90 degrees and work the areas you didn't spread the first time. Reheat and repeat always working the area between your last set of strikes. Once you achieve the desired length switch to a lighter faster hammer and tap it to the square or round shape you wanted. One thing to keep in mind is that you do not have to heat or work the whole spike all in one go while you are learning, fewer heats comes with experience (so the tell me). Controlling your heat, your hammer, and your next step seem to be the most important from my newbie perspective. -
Blacksmith Video Produced in Our Shop
Desmond Redmon replied to ripleycopa's topic in Blacksmithing, General Discussion
Amen... -
The Rolling Anvil project update
Desmond Redmon replied to dancho's topic in Blacksmithing, General Discussion
Like everyone has said awesome man! Keep the updates coming -
Smooth Smith, I'm not sure if you are still reading this or not. We can be an irascible bunch, but with reason. We in general don't mind newbie questions (which most of mine are), but you are I think trying to ask about a furnace (used to intentionally melt metals and produce a casting or ingot) rather than a forge (used primarily to heat metals to a workable temperature). I am unclear if you are unfamiliar with the difference between the two or if you are asking about using the firepot of the forge to house a crucible that you will then use to melt metal. Secondly, your image shows an infantryman with a rifle that same infantryman would have gone through training on placement of things like M18's (aka claymores). M18's are labeled for safety (front toward enemy) which forges nor furnaces are labeled. Which is why your post triggered the (forgive me Glenn) pucker factor. That said ThomasPowers recommended earlier alloyavenue is a good site and I agree for a decent primer but ask around there is almost certainly someone near you who casts metal a few times a year. I strongly recommend visiting one of them since no working foundry will let you in the building during operations because casting metal has so many inherent dangers. Seeing a furnace and the whole process involved will be of great help in understanding how to mitigate the safety issues involved. Liquid iron will burn through jeans with almost no hesitation and leave a second degree burn down your leg, into the top of your boot when it can cost you a limb (worked in a foundry) You mention casting copper then you've reached nearly iron temperatures in something (providing pictures would help too btw) so you are at near alloy temps. Plugging exhaust ports MAY be an acceptable idea if your furnace was built incorrectly or may cause the system to become unsafe. Rather like walking to an auto parts store picking up a random part and asking if it will fit your car we simply do not have enough information to answer your question. Either way both providing more information and reading more from available sources will make any advice we can offer much more valuable to you because we can answer much more specifically.
-
3 in 1 works good at 50+ degrees I haven't had the forge over a winter yet. 30 weight motor oil seemed to add a bit of drag to the crank.
-
I was really impressed by the image, so I contacted Tempil on Friday with a generic can I use this image to make posters for me and free to friends at a blacksmithing group question... Today before I got home from work they emailed me the .PDF, approved the distribution (free, cannot charge and must maintain copyright mark) so by all means contact them nice people.
-
Just my bit, (as a fellow newbie) don't bother with paint on the anvil the smoke from hot paint can be hazardous and your hot iron will burn it off and polish the face within a few days after you start hitting hot metal on it. As to claying, the iron around the tuyere looks pretty thin? The original firepot for my forge was 5/8" and the replacement I am using (Centaur Forge Vulcan) is about the same thickness of cast iron and I do not clay mine (other than high temp mortar at the joint between the pot and the ashgate). If it is thinner than that and you are planning on a lot of welding temp usage (making damascus etc) it might be worth it, else keep it dry don't rapidly heat or cool the iron treat it like a cast iron skillet and you should be ok. If you plan on welding a lot, cooling the forge regularly with water (generally a bad idea with anything cast) clay it. Take all of what I say with a grain of "let me look that up" since all of my info on claying is from reading the forums and old catalogs.
-
Edge repair (shiver)
Desmond Redmon replied to Desmond Redmon's topic in Anvils, Swage Blocks, and Mandrels
Thank you all for the info, and I do understand the advice to wait a year before making major changes. My I took round stone to the chips I was having trouble with and kind of refined the jagged points out to smooth enough to work with. My small tweek was as I said more of an OCD thing since I had a perfectly usable notch if I smoothed out the sharp edge... Figure if I can manage to grind away much material with a 200 grit stone I would end up a world champion arm wrestler, alas I ran out of sharp edge before I developed a 30" bicep -
Edge repair (shiver)
Desmond Redmon replied to Desmond Redmon's topic in Anvils, Swage Blocks, and Mandrels
As I discussed with Glenn tonight, this was a bit of a leading question... I was actually trying to use the few chips in the edge of my anvil to help fuller on a three dimensional shape rather than a my anvil is chipped away to nothing how do I put a 90 degree angle on it... I was exploring hammer only scrolling, and found I was picking up impressions from the chip I was trying to use to help me keep the radius of the rod while scrolling. I am still exploring the use of each tool an operation and the produced part was just a fire poker to use on the forge (I wanted one that the handle hung down when dropped against the wall of the forge body). Yet all of the advice I see is DO NOT EVER DO x. I was trying to all you folks into elaborating a bit more on when you do what to repair a chip, or use a chip to your advantage. My bad for the somewhat deliberately misleading question, but he what without the why is extremely frustrating to read page after page... Never leading me (or any other newbie( to a greater understanding. So my bad, and thank each of you for the input.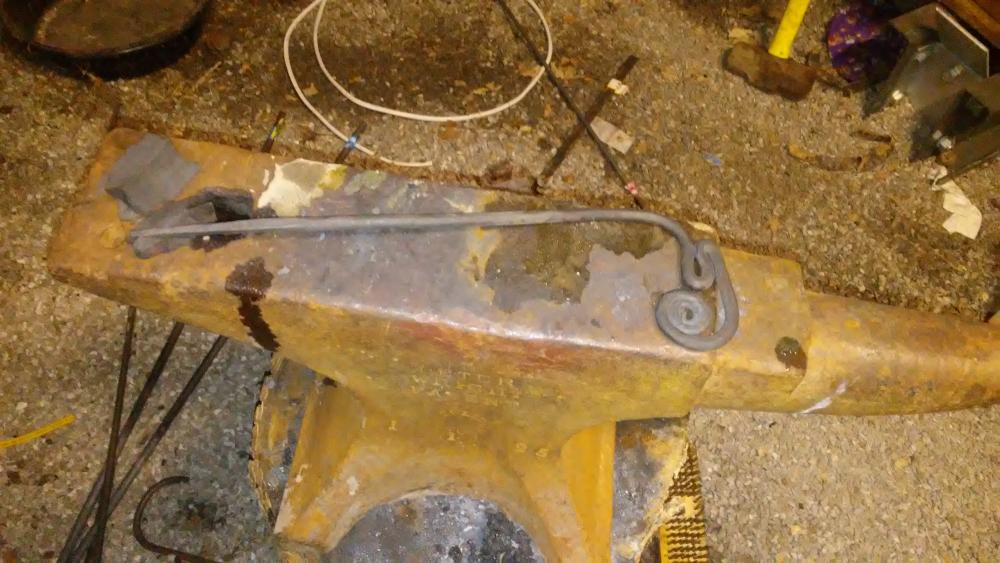
-
OK, I have been reading for a week or so (in my few mins of free time), and I see a huge majority of people saying don't grind, weld etc to repair edges. My edges are leaving marks that are more unsightly and problematic, and I have a variation of the questions I've seen asked frequently... I don't want to grind or weld to make a perfect edge, what I am trying to decide is how to blend the sharp points back so they don't gouge my work leaving "ugly" marks. I'm thinking of using a high hardness round file to remove the sharp points inside of the chip marks and using them for different sized radius grooves for fullering and shaping. Other than the very slight metal removal, are there any other dangers to the anvil in feathering off the sharp edges of the chips? Yes I know it's more or less an OCD question, but as a machinist I hate seeing sharp edges which concentrate stresses ...
-
Bearded Axe WIP (first bladed project)
Desmond Redmon replied to brickman's topic in Axes, Hatchets, Hawks, Choppers, etc
Looks like a good start man, keep it up -
Woo Hoo! I'm ready to start smithing
Desmond Redmon replied to Arkham's topic in Blacksmithing, General Discussion
Looking really good congratz mate! -
From the picture that's going to be the low end if anyone else is in competition I think. Most run 3-500 if in working order, and that looks in really good shape. Also depends how much the auctioneer knows about the value as well. I had to do a lot of searching for images and such while I was rebuilding mine, short of an electric blower these are really nice to use.
-
Just a thought, put a piece of steel in the other side of the vice (if you insert your piece on the right side of the jaw, put the piece in the left most edge of the jaw) that is the same size or ideally slightly smaller. Vices that get warn a bit will pull off center creating a less than parallel surface for holding your work piece. With cold mild steel you have about 20% grip on a heavily warn vice without a spacer which gives you around 60% if it is slightly smaller (less than the thickness of your fingernail) than the workpiece.
-
The only times I have personally applied heat to an antler was unintentional, i.e I was drilling and caused heat because the drill wasn't evacuating the chips well enough. That one time experience would lead me to believe that applying heat to them would be bad for long term usage. I ended up scrapping a 4" section of antler because it caused checking and cracking in the antler itself and lead to it quickly loosing its' grip on the tang of the chisel I was working on. I found it much more stable to either drill then shape the socket with a set of gun files install a brass collar then drive the tool into the antler, or drill the hole large enough for the tang to slip 75% or so into the antler then put epoxy in the hole and drive the tool into the seat. I am not sure how it would work for knife handles since the porous nature of the main trunk of the antler would make it unsuitable for a handle unless sliced into scales and riveted to the tang perhaps? Let me know how you do it and what you end up thinking I would love to know since at some point I will make a knife I'm sure.
-
What weird animals have been in your shop
Desmond Redmon replied to Glenn's topic in Blacksmithing, General Discussion
A pair of coyote got stuck in my woodshop overnight which left them in a very bad mood when I went to open the door (still not sure how I didn't hit my head when I did a superman flight out the door). A 1100lb bull decided to take up residence in the woodshop. A 150ish lb Saanen wether who loved to sleep in the wood shavings after a day of heavy planing in the shop that stayed for 5 years roaming around the shop and outbuildings. And sadly a great horned owl that had been hit by a car tried to hide in the shop, even though I got it to the local raptor rehabilitator when I found it in the morning it's wing was broken and had to be put down, that was truly amazing since it let me handle it without gloves and never even snapped at me when I picked it up and put it in the truck and drove with it in the passenger seat for an hour to the rehab center. A rather Well I suppose my shop buddy qualifies as a weird animal in the shop, so here's one of Ubie my fox too....


-
I want to see what my friends come up with since a couple of them have pipe certs etc and know the welders in the area better than I do so I'm waiting to give them a few days to see what they come up with.
-
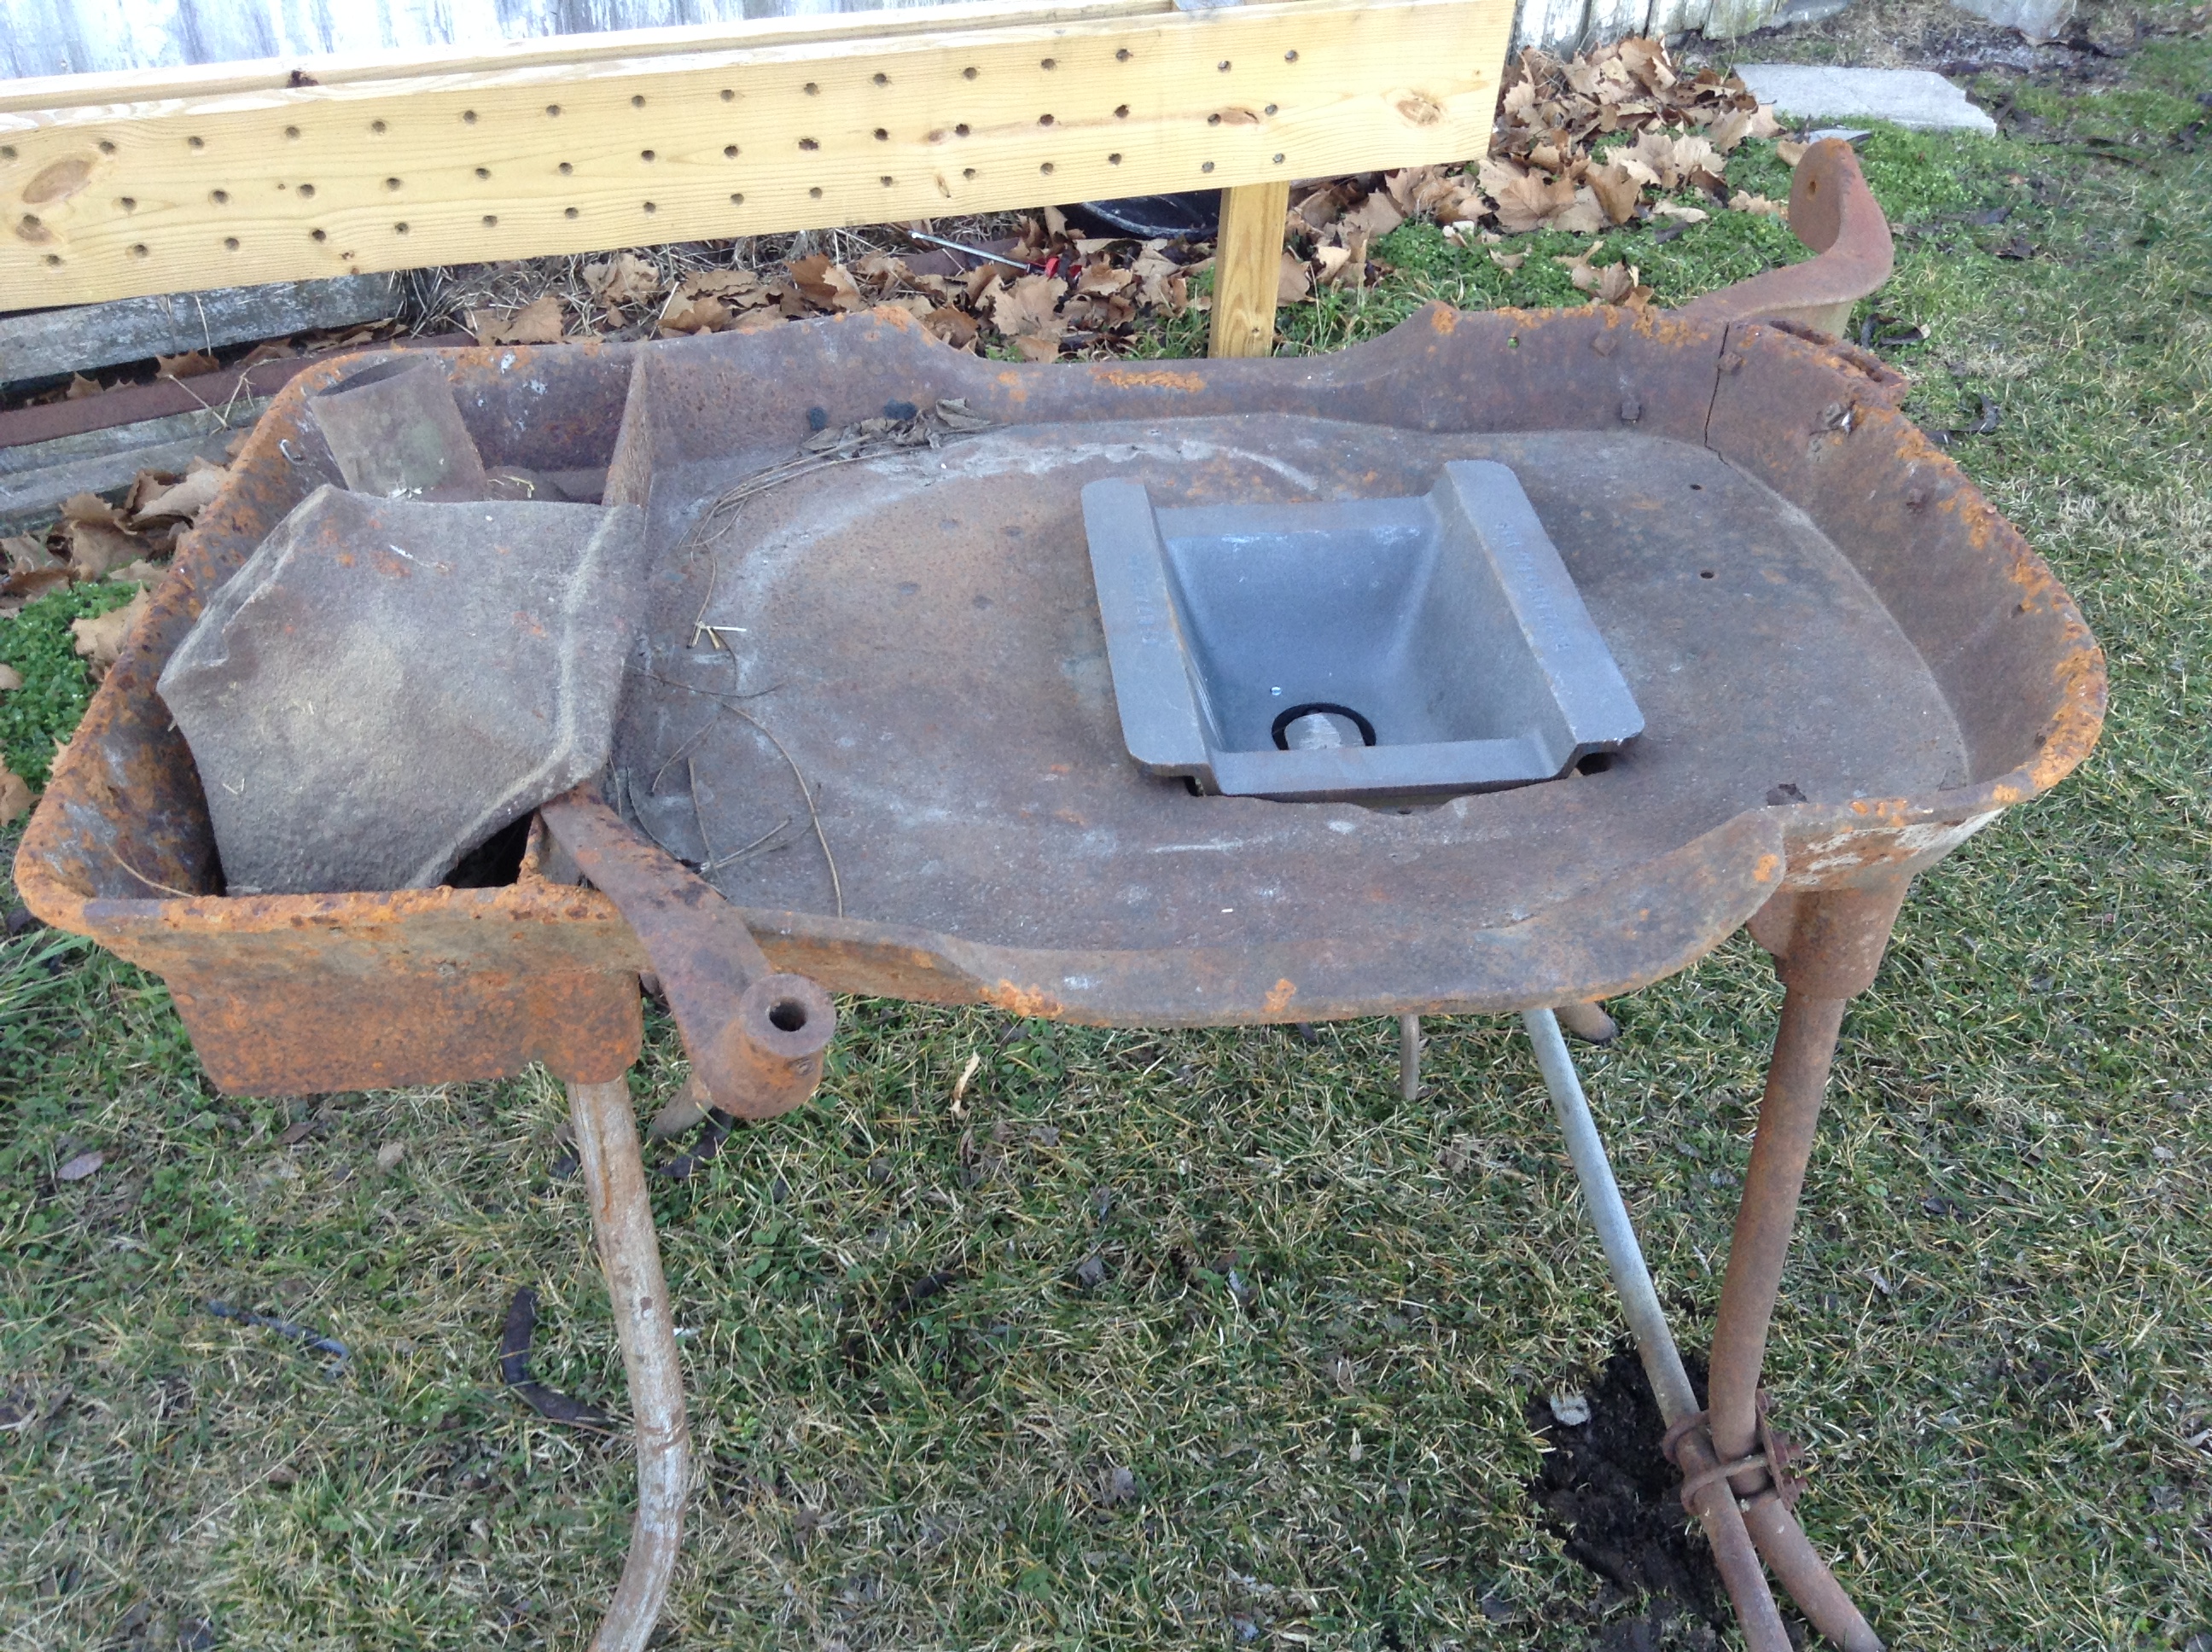
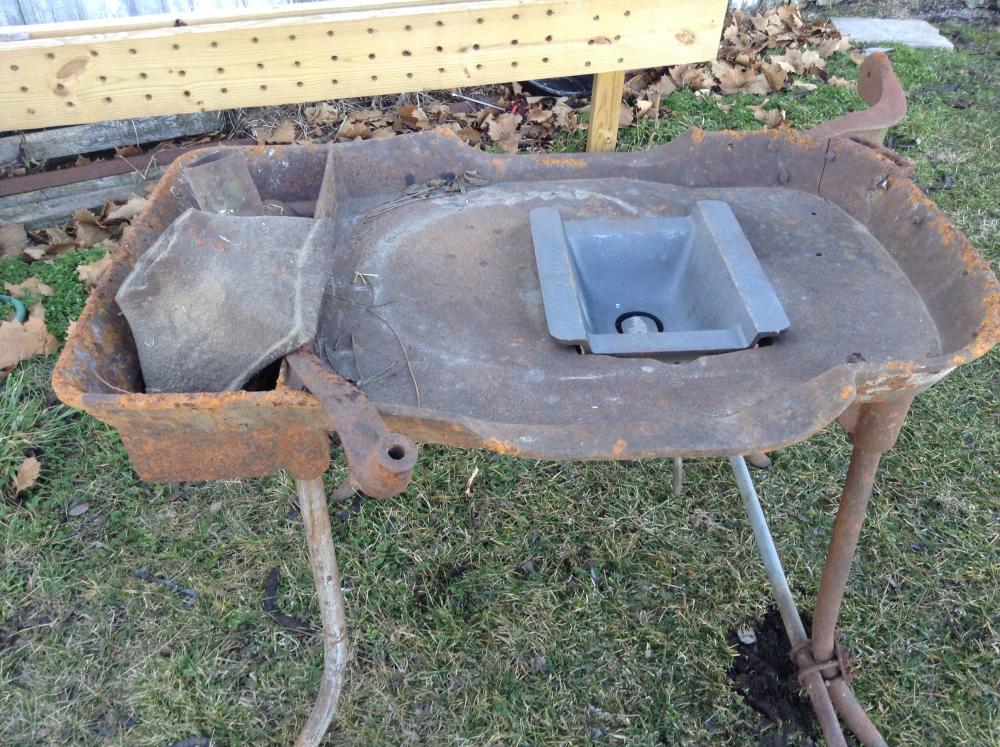
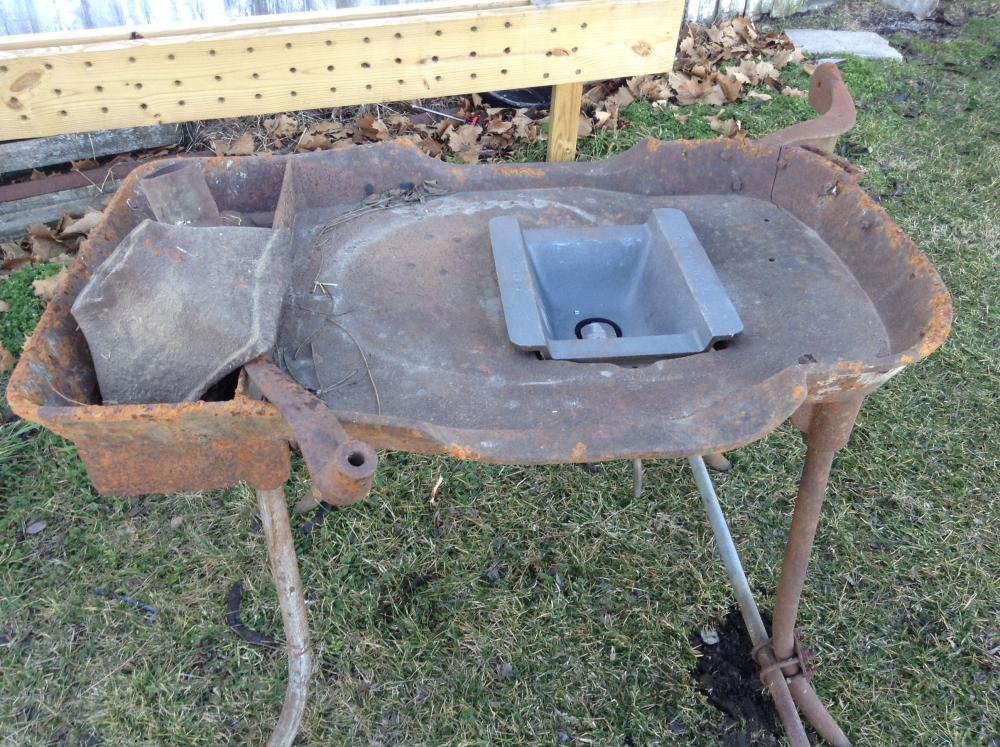
The ground finally dried out enough for me to get it to the shed... It's good to have friends since this came from a farm near us... I received the forge, the blower, the PW 142lb as a package. The blower has a busted off attachment point but otherwise is in excellent shape (the shafts in on the gears are still shining clearly), the forge has a crack along the attachment point with the blower support arm but otherwise in really good shape. I dropped in a centaur forge large firepot since one of the tabs on the original pot, the tuyere plate and the clinker ball, and the hood are missing from the original set. Talking to a couple of really good welders I know and finding one who's really good at welding cast.
.thumb.JPG.15f201c0ee4e15ad1dac72f0b077c1ca.JPG)

-
 Nice!
Nice! -
Wall hook, first project on a proper forge.
Desmond Redmon replied to Desmond Redmon's topic in Member Projects
I needed a rod with minimal delay (between work and home) so I cheated and bought a 3/4 a510 at tractor supply, equivalent to AISI 1018. -
Wall hook, first project on a proper forge.
Desmond Redmon replied to Desmond Redmon's topic in Member Projects
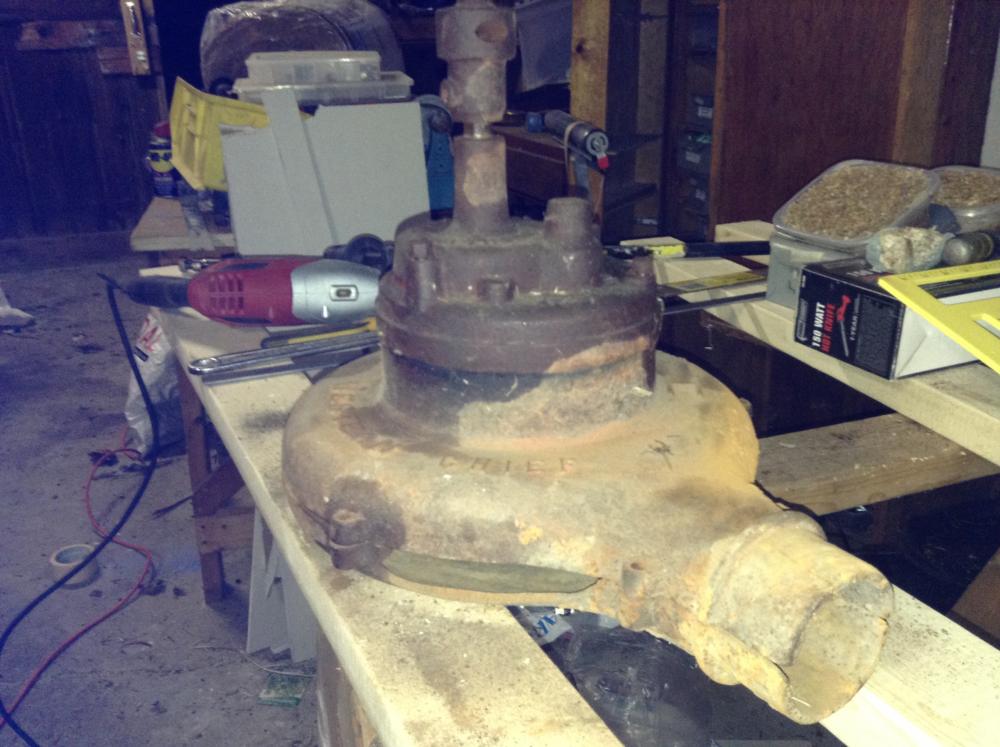
Thanks for the input, I thought about the point a bit after I left the meeting. Second project started, but not finished had trouble lining my body up to use the edge of the anvil to form the shoulder at the top of the hardy. Since I don't have any hardy's at all yet I set to work on making a hot cut off (had to cut this project off with a hacksaw due to vertical design of my temporary forge). Then the makeshift blower died and I had to quit before finishing drawing out the cutting edge (which is small 1.25"). Upset a 3/4" round rod into a 1" sq with a taper, drove it into the hardy 1/4" to set my size and form a bit of a snug fit. Then cut the end of the rod off (too long since it sticks up way farther than I wanted to). Then reheated and started to draw out the hot cut blade. And the hair dryer blower failed... Went to the local scavenger's house and rooted through piles until I found a damaged but potentially repairable Royal Western Chief cast iron blower with a broken shaft. By the time I repair it hopefully the ground will be solid enough to move the forge into place and start using a real forge... Please by all means comment on with things I should work on, or seek to improve. I am new to this so I don't even know what I don't know.


.JPG.795bfe1e5c92022c09bb18c68722c521.JPG)