jlpservicesinc
-
Posts
5,776 -
Joined
-
Last visited
Content Type
Profiles
Forums
Articles
Gallery
Downloads
Events
Everything posted by jlpservicesinc
-

What did you do in the shop today?
jlpservicesinc replied to Mark Ling's topic in Blacksmithing, General Discussion
@JHCCNice clean forge work... Belt grinder for the blade? -
What did you do in the shop today?
jlpservicesinc replied to Mark Ling's topic in Blacksmithing, General Discussion
You guys are rockin it.. All nice quality stuff.. I never even thought about using a cross bolt from a RR to make a hammer from.. I've got a few of tbose.. Thanks @JHCC for the excellent idea.. And Mr @ThomasPowersfor sharing it with JHCC... @Daswulf way to go on the conversion.. -
Here you go..
-
If you go directly to the YouTube channel. I thinks it' the 2nd video in the line up.. I think they are listed newest video first. If you like the Facebook page or subscribe to the channel I think you get auto updates.. Not a computer sorceress so not sure..
-
Have done a lot of pasta cooking on the forge during demos.. Fastest gallon of water ever brought up to boil.. LOL..
-
The beginnig titles and intro usualy say the materials used in the video as well as how much time.. Maybe you missed it.. And yes you are correct if using wrought iron this technique can still be used on refined wrought iron with little changed as well as not so well refined wrought iron.. Not very refined::: It just means forging the ends at near welding heat and being careful to punch the hole slighly bigger as you have to shear the end grain so the split does not propagate.. Again the technique is sound for 90% of the people (the other 10% being pros should all ready have it resolved) out there and if they are using wrought iron the first time trying this , who ever that is send me some because it's rare indeed that any newbie Smith with a new skill set working on their own willk attempt this on such materials.. Rebar, scrap strapping, drops, etc, etc are what will likely be their resources.. If I can find some time. I'l post up a short segment on doing this technique on wrought and you'l see it works just as well..
-
True that, but it would be a different video..
-
I started messing with it when I was 8.. 1978... OSV field trip peaked my interest and then messed with it for a few years making knives and swords and the like.. Got more serious with it about 13/14... and at 16 started in earnest to learn the craft.. Nice the technique can be applied in many, many ways only limited by imagination..
-
I was a blacksmith 12 years before I served my apprenticeship.. Its actually the only reason why the guy hired me.. First day on the job middle of February horse dumped right in my boot filled it up completely.. Was a huge gushy one... .. LOL.. I had 0 horse experience when the guy hired me... He looked right at me and asked why he should hire me as I had no horse experience.. I said because I can work metal... He laughed at me and said show up tomorrow and we'll see just what you can do.. LOL.. Never planned on becoming a full time farrier.. I did it for the experience and here I am 29 year later.. Trimmed 10 today.. Such good critters.. Was a great day.. YUP.. I turned a bunch of shoes.. We'd shoe between 15 and 20 horses a day.. I'd strip em, make all the shoes to general shape.. cool em, mark em, drop them at the horse.. I'd run back out to the forge while, He'd cold shape them, Drive 2 nails, each shoe. then I'd run back in to finish off the other 4 or 6 nails, clinch and finish, then run back out and make the next 4 shoes.. this didn't include any pads, borium, studs, These had to be done inbetween everything else... On some of the horses we'd do 2 feet at a time.. As a joke once in awhile he's nail on a complete size 4 black pad with the usual 2 nails and tell me to finish it.. They'd all be yelling at me to hurry up.. LOL.. Ah to be young again.. I could turn a size 1 flat shoe with side clips in about 6 minutes start to finish with or without trailers or heel calks.. .. 1/4X3/4 or 1/4X1... Full swedge nail groove took a few more minutes as did full swedge training plates.. I'll be posting up some shoe making videos at some point when I need filler videos..
-
Ah, here is the kicker.. Not every body is going to take your class.. And most certainly you are not going to travel to every newbies shop to get them forge welding.. forge welding is not a mystery, it's very straight forwards and as with all this blacksmithing stuff there is a ton of variance even for a given object with heat tolerance, etc, etc.. A few hundred degrees one way or the other for most smiths means very little.. Welding mild to mild or mild to wrought etc, etc, is very easy """ Easy if you have a skill set all ready".. . Besides that everything is easy once you know how to do it.. Again these videos are not for people who know what they are doing.. They are for the people that are looking for good learning and any smith worth their coal should be able to make a ring to size and any smith should also be able to make a non welded ring.. At least any smith who would serve apprenticeship under me.. This video was not about how fast I could make it... It's about "HOW to " make it... Everything is not a competition.. By the way I'm just getting warmed up as far as forging goes.. I'm getting to be able to swing the 4lb'er like it's a 2lb.. LOL.. That is so funny.. I'm still so rusty.. All of these videos are also a way for me to get back into forging shape.. I haven't needed to look up the formula for sizing rings in 25 years... The next year or 2 is going to very interesting... "Girl gonna go crazy" With that hammerin...
-
Thanks Jerry.. Save your pennies... Only took me 39years to buy new.. Yes, all the video have been filmed in the trailer.. Not sure if you caught the last demo which is shot in 360. If you watch it on your computer you can scoot or move all around it... This video gives a person the ability to pause the video and look all around the trailer to see how it's setup.. I get this all the time, How can you be a female and know your way around an anvil. LOL.. Desire.. And thanks you made my afternoon..
-
The video still had some editing mistakes in the titles when dealing with PIE Vs PI and 3.17 vs 3.14.. In an effort to correct and keep the information as correct as possible the original video was deleted and an edited version has been uploaded again.. After 60hrs of editing I was seeing double and just about sick of working on it.. Sadly the titles are done for the intro and exit at the very end of the editing process after watching it a few times so usually I'm so sick of watching the footage it's torture so just wanted it to be done.. The PIP takes so long to edit and then to add the formulas it just takes so LONG.. Took 1.5hrs to film and 60hrs to edit the 3 film streams to achieve the results shown.. The miss information was not acceptable.. So here it is again.. Thanks be to the person who pointed out the errors though.. much appreciated because my eyes weren't seeing anything at this point.. Video link has been updated in the original post. Or click here to go to the updated version.
-
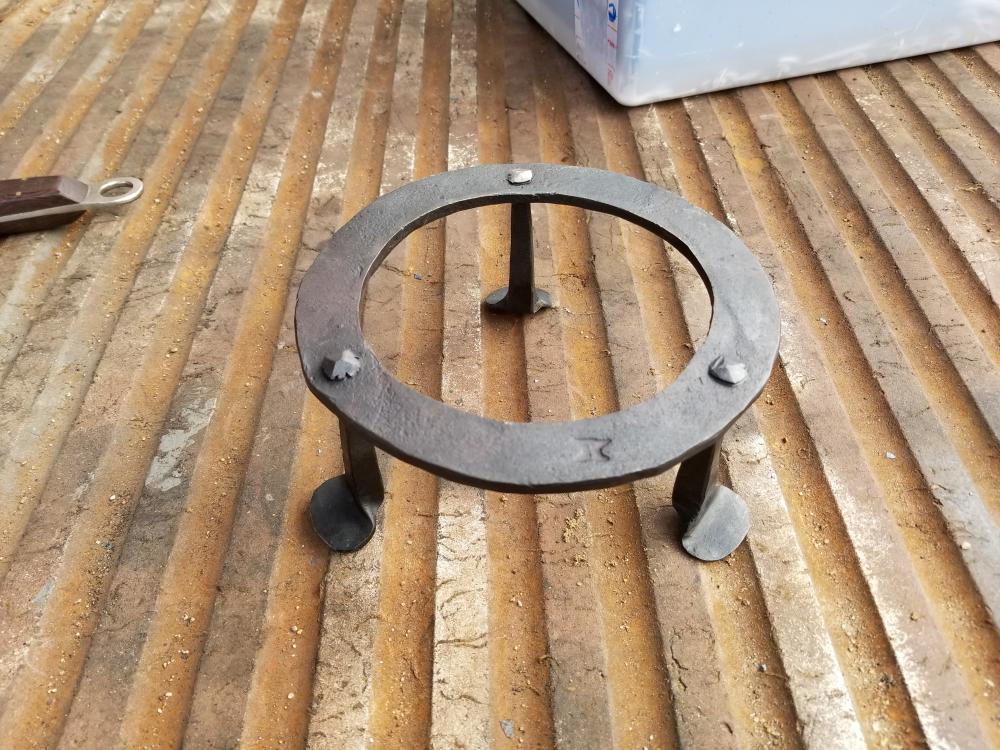
Here is the latest video "How to".. The main part or the main forging skill is forging the ring.. This video was made for those that can't forge weld yet but want or need a ring for something.. Here is what was made during the video..


-
Hi Glenn, just to clarify you meaning and from my understanding, With anthracite there isn't much caving (hollow fire) or open area unless there is is a huge clinker. vs soft coal where you can get a hollow fire.. ( in you neck of the woods do you see this more often).. It's one of the problems I think creeps up when someone bulds a firepot based on soft coal vs hard coal.. The depth of firepot as well as slope of the side wall as well as the coal size plays into how well it feeds in.. Pea vs stove as example (and yes I realize the standards for sizing can vary but in general at least around here the sizing is pretty consistent).. Pea or nut is the flavor of choice for most work and is easy to get at a local hardware store.. With pea there is nearly no air gaps and if fed in correctly and in line with what is burnt it can be a very tight fire.. Nut coal keeps a little more air flow and gapping between coal pieces.. Wtih pea you must keep a higher fire as the air is so restricted if one isn't careful with blast it can blow the fire right out of the firepot.. And stove or boiler coal well then there are large gaps between the pieces.. FYI.. A Tight fire will offer a more intense heat with a smaller center heart as the air and o2 are burnt and slowed by the resistance of less air channels in the fire mass.. A fire that has larger gaps because of the larger sized pieces can influence how manageable a fire size can be maintained and usually require more depth. I have found that it almost doesnt matter what fuel type, charcoal, hard or soft coal the pieces for the most part function about best in the cherry or nut sized pieces with pea sized pieces thrown in..
-
Show me your anvil stands
jlpservicesinc replied to pkrankow's topic in Stands for Anvils, Swage Blocks, etc
I'd be tripping over that supports to no end.. -
Keep the bed of the forge covered with a layer of coal.. This layering should be piled up about 10" back from the center of the fire with it sloping down into the firepot.. Next year I will be fabricating 2 hard coal forges for the upcoming school this will show a neat design.. The popping is kind of standard but having the coal being fed in slowly from the outer ring will help to cut back on it..
-
Very nice work.. Seeing this type of work makes me want to be a better blacksmith.. It's why I like the old videos and books so much..
-
Trivets Historical sources and Modern Examples
jlpservicesinc replied to ThomasPowers's topic in Historical Ironwork
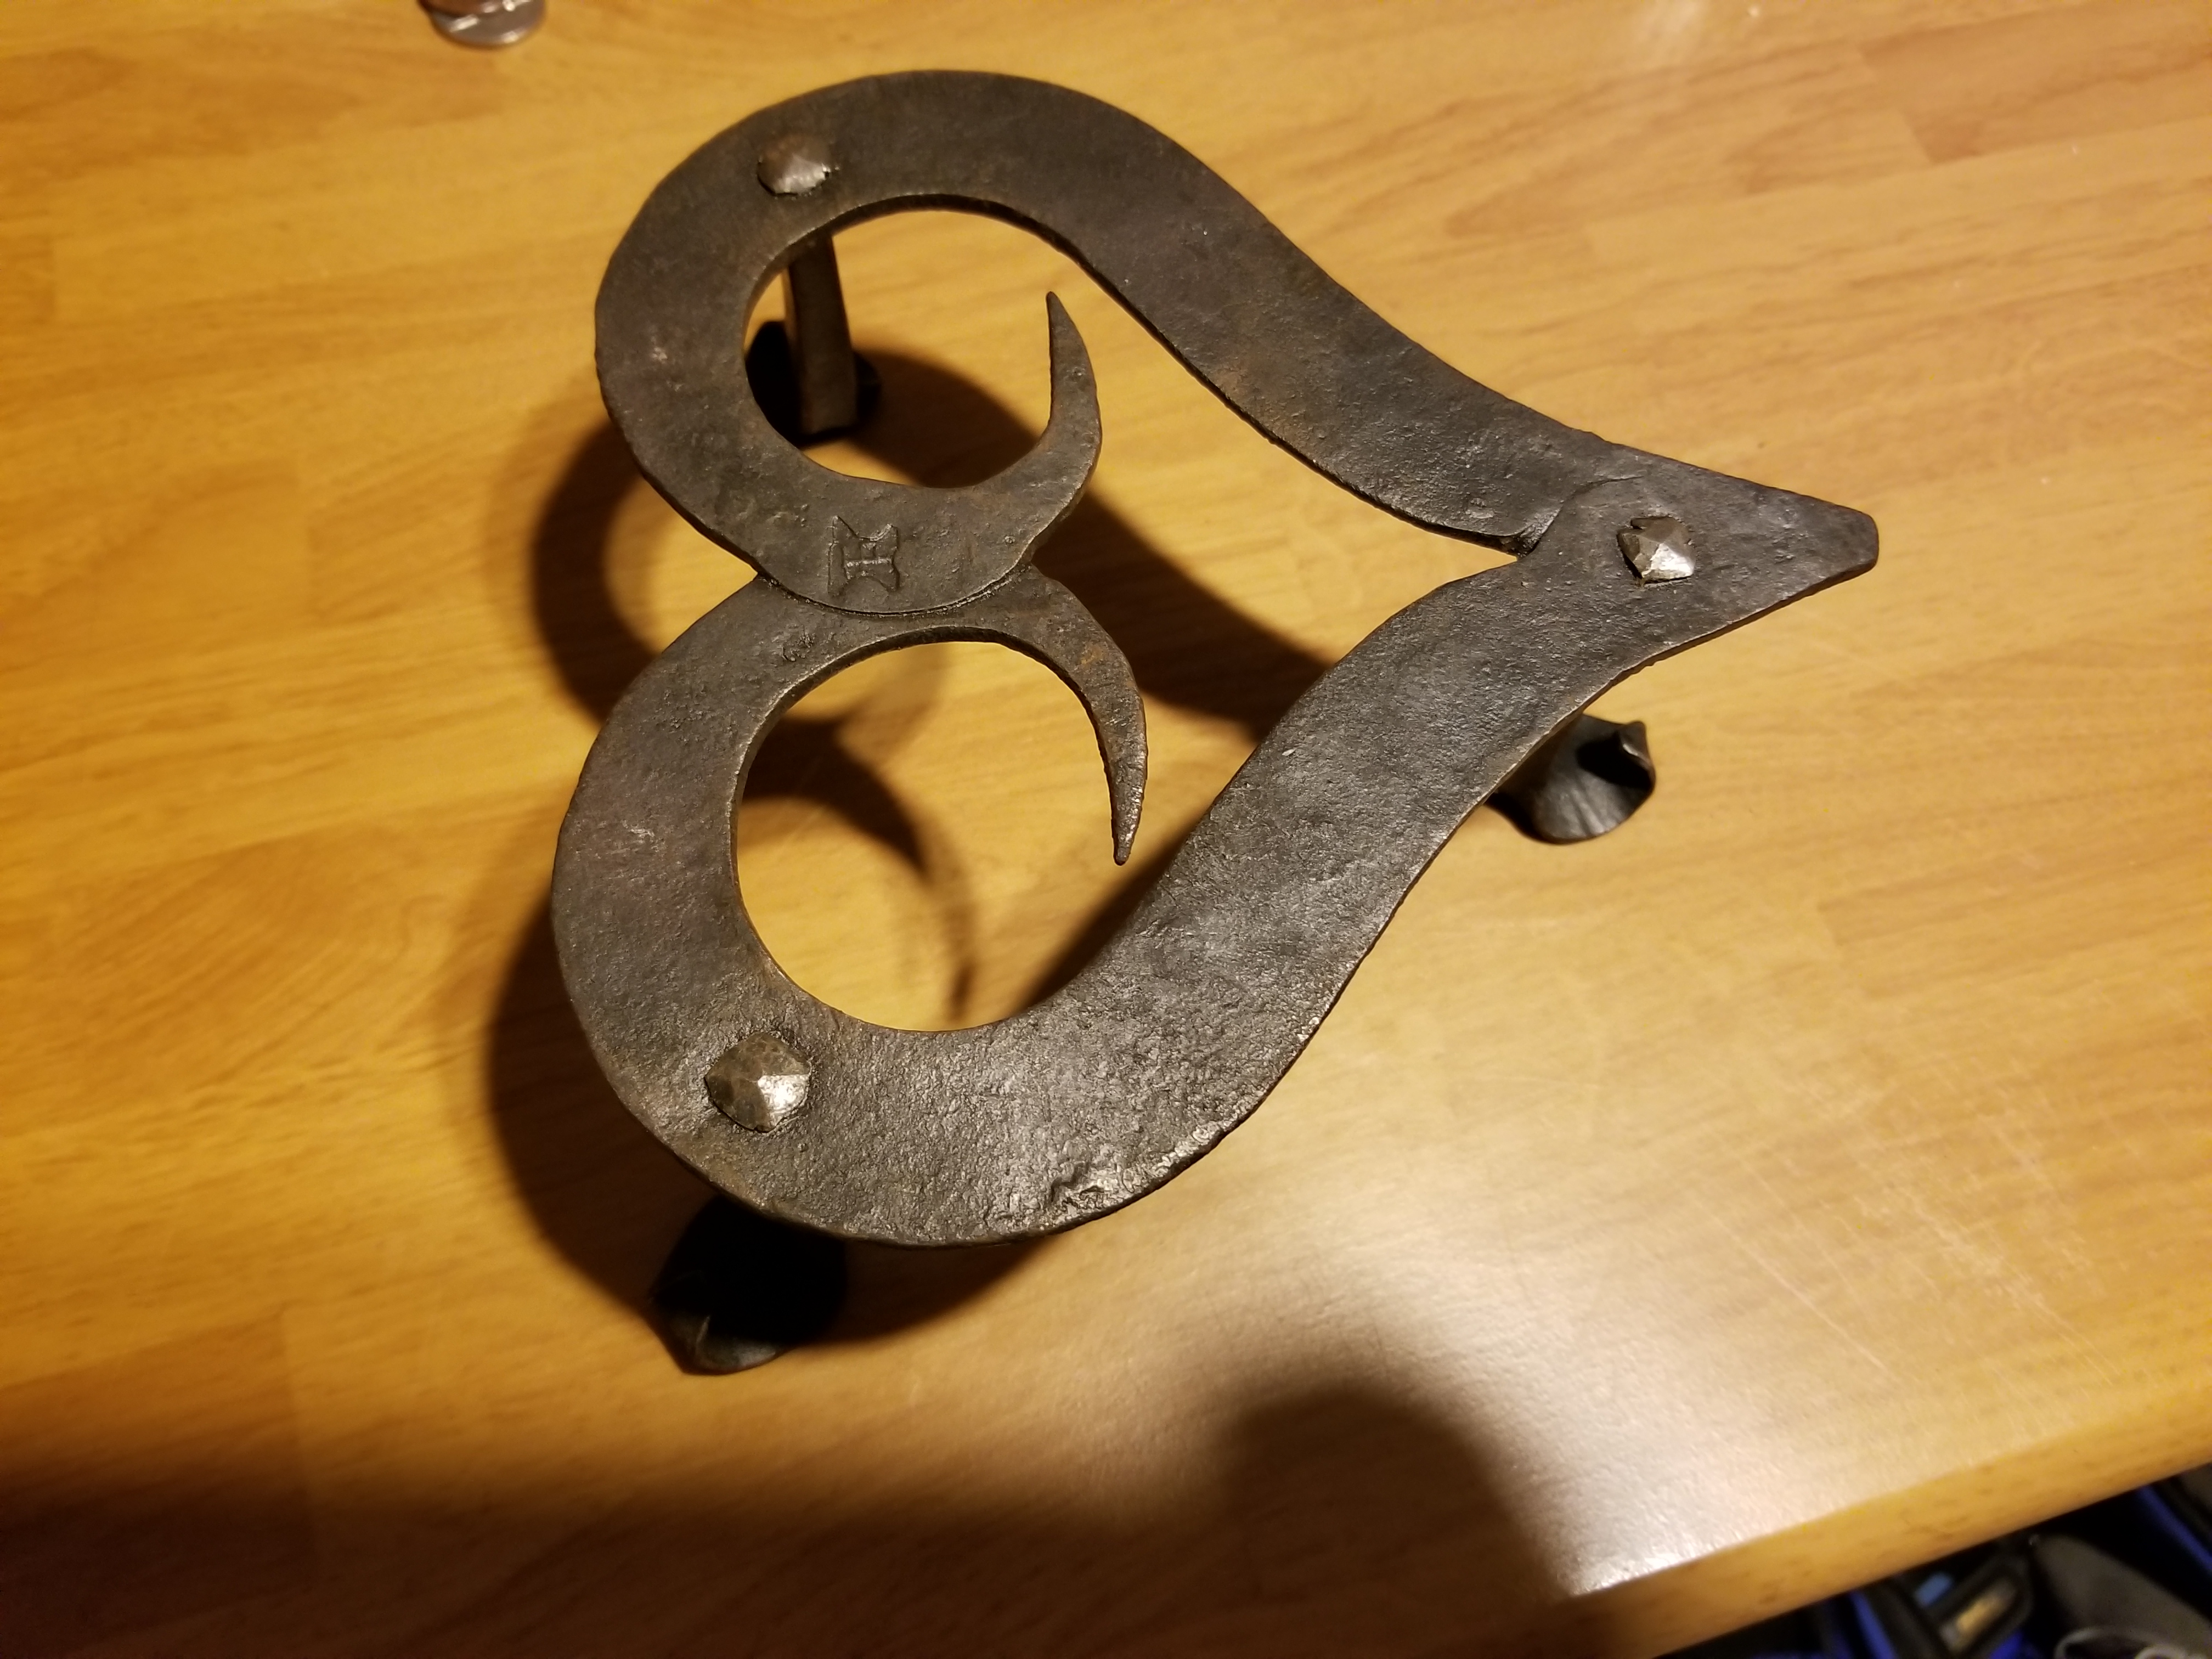
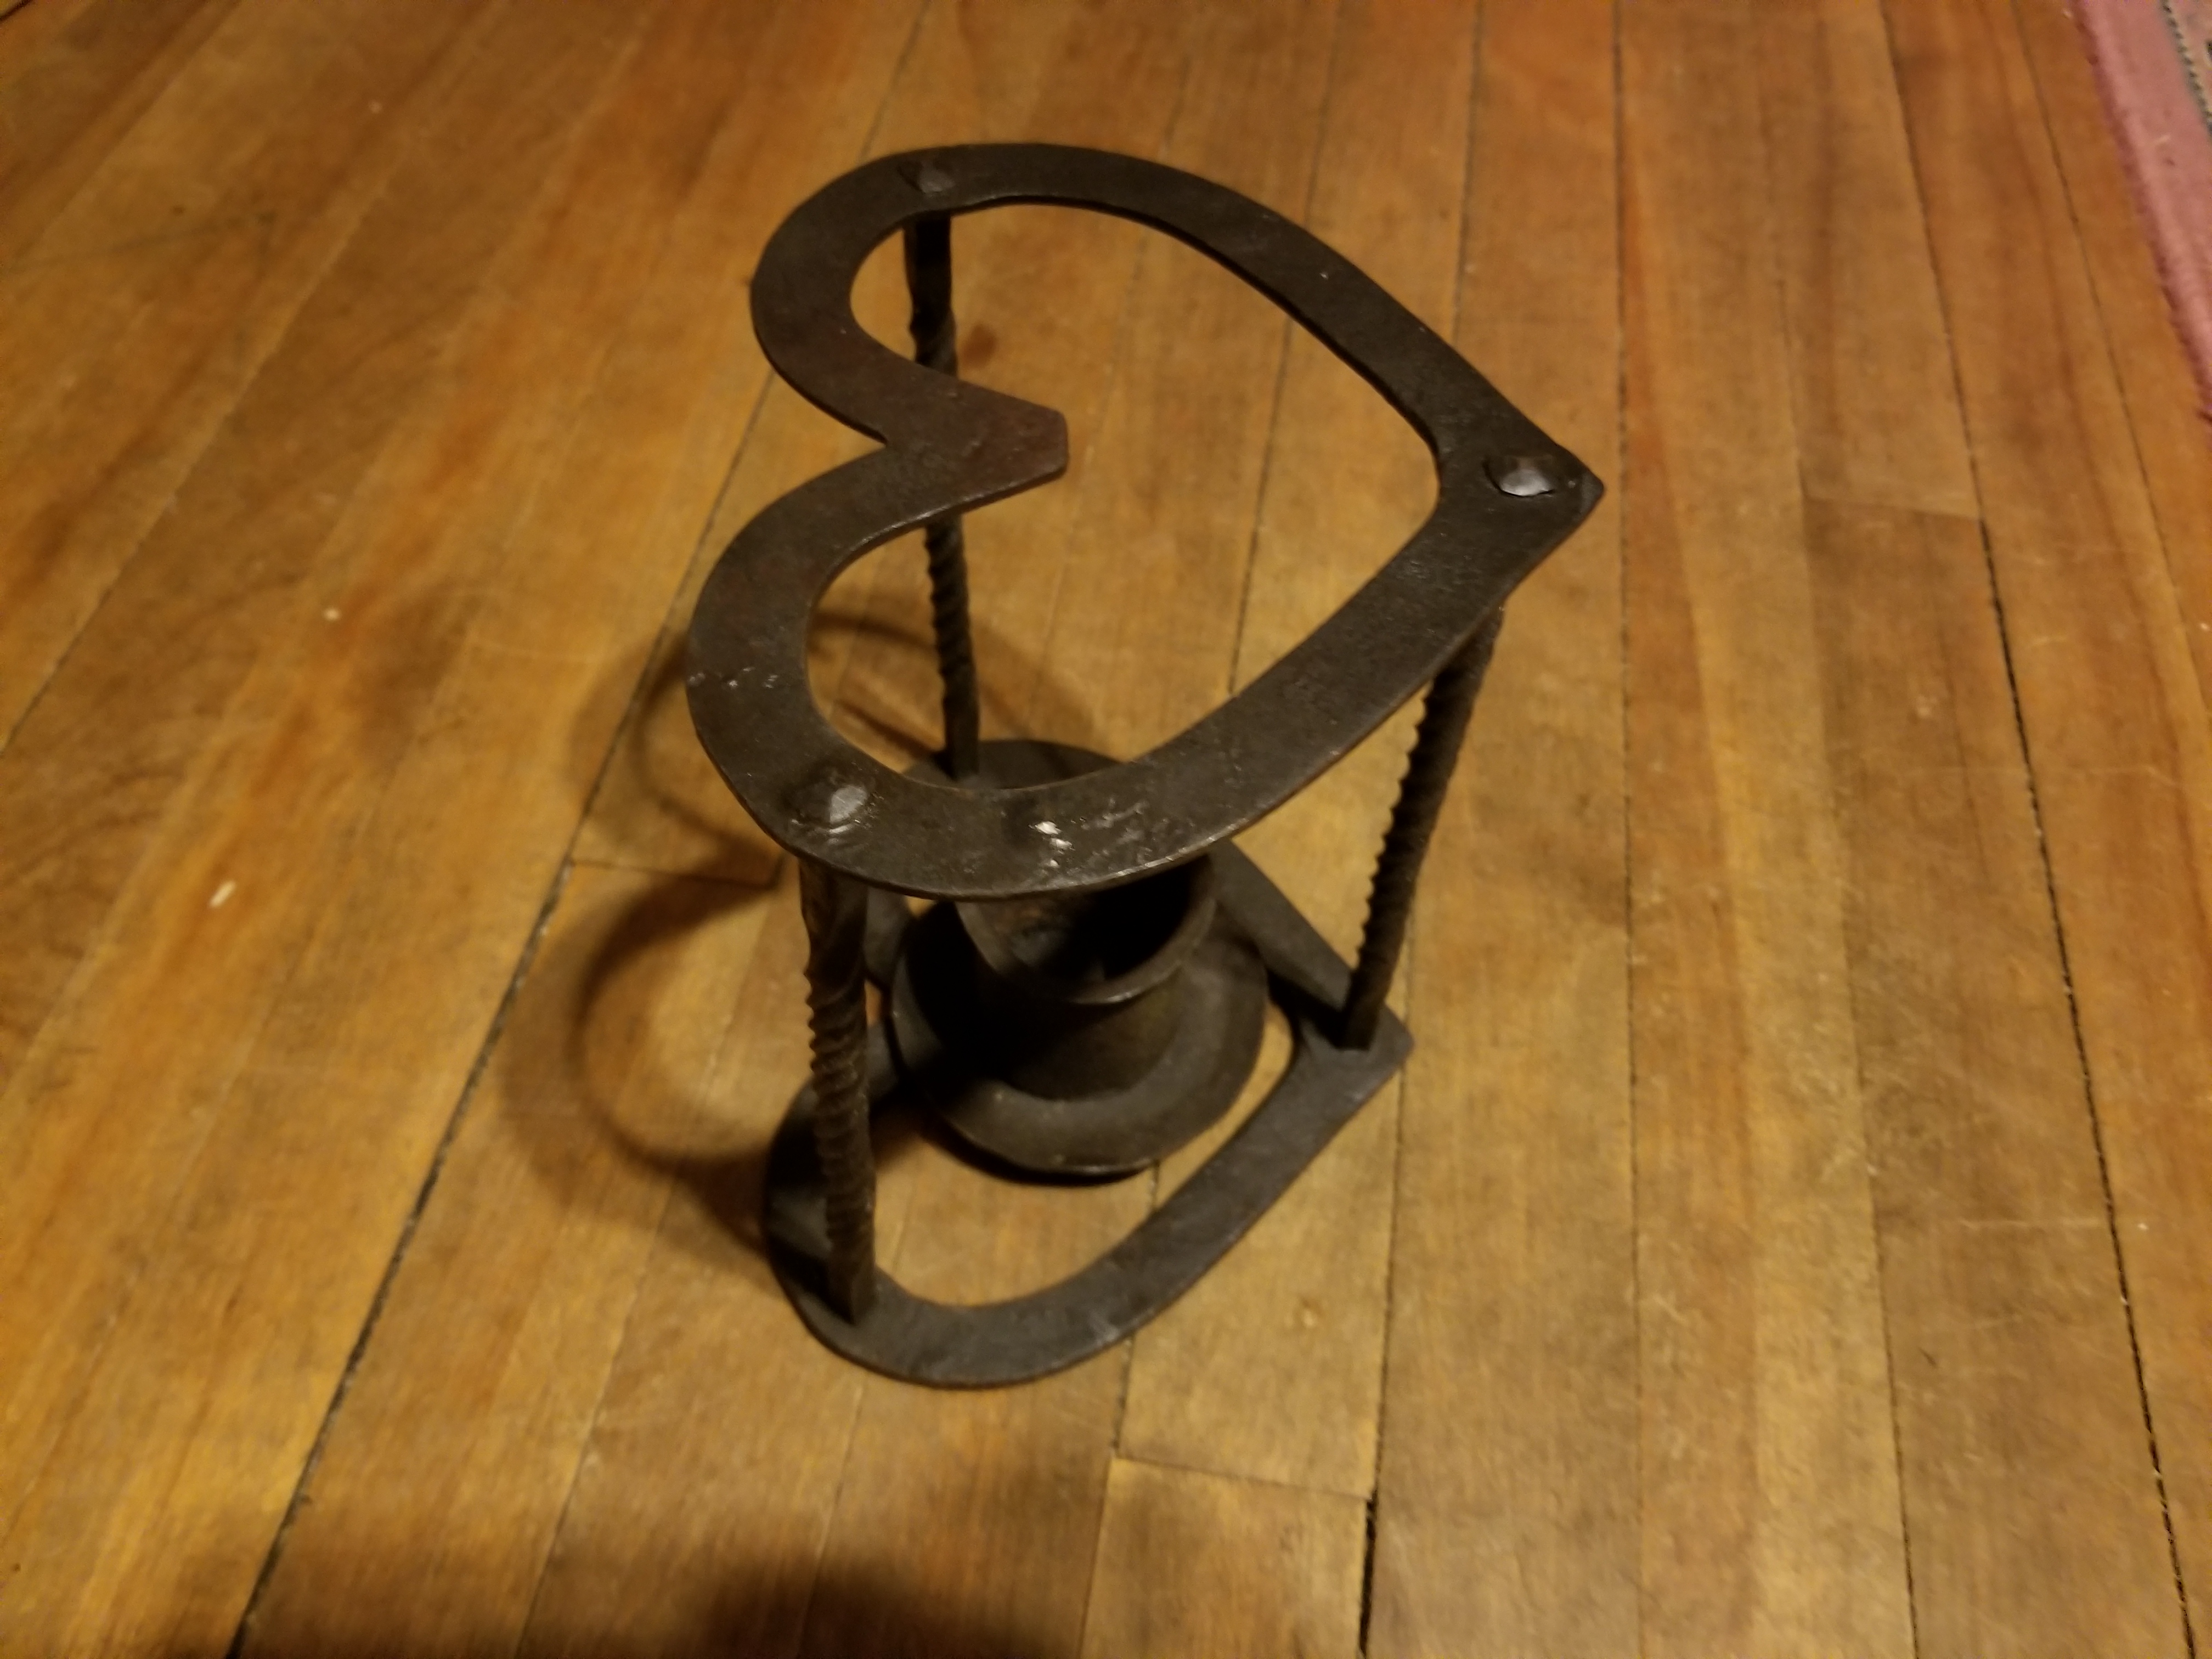
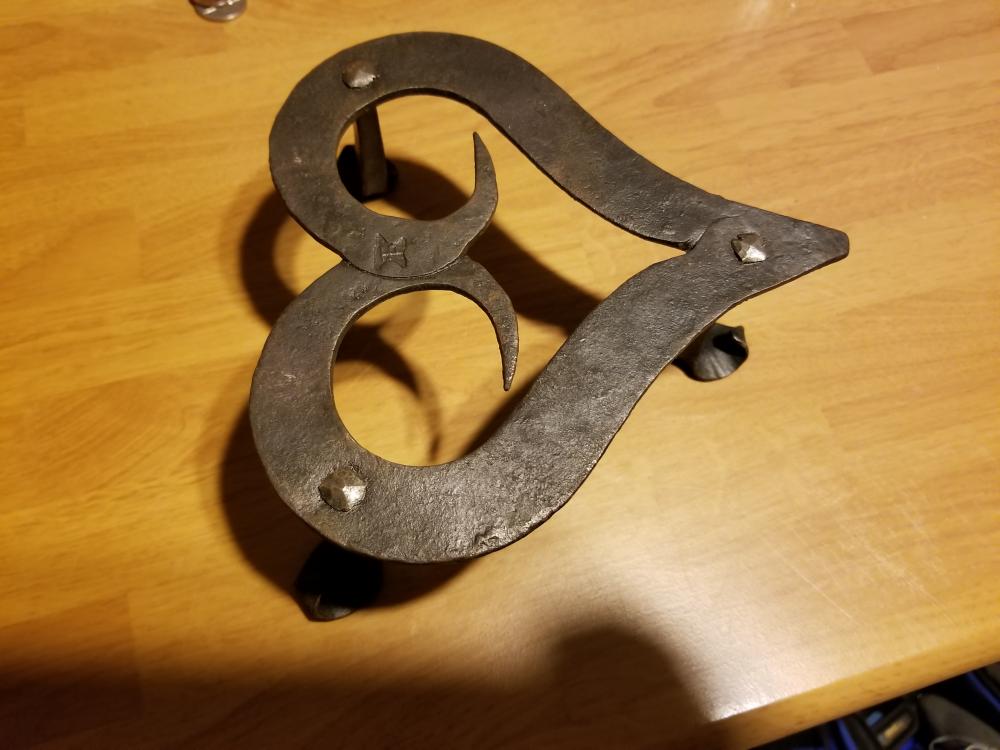
Thanks, In the next few months I will be filming and producing several more video's on trivet making.. One of the "How to" videos will be a heart trivet.. -
Sweet work.. Nice and clean.. How long did you take for you to make up the sample? I used to love that kind of work.. Been many years since I did anything like that.. Just beautiful.. Love to see more.. PM me your website.. Love to take a look..
-
Trivets Historical sources and Modern Examples
jlpservicesinc replied to ThomasPowers's topic in Historical Ironwork
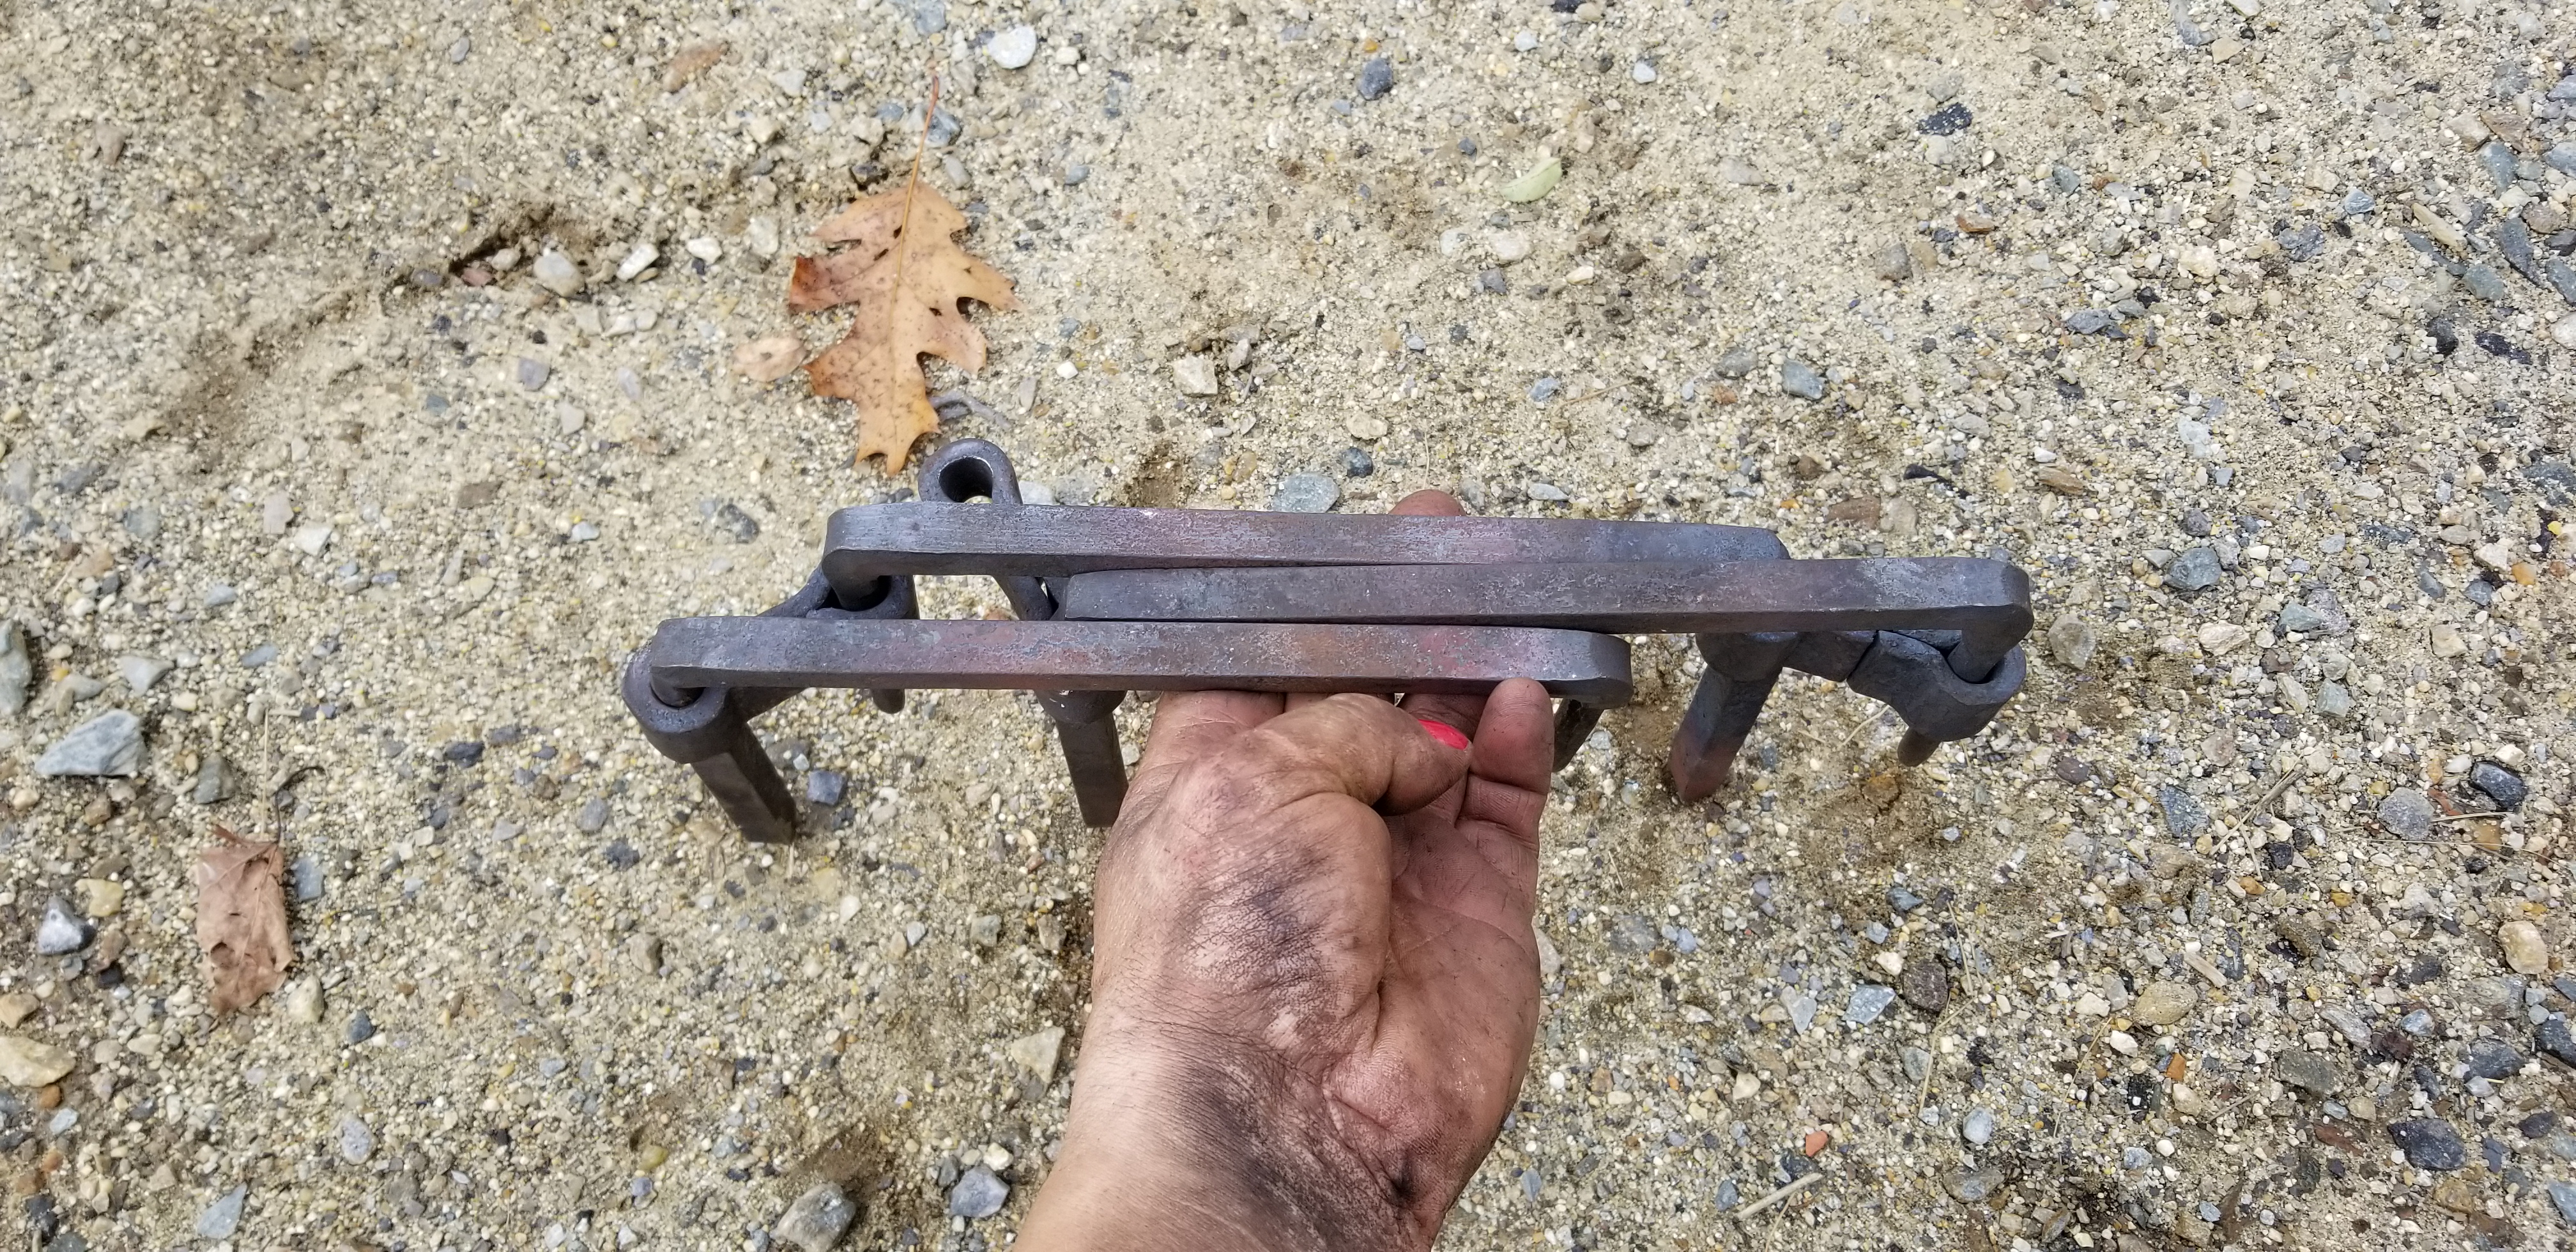
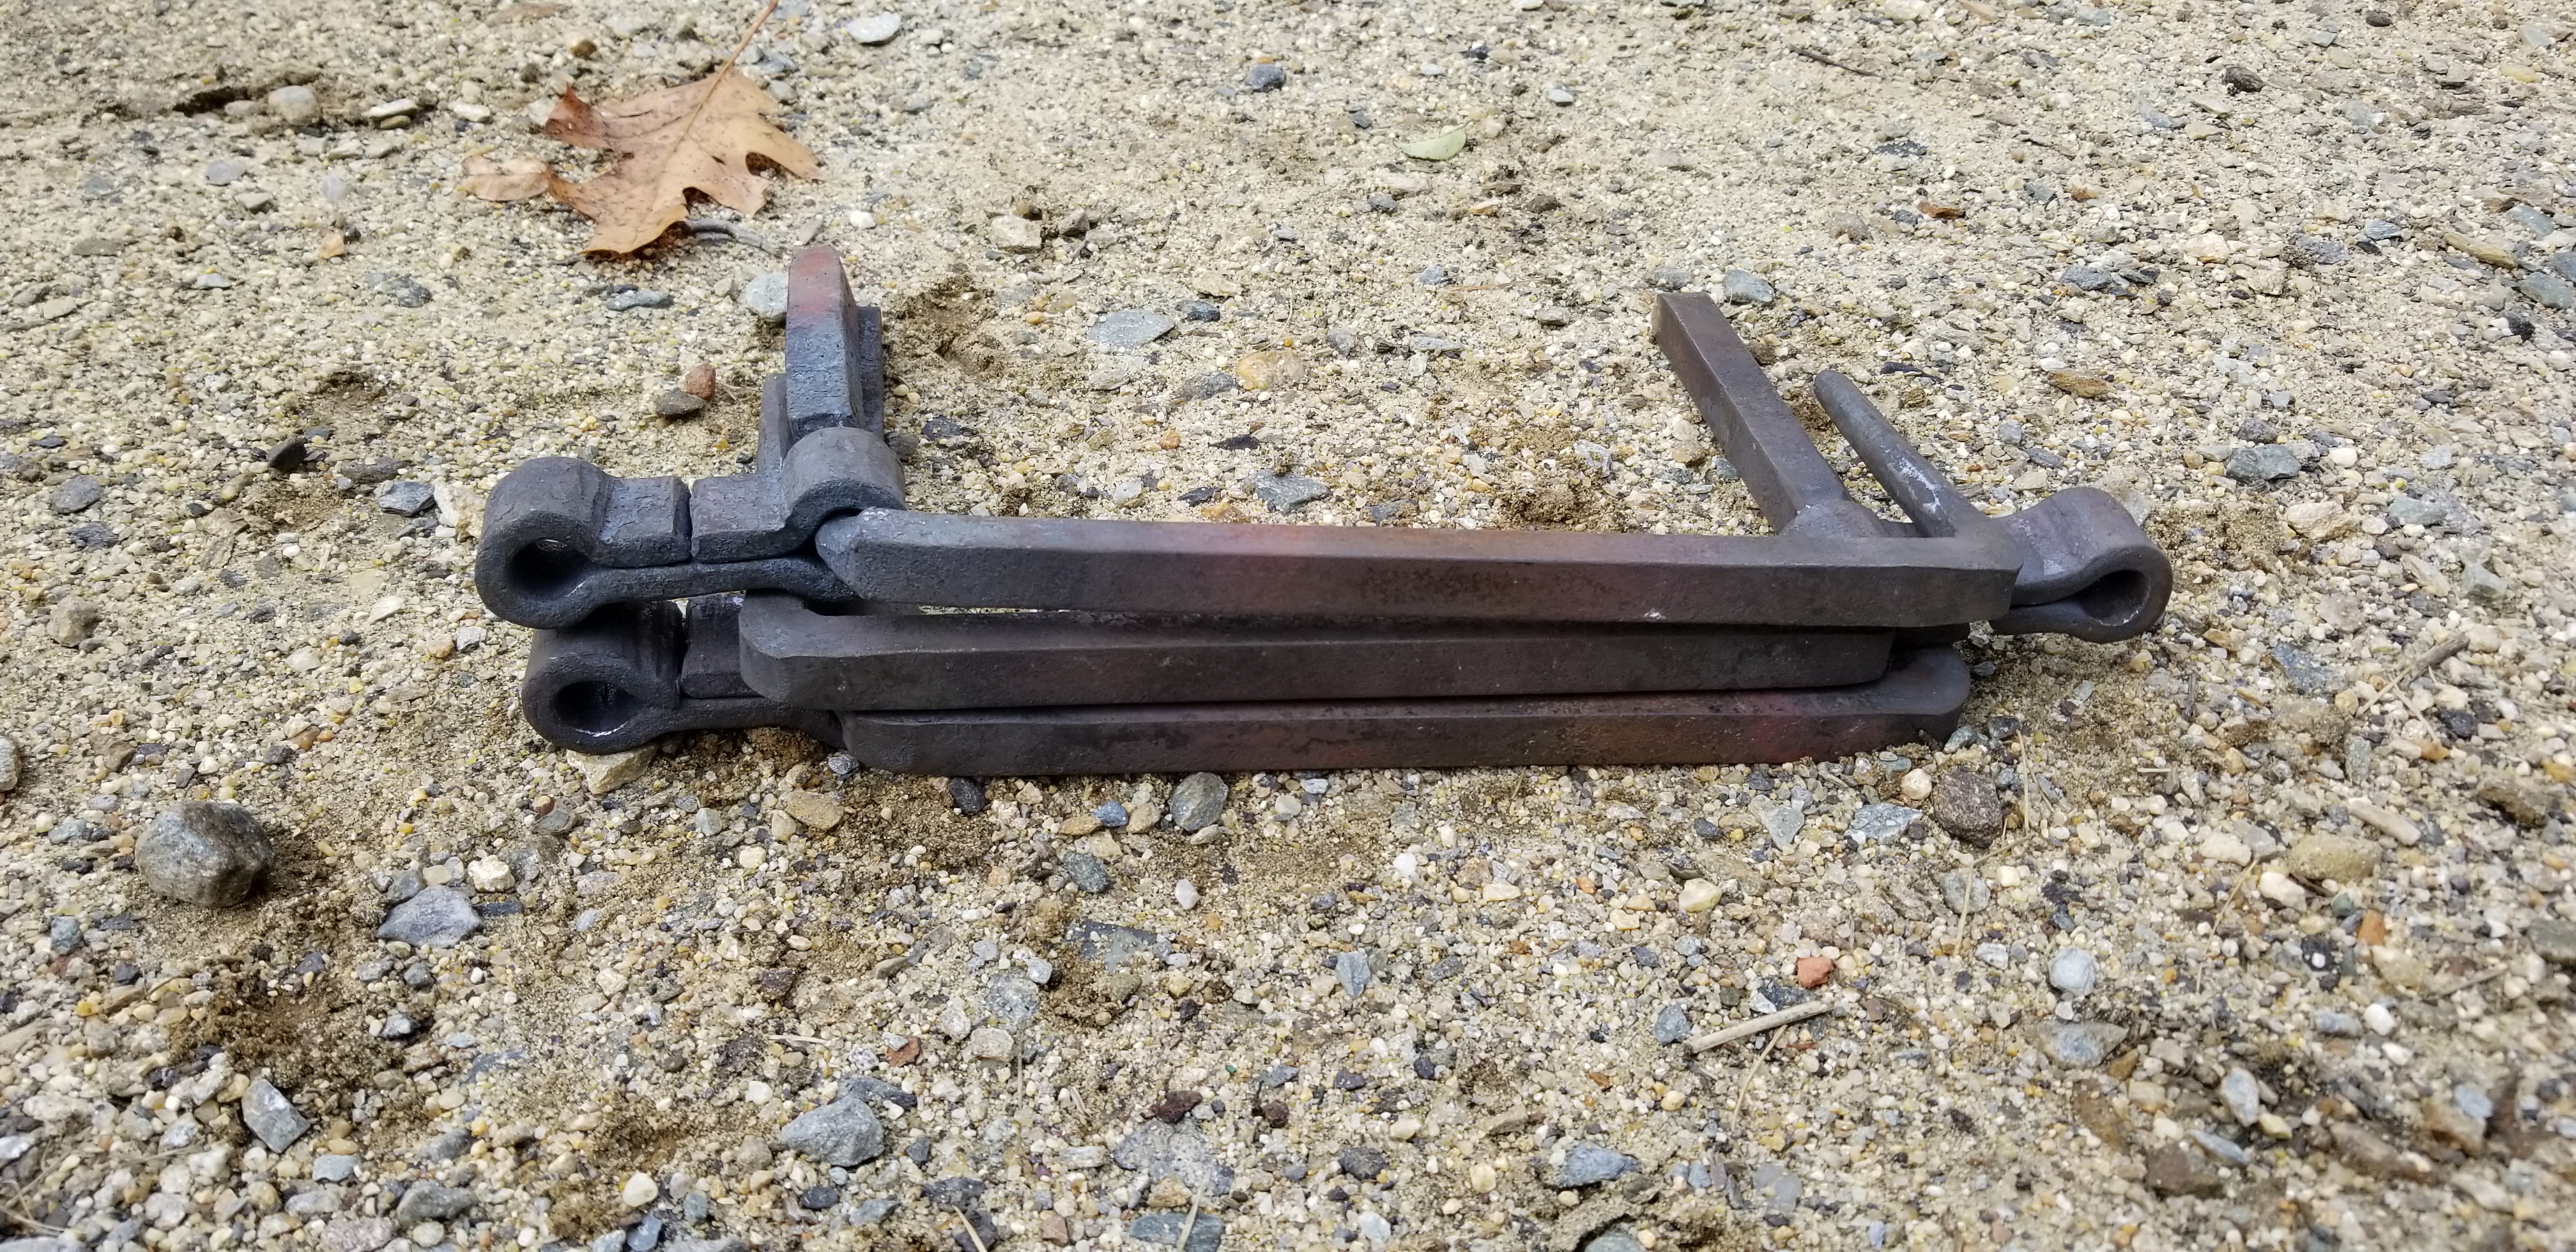
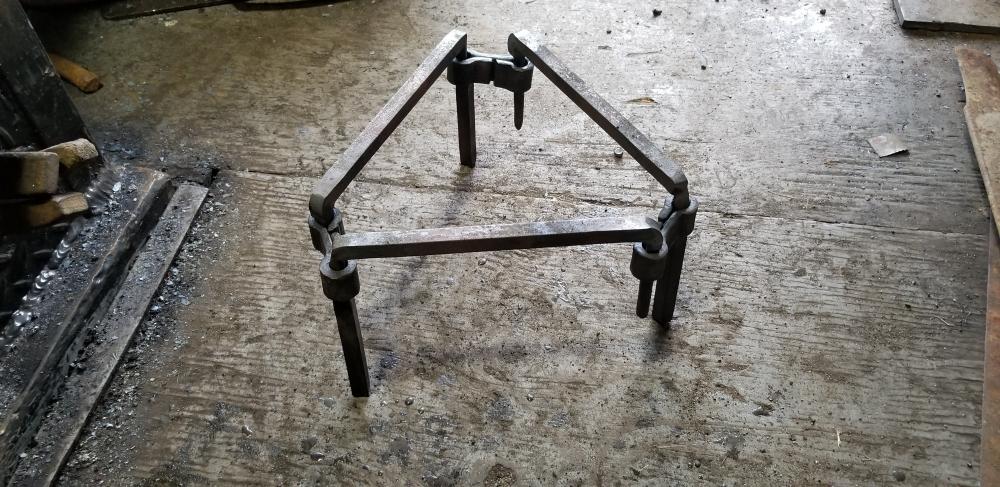
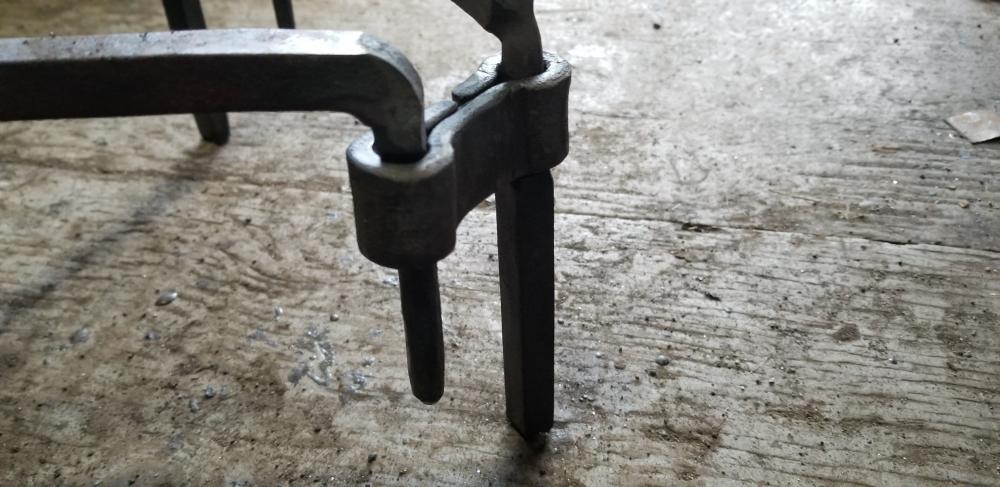
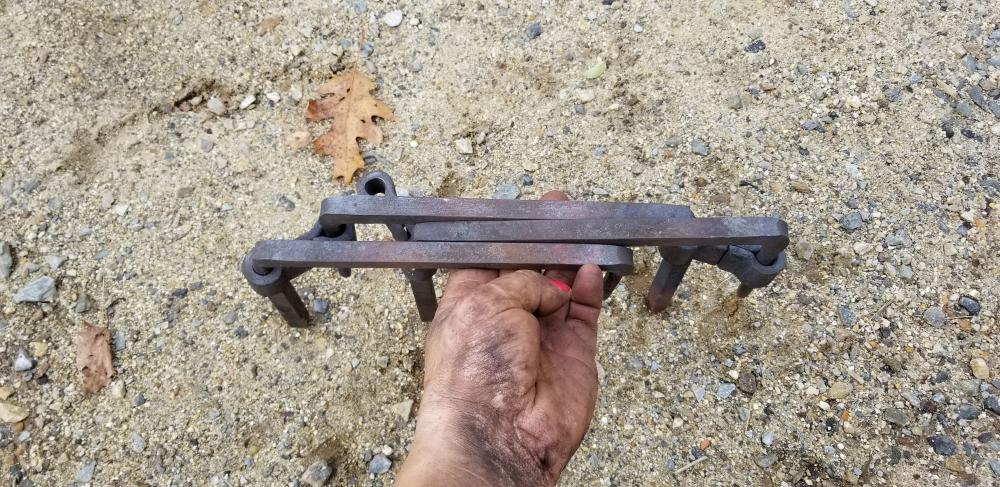
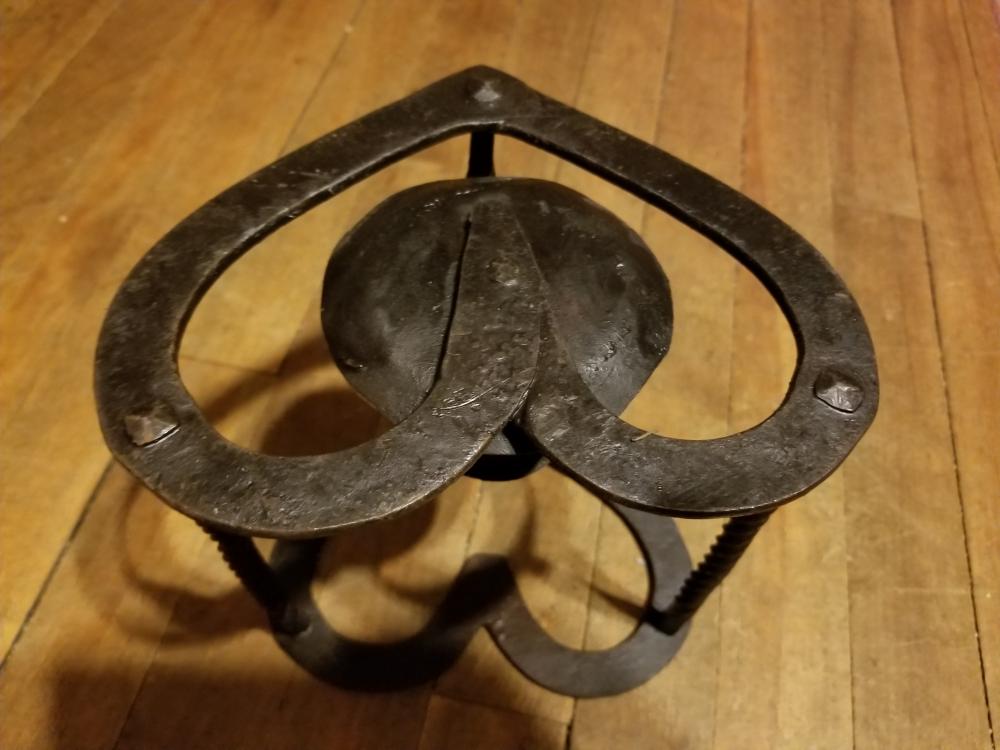
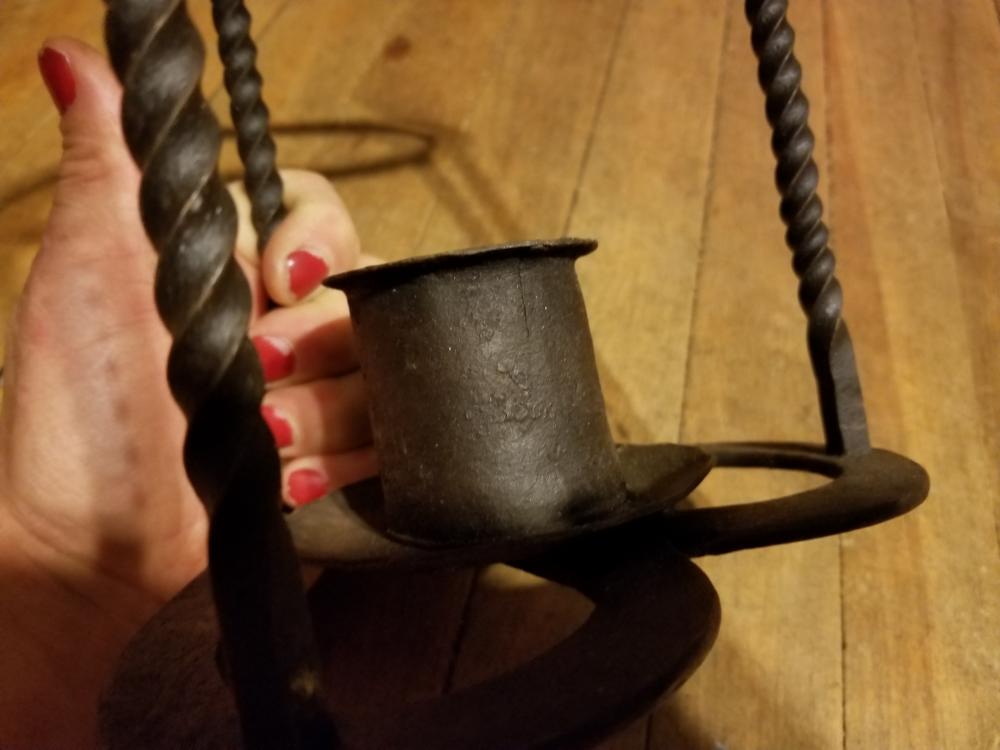
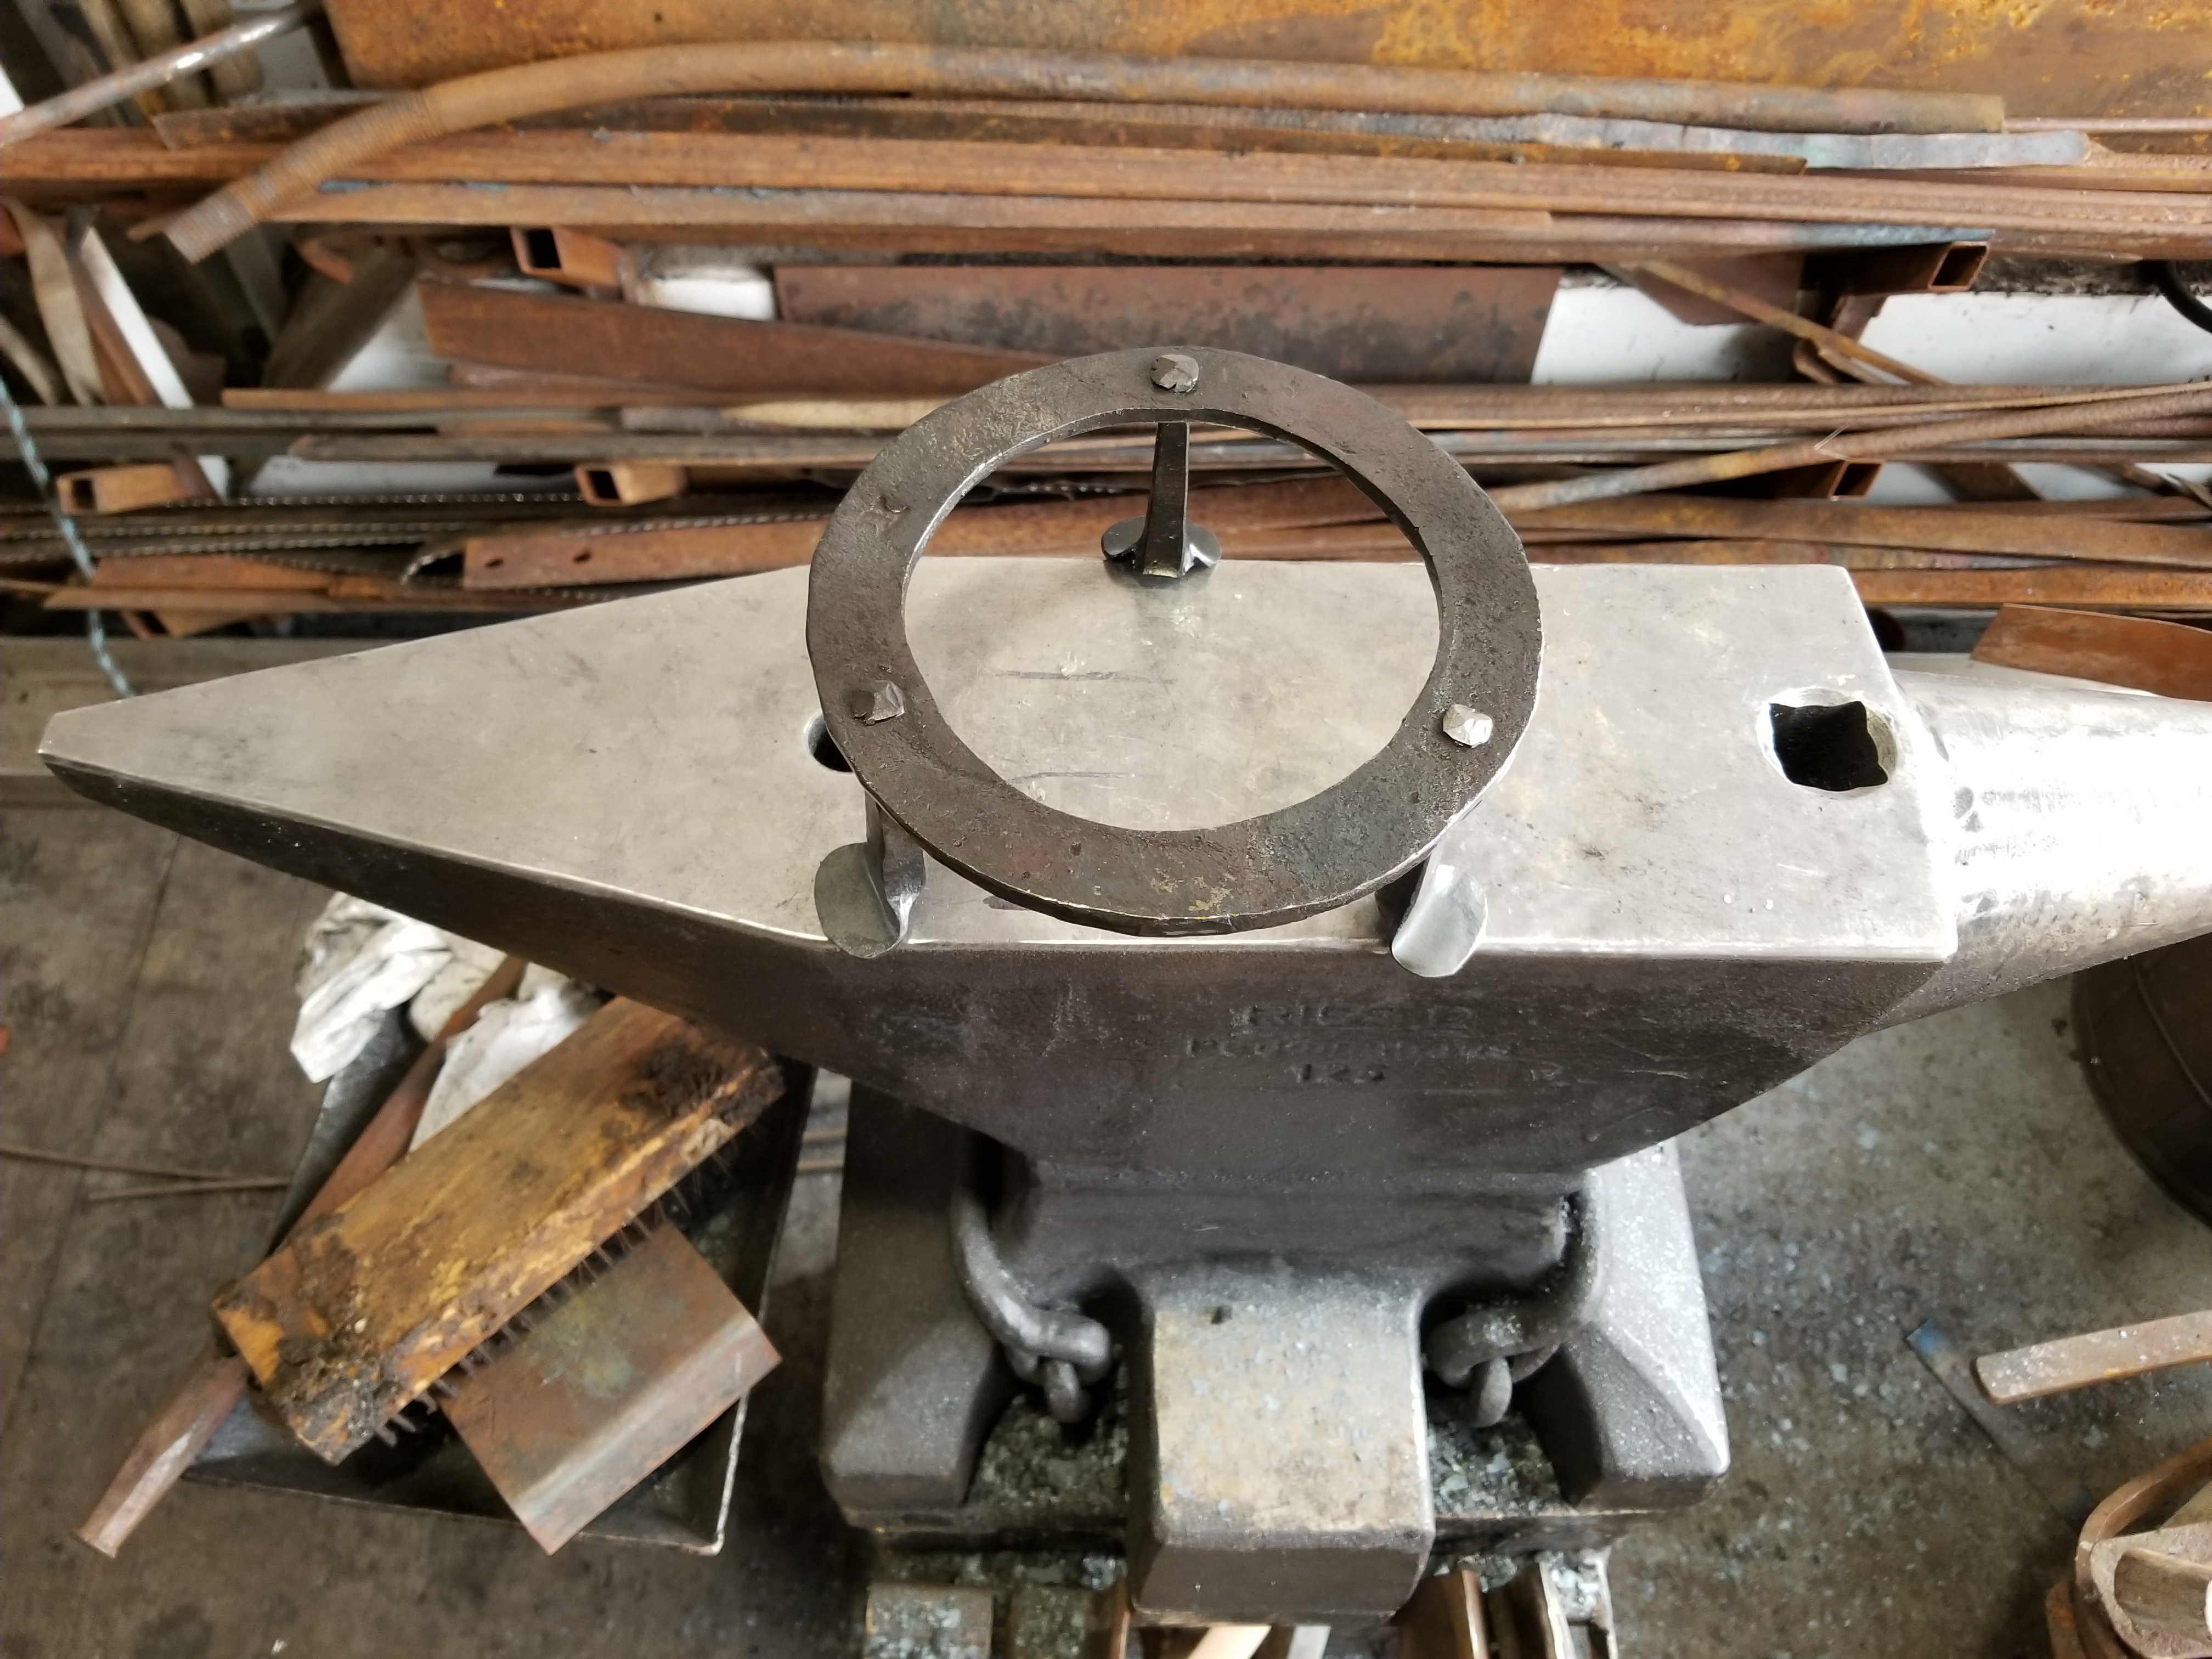
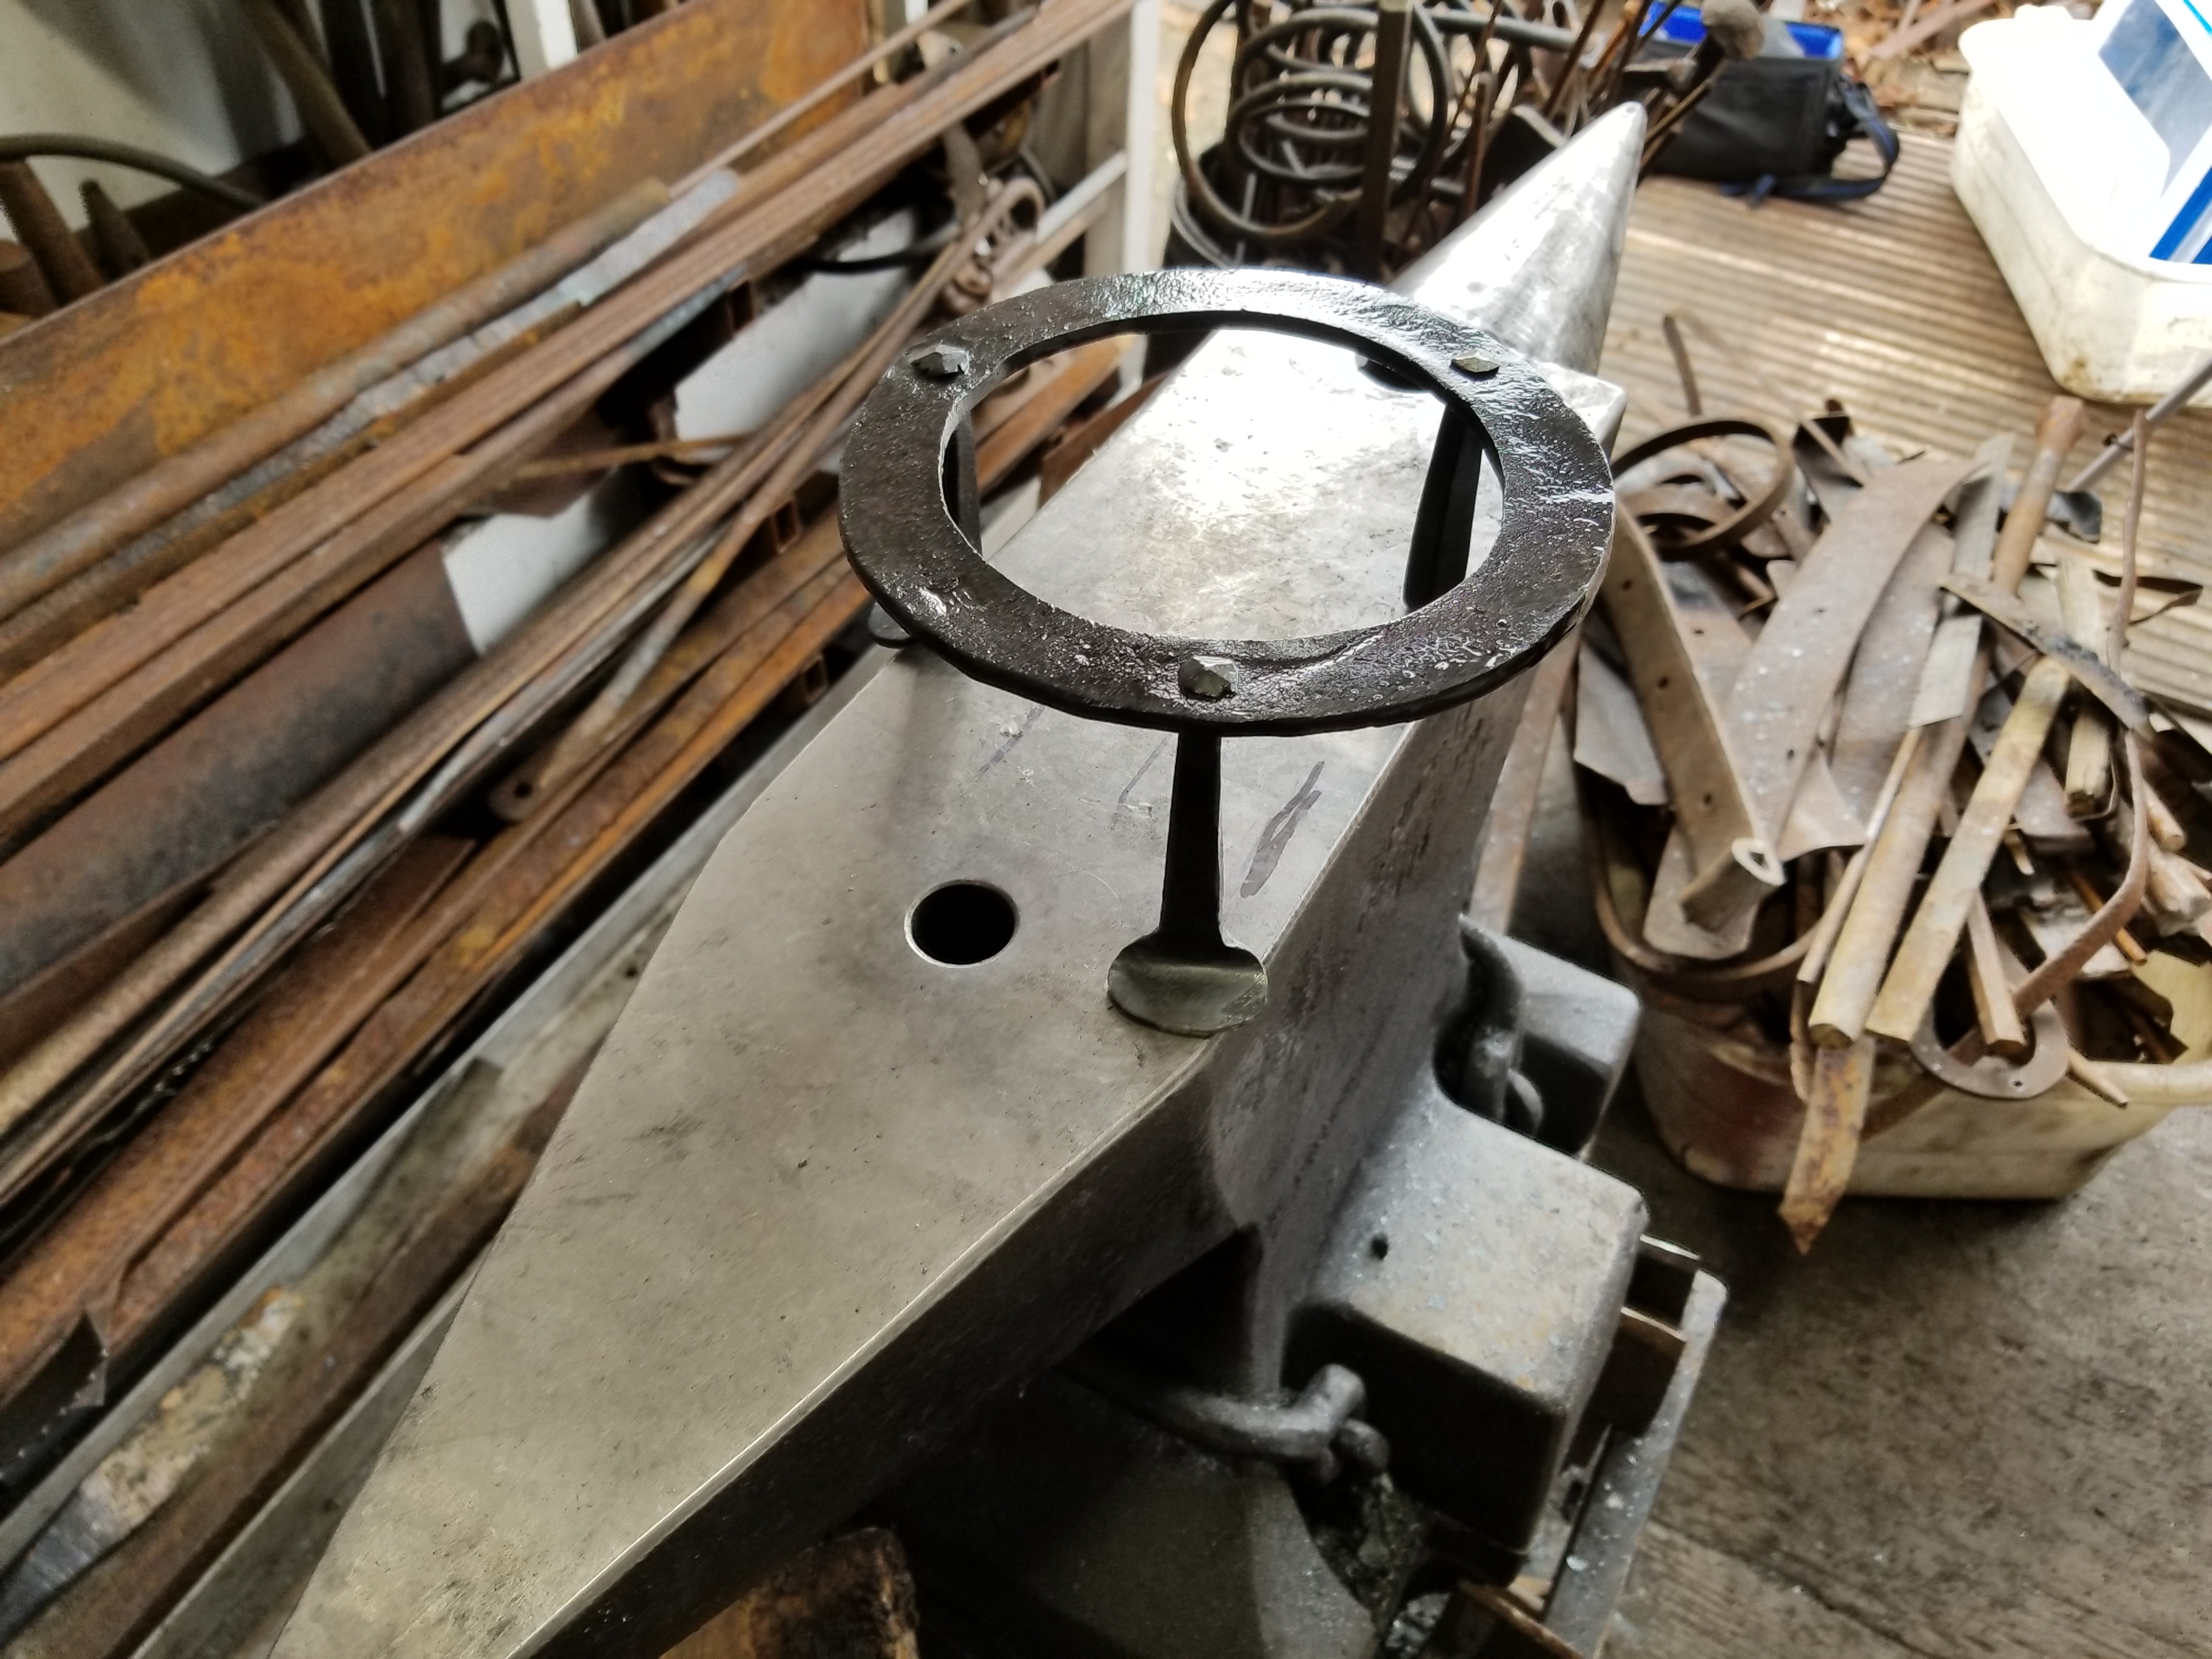
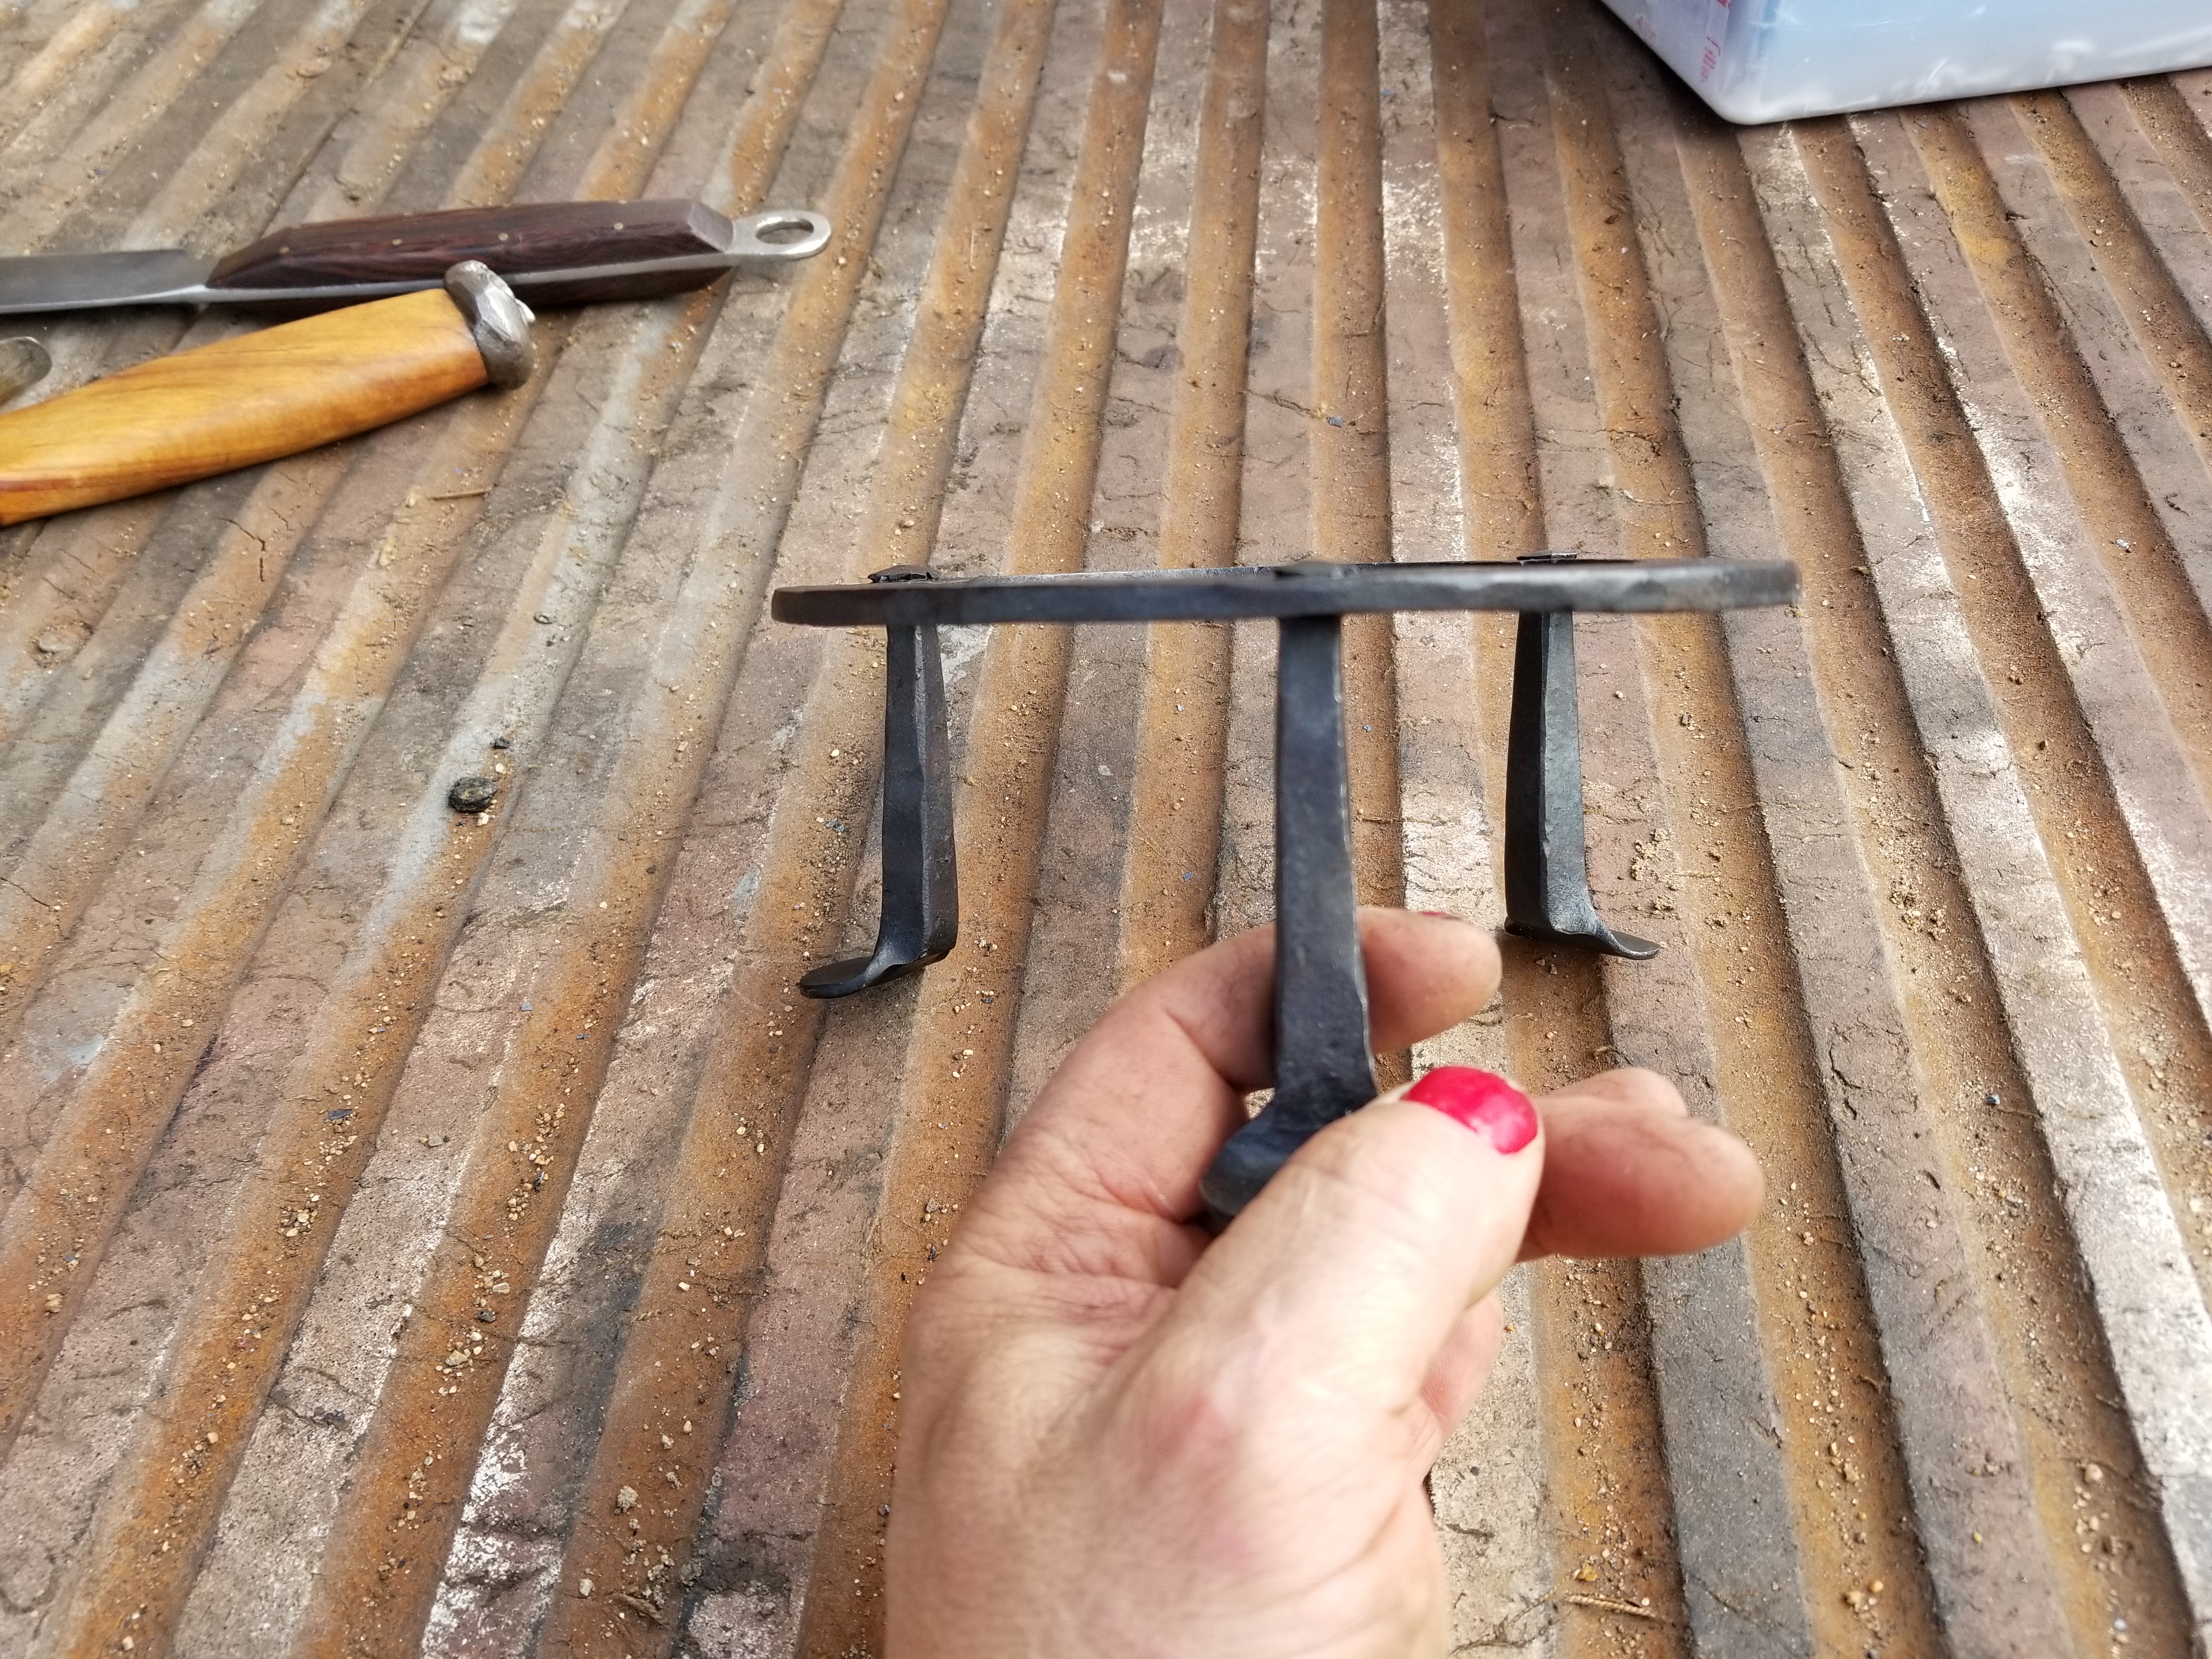
I don't have anything to add reference material wise, but here are a few I have made in the past few months.. And here are 2 no weld examples.. The Round one will be a "How to" video once it's done being edited.. It was made and filmed today.. It's a no weld forged ring.. Nestled double heart, Fire/camp trivet, simple hear trivet, and then a food warmer.. Not really a trivet other than the 3 legs..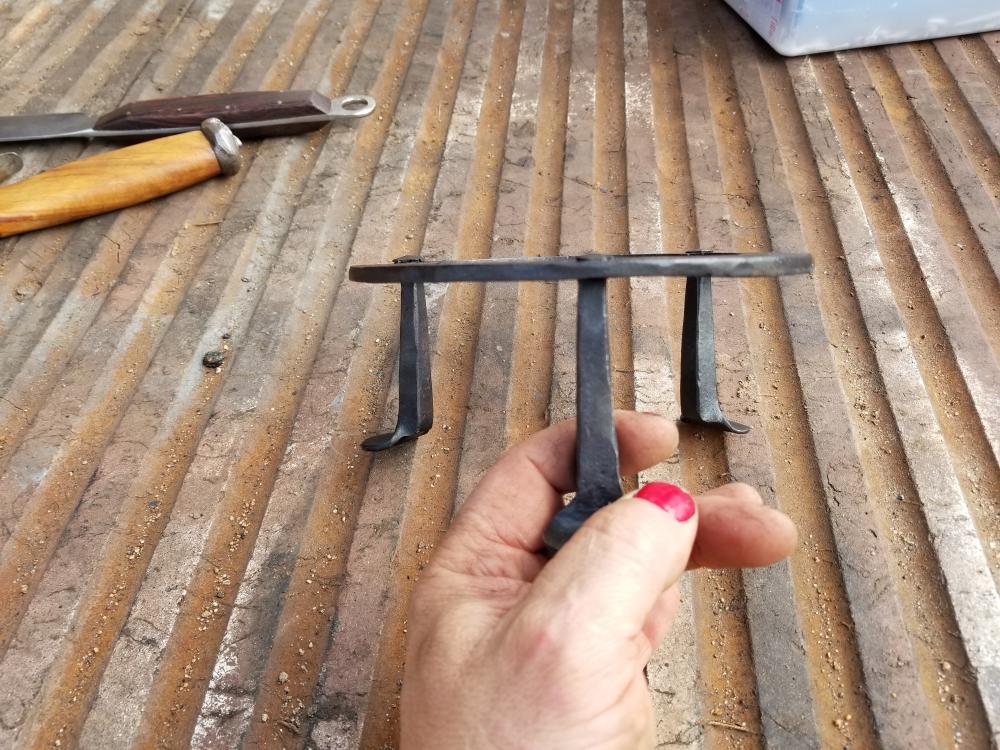
(2).thumb.jpg.5517badc7317b5a98ebb2fd6583f7943.jpg)
(2).thumb.jpg.7fb49bfa0e0fcecc5381971e78e52227.jpg)


-
Because I don't always know when something should be included or not and as to when is which or which is when.. I thought you are supposed to quote when it' a direct reply? This is a fuzzy area as I have found context can and often does get misconstrued here. So when to quote?
-
Nice. And yes I think we'd forge together splendidly. Why did you feel you have to repeat everything already said just for a one line comment, many people have to pay for bandwidth, and this only runs that bill up higher
-
Hardening a CR-V based hotcut hardy tool
jlpservicesinc replied to CheschireCat's topic in Heat Treating, general discussion
Problem is when a joke is told or an answer is sarcastic since it's written and read by the whole masses its very hard to tell whether its a joke or not without the facial expressions and body language. Being a more serious type and not liking fun at the expense of others I am happy when it's a good clean joke about just plain old funny stuff.. LIke if you are an American before you enter the bathroom and you are American when you leave.. What are you while you are in there? (European) Youro peein.. -
Way back in the day this was a " Goal oriented skill set task and desire".. Eventually I learned that while it is possible to get a one heat weld and finish a lot of it depended on the type of material, scarf, air temperature, anvil temperature, Hammer temperature and material cross section.. There is a ratio where smaller pieces will finish up just fine in the one heat, then there is a dead zone (at least for me) where it takes 2 heats or even 3 and then you get back up to a size where 1 heat happens and is easy.. 1"+ sized stock.. Anyhow I wanted to mention if you work in the summer in arizonia vs winter outside in Massachuesetts will determine a lot on just what you can get done in one heat.. All the video How to's were filmed last winter on some pretty cold days.. If you have watched the videos not once was the slack tub not frozen solid.. Temps were in the 15F-25F range no heat and no electricity.. I was pre heating the anvil..
-
Nothing wrong with what you did. It's a functional tool.. Unles you drill way undersized that pesky rounded broached look won't go away.. Only way is to thru punch it like in the how to video..

(2).jpg.355ab7b9ea9385a0edcef34bed0381c6.jpg)
(2).jpg.b010931179f83aa65b05b7351b225ff2.jpg)