Kozzy
Members
-
Joined
-
Last visited
Everything posted by Kozzy
-
I've not used one but a friend has one and has implied a couple of insights regarding the things: 1) It's obvious to more experienced people but not so obvious to inexperienced...rip chain, not crosscut chain and SHARP SHARP SHARP 2) Though advertised as one person machines, it is worth it to have a *smart* helper around to do things like insert the wedges (they can vibrate out behind you) or scream at you if something is amiss. That allows you to focus on leaving with the same number of body parts as you came with. Bonehead helpers are best left at home though. 3) Don't buy the cheapest Chinese knock-off on the block. These are so dangerous and finicky that you should take no shortcuts or cheapskate paths.
-
Certainly can't call that a bad start. Be sure and do some follow up reading on things like anvil stands and how to best line that forge so that you aren't using mountains of fuel or other problems. Though I'm sure it's a treasure that you'll find it hard to let go, most people don't actually need or often use a big swage block like that. Because of that, you might keep it in the back of your head that it can probably be sold to pay for other things you might want or use more. Not saying you should do it, just planting that seed in your head that you *can* if it comes up. And of course the standard note to update your profile to include your location--you never know who's just down the highway and can help you get rolling.
-
I've worked on several pyrolysis systems turning ground wood scrap into charcoal...which then usually gets turned into activated charcoal for filters. What you want to do is a continuous line pyrolysis and then take the charcoal output from that and compress it into usable blocks--similar to how standard briquettes are made. Without the clay fillers, they should burn a lot hotter than the BBQ version and be suitable for smithing. It could be done with leaves as the input pretty easily--probably via a screw conveyor feeding the pyro chamber and a drag conveyor as the exit. Not sure why one would bother though as there are better "free" feedstocks out there. Interesting as a concept, though.
-
So just curious: I've had people blow like a pinched-off tea kettle over one person saying 110 and another 120 or various combinations. I've even had people go into long diatribes about RMS vs average vs whatever as though it mattered regarding a generic question. Clearly, some people need to take a chill pill on the subject but... Is there a preferred voltage to use when referencing such things in USA text such as asking a question? If we are going to choose some voltage to call it, which one? On a similar note, it seems people can get even more wound up when talking 220-230-240 V end of things. Again, is there a preferred voltage to generally reference in the USA or is there true variation in what is being supplied on that end? Or are the crackpots going to crackpot no matter what get's referenced...
-
Can you shoot a couple of more photos of the cracks that won't be cut out in the re-hab so need to be considered? It's kinda hard in the photo to see if they are a big issue or not. Because things are so bad already, I'd currently lean toward drilling out the ends of any cracks as others have mentioned and just bridging any major ones with a piece of flat bar and bolting it in place. It's not a great fix but things are so far gone that you don't want to toss too much money/effort at it--if you toss a ton of effort or cost in, you might as well be starting from scratch anyway. Then clay the thing (or similar) as appropriate so heat never gets back into those areas to further any cracks.
-
Read, learn, and most of all, keep your eyes open for equipment. Heyburn/Burley/Rupert et al definitely have some hidden smithing gems in people's garages and barns...the trick is to tell everyone you cross paths with that you are looking and eventually you'll get a bite at the right price. You'll be banging iron sooner than you think. Great Great Grandpa is buried in Oakley just south of you..along with several spare wives he had. In that part of the country 140ish years ago, virtually every family came with a decent herd of wives
-
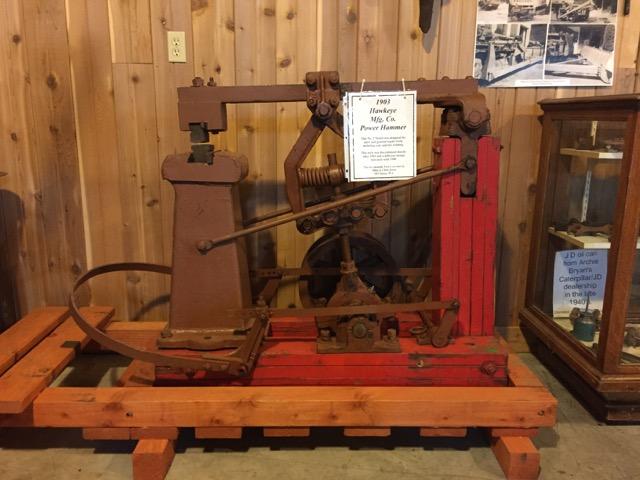
The belt pulleys are not correct...but the original flat belt pulleys might not be the best choice anyway. It also looks like they did something funky for the motor and pedal operation. I haven't actually used the one in our museum so can't say how well it works under power. Hand cranked, it looks like it'd do the job but only in the OK range of things. That implies that cost has a great impact on decision making vs a more traditional/common hammer. If there is something you want detailed photos of, let me know.
-
In the tinsmithing world (USA version), that anvil would go for at least 3 times what they are asking. It's far more suitable for sheet metal work than blacksmithing but certainly wouldn't be a bad thing to have around the shop. I've had my eyes open for stake anvils for a long time to go with my tin smithing junk but, being a cheapskate, just haven't run into any deals that fit. I'd be all over that if it was within 50 miles of me.
-
Interesting. That got me to look up the diagrams in the heat treater's guide just to see if I could spot something going on. With 1045, the final hardness is severely affected by the part size. A 2" dia bar will never get above about 40HRC at the surface and more like 30 at the core when quenched in water..and way worse with oil. This stuff hates larger profiles in it's hardenability. A 4" dia bar will never get above 30 HRC no matter how hard you try. FYI, the book wants a water or brine quench for anything above 1/4" thick or you'll get nearly nothing for hardness. Oil only for thin sections. Oh...and one more weirdness. The book has a chart of hardness variation based on pull-tests at a commercial operation. Doing everything perfect and consistent, they still got 20-25% variation in hardness over a 2 month run period--and it was a pretty flat bell curve so those outliers were not just the random oddball but fairly common to see. Coming out low was more common than coming out high.
-
Though my anvil is not highly magnetic like yours, I have a really weird anomaly of magnetism. There is a "ring" on the face which is magnetic where no other area is. Basically, it looks like the ring a coffee cup makes that your wife is always screaming at you about using a coaster regarding...slightly smaller and more like pop can sized. Perfect circle that picks up magnetic slag where no other area on the anvil does. It's not a disc area...it's a true ring of magnetism. I had intended to bring it up as a mildly interesting phenomenon in a post sometime but keep forgetting to take photos. Try and degauss using an AC welder as others have said. If you don't have that available, try a long shop extension cord (heavy cord that'll handle the amps) and plug in something like an electric heater to heat up your shop area...and just leave it wrapped/on for a day.
-
Can of worms kind of question. Yes, one can get a chinese version...and have the hassles of trying to find replacement parts when something fails. That might be possible or it might mean throwing part of the control away and starting from scratch. It's a crap-shoot. The other issue is underpowered steppers or servos. Underpowered doesn't just mean the motors here: It means motors, amps and power supply. The power supply feeds the amps which control the motor movement via pulses from the controller (computer) and that whole train varies wildly. Additionally, physical structure of the frame and gantry vary wildly--from good sturdy designs to total junk that will collapse if you lean against it too hard. The material support grid on cheap units (a consumable item that will need regular replacement) is often inadequate for cutting anything small. Here are some generalities to look for: If you can get one that uses standard Gecko drives/amps in the system, you will be FAR better off if something goes wrong. Gecko brand stuff is well supported and documented and pretty easy to work with. They even made one that's referred to as the "vampire drive" because you can't kill it--they put in a ton of internal protection so it doesn't die without some serious bad stuff going on. Barring geckos, just make sure it uses brand name stuff and not something unrecognizable. Servo vs stepper. Most of the low end tables..and many of the high end...use simple stepper motors. With those, the computer tells it step and direction but never knows if the motor actually made those steps. Sometimes steppers can get lost (lose steps or worse) because of this lack of feedback to the computer. Servo drives in general have an encoder on the motor that tells the motor's position. That way, if the motor isn't doing what the computer tells it to the computer has the feedback to either self correct or shut down if it can't figure out what to do. It gets a bit into the weeds but a servo motor can technically be a standard stepper motor to which an encoder is added...but in fancier systems is more complex in the motor configuration that actually positions the armature rather than steps it from one pole to the next (or half/quarter steps to get into even more weeds). You want torch height adjustment to be automatic. That costs a little more than the cheapie systems. Plasma cutters need a pretty specific gap above the material they cut in order to get the cleanest edge possible--and auto torch height makes sure that can happen. Water table can make a HUGE difference in ability to have such a thing in your shop. Plasma cutting is extremely messy and usually quite smokey. Water table cuts that down by 90%. Most makers really push their own software. Some is good, some not so good. Be sure and test drive the software to see if it works well for you. Mach III (or IV) software is available pretty cheap for these machines and is extremely reliable and easy to use and with a good fan base. Some makers opt for this as their standard just because it is such a reliable standard. In any case, make sure the software fits you like a glove and isn't like wrestling an angry badger to use. Dual vs single motors on the gantry travel (length, not cross travel...Y axis on most machines): There is some debate on the subject but the gantry will generally stay a lot straighter when it either has dual motors (one on each side) or a system that drives both sides via a cross shaft. The cheap tables drive only one side and that allows the gantry to skew across the width..making parts un-square or causing binding (and binding/drag causes lost steps on stepper motors). Support: You want a place that gives excellent support..for instance lots of good training videos and the ability to talk to a real person if you get into trouble spots. One could go on for pages with the minutia of details but the above is kind of the rough highlights. Without violating the TOU with advertising links, I suggest you poke around the site of a CNC plasma table maker in Bend Oregon. Might be a bit above your budget but there is some good info there.
-
I don't know what's available in Italy but in the USA where one can get chinese offerings at cheap prices, it doesn't really pay to make your own unless your needs are quite specialized. My plasma cutter sits on a chinese rolling cart designed more for auto mechanics (has some drawers) and I couldn't have bought the raw material for what the whole cart cost. My TIG sits on a more traditional TIG cart, basically the same deal. Same with the buzz box welder. With discounts, these carts tend to cost $ 75 USD to $ 200 USD depending on the features you want (some are even cheaper). But they do work well--sometimes with minor modifications. Alternatively, one can sometimes find a used platform to transform into a welding cart--check used office furniture stores as well as general used goods stores and eventually things turn up. In the past, schools were tossing the old tall tv/video carts and those made good platforms for welders, just as an example. So yes, you can build a fancy cart--it's nice to have the welders on a proper rolling cart with storage for consumables and cords...but it may be cheaper and easier in the long run to start with an existing platform from either the "cheap chinese tool store" or from used sources. Either just work with what the cart gives you or do minor modifications.
-
Depends on your use. If you were doing quite a bit of fabrication in profiles which would fit the cold saw, I'd keep that without hesitation over the band saw. Many benefits in that situation, especially precision. However, if you are mostly just lopping off hunks for the forge and doing some loose fabrication, I'd keep the bandsaw and sell the cold saw...then use that money to enhance operations somewhere else. Assuming you could only keep one and not both...but I'd keep both if at all possible.
-
So to clarify..someone welded the bottom of the hardy hole closed? Though not a huge issue, crud would probably collect in the hole and that'd be tough to clean out on a heavy anvil. Assuming I'm understanding this correctly, use a wire to see how thick the weld plug is and if it's not too thick, drill it out as much as you can. With a miserable work day, you could then file it out to a more appropriate shape if needed (or at least clean up from the drilling) Unless the surface is soft as butter, there seems no reason I can see to resurface the anvil at all. If it is soft as butter, probably still no reason until you can set up for the full proper method and have absolutely nothing else to do (or buy with the money it'll cost you). Use the darned thing and don't worry about trying to turn it into a perfect anvil. As you find stuff that truly is a big problem, you can tweak it one issue at a time toward where you want it.
-
Big sure feels good to work on but...imagine the anvil you might be able to get and still have a bunch left over to buy some other cool tools for that money. But also remember the "National Bank of Iron". That anvil will always have resale value (assuming it checks out as good) even if anvil prices drop, so you aren't paying 1300-odd dollars, you are simply putting most of that cash into the "bank of iron" for a while. The interest you earn is the ability to use the anvil while your money is in that bank account. It could even turn a profit.
-
$ 400 is no bargain but would sell quickly in my area. The weight is ok but a hair on the light side depending on what you are doing. And no, I don't mean "too" light, just that a few extra pounds can be nice to have for a shop anvil (vs traveling anvil). My take is that you can do better with a lot of patience...but you also won't be doing badly if you grab this one. It's right on that balance point where yes/no is pretty equal. If you find anything that tips the scales when you look, that'd help with a final decision. Don't let anvil buyer's fever talk you into it--be brutal in your assessment because it's not the only anvil in the world and another will eventually come along. At worst, you can find a great piece of scrap steel to tide you over until that happens. And once you buy an anvil, magically another deal comes along-- usually a little better. Murphy's law does that to taunt blacksmiths and keep that surly smirk on their faces.
-
The negative about some extinguishers like CO2 is that they can blow loose fire material if you use them incorrectly. In the kind of panic people tend to be in when using, inexperienced folks tend to point them directly at the fire which is not correct for just that reason. You work your way toward the fire rather than directly spraying right at the center in most cases. Some fire departments have public trainings on extinguishers that can be a handy half hour and worth it. They'll often light a small fire and let people use an extinguisher to get a "feel" for what it does. Yea, I know--it seems obvious--but having done it once on an actual fire does really help. Long ago when I had to take that training for business I was surprised that even after being told pointing right at the fire could basically spread it, many people still did exactly that..and it splashed the oil they were using and spread. It was also surprising how many people closed their eyes and acted terrified the first time they pulled the trigger..like it was going to blow up in their hands. Or sacrifice an old extinguisher of your own just to get the feel. Especially get a notion of just how quickly they run out: Those really small ones often only give you 10 or 15 seconds.
-
Ohio made a good point on the PPE...but one thing you should always add when buying a welder is a good (large enough and properly rated) fire extinguisher that follows the welder around wherever you are using it. Having it nearby and in a place you can grab it quicker than running across the room is no different than wearing a helmet--a requirement. 2 times I've come close to danger. One, I was stupid and didn't pick up some scrap paper from the floor in the area. Lifted my helmet and there was a little camp fire right at my feet, looking for my pant legs. The other was weird--my ex wife loved to throw about 6 dryer sheets in every load. Those leave a flammable coating on fabric when you way over do. I started feeling warm, lifted my helmet, and had blue flame crawling up my clothes. It doesn't burn that hot (more like a barely visible alcohol flame) but with the wrong fabric, I would have been in some deep manure. Anyway...be sure and cost protective measures into your welder purchase. It's basically a one-time expense but well worth it.
-
Watching youtube can give you some good general ideas to *think* about...believing youtube to be a good definitive source is where people get in trouble...sometimes dangerously so. In the areas of forge building, probably about 90% of what's there is just people repeating what others got wrong. If you look in the forums tab of this site under gas forges, you will find "stickies"...some excellent information that was pinned there to be helpful forever. Among those in the section is a lot of peer-reviewed information on how one should properly build a gas forge. Sometimes it takes a while to sort through but if you dive in, it will start making sense.
-
Just for some rough "beginning" numbers...went out and looked at my at my old Canox DC buzz box to give a starting point. Maximum welding (output) amperage is 225. 230 V input, 45.5 amps at max except it specifically says 75 amps when shorted. For general fabrication..though I rarely use this one...I tend to be in the 125 to 140 amp output range. That's typically with 1/4" thick or possibly thicker material. I absolutely HATE doing thinner on this because either I am not "good" enough at welding to keep from blowing holes or the machine isn't (always blame your tools so you can feel vindicated). Lower amps to better handle the thinner stock ends up being a frustration of sticking down electrodes for me as though I have to re-learn every time. It does get a little easier if I am running a lot of bead and can get in a "groove"....I temporarily improve but the gaps between using it are so long that I also unlearn every time. So....though you might be able to do some welding at 20 amps input, it might also be a quite frustrating prospect until you find your groove. You'll be working at such low output amperage that penetration will always be a bit mediocre and rod sticking will probably be a regular thing. However, it might work for the occasional minor and non-critical weld situation--just sticking some stuff together. I'd personally lean toward one of the low end wire feed welders. You throw a bit more money at them but it's really worth it in terms of usability and results, especially for someone who doesn't weld enough to get superior skills drilled in.
-
Probably carbide because those tend to be lower cost tools...but some of that kind of thing also use Stellite inserts. Stellite has variations in the mix so can be better optimized for applications than straight carbides. It tends to be a little less fragile than carbide also so can be better for tools receiving concussive blows. Color is a dark gray but not quite as dark as most carbide.
-
Building on this a little...how laminar does the flow through the openings have to be in a ribbon burner? The O.P. was thinking about a slice of perforated steel---but because I happen to have diamond rock saw blades around anyway, it got me thinking (dangerous, I know) If one were to take a piece of cut-to-size kiln shelf and do a series of groves with a diamond saw on one side roughly 1/4" apart, followed buy a series on the other side perpendicular to the first--deep enough that they just barely cross into each other at the mid point...that leaves one with an effectively perforated piece of high temperature alumina with roughly 3/32" squarish holes on 1/4" centers (depending on blade and spacing). At issue is whether holes like that will create burn problems or not due to turbulence or the grooves on the exit side or whether that might actually be of some benefit. Sorry--just something that crossed my mind which might make a longer lasting burner front plate..or one that can be replaced more easily (make 2 since you are already doing the saw set-ups and likely have extra material to begin with). I estimate total time to be about an hour which is far less as well as far less fiddly than casting. But again, it's tooling I already have anyway. Of course the above is a bit oversimplified because you have to consider sealing it into the mount too...
-
TP beat me to it. You want a tumbling action and too much RPM gets in the way of that--way too much and the stuff basically sticks to the outside via centrifugal force and a bit too much and the media and parts are being thrown rather than truly tumbling--sometimes resulting in damage if parts whack each other in the process. On the other end of the scale, too little rpm and the media/parts slide down the side and you get flat spots but no real cleaning action. A nice rolling "wave" is what you want. The actual speed depends on lots of outside factors including just how full the chamber is but my guess is that you are looking at somewhere between 45 and 60 RPM based on what I see there...and "guess" is the operative word here. That implies your 1/2 horse should normally be plenty once it's geared down. Our tumbler has an octagonal drum about 24" in diameter and runs at about 60 rpm with fine ceramic polishing media. Parts aren't delicate at all so can take a bit of "throwing" and fine media tends to cushion a bit better than coarse. Noise is always a problem..they just aint quite so you might consider some minor ways to help with that--cushioning in the right places for instance. I normally use a large vibratory tumbler in my personal shop and the noise of that makes it downright unpleasant to be around.
-
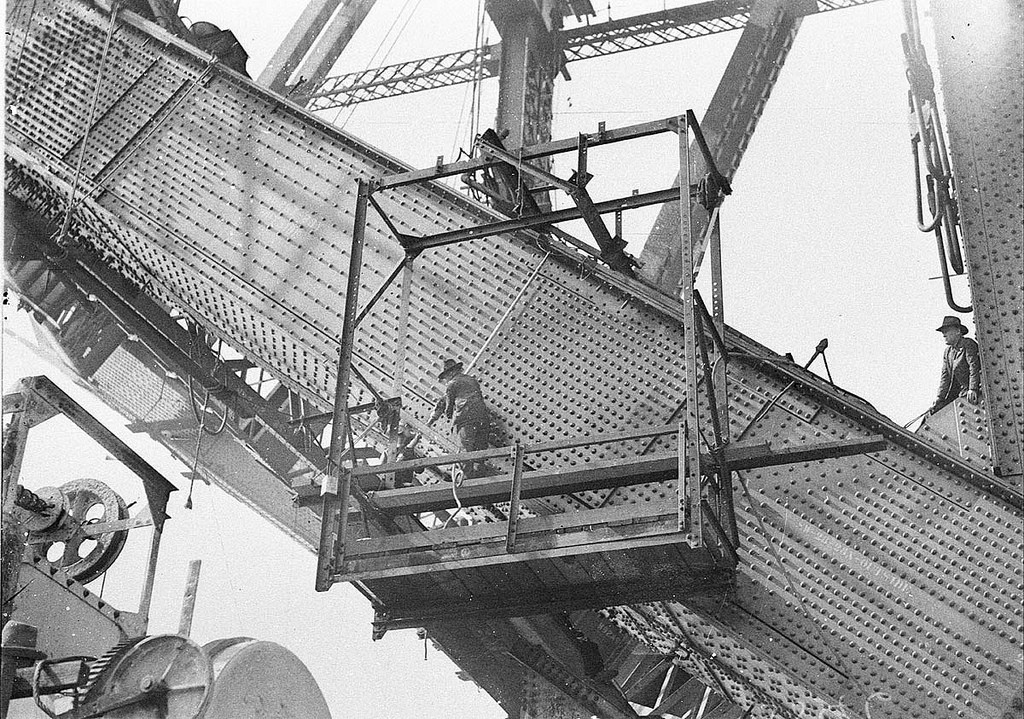
Since bucking bar came up...a little photo just to remind you that your job could be worse...

-
I got myself what seems so far to be one of those near miracle anvils. It was cast in a lot of 12 by a company that normally makes the super hard and tough bits for concrete crushers and such. It's effectively a proprietary stainless steel so doesn't really rust sitting out in the weather, 80+ % rebound (a hair low but not an issue in use), 280 lbs, with all the bells and whistles one might want in a german-ish pattern anvil. I've only slipped once with a 12 pound sledge and hit the face full force...and it didn't leave the slightest mark. And they weren't profitable...so 12 was all they made to the best of my knowledge. If you do a search for Shultz anvil on this site, that thread has a link to a very long thread elsewhere which shows full development of the pattern design and casting with feedback from other smiths as the pattern was developed. Not sure how this one ended up for sale (none of the others seem to) but glad I was able to snatch it when it showed up.