natkova
Members
-
Joined
-
Last visited
Everything posted by natkova
-
Its allewys nice to see fellows bellows being made
-
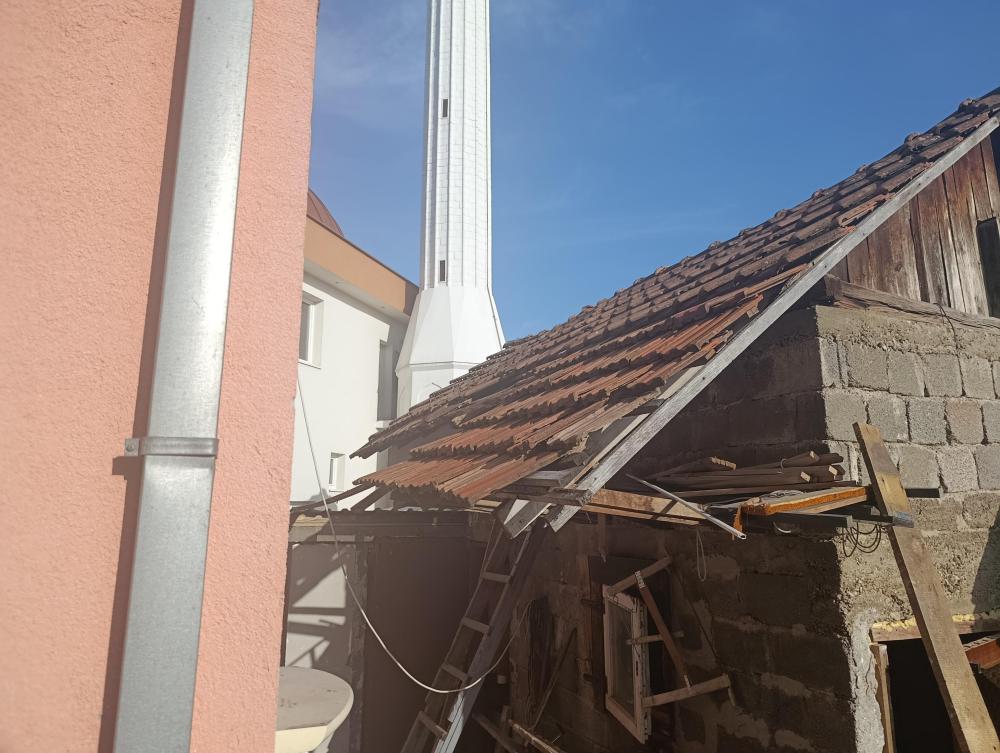
Thanks it was fun project View from top on new roof compared to old one on left
-
It's done , couple of shenenings need to be added but that's detail, like sheet metal on one side.
-
And here it is URL=https://lunapic.com][/URL] And the jig that was used
-
No newer models have it.
-
I don't know about that, but I know that they fasten tile with nails there are holes in them, if angles are higher like 70degrees and that's in windy places
-
They are attached on horizontal boards , I wouldnt call it board cause it's narrow . That narrow pieces of wood hold two sides of tile
-
Well they interlock like this This hook on top of picture are used to hook to wooden part
-
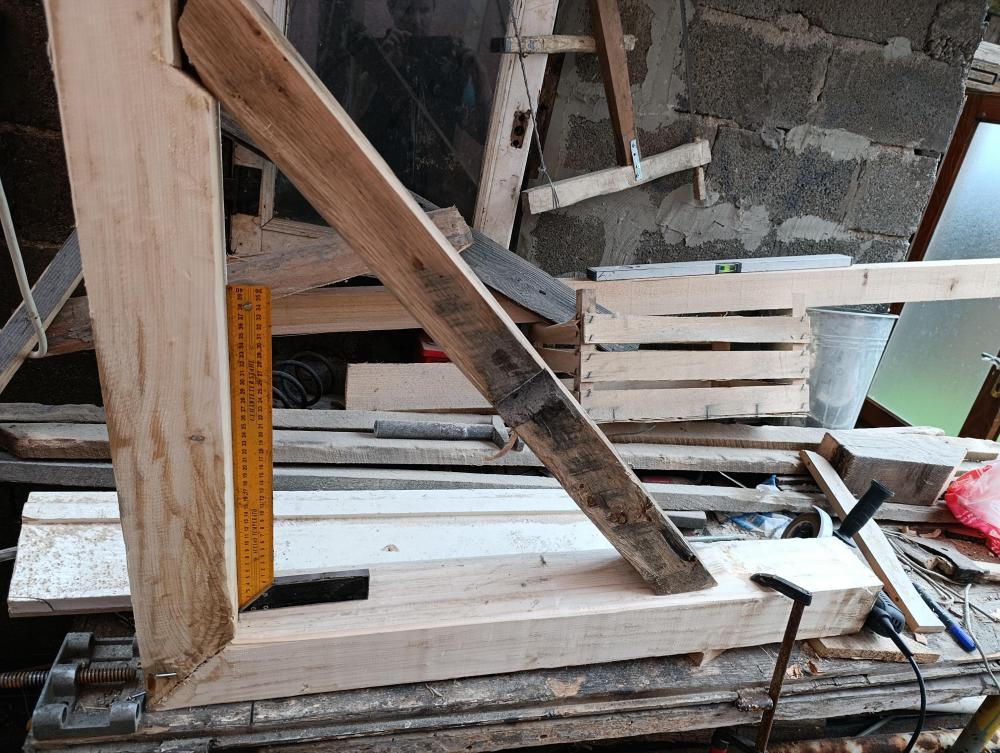
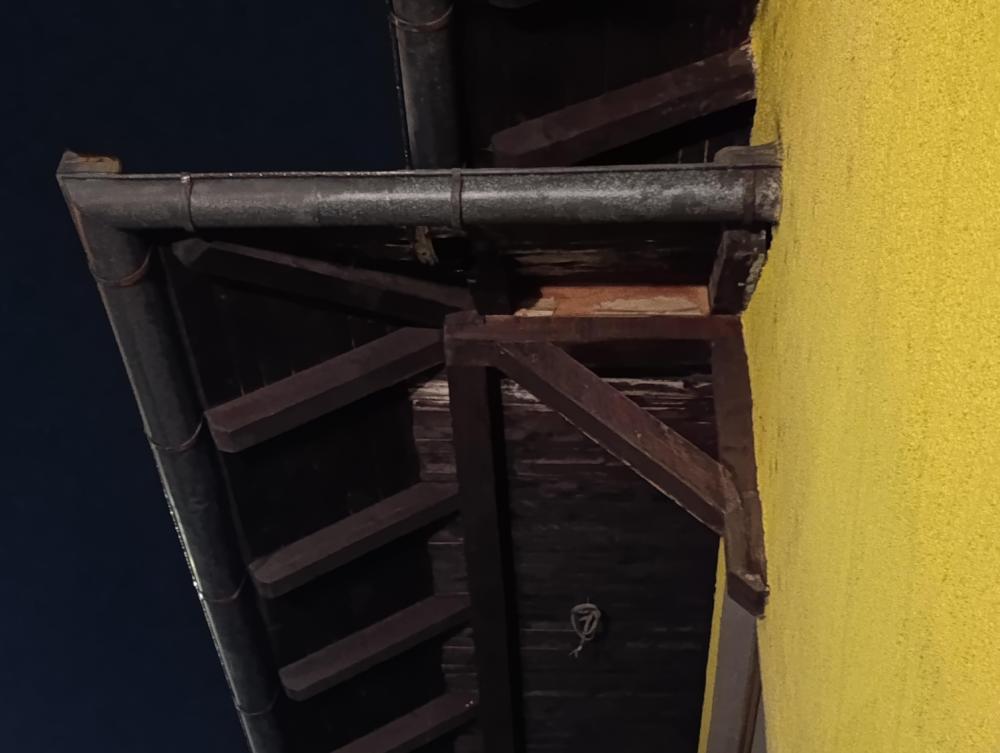
Yes it is , I now need to put roof over it it would be 2 by 3 1/2 beams . I thought to put 4by4 but I won't. Then need to go 2.5 by 3 sticks and ove it goes "roofing material" Wich look like it was build as brick. Classic European roofing style The space Between long stick must be measured according roofing dimensions. To make same distance between roofing material jig from wood is made. We measure from hook of tiles to bottom of tiles . Hooks are not seen in images but they are under plate , and they serve purpose so material hook to long sticks and it hold it.
-
And next what was done today . Citing and choping joint before everything is assembled
-
Adding small detail to bracket Existing washer had to be grind down so it can fit against metal bracket .
-
I like lag screws too cause you can use wrench on them and they have more torque that way Well i could get more fancy and use mortise and tenon but i choose not to, but i will cut notch , i can use some L brackets made or forged out of iron, i can buy one chrome plated and screw them also or nail them it wont be in vain. It will add mroe stability.
-
Oh diditn knew that , well my videos are accesed by links probably that's reason Frosty - I put some links from tik tok too. Well progress today was made, and Frosty i will in future add some more photos from my progress. Rope is tied to workbench Wich is made of steel pipes 2 inches and Wich have lots of materials on it placed and it won't have less weight then bracket. Pulley where is located and beam, one other side I used roofing tiles and it weight more then beam. Then tied pulley with wire to that beam and mounted all together. One side screwed of bracket Other side to go too, I made temporary fastener with strong zipties,just so it can hold and I can work with it better


-
Nailing bracket https://youtube.com/shorts/4B8iPqvNajw?si=jPNj6XihmEMNKHvc Litle bit of sanding And oldfashioned planing oak beam for bracket Wich I found out as scrap piece https://youtube.com/shorts/u4rK9KwEVw0?si=8sCVO_JpNtRj5IDf
-
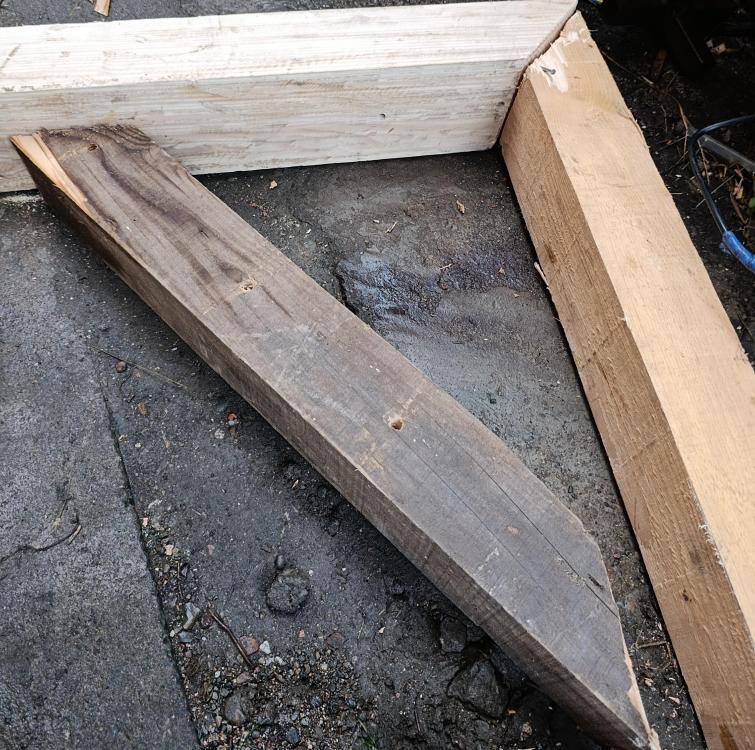
Another one was made today . Had one oak scrap part and used it as disgonal


-
I didn't knew that it was easy to work with timbers , it like Lego pieces Wich fit nice when cut properly. Work done with chisel as you mention it.. and some sanding https://vm.tiktok.com/ZMB7vAxWs/ https://vm.tiktok.com/ZMB7vJuw1/
-
Her is my progres on building awning for my shop. I plan to make it woodworking more efriendly because of rain and I today build one gallows bracket . Plan is to copy this system on other building First screws were used to hold beam at place then down 7 cm nails were used to nailed from side about 2.5 inches. Then I used 4 inches nails to nail this construction together. Cuts were made at angles too . 45 degree and bracket was made using layout from L shape where it went diagonaly. Hold excellent , need to make another one. Timber used for construction is 4x5 . Length is to accomodate my space above door and under roof about 30 inches long beam And I made some decorations on it It will be mounted using those long threaded rods that will go through wall and from other side another wood plank to act as washer and metal washer too


-
Good work its hard to straighetn those coils espceialy in charcoal forge.
-
Şaw this guy too, from him i learned that you can use WD-40 t remove rust from tools, i only used it when i want to unscrew something wich is tight.
-
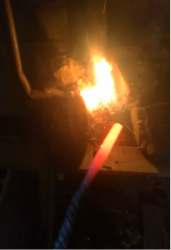
Yes it did inteen even it was 1" surface by 1 " probably welded file . It was small spot but it did welded . I used a stick welder to tack it s bit.
-
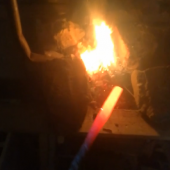
This is my fist successful forge welding .
-
Well I should made it different maybe wider but you are right but it hold nice , here is lots of projects and exercises done. Forging leafs , cold bending rings , then some upsetting at top , then I made rode , my first rose to be forged out
-
Well frossty it's look good enough for me.


-
Tryed to weld old file tong and it went well I think, I used stick welder just to tack some parts, I think it went well Your thoughts ?


-
Upgraded mine "flower holder "