Nobody Special
-
Posts
1,599 -
Joined
-
Last visited
Content Type
Profiles
Forums
Articles
Gallery
Downloads
Events
Everything posted by Nobody Special
-
I think you're right about the "pliers". Wrong shape for the bits. The medieval ones I've seen looked more like the Alexander Weygers illustrations of forged pliers with sort of triangular bits.
-
What did you do Outside the shop today?
Nobody Special replied to TWISTEDWILLOW's topic in Everything Else
I'd take maple over alder any day of the week. Alder is scary to be up in. The big thing is don't fell the whole stick unless you have to and have plenty of room. Just go up it, take the limbs off and then the trunk 18 inches at a time. More time consuming, but you never get that nasty feeling of watching the trunk come down on architecture. I was on a tree crew working ground crew when I first came up here and one of the regular cutters dropped a whole stick that went over onto a house. Learned about splitting frozen wood to bust up pecan; that wood is stubborn until it's sat for two years. Yesterday was wheel bearings in 20-degree weather and today was hauling hay after work in 25 degrees. But hey, with the inner and outer races that's material for eight new blades! -
I used to green sand cast some; that's how I got into forging sideways. Up in Washington though. I would advise that you check the Dave Gingery books for a start. There are a lot of good books out there, but he's not bad for a simple, easy to understand book on beginning green sand casting. Other advice is seek out other casters - if you can't find them in the forging community, try college art programs. Casting has a steep learning curve and many chances to obtain interesting new scars and respiratory ailments. Good equipment and ventilation is a must - especially crucibles and PPE. Stay away from zinc until you're more experienced. Fume fever sucks. I'm gradually setting up my forging area now and have been procrastinating on setting up a casting table while waiting for nicer weather. My wife wants me to teach her.
-
Jeez, next you'll be telling him about the flames freezing and putting them in the deep freeze for later. Beats heck out of matches but gets a bit messy when the power goes out...
-
Y'all got me excited for a minute, then I started looking at the NWBA meetings; they all look to be about four hours or more south of me. I wouldn't mind getting a group going up here on the north end of Washington, but I'm not set up well to host. I haven't welded on wood, but it's lovely for use with a wood mallet or rawhide mallet to straighten twisted pieces that you don't want to mar. I used to keep a sawhorse made with a chunk of railroad tie handy as an impromptu anvil for just such a purpose. Smokes a bunch but works great. As to quenching in water - I'd borrow from Thomas Powers and make a test coupon, then use whatever it quenches best in. Some do well in water, some oil, some brine, and some steels don't even get hardened from bad language and mean looks.
-
Colonial Anvil and Stump, info
Nobody Special replied to ZzzDerekzzZ's topic in Anvil Reviews by brand
Good evening, From what I recall, the step on the horn was one of the big things differentiating the London pattern anvil from the English pattern or colonial anvils (colonials tended to have smaller horns and for awhile often had the fifth step or leg on one side in the middle. Ones with stepped horns go back to between 1780 and 1800, I think...it's been a minute. Pritchel holes really started being a thing 1820-ish, and more prevalent from 1830 or so on. This puts yours at a fairly narrow probable time range, probably between say 1780 and 1820. Later anvils not only had the pritchel but also got longer and thinner. I have a William Foster Anvil that looks almost identical from 1816, except in mine the heel is broken at an old forge weld, which is common for the brand, especially due to its age. Wiliam Fosters were at that point the third most common import, and yours has the look, but many brands existed at the time that looked similar, especially the wide sweet spot (the spot over the main body). I'm not sure why they got away from the wider faces; it makes mine my favorite anvil, to work on broke heel and all. You may be able to find faint markings by tilting it slightly sideways and rubbing the side with flour, corn starch, powdered chalk, or my favorite, baby powder. It really, really brings them into relief and even partial words, numbers, and markings can help identify a maker. As a tool, with the face damage I wouldn't go very high in Massachussetts, maybe three bucks a lb unless you find someone that is sentimental over the age. As an antique? Depends on what you can get some poor fool to part with. The sky is the limit if you have the gift. -
ID for Blacksmith Vise marked MANN & CAMPBEL SHEFFIELD WARRANTED
Nobody Special replied to EdwardC's topic in Vises
I don't know the brand, but my Google-fu is strong. There was a forge in the Sheffield area called Moss & Gamble Bros Limited, Special Steels and Tools, Franklin Works, Wadsley Bridge, Sheffield, which had the distinction of having the largest steam hammer in the area at one point, in Wadsley Bridge, a suburb of Sheffield. Here's a link to their industrial works, which has since been converted to apartments. [10479] Wadsley Bridge : Moss & Gamble's | Fox Hill Road, Wa… | Flickr Not sure the exact period, but I found other blacksmith tools with their stamp. There's also a post about one of their anvils here, -
I'm in the two-shop for the HHC of the 56th TIOG. A super-secret squirrel type but it sounds vastly cooler than it is. They don't let me do real work anymore, these days I mostly just show up and try to herd the cats.
-
Depends on the unit. There's some all over the place, but I'm at Lewis when I go.
-
I'm in the Washington Army National Guard. 9 yrs big Army, 24 years overall, about 15 full-time.
-
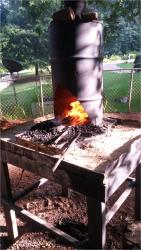
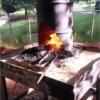
Got tired of my modified bottom blast 55-gallon drum forge with charcoal...it works, but it could do better. Started, and mostly finished a JABOD in about an hour and a half. Didn't have any 3/4" pipe laying around, so I'll clay it when I get back from drill next week. Similar to the original JABOD, two-foot box out of 1x8", side-blast with the tuyere about half-way up. Planning to make a tapered trench about four inches wide and seven to eight inches long, with the bottom at the deepest maybe five inches to start (with only 7.5" to the bottom, I don't want to overheat it and catch it on fire!). I had a similar forge in Georgia, but a bottom blast, sort of a duck's nest over a brake rotor, and hood from a small cut down oil drum. Worked well with coal.

-
What did you do in the shop today?
Nobody Special replied to Mark Ling's topic in Blacksmithing, General Discussion
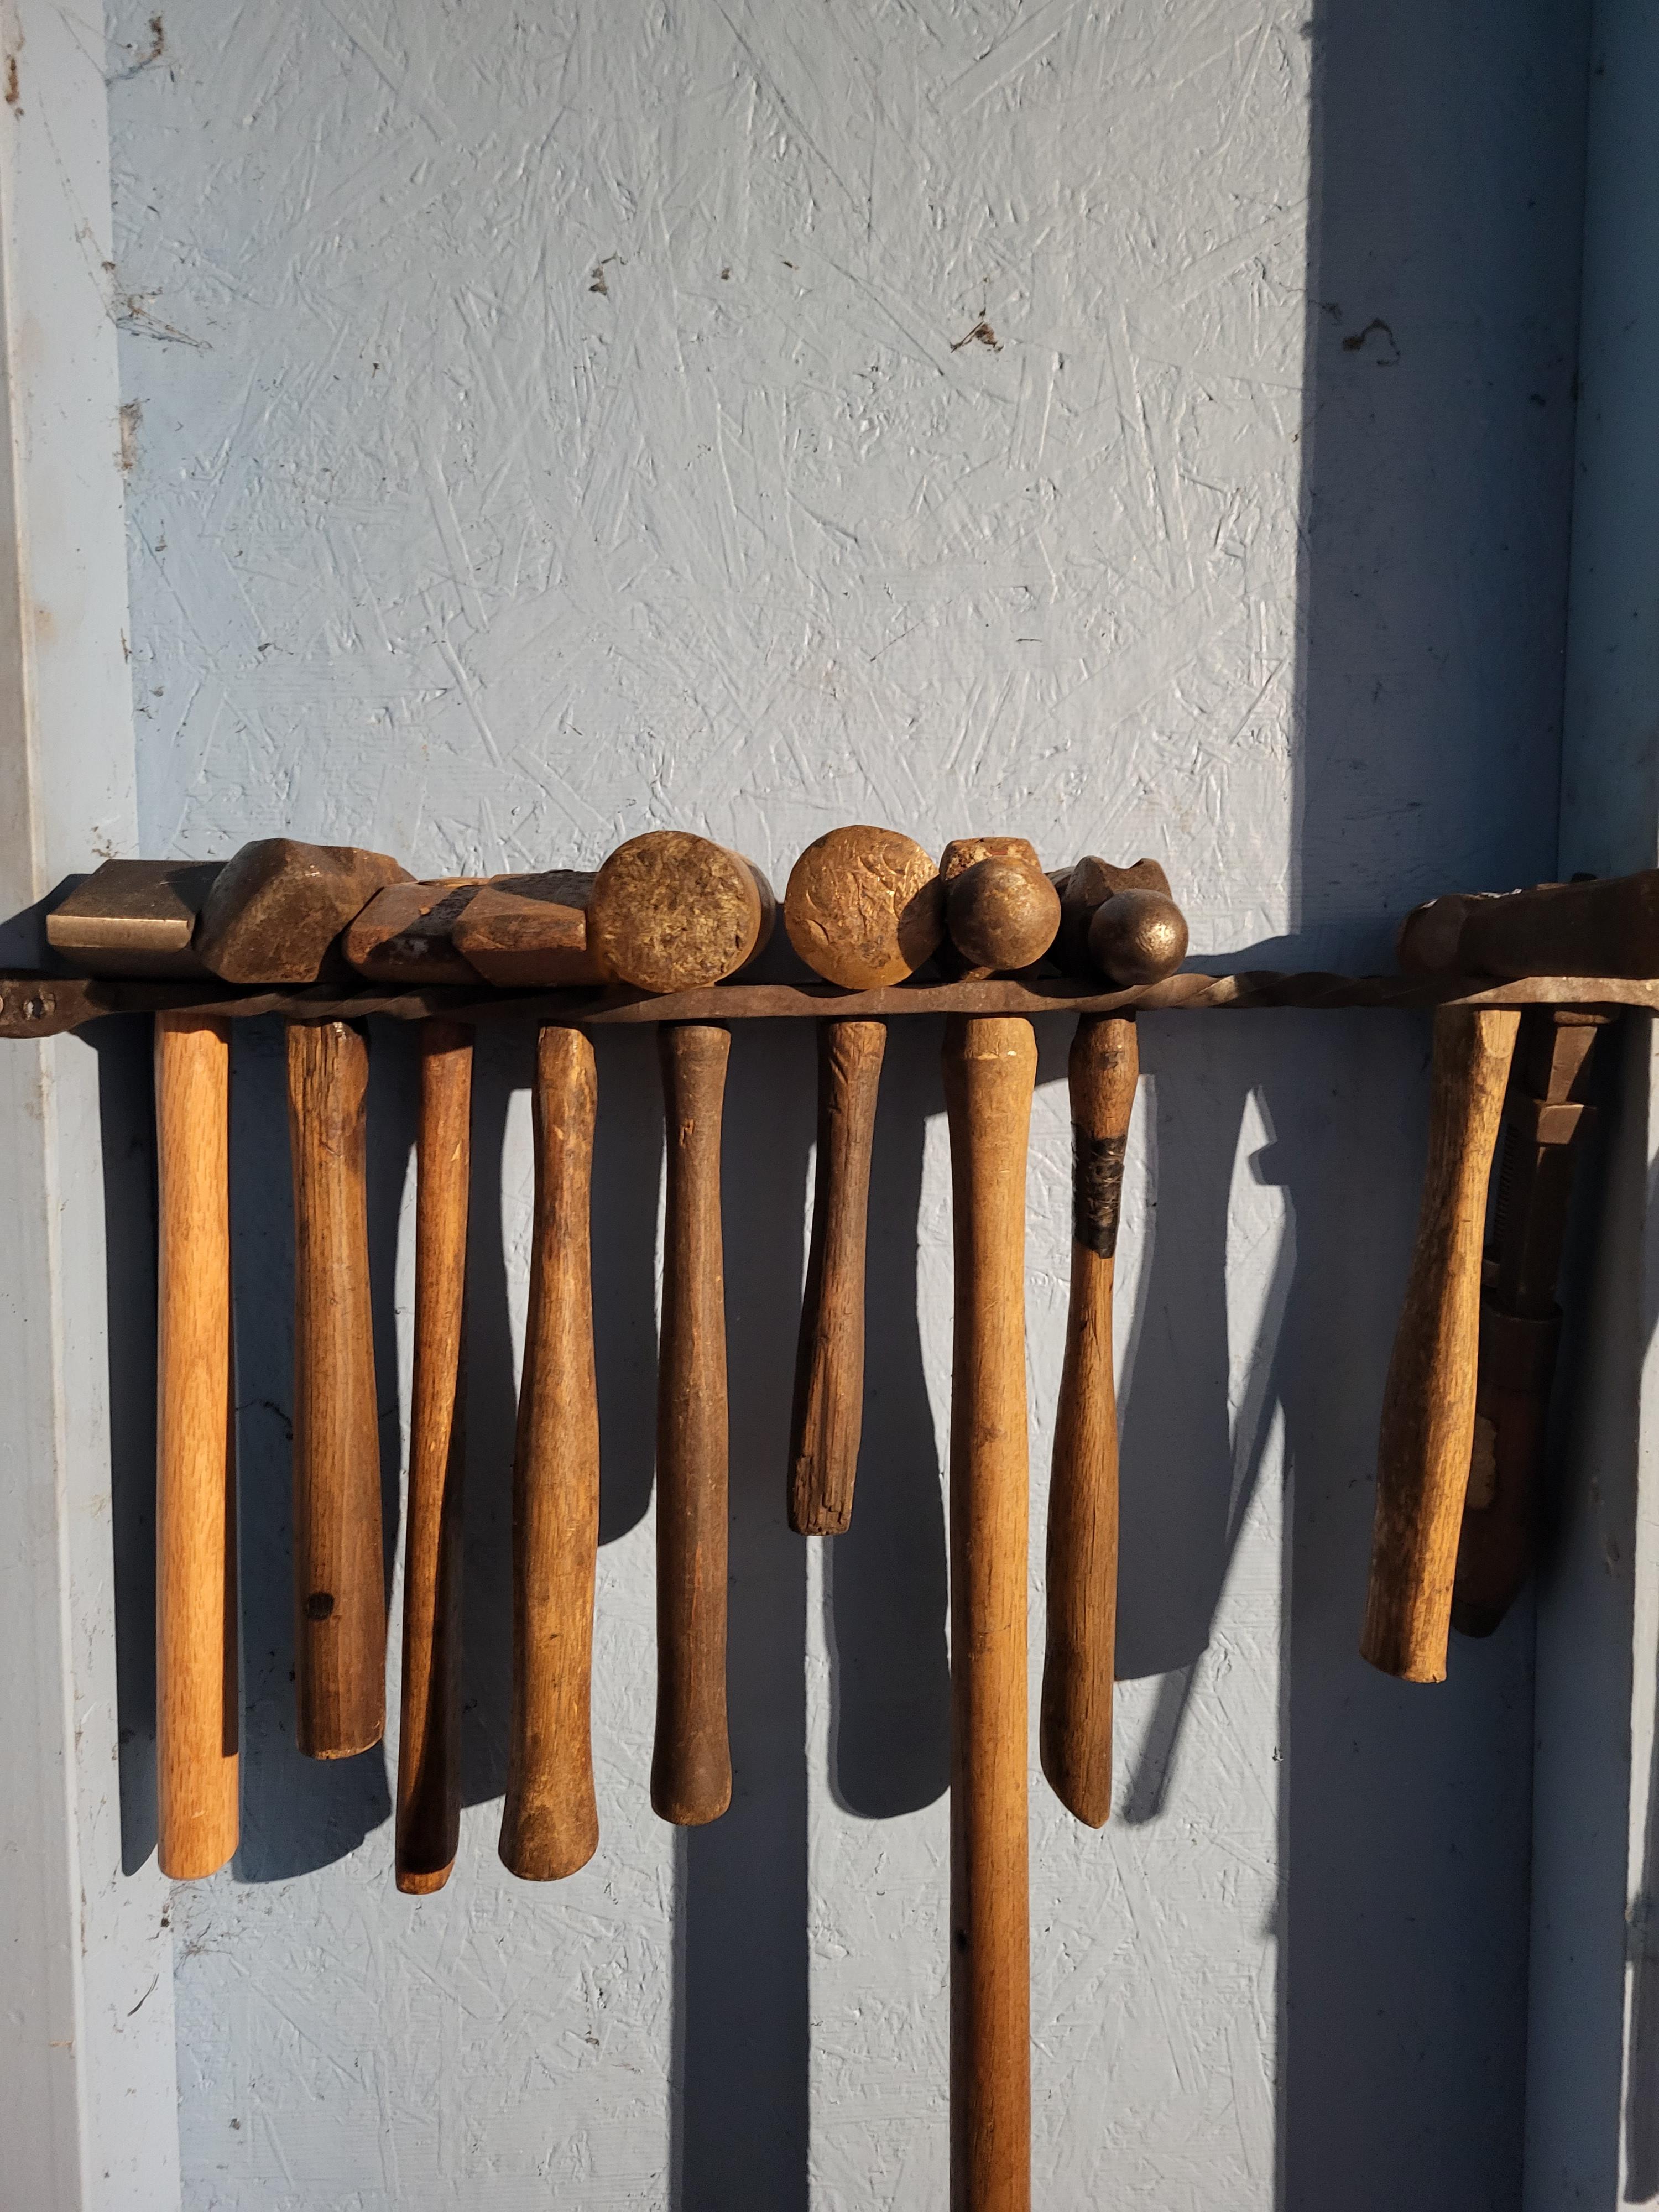
Ain't much, but made a few bars to serve as tong and hammer racks. Tabs on the end, punch and simple twists for aesthetic pleasure...and also because that square stock got a good brine soak when the ocean came to see us last January.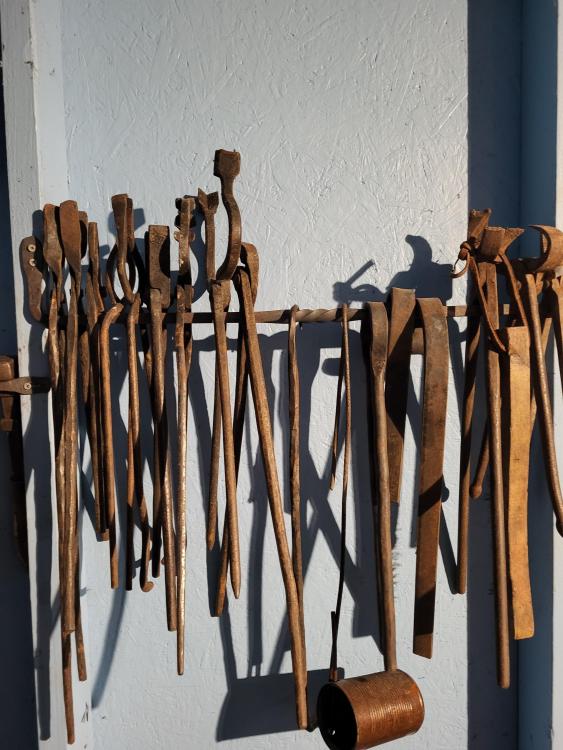

-
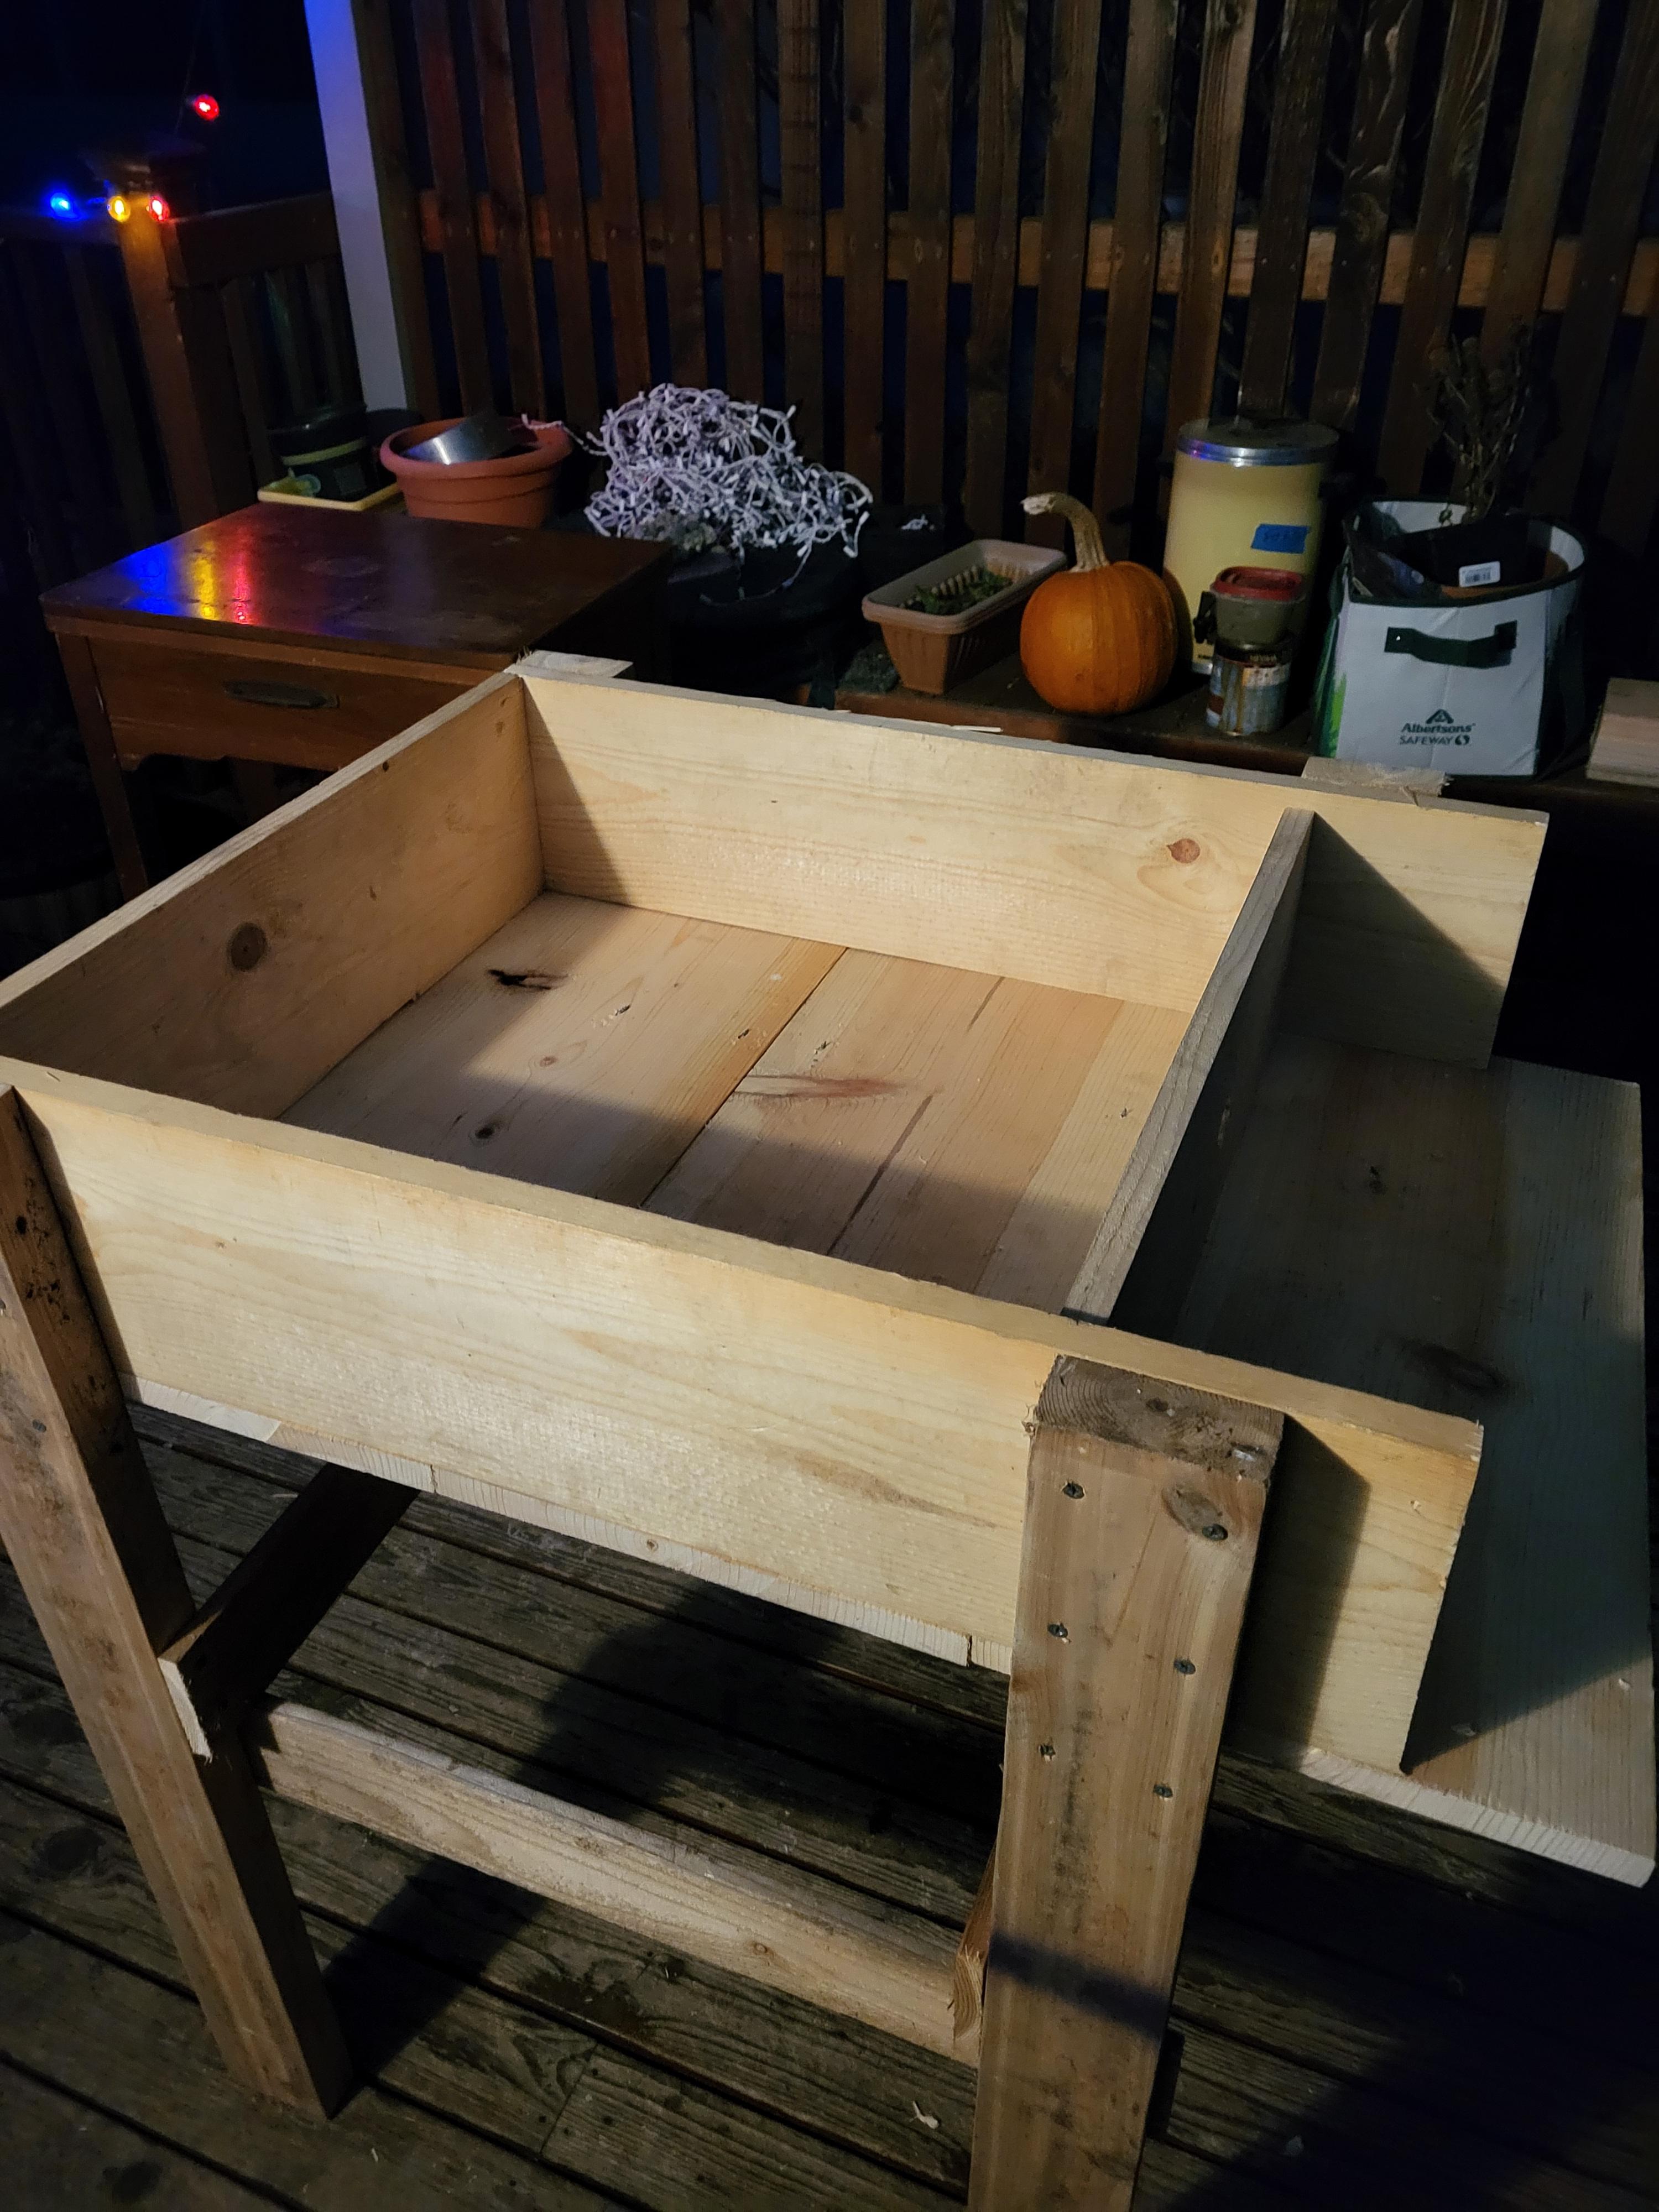
Made this today. Surprisingly rock solid for wood. Reinforced with forged brackets at the bottom.
-
Show me your blacksmith pets
Nobody Special replied to Glenn's topic in Blacksmithing, General Discussion
To be fair, I don't mummify any part of my cats with sulfuric acid and display the corpses after they're dead, so it was already kind of a low-risk situation. -
Show me your blacksmith pets
Nobody Special replied to Glenn's topic in Blacksmithing, General Discussion
Whiskey (red nose), Moonshine (black and white), John Stuart Mill (grey tabby), and Aristotle (orange tabby). I wanted to name Aristotle Jeremy Bentham, but my wife said I couldn't have two utilitarians in the house at the same time. Joke's on her, JSM is a perfectly catty cat, and mostly only maximizes his own personal happiness.


-
Welcome! We've already been talking a bit in the section on scrolling wrenches, but I've been gone a long while until recently, so I don't always know who's new. Love the look of your dog. Yours too, Frosty. I've got two pits, Moonshine (black and white) and Whiskey (red nose) In our house, dogs are alcoholic beverages, cats are philosophers (Aristotle (orange tabby) and John Stuart Mill (grey tabby)). We don't name the bees.
-
How would you forge this double scroll wench?
Nobody Special replied to Jo_Bai's topic in Tools, general discussion
I like Frosty's way, probably better than what I came up with, but it would be fun to try both. Ask three blacksmiths for the solution to a problem, get eight different answers. Here's the truly abysmal promised drawing of the steps I would take.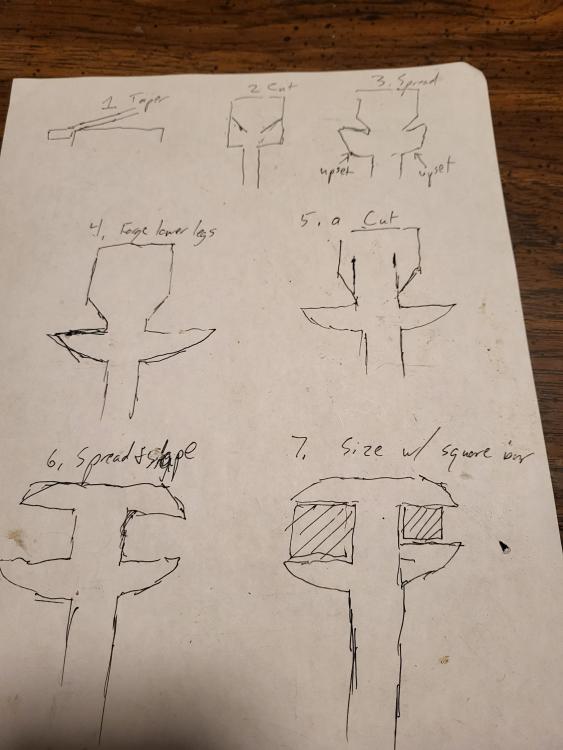
-
How would you forge this double scroll wench?
Nobody Special replied to Jo_Bai's topic in Tools, general discussion
Thought of another way this morning, probably even simpler. May need a wider bar. Start as before, up to the part where the lower legs are formed, except make it more towards the end of the bar. Instead of splitting the end of the bar and folding, make two more cuts upward, parallell to the main bar, starting on the near side of the angled cuts you used to form the lower legs. This should mean you've cut away two legs of a triangle with one "leg" still a part of the main bar. That's your upper fork. Then fold up the leg, clean out the spans between forks and size. I'm out getting tires, I'll see if I can draw it when I get home. If you're bending in the vise, and it clamps evenly side to side (not all do) you can also use two pieces of round stock spaced a little, although it's not as sturdy and doesn't do well on heavy stock. I'm also prone to cheating on scrolling jigs by using a Ford wrench, if it will fit. I've used them on everything from twists to water pumps, to toilet tank nuts, recently. I don't know why nobody sells them anymore. -
How would you forge this double scroll wench?
Nobody Special replied to Jo_Bai's topic in Tools, general discussion
I've only made single sided ones, but I would think there would be a couple of ways to go about it for a double. If you upset the leg, as above, you would have to do it with struck tools instead of on the anvil, or as noted, you would collapse the other legs. It might be easier to do it by working with thicker stock than you end up with and cutting. Take a narrow bar and use half-face blows to taper the handle end, below where the lower parts of the jaws should be. A few inches from the far end, make two cuts in a V shape, with the bottom of the V towards you. You'd want to leave maybe half the thickness of the bar. Bend the two cut pieces out, as if you were making out decorative elements on a strap hinge, but instead, use fullering and upsetting to form the two lower legs. Then in the remaining thick section at the end of the bar, split it down the middle for a little ways and then fold those two halves over into a T shape, and use the horn to shape the two upper legs. Use the horn to fuller the space in between the legs to a roughly even shape on each side. Then space it to the desired width on each side using a bit of square bar. I may try this tomorrow, it sounds like a fun project. -
What did you do in the shop today?
Nobody Special replied to Mark Ling's topic in Blacksmithing, General Discussion
Swarf catcher? Like not all over the motor and the floor? That's genius! And it looks good too. I went to go start my kid forging some points and leaves, and realized I still needed a proper post vise stand, which meant I started measuring the post vises and realized they needed some TLC...which lead to degreasing and cleaning the rust on one and realizing the other needed a screw replacement...which led to hunting around home depotism for something to weld in as a replacement acme screw and nut (I'm thinking house screw jack)...and heck, while I'm at it, let's do some rust proofing. Paint dries faster than linseed oil, and comes in prettier colors, so long story short...here's today's leaves.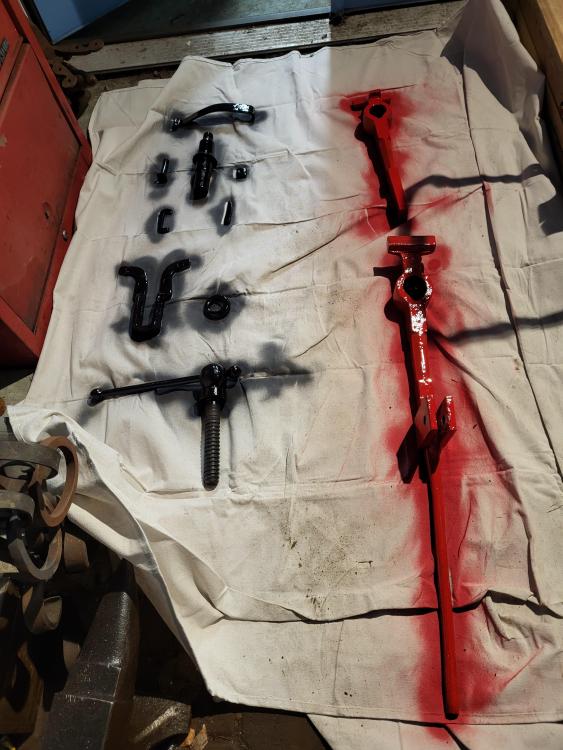
-
What did you do in the shop today?
Nobody Special replied to Mark Ling's topic in Blacksmithing, General Discussion
About 3.75 lbs with the handle (1.75 kg). Got a cheap 4 lb sledge at a yard sale and ground a diagonal peen into it years ago. When I forged every day, it was my go-to hammer. Since I'm just getting back into forging, most of the time I use about a two-lb hammer (.9 kg) so I don't end up with tendonitis. I have a ridiculous Mjolnir looking thing I made as a joke too. Something like a 16 lb square sledge that I found on a farm and they gave to me. They used to use it to drive wooden fence posts. I liked to have it out at demos so kids could try and pick it up, but I've only ever used it when I was seriously mad at a piece. For my shop, when they installed my house, some yahoo put a carport over the septic tank, with a brick floor. Only an idiot would put that kind of weight over the septic tank and drain field pipes, but it works nicely for light storage and working on projects outside, so that's where I do my forging. The light you see is electric - it gets dark here around 4 pm right now. -
Noise cancellation?
Nobody Special replied to SubterraneanFireForge's topic in Building, Designing a Shop
I can't help you much with the forge, but someone on here will know. For the anvils, the usual solutions are wrap chains around the middle, put magnets under the heel and horn, and a silicone mat underneath. Having the anvil firmly attached to the base also makes a huge difference. There's a big difference between ain't gonna fall off, and not a bit of wiggle or vibration when it comes to "securely attached". One noise reducer that I've seen work well but looks hideous is gobs of silicone caulk under the heel and horn, but it's not exactly common and it looks weird. You could also look for something like a Fisher Norris anvil, which had a cast iron base and a steel top - very, very quiet. For the spike anvil, I would imagine having the base sunk in all the way to the top of the spike would quiet it down but make it difficult to remove. Dunno, I haven't used them much. -
What did you do in the shop today?
Nobody Special replied to Mark Ling's topic in Blacksmithing, General Discussion
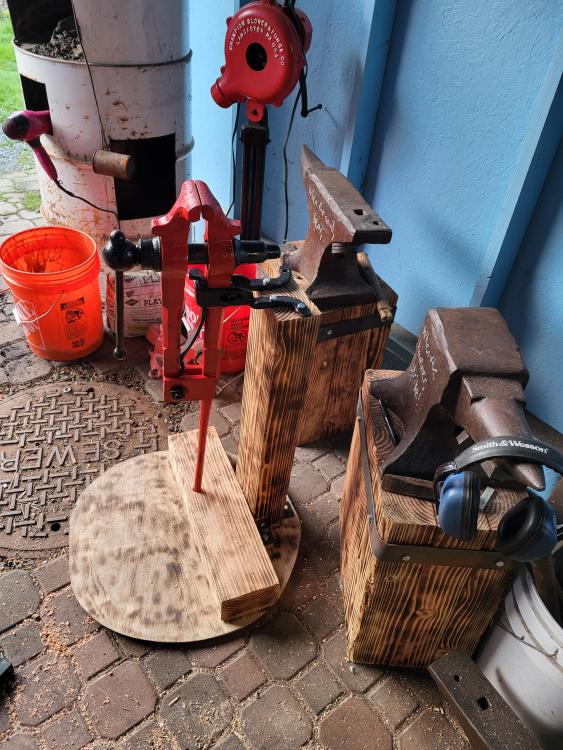
Used to be in the Alex Bealer group in Atlanta; Mark Hopper at the Goat N Hammer was in the group and forged either a D12 or D20 (that one I think) for a demo. Fun to watch, but I didn't feel up to it. If you wanted to do lost wax castings, they make silicone D12 and D20 molds for plastic that would work well for making lots of wax forms. There's also the lost foam method, which has the advantage of not requiring removal of the master from the green sand mold. Forged a little with the kid today, nothing special - banded the second anvil stand with my kid and then just practiced tapers and points for a bit. Tomorrow, I think we'll make a stand for one of the post-vises and maybe a stand for tongs and tools.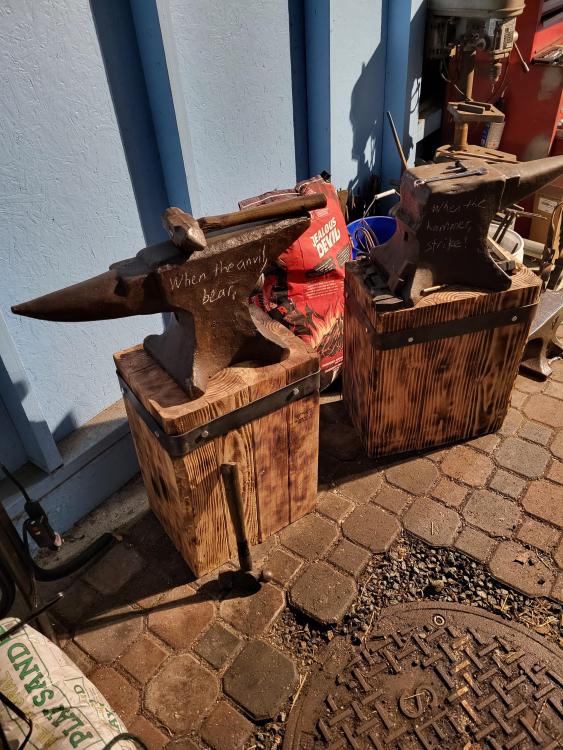
-
What did you do Outside the shop today?
Nobody Special replied to TWISTEDWILLOW's topic in Everything Else
Ran around a bunch today, got feed for the horses, started meats for the Christmas tamales, and got the stuff for the sauces and masa. I'm too dang old to deal with doing it all in one setting anymore, so I generally spread it out over a few days - one for meats, one for sauces, one for masa, and then lawdy-dawdy everybody gets together for the tamalada (i.e. a party rolling tamales) after which you steam them. Drinking optional but encouraged at any point in the process. Smelling the pork shoulder cooking for 8-10 hours without eating it kills me. -
Copper and brass hammers are nice for struck tools, as they are softer than the drift/punch/whatever, so they tend not to deform them as much. Unfortunately, they get pretty dinged up and mushroomed in turn. I've also used them to straighten twisted pieces, especially hitting them onto wood, but that doesn't work as well as a wooden or rawhide mallet.