Nobody Special
-
Posts
1,580 -
Joined
-
Last visited
Content Type
Profiles
Forums
Articles
Gallery
Downloads
Events
Everything posted by Nobody Special
-
What did you do in the shop today?
Nobody Special replied to Mark Ling's topic in Blacksmithing, General Discussion
Swarf catcher? Like not all over the motor and the floor? That's genius! And it looks good too. I went to go start my kid forging some points and leaves, and realized I still needed a proper post vise stand, which meant I started measuring the post vises and realized they needed some TLC...which lead to degreasing and cleaning the rust on one and realizing the other needed a screw replacement...which led to hunting around home depotism for something to weld in as a replacement acme screw and nut (I'm thinking house screw jack)...and heck, while I'm at it, let's do some rust proofing. Paint dries faster than linseed oil, and comes in prettier colors, so long story short...here's today's leaves.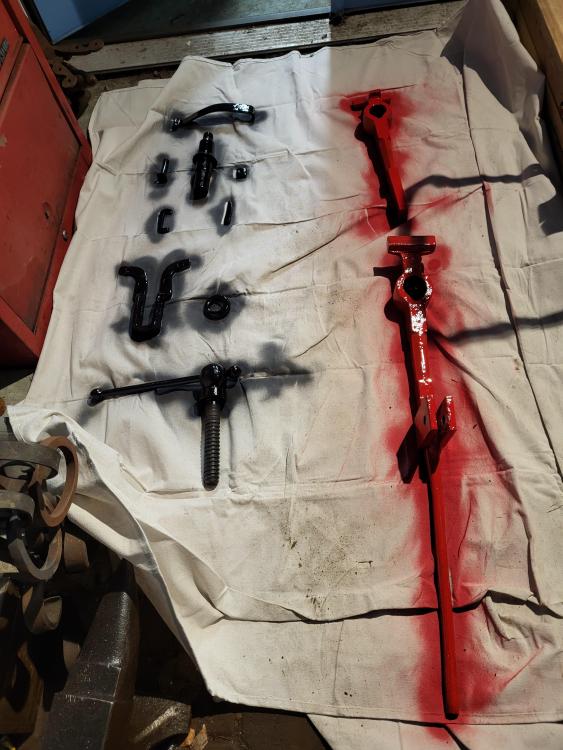
-
What did you do in the shop today?
Nobody Special replied to Mark Ling's topic in Blacksmithing, General Discussion
About 3.75 lbs with the handle (1.75 kg). Got a cheap 4 lb sledge at a yard sale and ground a diagonal peen into it years ago. When I forged every day, it was my go-to hammer. Since I'm just getting back into forging, most of the time I use about a two-lb hammer (.9 kg) so I don't end up with tendonitis. I have a ridiculous Mjolnir looking thing I made as a joke too. Something like a 16 lb square sledge that I found on a farm and they gave to me. They used to use it to drive wooden fence posts. I liked to have it out at demos so kids could try and pick it up, but I've only ever used it when I was seriously mad at a piece. For my shop, when they installed my house, some yahoo put a carport over the septic tank, with a brick floor. Only an idiot would put that kind of weight over the septic tank and drain field pipes, but it works nicely for light storage and working on projects outside, so that's where I do my forging. The light you see is electric - it gets dark here around 4 pm right now. -
Noise cancellation?
Nobody Special replied to SubterraneanFireForge's topic in Building, Designing a Shop
I can't help you much with the forge, but someone on here will know. For the anvils, the usual solutions are wrap chains around the middle, put magnets under the heel and horn, and a silicone mat underneath. Having the anvil firmly attached to the base also makes a huge difference. There's a big difference between ain't gonna fall off, and not a bit of wiggle or vibration when it comes to "securely attached". One noise reducer that I've seen work well but looks hideous is gobs of silicone caulk under the heel and horn, but it's not exactly common and it looks weird. You could also look for something like a Fisher Norris anvil, which had a cast iron base and a steel top - very, very quiet. For the spike anvil, I would imagine having the base sunk in all the way to the top of the spike would quiet it down but make it difficult to remove. Dunno, I haven't used them much. -
What did you do in the shop today?
Nobody Special replied to Mark Ling's topic in Blacksmithing, General Discussion
Used to be in the Alex Bealer group in Atlanta; Mark Hopper at the Goat N Hammer was in the group and forged either a D12 or D20 (that one I think) for a demo. Fun to watch, but I didn't feel up to it. If you wanted to do lost wax castings, they make silicone D12 and D20 molds for plastic that would work well for making lots of wax forms. There's also the lost foam method, which has the advantage of not requiring removal of the master from the green sand mold. Forged a little with the kid today, nothing special - banded the second anvil stand with my kid and then just practiced tapers and points for a bit. Tomorrow, I think we'll make a stand for one of the post-vises and maybe a stand for tongs and tools.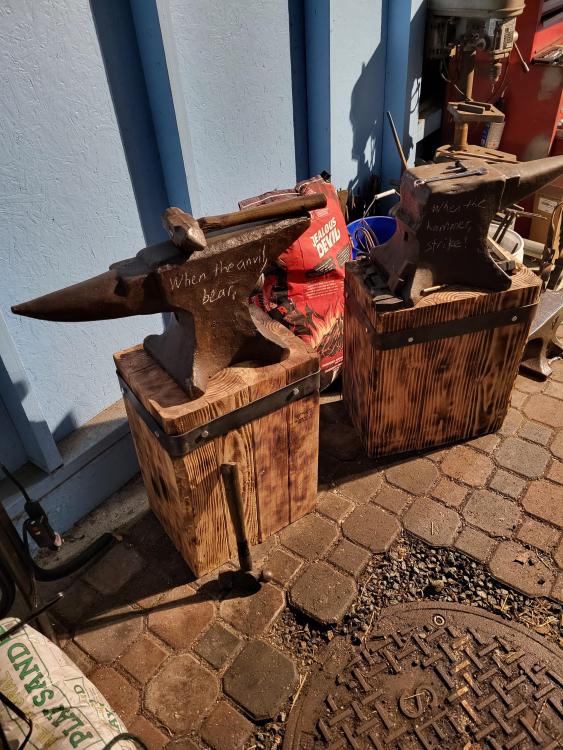
-
What did you do Outside the shop today?
Nobody Special replied to TWISTEDWILLOW's topic in Everything Else
Ran around a bunch today, got feed for the horses, started meats for the Christmas tamales, and got the stuff for the sauces and masa. I'm too dang old to deal with doing it all in one setting anymore, so I generally spread it out over a few days - one for meats, one for sauces, one for masa, and then lawdy-dawdy everybody gets together for the tamalada (i.e. a party rolling tamales) after which you steam them. Drinking optional but encouraged at any point in the process. Smelling the pork shoulder cooking for 8-10 hours without eating it kills me. -
Copper and brass hammers are nice for struck tools, as they are softer than the drift/punch/whatever, so they tend not to deform them as much. Unfortunately, they get pretty dinged up and mushroomed in turn. I've also used them to straighten twisted pieces, especially hitting them onto wood, but that doesn't work as well as a wooden or rawhide mallet.
-
May 4, 2016, Forge Explosion! by rwolfe, see below. It was after banking with green coal, which would create a bit more coal gas. I had a couple of little ones before, nothing like the violent ones they described. The one that's really gotten me a couple of times was water on the anvil popping off iron scale. It's fun...when you do it on purpose.
-
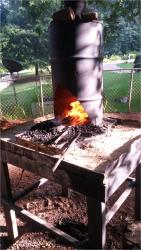
It's a good start. If you've got wood, it's not terribly hard to make lump charcoal if you have a 55 gallon drum and a place you can make fire without the neighbors freaking out. You may also find that you prefer a brake disc, or if you are going to eventually be using charcoal (coal being a bit tricky in California), the JABOD forge (just a box of dirt). Welcome, and best of luck.
-
You don't have to have an especially smokey or dusty forge, although a lot of us do. The simple matter is that as much as I love smoke, it's bad for you. It has carcinogens, if coal, then heavy metals, and above all, particulate matter. There are some rather nasty studies that show about an additional 70,000 deaths a year in the country from respiratory issues associated with coal fired plants (and no, I do NOT want to get into that political argument. I used to run 22,000 ton coal trains into the largest plant in the country), or you can look at events like the great London Fog/Smog of 1952 caused by coal, that they now think killed around 11,000 people or higher (the original estimate was much, much lower because it didn't account for deaths directly and immediately attributed to the event). And then there's always our good friends carbon monoxide, zinc fume fever, and grinding particulates. I read a great microhistory of coal that talked about massively increased rates of cancer in South China associated with the practice there of roasting chile peppers over coal. But on the other hand, you live in a world full of similar hazards without thinking twice about it. PFAS and organophosphates in your water, particulates in the air from power plants and your car, glycophosphates in your flour and bread. You don't fill up your gas tank or sit around a campfire drinking a beer (also a pretty decent carcinogen) and worry about what it's doing to you because you have beer breath afterwards. In the office, printer toner is especially nasty. For extra fun, read up on the pollutants from gas stoves (and I would still take one over electric any day of the week and twice on Sunday). I agree with the above - use good ventilation and clean your shop routinely and you'll be fine. Avoid breathing particulates from grinding and excess smoke. Wear a bloody mask especially if you ever grind bone (and that is a whole different discussion). I assume you are using decent venting from your hood, and some people use exhaust fans, although when I had one indoors, mine drafted decently enough that I didn't bother. I did often open the side doors though. The joy that metal working brings me is far beyond the tiny amount of risk that it entails.
-
Pretty Columbian, Timberframer. I enjoy the heck out of my little 75 lb'er. Not sure about the original paint; I've seen painted anvils before, but I'm not sure that many came painted. II have no issue with paint on one, you do you, unless I'm buying one, in which case I tend to be suspicious of hidden flaws. Tends not to last well though if you like to use the various parts of the anvil besides the face though.
-
You know, I have been running into leg vises for years that have had the bottom part of the leg sheared off, often because they were fixed into something like cement and it was easier to cut off than remove it whole for whoever scavenged it. Thomas Powers even sent me a piece of wrought to weld on and repair one once. It never occurred to me in all that time to simply put a couple of holes in the leg and bolt it to a post. Yeesh. While I appreciate the rather obvious idea, now I feel like an idiot.
-
Erm the understanding, or eww the quenchant? The knuckles are of course the part of the coupler on a train car that folds over and holds it closed, and it's also the part that's designed to break under stress, so it doesn't tear up the railcar itself when it comes apart (I know you know that Frosty, speaking for the non-cognescenti). Trainmasters (conductor's boss) and road foremen (engineer's boss) tend to investigate while the poor conductor is lugging the 80 lb replacement knuckle into place, and their investigation is heavily based on how much shiny metal is in the break, on the basis that if there's a lot of rust, the cracks happened earlier and the train crew isn't to blame. They almost always want to blame it on the crew that the break happened to, which then gets a one to three month suspension, so it's in the conductor's best interest to make sure there's plenty of rust on it by providing "recycled" moisture and making the knuckle as difficult to recover as possible. Into the back of an open hopper was my favorite. That aside, they make wonderful anvils or swages, if difficult to get.
-
I kinda like the knuckle from a train coupler myself, if you can get one. Great as an anvil and lots of fun swage shapes all over it. They're a bit hard to find in one piece though. As a former conductor, I beg all would be scrap monkeys to stay off the rails; it's incredibly dangerous and there are better places to get scrap steel without giving your friendly neighborhood railworker a heart attack. If you do find a broken one though, rinse it down and wash your hands; when one broke we used to use erm, as close to Theophilus's favorite quenchant as was available to create flash rust so the trainmasters wouldn't blame the break on us, then throw the knuckle as far into the woods as it would go so they wouldn't want to try and recover it. Road foremen and trainmasters are mean.
-
What did you do in the shop today?
Nobody Special replied to Mark Ling's topic in Blacksmithing, General Discussion
Hola, White Fox. Sounds like a fun day either way. Heck, you've probably made more hammers than me, and my apologies if you are more experienced, but if your hammer has been splitting from punching, I would consider the usual slit and drift for regular steel and working the hammer with the drift still in the eye. With wrought's tendency to split though, you might find it useful to drill small holes at the ends of where you want your slit to be to stop it from splitting when slit. If it is a very rough grain, it is even more likely to split and may need to be cleaned up a bit. You're right that wrought welds pretty hot and might get close to burning the steel. Bealer describes a couple of ways to weld a steel face onto an iron bar for a hammer in Chapter Six of The Art of Blacksmithing. If you're having trouble and the steel isn't burnt, you might try the trick he describes of cutting teeth into the corners of four sides of the steel, perpendicular to the face, then driving the teeth cold into the face of the white-hot wrought iron before welding. That might also help with the other problem I've run into with welding steel to wrought; when you quench, even with good welds, wrought sometimes likes to shear off from the steel. It's worse with thin cross sections, but I'd hate to have it happen on a hammer. I'm sure there are people on here who have worked wrought a lot more than me, feel free to correct me. I mostly like to use it for decorative pieces, so I can show off the grain. Last one was a heart I made for my wife from a marine bolt I found on the beach. -
What did you do in the shop today?
Nobody Special replied to Mark Ling's topic in Blacksmithing, General Discussion
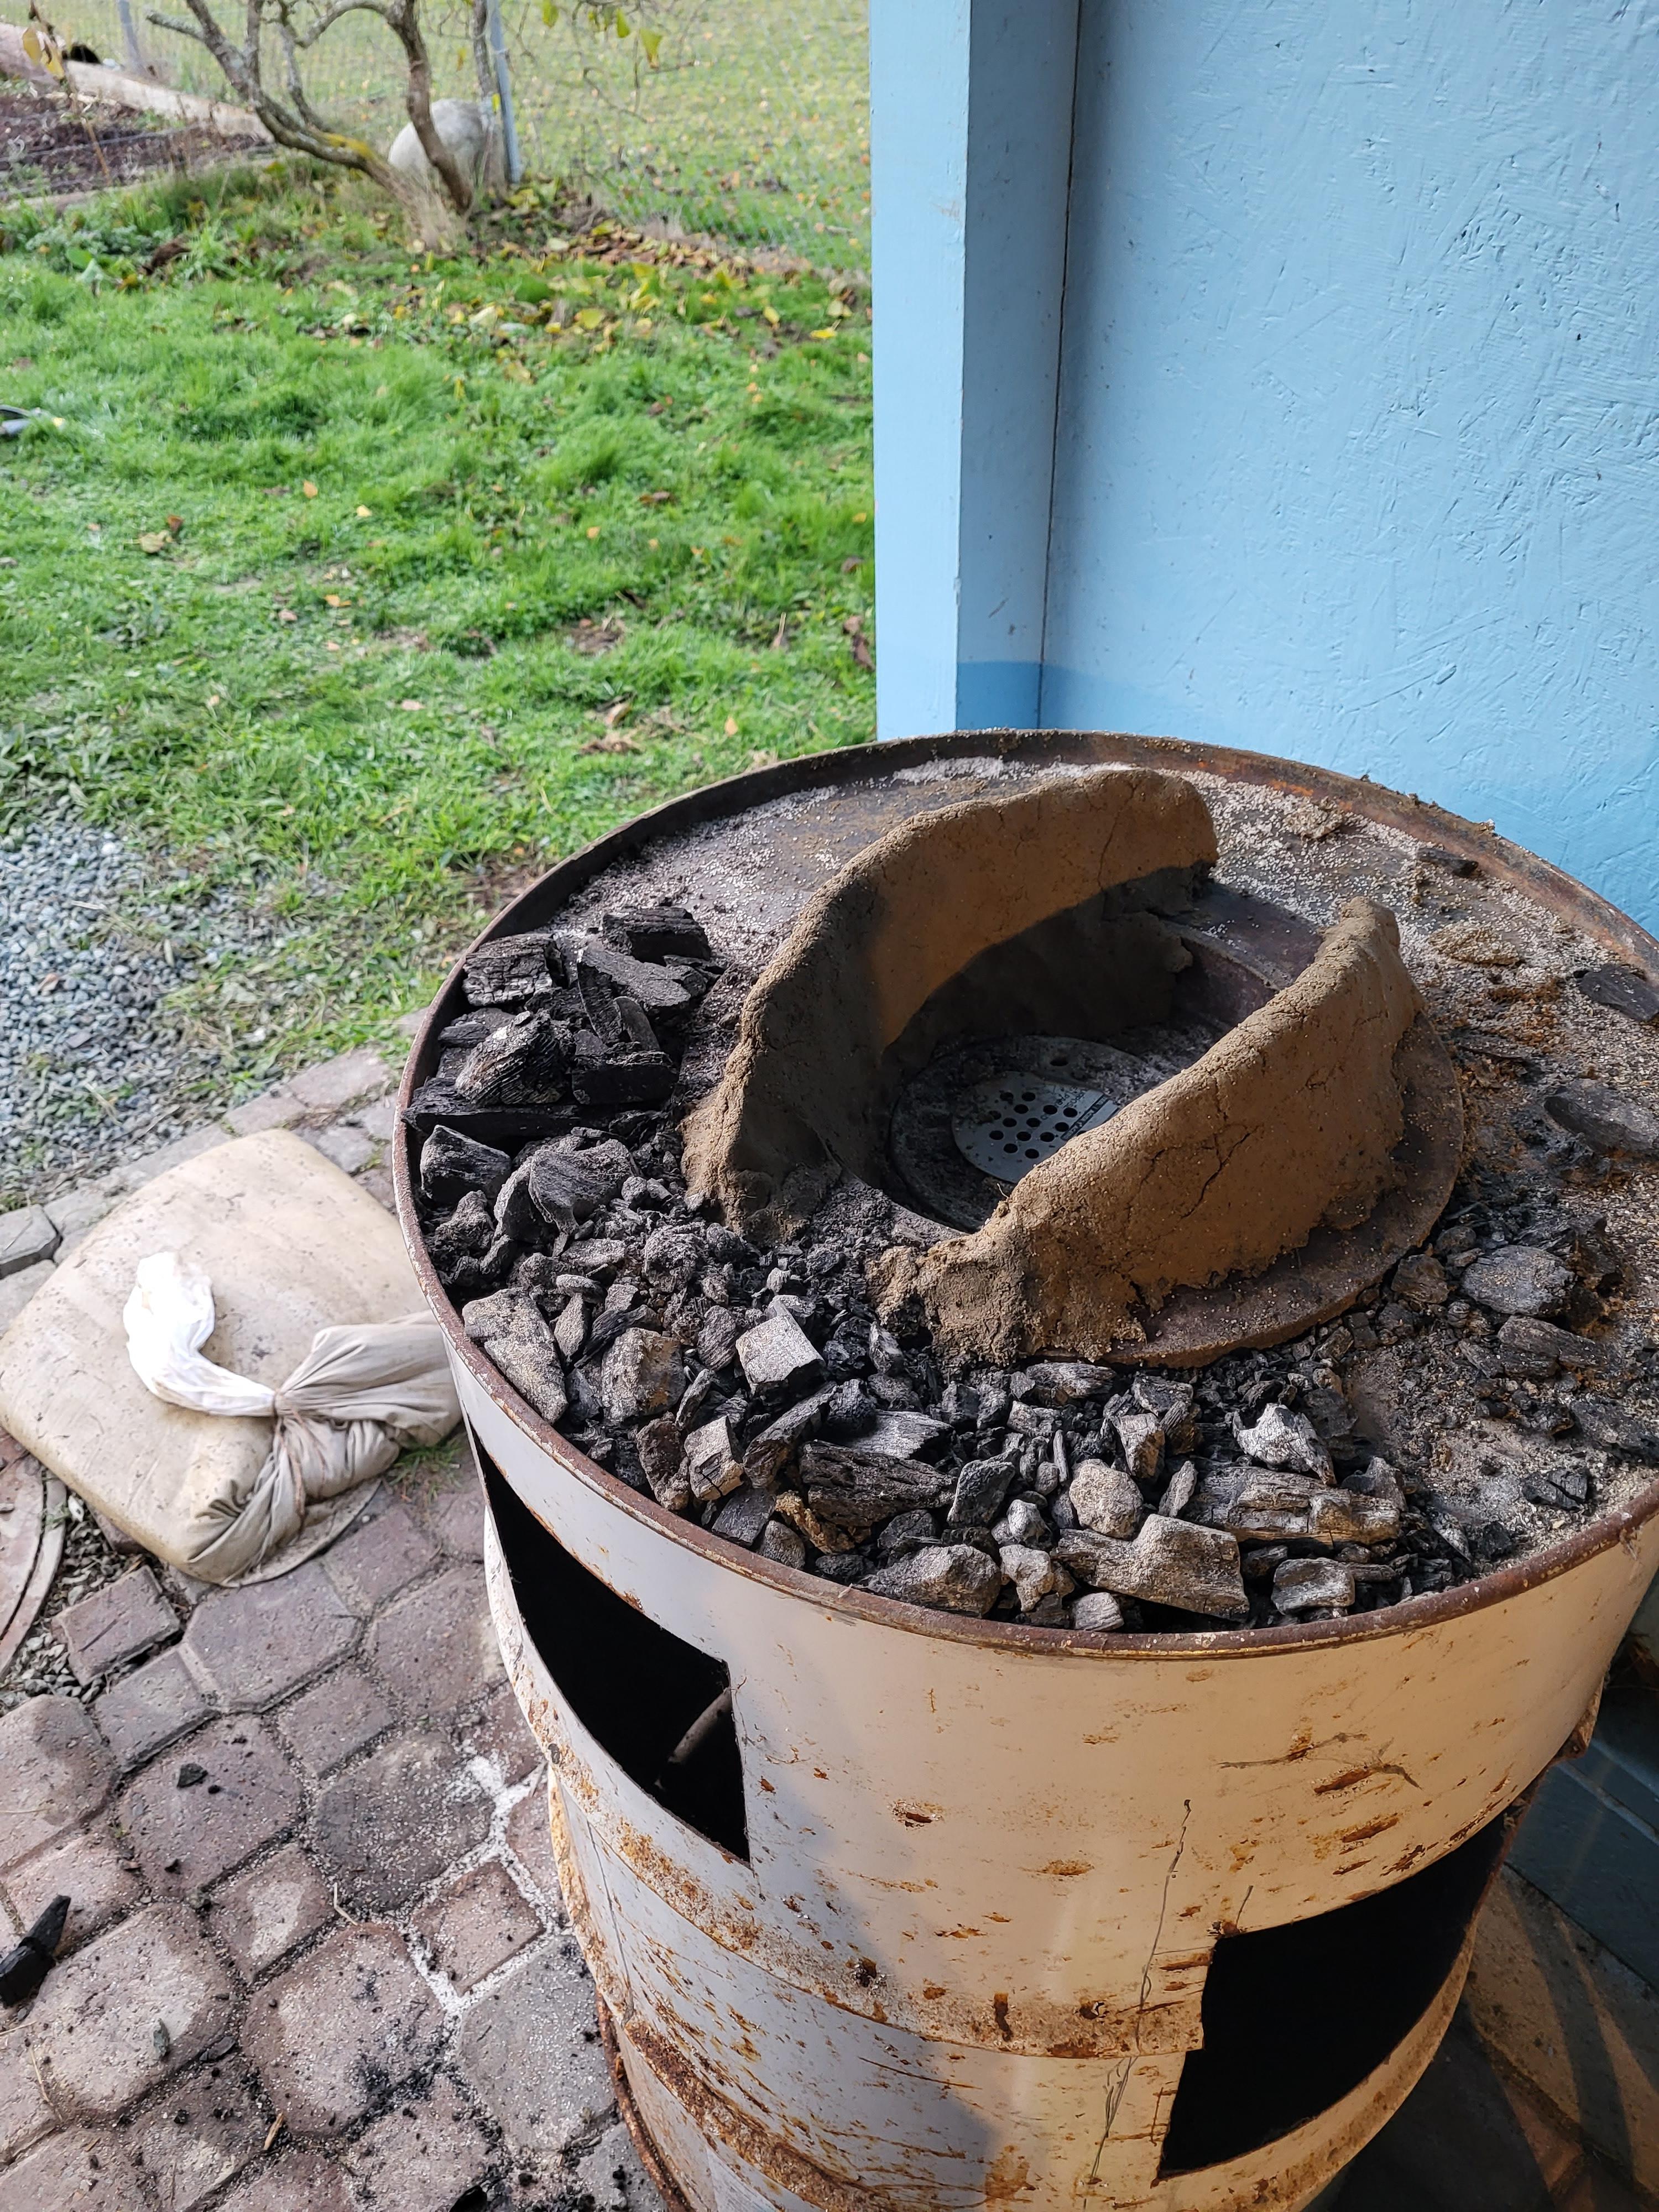
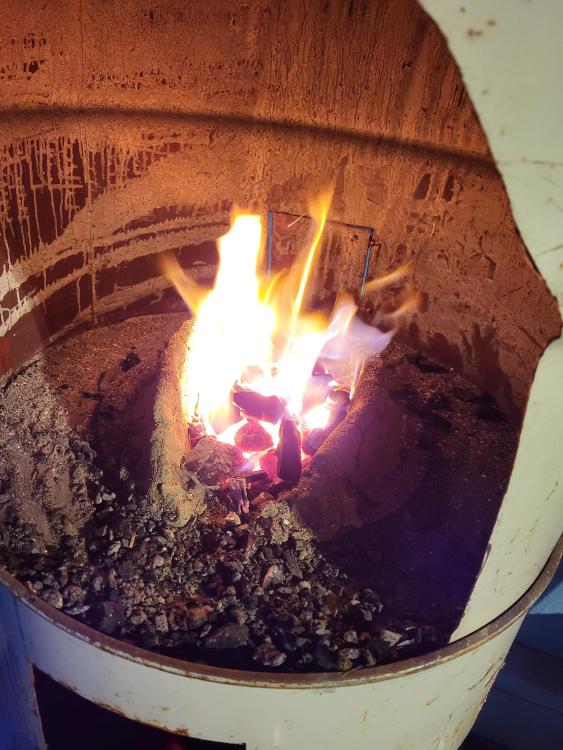
Nothing much pretty today, but picked up a bit in the forging area today, processed another five-gallon bucket of wild clay for maybe crucibles, added a small cover I made for the tuyere, and drilled and attached the band to one of the anvil blocks. Also adjusted the forge to be more appropriate for charcoal by adding clay (and sand for temper) walls to make it narrower and deeper, sort of like that clay taco that Thijs Van de Mannaker forged a spear in for one of his videos. It still doesn't behave like coal, but fuel consumption slowed down considerably, it re-focused the heat towards the middle beautifully, and with the new screen, I didn't have charcoal get in the tuyere and heat it up.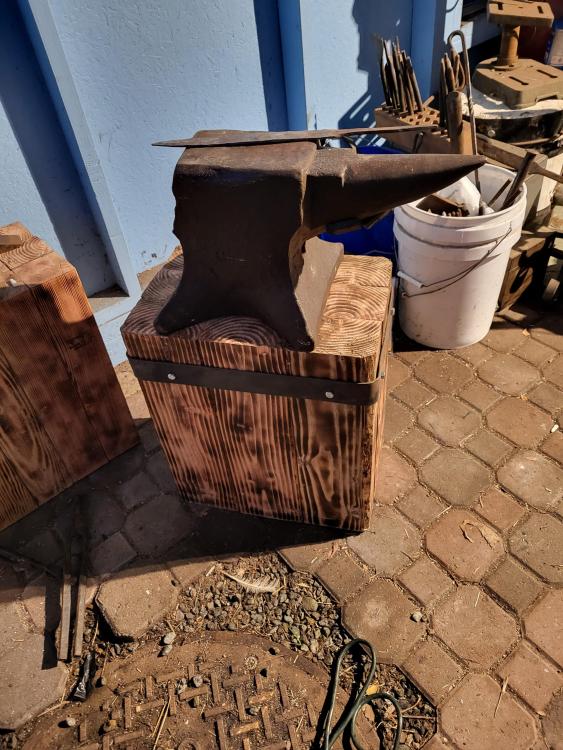

-
Why is anvil rebound important?
Nobody Special replied to rdennett's topic in Anvils, Swage Blocks, and Mandrels
For anyone that considers rebound unimportant, I suggest you try forging on hard dirt as an anvil, a block of wood, a stone anvil, a cast iron wonder, or mild steel. I have on each. Rebound of course relates to mass and hardness. If the anvil is light, or lacks hardness, more force will be dissipated into the anvil or tend to affect it kinetically (i.e. it moves the anvil or passes through it into whatever is supporting it) rather than going into the work. Of course, mass isn't really the same as rebound, it's just that if you hit a 3-gram anvil with a 10 lb hammer it's the anvil that moves, no matter how good the rebound. Sledgehammer heads have great rebound, but a big block of mild steel may be a better anvil, partially due to their size. Forging can be done on a number of surfaces and there are simply times and uses where softer anvils with less rebound may be better for your purpose, but in general use, this often isn't the case. Rebound isn't the only consideration, but a hardened surface of the right material composition makes a great deal of difference in the work, not simply in preventing deformation of the tool. That difference is not only not negligible, it's rather extreme. I'm rather surprised you feel that no one has tested this scientifically, Flatliner; I've seen rather extensive papers on the matter from everyone from toolmakers to dissertations by physicists and engineers, some of which you may be surprised to find enjoyed forging. And although you note that cast iron is too brittle and soft to make a good anvil, you might find it weird that most of the time although yes, it is brittle, it's actually harder than mild steel and has greater compressive strength. Still a lousy anvil though. I wish Thomas Powers was still with us; not only could he have explained this better, but he would have had eight citations on the subject. You can still find some of the works though if you dig enough, although you may have to go beyond the Googlesphere. But feel free to try your own experimentation or do things your way; if the metal doesn't move better for you on heavier (or even the same size) anvils with better rebound, you can always tell me "E pur si don't muove". -
Ceramic crucibles
Nobody Special replied to Nobody Special's topic in Smelting, Melting, Foundry, and Casting
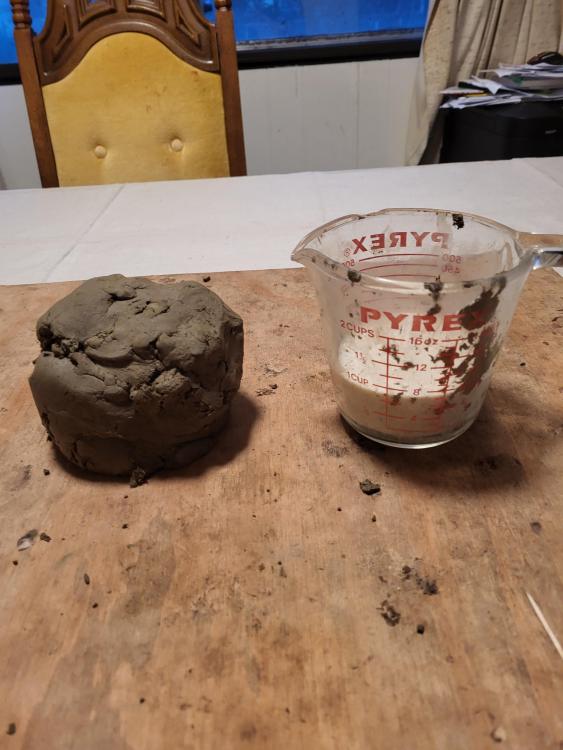
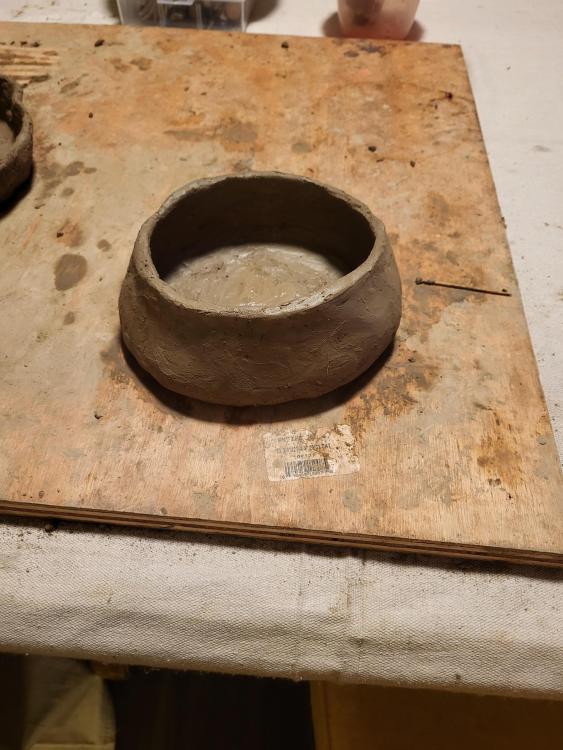
So, went hunting today and found a couple of good clay banks and places with heavily clayed soils. Brought home four buckets, three of which were an almost clean greyish brown clay. I pulled out about a quart of the cleanest to play with and started on the rest - took about a half a bucket, mixed with water, and poured through a screen. Tomorrow, I'll pour the water off leaving the clay underneath, then pour it into old pillowcases to let the water dry out. Mixed the stuff I brought in with sand for temper and made a mediocre coil and pinch bowl to fire to see how the clay behaves. If it goes well, I'll set up molds to start making crucibles and playing with different ratios of ingredients and see what survives the furnace.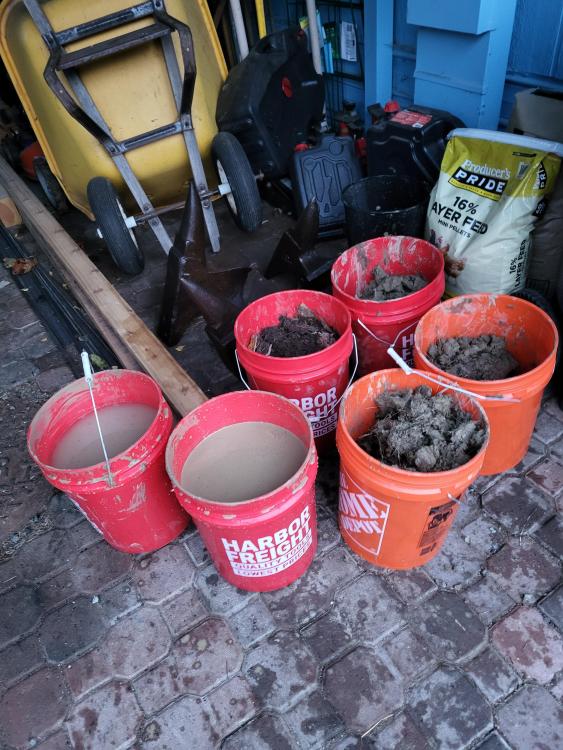
-
The axle idea works well if you don't mind the small face. I don't disagree with the counterweight idea, with one caveat. Some of them are made of cast iron, which is a terrible thing to discover after lugging one home. You can find out which ones those are very easily though, they make more of a dull thunk than a ring when you hit one with a hammer.
-
Ceramic crucibles
Nobody Special replied to Nobody Special's topic in Smelting, Melting, Foundry, and Casting
I'm a good bit north of that, but I can keep an eye out. Distance-wise it's not very far at all, maybe 55 miles, but with traffic on I-5 and the ferry, it can take two hours to get to Seattle, some days it's easily three or more. If I make a ball mill, I can get all you can eat from crushed kitty litter, the cheap stuff. I've wanted one for a while, but ya know...make a tool to make a tool to make a tool... -
Ceramic crucibles
Nobody Special replied to Nobody Special's topic in Smelting, Melting, Foundry, and Casting
I think they use it to make glazes opaque, so pottery places may have it, although I'm scared to look at the prices. I was mad enough about the sodium bentonite. I paid $60 for a 50-pound bag at a pottery joint in Tacoma when I went down to drill, and I used to get it as a pond liner at feed and seeds for maybe $6. Tried five places up here and only one even knew what it was. Nearest place that might have it or fireclay was two hours away in Everett. In the end, I paid without complaining, but it got me thinking about rigging a ball mill up again and it certainly has me looking at harvesting wild clays. That's probably not economical either - in the end, it will cost me the time I could have used to make twice as much money and just buy what I want, but at some point, the whole fun of playing with metal is making something yourself from scratch. You just have to decide for yourself how far to take that. -
Good evening, My old casting furnace came up from Georgia with some stuff I had in storage, and my wife has gotten interested in green sand casting, so I bought her a couple of the old Gingery book series and I've been slowly assembling the bits and pieces for the sand, the flask, tools, etc. I still haven't replaced my crucibles, and although I'm sure that I will buy some proper, or at least cheap Chinese versions of proper crucibles, the last time I stopped I had begun experimenting with ceramics and had made a couple of plinths that held up well for several melts. I'll probably get the Vince Gingery book on making your own crucibles, but I'm looking at recipes and the like online. I can get better fireclay eventually on the mainland, but right now what I've got is sodium bentonite, and there are the usual wild clays from the glacial leavings up here I can process easily enough. From most of what I've seen, more temper needs to be added than normal; rather than the 20% or so added to a wild clay to fire it in earthenware, it looks like a mix of more like 60 percent of silica sand or powdered grog with the remainder as fireclay for crucibles. I'm also curious as to whether you can add alumina to clay to improve its thermal survivability. Preheating is of course crucial, anything homemade will be retired after a few pours if successful and I'll post any experiments on here, including the glorious failures from thermal shock and bad recipes. If anything, I'm planning precautions with the expectation of more failures initially than success. Heck, I've had failures from "good crucibles", and ask me how I first found out that molten aluminum gradually eats away the walls of heavy steel crucibles. (It involved my shoe soles going click click click everywhere I walked until I bought new ones). Any thoughts from someone more experienced in this? Fair warning to anyone considering this, casting is inherently dangerous. I would recommend to any beginner to spend the money on good equipment and PPE, including premade crucibles. I also recommend they take classes or find a mentor with experience, and although I respect the people on iforgeiron, I would recommend not learning from most online sites or influencers. I got started in metal working by learning casting from online sites and I consider myself lucky to only have a few weird scars and to have gotten zinc fume poisoning once before I looked for better sources of information.
-
Forged Post Hole digging bar
Nobody Special replied to Alan Evans's topic in Tools, ID, and pictorial reference
I see them occasionally in the places you find really old tools, like a farm auction or the kind of flea market or place that sells antique stuff from estate sales cheap without too much pretense. Got one in my garage I got at an auction in Cartersville, GA with a bunch of long yard tools; I've used it to move stuck cars, lift septic tank lids, and bust rocks in post holes. Surprisingly, the usual chain knock-off tool places sell them too, for relatively cheap. -
I'm not 100%, but that profile screams Hay Budden farrier anvil to me, and that serial marking would make it about 1908-ish, I think. You'd have to check with someone that has Anvils in America.
-
How can I tell if I have a Chinese mass produced hammer?
Nobody Special replied to newforger2024's topic in Hand Hammers
I've got nothing much to add on the origins of hammers, but I will say that cheap used hammers from flea markets are favorite for modifying without feeling bad about it. One of my all-time favorite forging hammers is a three-pound diagonal peen that started out heavier and more inclined to ideographic writing. I just ground down a little at a time alternating with water just enough to prevent it from heating up and affecting the temper. You can change the peen, swap or cut down the handles, make texturing hammers by changing the face, or if you're really confident about your heat treating, forge it into a different tool altogether. Lots of people enjoy making ball peen tomahawks, but you can be a lot more creative if you put your mind to it. And if you mess up, you're only out the time and a few bucks. -
I would tend to argue that no, in a lot of ways I'm not the same person, although I'm similar. Continuity is a slippery concept. If you replaced the tires on your car tomorrow at 08:00, then the alternator at 08:10, tie rods at 08:30, and so on until the last piece was replaced by lunch time, it would be a tougher argument. Or what if you gradually replaced the parts with say, until it was entirely made up of the parts for a 74 Dodge Dart? At that point would it still be whatever it is you drive now, which I can only assume is a 70 Mustang with the 429 and the Shaker hood?