Joel OF
Members
-
Joined
-
Last visited
Everything posted by Joel OF
-
Hi Charles. To be honest I can't remember what my dimensions are/where they're taken from, but to avoid clinker building up under the tue (and to generally shape the fire) I'd planned on skinning the top of the fire bricks with sand.
-
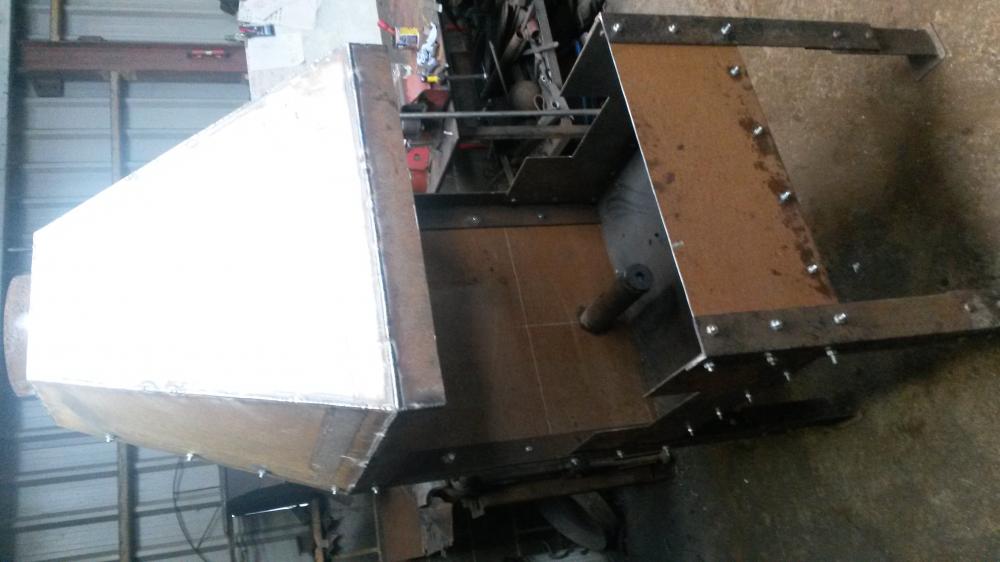
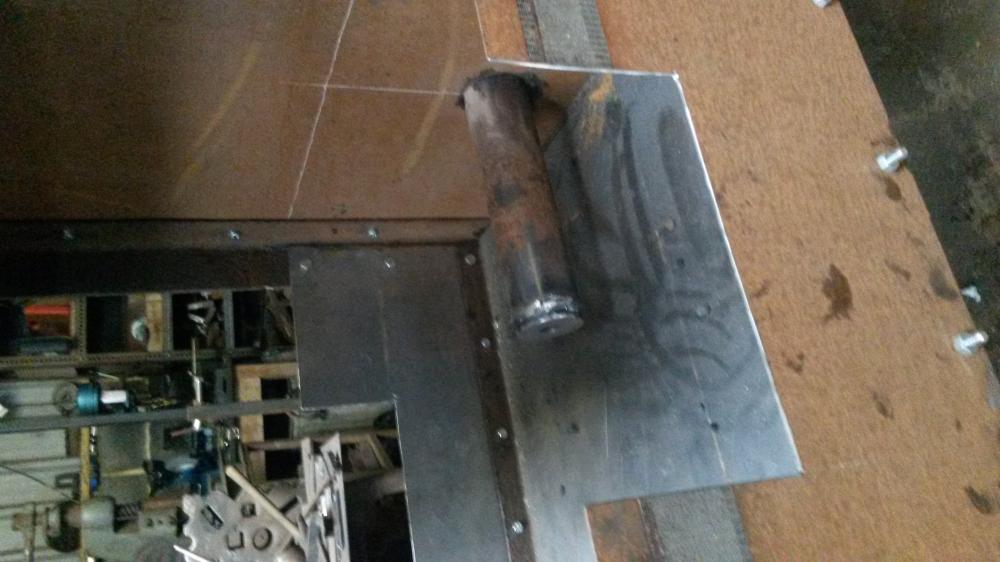
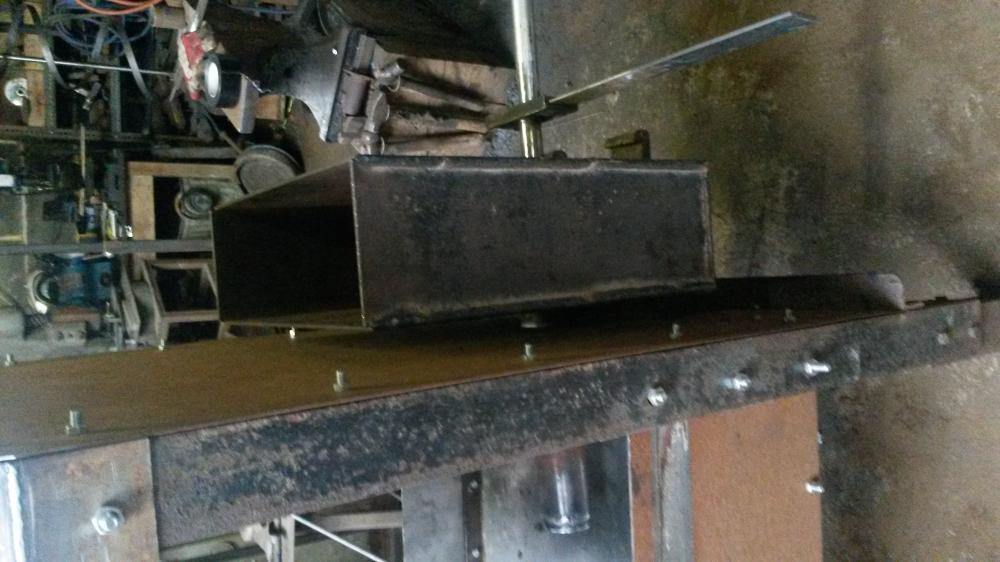
Taking these today reminded me I've got to cut the excess off the bolts and make a couple bracing straps to tie the top of the bosh to the back of the forge. It's weight is being carried by a bit of angle (that can't be seen) but I think it needs a bit more load spreading. I've made the side cut outs the same as they were before but I'll see how things go & maybe tweak.
-
Hi folks, I've only ever used bottom blast forges but I've just finished restoring / fabricating an old water cooled side blast forge given to me by a farrier mate. It was well and truely kaput and I had to fabricate 90% of it from scratch, (hood, hearth, back bosh and water cooled tue), except the angle iron frame which thankfully was salvageable and served as a template. The old cast iron brackets the back bosh sits on were okay too so I'm re-using them. I have fabricated the tue and bosh as one piece and didn't taper the tue so I can slide it forwards/backwards for the optimum position, though I'm pretty sure I've fabricated it to a sensible length which allows the bosh to sit about 2 inches away from the back of the forge on the cast brackets. (I will shim under the bosh to tilt the tue downwards to avoid air gaps). I've left about a 2.5 inch gap between the bottom of the tue and the hearth so I'm planning on buying some 1 inch thick fire bricks and putting a couple layers of them down, then a skin of sand. The only thing I'm unsure about is the breastplate. I do have access to 20mm plate which I could cut into shape and bolt in position, or my other idea was to tack weld a few short lengths of angle iron vertically to the back of the forge, then slide a layer or two of fire bricks down into the channels. Which would you go for? I replaced all the sheet work on the forge with like-for-like so the back sheet is 2mm. As that's quite thin I'd imagine there's potential for that to distort over time if there's not some protection in front of it as I'll be banking coke up against it. The distance from the front of the tue to the back of the forge is approx 1 foot. Like I say I'm new to side blast forges so any tips from the experienced users would be a great help. Cheers.
-
Cheers folks. I met the client's wife for the first time when I popped round the other day, she's happy with it so I'm happy. The bear's rusted down well & is a proper brown bear now. She said they had some little kids round recently and they were completely freaked out by it, haha.
-
Bullseye. I liked his tip in the BABA mag a few issues ago - keep 1mm cutting discs that are worn right down to use as shims, I don't think I've chucked one away since. I reckon I've got enough now to shim the leaning tower of Pisa back up to straight.
-
Oops, forgot I started this topic! Cheers for the replies. Yep I see what you mean, Alan. I think at the time of posting I'd only imagined doing this whilst the gate was stood/leaning upright. Greater possibilities when it's laying down. I like the picture in Peter Parkinson's book "Forged Architectural Metalwork" of a smith (who's name is on the tip of my tongue but I can't remember at the minute) riveting a gate together in the way you just described, but he'd also roped his son into pushing against the back of the vise.
-
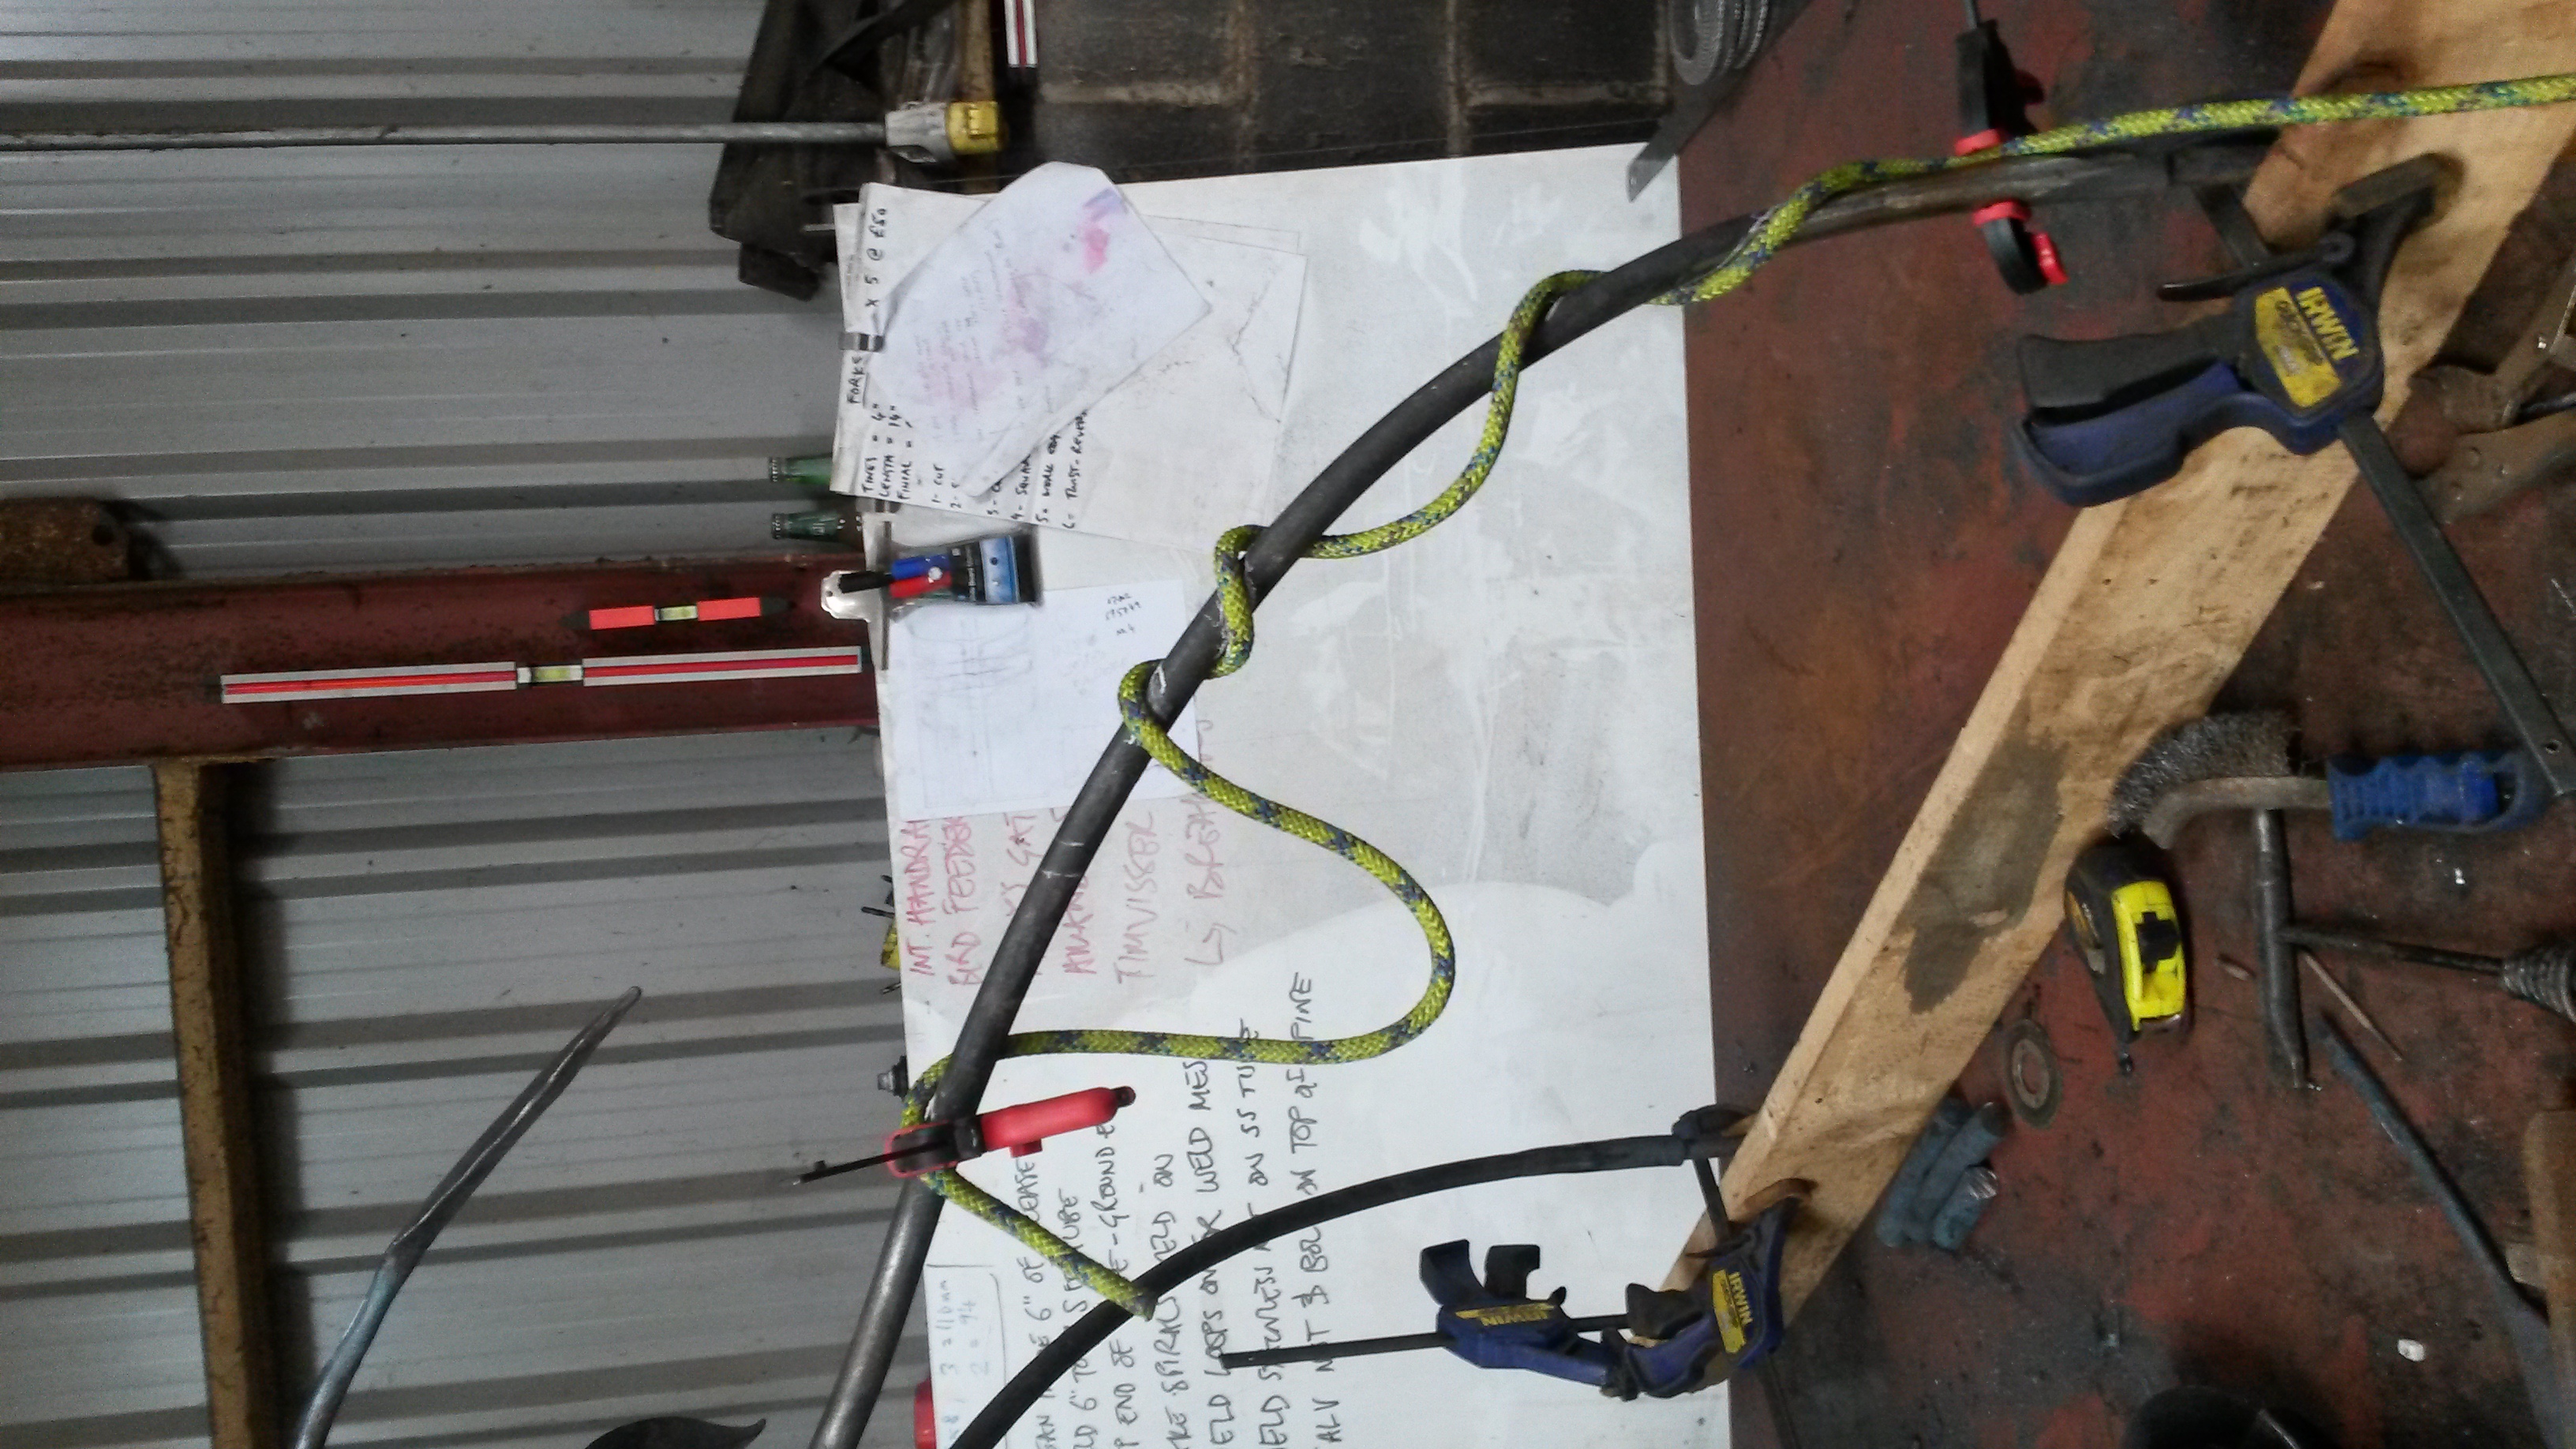
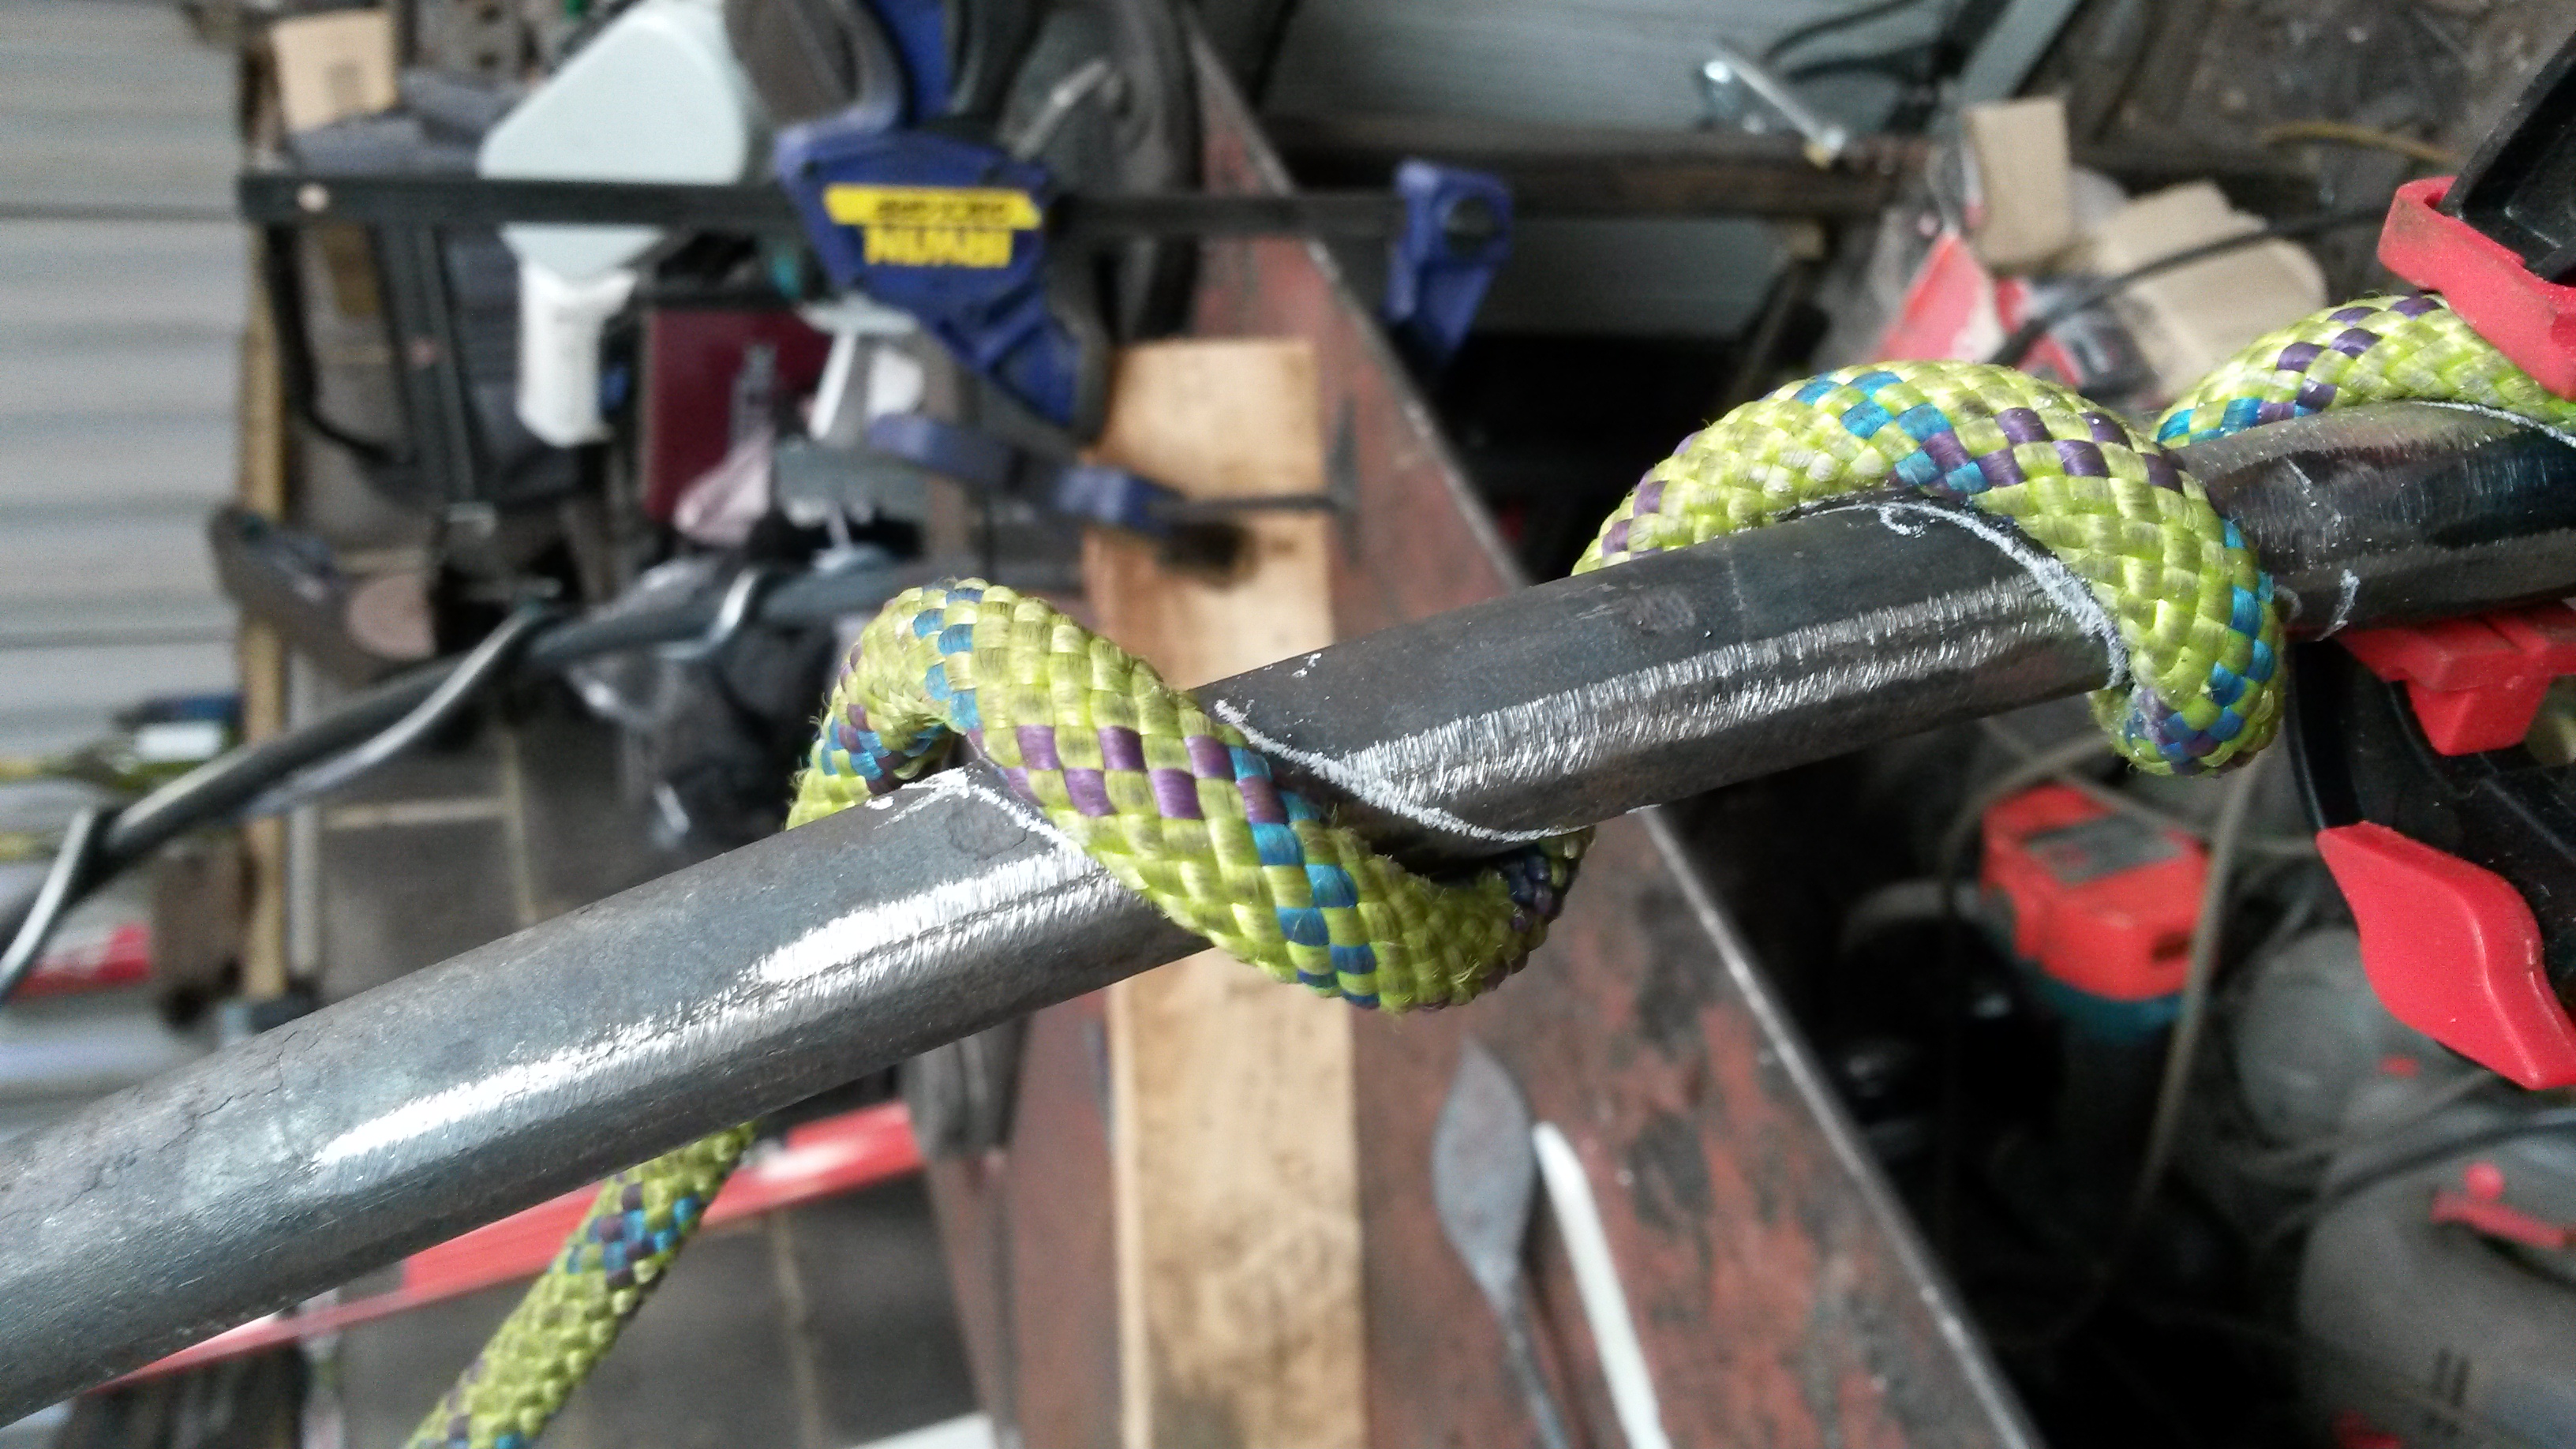
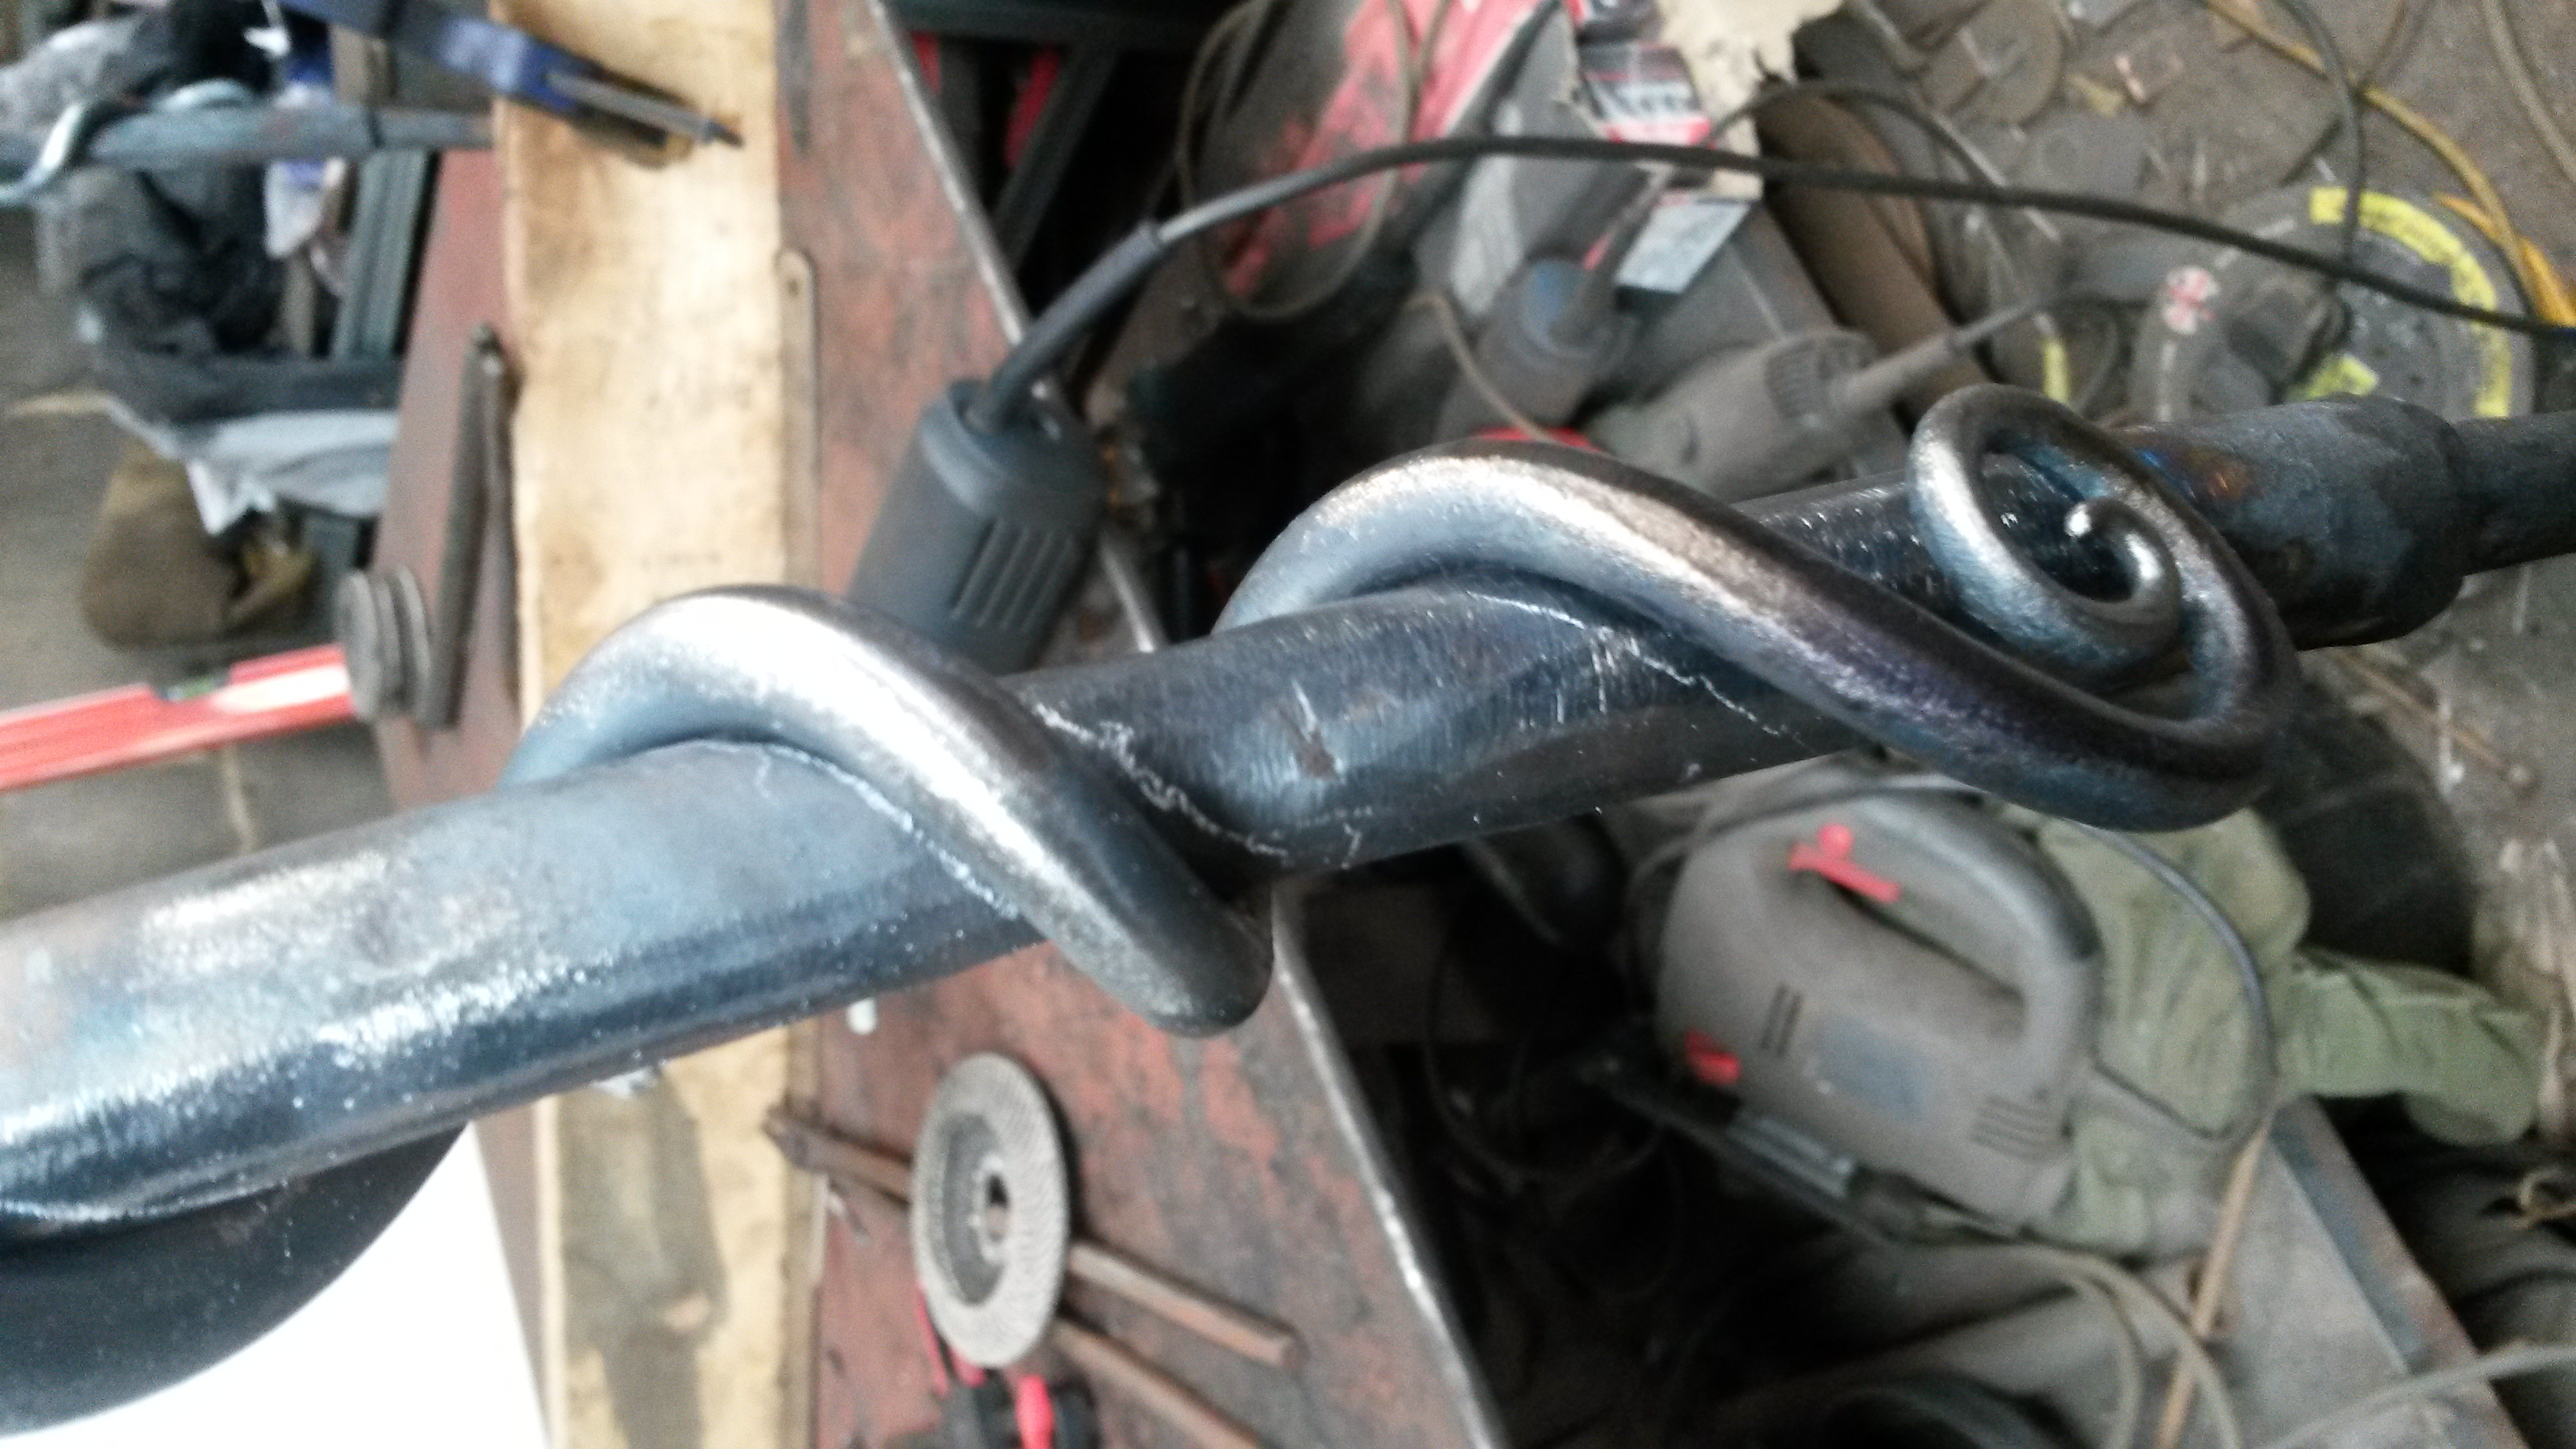
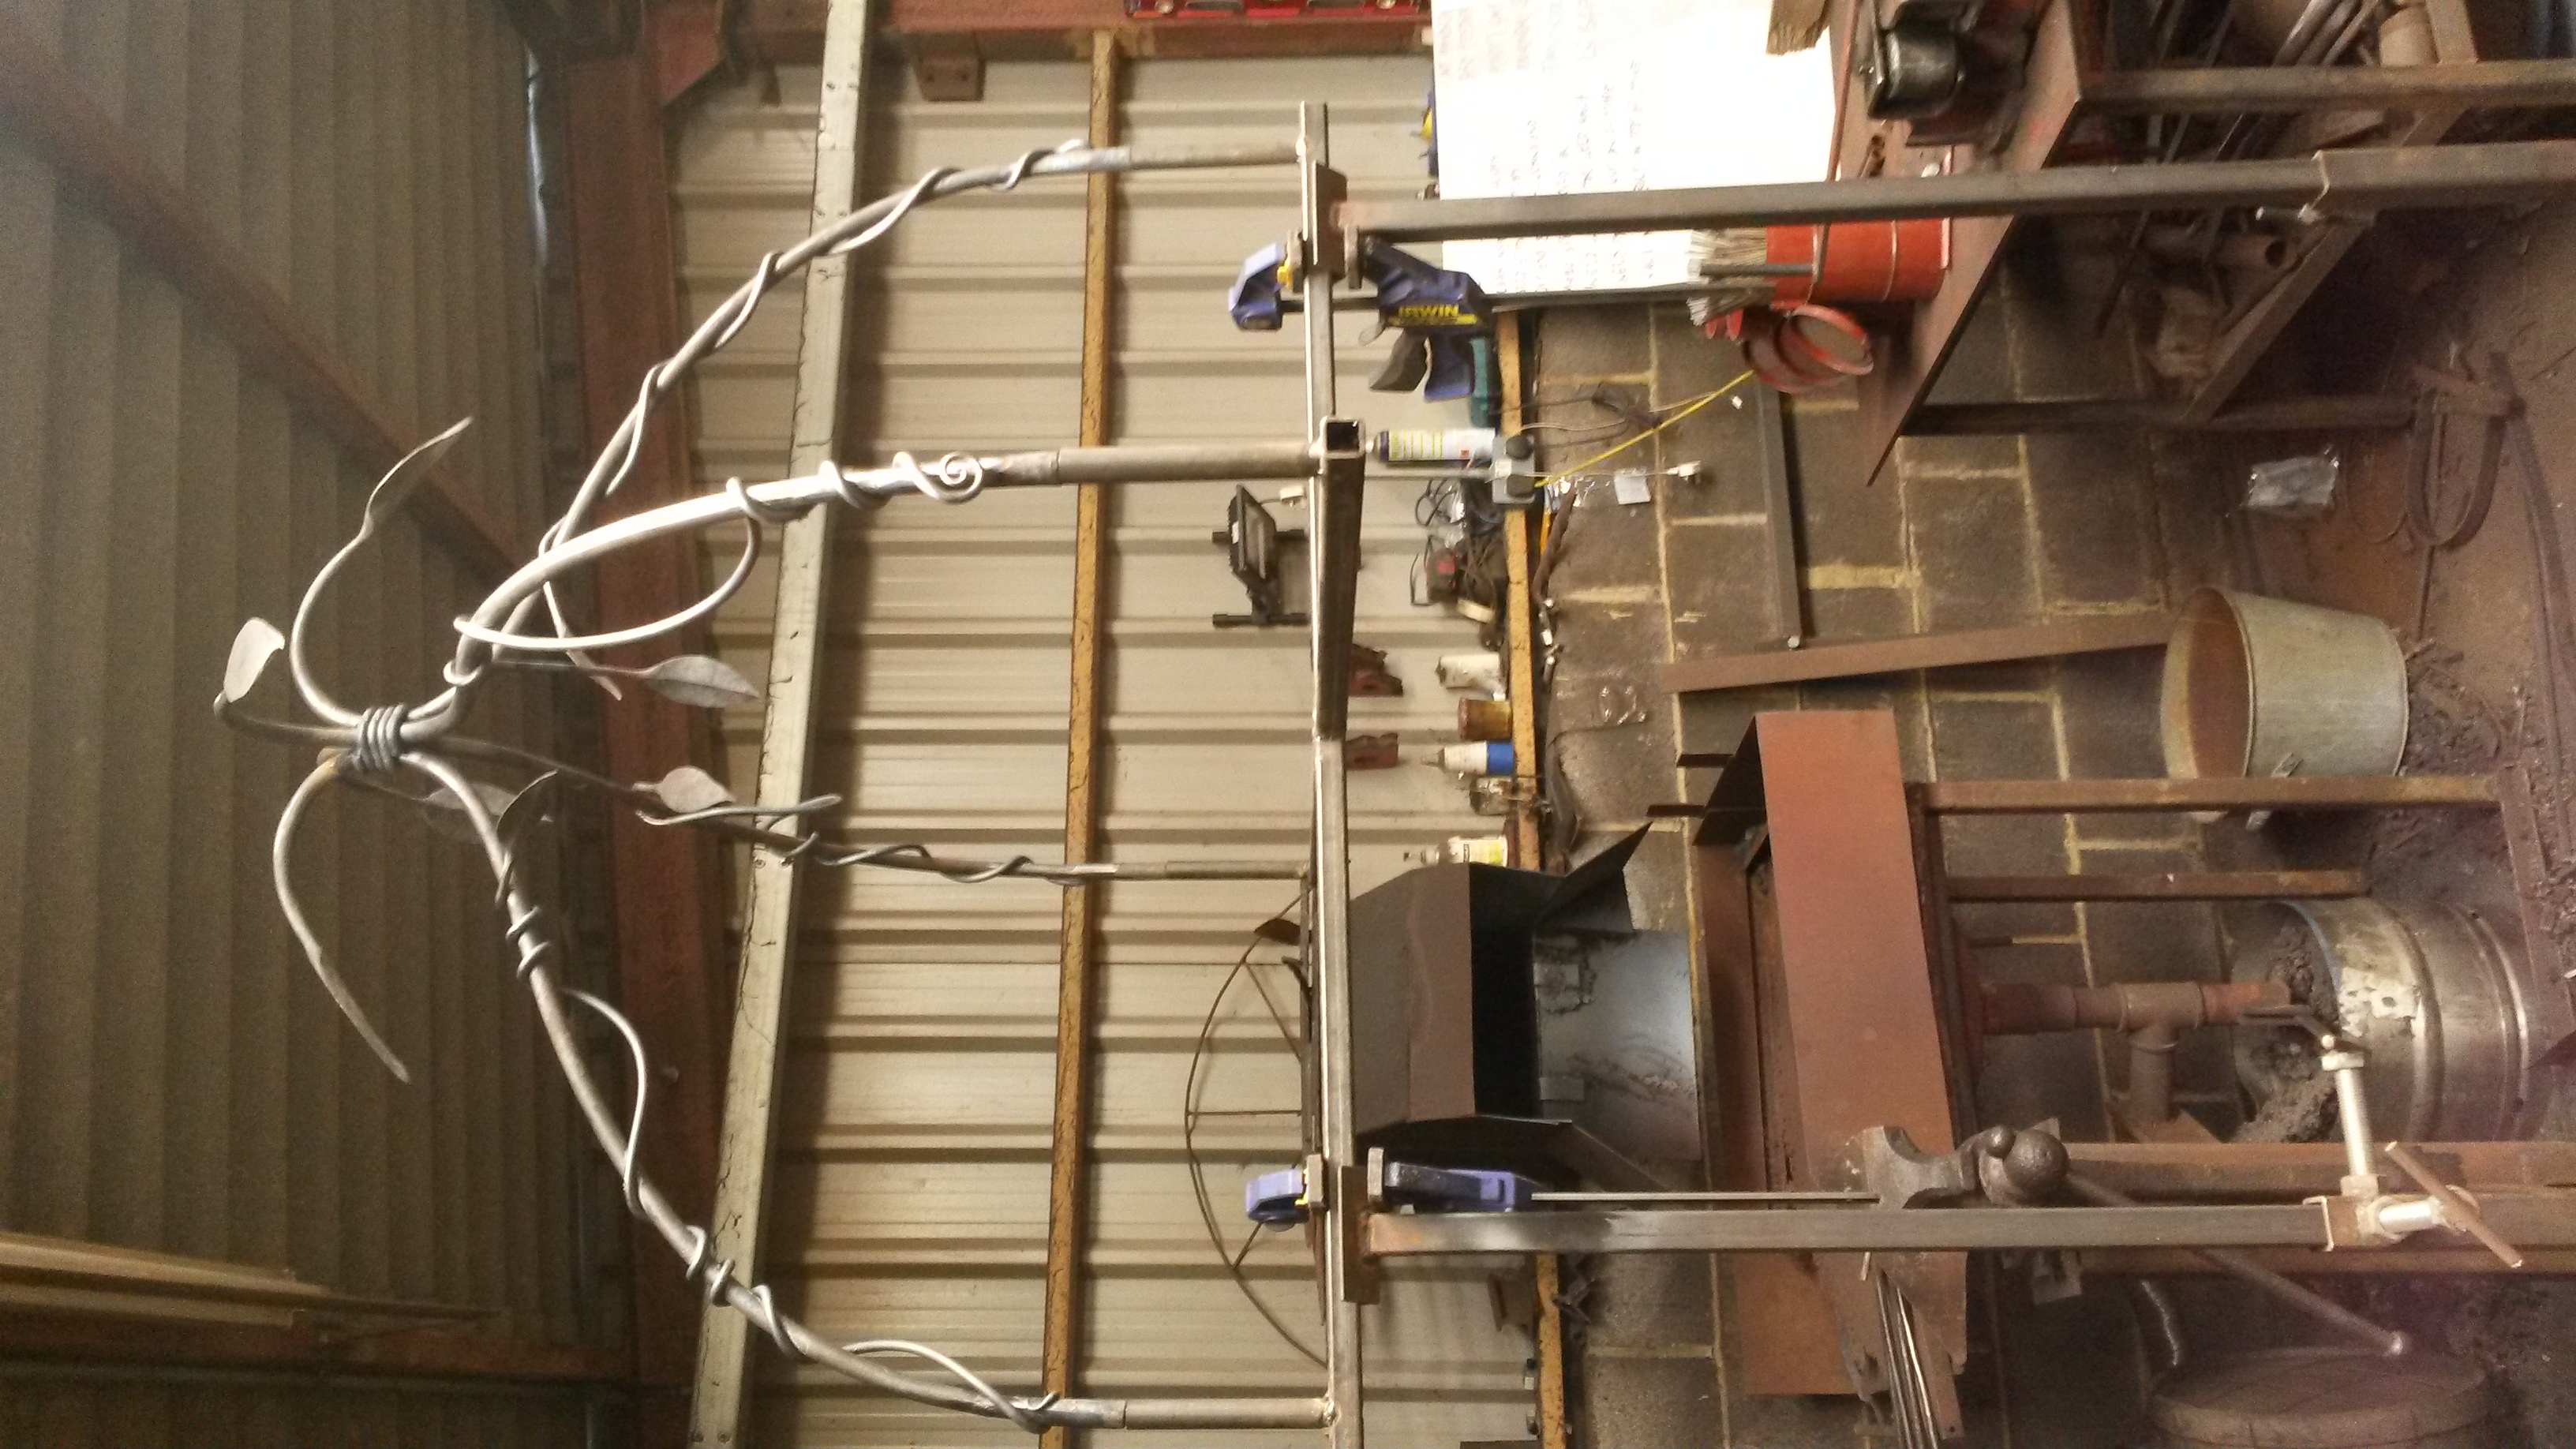
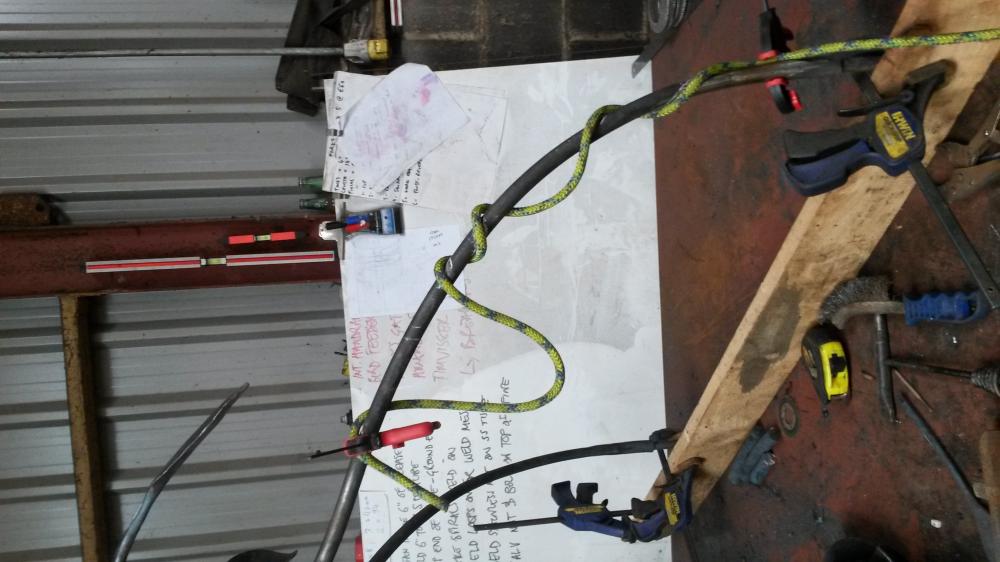
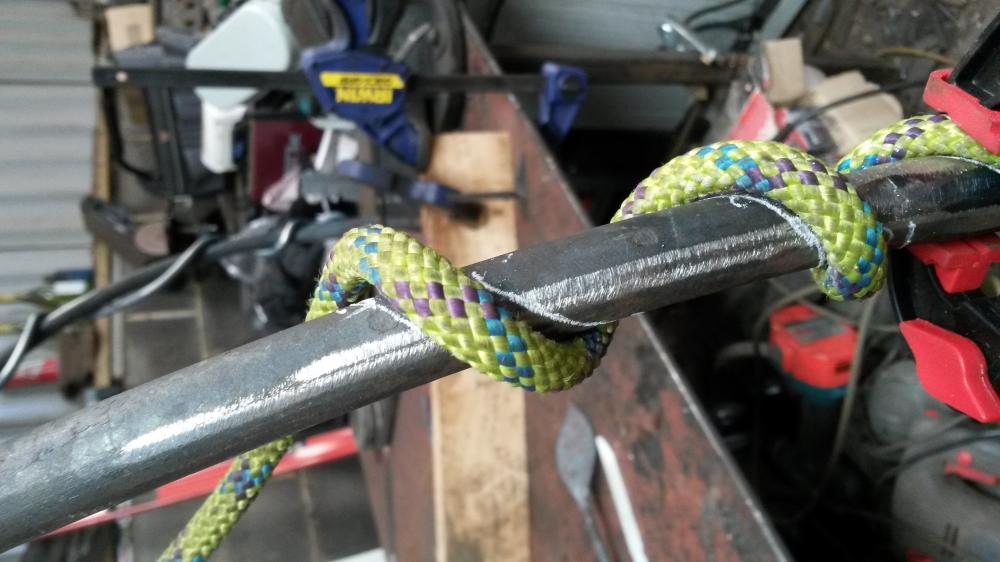
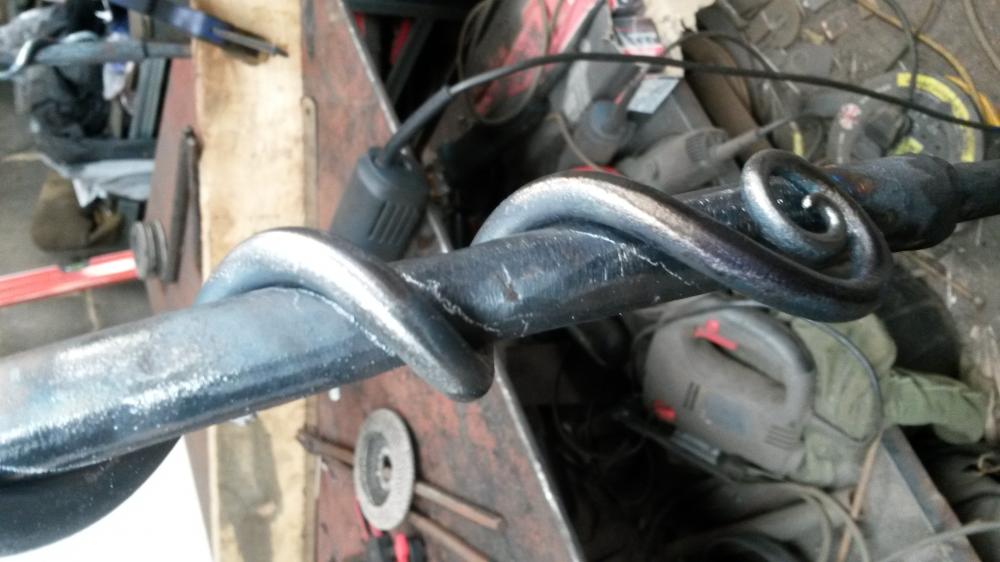
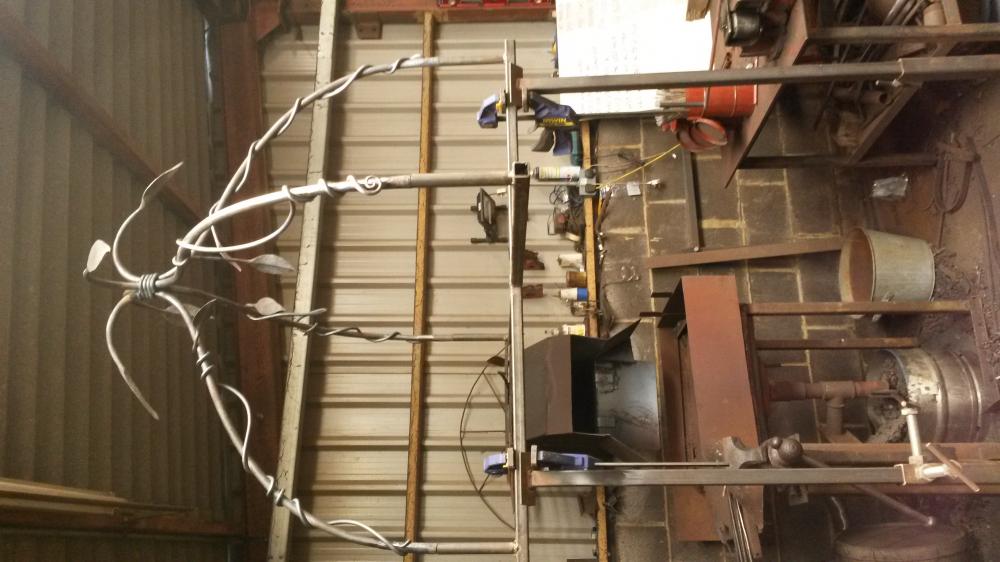
Because it matches steel bar sizes exactly it works like a charm for mapping out the paths of vine tendrils. Just draw around the rope to mark your path & away you go. Leafy garden plan support structure/bird feeder commission in progress.
-
I get that when after necking down the blob I leave at the end is too long. That's another thing I like about necking down off the bick, if after a few blows you think you've left too long a blob you can easily reduce the length of it by pulling back on the bar and reclaiming that extra material into the stem. The other problem which I always used to run into when I necking down off the far edge was that it would leave quite a hard shoulder, so when I worked on the back of the leaf it was really hard to stop the material from folding backwards and cold shutting ontop of the leaf-to-stem transition point. I don't get that problem on the bick because the transition shoulder is naturally much more gentle. Also, when I come to turn the 4 sided stem into 8, I work on the bottom corner first by hanging the blob face down over the bick and striking on it's bottom corner. By doing that the rounded shape of the bick fullers the material at the back of the leaf forwards. Ultimately the back of the leaf becomes more sloped & the chances of the material folding back & cold shutting are massively reduced.
-
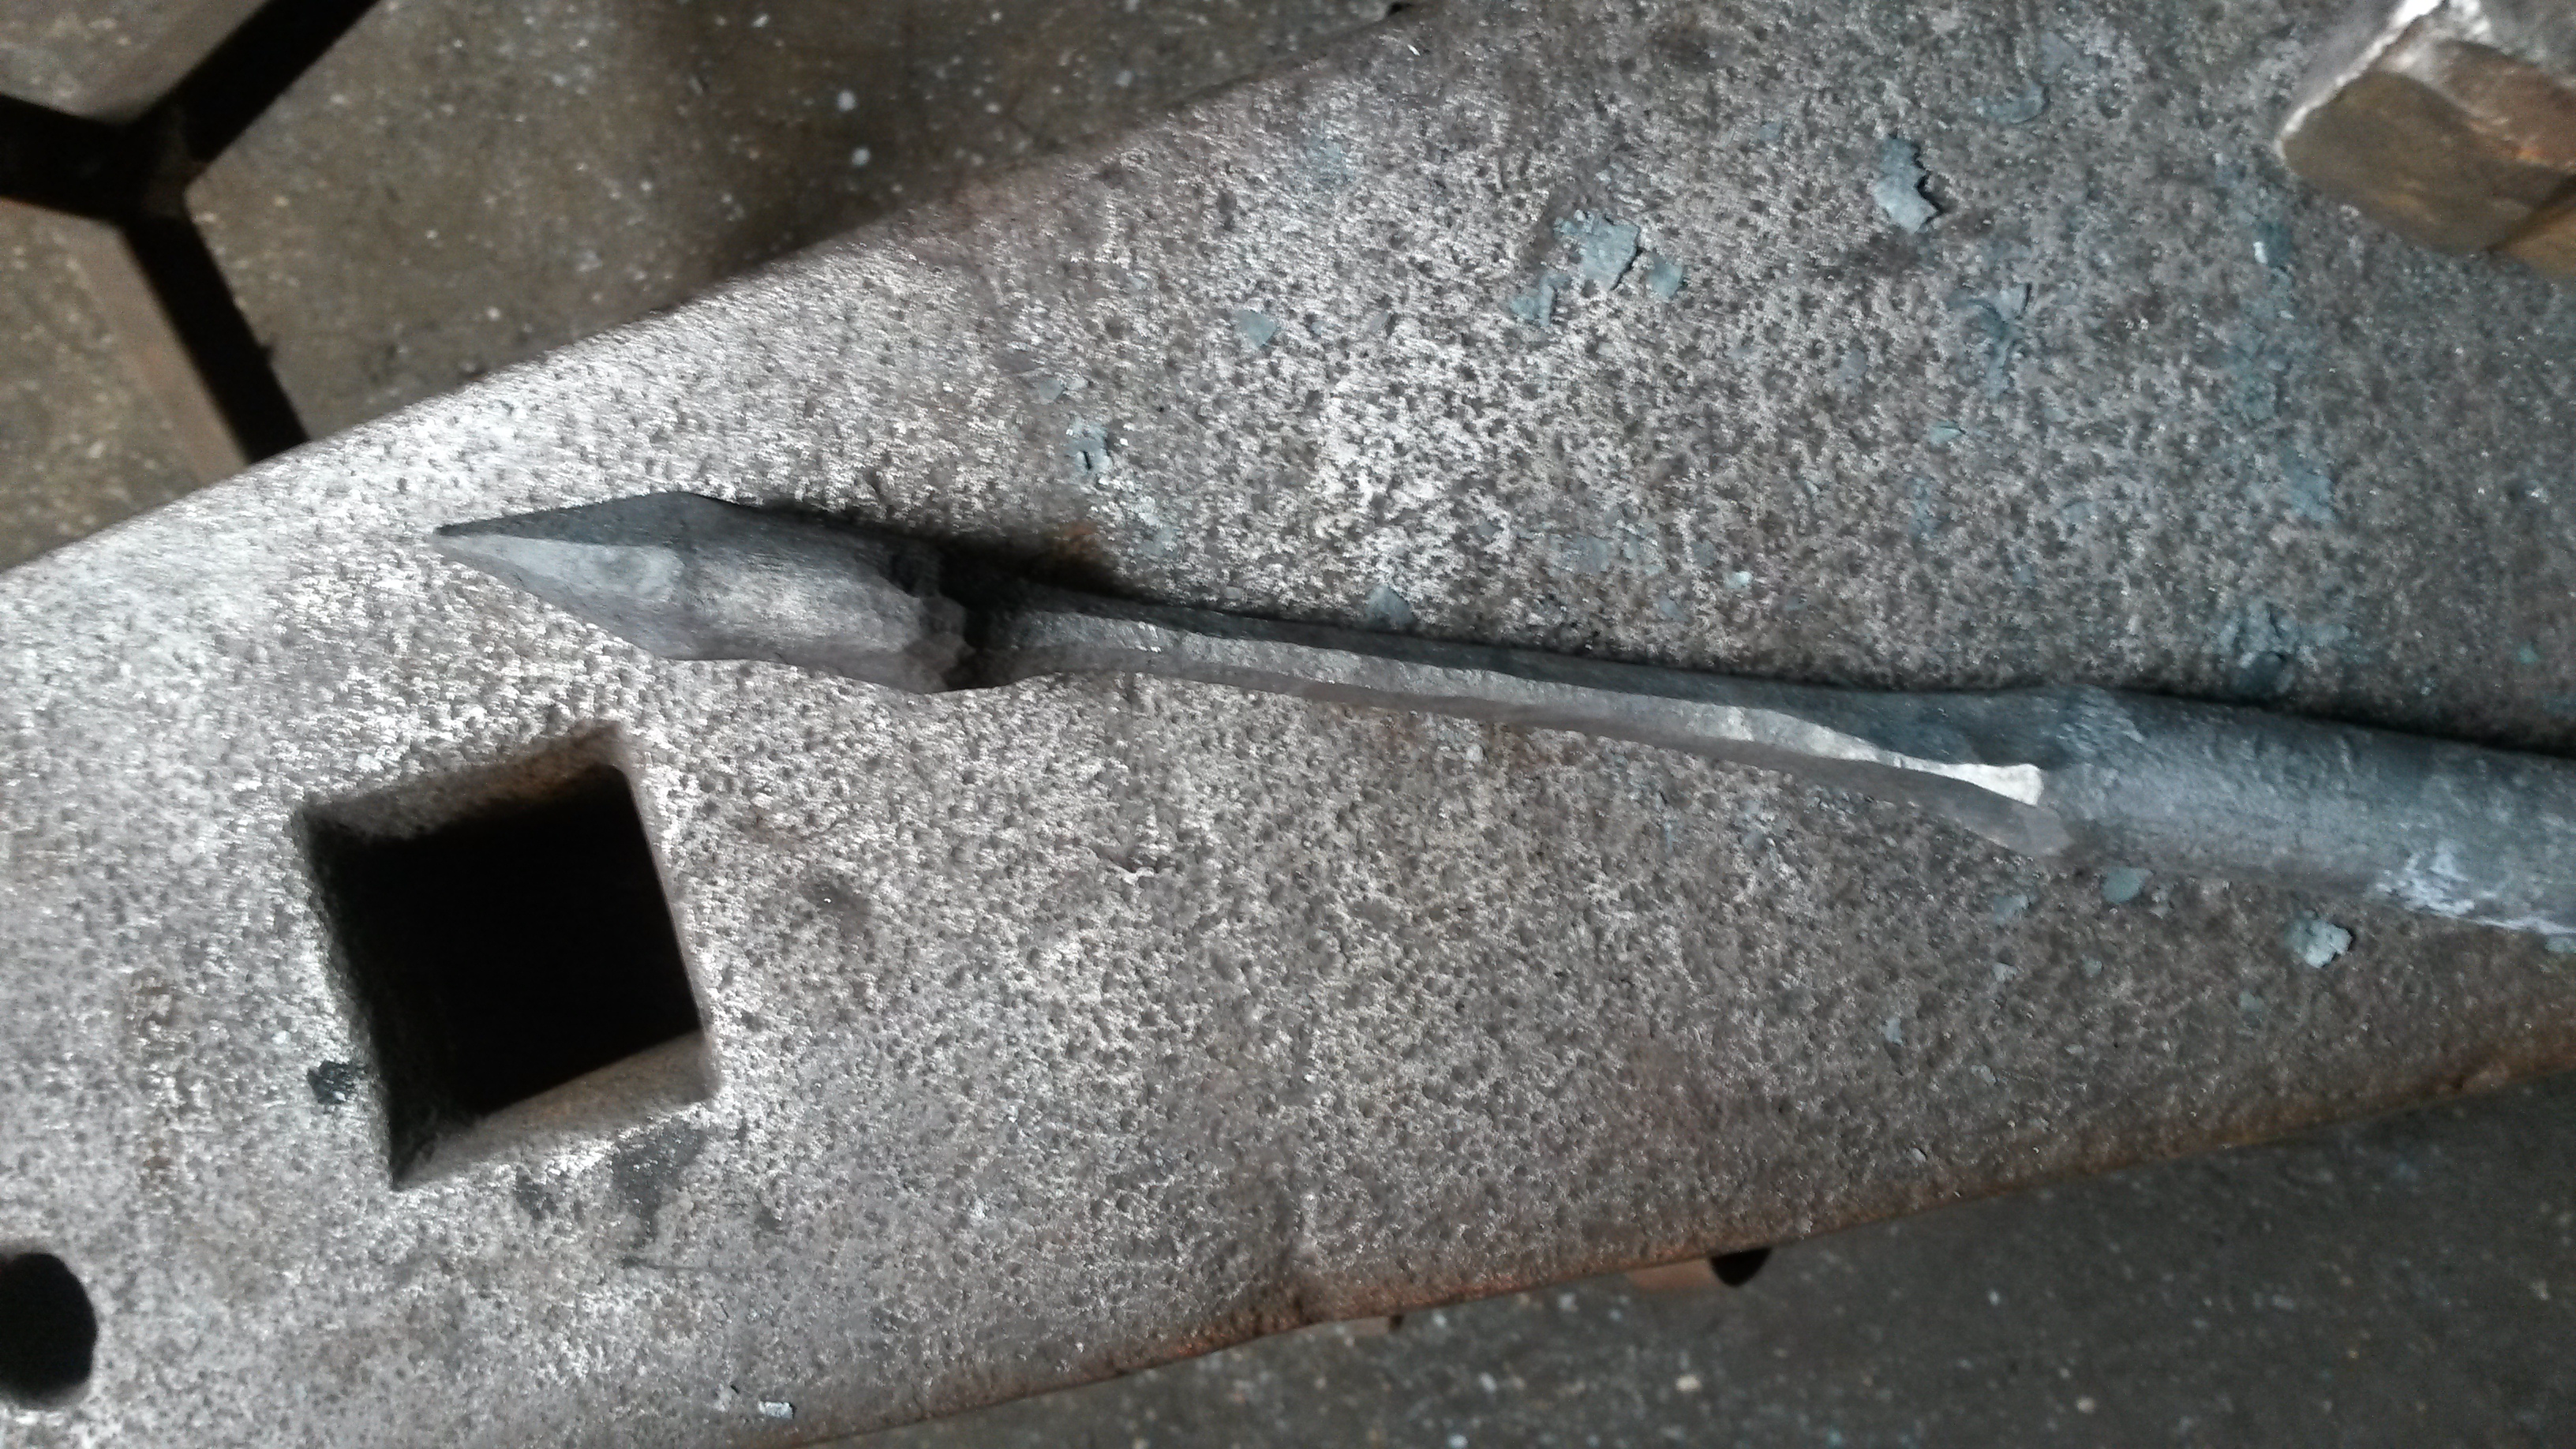
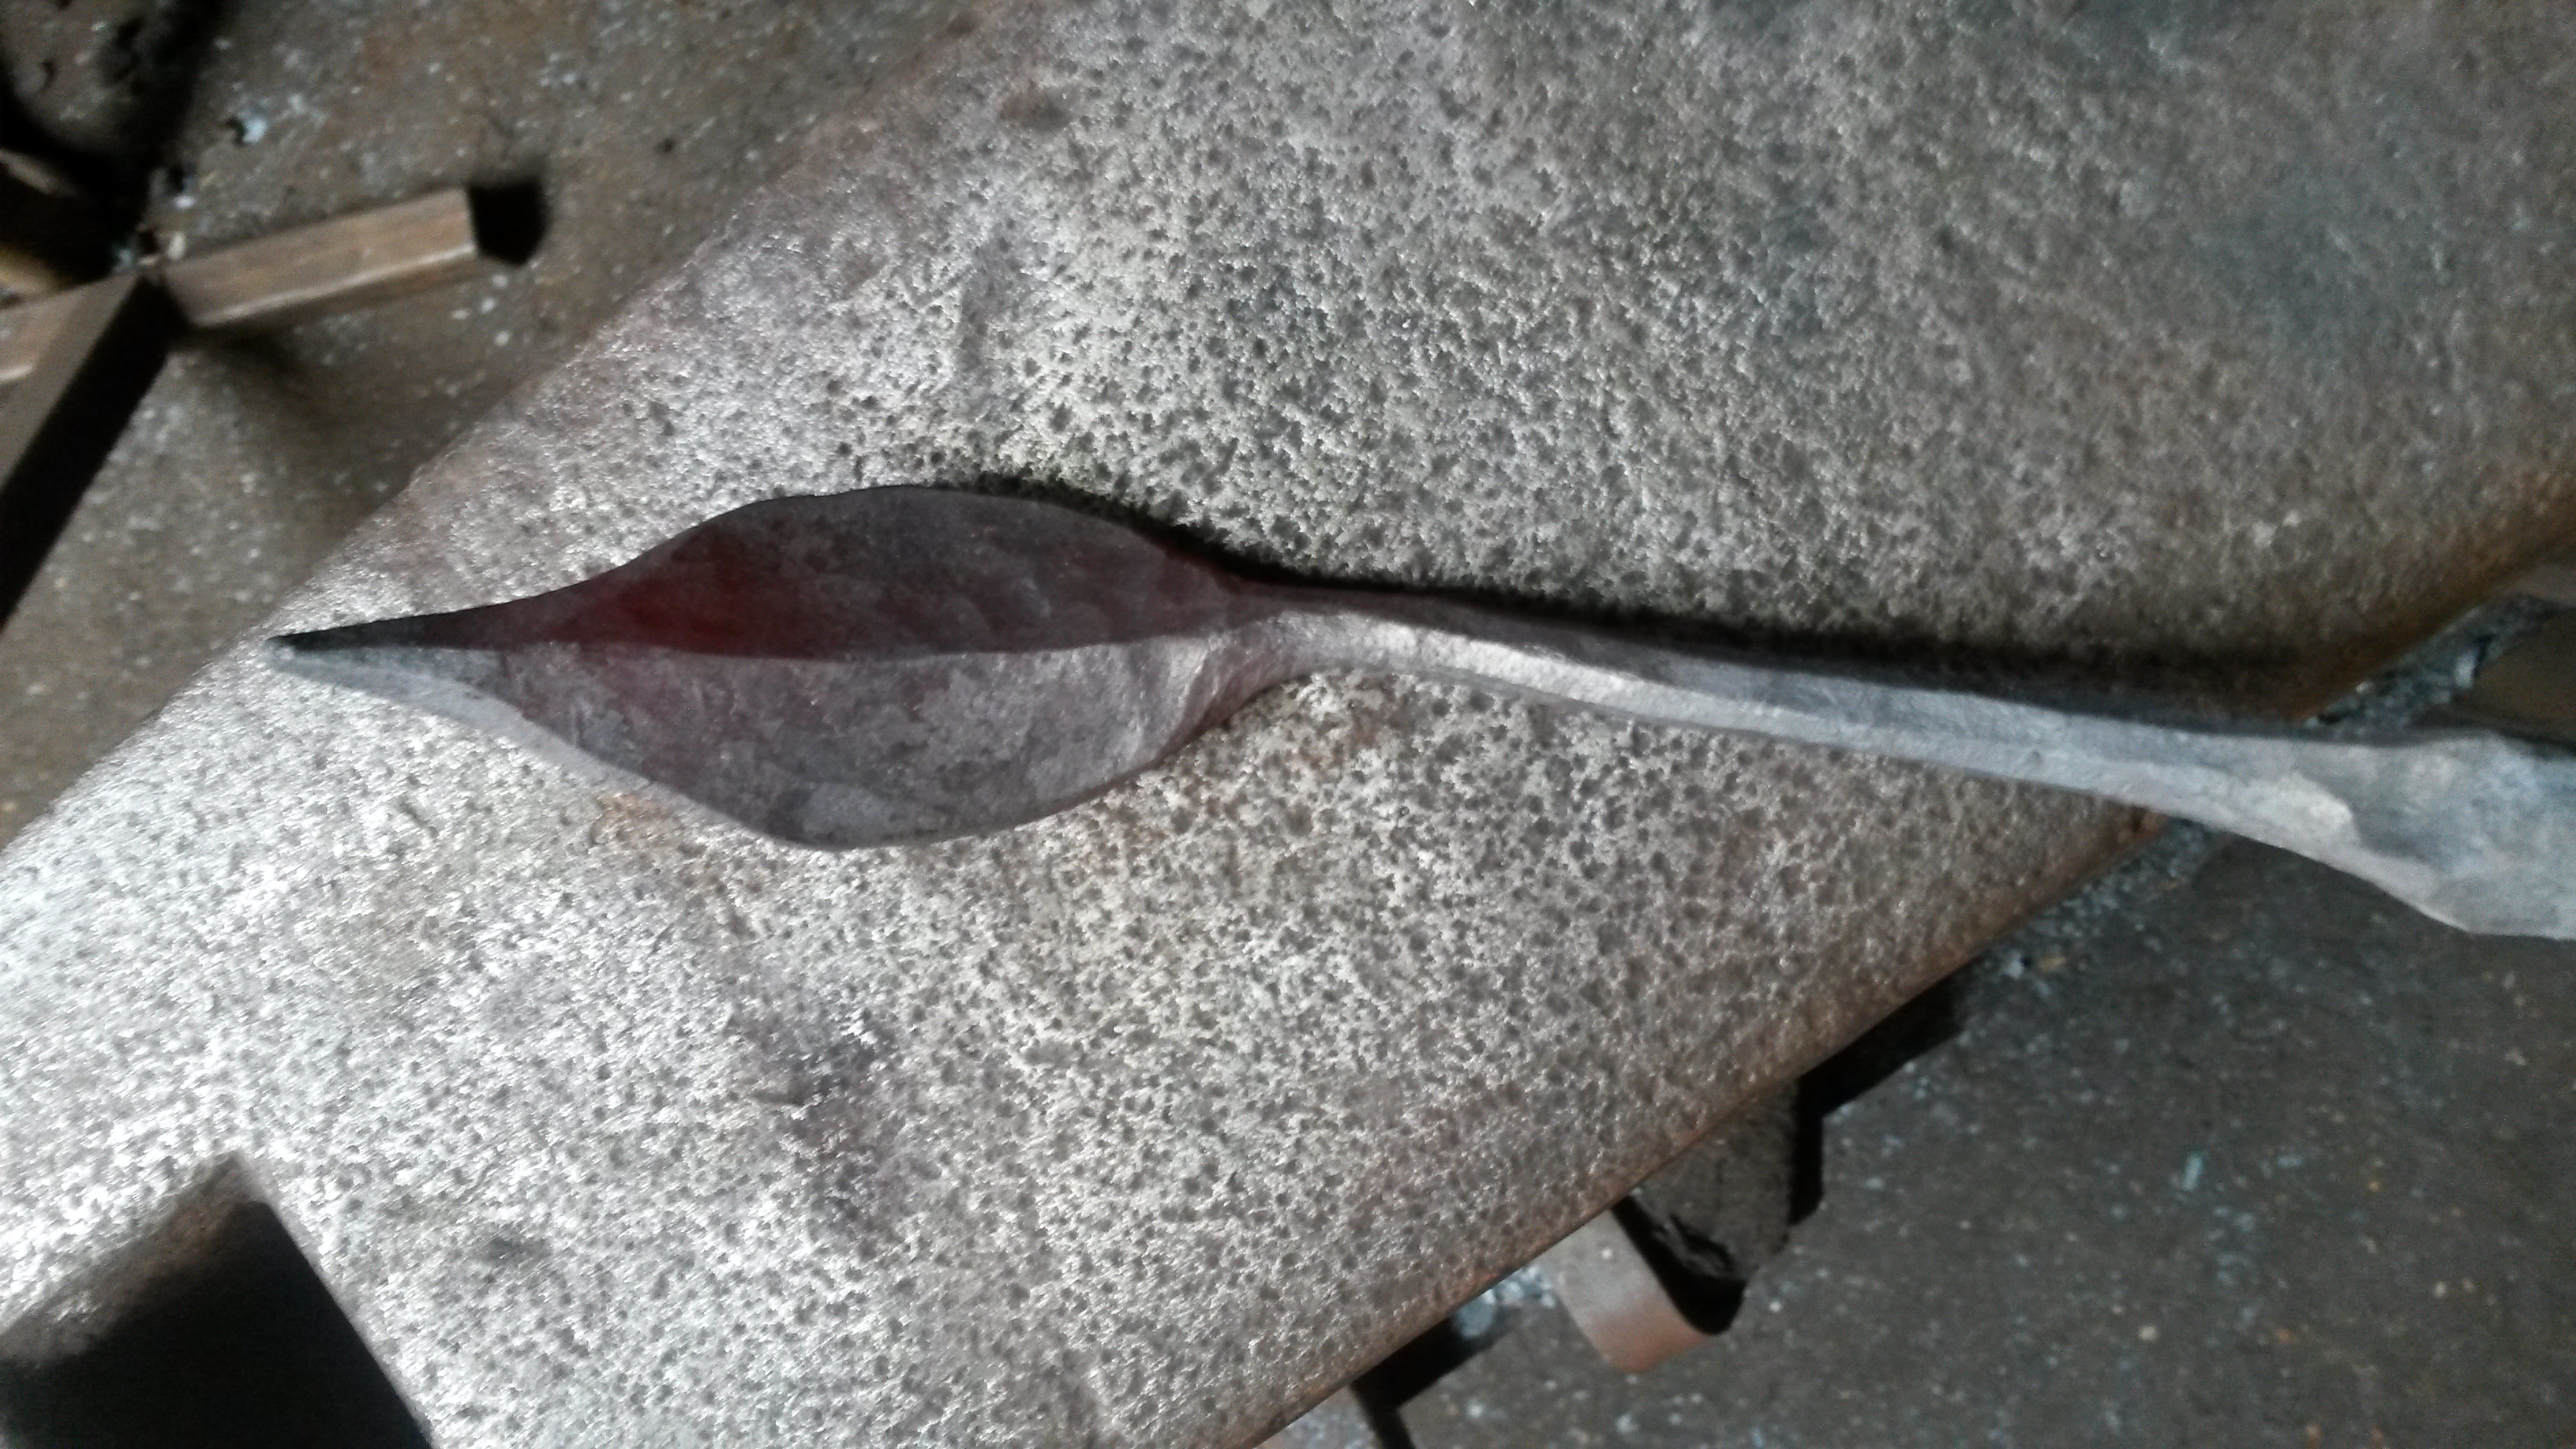
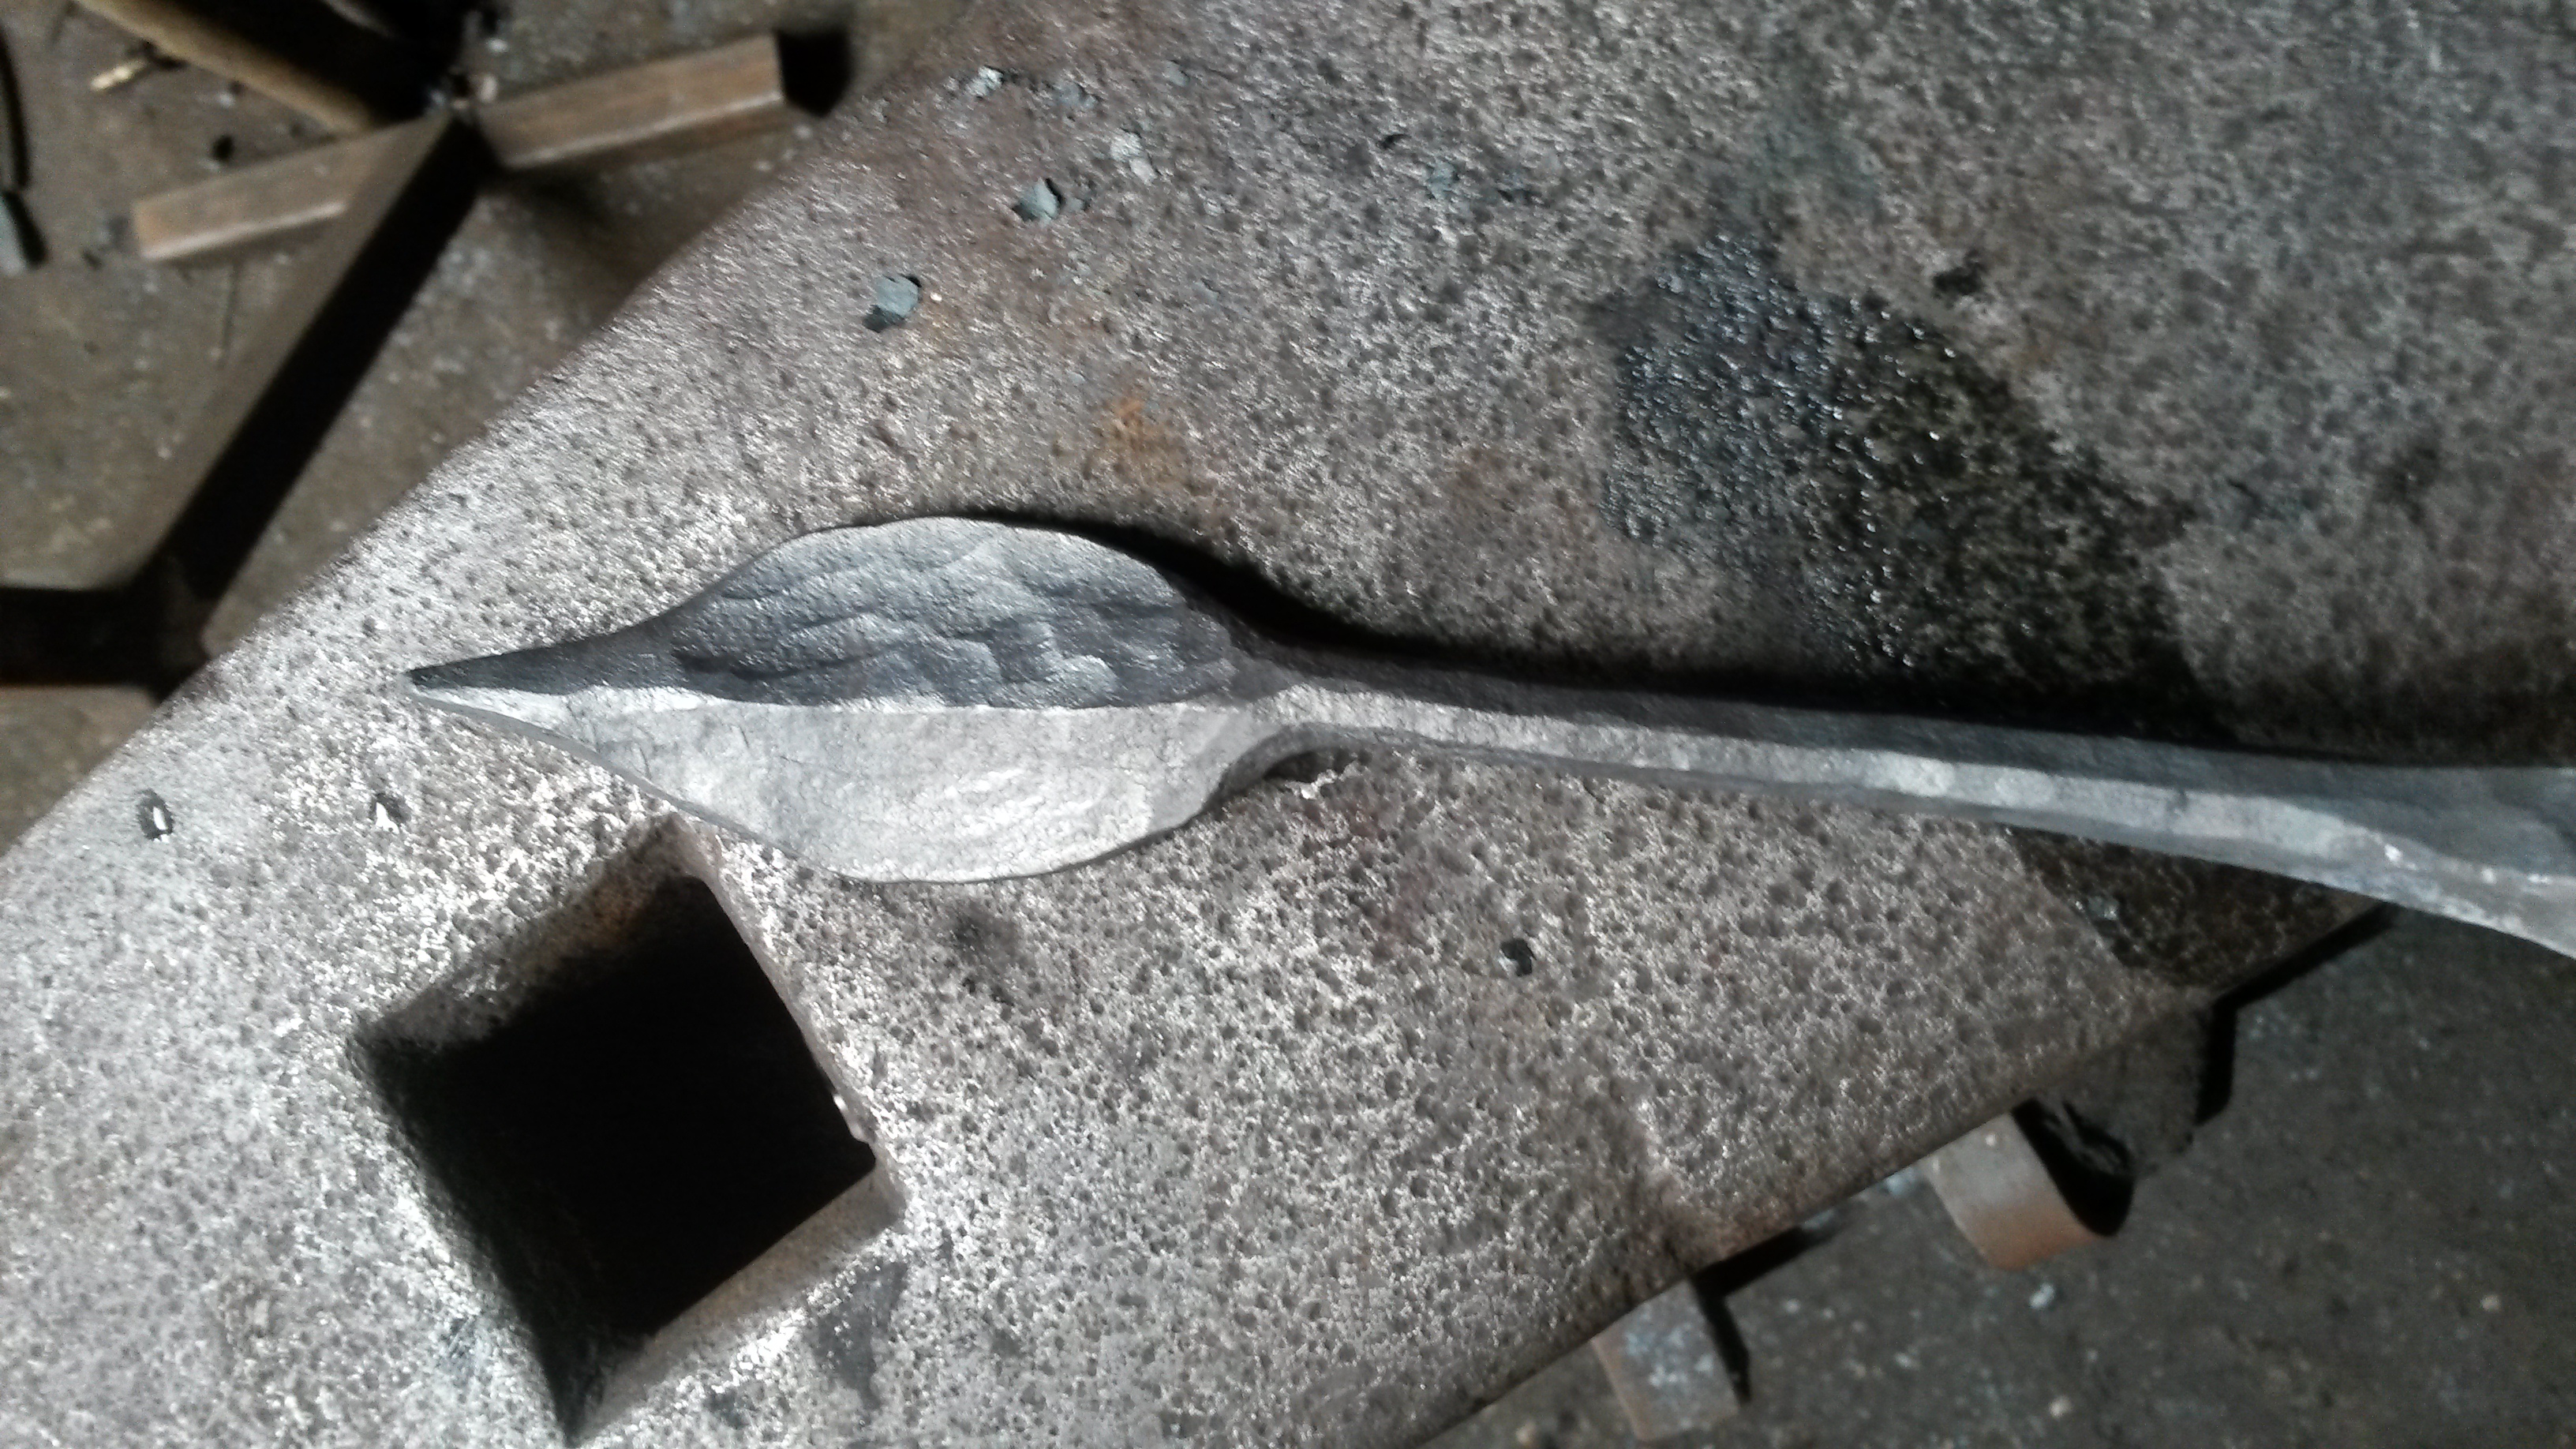
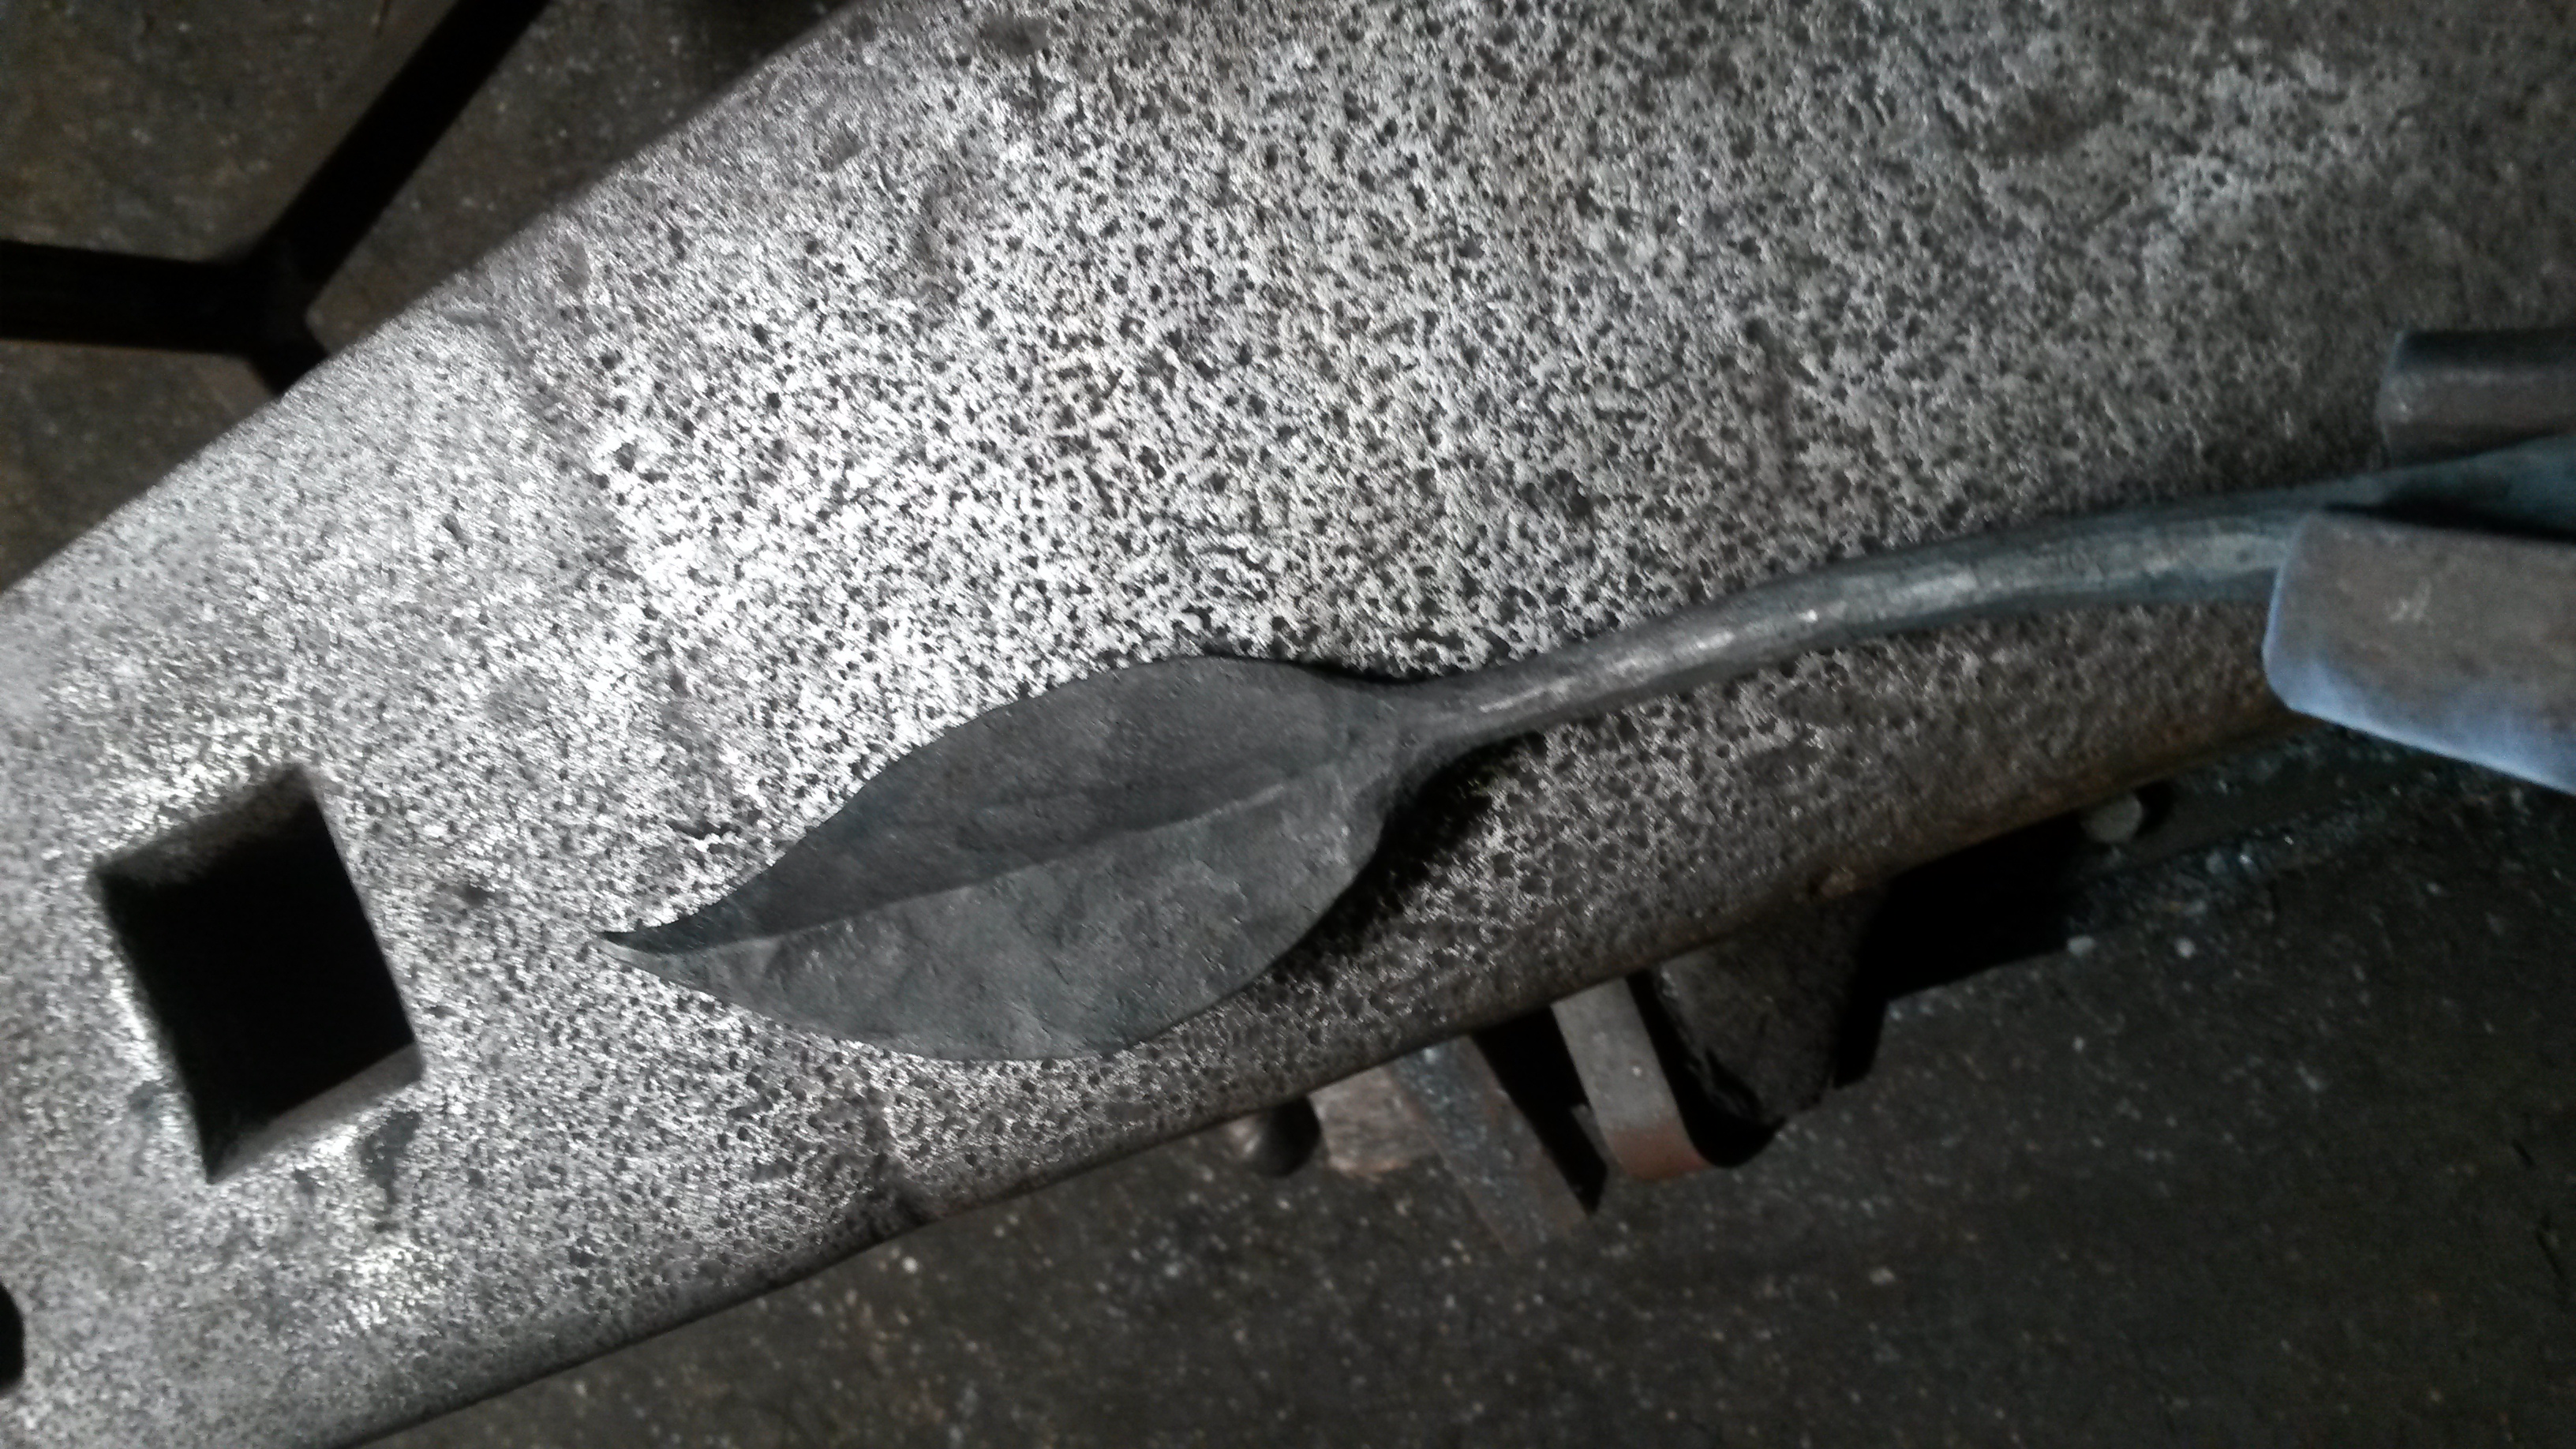
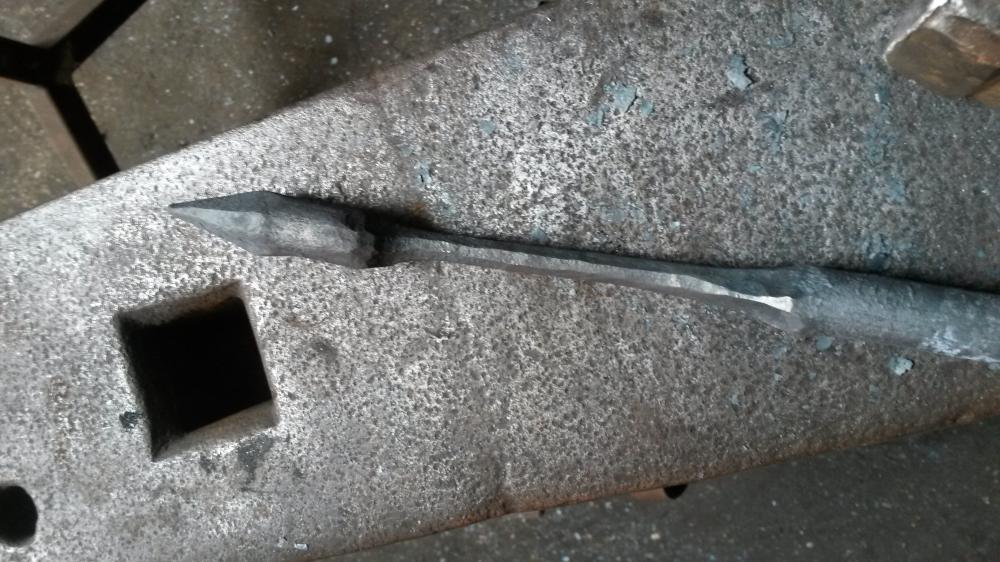
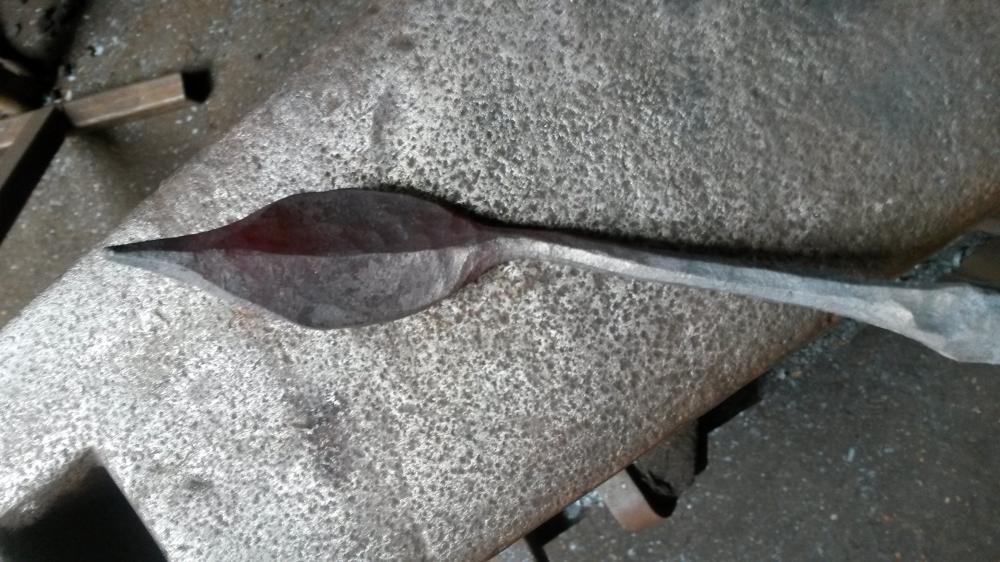
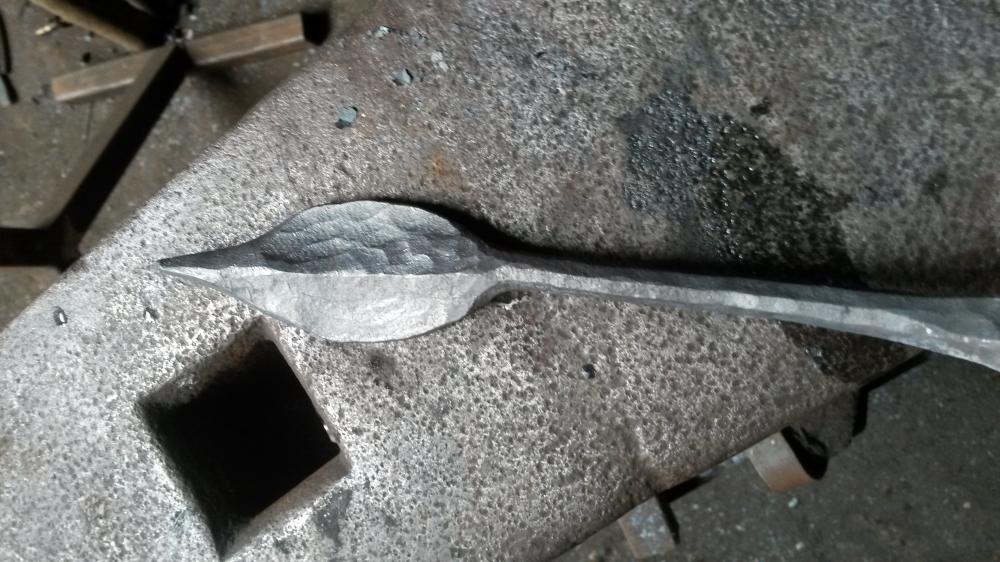
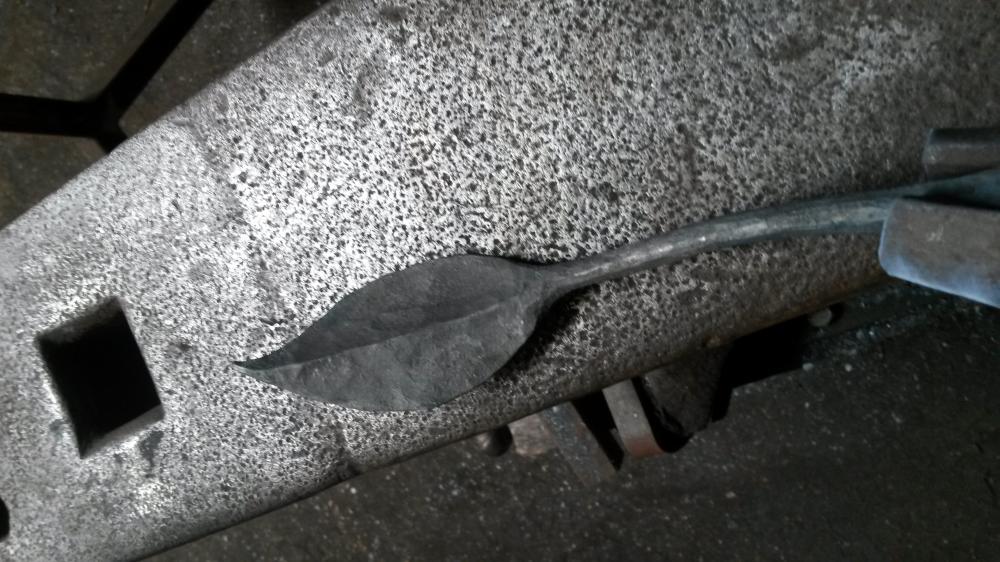
Hi folks, for a while I struggled with necking down leaf stems without them breaking, I assume I'm not the only who has run into this problem but thankfully now I've developed a leaf forging process that eliminates the issue. (Due to health problems I haven't been able to get an apprenticeship or study blacksmithing so I'm self taught, as far as I know this tip might be taught as part of leaf making 101 and could be painfully obvious to some, but it's new to me). I've had more than my fair share of help from this forum so when I find something that might be useful to someone else I think I should pitch in... I'm working on a commission at the minute that requires lots of leaves so I took the opportunity to photograph what I mean. I like to do my leaves with a raised central vein, the hammering angles required to push/pull the vein into position can cause the stem to twist. My solution to help know when the stem is untwisted is to not planish out the corners when rounding up the stem. If you leave the corners alone and leave the planishing till after you've forged the leaf, you can easily see where the stem's twisting. In the pics below the stem hadn't twisted much before I rescued it, but it could have gone much further and become a problem, if I let it. Another major factor in my process of avoiding the stem becoming brittle is to neck down on the bick, not off the far edge of the anvil. I find that unless your anvil's far edge is very rounded necking down that way is too much stress on one specific point in one go, whereas the bick is a gentler curve and shares the stress better. This leaf is made from 16mm round bar. Stem necked down on the bick, corners left unplanished. Neck starting to twist behind the leaf, as can be seen on the corners. Stem twisted back straight: Leaf finished and corners planished:
-
Yeah I think that stuff became Stovax. A couple weeks ago when Googleing graphite pastes I ended up on some obscure forum where people were singing Zeebrite's praises but were saying you can't get it anymore. Someone then piped up about Stovax & the consensus seemed to be that it was the new version/same product. Did it take long to dry when you thinned it down?
-
I remember reading in a recent BABA mag that focused on finishing that Peter Parkinson does some of his internal finishes with this combo after pickleing. I stopped in at the Fire and Iron gallery on my way back from the New Forest to grab a pot but Lucy said they were all sold out! I normally finish my interior work with the common beeswax, turps and linseed mix, so I reckon my first port of call will be mixing up a new tub and sprinkling some graphite in to see what happens. I'd imagine that will give a nice look but I'm guessing that graphite needs to be mixed in with some that'll set hard so it can't rub off on fingers/clothes etc. I guess there's only one way to find out! I picked up some Liberon "Iron Paste" and I might try and get some Stovax Grate Polish as well, both off the shelf paste/polishes/gunk that contain graphite for smartening up your fire places. My gut feeling is that using graphite is going to be quite an involved process and maybe not a system I'll use on my £8 bottle opener keyrings, but more likely something saved for candleabras worth a few hundred quid.
-
Hi folks, I've just ordered 2kg of natural graphite powder (and am being sent a freebie sample of micronised graphite from another supplier) so I'm going to experiment mixing it with a variety of waxes and paints for internal and external finishes. Out of curiosity, what you mix your graphite with and in what proportions? Cheers
-
Joel OF replied to Everything Mac's topic in Blacksmiths and Metalworkers Association of the South West UKMy search criteria was pretty much: Easy access, flat hard floor (or at least partly flat), no residential neighbours, electricity, double doors, toilet, somewhere relatively easy for clients to find, not a million miles from coal merchant/BOC/blast cleaners etc. Took me a while but I found it, and it's got the added bonus of only being 10 mins from a variety of tools & fixings shops & the small steel yard I use for odds and ends.
-
I have my eye on my Mother's long & shallow galv plant tub(?). Looks ideal for quenching large items that won't fit in their galv bin...that grew legs and ended up in my workshop. So too did their garden sieve thinking about it.
-
Yeah it leaks. I'm surprised no one has said it too, I didn't put it on there. The farrier I got it off believes a little bit of tape is safe but the fabricator I work next to says it's a bad habbit. Either way it's going in the bin!
-
Thanks for the tips folks. What's forbidden? If I'm being slow I blame my cold & snotty brain.
-
That would be ideal but I think UK stores will only carry UK standard thread fittings so it'll probably have to be an eBay job. I'll try a plumber's merchant anyway. UK threads are referred to as "BSP", what are American propane threads referred to as? If I Googled a reducer or went into a plumbers merchant to ask for a reducer I'd be looking to get a "BSP to .... propane fitting".
-
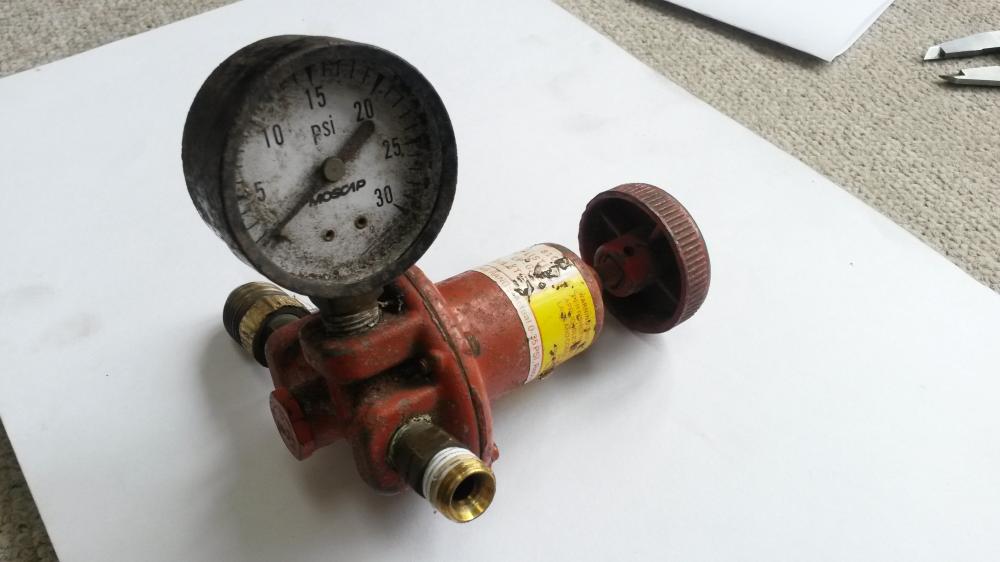
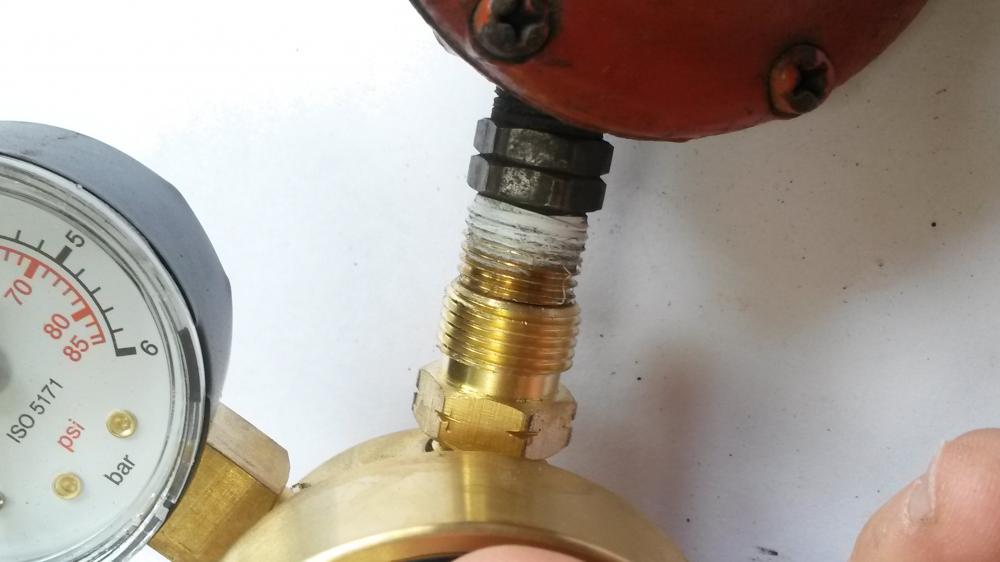
Hi folks, 2 questions... Taking full advantage of this website's international usage, I bought an old gas forge a few months back off a farrier mate & decided to replace the regulator as it's seen better days. My new British Standard regulator arrived but the hose (already attached to the forge) wouldn't screw on, that baffled me a bit until I noticed the regulator is American (Lister) and the hose fittings are too small. The O/D of the threads on my new British reg look to be 5/8" and the O/D of the threads on the old American reg look to be 9/16". (Close up pic of the two side by side illustrates the difference). I rang the supplier I got the reg from to ask if they did a step up/down fitting which I could just screw on, they said there isn't such a thing, sounds unlikely to me. I'm new to gas gear in general and clueless with Americam fittings, can anyone offer some advice as to which items I need? Considering that the current hose fits the forge I'd like to keep that if poss. The other thing the supplier said was that by law I MUST have a flashback arrestor on the hose. I know the rules vary if you're working on your own VS working with others, but even still that sounded suspicious to me. He then went on to say that if I bought a flashback arrestor he'd throw in for free a variety of British fittings that I could crimp onto the narrower diameter American hose if I cut the existing fitting off. That really made me think he's just trying to flog me a flashback arrestor. By UK law do you need a flashback arrestor on a propane forge? I've got them on my oxy-propane gear. Cheers in advance!
-
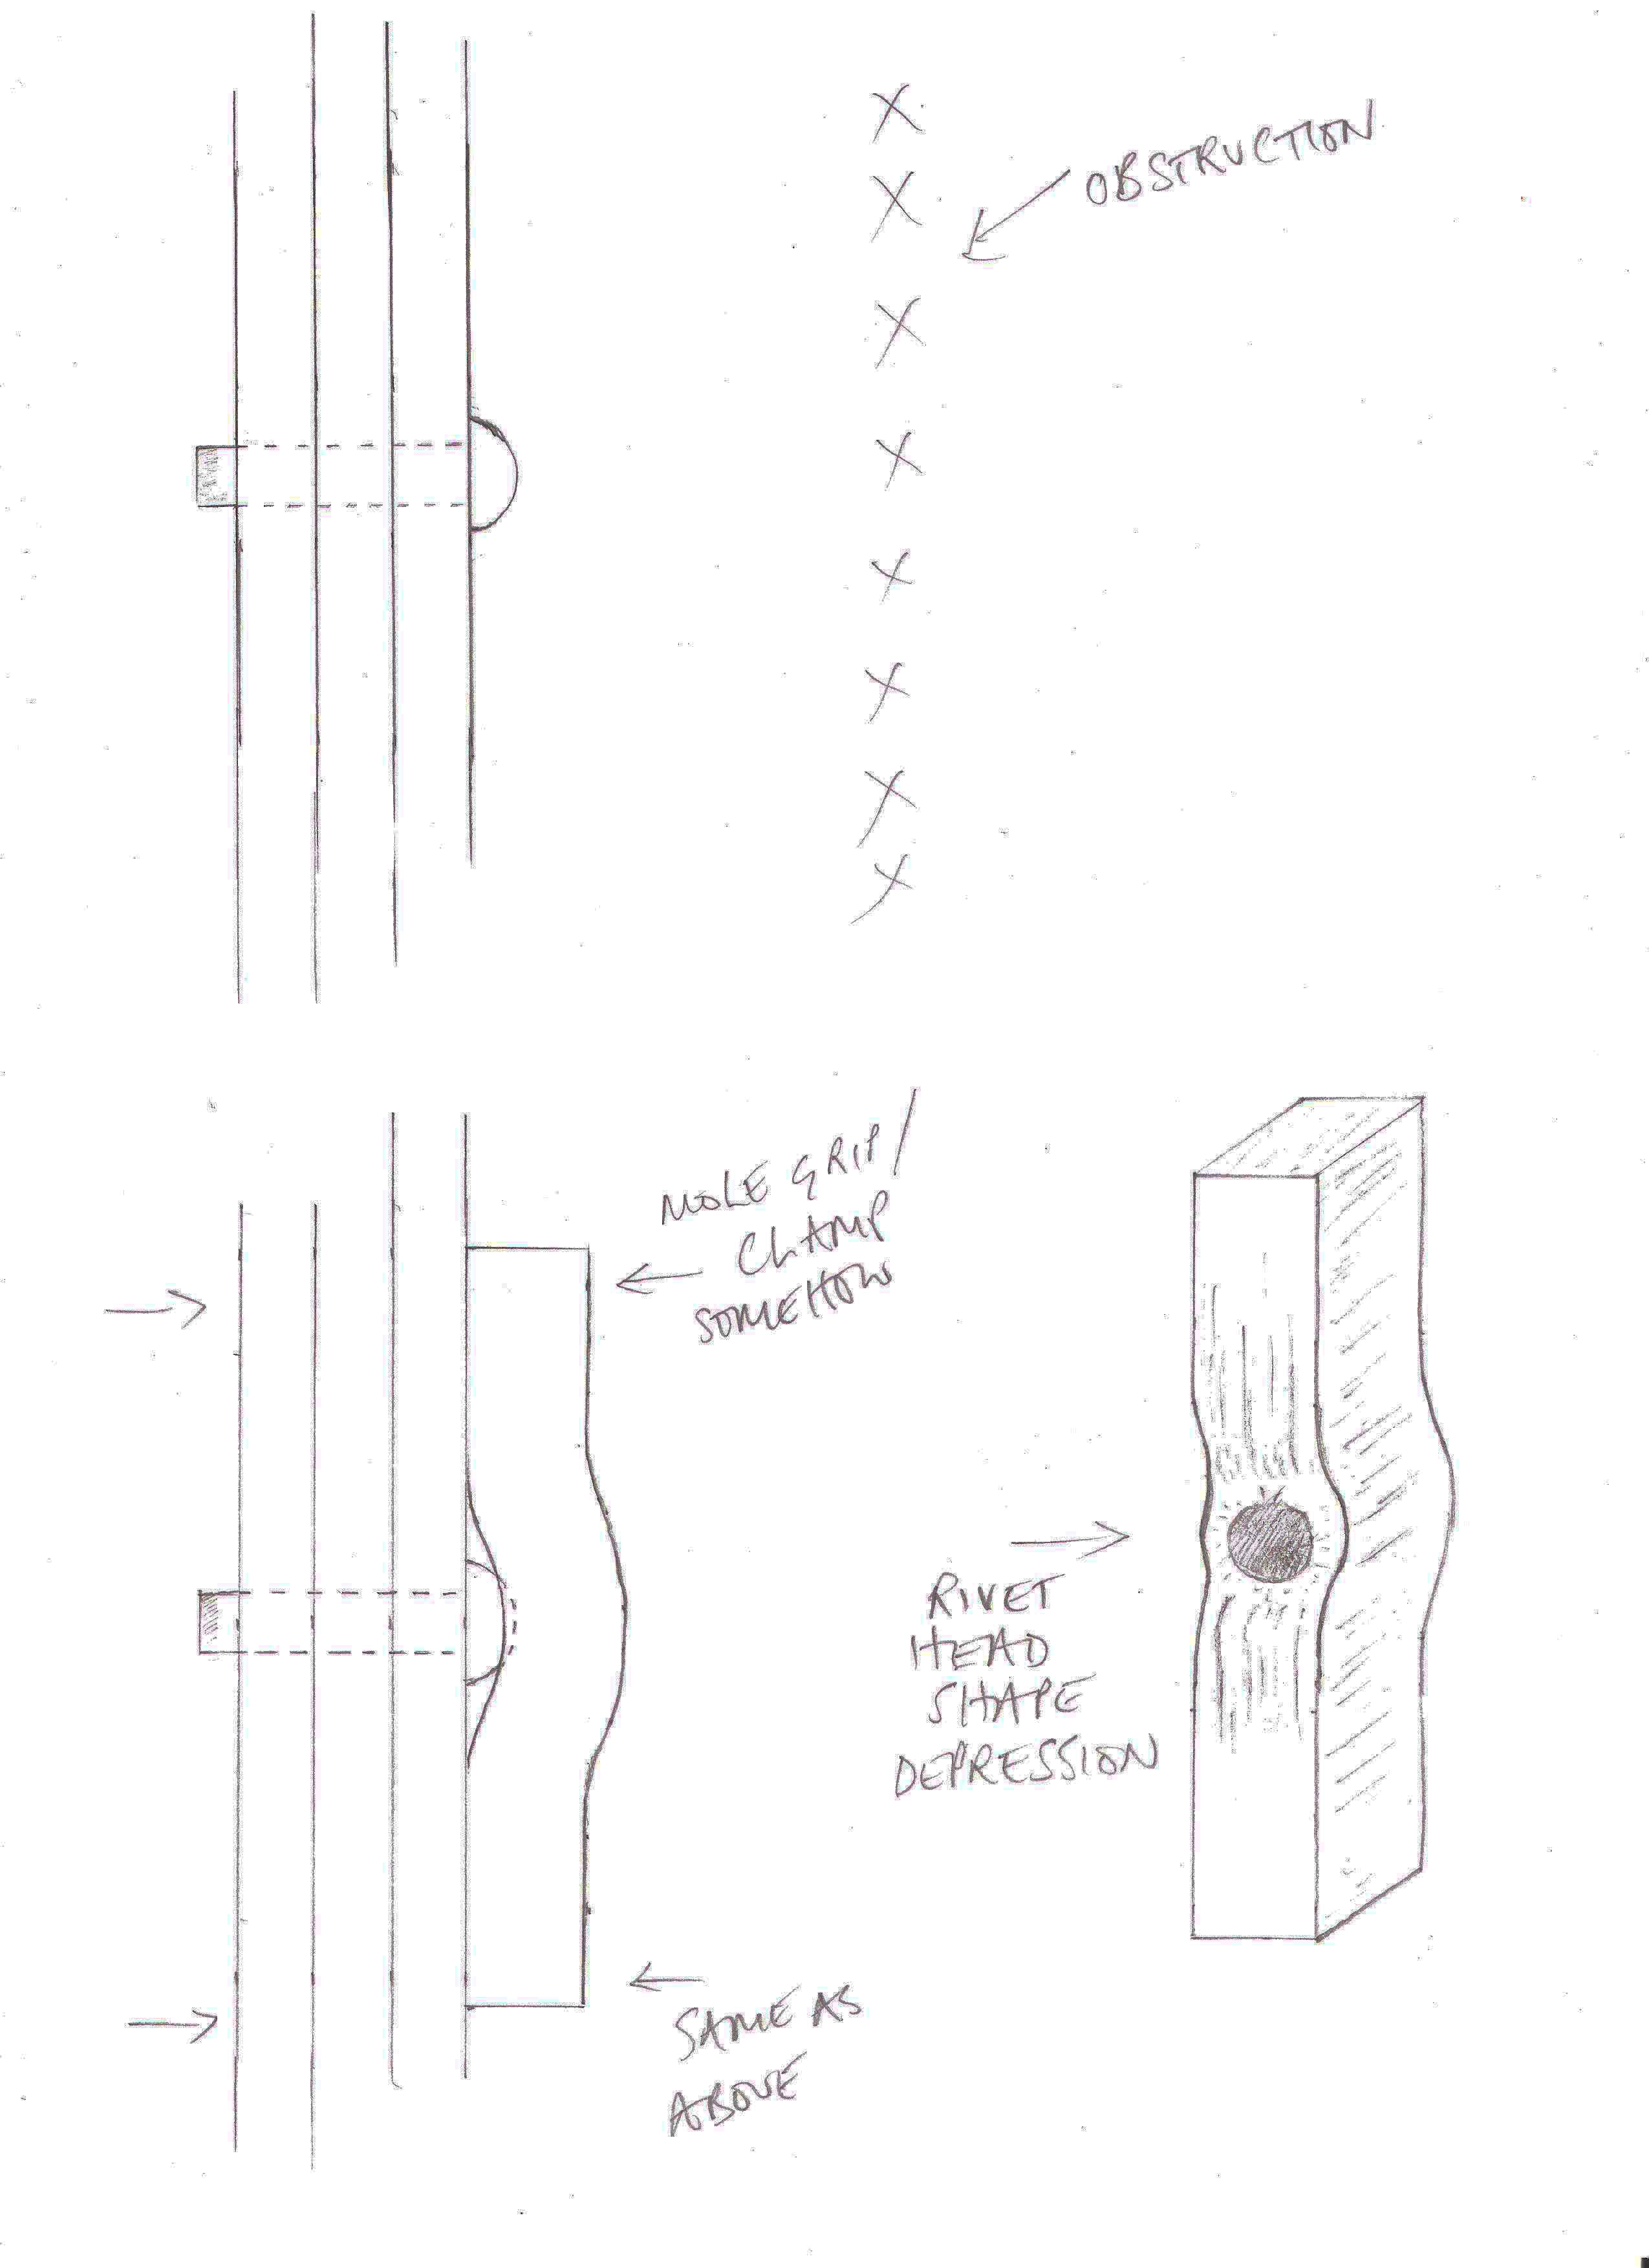
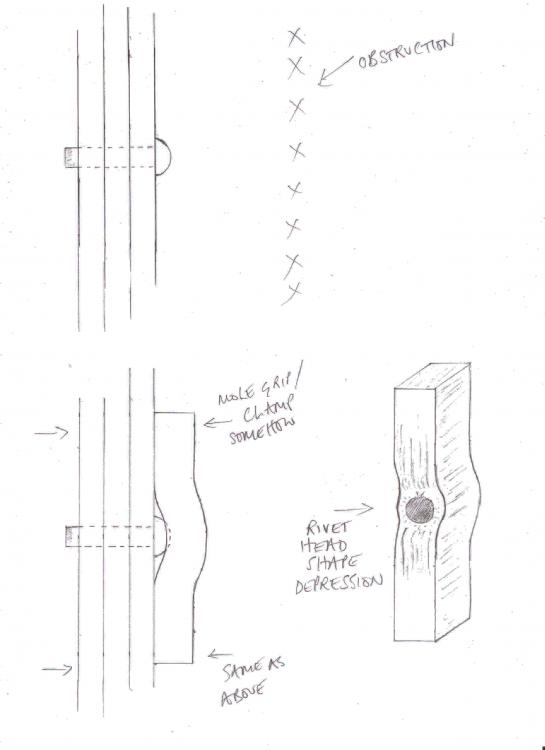
Hi folks, I was working on an idea for joining 3 pieces of steel together in a gate with rivets when I realised it would be a very tight space because of an obstruction, meaning I wouldn't be able to get by body behind the rivet head in a way that would offer a decent amount of resistance. I've changed the overall design of the gate so the rivets are now redundant, but the curiosity of how to rivet in a confined space lingered. Do you have any special gizmos that you use in a confined space to offer resistance and maintain the rivet head shape? I doodled this idea this morning, I think it could work on small rivets (like 6mm or 8mm) that don't require much whacking, but I doubt this would work on bigger diameter rivets. Note - I've designed this so it can be gripped / clamped on as quickly as possible so the rivet can be done in 1 heat from the fire. I originally invisaged a more universal / adjustable bracket with nuts and bolts to grip it againt the work and then I'd heat the rivet with the oxy torch, but whenever possible I like to leave the oxy torch as a last resort as I like the buzz of having to do things in 1 heat.
-
Joel OF replied to Everything Mac's topic in Blacksmiths and Metalworkers Association of the South West UKGive this a try. Any big country house that's open to the public will probably have some outbuildings to rent, and chances are that even if they don't they can give you the number of a local commercial managing agent who might be worth a try. Finding a workshop ain't easy, stick with it.
-
Cheers folks. For what it's worth I discovered a company in Burgess Hill called Ace Coatings South that do vinyl paint in any RAL or BS colour you want. Then all you have to do is make the client realise ironwork doesn't have to be BLACK!
-
Thanks folks. B.T.W Alan, I remember you mentioning before that you mix graphite in with your paint, is that with vinyl paint? Where do you get graphite from? *sigh* Brundles. Every time I hear that name I get this awful earworm mash-up in my head...a varition of that Ant & Dec song "let's get ready to rumble"...becomes "let's get ready ready, let's get ready ready, let's get ready to Brundles". Now it an annoy you too.
-
Hi folks, from looking up a few specialist paint suppliers I see that vinyl paint is the type of paint specified for use over zinc treated surfaces, typically "high build vinyl paint". Does anyone know what it is about vinyl paint that makes this the case? Just curious.
-
LOL, for a split second when I read that I thought Balu was the surname of some south American artist I hadn't heard of and I'd inadvertently mimiced his style. Y'know, like "Juan Balu", the revered Chilean sculptor who was assasinated in the 50's. (Overactive imagination). Or does he mean the bear from the Jungle Book...
-
Thanks folks. The client has emailed to say his wife loves it & can't wait to get home so that's a relief. No it's not got a finish on as the client wants it to rust down like an alpaca sculpture they've already got in their arboretum. About a week ago I gave him a good dusting over with a flap disc to knock off some of the mill scale & have been spraying it with vinegar daily to start it rusting.