Joel OF
Members
-
Joined
-
Last visited
Everything posted by Joel OF
-
With doughnuts / chocolate biscuits / cookies.
-
I second the idea of facing lights upwards into a canopy to be diffused & reflected down. If it were me I'd try and get my hands on some battery powered 5W LEDs, preferably "warm white" rather than "cool blue". LEDs have the benefit of running much cooler so you can handle them easier if you discover the positioning needs a tweak. With enough height and width above your work area they may be gentle enough to be angled downwards. You also try difuseing them with an opaque screen in front of them, grease proof paper would be the first thing I'd try, but I'd never suggest anything to someone I didn't know was fire proof.
-
I haven't got notches / cut outs in the side walls, the sides are the same height all the way along.
-
I typed out a long answer to this earlier but it disappeared into the ether when I hit reply. In short I'd say go for it, even though I'm bumbleing around inefficiently I can see the benefits. I suppose my main concerns are whether I'm burning coke than is necessary with the fire at this depth, and how much higher would I want to build the fire up to hit the sweet spot for fire welding? My bottom blast forge was about 4 inches deep, for fire welding I'd build that up to about 6 inches and have my metal in at 4 inches.
-
The depth of the hearth on the one I've restored is 12 inches. As I fabricated the bosh and tue all in one but didn't taper the tue, I've shimmed up the back of the bosh to tilt it down. In practice that's nudging my tue air hole down to 3.5 inches from the top of the sides and 8.5 inches off the bottom. I made the tue with what I had available so it's 3 inches O/D with a 1 inch air hole. I'm going to drop in on the local ol' boy farrier/blacksmith who runs (or ran) coke forges to grab some bags of ash off him, I'm sure he'll have a pearl or two.
-
Cheers. I'm a coke man.
-
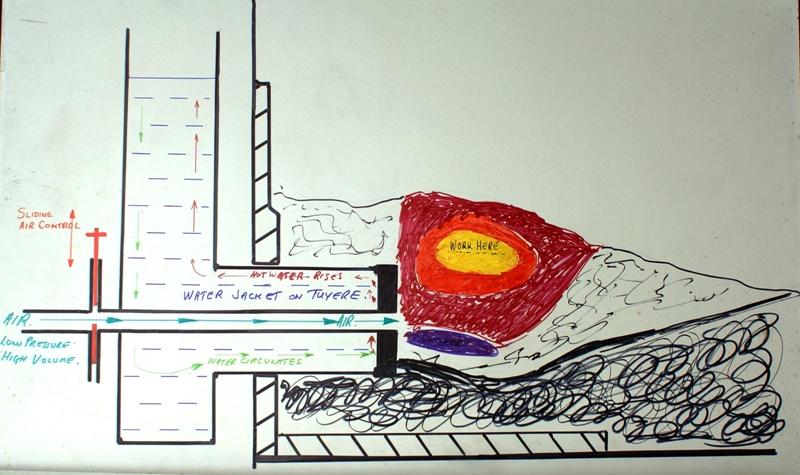
Hi folks, to cut a long story short I've been forced into a horrible situation that involves changing workshop and at the same time being thrown into switching from using a bottom blast forge to a side blast forge. The real problem is I don't have any time to get used to the fire change as I have to make and design a range of Christmas market stock now in 5 days as my first market is next weekend. I'll start by saying I have trawled through lots of old threads looking for the answer but haven't had any joy. I'm sure now that I've said that someone will link me to the one thread I haven't yet found that details everything I'm asking... With regards to side blast forges, (particuarly water cooled), putting aside the depth under the tue and focusing solely on the coke level above the centre line of the tue...I can't seem to find a coherent theme or constant depth suggested. I have restored a side blast forge without any cut outs at the sides and I have followed the advice in The Blacksmith's Craft book to make the sides 3 inches above the centre line of the tue. I have saved the illustration they give in the book which shows this but to avoid any copyright infringment I won't upload that. I hope instead that John B won't mind if I upload an illustration of his (that he included in a reply to someone else on an old thread on a similar subject) that I saved a while ago, as the picture is virtually identical. (Yes, I am that sad, I save illustrations of fires for my own reference). That would suggest to me that your fire is always going to be at least 4 inches deep, (3 under the sides, 1 inch over your work on top). However I've read from some very experienced smiths on here that the centre line of the tue could be only 1 inch below the sides, or even at the same height. So if you're laying a long bar across the fire and resting it on both sides, that's a massive difference in fire depth and I'd assume that a fire only 1 inch deep would be rich in oxygen and you're work would be very scaley and hard to fire weld(?). Frustratingly I was confident at fire welding on my bottom blast forge but now with the change I'm reluctant to design any stock that includes fire welds as I can't afford the time to battle dirty welds that fail because I've got the fire depth wrong. I expect I'm overlooking something obvious, I usually do. As I say the situation I'm in is a bit nightmare-ish (feeling like I'm working in someone elses workshop too so I feel disorientated too) so if anyone can offer some words of wisdom it'd be much appreciated. Cheers
-
Well I've put the oxy torch right next to a vise & I suppose I could even put my 2nd anvil down that end too...turning the cold end of the workshop could warm up into a "luke warm" end. Hmm, I suppose that when I finally get round to making a touch mark I could have it (semi) permenantly setup in the littleun.
-
A couple years back I scored a free small No.3 Denbigh flypress and recently I bought a huge Norton No.6DB flypress. I've 99.9% moved into a new workshop & I've setup my "hot metal working zone" in a way I'm confident stand the test of time, but I can't really find a good spot for the small fly press. (I don't think I used the small flypress once in my old workshop after getting the big one). The only convenient spaces for it are down the other end of the workshop in the fabrication/assembly area which are too a long a walk from either my coke or gas forge for a piece of metal to retain a decent heat. My only heat source down that end is the oxy-propane torch which I positioned there to avoid coke spitting out onto the hoses / prevent fire welding nasties landing on the hoses. I suppose if I put it down that end I could use it for light weight spot straightening, but even then it seems a bit decadent. Before I dismatle it and put it in the corner to become swamped by clutter forming around it, can anyone suggest any uses for it that may sway my mind to keeping it on the shop floor? Merci buckets.
-
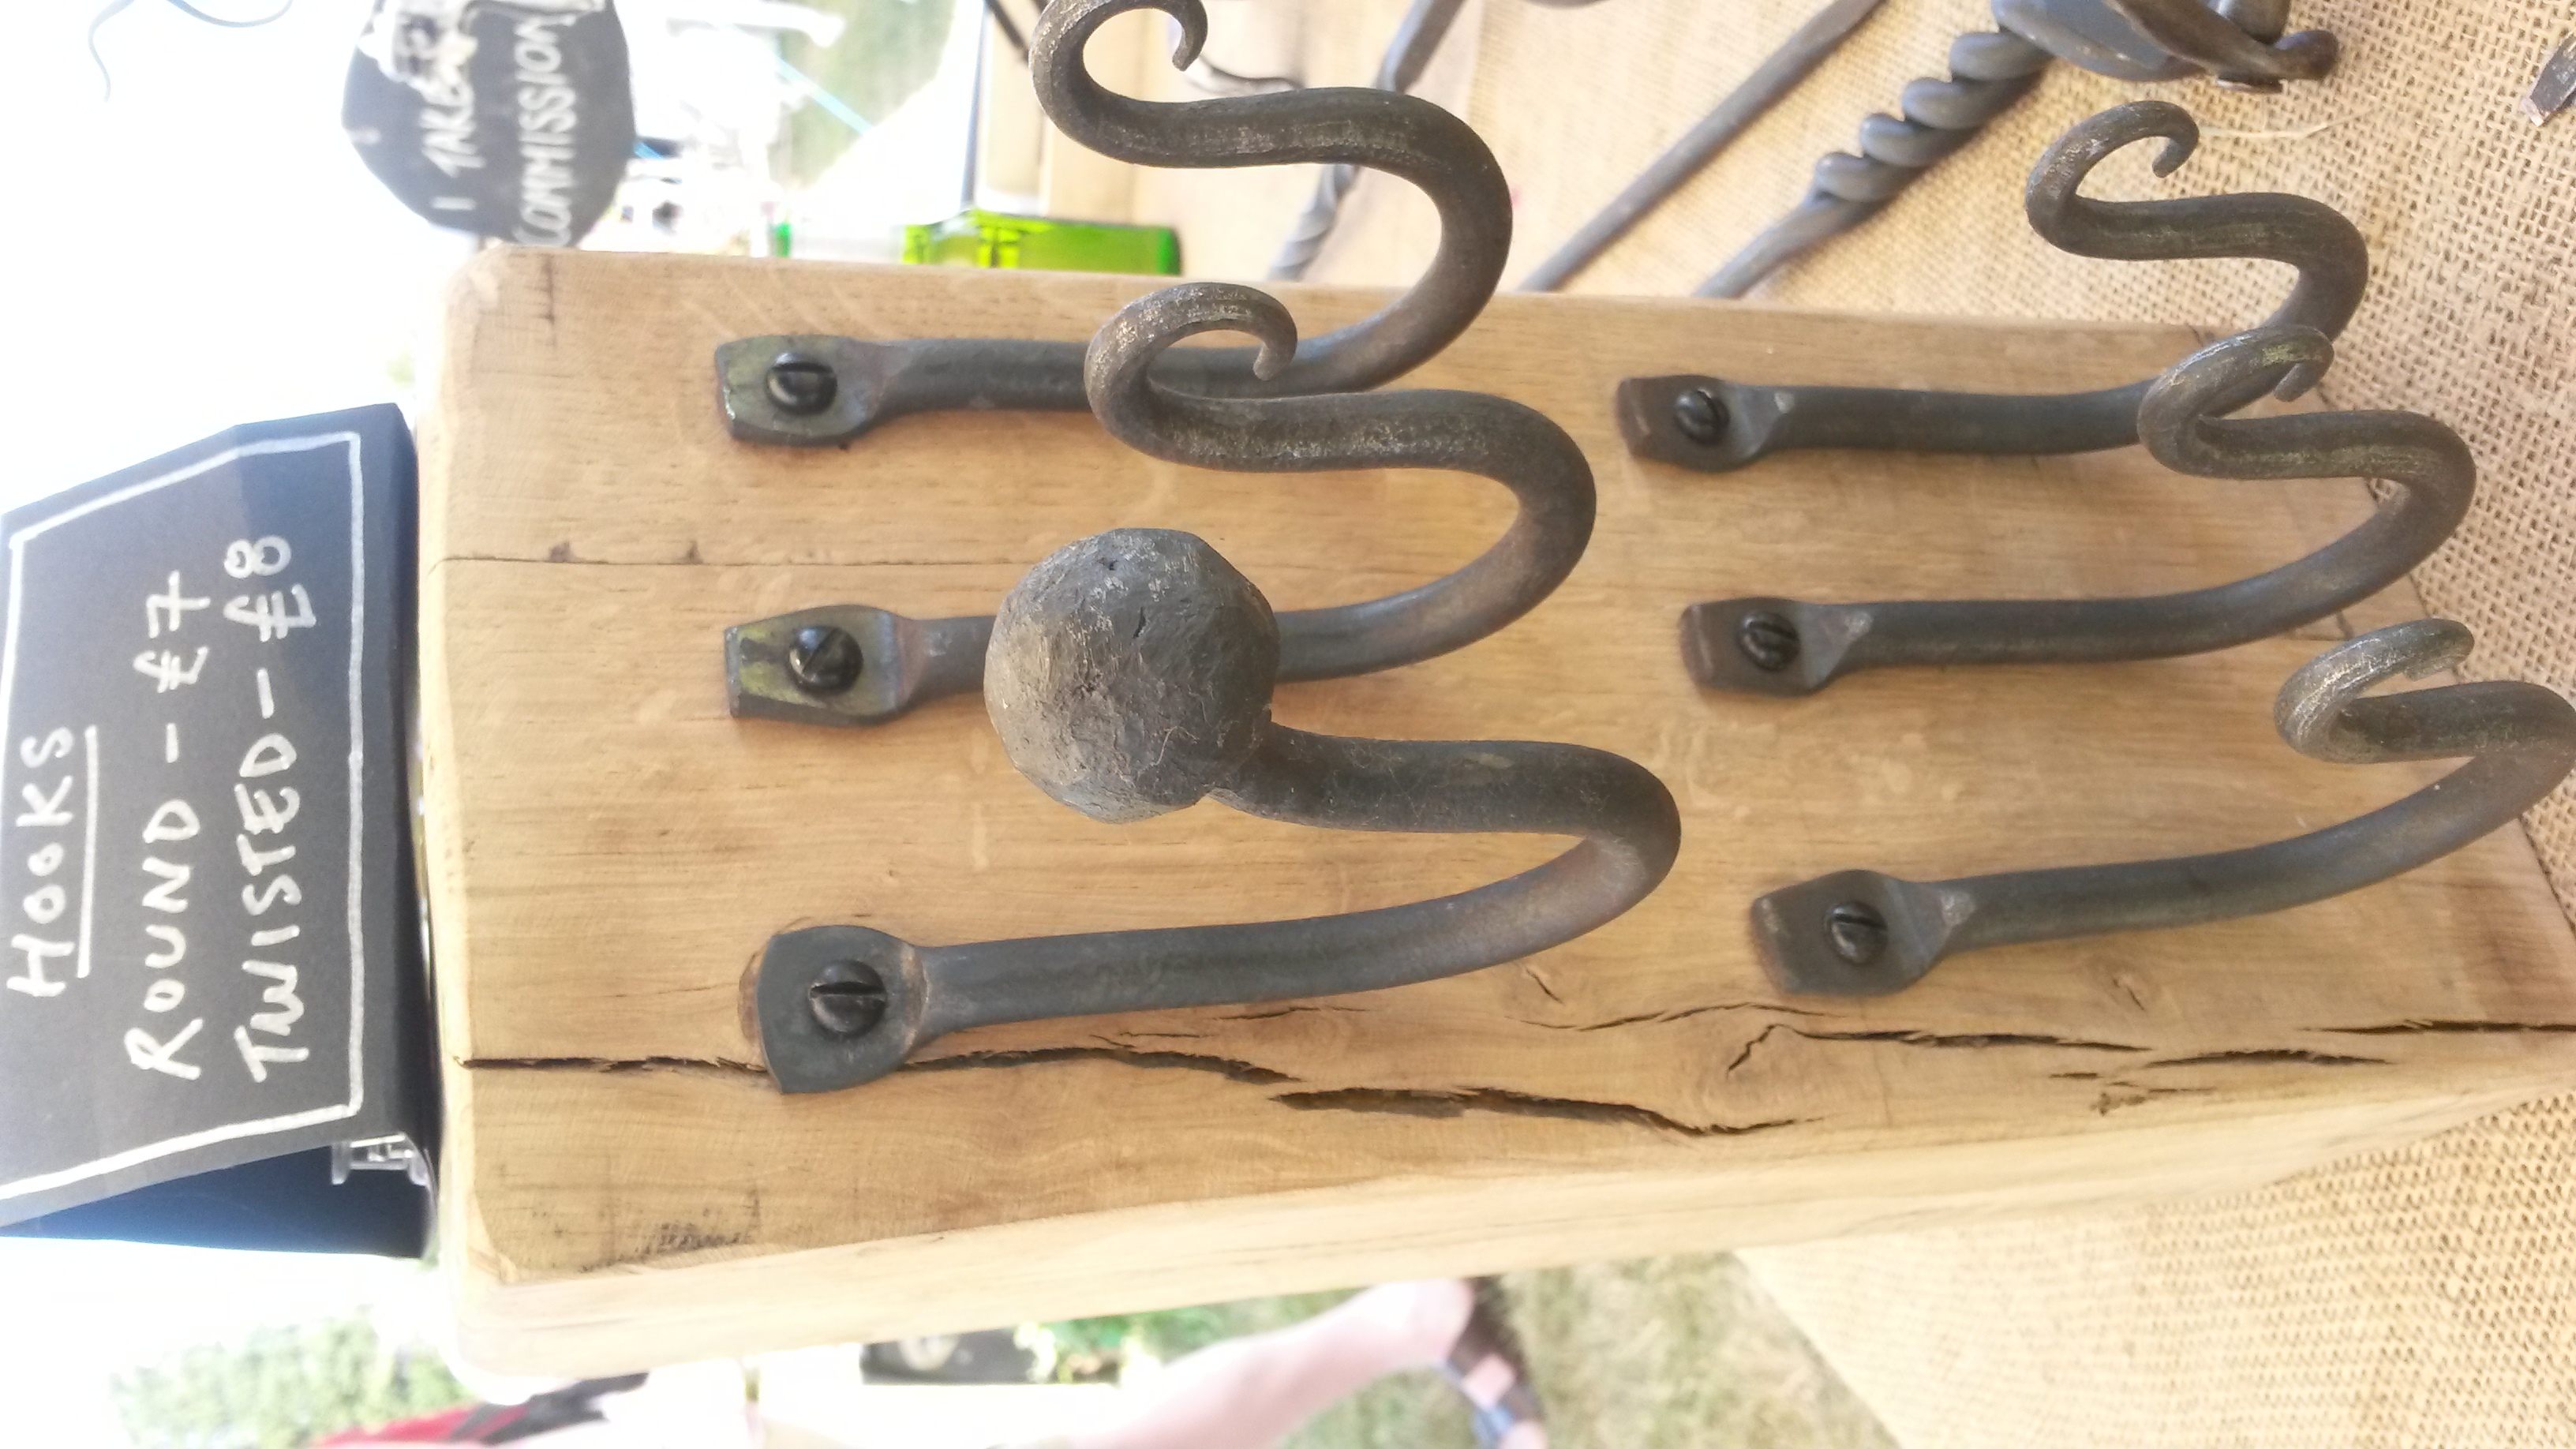
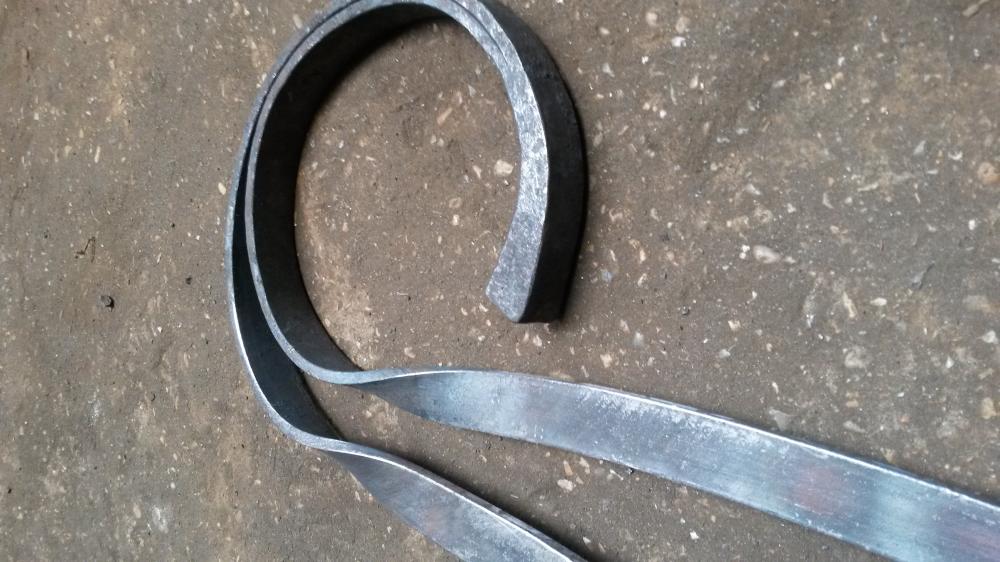
Heh, I just found on my phone a picture of a hook I made last summer at a demonstration. I was making one particular item on repeat but also taking on the spot orders to relieve the boredom. Obviously I try and give a bit of showmanship to it, explaining how I'll make their item, then explaining what I'm doing as I go along. A guy came up and asked for "a hook with a ball on the end" so he could hang his motorcycle helmet up, he described the shape and size he wanted. I told him that to make it using what I had to hand I would get a piece of 10mm round bar, wrap a piece of 12mm round bar around the end of it in a doughnut shape, then repeatedly fire weld them together and work it into a ball shape. I explained that it'd be a bit of a challenge because I was out in the blazing sun and barely able to see the colour of the metal, and there was a breeze which would blow the sparks away from the fire, making it really hard to judge when the metal was hot enough to weld. (No flux). He seemed interested but when I was getting to the critical stages his mate turned up, he then lost all interest and started talking about the price of potatos in the supermarket, obviously that conversation couldn't wait. In the end the guy was happy enough with it but didn't really seem too interested either way about what was going on. Although it's only a small unremarkable object I thought I might as well upload the pic as someone here will appreciate the process more than he did. There's some tiny spots where the welds didn't quite take but it ain't going anywhere in a hurry. I'm sure if I'd given it a little tickle with a rasp to it to neaten it up they'd have dissappeared, but given he'd lost interested and I was only charging him £7 I felt he'd already had his money's worth. I wasn't fussed that he wasn't paying attention to me, it was his apathy towards a dying craft and one of the most magical processes in it that irked me. His loss. I have no idea why my pics always rotate themselves through 90 degrees when I upload them.

-
I think you meant to post a link to a video but you've posted a link of this thread. The bick/horn on your anvil. Obviously every anvil's bick size varies but you probably want to neck down a few inches back from the tip of the bick.
-
Bick = horn.
-
Ha, yes. I was recently mulling over shifting the focus of my business from local commissions to internet based product selling, but then the thought of all those hours I'd have to spend on social media being narcissistic whilst developing A.D.D from "feeds" and "Likes" and "shares" alerts strobing in my eyes like one of those crazy Japanese cartoons that give children epileptic fits kinda put me off.
-
Fair dos, I wasn't hoping to structure my business plan for the next 5 years from people's answers, just curious I guess. I appreciate that location is a massive factor if you're mainly taking commissions from local clients or only selling products at local markets, but the big common demoninator nowadays is online shopping which, (as long as the customer is willing to pay the postage), kinda renders your location meaningless. I've had mail order enquiries from people in England as well as America for my rams head pokers - which I posted a pic of on Twitter.
-
Just curious what sort of ratio folks strike between bespoke commission work VS product sales? I.e does 50% of your income come from products and 50% from commissions? Do you only work on commissions and 100% of your income is earnt that way? Do you make all your money from products alone and just do the odd commission for sake of mental stimulation, even if you only break even?
-
Nice. Understated industrial aesthetics are definitely my favourite style of ironwork. Knowing when to stop with the embelishments isn't easy & you seem to have nailed that. The pic of them back to back reminds me of the Tyrell Corporation logo from Blade Runner, which is never a bad thing.
-
This has reminded me of the statue of St Peter in the Vatican and his foot which has been worn down from visitors kissing it over the years. Unless it's going outside just use something basic like beeswax and let the bellies burnish your work with their kiss.
-
Joel OF replied to Everything Mac's topic in Blacksmiths and Metalworkers Association of the South West UKStick with it, finding somewhere can take a while. If you haven't already do try the local big country house estates for the sake of their outbuildings. My new workshop is an old sheep shed no longer used by a tenant farmer based on a country house estate. The place was virtually falling down when they showed it to me but the estate have paid for all the repairs & kitting it out with 3 phase etc. Estates like that have to cover the running costs of the house so they rent out as much as possible & it's in their interest for the estate to be well maintained.
-
I've got some arty fabricator mates that use Corten sheet for plasma cutting rusty garden decorations for middle aged rich women that like that sort of thing. I think I remember one of them saying a sheet of 3mm costs 3 times the amount of mild steel.
-
The scrap bin is a cruel mistress, visit her and she will cleanse you. With such a hard shoulder transition from the lead to the stem (made from necking down off the far edge of the anvil) it's easy to get breakages. IMO necking down on the bick is kinder to the steel and creates a gentler, more realistic transition from the lead to the stem. You may find this thread I started a while ago of some use. Even if you don't forge a raised central vein the general processes may prevent you making as many visits to the mistress as I have made... **Attempt number 3 at positing the link still won't work. If you're interested, go to the search bar and type "avoiding leaf stems breaking"**
-
A brand new Vaughan's forge? Pretty swish!
-
I somehow managed to forget to say wire brushing before folding the metal back, after folding the metal back & inbetween welding heats is also going to help.
-
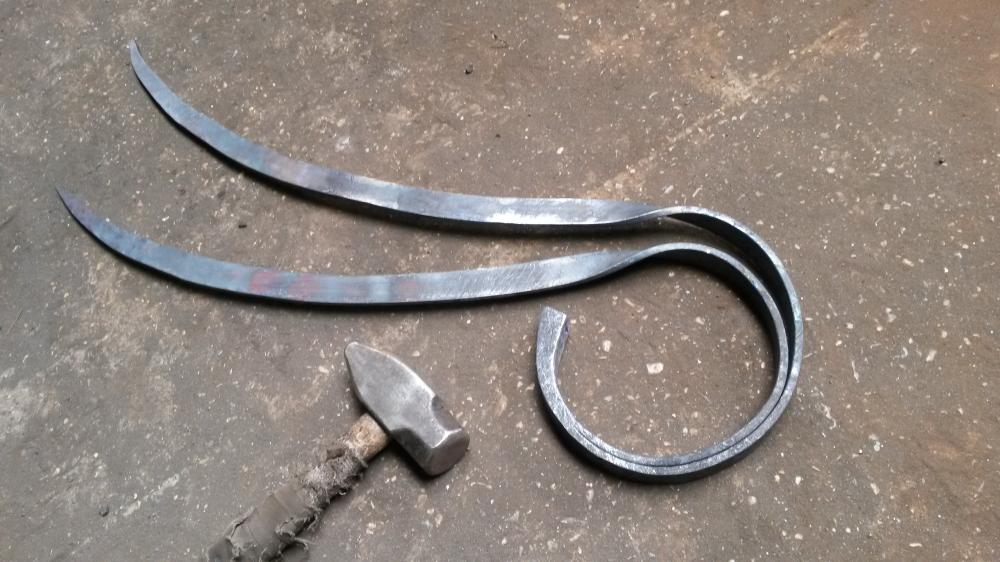
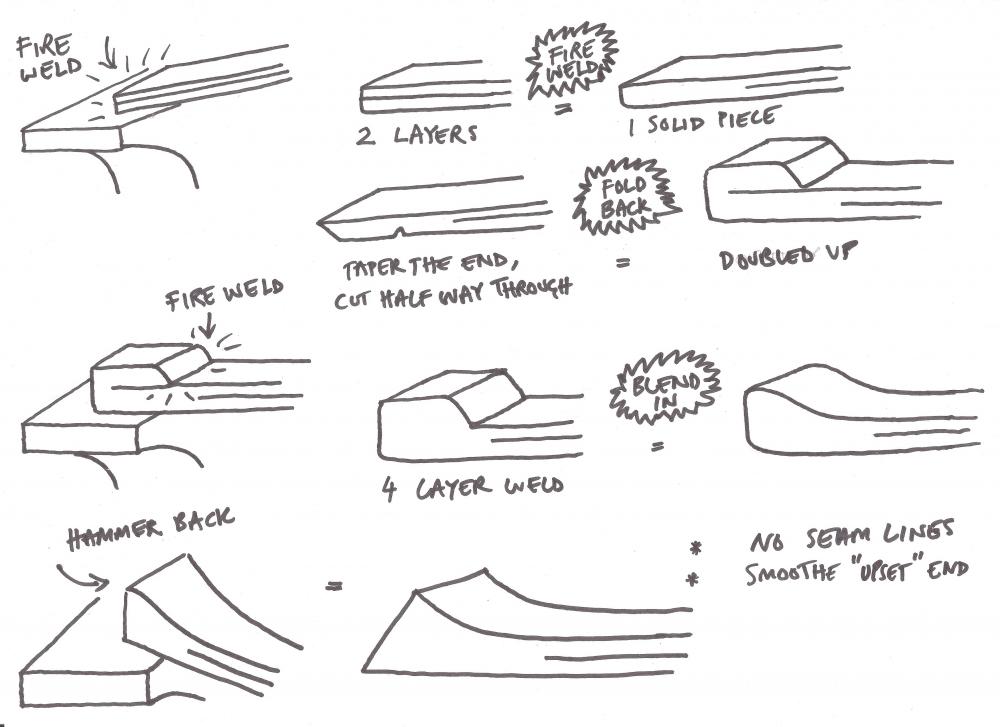
I know you're asking "what am I looking for...in this trial to see if it welded at all" but as it seems it didn't weld (or weld enough) it's hard to point to something and say "that's what you're looking for", when it's not there to start with. It's easier to answer "what am I looking for?" by answering that in terms of what you should be looking for whilst welding. For the sake of a bit of promo on my business Facebook page I drew up a step by step illustration of the process of fire welding an upset end on a component of a gate I'm working on. I've attached both below as it seems relevant to your question. My illustration doesn't match exactly what I've described for you as it was only aimed at the general public. Where the illustration clashes against what I've described for you, follow my description and not the illustration. You don't need flux, I've never used it on any type of weld I've done. Without typing an essay and describing every single element of forge welding, in my opinion for the type of weld you tried / I have illustrated I would say the most important elements are: - Taper the end of the bar before folding back so that the rear of the fire weld blends in and doesn't start to shear into the parent bar. - When you fold your metal back before welding do not shut it flat, only shut the tip leaving the back of it open so any nasties can be ejected out. - Weld the closed tip first, then put the metal back in the fire and bring it up to another welding heat, then start welding behind the tip. - Flip it over to weld from both the top and bottom so if you do have a seam line at the side, it isn't eccentric. - No seam lines is a good sign - Stop hammering as soon as you lose the welding heat - Multiple welding heats will give a better weld than 1 welding heat. - Any work on the area you have just welded should be done a near welding heat.
-
If he ditched the MIG and started forge welding it'd be like he's gone from electric to acoustic.
-
I was out installing some work yesterday and didn't get a chance to measure up so today I'll measure the distance from the bottom of the tue to the hearth bed. I know I made the tue hole 1" and the outside jacket is 3" outside diameter, but I can't remember the exact distance I left from the bottom of the tue to the hearth bed. Good idea on the air gap, Andy. I'll probably use a layer or two of 1 inch thick fire bricks in the end as they're only £55 for 30 online. 9.5" x 4.5" x 1". I'm sure I could find a use for the leftovers.