DSW
Members
-
Joined
-
Last visited
Everything posted by DSW
-
So, How did you do? Awesome: Told your boss what he could do with his job and put a down payment on a Ferrari. . Great: made big bucks...thinking about quitting your day job. Good: made a semi decent profit... At least enough to cover lunch. Fair: Basically broke even...Was able to buy coffee ( not counting Starbucks) Poor: Lost your shirt.... Customers seeing your naked chest ran screaming down the isles.. Added to the loss was your bail to get out of jail for indecent exposure. No comment: Trying to maintain low profile to avoid unhappy "investors" in cheap suits who would like to break your legs because you owe them large sums of money you borrowed to make this happen. :P
-
Years ago I vaguely remember reading an article or book that talked about brick chimney design. There was a ratio of diameter to height that tended to draw better than others. The book was written when they used coal to generate steam in most factories and a good draft was critical to the proper generation of steam or heat. I've hunted thru the books I can locate on chimneys but I haven't located the reference I'm looking for. Best I could come up with was this tonight. I'm betting a bit more time with google might locate what I was looking for. http://www.gutenberg.org/files/22657/22657-h/chapters/chimneys.html
-
It's possible to get coal and coke from blacksmithing supply houses. I'm pretty sure Blacksmiths Supply, Centaur Forge and Pieh tool all carry one or the other just to name places off the top of my head. Down side is shipping usually kills you if they aren't near by. I believe Kayne & Son ( Blacksmiths' depot) is located in NC. http://www.blacksmithsdepot.com/about-us Coal can be found for home heating and various supply yards. You might also check and see if there is a coal fired railroad around that might sell you some. Check because not all of it is really suitable for smithing. Best is usually soft coal vs the hard coal that's often available for heating. As mentioned several local blacksmithing groups near me have coal available to members. In some cases commercial smithies bring it in for themselves and then make quantities available to members at a reasonable cost.
-
Sadly I think you are right about scrappers and most likely it's long gone into the shredder. Looked like a great old forge. It might be worth letting the cops know. Around here with nonferous scrap they photograph both the scarp and a copy of your drivers license when you scrap stuff. Not sure about steel and iron. I know they copied my DL when I took steel in a few years ago, but don't know if they also photographed the load or not there. Around here the cops are so so about looking for scrap thieves. Most times they take the outlook that chances are they can't readily identify scrap because it all usually looks the same and it's tough to prosecute someone who dumped a load of stolen pipe. In some cases however when items are worth serious money and readily identifiable, they get off their buts and make a run of the scrappers to look at the picts. If nothing else a police report will go a long ways towards at least getting you money from the school district to cover the loss. They negligently left it out where it could be stolen, so their insurance should cover it. It won't bring the item back, but at least you can possibly replace it. Also school districts tend to get more attention from the cops as they can make a bigger "splash" vs ordinary citizens. That might just help get the cops to actually look into the matter seriously. You might get lucky and the scrapper set it aside vs grinding it up. They probably wouldn't tell you they had it, but they might come clean to the cops to stay out of trouble.
-
I had a kit knife years ago that was very similar to an old Kbar. The kit used stamped leather washers that you filed and sanded to the profile you wanted after assembly. If I recall correctly you slid each washer down then pounded them into place with a tube like tool to compact them together so you could eventually get the pommel on.
-
Thor the term for your " rock breaker " is a hydro hammer. Does my heavy table count? We've heated and beat a ton of stuff on it over the years. 1 1/2" thick top makes a great pounding surface and the fact it weighs in at just about 1.5 ton means it doesn't move at all.
-
Smartflix rents a bunch of blacksmithing videos. https://smartflix.com/store/category/34/Blacksmithing You can also check with your local ABANA affiliated club. Many clubs have a library of books and videos that members can check out.
-
If you see black spots in the bottom of your fire or big "hollows" chances are they are clinker. I can usually tell when I've got them that way when the fire burns down a bit. As mentioned I can usually dig down and pluck them out with a poker. I have a lot more trouble with the anthracite I was given vs the bituminous coal I've worked with. Part of the problem with the anthracite is probably due to crud that's mixed in with it from the old coal dump in the basement where it came from. However you can often see the clinker that was "bubbling" out of the chunks of coal after the fire is out, so obviously it's not the best stuff in general.
-
I can't see why you couldn't fuller down a piece of pipe and do this. I've done enough candle cups that way with my little guillotine fuller. Personally if I was going to do this, I'd go with copper or stainless vs steel. I'd be tempted to either braze or solder the base to keep it simple, or just wimp out and tig it.
-
Sorry it took me a bit but the camera battery was dead for some reason. These were the two boxes I could locate quickly at the house. The blue one came from somewhere with a bunch of tig parts. I'm guessing the day instructor at the tech school gave it to me when they got parts in a few years back and they didn't need the plastic box. Clear one is my basic set of parts at the house for my Syncrowave 200.
-
I keep most of my tig stuff in a small plastic box similar to what you describe. This allows me to have a couple different tungstens, collets, collet holders, cups etc available and protected. I forget now where I picked the box up, but most likely it was in the tackle section of Cabelas or some other area.like that. If I can put my hands on it and my camera later I'll snap a few pictures. Generally I stick with one size cup for my gas lens and one or 2 sizes for my standard collet bodies in my "travel" stuff. The standard cups are a 7 or 8 and I'd have to look at what size the gas lens cup is since I can't recall off the top of my head. I also have a similar small box that holds assorted mig parts as well for class. Usually a few tips, spare nozzles and adapters, etc for the tweeco torches the school runs. Most stuff is under lock and key and it's not always accessible for us at night,
-
Mig welding doesn't take a lot to learn the basics. Average student where I help teach can get it down in less than 48 hours of class time with instruction. They could be at the point of putting together a functional gas forge a lot sooner. It wouldn't be pretty, but it would stay together. Something small like rings could use a small 1-2 burner gas forge. One of the coffee can or freon cylinder forges would allow you to work small steel and such. That said I've got almost as much into building my own gas forge as I would if I'd just gone out and bought one in the 1st place. That doesn't include all my tooling like my welders either. My coal forge on the other hand was much less expensive. I had almost all the materials saved up well in advance including a small blower. I think in total I have less than $30 in it in the original form. The welder ( bought new) to assemble it would have pushed the cost to about equal to a commercially bought one however. Used, the welder might have added $50-150 depending on how good I was at locating a used stick welder. You might think about taking a night welding class at a local tech school. Most instructors are more than willing to allow students to work on their own projects within reason, once they have the basics down. Learning the basics of mig or stick also wouldn't hurt in this hobby. Classes also usually go over the basics of Oxy fuel cutting and heating and that's another useful "tool" to know working with metal. Around me a class breaks down to about $11-15 per hour of class time. When you sit down and add up what the materials, machine, electric, rod/wire, gas etc, not to mention the instruction would cost you, a class is stupid cheap. Given a choice, I'd suggest learning mig 1st as it's usually the easiest for guys to pick up on.
-
You have a fairly large thermal mass and a tiny burner. It's going to take awhile to get things to heat up.
-
I was just looking at some sinks on another site last night a guy made using some SS warming trays and salad bowls.
-
Typical modern insulated wood/steel/fiberglass doors have a rectangular wood frame capped with a sheet material. The wood frame isolates the sheets and gives you something to attach your hinge screws and latch screws too. It also forms the cavity that is filled with foam insulation. For exterior applications marine ply would be my choice. 2 1/4" sheets plus 1 1/4" frame would give you a standard 1 3/4" door. I'd probably add a few pieces of blocking to the center to prevent the insulation from bowing the thin plywood. They make foams specifically for filling hollow wall cavities. In this case you'd glue up your door, leaving the cavity inside empty. Then you'd drill holes at predetermined locations and squirt in the foam. you have a few "vent" holes also to allow air to escape. When the foam reaches th event holes you know the cavity is full. Option 2 would be to treat it like an open wall cavity. In this case you spray the foam in the open cavity and allow it to rise. When it hardens, you shave off the excess and close up the cavity. With wall studs, they use extra long sawzal blades for this. I'd be tempted to set up a "gantry" like rig to support a router and use the router to cut down the excess foam to give me a nice even surface to attach the 2nd side piece of plywood. If you want that heavy individual wood slat look, you'll either have to go with a sheet good like beaded plywood, or sacrifice interior insulation to use thicker boards. 2 layers of 1/2" oak would leave you with only 3/4" of insulation. standard 3/4" thick 1x would only leave you with 1/4" and wouldn't be worth it in my opinion. If you go this route, I'd tongue and groove all the boards and glue them together as well as glueing them to the back layer. This would also allow you to have that beveled look that would set of the individual planks from one another. Down side of this is that you will limit the expansion/contraction of the wood and may end up with cracking, especially if you use large pieces. Another option would be to simply go with one layer of extra heavy planks backed up with cross slats. The typical old "barn" door. Again I'd tongue and groove the main planks and glue them together. The cross slat I'd treat like the cross slats that are used on typical table tops and allow a bit of an elongated hole under the nut to let the slats expand contract a bit. This is fairly well covered in most woodworking books or instructions on solid plank table tops. I know Norm Abrams has covered in several times on New Yankee Workshop, so it's probably in a video online somewhere. As far as studs, take a look at the doors I posted up in the thread on the Bryn Athyn Cathedral. All those studs/bolts are hand forged with hand forged nuts on the back. If you really want a studded look, that would be the way I would go. It wouldn't be all that hard to cut square stock as nut material, then hot punch ( or drill) and thread. Bolts, either start with standard bolts and reforge the heads, or go completely from scratch. You could draw down stock with a power hammer to a fixed size and thread with dies relatively simply.
-
What are you trying to accomplish with said doors? Are you going for an accurate historical recreation, or do you want something that just looks "heavy"? I ask because I can think of a bunch of different ways to make a door. Many would make use of more modern materials, but leave you with a stouter more stable door.
-
I think it's referred to as "Bait". You lure the chickens up on the grill that way instead of having to chase them around.
-
If you are going to tig cast, use high nickel filler. I've had decent results on some cast items tigging short beads to keep things cool and using 99 nickel filler rod. I didn't have access to an oven to do a decent preheat/postheat. It also helps to peen the welds as they cool. I'd weld maybe 1-2" and then wait until I could put my bare hand on the weld bead before running the next one. Nickel is more ductile than E70 filler and is less likely to cause cracking. Given a choice I'd personally lean towards brazing since there's less chance you'll have issues. I don't see any practical reason to need to do an actual weld on your blower. It shouldn't get hot enough you'd need to worry about the braze melting like it might if this was a forge pan.
-
You might find these links helpful. They give rough sizes and weight ratings for strap type hinges. http://www.hardwaresource.com/hinges/SPECIALTY+HINGES/Strap+Hinge+-+Dummy+Strap+Hinges/Heavy+Duty+Strap+Hinges/Heavy+Duty+British+Style+Strap+Hinges http://www.hardwaresource.com/hinges/SPECIALTY+HINGES/Strap+Hinge+-+Dummy+Strap+Hinges/Heavy+Duty+Strap+Hinges/Strap+Hinges%2C+Heart+Style%2C+Heavy+Duty http://www.hardwaresource.com/hinges/SPECIALTY+HINGES/Strap+Hinge+-+Dummy+Strap+Hinges/Heavy+Duty+Strap+Hinges/Strap+Hinges%2C+Bean+Style%2C+Heavy+Duty http://www.houseofantiquehardware.com/black-iron-door-hinges-strap-heart?sc=10&category=38
-
I used to do the same thing when I was doing a lot of diving. Guys would bring up a bag full of scallops and want a good knife to shuck them with. I'd pick up and regrind SS butter knives by the box and sell them in both left hand, right hand and unbent to guys at the dock either before the boat left or when they came back in. I'll have to dig around and see if I saved one for myself as a template or not.
-
I've done a lot of that with the premade stuff from places like King Metals. When I get some stuff in I'll lay it out on a sheet and take picts of how the pieces lay out and nest for future reference.
-
I've been looking at bath and kitchen items. Things like TP holders, towel bars and robe hooks, pot racks and trivets ( sp?) Paper towel holders, more hooks.... I agree that in a poor economy people don't have a lot of disposable income, but they still often buy small items for the home. I try to stay away from shepherds crooks since they use a lot of material and you can buy the cheap imported ones for less than I can buy the material. Wall mounted pot holders for plants seemed to have some interest however, along with plant hanger hooks. Both are small and inexpensive and don't use a ton of material for the smaller ones. Horse people love horse shoe stuff. While a lot of what I make in that area is all electric arc welded, I try and mix it up with some hand made stuff. Horse people almost always have money and are more than willing to spend it on tack hooks, gate latches, shelf brackets etc as long as it looks "horsey", usually including horse shoes. Premade shoes are fairly cheap and can give you a few items that add profit even if they aren't hand forged.
-
From what I can see it looks like your exhaust duct is way too small. Trying to push large volumes of air thru long lengths of small ducting usually causes the blower to over work and overheat. Part of the cooling for the blower is the air passing thru the unit. If the fan can't push enough air thru the small duct work, it over works and can't cool itself down properly. 3" is tiny. 6-8" is probably minimal at best. Ducting is rated at a maximum flow volume ( in the US it's CFM or cubic feet per minute in Europe I'd guess it's in liters) Fan size and duct size have to be matched. If anything have the duct size exceed the fan rating. Note that bends and longer lengths increase drag, and reduce flow. Also corrugated duct work causes more drag than smooth ducting also decreasing max flow. Lack of exhaust flow will kill you if you are running a forge in an enclosed space. At a minimum I'd strongly suggest installing a CO alarm. Keep in mind CO is heavier than air, so installing it at ceiling level means by the time it goes off it may no longer matter to you since you will be unconscious.
-
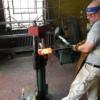
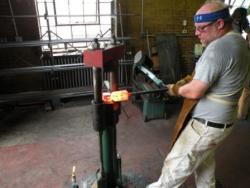
No picts of my post vises right now, but I've got one of my 5X Parker on the heavy steel table. That's a 20 lb sledge head laying on the top next to the vise and the top itself is 1 1/2" thick. Off the top of my head I want to say the jaws are 6", but they might be 8"
-
Ah Andrew, I feel your pain... Yeah it never seems I have enough weeks in my days at times. Then other times when things are slow you just about pull out your hair because you've got the time to do all those "around to projects", but no cash to do them... It also sounds like you have another problem I have. You may be too picky about your own work. Not necessarily a bad thing though. It's usually the mark of a craftsman. One thing you might think about though. Part of the idea of a "hand forged" item, is that no two pieces are ever the same, so irregularities are acceptable within limits. In fact many people TRY to get that result vs the "machine made" look where everything is exactly the same. I often have to remind myself that there is a balance between perfection and profitability. Chances are 99% of the time the public won't ever see the "glaring" issues we would. Most will just look at it and see a nice fence, even if you welded it up with bubble gum stick welds and left half the slag on things. I know I find myself constantly critiquing stamped concrete ( since I did that for over 15 years) as well as iron work. My family thinks I'm nuts however and can't even begin to see what I spot.