DSW
Members
-
Joined
-
Last visited
Everything posted by DSW
-
An easy way to check vibration transfer would be a simple glass of water. Fill the glass and set it where your forge will go, then fire up the hammer and beat the snot out of something and see if you notice the vibrations in the water. It won't give you an acurate way to note exactly how much vibration there is, but it should tell you pretty quick if your floor is transfering the vibration from the hammer to the forge location. Small ripples probably aren't much to be worried about, but if th e water is sloshing out of the glass, you might want to rethink things a bit. They used to judge how smooth train tracks were this way. They'd set out a full glass of water on a table in the rail car and see how much was left in the glass after they passed thru a track gangs section. The Pensylvania Railroad used to give an award to the track gang with the smoothest section of track this way IIRC.
-
Concrete filled with steel bar often breaks up easier than solid crete with no steel in it. Take it from someone who has broken up quite a bit of crete in his career. Crete almost always breaks away from the steel 1st. I guess small bits of steel like crushed stone might add some weight, but it's probably marginal at best. Also note that concrete in general is moderately corrosive to uncoated steel. This is especially true if it gets wet ( concrete IS porous and WILL absorb water). When the steel starts to rust, it acts like a wedge and helps split the concrete ( it's why you often see steel exposed on road bridges and so on where the crete has spalled.) If you wanted to add mass, the best way would be to use a very fine "sand" of steel vs larger chunks. The finer particles would allow you to add more steel vs using bigger chuncks pound for pound. Down side is this would rust much faster than larger pieces. The end result probably wouldn't be worth the effort. Lead shot would probably add more mass, work in better, and have less corrosion issues. Even then I seriously doubt it would be worth the effort and expense.
-
Been quite a few years since I lived out that way in Keyport Wa, but I'd go back in a heartbeat given a chance.
-
6'4" roof height is very low. A standard door in the US is 6'8" high. Not a lot of room to swing a hammer unless you really are a Dwarf. My downstairs den ceiling is 7'6" vs the standard 8' and it seems very low. The storage area of my shop has a 2nd floor "loft" and the lower storage area and upper area is around 6'6" and almost everyone ducks when they go in there. The upstairs is a bit better since the rafters are actually a bit higher up and it's only the cross ties that are set at 6'6" so it fells "taller" Around me fiberglass corrugated panels aren't too bad in price. Most of the home centers carry them. For a flat roof, I'd probably look at asphalt roll roofing for a shed. Shingles don't usually seal well under a 3/12 pitch. You pretty much just roll out the roofing and muck the seams on all sides to seal all the edges well. Option 2 would be some of the roll on liquid roof mucks designed to recoat trailers and mobile homes. Personally not a great fan of either one, but that's mostly because flat roofs naturally tend to want to leak and cause issues.
-
Yep. It's why so many of us ask new guys to post up their locations. I know at least 4 guys here that are roughly in my area, and possibly 2 others who I'm not sure if they have joined yet or not. In many cases there are guys here who are more than willing to let guys come by and learn.
-
Trying to plan to reuse stuff in advance usually ends up restricting you later unless you have a final plan in mind right now. Best bet would be to figure anything you can later salvage as "found" materials and not worry about it now other than possibly make everything easy to disassemble. Otherwise you end up with neither shed really doing what you want. Posts don't necessarily have to be sunk in the ground, but you do gain a bunch of things if you do so. An L shaped free standing wall will support your roof ( well at least 3 corners of it with the garage supporting the 4th.). The ends and corner of your L would be your main posts. Posts are easier to do simple framing with vs wall construction. With a post and beam construction, the wall material is then just infill and can be anything or nothing. if you opt to go with a "wall" type construction, then the wall itself takes the load and you have to do studs or use a solid bearing material like a stress skin panel. Sinking the posts in the ground would lock the wall in place so it won't shake or move in the wind. You can accomplish the same thing if you bolt the walls to the concrete instead. Down side of that around me is that a concrete slab moves when the ground freezes and thaws, even in our relatively mild winters. Many people are amazed at how powerful ice can really be. Moving walls have a bad tendency to cause roofs to spring leaks. I'm personally not a big fan of corrugated roofs. They are noisy in the rain, and hot under the broiling sun as they radiate the heat. They also usually need to be used on a fairly steep pitch to not leak at the sides and ends. The pitch I'm envisioning on your structure is fairly flat for a corrugated roof. One nice option is to use the translucent fiberglass panels. That way you let in a fair amount of light. If you go with steel or alum, keep in mind that you need to make sure you use the right fasteners if it's for long term use. We used to have a corrugated alum roof on the old shop and when someone patched the roof, when some panels loosened up, they used steel nails to replace the alum nails the heads ripped off. The alum roof rotted out right around the nails due to dissimilar metals corrosion.
-
I'm pretty sure the front and rear rotors on my truck are "dished" in the center on the back, especially the front ones for the 4WD.
-
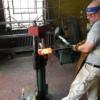
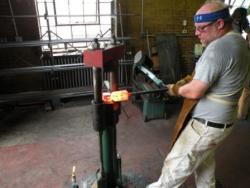
Nice work. Good to have you here with us.
-
I did a bit of digging on Victors site as my wireless connection would allow me. The difference between the STK-9 and STK-11 appears to be that the 9 has a single burner, and the 11 a "double barrel" burner. I can't find exact specs on the 9, but the 11 shows it capable of silver brazing up to 3" and soft soldering up to 6" ( I'm assuming the mean pipe not solid for obvious reasons) The STK-11 shows it can silver braze 1/2" to 2" ( soft solder to 4") with Propane and silver braze 3/4" to 3" ( soft solder to 6") with MAPP. From what I can tell I'm going to guess the 9 is close to the same capacity the TX 504 below is capable of, but that's just a guess based on one other torch they had listed in the sales lit. The TX504 shows tips available to silver braze 1/4" to 1" ( soft solder to 3") with Propane and silver braze 1/4" to 1 1/4" ( soft solder to 4") with MAPP. It also has the self lighting option the other two do not have. I found this info in the Extreme sales literature that I located by pulling up each option on Victors site. Here's the page for the STK-9 that has the " Extreme" literature linked. http://www.victortechnologies.com/products/detailProduct.html?prodID=0386-0403 I can't say if these will accomplish what you want or not. The STK -11 seems a bit overkill for small work. It's really for sweating large pipe. Also I'm going to guess silver solder is about the max these might be able to braze. Brass brazing may be beyond their capability, but I'd have to check melting temps on the brazing rods. If the temp for brass rod is lower than that for sil solder you should be good. If it's higher, I'm going to guess you'll need more heat. Also keep in mind the flame size on these is moderately large compared to say even a medium sized Oxy fuel tip. Oxy fuel would give you more control over the area heated as well as more heat output. Oxy would definately get hot enough to brass braze. I'm not sure why you might be leaning away from Oxy Propane.
-
My 1st thought would be some sort of "shed" or slanted roof. I'd be real tempted to attach a long board across the back of the block wall out to a post in the corner where you have the sliding door listed to form a beam to support one side of the roof. The other Beam would be attached to two posts located at the other two open corners ( by the shed and where you have the forge marked. I'd be tempted to slant it away from the walk towards the hedges, but I can't tell if you have the height to do that if the beam is only attached to the block vs jacked up in height. If you don't have enough height, then I'd still use the beams, but the garage side would need to be high enough to drain onto the existing roof. If height is an issue I might also look into a more conventional peaked roof sloped towards both beams. Either form trusses or frame conventional rafters. Walls should be fairly simple to do. some plywood siding on 2x's attached top the posts would do.
-
I wish I could get online right now with my other computer because it's got all the picts of the shed I've been working on as well as the house and shed from Jersey. A few generic thoughts since I'm in a bit of a hurry this morning. Floors... It's MUCH easier to pour and finish a concrete floor before you put up walls. This way you can work mostly from the outside to screed and finish vs wading thru the crete. You get a much better finish that way if you are not familiar with doing concrete vs doing it after the walls are up. I can walk you thru all of this if need be as I did concrete for a living for almost 15 years. There are some easy tricks that can make this SO much easier on you if you go this route. I'd be careful with PT today. The "newer" ACQ treated lumber that's been sold for the last few years is very corrosive to metals. It will eat thru fasteners and flashings fairly quickly unless you use specially designated fasteners ( expensive), Stainless steel ( more expensive) or copper. Alum is totally out. The suggestion to work with 4' dimensions is a good one, but I'm not sure I agree with the 4'OC part. If you do 6x6 posts and set them on 4' centers, you will end up piecing in the exterior siding if you want to go with something that fully wraps the exterior. In this case 4' outside to outside would make more sense. If you do posts with panel infill similar to post and beam construction, going 4' inside to inside makes more sense. That way the posts still show and you use full sheets vs having to cut each one at the post down. If I was going to go with a pole barn type building, I'd probably do a post and beam style. It goes well with blacksmithing and you can showcase some of your work that way in the construction. Around me there are any number of guys with small mills that will sell you rough sawn posts for timber framing, usually fairly cheap. Down side is many times they are green lumber, but several guys I know have aged posts for sale. I'd be real tempted to go this route vs PT posts. Insulation. You generally get the most insulation value from sprayed foam vs fiberglass. I'm working on a remodel of a Sandy house in New Jersey right now. I can get an R15 in the walls with fiberglass, or I can get almost an R 30 in the same stud cavity with spray foam. They do sell "home owner kits" to DIY. The cost of foam is significantly higher than R15 fiberglass, but when you figure what it would cost to have an equal R rating to foam, it's not as bad as it looks. Foam also seals out wind and moisture. I'd have to agree the idea to be able to open up the shop makes a lot of sense. Big wide doors you can open in good weather can make a huge difference in comfort. While not the greatest, double steel exterior doors can give you a decent opening size for ventilation and still provide you with a decent seal in the winter. You might check and see if there is an architectural salvage yard or Habitat store in your area. Older front doors from homes in the 70's and 80's would make a good inexpensive choice when people remodel. You can also often pick up decent used windows from these guys as well. I've got a bunch of nice salvaged windows to close off the one wall of my shop space as well as a salvaged industrial roll up door.
-
That's a good idea. The key is that he keeps you in mind, but you don't pester him too much. Unfortunately I've seen stuff go to scrap because the owner didn't think anyone was still interested in it. "That old stuff? No one would want that... I scrapped it to make room. " :wacko:
-
Their "plumb" and mine don't always match up.... I worked one job where the masons "plumb" walls ended up tapering in enough in 10 feet that they actually shortened up the basement by just over a foot. One wall tilted in about 8" in 10 feet Same goes for the use of a transit. We got a call back on one job because the carpenters claimed we'd screwed up the level on the tops of the walls we poured. Ok, Our laser is supposed to be +/- 1/64" at 1000', so maybe the laser got dropped and was out of alignment. Off it went to be calibrated and verified, and we borrowed a certified one from the repair place to check our work... Turns out our stuff was with in +/- less than an 1/8" max vs the 2 1/2" the carpenter claimed. This ended up backed up by the surveyors who had also shot the walls for setting the steel. Turned out we later found out he'd used a manual transit and they must not have leveled it correctly. Thus THEY unleveled the building by 2 1/2". I've also run into issues with "level" any number of times when I was helping set Xray machines with a friend. Most guys figure as long as the bubble is within the lines, it's "plumb" or "level". Bzzzt! Wrong answer! Verify things for yourself, and make plans in advance for things NOT to be level and plumb.
-
I have 3/32" 6011 at the house and the tech school usually keeps 3/32" 6010 on hand. I've seen 5/64" on rare occasions in some rod types. Off the top of my head I may have seen it in 6011. Lincoln and Hobart both make 6011 in 1/16". I know some places like Harbor freight and Tractor Supply carry it. I can't remember if I've seen it at Sears, Depot or Lowes ( since I generally don't go to box store for my welding supplies) Online Depot lists both a 5/64" rod and 1/16" rod as "fleetweld", but no AWS designation. I can't remember if "Fleetweld" is Lincolns name for their 6011 or if it's the one for their 6013 rod off the top of my head. Down side of tiny rods like these no matter what the type is that they tend to be super "whippy" and flexible, and it's often very hard to weld with full length rods. On the rare occasion when I've had to use 1/16" or 5/64" rods, I usually cut them in half, then break off enough flux to grab them with the stinger. The shorter length makes them easier to "aim" accurately even if you have a bit more waste. 6010/11 is not my best rod. I'm also not great at whip and pause using them, so I'm still learning how to manipulate the fast freeze characteristics of these rods. I've had fair results playing with 3/32" 6010/11 on 18 to 22 gauge, just to try it. Given a choice, I'll mig or tig anything this thin for real, but some times that might not always be the case. I've also managed fair results with 1/16" 7018 on the same thickness material. I'm much better at manipulating 7018 than I am 6010/11. I've had decent results running even big 1/8" 7018 on material as low as 16 ga for lap joints ( didn't have any 3/32" or smaller on hand) I've never used one of the HF flangers. I have one of the manual ones like the Eastwood's one somewhere from years ago when I was trying to do body panels on my old Plymouth. Today I don't generally need to use one, but they do offer an option for those who aren't as skilled at welding thin sheet since it give you more material to weld on. I'm also not a big fan of the open back side that can collect dirt and water flangers leave on auto body work, but that's a different matter.
-
Expanded metal works because there are more places welded and it can spread the load over more area. When I see issues on trailer ramps with expanded metal. it's almost always because the trailer company cheaped out and didn't weld the expanded metal more. You can get away with a few short 1" welds here and there if all that goes on it is a small walk behind mower. Drive a 1500 lb + zero turn on it at speed a few dozen times and the few strands of expanded mesh that are welded start to tear away while the rest gets bent all out of shape. You could support those logs with a simple canvas cover, but as soon as it tears, the whole thing will unzipper. The large surface are spreads out the load so no one area gets too much. A soon as you start getting concentrated loads, or the loads start to combine due to damage, the thing fails. I'd probably go the same way you though, with bars vs exp mesh. Irregular shapes on the truck are probably more easily accommodated with open areas vs a "solid" sheet. Expanded mesh is also a real pain to cut unless you have a shear or a carbide metal cutting circular saw.. You burn up a lot of zip wheels and even cutting it with plasma is often somewhat of a pain. I've cut quite a bit of exp metal mesh to fix trailers and build screens for work trucks and so on. It's not a material I look forward to working with given a choice. I'd also agree with the use of ACME rod. It works much better than standard threaded rod and is worth "hunting" for. MSC. Graingers, Mc Master Carr all carry it and you can get it or order it at most commercial steel yards. Trust me it's taken me a long time to try and break myself of the buy every tool and build everything myself habit, and I'm still working on it, so I understand exactly WHY you want to do this yourself. 65%+ of my house is filled with my tools both for my hobbies as well as for my business. I can usually produce just about any tool to do any job within reason, and often beyond reason... What it's taken me so long to understand is that many times it costs me MORE in the long run, even though it looks like the better way to go about it. I've learned that in some cases it makes more sense to pay someone else to do the job so it gets done faster and better and I can concentrate on other things that I'm better at. I'm not saying don't do this, just understand that it may not be as simple as it seems.
-
Anyone who has ever hit their thumb with a new waffle faced framing hammer can attest to the damage a ridged faced hammer can do. One of the 1st things we'd tell new guys to do if they showed up at work with a brand new framing hammer was to take it over to the grinder and smooth off the face. Someone with experience can make use of a waffle faced framer since chances are they may not hit their hand much, but new guys usually pulp their fingers fairly regularly.
-
Hello and welcome. Tons of great info here to learn from. Pull up a chair and a few snacks and sit down and read thru a bunch of the older threads to start with. As far as making a career as a smith, some do, but it's not a huge market. Most guys I know who make a living with metal are primarily welders, sheet metal workers or machinists. Quite a few of these guys also heat and beat metal to some degree, either as a hobby, or as a part of what they do on occasion. If you are looking to make metal a career, I'd probably steer you towards one of those vocations as far as a way to bring home a decent check every week. I know around me there is a shortage of trained machinists. Most of the tech schools have dropped their machining courses and the older guys are slowly retiring. The demand is mostly for CNC machinists, but the guys who can still do prototype work by hand are in high demand as well. I can't tell you much about sheet metal workers. I had a friend of the family who made a decent living for a lot of years doing custom duct work and a moderate amount of custom sheet copper work, but he retired a few years back and moved south to live with his kids. welding jobs can cover a wide gambit. There are good paying jobs for those with the skill set to do precision tig or do pipe work, but there are also a lot of low to mid paying production jobs as well. Where you are located and what kind of work is going on will determine if you can manage to find any of the higher paying jobs. If you are serious about making metal working a career, I'd pick an area you are interested in and start looking for some classes to take at a local tech school or community college. These classes will often get you where you want to go faster than trying to learn on your own.
-
Hello and welcome. I'd suggest looking around and finding a local blacksmith's group to join. I'm betting you can locate one fairly easily in Va or Md. with a bit of searching on the web. You might also think about looking into a class at some point. Most times when you sit down and add up what you get out of a class, the cost is stupid cheap. My class ran me something like $11.50/ hour when you broke it down. For that I got fuel, access to equipment and tools I wouldn't have been able to afford at the time, plenty of materials for practice and projects as well as quality instruction. When you sit down and think about it, it's hard to see how they actually made money on the course. Just learning some basic things about hammering and so forth and well as fire control, probably saved me at least the cost of the class in wasted materials if I'd have gone at it on my own.
-
DC- doesn't work with all rods. Usually it works best with AC/DC rods like 6013 or 7014 vs some pure DC rods. Also fast freeze rods like 6010 or 6011 are often used for thinner sheet IF you are skilled enough to run them well. Down side is these rods are also deep penetrating, so many people have issues doing this unless they have the skill level to freeze the puddle without opening up a big keyhole. Running smaller rods like 1/16" at lower amps helps. Joint design also helps greatly. Lap joints work best with thin sheet so you have more material to help soak up the heat vs a thin edge. Places like Eastwoods sell panel flangers designed to put a "step" in sheetmetal auto body panels to help facilitate these types of welds in thin sheet. I think Harbor freight also sells an air flanger as well.
-
I thought I'd typed a reply to this, but it's not there for some reason. My wireless must have crashed again when I went to post. I'm not familiar with them personally. Someone recently in the past 2 months mentioned them and I saved the link because they looked like a good inexpensive alternative to building one from scratch. I wish I could remember who here posted up the original link or made a comment about them, but I can't. Hopefully they or someone else can chime in on the subject. My only recent experiences with gas forges has been with the ones in my class and with two home made ones at a hammer-in in August. The school had three of the Whisper Mommas or a reasonable facsimile, and one that was like the Whisper Momma with the open end ports that they used to heat long stock. I did find the small size to be a hindrance with some of the stuff I was doing. The bigger openings front and back on the Artist Deluxe forge looks more useful for some things. A quick search pulled up these threads on Majestic here... '?do=embed' frameborder='0' data-embedContent>>
-
Thanks for mentioning these. I'll have to add a visit to them when I get the chance and make it out to the West coast again some time in the future. There's supposed to be several Yellin pieces in Philly. I'm pretty sure I saw them years ago and admired them. Locating them again and going back to study them in detail, is on my list of things to do in the winter when work is slow. I'll also have to make time next time I'm down near DC to visit my folks to stop by the National Cathedral and look at his work there as well.
-
37 in a 35 zone is usually fightable in most states. Typically if you are less than 9 MPH over the speed limit, they can't convict you for speeding if they are using an electronic timing devise. ( I know that applies to VA, PA and Wash. when I've lived there." That usually is so there can be discrepancies in things like your speedometer, timing system, tire size etc that might change the speed shown. Having said that I've seen speed traps many times where everyone miraculously is going exactly 47 in a 35 zone.... Forget to reset the gun by chance? They'll also often use a "generic" citation vs one for speeding. "failure to obey a trafic control devise" ( ie speed limit sign) is what they will typically rewrite citations for. It usually caries the same fine, but no points. Of course even if you "win" you usually loose since you have to take a day off work and travel there to fight the ticket in court. Many times the cops are more than willing to be "easy" on you and reduce the ticket to a charge with no points if you are willing to simply plead guilty and fork over their money. At least ift can save you the added expense on your insurance. Around me the favorite money maker is local DOT check points. The local cops have found commercial trucks, and guys with trailers are an easy source of revenue. Failure to have enough straps/chains on things is always a favorite. Minimum used to be 2, but that may now have increased to 4 ( 2 front and 2 rear minimum) and in some cases if an item chained is longer than a specific length, you need chains in the middle as well. Then there's always the requirements that all loads be tarped in some localities. Burned out bulbs, no brakes on trailers or dead trailer batteries, various general safety violations, no inspection on trailer, The list goes on and on... It will get really ugly if they think you look over weight and pull out the scales. In PA if your trailer tops 10,001 lbs, you must have a class A license, same as if you are running big rig. On top of that they'll usually hit you for no medical card ( required if you need a class A) and probably ding you for having the truck/trailer registered wrong, and the fact you don't have the required 6 month inspection stickers for "commercial" trailers. Just the over weight fine is pretty heafty. TAck on all the other ones and you can be looking at several grand in fines.
-
I don't see anyone who's being negative and I certainly don't see any sort of flaming. I made several comments on what you said and denoted why you might have problems and tried to explain where we are coming from. Myself and others have given you suggestions based on hard won experience, to help you avoid having to learn the same lessons over again. Sorry if some of us older guys aren't PC. I won't tell you you are doing a good job if you aren't, just to make you feel all warm and fuzzy inside. My critiques tend to be blunt and straight forward. I also won't be abusive, call you names , insult your intelligence or scream at you like a drill sergeant. Like anything else in life, you need to weigh the positives and negatives and make a choice. It won't matter to me one way or another which way you choose to go.
-
Hoses designed to work strictly with Acetylene are type R. Hoses used for other fuel gasses including acetylene are type T. In some cases the outside sheath of the hose is clearly marked as to the type of hose used, In other cases it's not. Typically either older hoses, or cheaper off brand hoses have a tendency to be type R more often than more expensive name brand sets. However generally more and more companies are simply just using type T on all their kits. Note that your tips will need to possibly be changed as well. The flame cone on an oxy propane torch is different than that of an oxy acetylene one. Some torch tips cross over with no issues, but you may need to change sizes vs what you'd use with acetylene. For example my air acetylene tips are much smaller and completely different than my air propane torch by the same company. I don't use oxy propane to heat with currently, so I don't have the conversion chart for the "welding" tips. My oxy propane cutting torch however uses a completely different tip than the one on my Oxy acetylene cutting torch. There is a completely different hole pattern on the propane tip to deal with the change in flame configuration and the different flame cone. I believe an Oxy propane rose bud is also different, but I haven't converted that rig over from Acetylene yet because I haven't had a large heating job that has required that conversion yet. I'd pull up a chart from the manufacturer of whatever torch set you get. Most tips are clearly stamped with the tip number and you can check the conversion charts to see what tips will cross over based on the size material you are working with. I had to do that with my Smith cutting torch when I converted it to propane, and I'll end up doing the same thing when I end up converting over the Victor handle for a propane rosebud.
-
The basic generic explanation for brazing vs welding I've always been taught is that if you are melting the base material, you are welding, where as brazing/soldering the base material remains intact, but the filler is molten. Because the base material melts in a weld, the filler and base material mix and change the composition of the weld itself. With soldering/brazing the base material alloy at the joint location remains the same. The braze material or solder just bonds to the surface vs mixing with the base material. When looking at tig welding / tig brazing that distinction would differentiate the two. If you are melting the base, then you are welding, if not, you are brazing. With copper and brass alloys where the melting temps of both the filler and the base material begin to come quite close to each, it's often a very fine line between one and the other.