DSW
-
Posts
2,161 -
Joined
-
Last visited
Content Type
Profiles
Forums
Articles
Gallery
Downloads
Events
Everything posted by DSW
-
Weed burner is another propane tool I've had issues like that with as well. I've also had problems with gas grills if they aren't sitting the right way on a slope. The OPV valve is on an arm and if the tank is sitting the right way on a slope, the valve will partially close.
-
You don't need to hit it as hard as you can, just efficiently. Smashing it super hard probably won't push the metal where you want it to go. Then you'll have all that extra work straitening out the mess you made and moving the metal back where it belongs. Hammer control is the key. If you have good hammer control, THEN you can hit harder and move more metal to pick up time. As far as the oval, Make it round 1st, then drive it from the other end against the step on the anvil or even the face. I know one of the Youtube videos that's been posted here shows clearly how to do this, but I don't have the link on this computer.
-
"Newer" style 20 lb propane cylinders ( the ones with the triangular hand wheels) have a OPV valve that can limit flow under some conditions. Older cylinders or larger cylinders don't have an OPV valve and can flow higher gas rates.
-
It might help if we knew where you were located at.
-
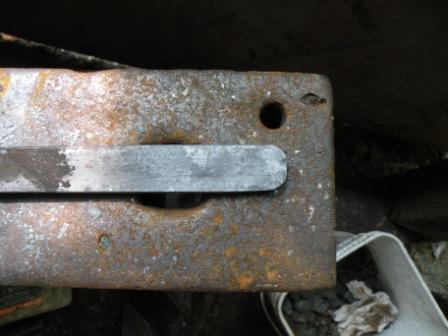
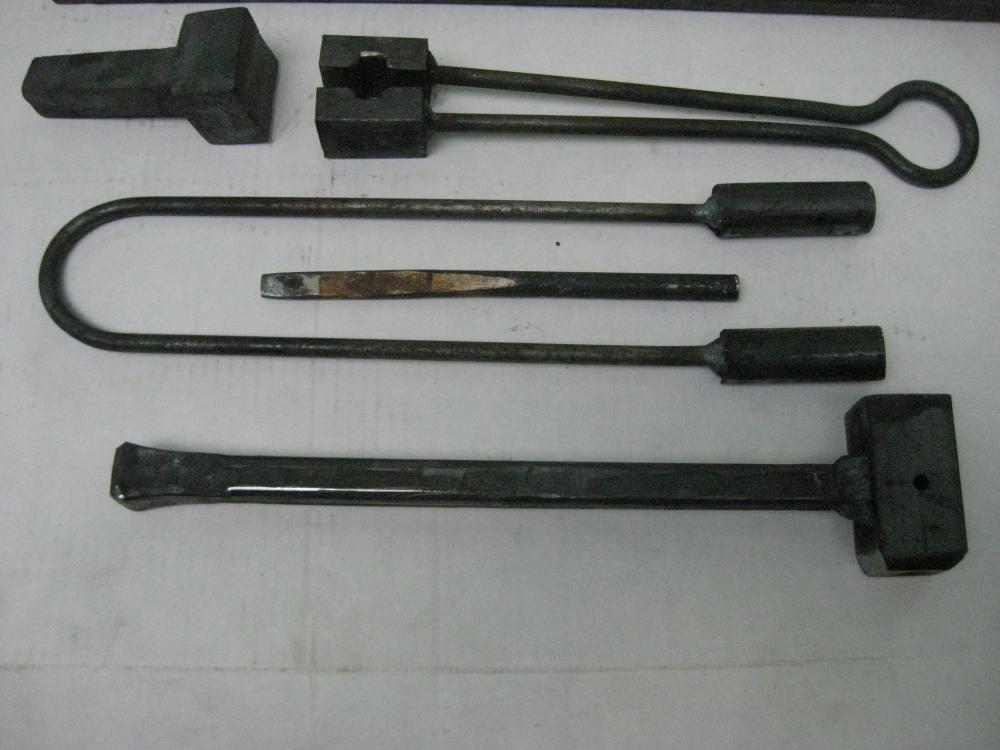
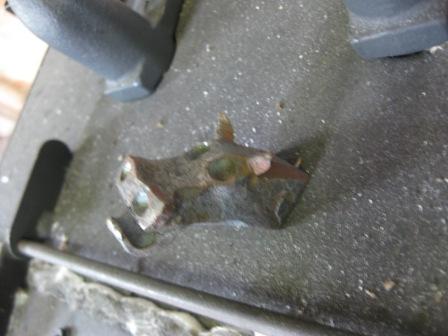
The "bottom" of the header I knocked off part of the corners so you can get the hammer angled to round over rivets if you want a domed head or rose head rivet. There's still enough flat to get the nice flat underside of the rivet, but any excess is removed to get it out of the way of the hammer. Flip the tool over and you can use the other side if you just want flat head rivets. Upset end on the handle was just a "scrap" that was knocking around. I was working on a mock up for an upset foot if I remember and when I needed a handle it was laying on the pile of assorted "stuff" to be used/reused as needed. I like to try and use small tests like that on tools if possible. Makes them easy to find in the pile of tools and makes things interesting to look at. If you need a better pict let me know. That was the only one I could find at the moment and showed a bunch of the assorted tools I made when I was working on making the forged legs for my coal forge.
-
Nice. I may copy that pict and send it to a guy I know who's been trying to figure out how to mount his block "anvil"
-
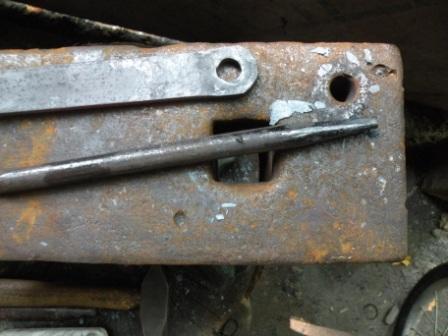
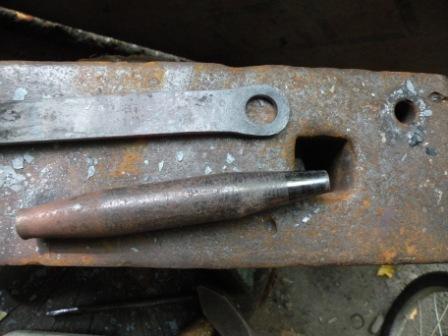
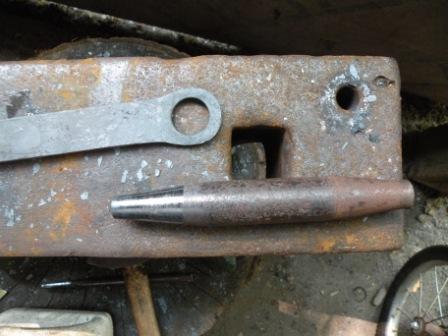
I posted this up for you the other day. I drift my openers vs opening up the ring on the horn ( still working on getting that down). You can make a simple pritchel plate by drilling various size holes in it and using them to drift open the hole. I use the small pritchel on my anvil to punch the hole ( though you can drill it with a drill or even slit it with a chisel instead). I drift to about 1" on my swage block simply because I have it. If I didn't, I'd make a pritchel plate to go over my "portable hole". Arkie here suggested slitting vs punching the original hole and I've found that useful when I don't have as much material to make the ring. I can't remember if the RR spike opener I made I slit or punched. I know I upset the point to drive more mass up into the ring area before I did anything else. I've also found knocking in the corners 1st helps, I was fighting getting the ring round before I did that.
-
PM sent...
-
Good optics are important in a welding helmet. However that doesn't mean you have to spend a fortune. The optics on my fixed shade Jackson big view hood are every bit as good if not better than that of my $300 Miller auto dark hood. Only advantage the AD hood has is that I can dial the shade as needed when changing processes working with students at the tech school, and I can keep the hood down and watch their body position as they go to strike an arc. ( Many never realize how much they move between when the drop their hood and when the strike the arc.) Don't get me wrong, Good quality AD hoods cost decent money ( HF hoods aren't worth jack because of how poor the optics are), but a fixed hood is just as good and can be picked up dirt cheap many times. A good fixed shade lens and you are good to go. My original welding instructor wouldn't let any new student use an AD hood. He wanted everyone to at least know how to use a fixed shade hood as at some point chances are they'd need to use one if the batteries died in the AD hood. As far as a welding table, most of the stuff I do is either off saw horses or the ground most of the time. On occasion I'll toss some sort of "table" material across the horses. I've used plywood in a pinch, but a sheet of cement board works really well. Eventually I'll find a nice flat piece of 1/4" plate to use, but chances are I'll use it more forging doing hot layout than I will welding. That's really what I use a table for mostly, layout and mock up. I can do that on simple plywood.
-
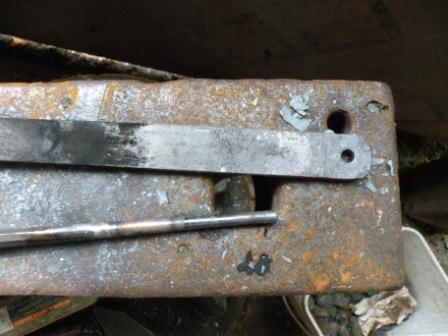
Bolts / round head screws will work as rivet material if you can't get anything else. Headers though aren't all that hard to make. Just drill thru a solid piece of stock longer than what you need and add a handle to it. The "hammer" looking thing at the bottom of the pict is the 1/2" rivet header I made when I made the legs for my forge. It's about 4" of 1 1/2" square mild steel with a 1/2" hole drilled end to end. I'd heat the end of a 5 1/2" piece of 1/2" round and then drop it in the hole in the end and use the handle to keep it on my anvil while I formed the head. Then a quick dunk and 90% of the time the rivet would just drop out when I tapped the end of the header. I can then cut the rivet to length. I found 4" of rivet was more than enough to do the 2 pieces of 1/2" plus the single piece of 1" and still have 1.5 times the diameter to head on the other end after cutting. The extra length gave me some wiggle room for the one or two odd rivets I needed that had to be just slightly longer.
-
They say the mind is the second thing to go. Too bad I can't remember what the first thing to go was. Welcome to senility...
-
I'd always heard of the process as vacuum metalizing.
-
Biggun, note the original post where Drako showed that Fisher was all the way back in 2010...
-
100 Days Until Christmas 2015, or less
DSW replied to Glenn's topic in Blacksmithing, General Discussion
I drift my openers vs opening up the ring on the horn ( still working on getting that down). You can make a simple pritchel plate by drilling various size holes in it and using them to drift open the hole. I use the small pritchel on my anvil to punch the hole ( though you can drill it with a drill or even slit it with a chisel instead). I drift to about 1" on my swage block simply because I have it. If I didn't, I'd make a pritchel plate to go over my "portable hole". Arkie here suggested slitting vs punching the original hole and I've found that useful when I don't have as much material to make the ring. I can't remember if the RR spike opener I made I slit or punched. I know I upset the point to drive more mass up into the ring area before I did anything else. I've also found knocking in the corners 1st helps, I was fighting getting the ring round before I did that. -
Here's the PABA newsletter for last month. It has a listing of all the 2016 events that they know of right now. Andrews shop is the October meeting. Last page is the membership application. For your $25 they will send you an email copy as well as a printed copy of the bimonthly newsletter and send you emails of any new events or schedule changes. PABA November 2015.pdf Let me know when you are ready to look for a welder and what your price range is. Deals don't pop up every day, but if you are willing to travel a bit, it's not too hard to find some decent stuff especially in NY city or Philly fairly regularly. Glen doesn't get any moneys from CL listings, so he understandably doesn't want to promote someone elses stuff here. Once I know you are serious, I'll keep my eyes open more regularly to see what's out there. I don't see anything really cheap right now, but I did see a few really nice machines listed at reasonable prices that if I was in the market I'd look at closer if I had the funds. I just hate to hear new guys who rush right out and spend $300 on a brand new Lincoln AC 225 buzz box at some place like Depot, when I see them fairly regularly in the $50-150 listed. The "off brand" ones like Craftsman, Montgomery Wards, Century, Dayton etc are every bit as good as the small Lincolns if not better many times, and most are built like a tank with almost nothing serious in them to break. I've passed on some decent deals to guys I teach in class and so on semi regularly.
-
Don't be in a rush to run out and buy a welder. I see tons of good deals on CL for them fairly regularly. It can save you a bundle over new. When you think you might be interested, PM or Email me with your zipcode and I'll browse thru the CL adds and see if anything good jumps out at me in your area. I often find the basic transformer AC only stick machines for about $50 listed on Cl. You never know what you can find though. I've seen a few postings from other areas for some really nice Ac/DC stick machines for $150-300 lately. If the $150 one was close by, I'd have grabbed it just to sell it to someone learning because it was such a good deal. Depending how far away you are, we might be able to hook up after Christmas if you need stuff welded. Strousburg where you picked up the coal is a pretty good haul for me and I know you are past that. We'll have to see how things shape out.
-
I have this one saved that I think someone did as a demo at the college.
-
Oxy/acet torch question
DSW replied to Elemental Metal Creations's topic in Welding/Fab General Discussion
Around me small cylinders are almost always customer owned, and anyone will exchange them. Larger cylinders are a bigger crap shoot. there used to be a half dozen or so independent suppliers who would fill customer owned large cylinders. Almost all of them have been bought up or gone out of business, so it can be hard to get large cylinders exchanged or filled at least locally. My buddy about an hour south of me took all my large customer owned cylinders because he can still get them filled, or swaped with his supplier. Tanks with the big name suppliers have to go back to that company. However I've found that as long as you have an account with them, they don't ask where the cylinders came from. I've borrowed cylinders from a friend and gotten them refilled before returning them no problem with Praxair, even though I don't have any cylinders on my account. As long as I have an account, and one of their cylinders, they will swap no problem. I've gotten the same response from the counter guy at Airgas as well. A simple cash account isn't all that hard to get. All I needed was a few references and a credit check. They will even pick up and deliver if I want them to, though it's easiest usually for me to just stop in at the store down the street from me. -
They might also know of someone else who has one. I was talking about my forging class to my Chiropractor when he mentions he knows an old farmer who is a client of his who has a few anvils. I was talking one day to the neighbor of one of my customers about some small things I had forged, when he mentions he has a friend who cleans out houses and scraps stuff who may have an anvil for sale. My big primary anvil came from the police officer who was taking the machining class at the tech school and got paired up with me to share the milling machine. He tells me he has one from his dads old business that I can have if I want. The 1st two examples are two people removed. You just never know when you'll find someone who knows someone who has something smithing related.
-
Or use a soft faced striking hammer like lead or brass.
-
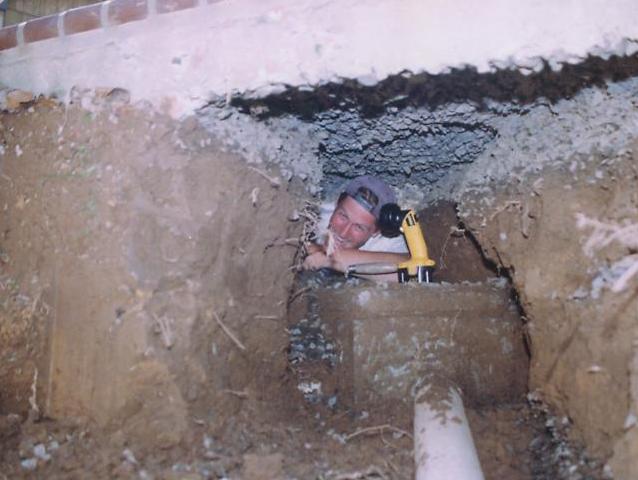
Lets try again. Knowing more details about your situation like size and access conditions would help. We often get large septic tanks with two and three piece lids. That's done to keep the weight under that the crane on the truck can handle. Working inside a tank is very doable. 1st thing is you have the tank pumped all the way down. You should anyways on a regular basis. Since the lid is off, now is the best time to do so. If it hasn't been pumped regularly, the sludge may have become like rock at the bottom and reduced your tank capacity. Often they'll pump the tank, then come back with a load of clean water and flush it several times to free up what's in the bottom. At the same time take the chance to spray down the tank with disinfectant and pressure wash the walls. A tyvek suit, rubber boots and gloves take care of the rest. I've lost count of the number of tanks I've had to work in and around doing excavation and working for the septic guy I plow for in the winter. It's not a pretty job, but someone has to do it. That includes changing out pumps inside the tanks in sand mounds and transfer tanks. You are going to want at least 4" to 6" of crete minimum on top of the tank, more if you want it to take serious weight like a vehicle on it's own. Amount will be based on tank size. Concrete weighs 150 lbs to the cubic foot dry. Wet you are probably looking at 200-225 lbs. That's a lot of weight to support overhead. You will need a lot of shoring to support this. Things go bad fast when floor forms fail. Steel in concrete is badly misunderstood. Concrete is good in compression, but bad in tension. Steel helps transfer tensile loads to compression loads by making the concrete compress in the tensile areas. two problems with this. #1 concrete is porous, and steel will rust if too close to the surface, so minimum is usually 1 1/2" to 4" of concrete coverage to prevent rusting. #2 is that steel only works if it's as far from the neutral axis of the slab as possible. Steel in the middle of the slab is neither in compression or tension, and adds zero to the strength. To add the most strength, the steel would need to be just below the surface of the concrete, but have enough coverage to transfer the load. That's not possible in a 4" slab. It's not even terribly practical in a 6" slab. Even in 6" of crete, you only have 3" from neutral axis to edge, and the last 1 1/2" can't be used due to coverage and corrosion issues. That's not much added strength at all. Heavy duty commercial lids have cast in place beams incorporated in the lids to add strength.
-
1st one is a star drill. Used to drill rock, brick, concrete etc. Pound and turn, pound and turn.
-
Stupid disappearing posts again
-
Thanks John. I hadn't expected anyone to identify mine.
-
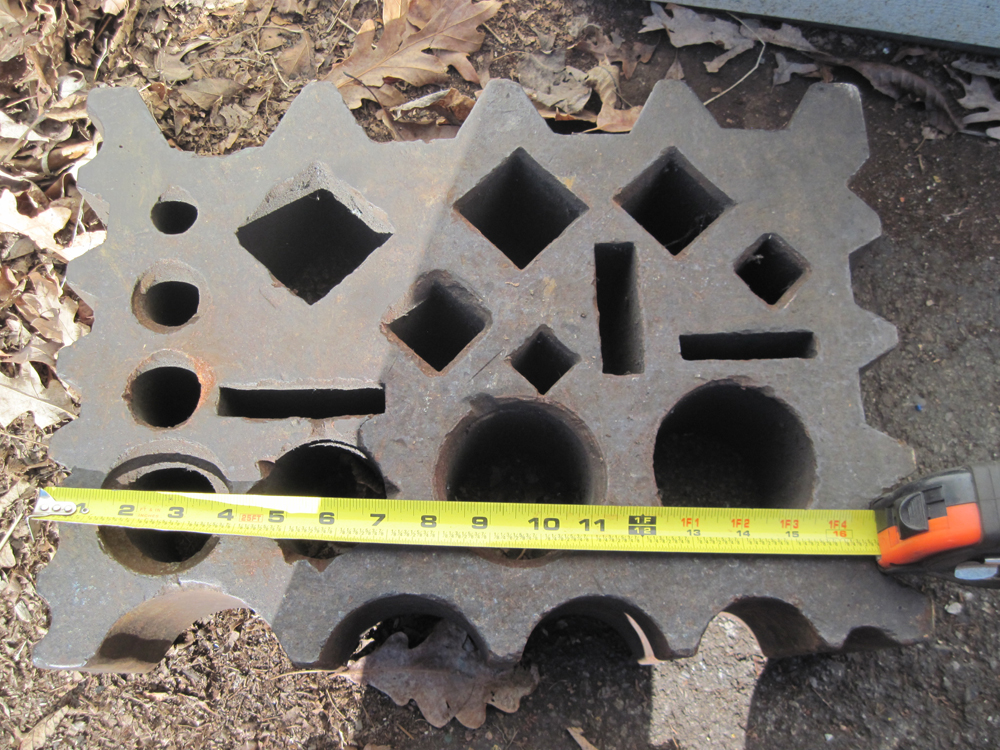
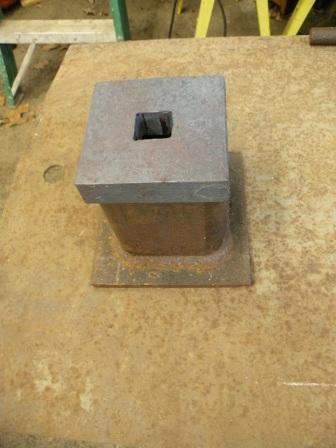
Very nice. I had to go look at the picts of mine to see if it was the same block. Yours is very similar, but a bit more organized and in better condition. I find I use the 1" square that matches my hardy hole all the time as a 2nd station with some hardy tool inserted, and I make use of the round holes frequently when drifting bottle openers.