DSW
-
Posts
2,161 -
Joined
-
Last visited
Content Type
Profiles
Forums
Articles
Gallery
Downloads
Events
Everything posted by DSW
-
Steve if you all get together, you'll have to let me know. If I'm not working maybe I can make it down.
-
Nice. I'm hoping to have time to work on mine this week.
-
Nice. I'm seeing a slight pattern. Is this Damascus or just something that happened randomly?
-
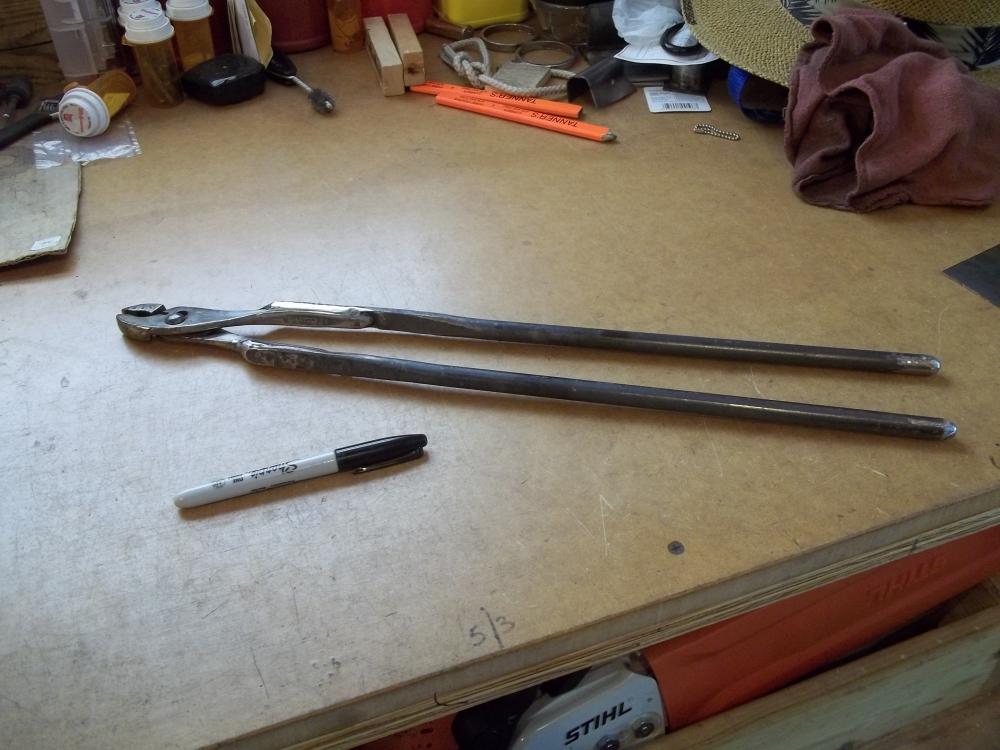
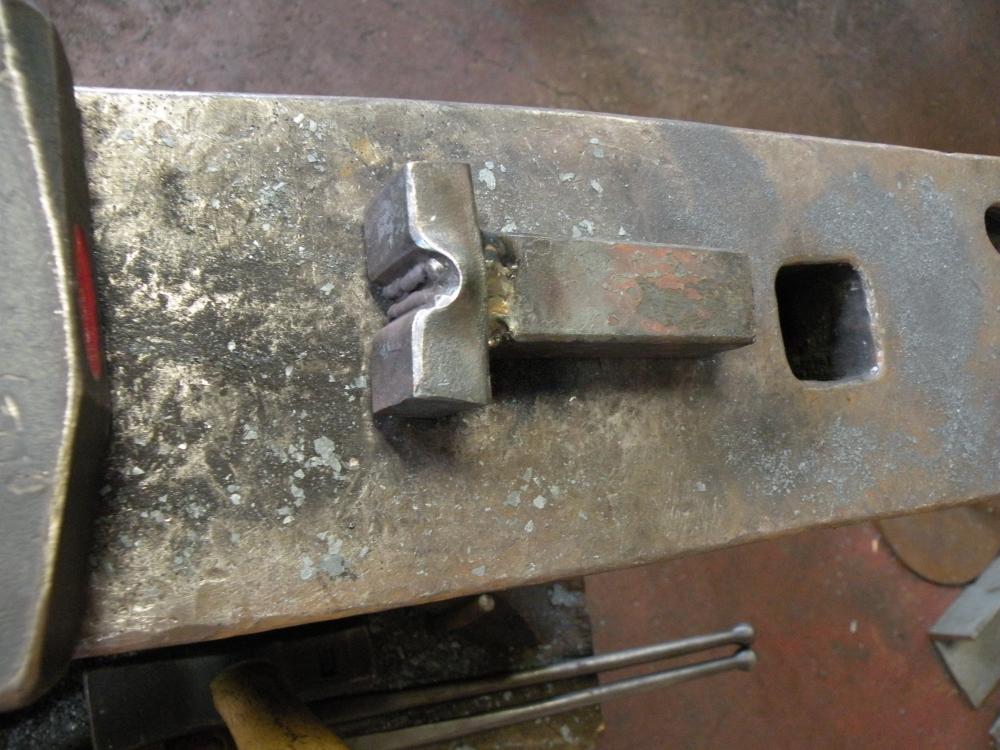
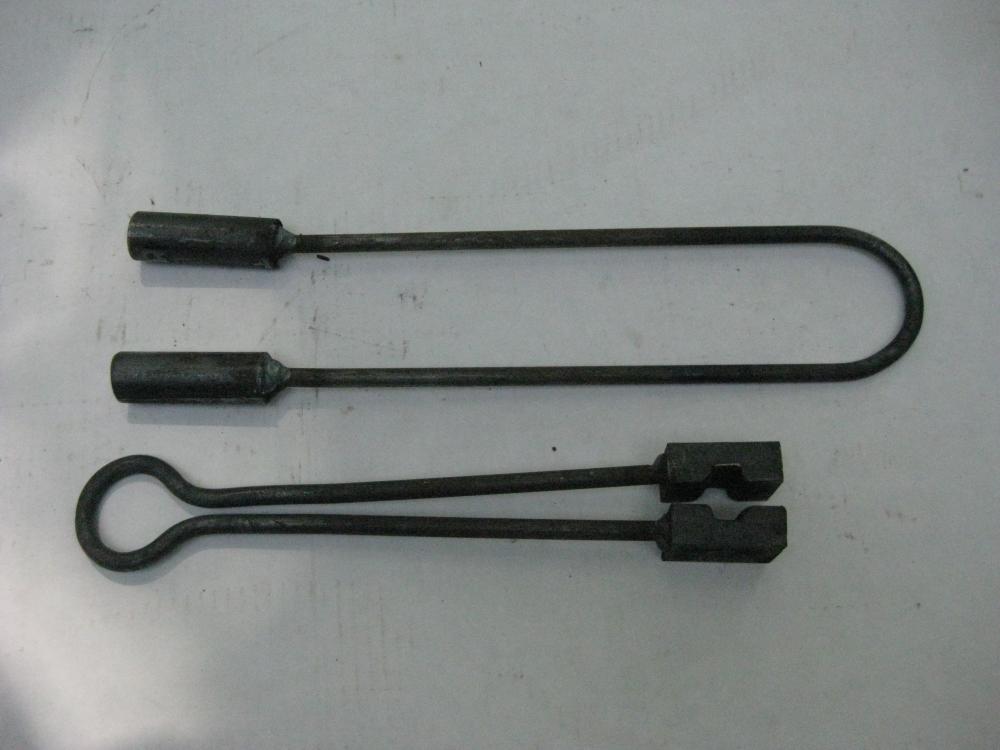
For safety, I'd look into doing something for tongs 1st if you want to use spikes. You don't have to make fancy forged tongs to start out with ( though they are good skills projects, they are often what I'd call medium to advanced beginner projects). On member here has a set of old slip joint pliers that he simply arc welded on some rod to make longer reigns. I've also seen them done as water pump pliers for larger stock. You might also look up twist tongs. Just about anyone can make those with minimal tools. Arkie here posted these up. As far as welding a shank onto a hardy tool, yes you can do that. I'd watch using RR spikes because the area below the head isn't always flat. You don't want the spike to act like a wedge and split the heel. You'll either want to grind/file it flat, or heat the spike and upset it slightly in the hardy hole to shape the spike to the hole. here's one I welded a shank onto a piece of 1" x 5/8", then heated and shaped the profile I wanted with it in the hardy hole. Be aware that sometimes the welds will fail if you don't prep the piece well. A good bevel and plenty of weld helps.
-
strange cold chisel
DSW replied to Nick O's topic in Hot Cuts, Anvil devils, metal cutting on the anvil.
I've seen them before. I've seen them used for a number of things. One would be if you wanted to chisel out a hole in heavy stock. You'd drill out most of the stock, then chisel out the rest to your line. The single flat side would be towards your line, and the bevel would be towards the center to carve out the waste. I've also seen them used to cut sheet stock in a vise. You clamp the stock on the line you want to cut, then keep the flat side down against the vise and the bevel towards the waste. I have a much longer one that I use as a hot chisel. -
I'm not sure I understand your real question. As far as space, drawings like plans and good picts would give us an idea what you have to work with. As far as space usage, a lot depends on what you have, what you need to do, and what you want to do... With a space like that, I'd want a space inside to park the truck so I can work on it. In my 'shop" that space doubles as my general large project work area. If I need space to fab a large item, paint trim or railings, change the oil on a rainy day... I use that same space. I have an area with racks dedicated to stock storage. I have a closed off area that can be heated for other storage like paints etc, it's also lockable, so I use that to secure more expensive tools. If I had a space the size you have, I'd be tempted to set up separate wood and metals shop areas, as well as a dedicated forge and machinery area. I'm sure if I started blocking out areas, more things would come to mind.
-
Using coal for the first time
DSW replied to Curtis87's topic in Solid Fuels: Coal, Coke, Charcoal, Wood, etc
I dump it all in and burn it. The fines clump together as it cokes up. Occasionally some fines get dumped when I clean out the ash in the bottom of the fire pot, but most get burned up. -
Stumped a plea for project ideas.
DSW replied to Toothygrin's topic in Blacksmithing, General Discussion
I'm constantly collecting pictures of projects that like. On occasion when I can't sleep, I may take a few of those ideas and do image searches to collect more picts for ideas. Then when I get a block, but want to do something, I'll browse those files and look for something that will catch my eye. The same works in reverse. If I see someone take a common item and create something interesting out of it, I'll save that info as well. Then when out browsing flea markets, yard sales, scrap bins, I'll keep my eyes open for a few to stock away for later use. One example might be RR spikes. I have no interest in turning them into knives or hawks, but I've seen plenty of figures made from them. Then there's bottle openers, hooks and all sorts of other things. Tools are another area I collect picts for future projects. If I see someone with a good tool idea, I'll save it for later. Another possible option is simply new techniques. The other day one member here showed that reverse twisted bottle opener. I like the look, so I saved that link for some time this winter to play with and try. The technique might be traditional joinery. I have a lot of saved picts of trivets that are primarily joinery projects. As far as scrap, I have a number of chunks of railing saved to eventually cut apart for small stock. I keep my eyes open on trash day, and I know a few scrap guys and occasionally browse what they find to see if there's anything good I might be able to use. With steel scrap at a couple cents per pound right now, they will often be happy to trade it for better scrap like alum, or sell it outright cheap so they don't have to waste gas hauling it. -
I believe most of the forges at the college are run off natural gas instead of propane, but they have to use a gas concentrator to do so.
-
anyone doing this with their kids?
DSW replied to natenaaron's topic in Blacksmithing, General Discussion
I did a bit of looking but I can't locate the exact ones the 4-H program uses. Cabelas has at least two different youth shooting glasses, Cabelas brand and Champion, both available in clear or yellow. I've also found Remington and S&W make youth shooting glasses. I also found this that has a number of possible options for kids. http://www.safetyglassesusa.com/childrens-safety-glasses.html -
anyone doing this with their kids?
DSW replied to natenaaron's topic in Blacksmithing, General Discussion
I'm trying to remember where we get the kids size safety glasses we use with the 4-H shooting sports programs like air rifle and archery. I want to say they may come from the archery outfitter supply we use, but I can't say right now. That might at least point you in the right direction. I'll dig a bit and see if I have one at the house in a package or not. You might also think about something like choker or Croakie to keep the glasses up on their face, even if they are a bit big. I hated working in glasses for years before I found Croakies. Now every pair of prescription safety glasses I own has them, and I keep at least a pair or two in stock for when they wear out. I'd also suggest a wooden box or platform they can stand on to raise them up higher until you can get a shorter anvil for them to work on. -
Be sure you like the coal you buy. When I 1st started out I was given 4 big 55 gallon drums full of anthracite that came from the coal bunker in my buddies grandparents basement. Turns out that coal isn't very good for smithing, and I have bought good bituminous to use instead. The point being if I'd paid good money for all that coal, I'd be stuck using that. Since I only have my labor into it, I can easily simply walk away from it and use something better. Biggest issue right now is I have those 4 big drums taking up a lot of space I'd dearly love in my shop, but I have no good place to go with all that coal and it's a lot of effort to empty and then refill the drums so I can move them.
-
Hey Dave. There are a number of us here in the SE PA area. You might check out Pennsylvania Artist Blacksmiths Assn. (PABA) Quite a few of us in this area are members. https://www.facebook.com/PABlacksmiths
-
New member with lots of tool-related questions
DSW replied to 1215's topic in Tools, general discussion
Hello and welcome. Take a minute and add your location to your profile so we have a rough idea where you are at. We have members from around the world, and it helps when answering many questions to know where you are at. As far as the Hobart Welder, Try asking over at Weldingweb. There are a number of guys over there who refurb older engine drives. Down side of that machine is that the "HOBART" or today is not the same company that made your machine, so parts on the welder/generator end may be tough to come by. Most times the engines were sourced separately and can be fairly common. They'd need picts and model details to be of much help. Same goes for your Ingersol Rand. Sounds like a tow behind jackhammer compressor. A few of the guys over there may be able to help with that as well. Up side on that is that these are usually fairly common in construction, so you can probably still get parts if need be. If you need a LOT of air, these are great machines. They usually will put out something like 125 CFM at 90psi nonstop. If you need to drive big air tools they are great. They are also great for sandblasters. They are big and noisy for small occasional use though. Post up picts and we can help you will what you might need. -
There seems like a goodly number of members here from AK. I'm sure when Frosty gets back he'll help hook you up with those in his area. You might want to take a minute and add your location to your profile so we always know where you are at. It helps when asking questions if when the person replying realizes you are just down the road from them.
-
I was over at my steel supplier the other day to buy some steel tube to fix a hand rail. I noticed next to his big saw he had a chunk of steel 4" x 8", so I asked what a 16" length of that would run out of curiosity. Weight was right about 150 lbs for a block that size and he said it would run some where around $270 or so, a bit less than $3 a pound is what I remember. I'm not sure if it was an alloy steel like 4140 or if it was just a low carbon steel like 1018. No horn, but I was thinking it would make a decent starter anvil for someone who can't find a London pattern anvil.
-
That stuff is great.... I use it all the time and keep a bucket of it on the truck .... For tapeing drywall. It's the wrong stuff for a forge. Simplest stuff is to get some high temp insulating blanket and coat it with the right coatings. You can build it from high temp insulating fire bricks as well if you don't want to do a can type forge. Wayne Coe here has a everything you need on his website along with good directions on how to use it. Go to the Forge Supplies page at www.WayneCoeArtistBlacksmith.com and study the stuff there.
-
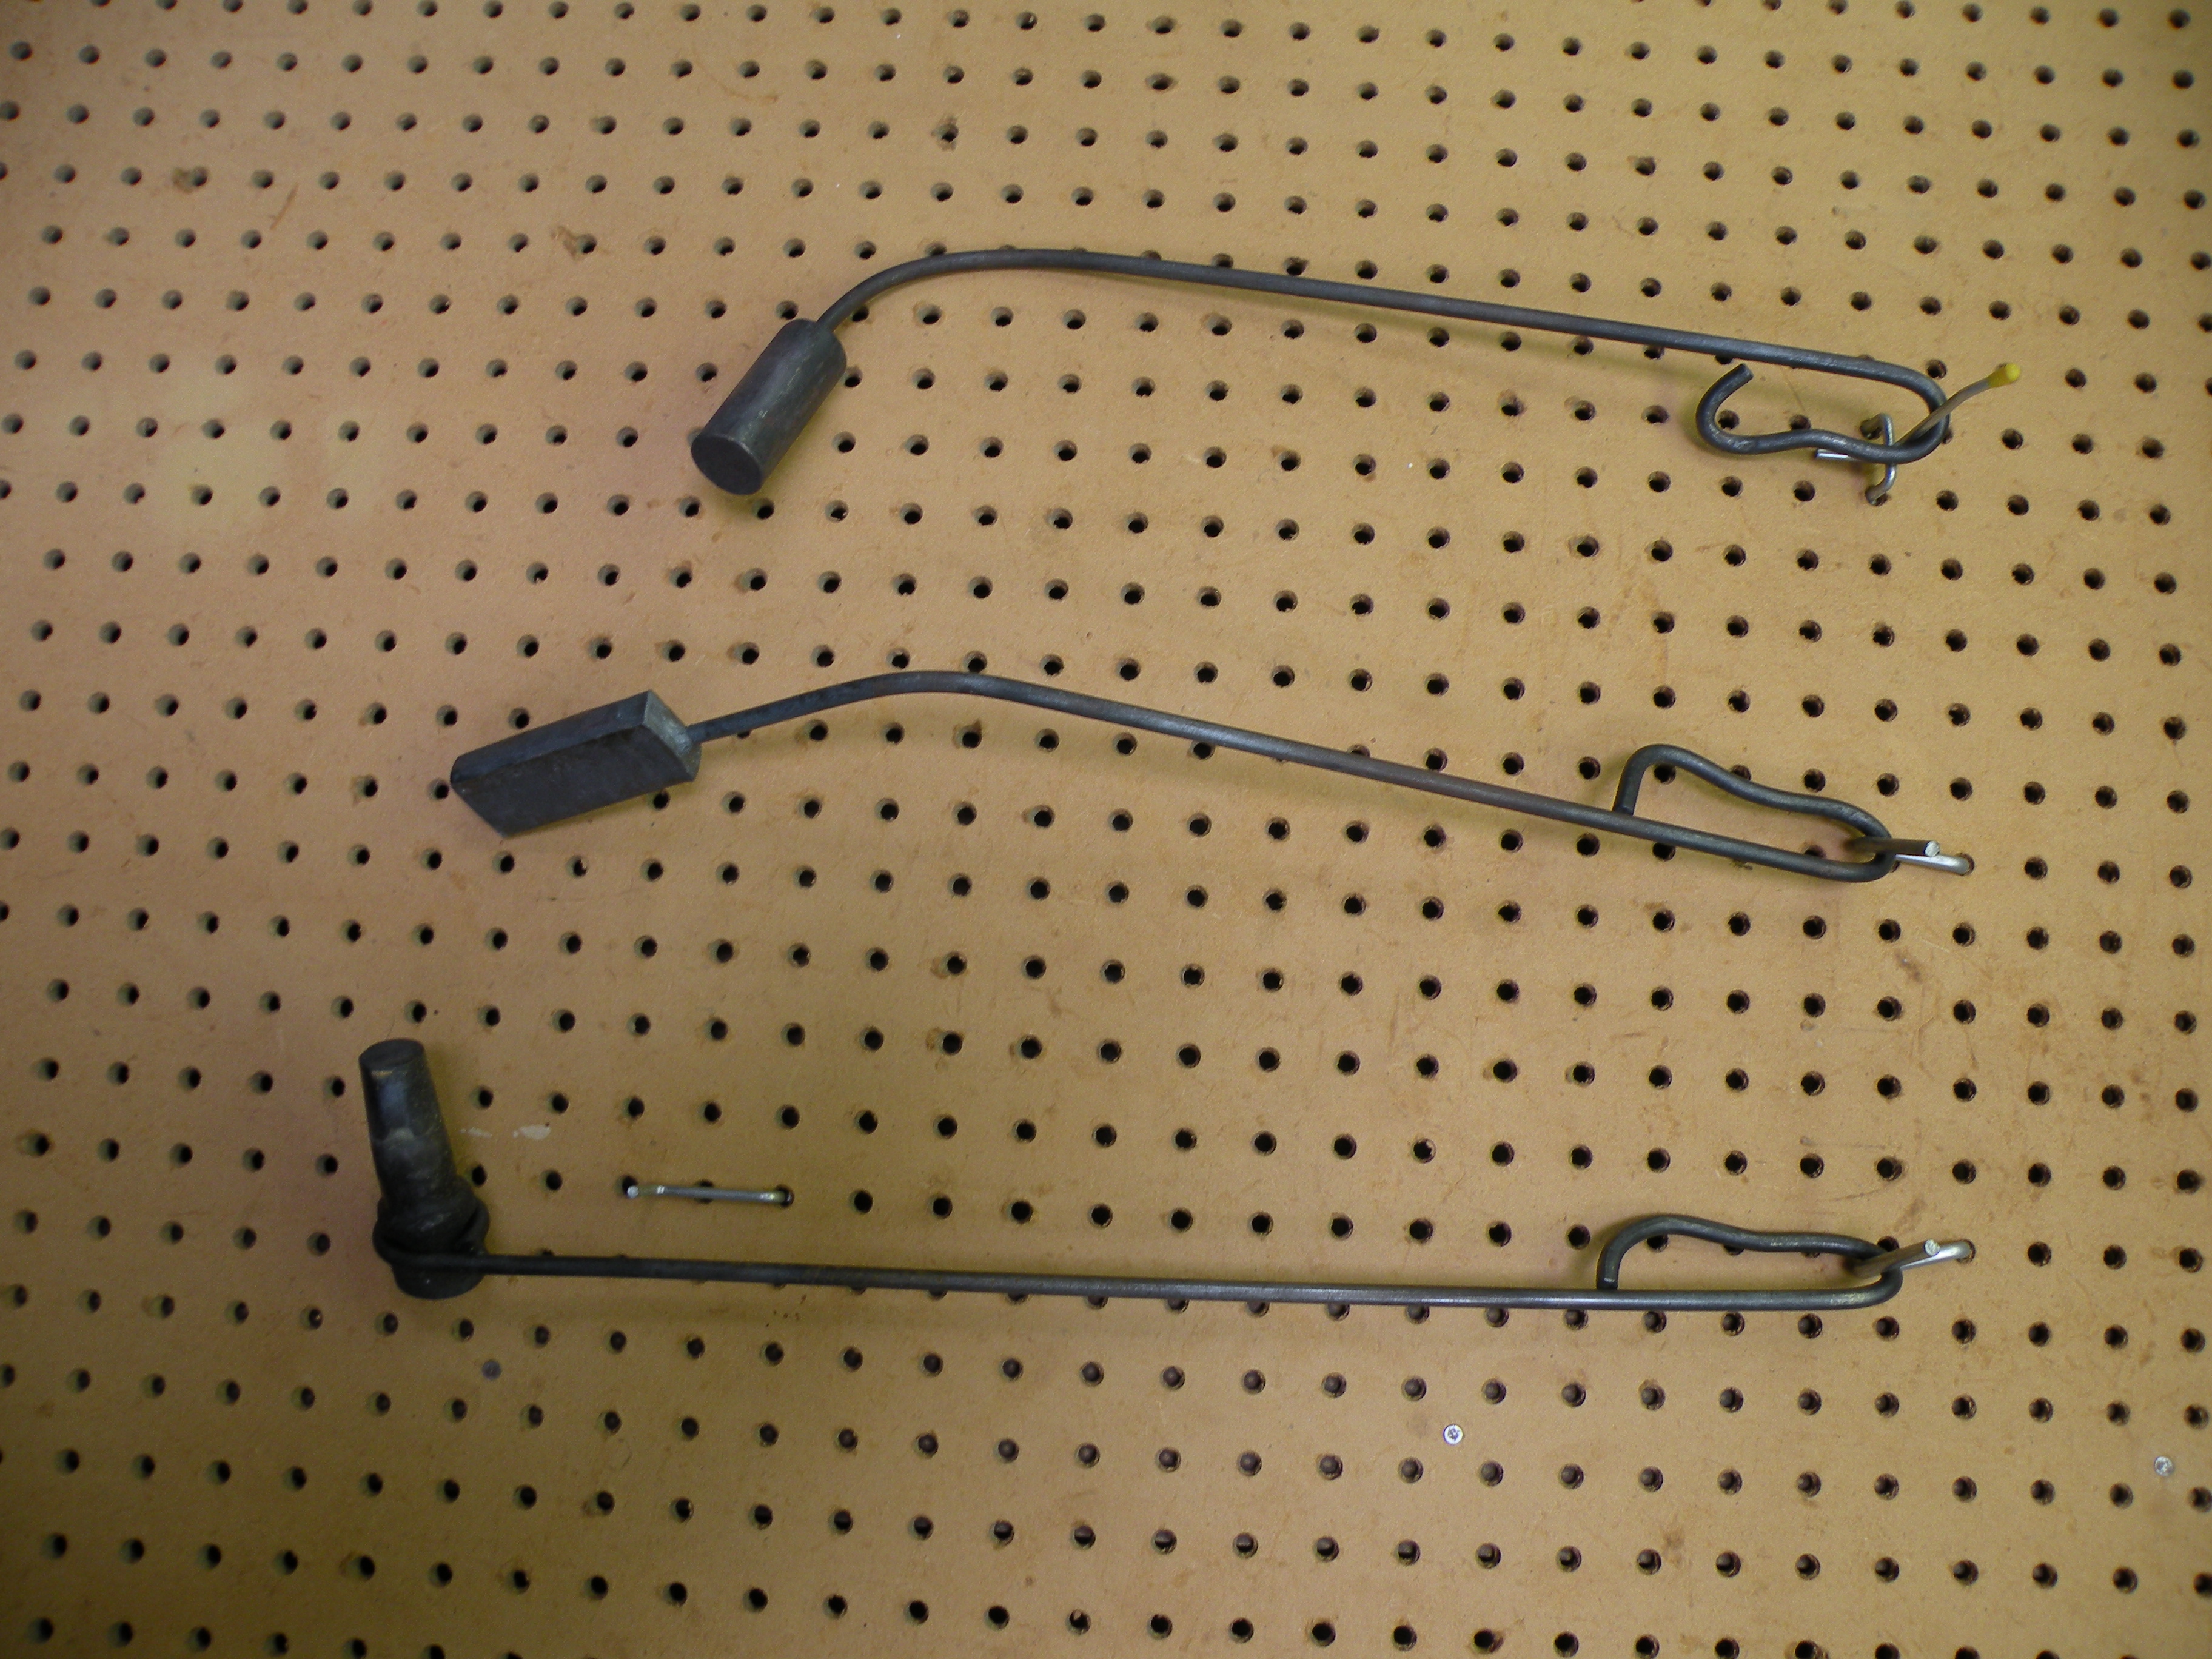
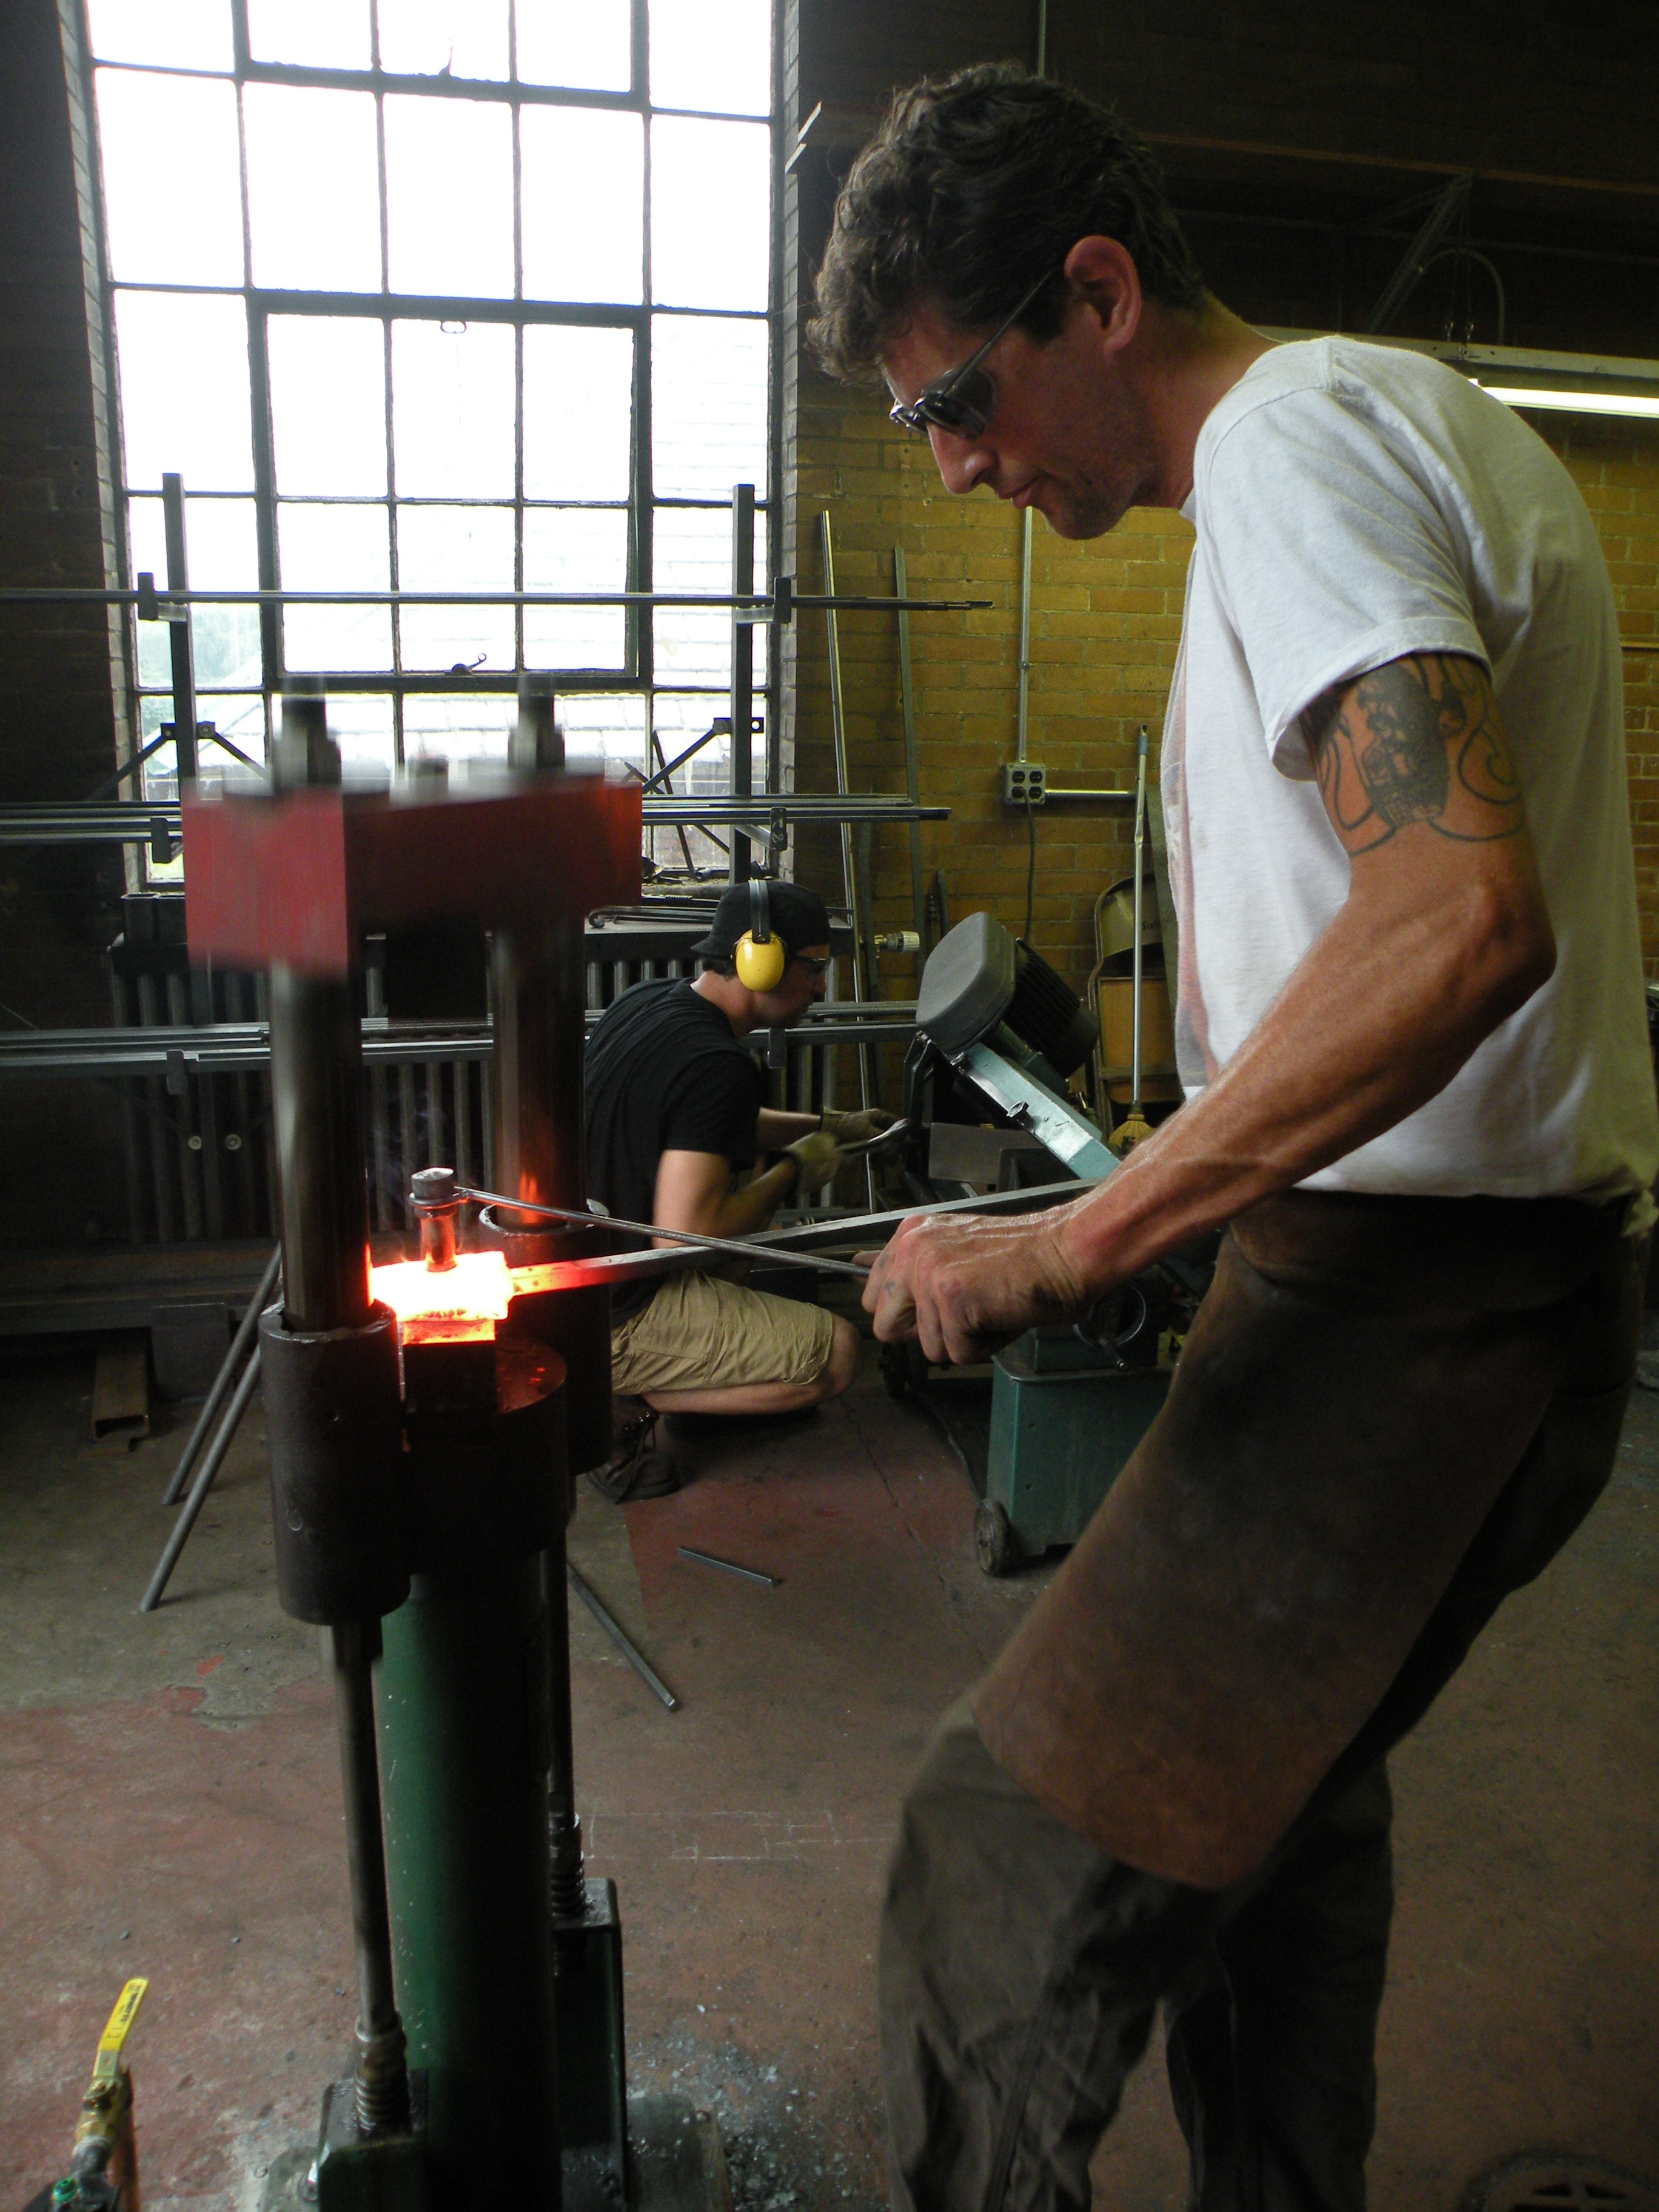
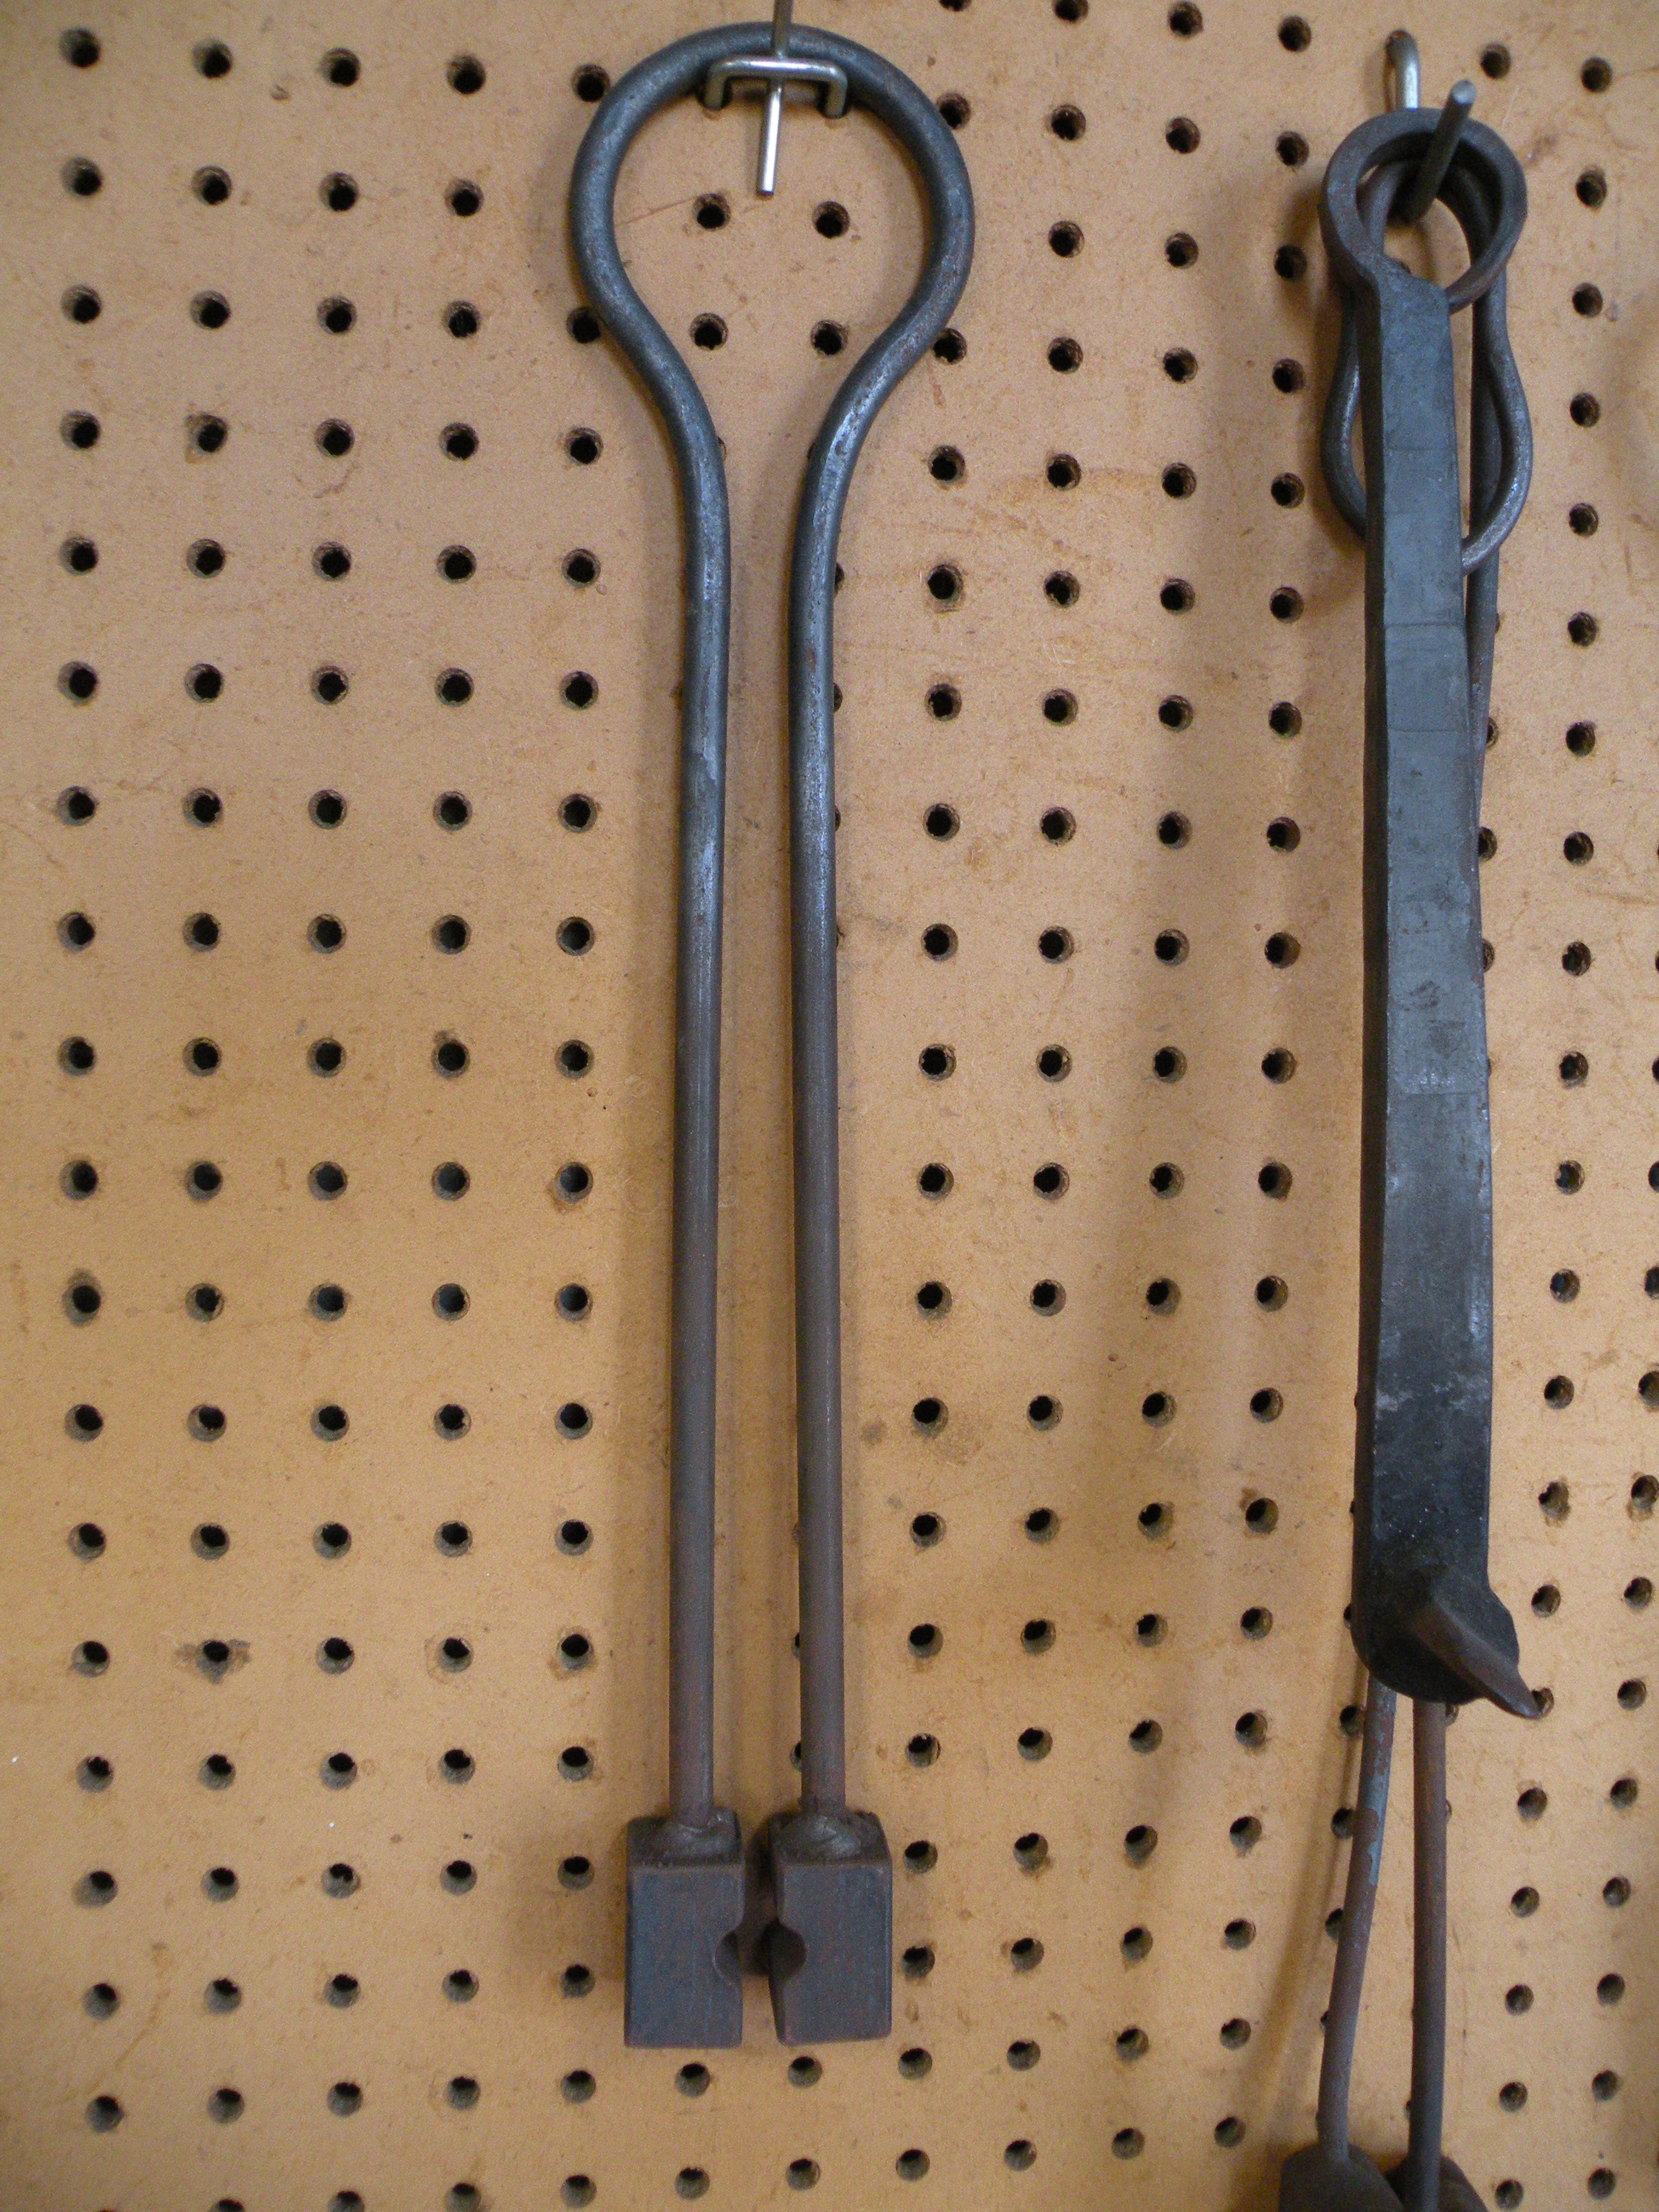
I thought I had a few picts that showed the handles on the power hammer tooling at the college better, but it looks like most were of the working ends of the tools vs the handles. I did find one showing some of the rod and loop handles and one of Warren using the bottom punch in the power hammer as well as two so so picts of a returning loop handle used on fullering or necking dies.The one from the college and the 2nd of ones I made there to do my top tools and tenons for my forge legs. I bent the last one around a bit too far. I should have left a bigger space between the rods and kept them parallel like the one the college has. If you aren't careful you can get pinched a bit in the back near the loop. Nothing that really hurts, but enough to feel it if you forget.


-
Unlike anthracite, you don't need an air blast full time with Bituminous. I have an air gate on my blower that I can close down to restrict the air when I don't have steel in the fire, or when I want a slower heat. Some simply turn the air on and off instead. I know a number of people who use one of those HF foot switches to turn their blower on and off as needed. The coal in the last pict is obviously still green. You don't get flames like that when the coal has coked typically. I keep a pile of coal right up against my fire pot that is slowly coking. I drag small amounts into the fire as needed and that keeps down the smoke. For starting I use coke left from the last fire plus some new fresh coal. I try to get a flame like you have as soon as possible to burn off the smoke, usually by poking a hole in the top layer to let the flames out. I know people who will burn a piece of newsprint in the back of their forge under the chimney to ignite the smoke when starting up as well as to increase the draw until the fire heats up.
-
Yes. I have both their Versa Jig and their G2. I bought them after talking to one of the guys at ABANA in Delaware last year. ( I wish I could remember his name right now Grrr...) I'd thought about building my own copy, but the info I got from the guy at the booth on how to use the tools for various projects was well worth the extra money I spent.
-
The Smithin Magician like John B shows is available from Blacksmiths Supply. The style like Gary Huston shows is available as the G2 from Yesteryear Forge. I like the G2 as you can use it to fuller the length of a piece as well as across the work. So if you want to put a groove down the length of a small blade, you simply turn the work to come in from the side vs the end.
-
I need to try and get to the shop later today. I'll try and take a pict of what I bought there if I remember.
-
The smithing coal he bought at Peoples down the street from Andrews shop is from about 3/4" down to fines, though there are a few occasional bigger pieces.
-
Access to something like that today is pretty easy. the proliferation of small CNC plasma tables makes it relatively easy for many small fab shops to do small jobs like that in house fairly inexpensively. There are also plenty of DIY CNC kits out there as well. You can also always go "old school" and make yourself up one of those OA pantograph pattern cutters. There are plenty of plans out there you can follow if you want. Talk to local shops about blanks like this. Many times they can possibly throw a few on when they do regular jobs and fit them into the "scrap" space. I've looked at getting simple disks or leaves cut in the past. Hinge blanks wouldn't be any different.
-
Good to have you here with us. Quite a few members here are in the area. Take a minute and add your location to your profile so we always remember where you are at. Philly's got a lot of great iron work to look at. Plenty of Yellin stuff in the city and if you ever get the chance to make it outside the city to Bryn Athyn in Mont. Co, I highly recommend it. Both the Cathedral and Glen Cairn have tones of great metalwork that's probably some of the best in the nation. The college at Bryn Athyn also does week long blacksmithing workshops in July that I'd highly recommend. You might also look into Pennsylvania Artist Blacksmiths Assn. Meetings are a bit out there, but not too far away depending on where the meeting is at.