anvil
-
Posts
3,246 -
Joined
-
Last visited
Content Type
Profiles
Forums
Articles
Gallery
Downloads
Events
Everything posted by anvil
-

Forge welding, how to see when it's ready?
anvil replied to DennisCA's topic in Blacksmithing, General Discussion
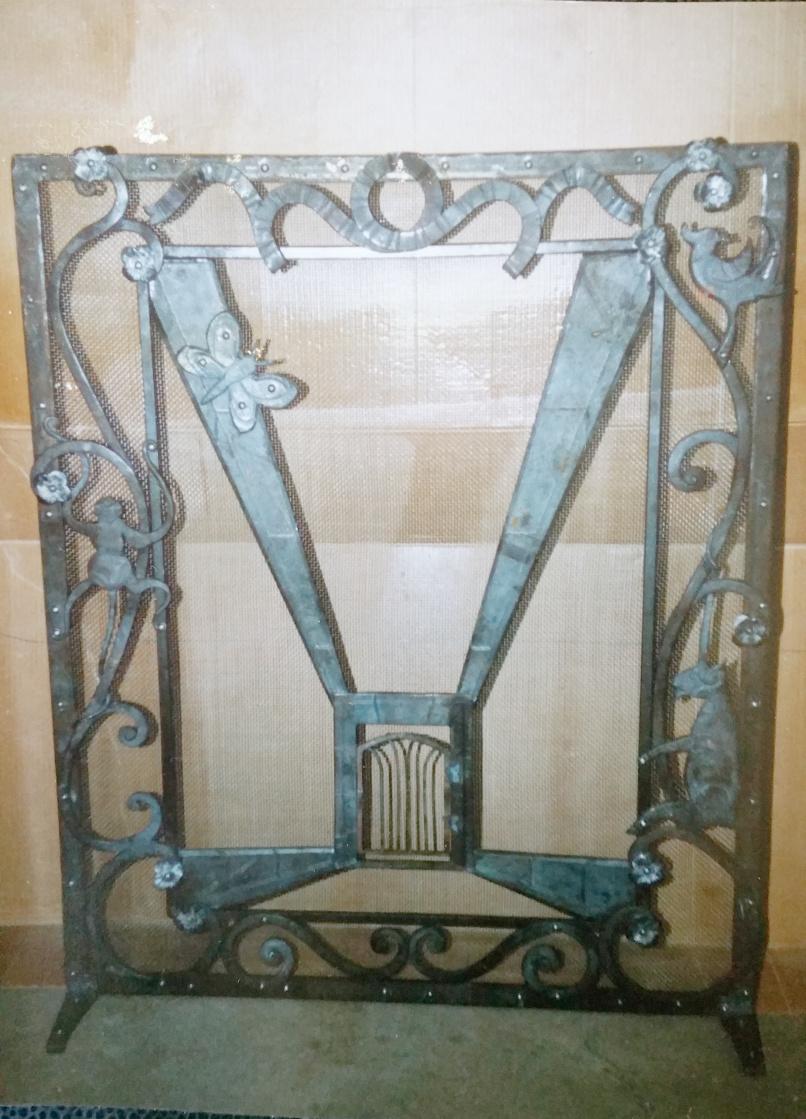
If you look, you will see there is a little slit in the scroll that the tail"corkscrews" thru and becomes a point of attachment Thomas, thanks. I actually did the bird to see how close I could come to emulate Kuhn's work. And the other critters are definitely in the same style. Your recognizing this is quite an honor. I guess I succeeded. Often when we do things within our work, we don't do them for just everybody. We do them for the few who will recognize these details. You are the first, and it's been worth the wait. Thus my thanks. -
Forge welding, how to see when it's ready?
anvil replied to DennisCA's topic in Blacksmithing, General Discussion
Actually, I did this a long time ago, and am not sure if the other critters are in his books or not. I just don't remember. I do try to credit what I do to where it came from. It kinda keeps a continuity to our traditions alive. Lol, the monkey still gives me nightmares, and you are right, I never was able to complety get rid of the devil in the monkey. I did a set of four fire screens for the W.C. Fields estate in Beverly Hills. That alone ought to be worth a free beer in any bar worth a hoot. Not bad for living in Corado and no advertising. -
Not meaning to diss your nice work, but technically speaking, I'm not a fan of diagonal peens. My go to is a simple cross peen. Reason is, I'd rather move my iron to the proper prospective than add two hammers to my tools to do the same thing.
-
Forge welding, how to see when it's ready?
anvil replied to DennisCA's topic in Blacksmithing, General Discussion
Slinging borax is the way to go. I think it's a Turley trick The bird is directly from Kuhn. The other three critters are mine using techniques I learned from the bird. I called the monkey " the monkey from hades". This screen was for a nursery and it took the "devil of time" to make it not look like something from a Steven King novel. This was my first attempt at doing a perspective "drawing" in iron. The gate is actually hinged and actually worked. However discretion was the better part of valor and I did not think it would survive in a nursery. Also, the gate pickets are all mortise and tenons. As far as forge welds, all corners are forge welded and the scrolls around the perimeter are one piece due to forge welding. The corner welds are a bit difficult, but the rest are just very basic welds that one can do after learning to weld. Forge welding to dimension, or just plane forging to dimension, in my opinion, should be a goal always kept in mind until it becomes second nature. Forge welding at lower temps comes with experience. -
Looks good. Clean and simple. If the eye is a bit off, you can correct that when you fit your handle. Just set your hammer handle along the centerline of your hammer. Also with a diagonal peen, it's nice to have a pair. The other with the diagonal going the opposite direction.
-
Awesome, a real "turned on" moment
-
It's exciting to hear about your new shop! Rooting for it's completion. I too have a new shop in the works. With covid, a hip replacement and cataract surgery it's been slow going. I will use a generator hard wired into a main breaker for power. All wiring is run thru metal tubing. Hoping for a late fall to early winter to be done
-
I mix a quart of linseed oil and blo in a one gallon metal paint can with a lid. I add anywhere from a walnut to a golf ball sized chunk of beeswax, cut up for quicker melting. Put this on your forge fire and give it a little heat. If it flashes, remove the paint can from your forge with your poker or rake and put on the lid. Remove lid and put it back on your forge. When the beeswax is melted, pour back into the two quart cans. Done. Takes about 15 minutes and apply with a rag. Depending on your workload, it will last for months. If you want a paste, add more beeswax.
-
Thanks, and you are correct. I should have said "modern shovels are mild or high carbon. Also, I'm actually winging it on old shovels as well. I'm assuming that older shovels were wrought due to price of other steels. So scratch my last post. For what it's worth, and where my assumption came from, my grandfather was a coal miner '20's_'50's. I have one of his old shovels and have seen other old ones made in two or 3 pieces. There was the shovel body and one or two spade type connectors that rivited to the shovel and the other end made the socket for the handle. I assumed that the spade connector was a high carbon steel to strengthen the shovel, and join the shovel body to the handle, and when the shovel wore out, you could replace it.
-
You have the right idea concerning microfractures. Altho it's important to know, I had far more failures like yours when first starting out than after gaining experience. Beginners need to look close at their technique and shy away from blaming their material.
-
Forge welding, how to see when it's ready?
anvil replied to DennisCA's topic in Blacksmithing, General Discussion
Lol, I've done that in broad daylight at a crafts fair. As an example, about 20 forge welds, all to dimension and all done with 20 mule team borax.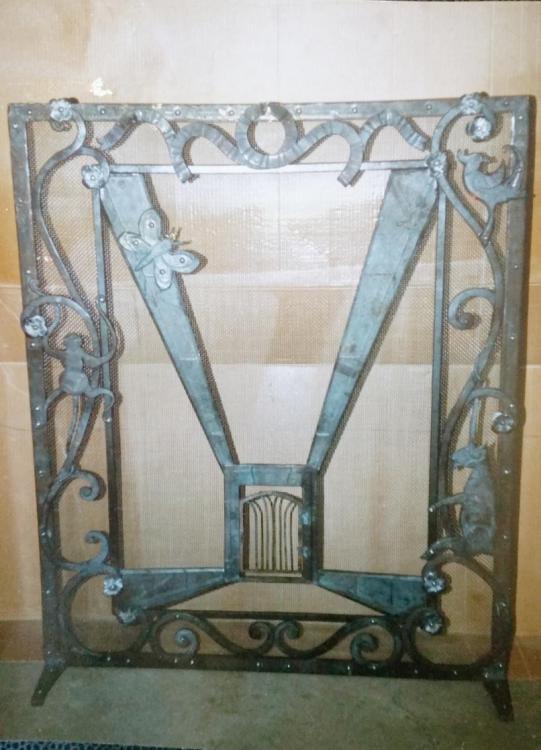
-
Your shovel, if it's old, is most likely wrought iron. If modern, it's mild steel. Neither will make a spring .
-
Trouble forging 1in square stock
anvil replied to Dan_the_DJ's topic in Axes, Hatchets, Hawks, Choppers, etc
Why do you think it's called a "slack tub"? A reeel blacksmith never gets thirsty. -
Forge welding, how to see when it's ready?
anvil replied to DennisCA's topic in Blacksmithing, General Discussion
What iron dragon said is gold, as is just moving a piece of coke and looking at your iron,,, in a constant light. When I was starting out, I'd look for the early sparks, slow my hand crank a bit, and count thousand 1, thousand 2, thousand three and pull it out. That pushes the burn envelope a bit, but it worked for me til experience kicked in. I tried the "high priced spread" for borax, but not for long. I just use good ole 20 mule team mixed with a bit of boric acid for bragging rites. -
Trouble forging 1in square stock
anvil replied to Dan_the_DJ's topic in Axes, Hatchets, Hawks, Choppers, etc
Be careful, you might be painting yourself into a corner. Seems you can't get the high priced spread and don't want to deal with the rest. And if you had been working on your forge welding from the time of your first post, you'd be well on the way! Just giving you a bit of a hard time,,, with a grain of truth. -
He also said a shiny black finish and was doing a simple hot oil technique. Hot oil does a beautiful matte finish, not a shiny finish. I have no experience on a shiny finish for steel.
-
Not to beat a dead dog, but what caught my eye is never downsize your pipe. You can go from smaller to bigger, but not the opposite. For what it's worth, the reason for the negative critiques is not necessary directed at you, but to make sure others don't follow your design.
-
Metal tempering without an oven
anvil replied to MisterJohn's topic in Heat Treating Knives, Blades etc
I've done that, if this is what you are doing. Reroll the coffee can into a cone. Put the wide end over your coke. Use the heat coming out the narrow end for a localized heat source -
What can one expect out of a camping/survival knife?
anvil replied to Dan_the_DJ's topic in Knife Making
Here's the process for heat treating. You will find this for most steels with few exceptions. Forge Normslize: same process as you described, then air cool. Anneal: same as you described, then cool in lime or clean filtered wood ash. Remove all hard stuff and only use the fine ash. Hard bits, no matter the size creat spaces. You want the ash to naturally surround your work completely. Cold work: Harden: bring up til you lose magnetism, and quench in either oil or water. With 1075, water quench will give you a harder edge whilst oil will give you a tougher edge. The difference is think what a knife or wood chisel does vs what a hammer does. Oil is "safer", meaning if you mess up your heat treat, oil is more forgiving. Temper: This actually determines "best use" of your tool. With 1075, a water quench and drawing to a straw will give an excellent cutting edge. However, if you do it correct, it should chip if you try to hammer it thru a nail. If you temper to a purple/blue color, you should be able to hammer thru a nail, but with a knife profile, it won't hold a sharp cutting edge as well as a straw color. It will wear quicker, but should not roll. If your edge rolls, you missed your heat treat at one or more of the above steps. I prefer the reserve heat method when I temper my tools, no matter if it's a knife, hammer, or cold chisel. This means heating the back edge of your knife and letting the colors run towards the edge and transition of knife and tang. This way you get a narrow temper(3/8") for the job on the edge, a spring temper in the body to give some flex,, and a relatively soft back end to absorbed shock. Final sharpening There's a lot more that can be said, but the above will work for most steels with a blacksmithing setup no matter if you use a known or unknown steel, or are making anything from a knife to a hammer. If it doesn't work with unknown steels, and assuming you are confident in your HT process, you have a known point to start experimenting with your mystery steel until you find the correct temps and times Since you are on line, if you can get to either the android or iphone app stores, I highly recommend a free APK called " Heat Treaters Guide Companion". -
Forge welding, how to see when it's ready?
anvil replied to DennisCA's topic in Blacksmithing, General Discussion
Try this, it works every time With your poker, gently move a piece of coke out of the way and look, then move the piece you moved back where it was. You can also, depending on shape, quickly pull it back to you and look, then slide it back in. Don't disturbed your fire when you do this, just move it quickly in and out. I'm not sure what some above are implying, so to clarify about what you burn in a coal fire: if you are burning bituminous coking coal, the green coal stays around your fire and you should only have coke in your firepot heating your iron. Coal mixed in the firepot means you have a dirty fire. Basically, when the green coal burns, it turns to coke. This gets moved into your firepot and you move the coal into the space that turned to coke. -
Lol, you have a point. However spend a 1000 hours on a $400 124# PW is the best of both worlds.
-
Here's some more advice. You have already been to Centaur website, so you know how to get there. Go there and look up their rectangular cast firepot with a clinker ball. The dimensions for their firepot are there. They are about 9"x14" x4" deep. Build a firepot to match and buy a clinker ball and handle from them. The difference in efficiency between a clinker ball setup vs a flat piece of steel with holes in it is like night and day. I've used their firepots for over 30 years. The dimensions are taken from good firepots of the past. You can heat anything you mentioned all the way down to a narrow trench fire for heat treating or knife making. Check the price for the whole setup, firepot, tuyere, and clinker ball. Either way you won't be disappointed. Peigh tools is another source. And there are some other good places that do great cast firepots. Sometimes saving a dime will cost you dollars in the long run. For a good fire for basically any size steel you want 4" of coke underneath and about 3" on the top. Your iron should be parallel with the top of your firepot and easily slide across the top back and forth. Never point your iron down. With the dimensions above, you can get about 4 lengths of 1" square stock and quite easily get an 8" long heat on them by moving them back and forth. You can get easily 8 lengths of half inch square and get the same length of heat. Learning fire control will make this possible. As a general rule of thumb, a 6" long heat will keep you pretty busy. Basically the dimensions I gave is a great size for a single man full time shop doing any size work you want from hammers to crafts fair limited production to gates, railings and any lighting you want. And a 3"-4" tuyere is fine. You want air volume, not velocity. The smaller the tuyere the higher the velocity to get proper volume. Too much velocity means burnt iron. A good hand cranked champion or candy Otto blower is sized to about that size. The same size tuyere applies for electric fans as well.
-
Firminy anvil, horn sloping up
anvil replied to HSC 3 knives's topic in Anvils, Swage Blocks, and Mandrels
Interesting anvil. Speculation on why it's pointed up is just that. Speculation. Benona, the horn is not the best for drawing out, even tho some do. The reason is the converging lines. This means that one side will get drawn out more than the other. If you want a straight piece, you must correct for the uneven draw. I believe the horn has two benefits, edge bending and adding a third dimension to a scroll. The narrower the piece, the less twist you will get. Think horse shoe. The wider the piece, the more twist you get because of the converging horn. So, why is the horn pointed up? My guess follows the above. Perhaps with the horn pointed up and if you use a straight down blow, you will get more twist. Thus it may be easier to get max third dimension in your leaf type scrolls. -
Making a presentation sword Sword for General Eisenhower 1946
anvil replied to ThomasPowers's topic in Swordsmithing
With all the line shafts in the shop, I wonder why the drop hammer was run by hand by an old guy. Perhaps showmanship. There was a lady there as well. Interesting vid. -
Why don't you take your 1" stock and make a hammer eye punch or a slitting chisel, and a drift, then make a real hammer that you will use? You can either punch the eye, or slit and drift the eye. I wouldn't buy a hammer so I would know what size eye to make. Seems redundant.