TheoRockNazz
-
Posts
863 -
Joined
-
Last visited
Content Type
Profiles
Forums
Articles
Gallery
Downloads
Events
Everything posted by TheoRockNazz
-
 Fantastic group of blades, loving the big choppers
 -
Beautiful and flawless!
-
To all those smiths who told me railroad spikes were useless
TheoRockNazz replied to Forging Carver's topic in Knife Making
Well said, Frosty -
Buzzkill, sounds like it's time for you to experiment Thomas, the issue I am facing with using other types of shells is that dozens are needed per each knife, and each needs to be sanitized and cleaned before use; I get white ones already sanatized and cleaned for me by the pound... although I suppose nothing is stopping me from just dying them.
-
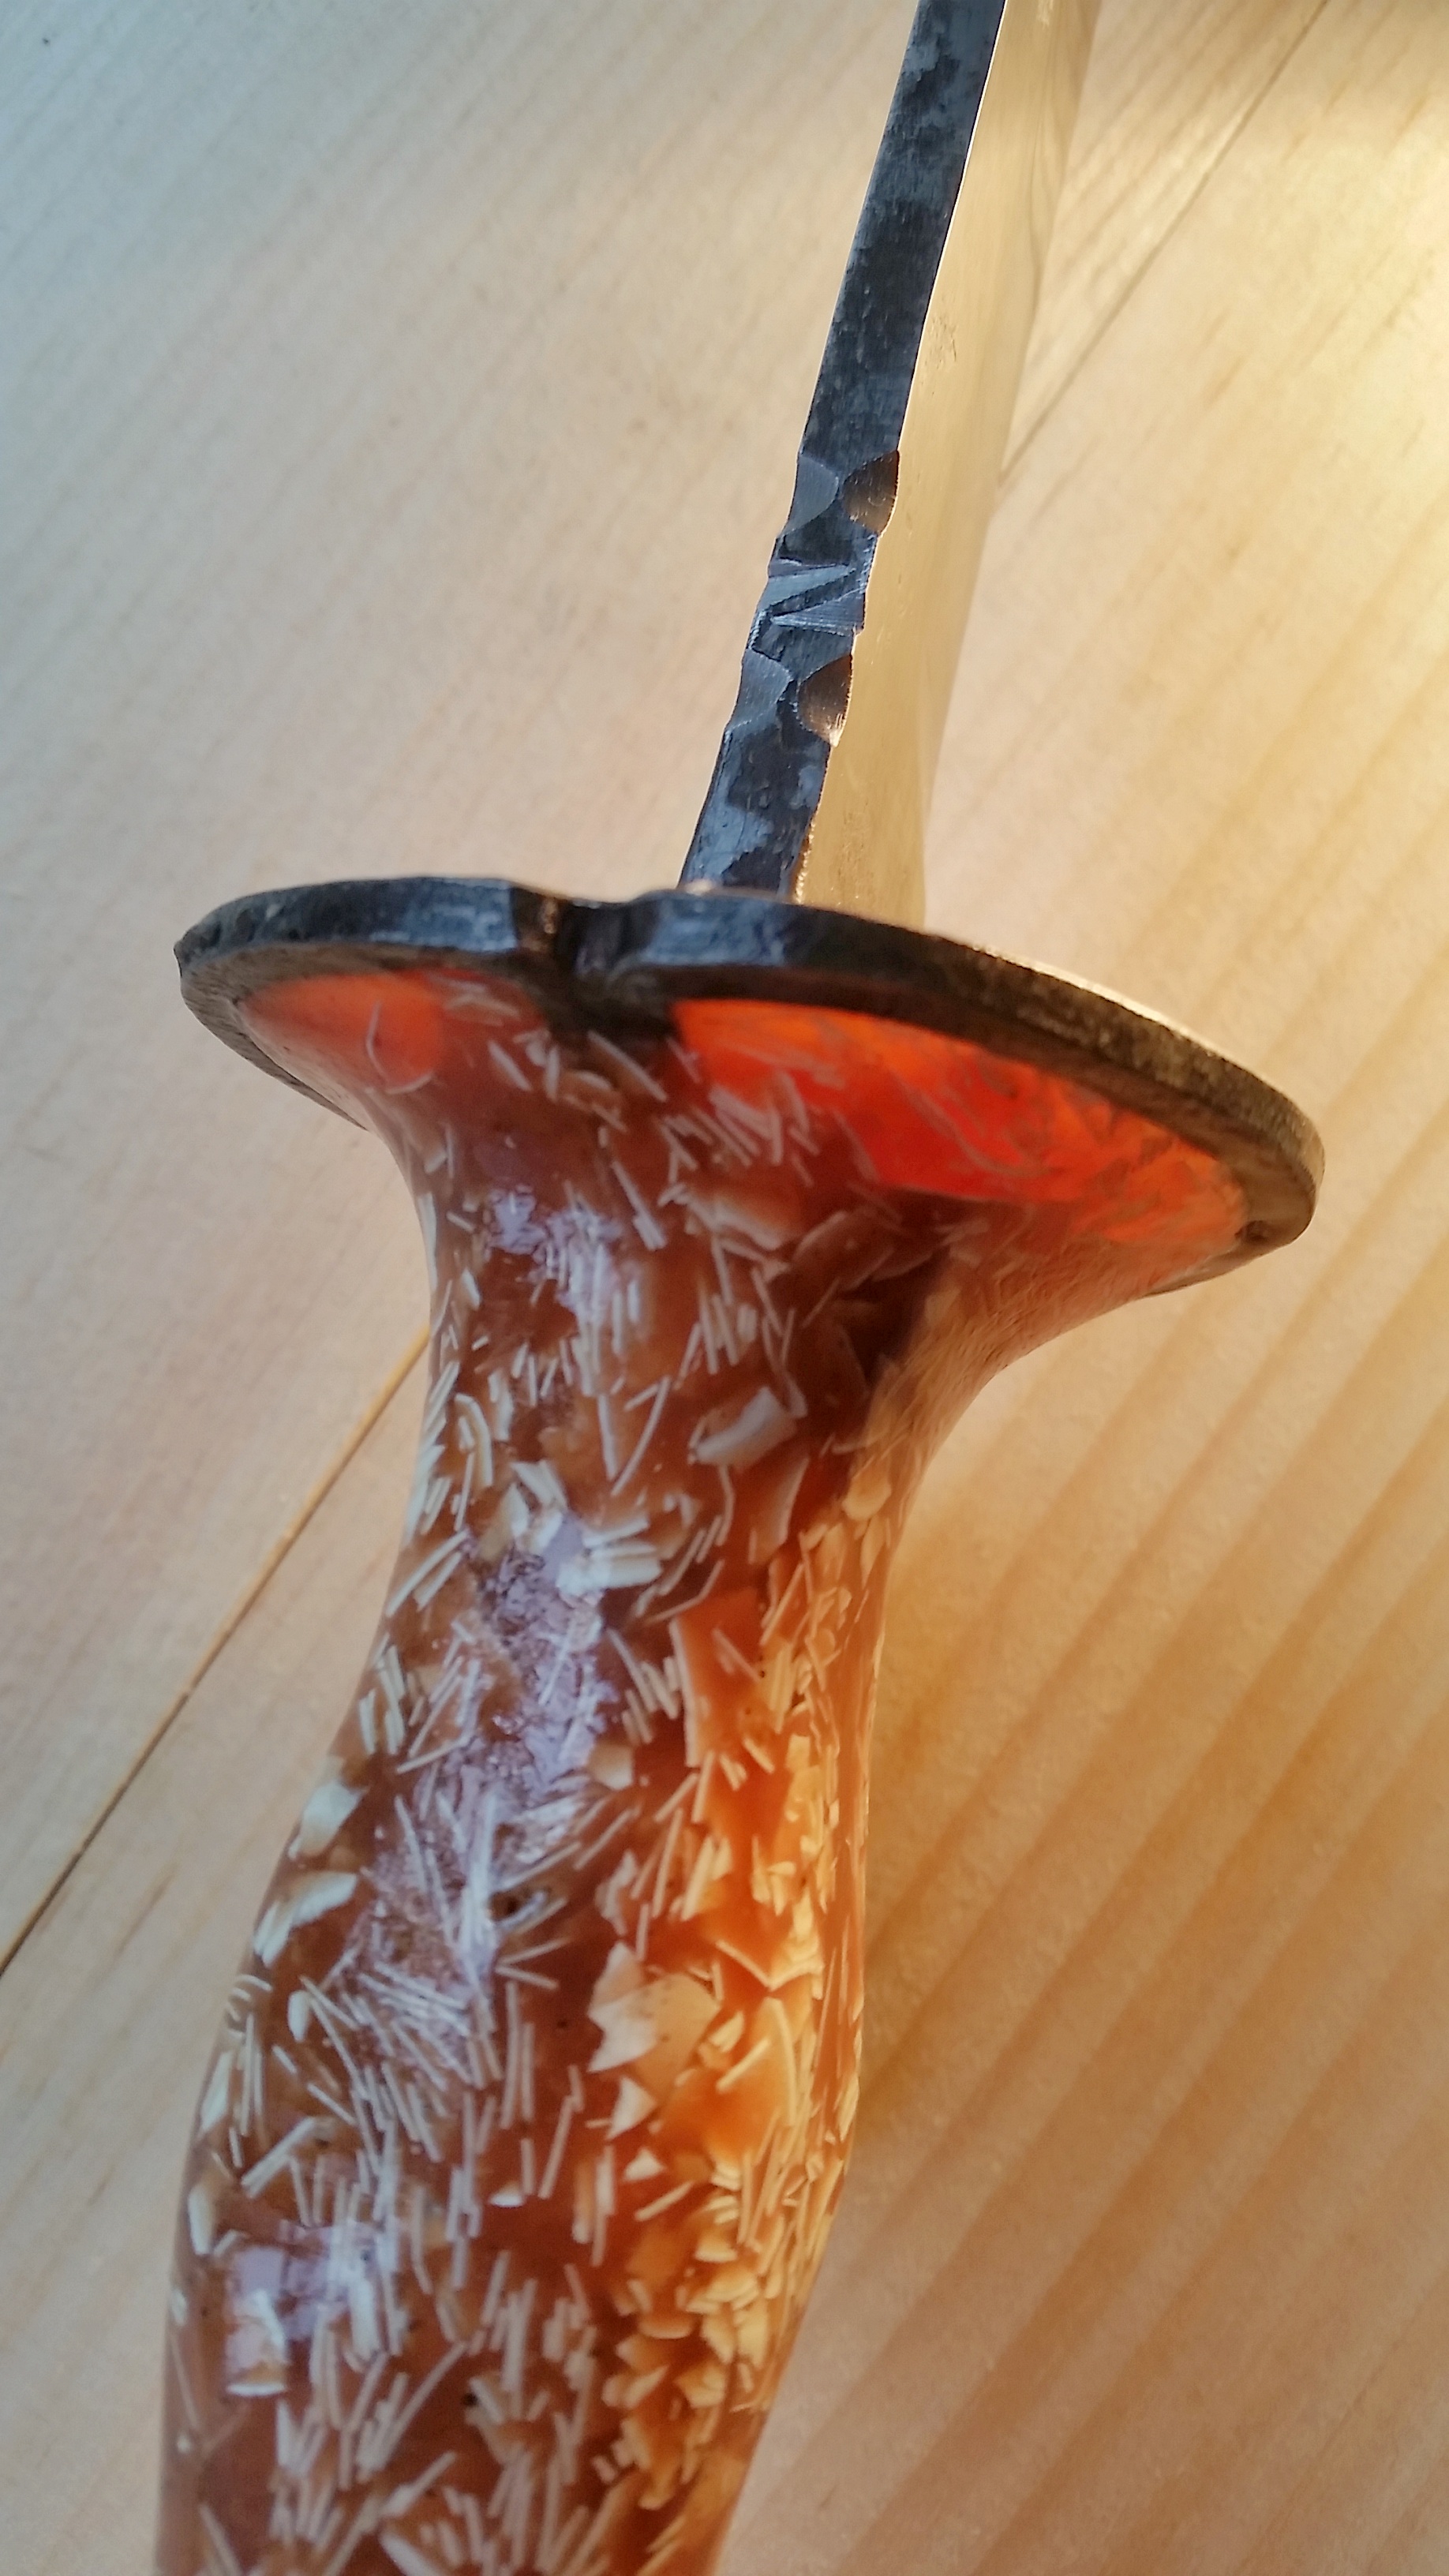
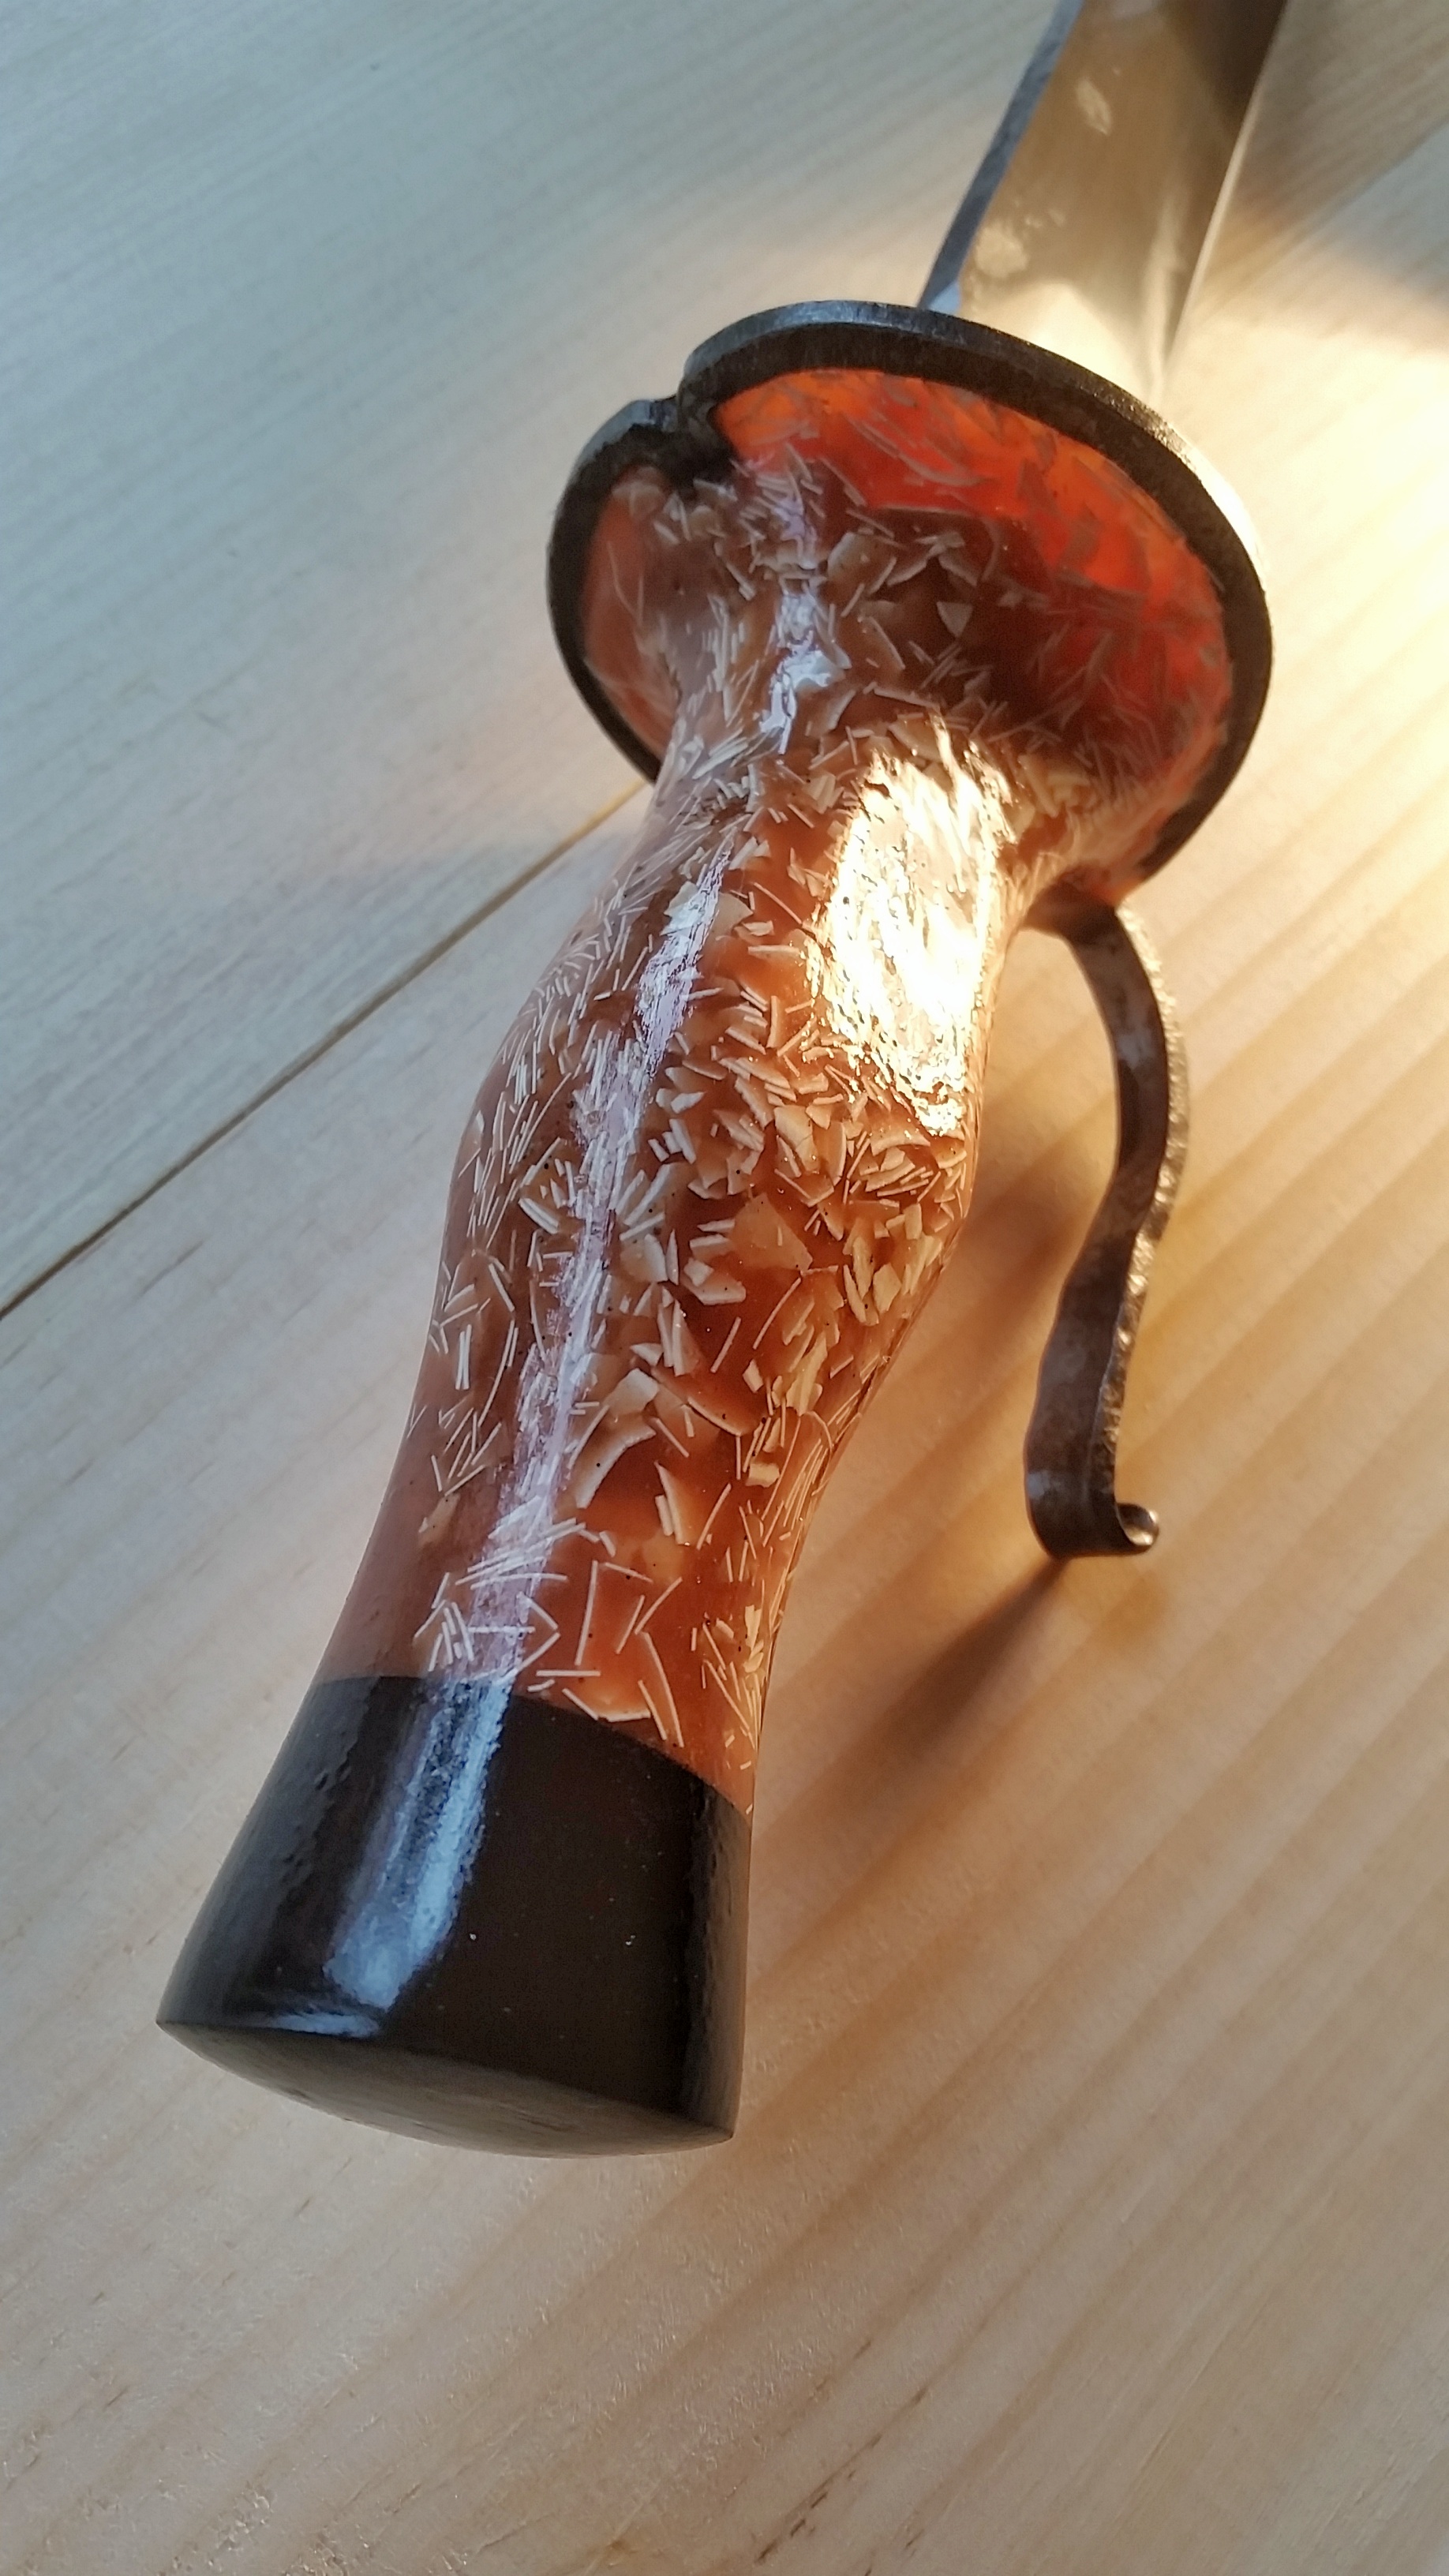
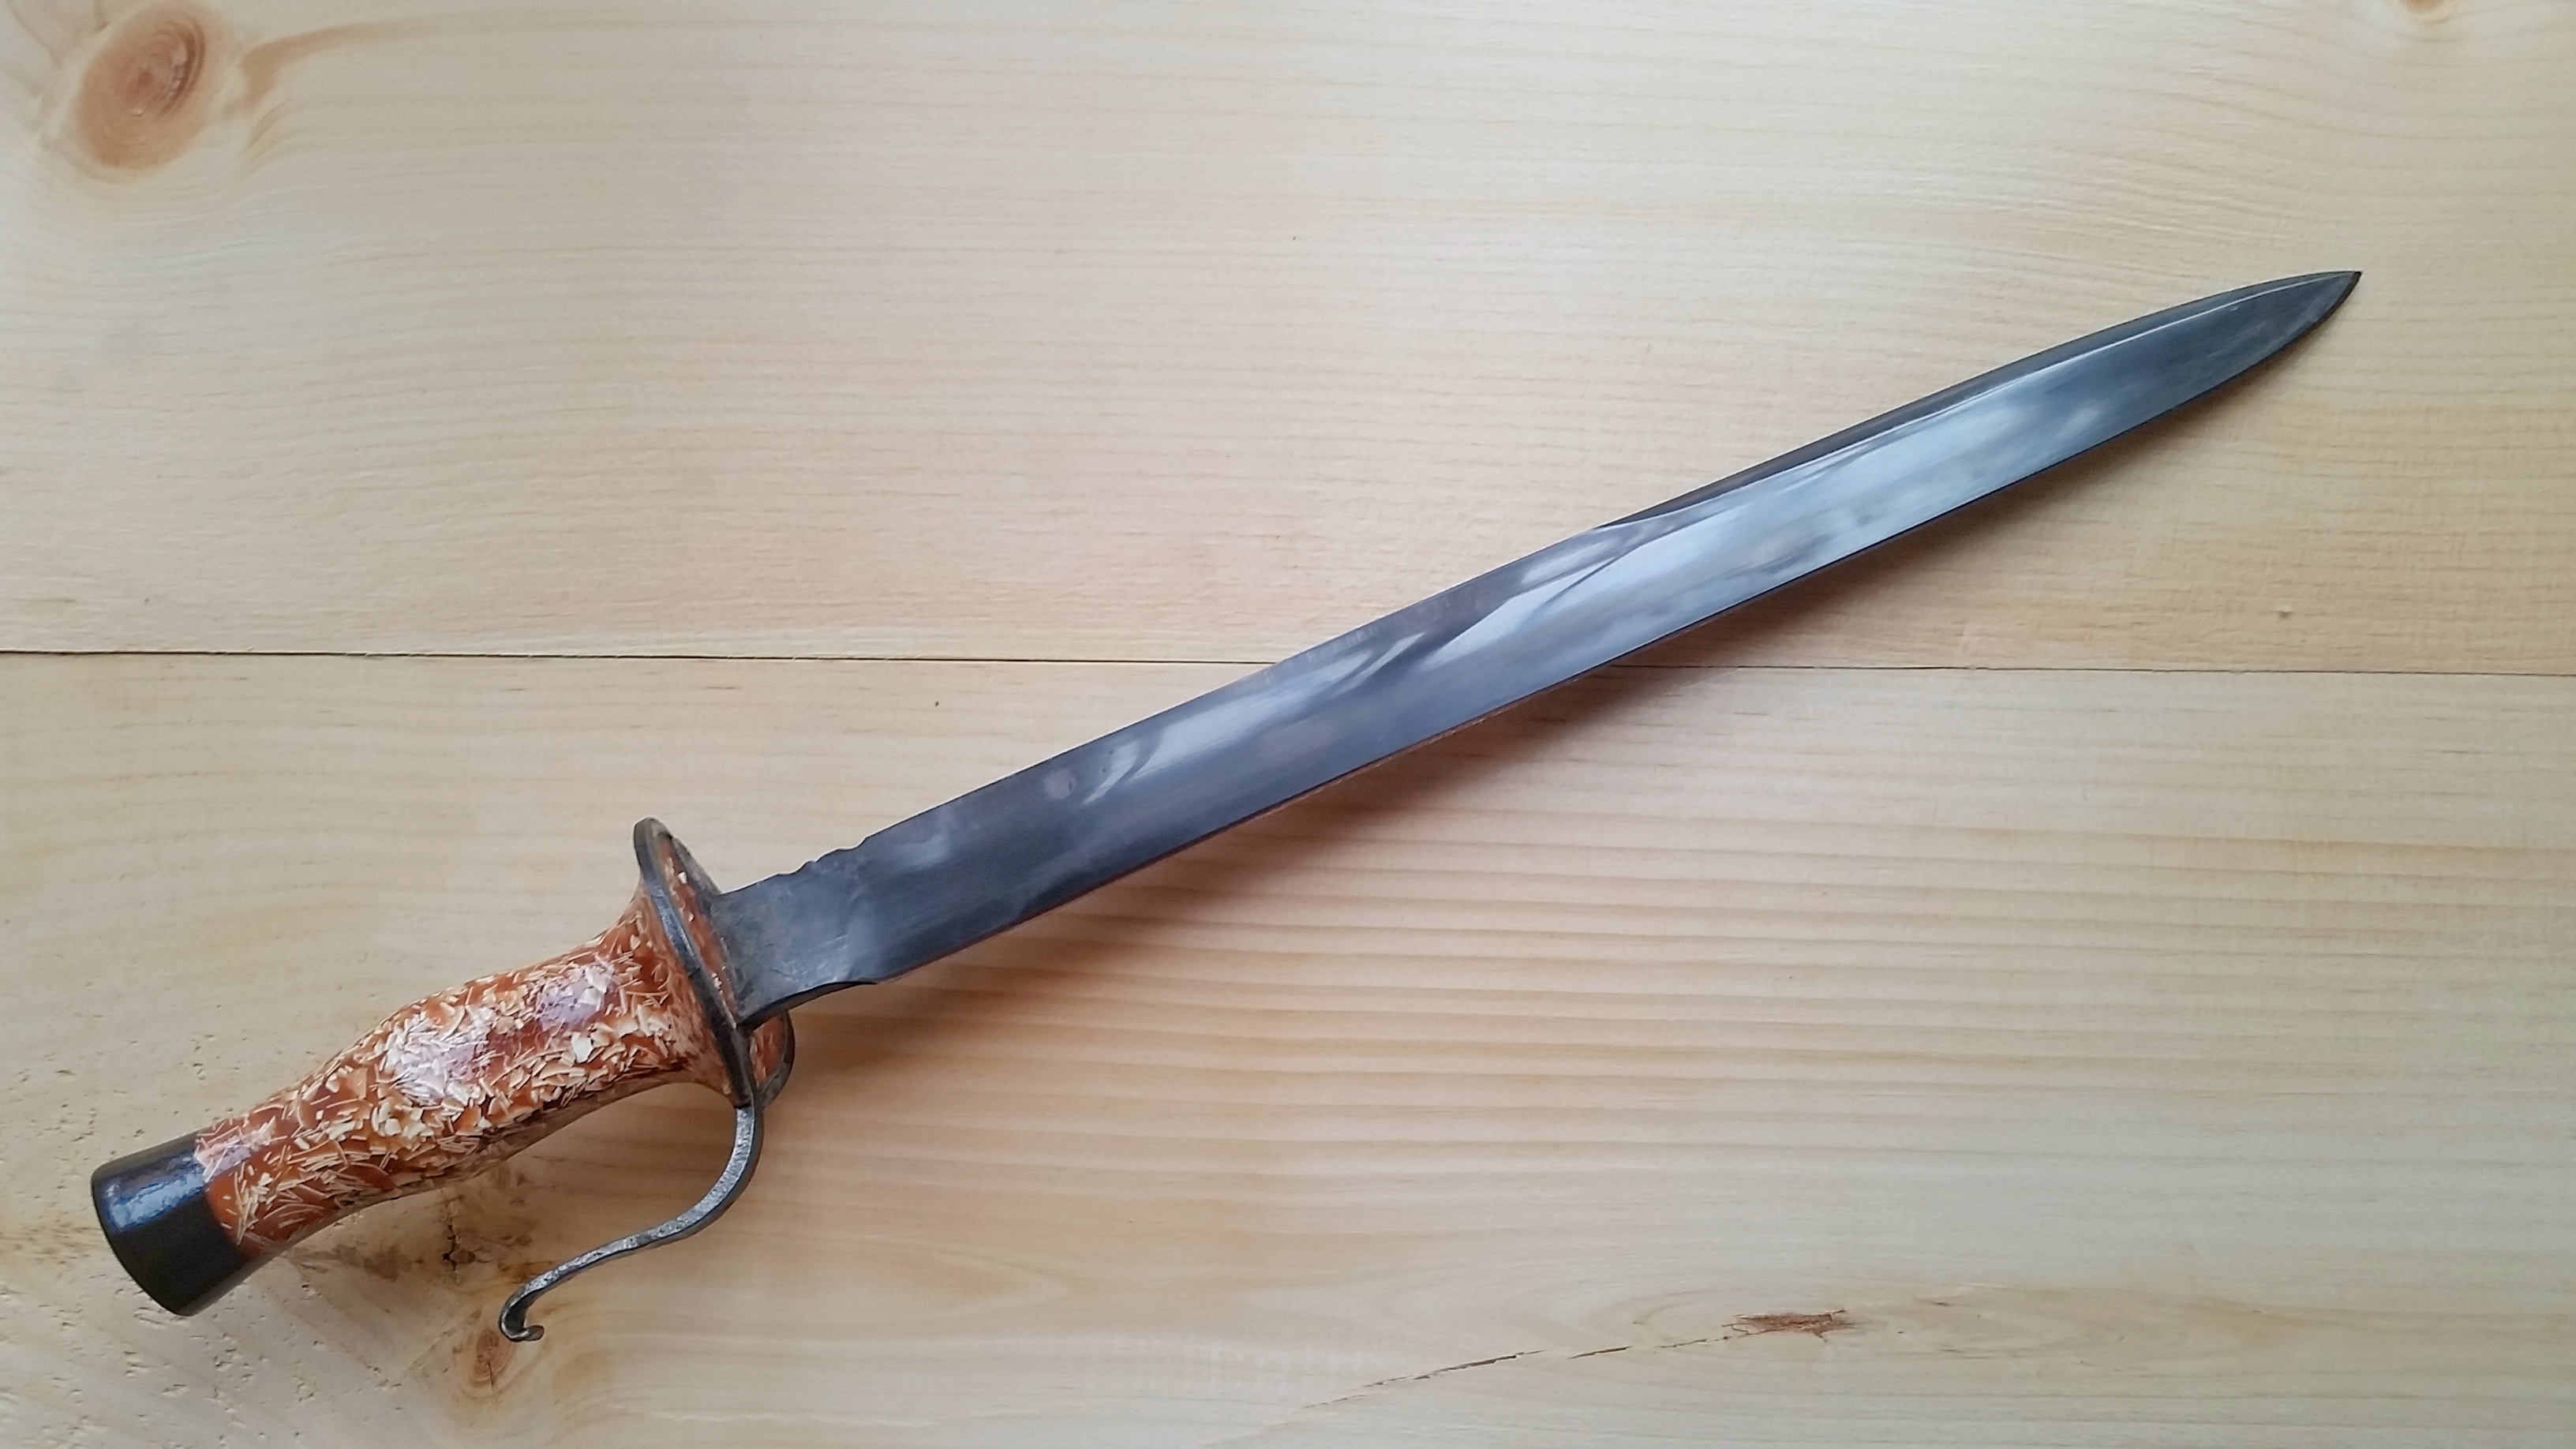
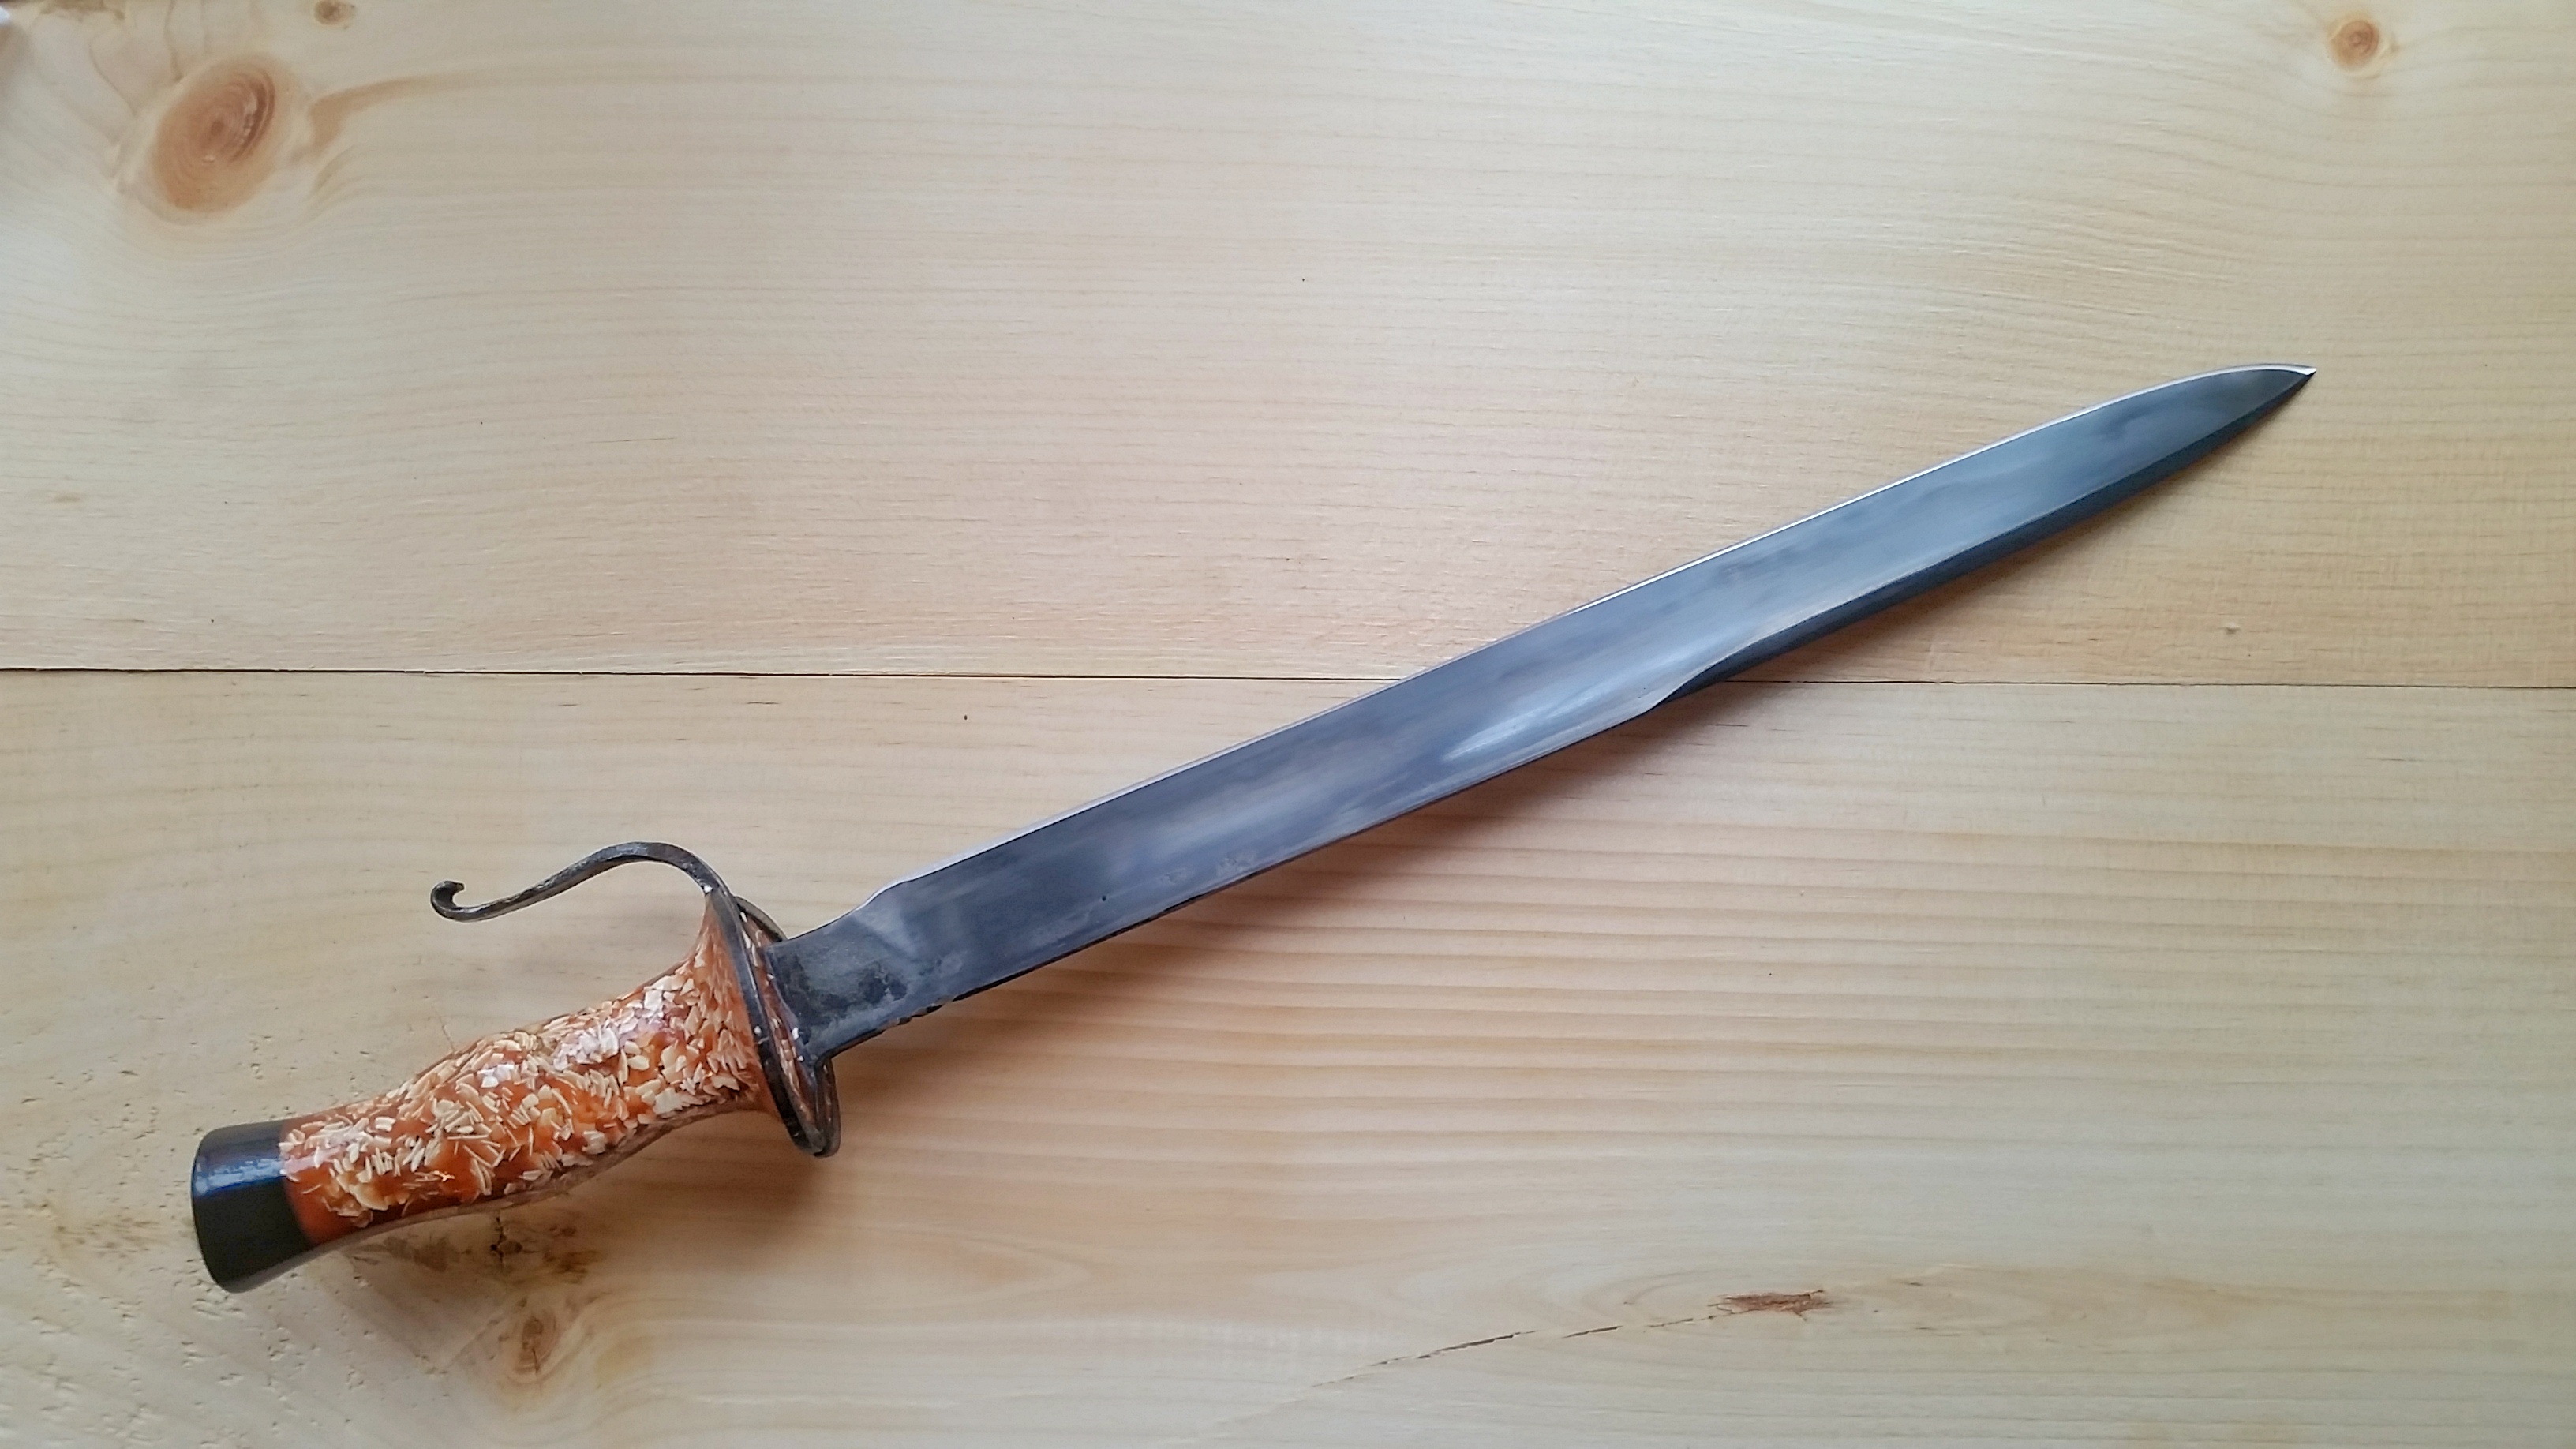
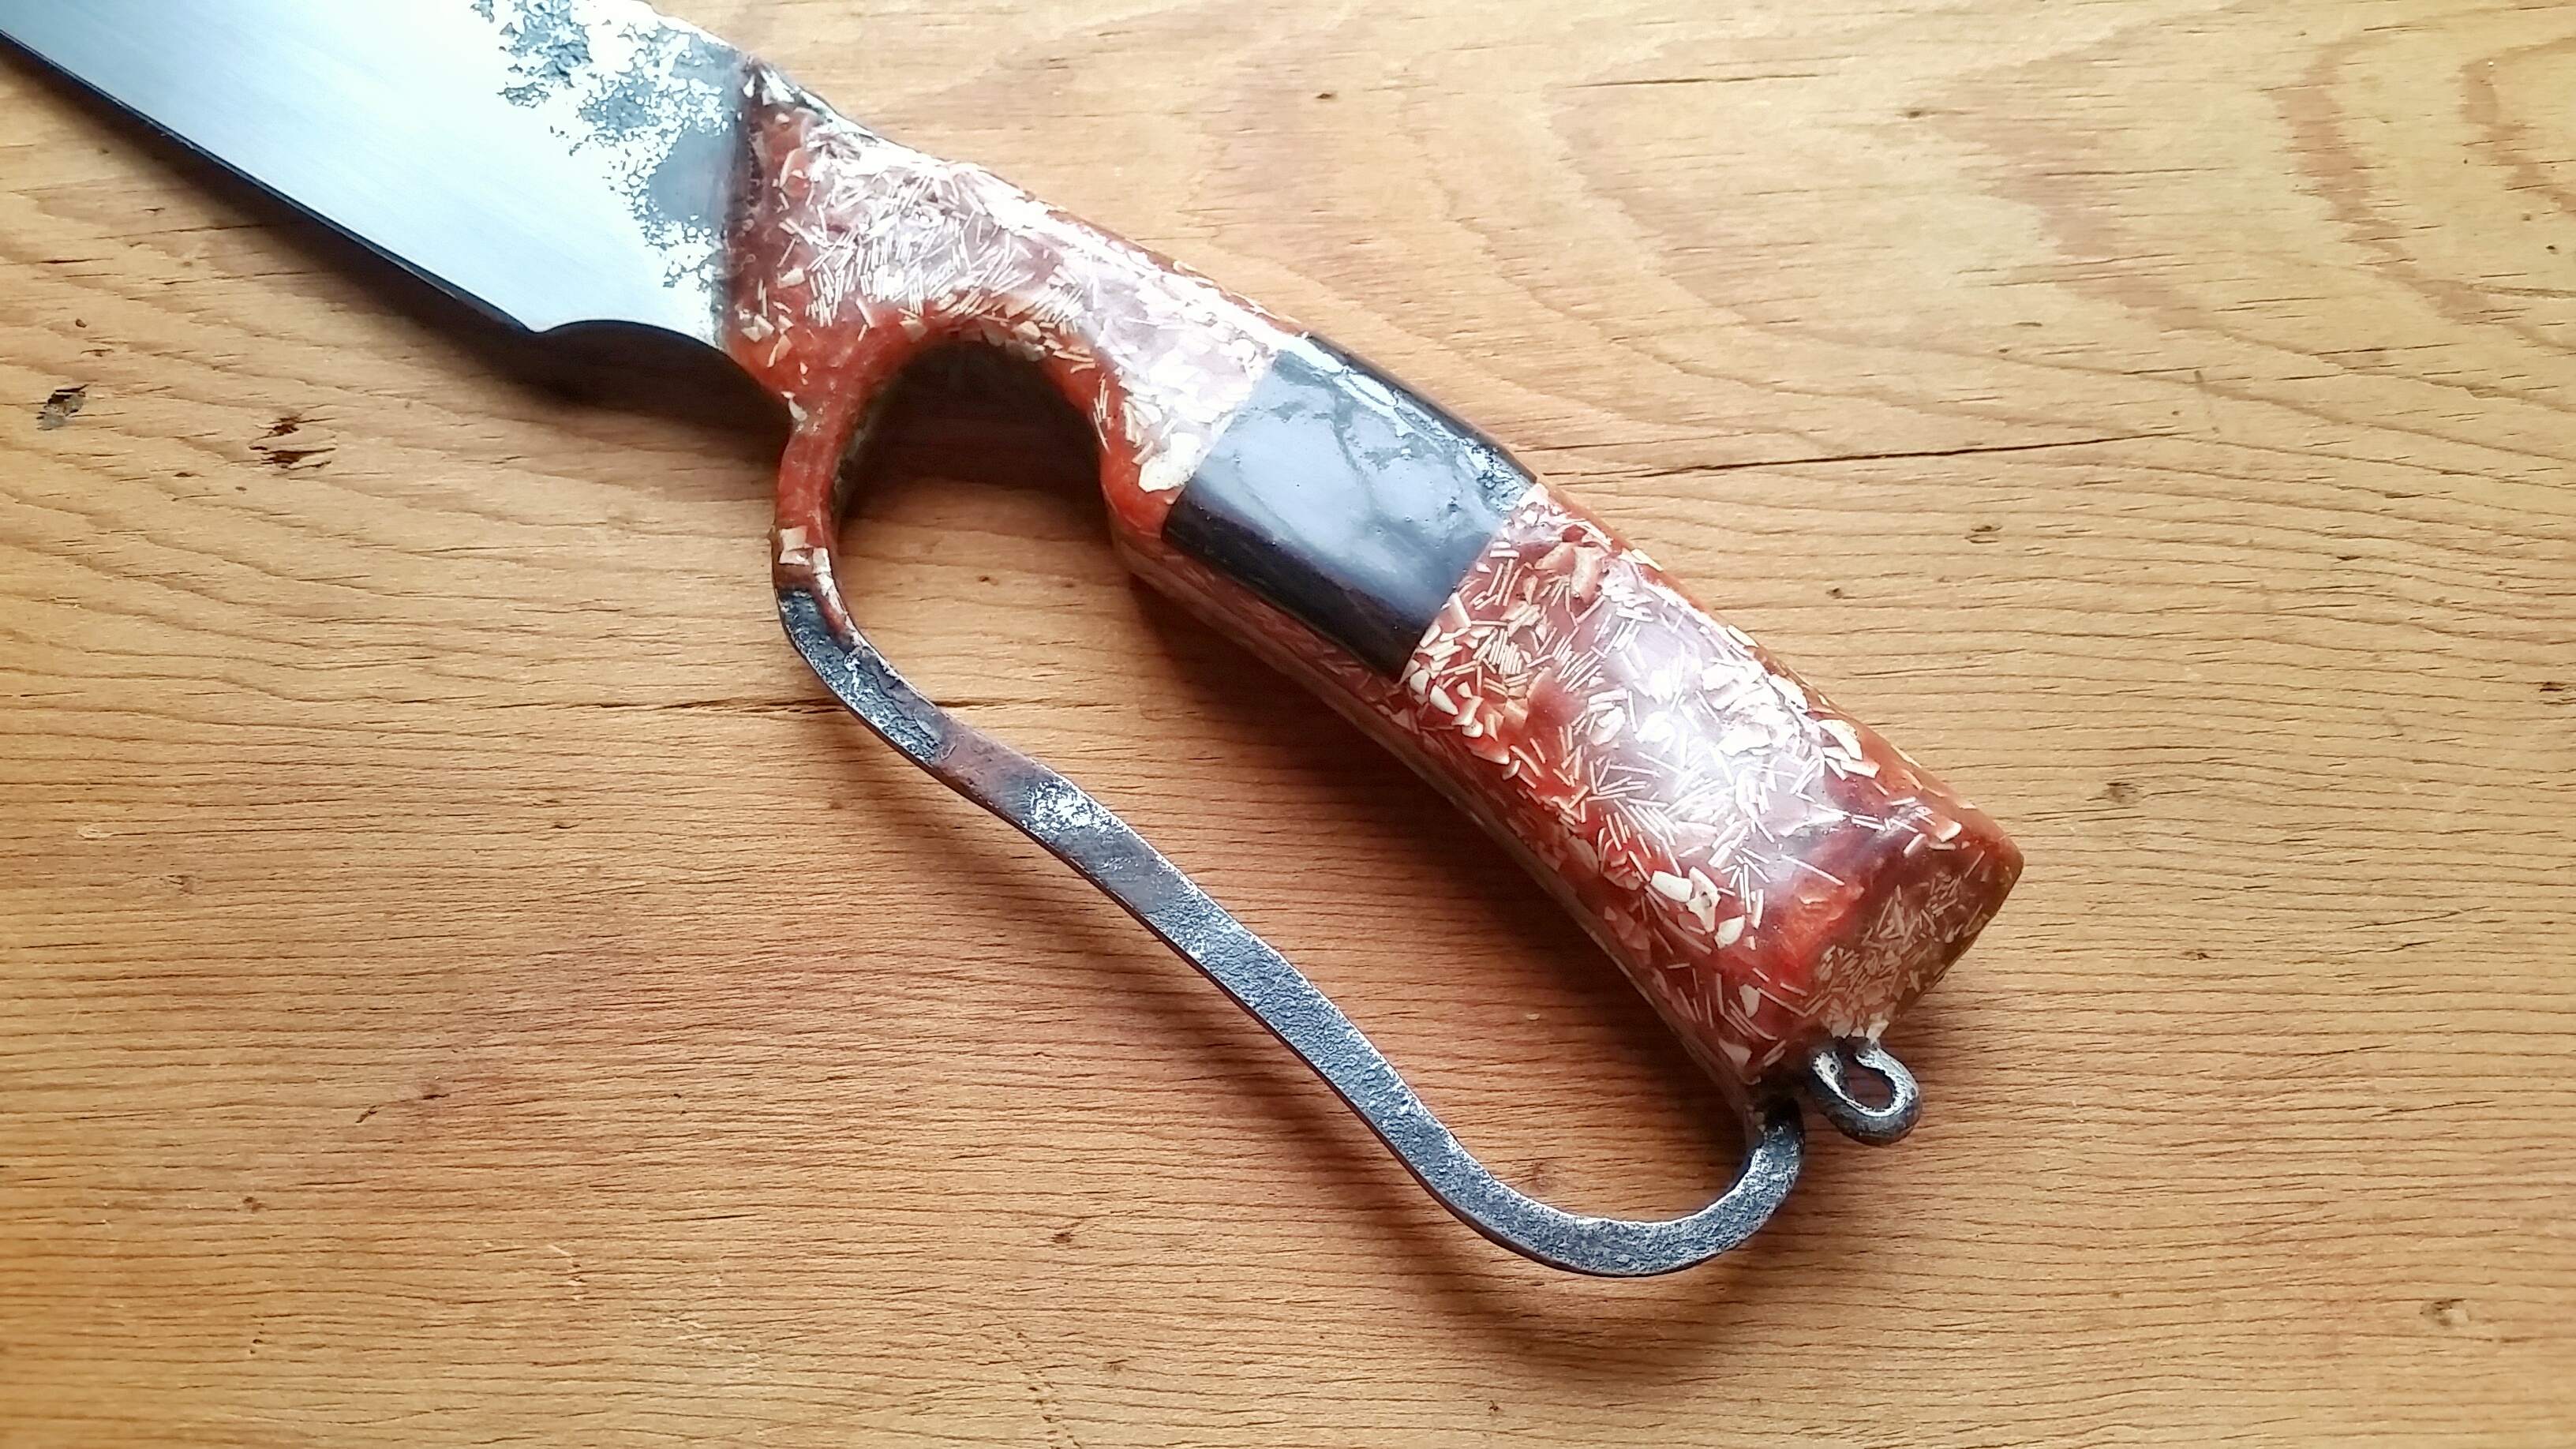
After forging and profiling the tang, I drill a couple holes and create a chamber to contain the material with artists tape, then literally mix n pour the material around the tang. It's easy to shape and cleans up nice.
-
I've been having a lot of fun with this material, it's great for forging all sortsa wacky integrals and then not have to spend hours getting the scales to fit. My favorite comment yet is that the material looks like someone vomited back up osso bucco and noodles on the handle... I'm still giggling


-
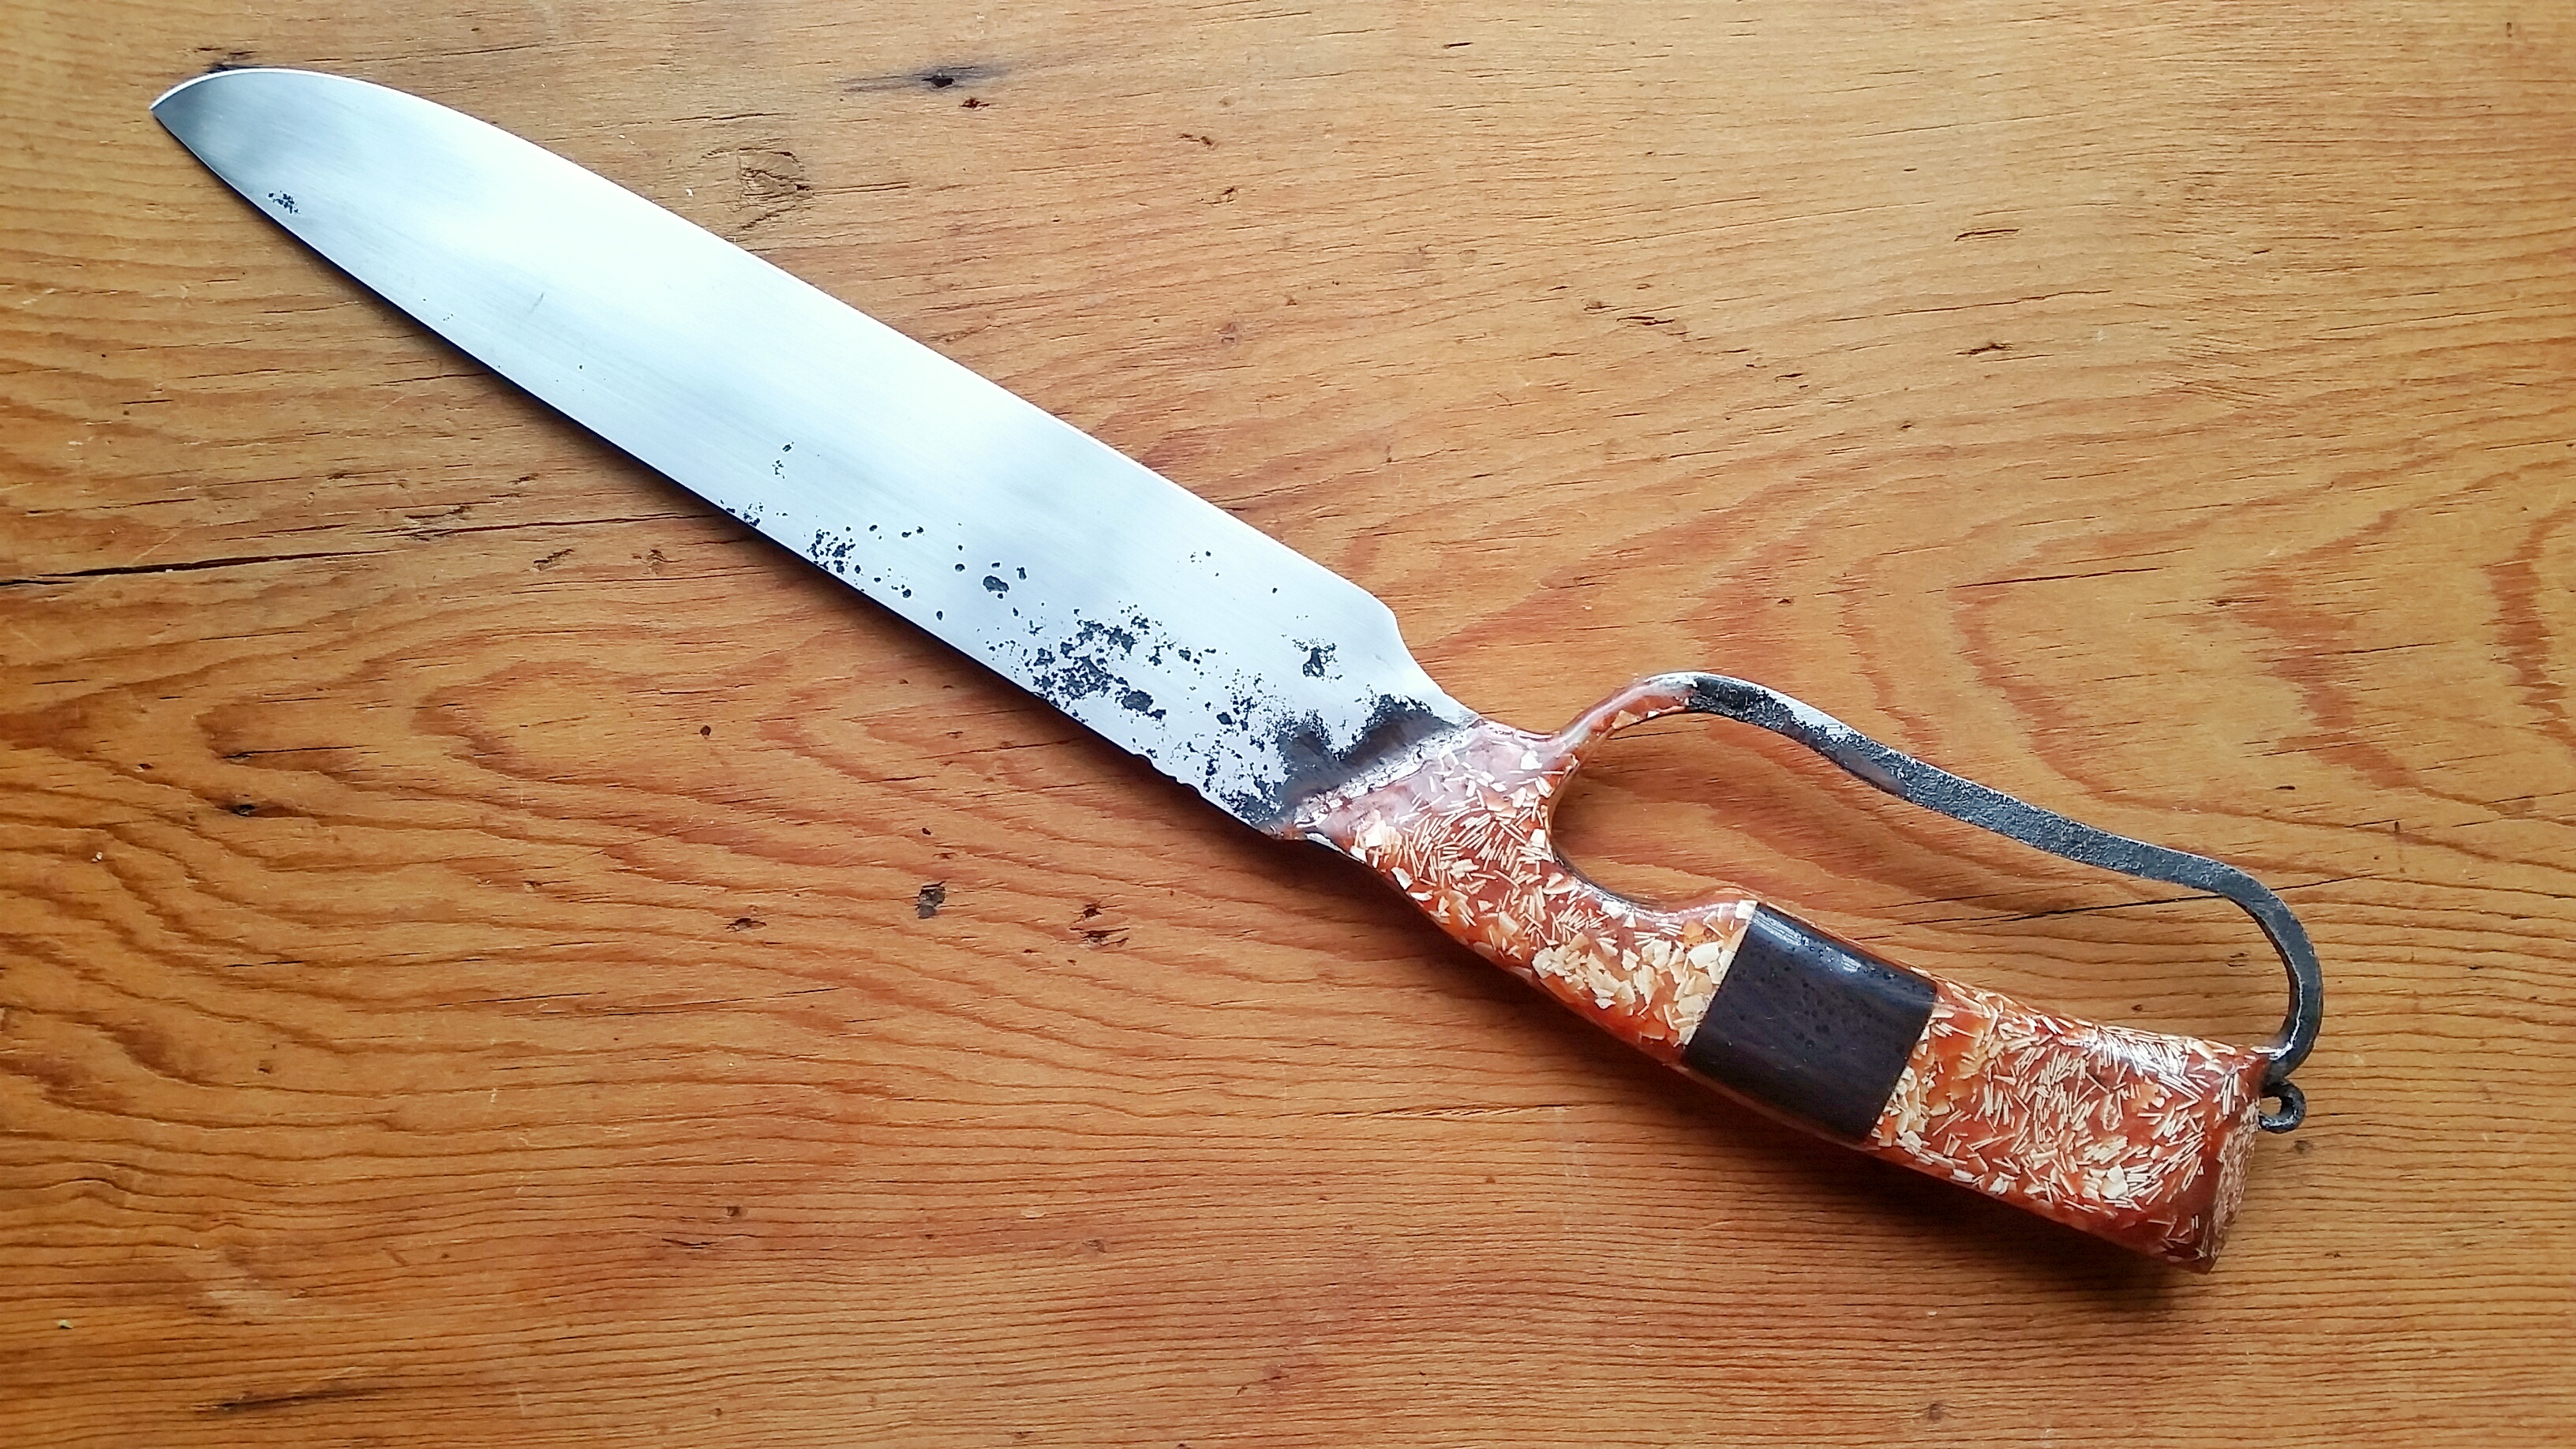
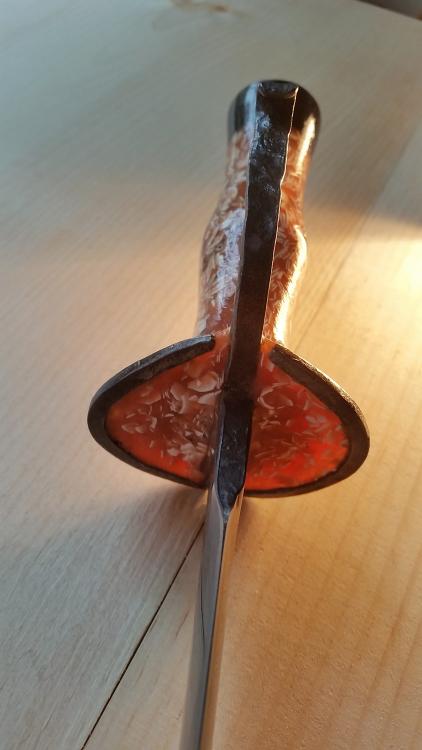
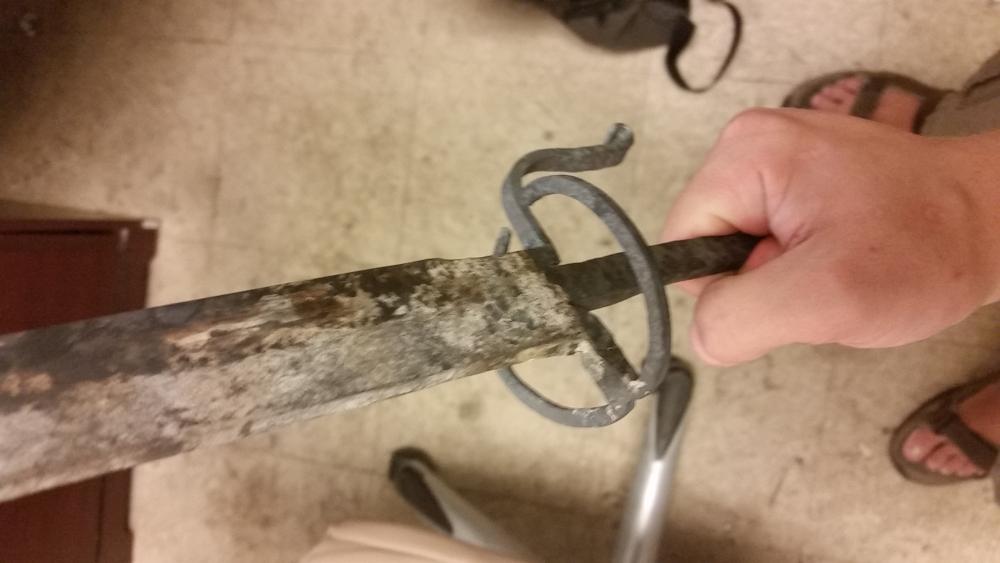
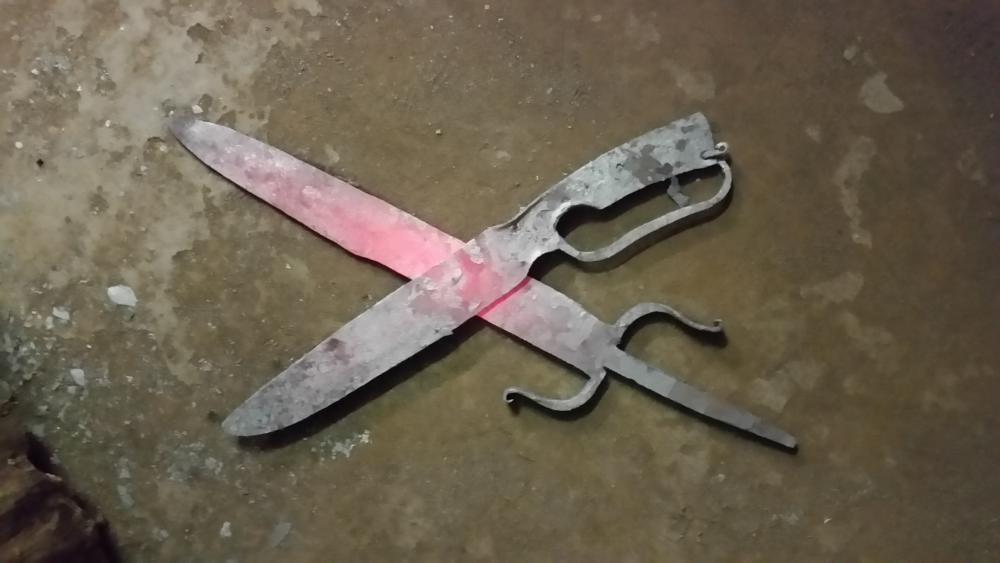
W2 integral pig sticker with hamon, Impregg, and ebony
TheoRockNazz replied to TheoRockNazz's topic in Knife Making
Thank you -
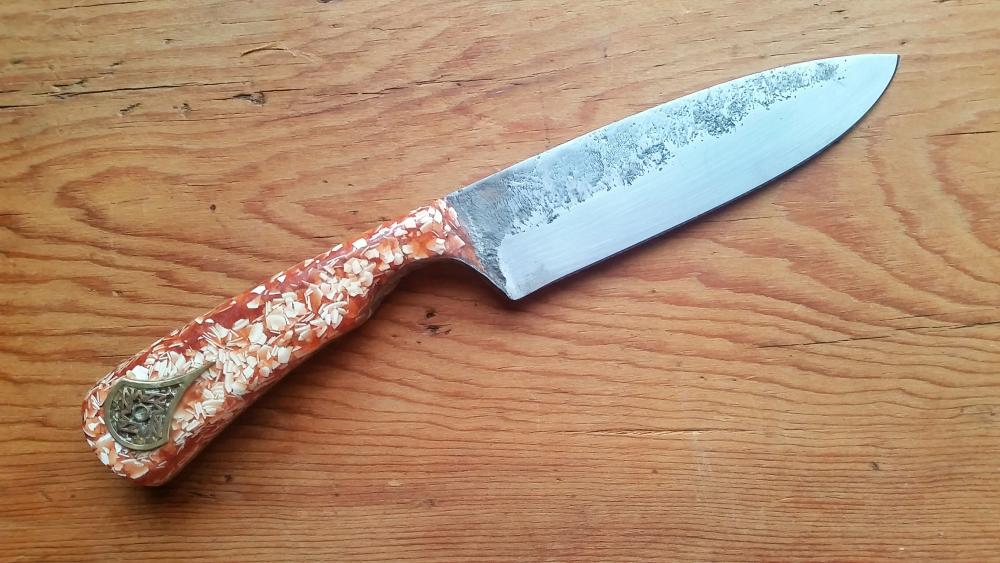
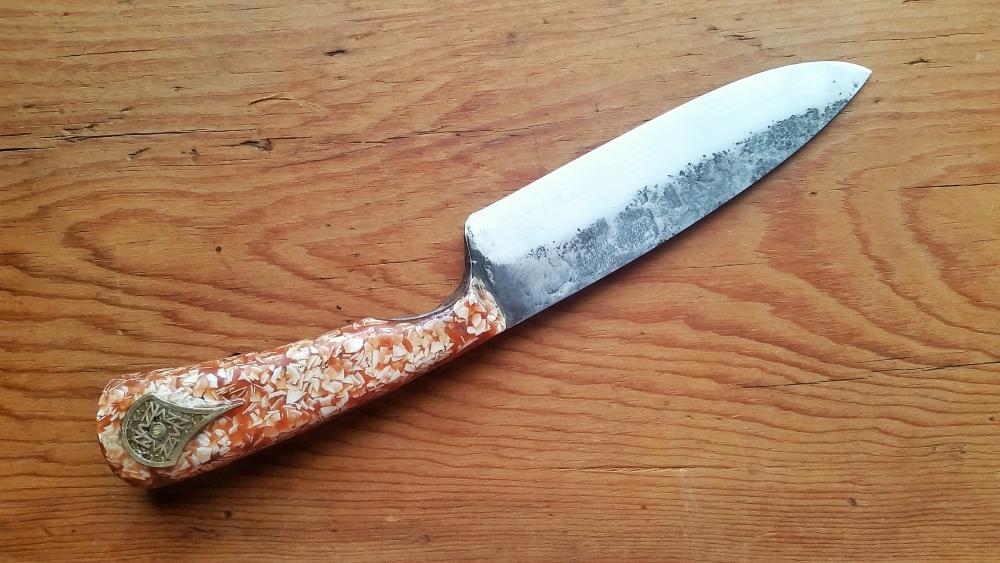
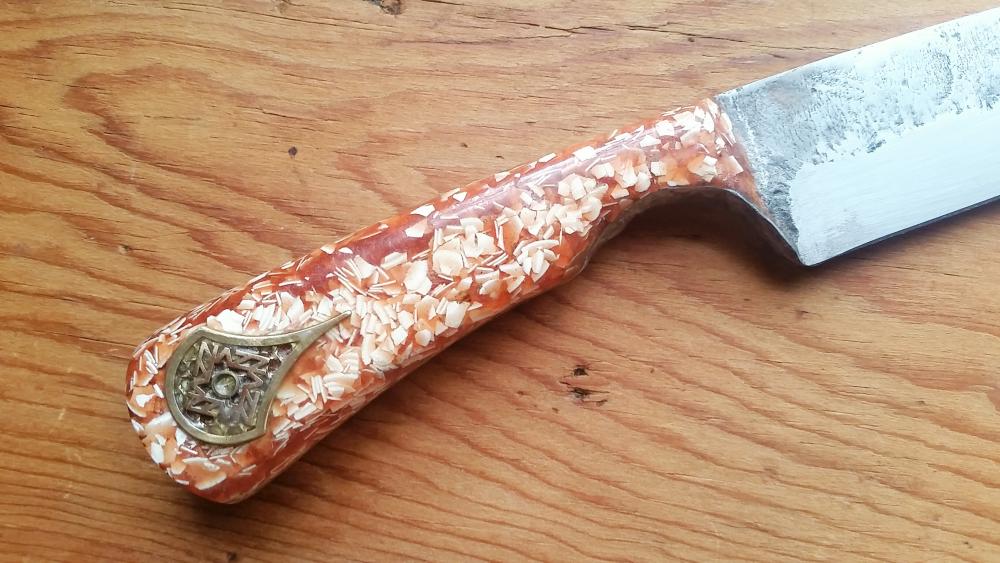
Just finished up this puppy. I had a lot of fun forging this blade; W2 high carbon steel blade with integral guard. Handle is my own cast Impregg handle material (sanitized crushed egg shell, mica powder, and G-Flex epoxy) and ebony. The Impregg material is translucent in the thinner areas around the guard. The hamon came out almost exactly as intended - a little closer to the edge in spots but still very serviceable. Comments and critique encouraged! Theo


-
So this is funny - I was experimenting with finishing a Impregg handle with a light coat of polyurethane (for added UV protection) instead of a thin coat of G-Flex, and it's super slippery in comparison to the epoxy. The epoxy is not really rubbery, just has a lot more flexibility and impact resistance in comparison to most epoxys. I've noticed the texture is determined by how you apply the top coat: thick feels like polished/buffed antler, thin feels like freshly sanded micarta.
-
Yeah man, lookin good! Whatcha gunna do for a handle?
-
That's a great lookin practice knife. The next step is to do it again in heat treated high carbon steel so that it'll be a real and practical knife. Can't wait to see the next one!
-
Loads of integrals this time https://youtu.be/Dc2kVOejXes
-
Thank you for sharing. Mind sharing a little more information? I imagine you're trying to copy the top knife, can you tell us who made it? Did you rehandle it at some point? I like where you're going with the bottom blade, a little more filing and you could get the exact same profile as the top blade. I am always a big fan of some hammer marks or marks from the tool the blade used to be left on the flats.
-
Give it a shot. A quick glance at tech specs tells me it could be a couple different types of steel, some would make decent blades. Anneal that sucker and start cuttin some blanks from it. Before the real curmudgeons get on you about it; have you already read through the new knifemaker stickies?
-
Haha, yeah I have my goat and alter ready. I think I'm just going to have to focus on using alloys that are very similar and simply won't delaminate once welded... hopefully
-
Hand Forged Knives with My Own Impregg Handle Material
TheoRockNazz replied to TheoRockNazz's topic in Knife Making
Dustin: It's a perfectly smooth surface - the shells are porous and soak up the epoxy and pretty much become stabilized. I did put a final thin coat of epoxy over it to give it a sheen. I did struggle to get the shells to become uniform in the epoxy, I think I finally got a handle on it (lol, get it?). Daswulf: The inspiration comes from my father who creates sculptures from egg shells http://jamesnazz.net/ I have been looking into different shells and mediums - chips of mother of pearl have captured my attention recently. I had been thinking the same thing, that this would work really well for mixing in ashes - with the eggshells it would be a great death and rebirth piece. -
That's looking pretty sexy, lovin the blade shape. That inclusion on the right side ricasso worries me because it carries through into the plunge line, which means it's in there pretty deep. Make sure that the person buying it understands it's a light to medium duty knife; no chopping or similar heavy use. I like where these are going - I'm always a big fan of integrals - keep forgin them to build stock especially if they sell
-
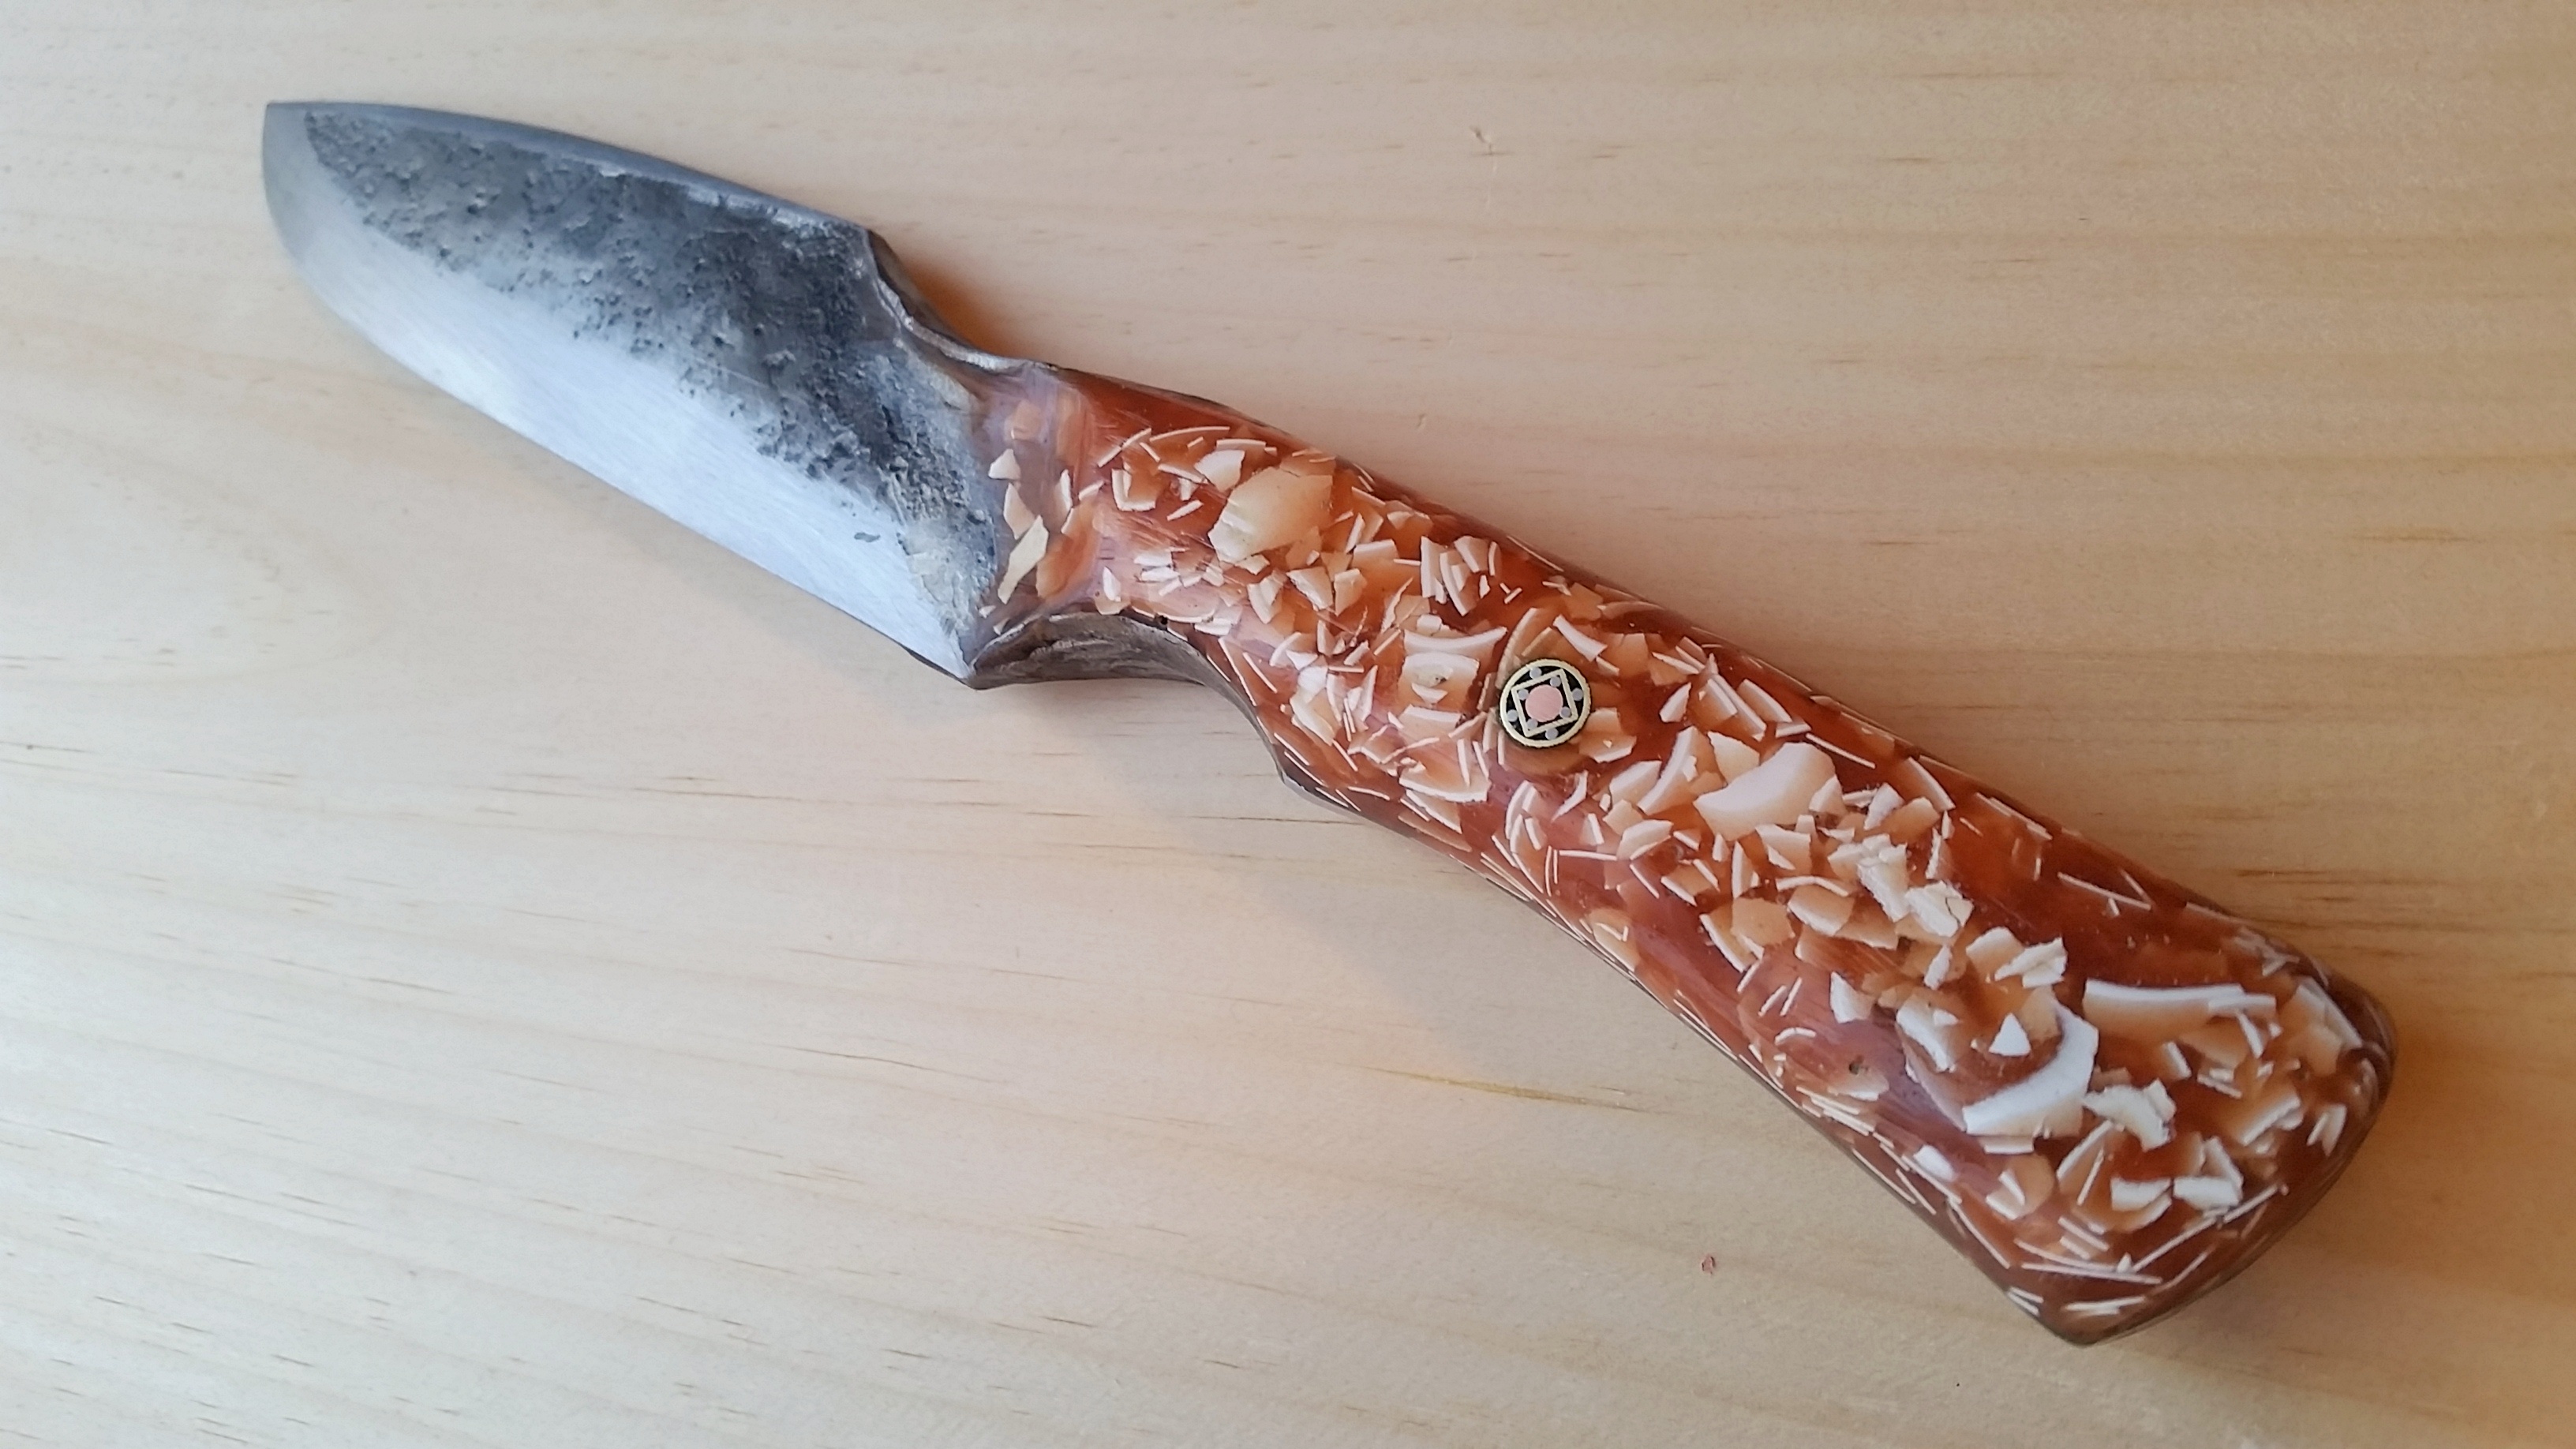
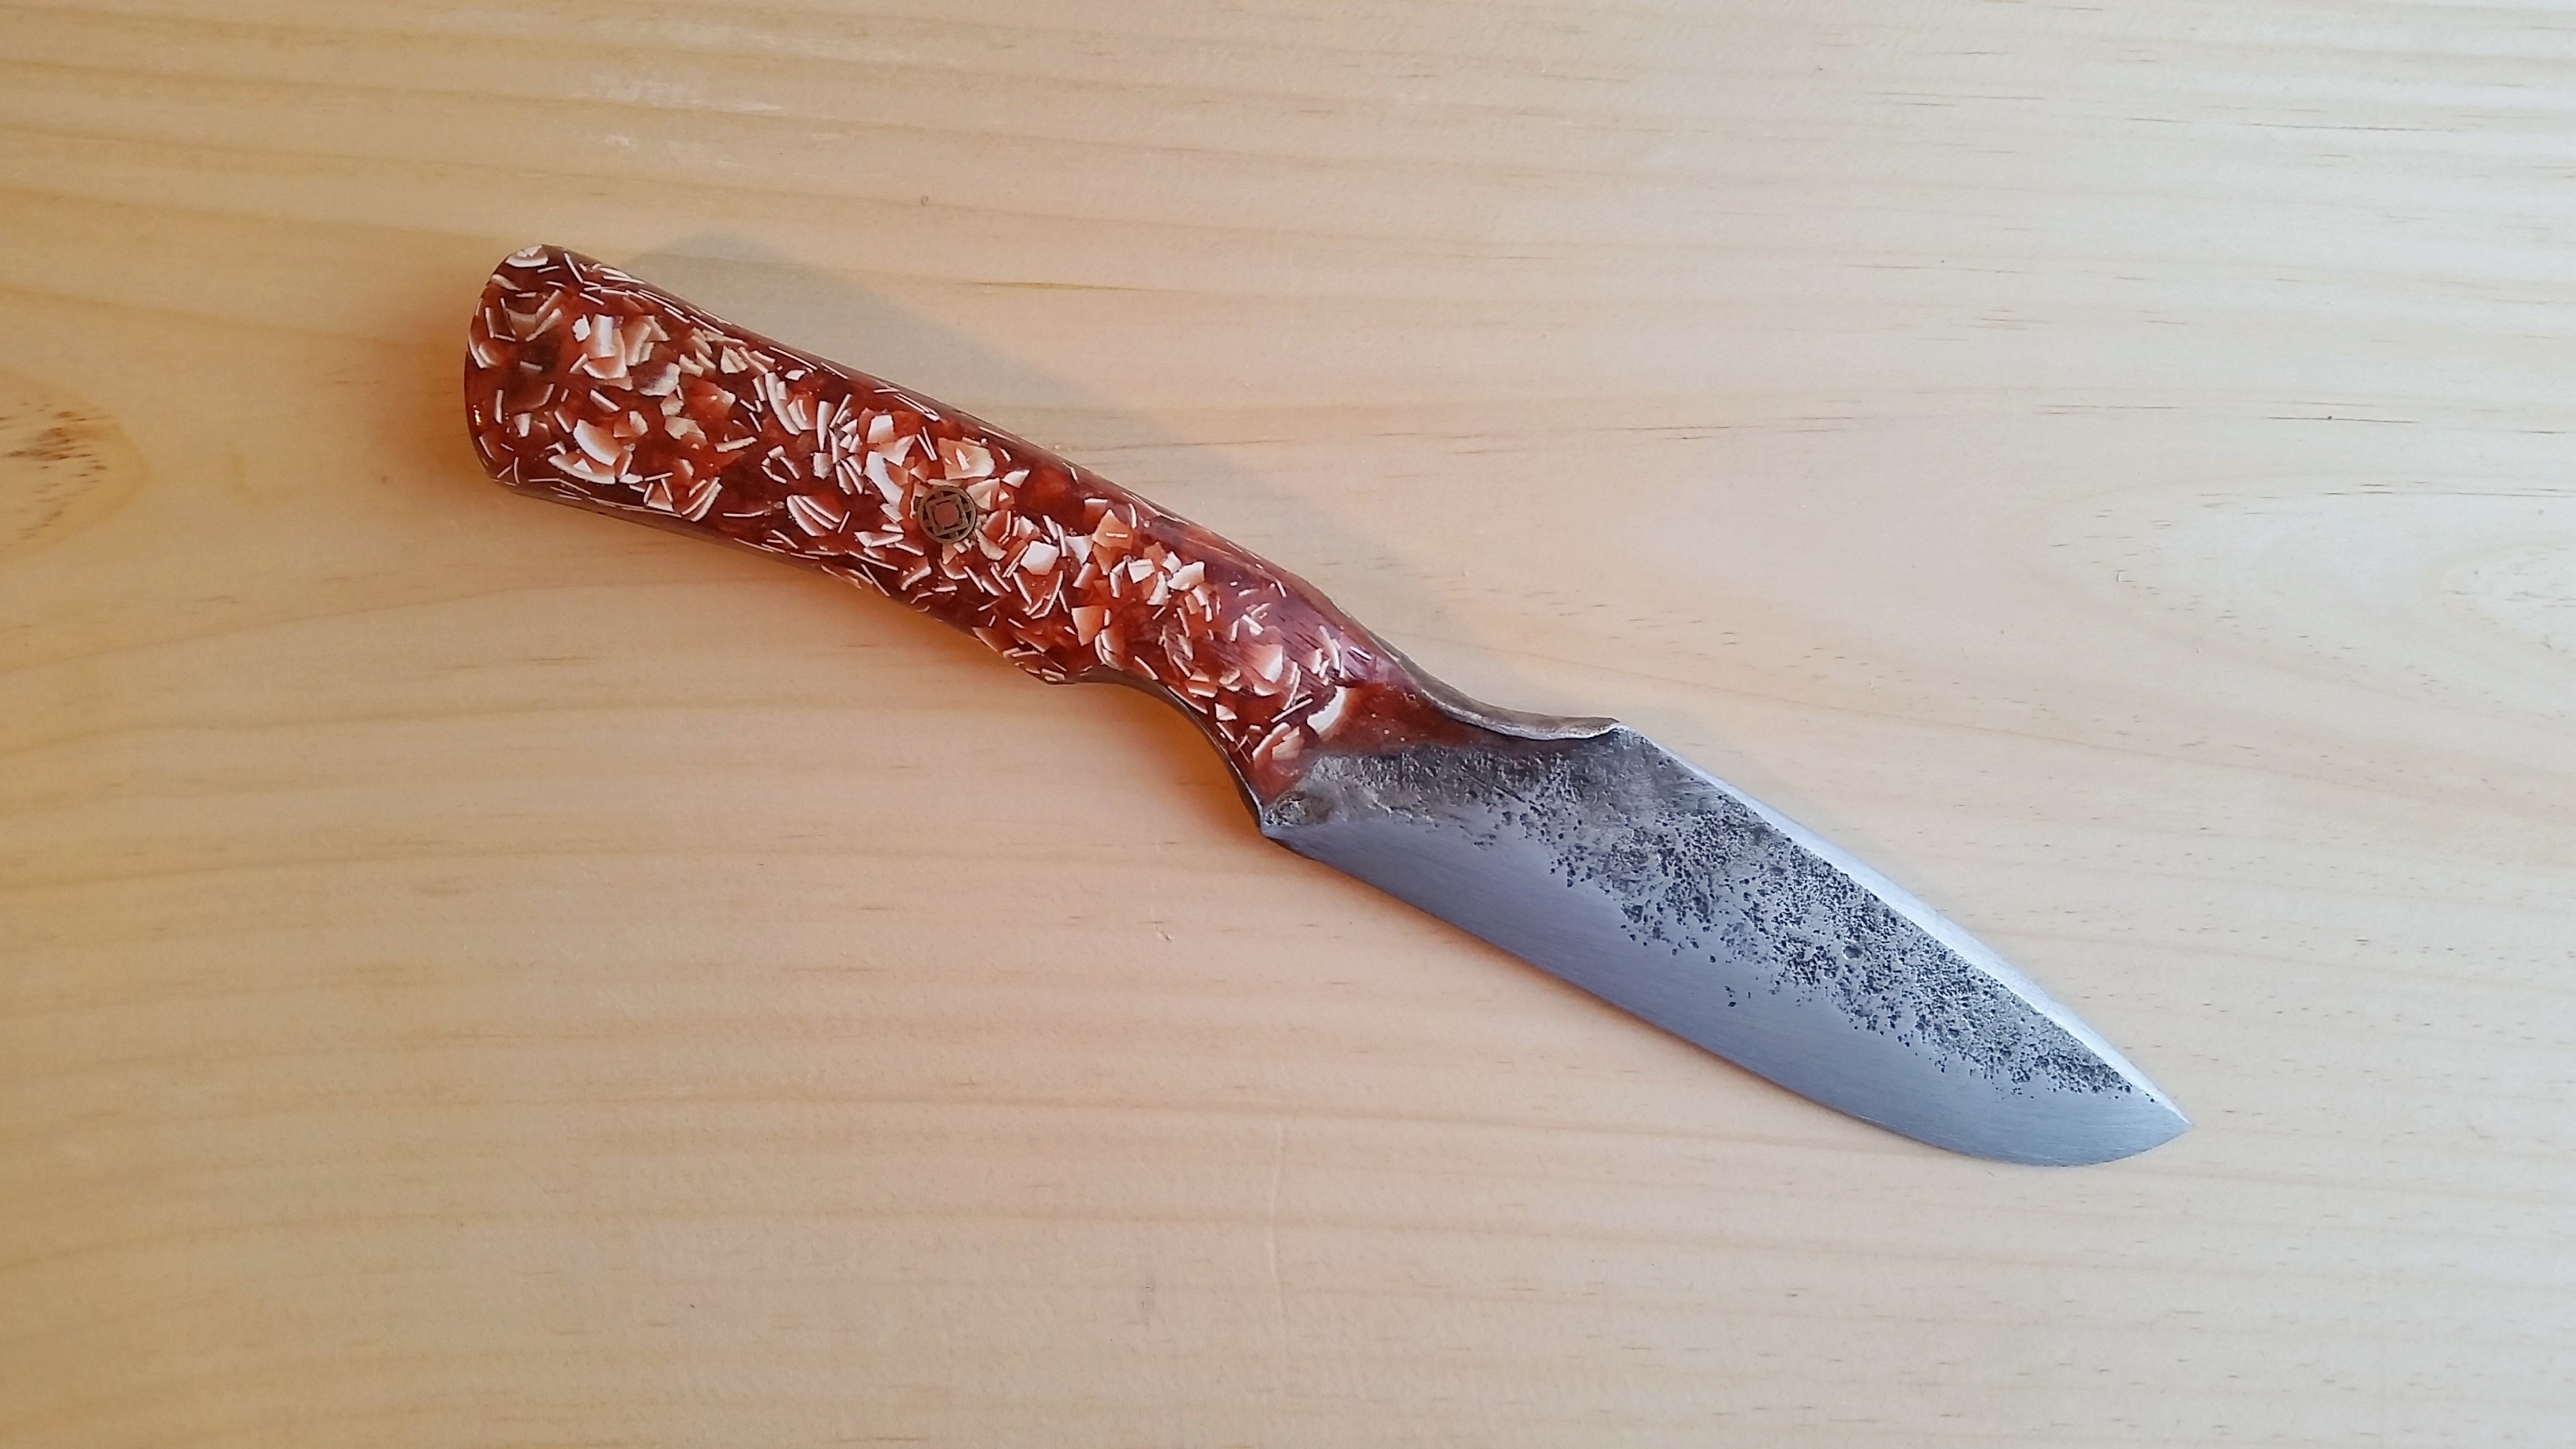
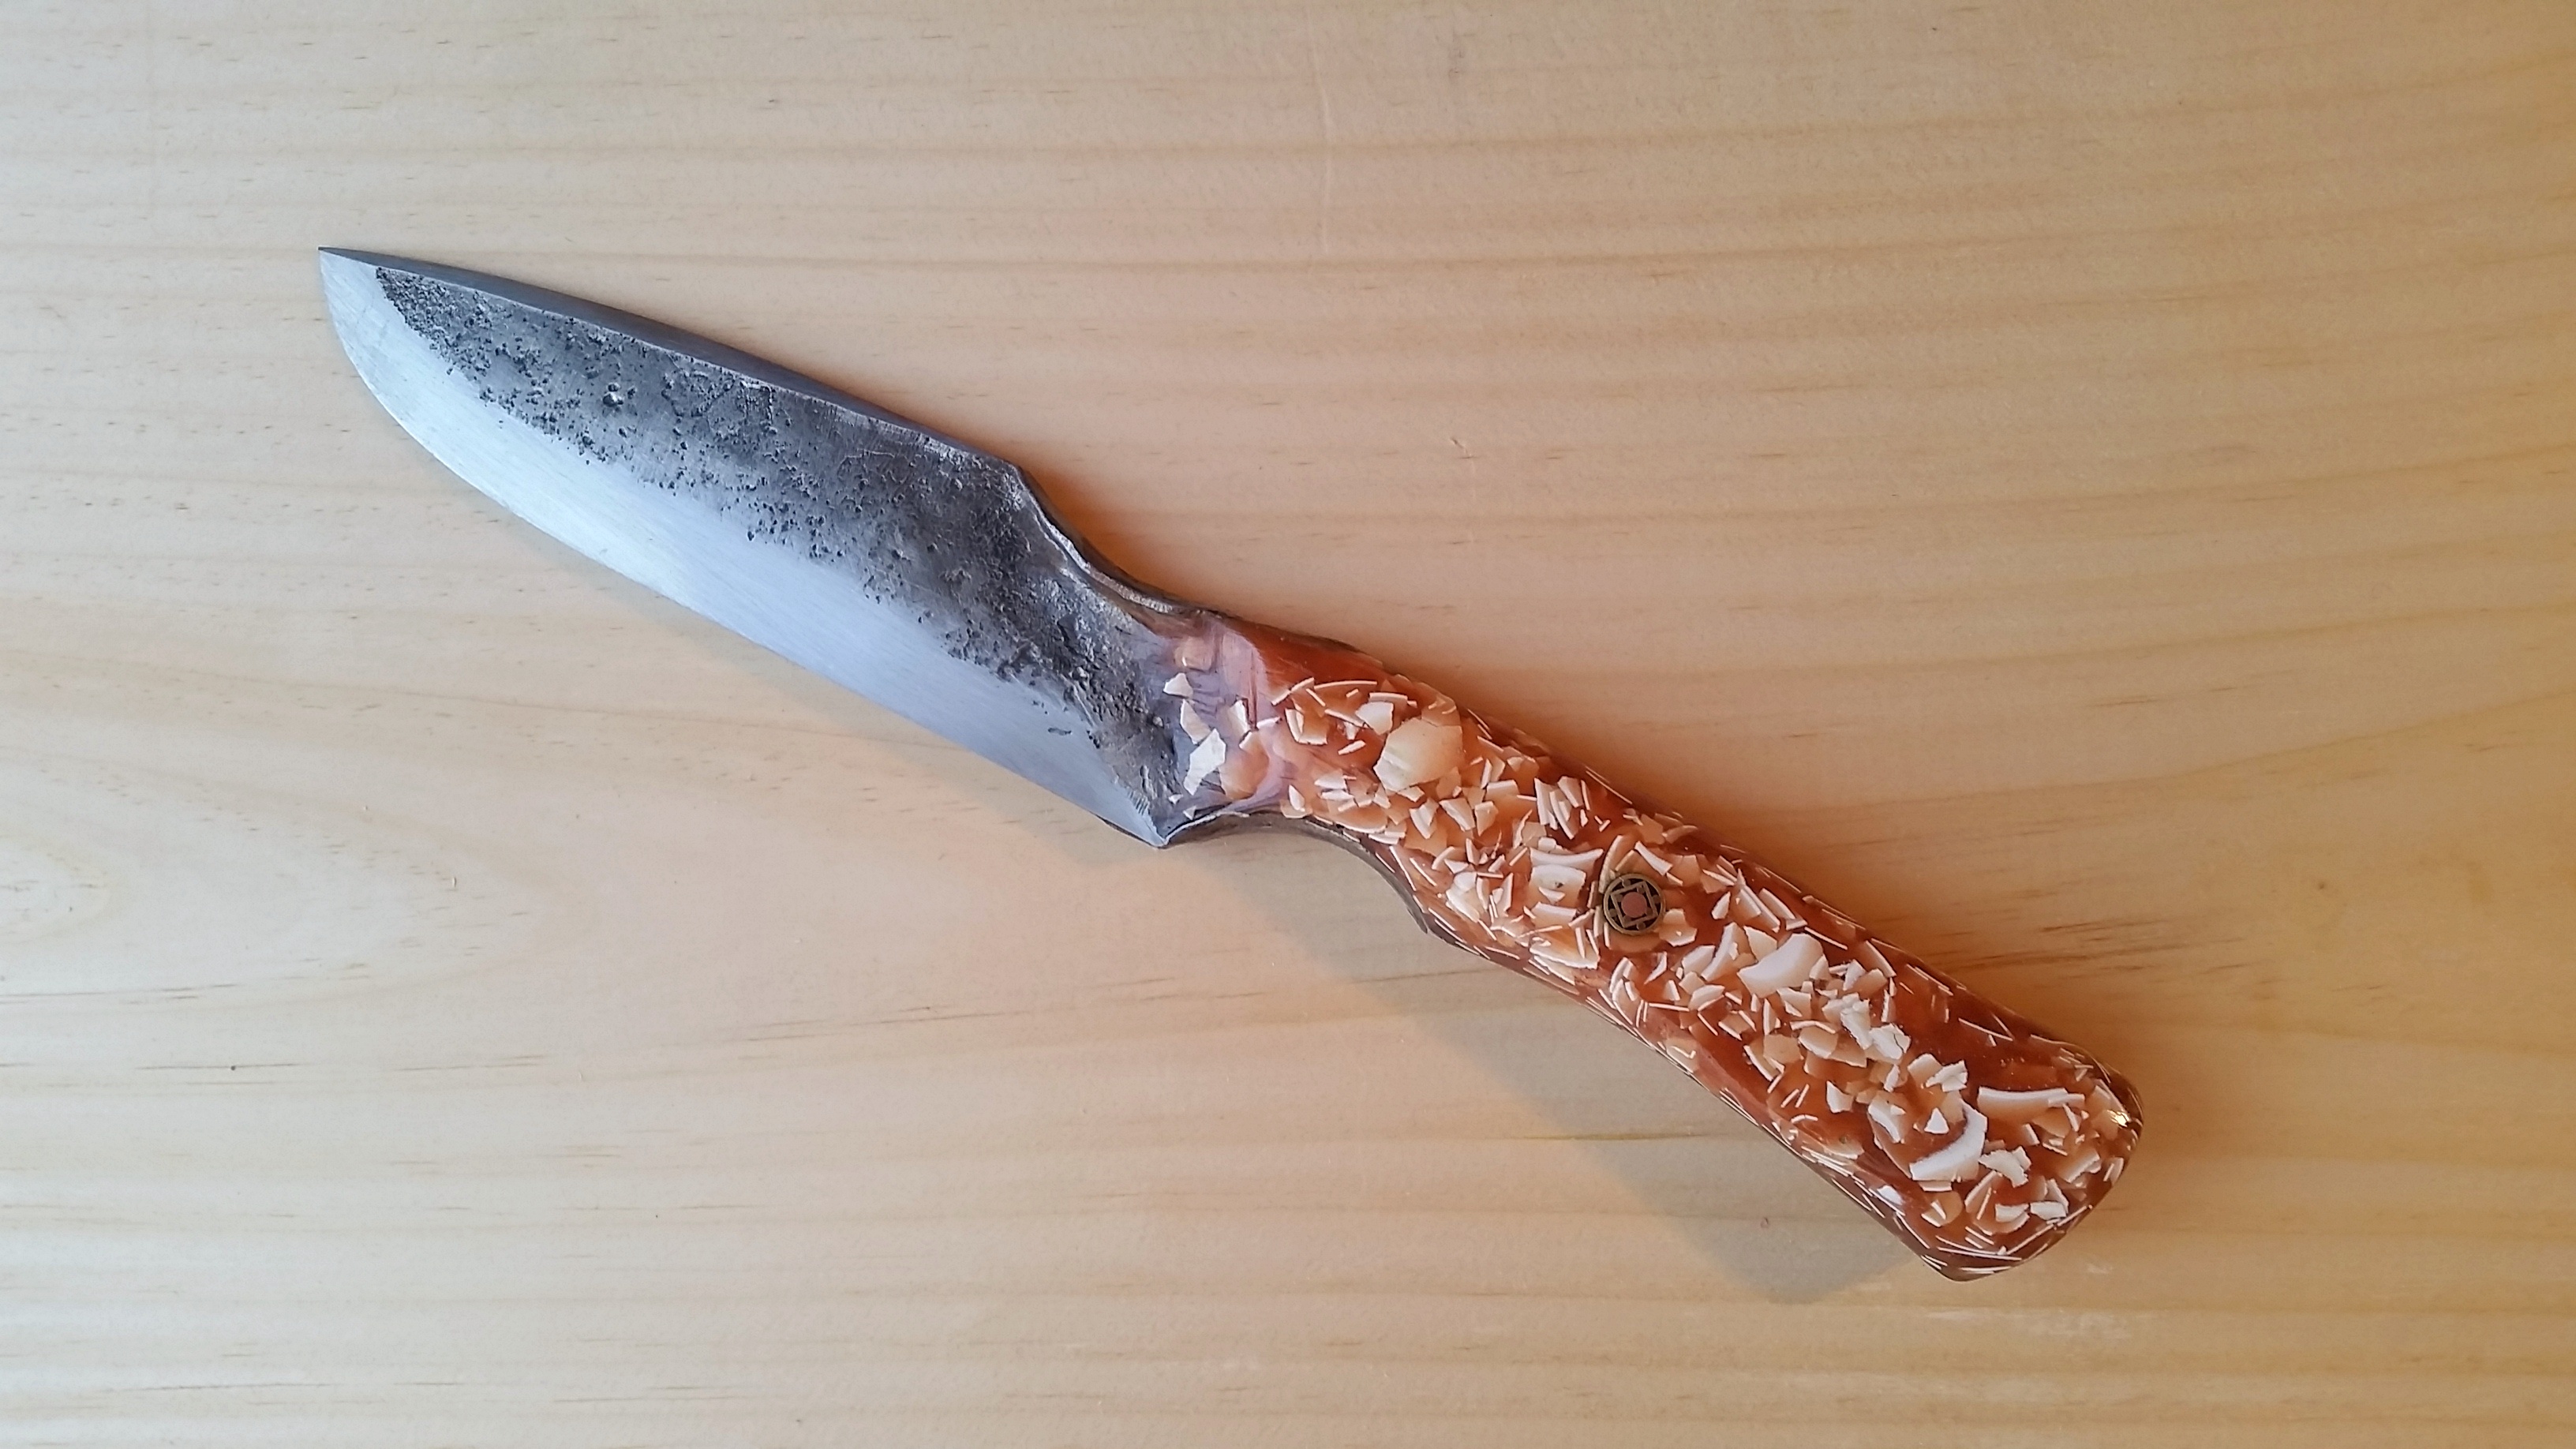
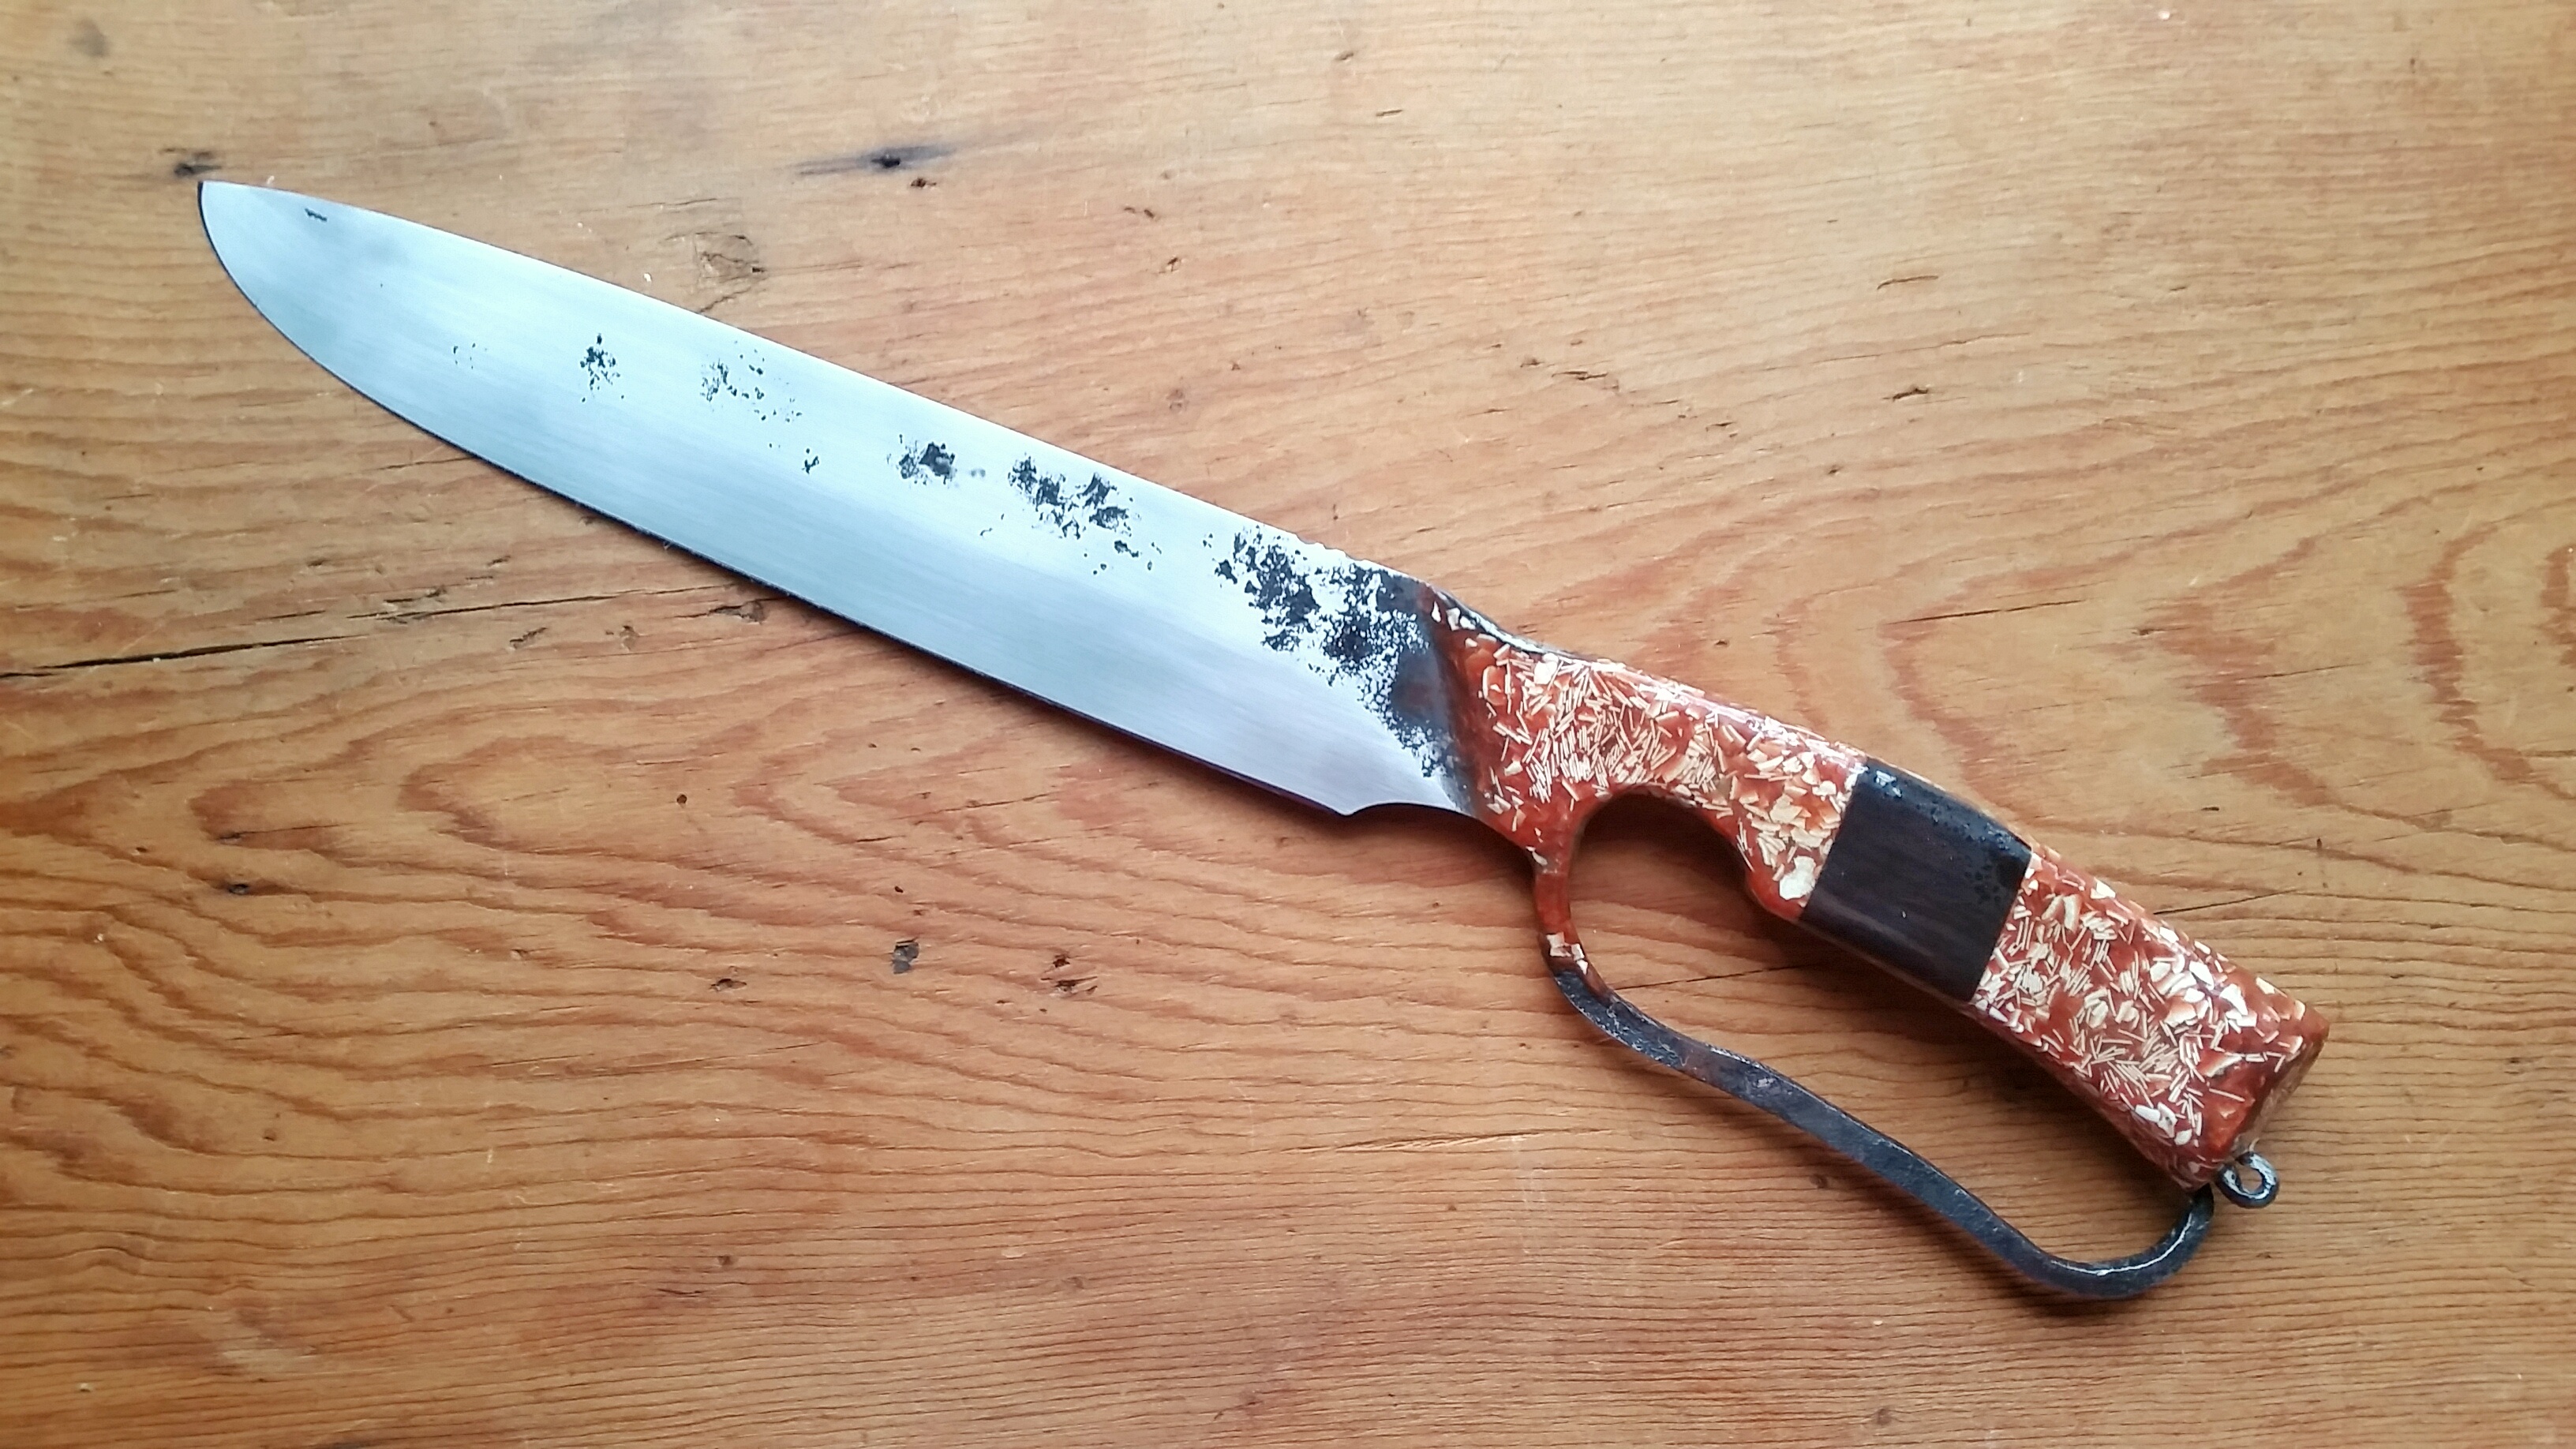
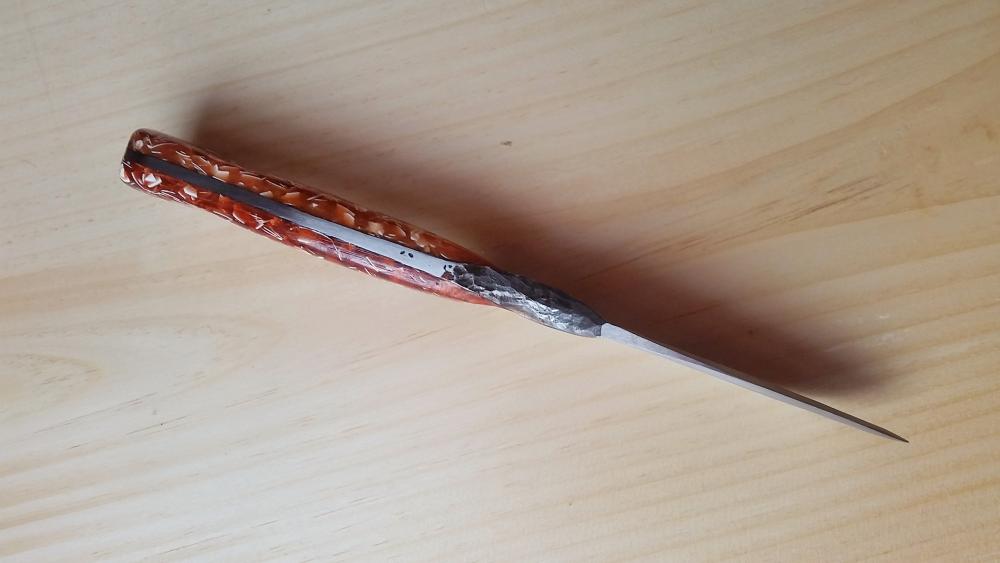
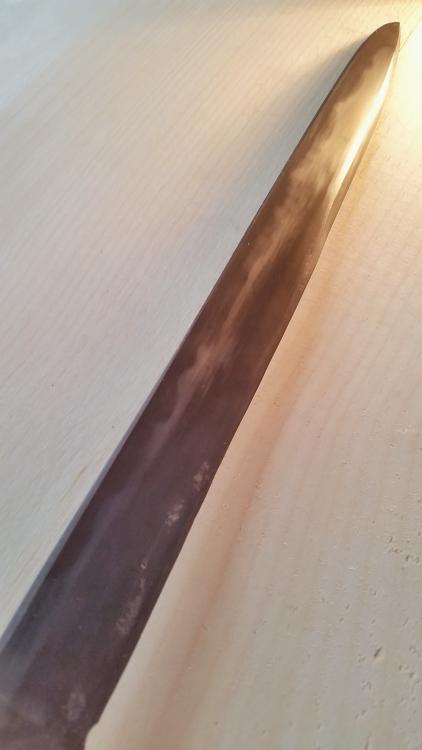
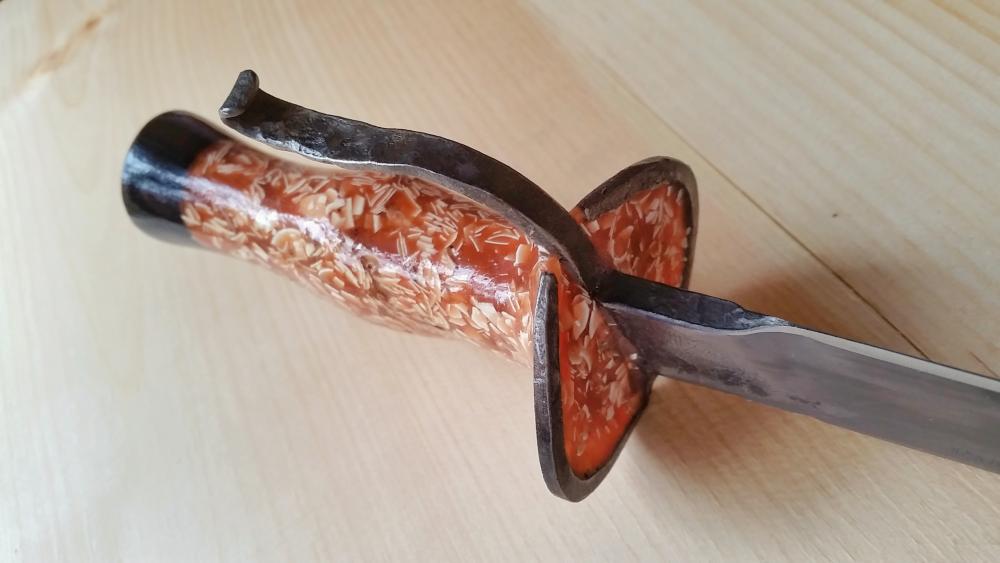
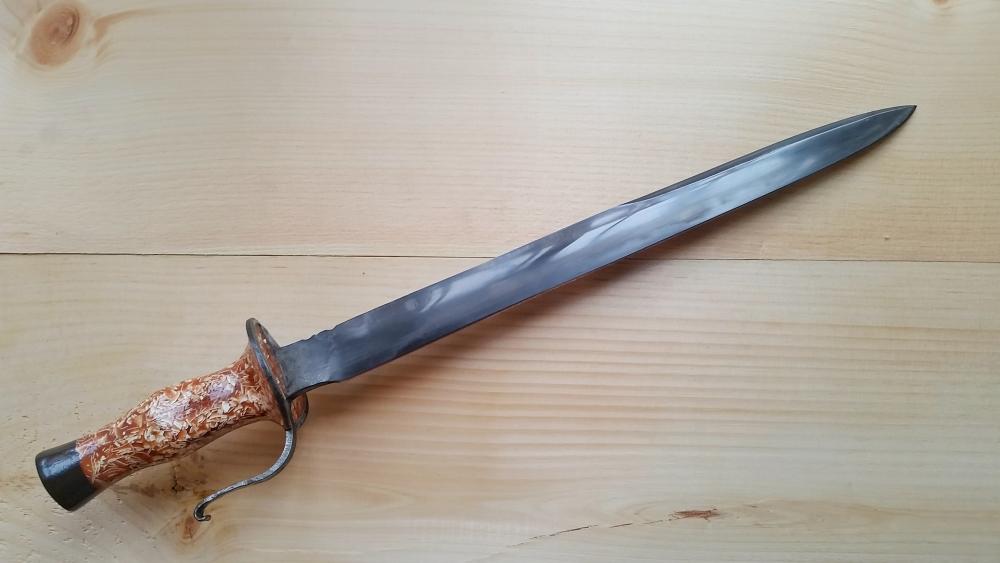
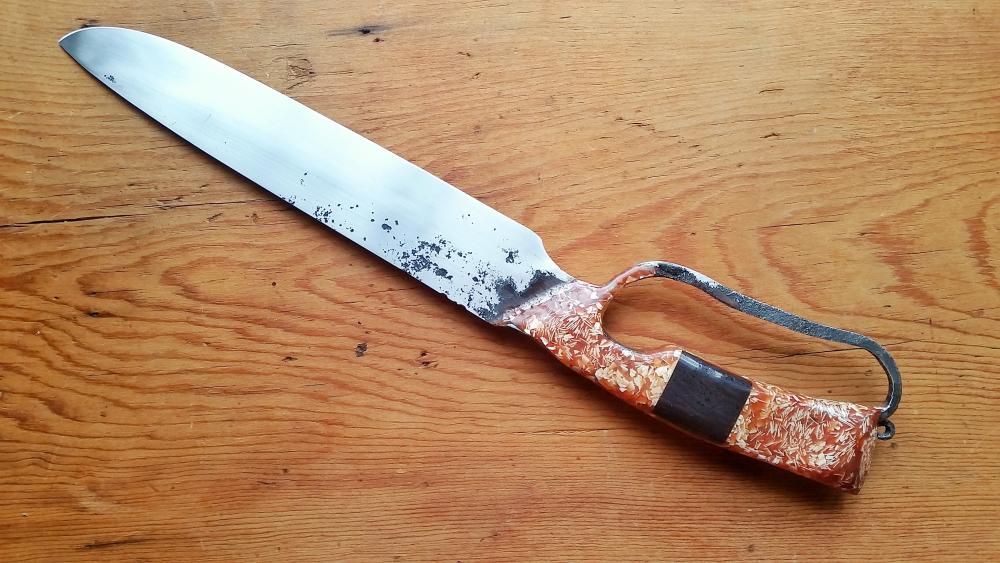
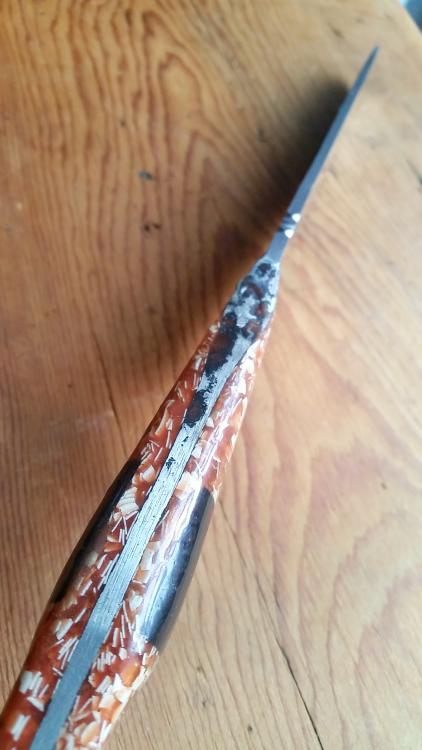
So I am experimenting with this new handle material I made up that I call Impregg. It's sanitized and crushed egg shell, mica powder, and G-Flex epoxy. It's got some really neat depth to it, you can see through the gaps between shells to the swirls of mica powder inside. The tang is left rough and the material is "cast" directly onto it. I feel it will work really well for my integrals especially.Please let me know what you think, I plan on using it in a little upcoming series.Hand forged S7 high carbon steel camp knife with integral guard. Impregg handle and wenge insert. This knife features a forged thumb rest that gives you wonderful control over the blade for most tasks.Hand forged W2 high carbon steel camp knife with integral finger rest. Impregg handle and 3D printed cast bronze medallion with my logo incorporated.


-
Thank you guys!
-
This gave me a good laugh Yeah, start with the small stuff - the guys on your other post have some great ideas on how to start. I look forward to seeing what you forge
-
Lookin good! Can we get some more pics?
-
I summon the masters of patternwelding; hear me o great ones! ...anyways, I've been experimenting with integrals A LOT recently, and have encountered issues trying to forge them from patternwelded billets. Simple patterns, like random, twist, or ladder stay together just fine, but san mai has been fighting me. I had a beautiful san mai billet with a twisted shell that I just kept delaminating trying to get to shape - although it may have been because I put a pure nickle shim between the layers, and the nickle weld was giving. I am attempting a simpler san mai to see if I experience the same problem. Are there patterns outside the three I mentioned that in your experiences hold together well when forging the blade to shape? Thanks in advance for any advice; expect your blood sacrifice in the mail in 3 to 5 business days.
-
Always a big fan of your work. I like seeing hammer marks, especially when you can see that forging process in them
-
Thank you guys. Oh, yeah, the N / Z is intentional, I'm talking about the other side of the grip, visible in the first picture. My favor so far is someone's comment that it looks like a butt plug... I can't stop laughing
-
Thank you Buzz Dog: the drift on the san mai pattern and the scratches/blemishes on the inside of the handle