
Gundog48
-
Posts
283 -
Joined
-
Last visited
Content Type
Profiles
Forums
Articles
Gallery
Downloads
Events
Everything posted by Gundog48
-
Thanks Steve, that information is exactly what I was looking for. Also just got myself a great set of tools, including a few hardy fullers, you wouldn't believe (actually, I'm sure you would) how much easier and cleaner drawing out is using one, I am feeling a lot more confident now. When I go to do this, I'll use your method, it sounds very thorough. Hopefully I may be able to forge a wallhanger worthy of my wall, and eventually move on to forging a proper sword. May I ask what kind of fullering tool you use? I made a lever arm fuller, but the quality really isn't good enough. I think I understand you better now. The reason I want to move on to make a sword is, as I explained, to learn and improve. I've forged quite a few knives, although I've only finished a couple of them properly as I don't like ruining well forged blades by doing the grinding with the incorrect tools. I've designed my belt grinder and am waiting to hear back from a few steel merchants to get the materials, once that's done, I have over a dozen knives to finish off! I've gotten quite good at getting knives to look exactly how I want them in the forging stage, so now I want to challenge myself and do something much harder. I don't give up on things when they don't go well, it just gives me more motivation to get better and make it work, if I judged myself on the first few knives I made, I wouldn't still be smithing! I've done a load of knives, I've been doing a lot of decorative stuff like horse's head bottle openers and scrolled candle holders, but I find swords beautiful, and to just get a taste of the possibility that I could make a sword-shaped object myself gives me all the motivation I need!
-
Ahh, abrasives, I can understand that. I like to avoid them, especially grinders, when I can because they look too clean and artificial or leave grind marks unless you bring them to a polish, what sort of grit? Thanks Willway for the advice on different finishes and quenchants, I remember hearing about motor oil, although I'm a little apprehensive after what my father gave me telling me it was 'normal motor oil' turned out to be synthetic brake fluid, still haven't got rid of the smell! What sort of wax is this? I'll check out the Rustolem products, I think we do get them in the UK! This is invaluable, thanks!
-
Thanks Thomas, I think I understand what you're saying, also found a great video by Joe about drawing out evenly. Steve, you're certainly right there, I won't be ready to forge a sword for a long time. The reason I want to try is to learn. Before I started forging knives, I read book after book about it, watched hundreds of videos and loads of guides on the Internet. I sat there reading it thinking, "okay, that's easy enough" and "I understand how that works". Thing is, as soon as you physically get to the forge, heat up your steel, everything is different from how it is in the book. The stuff that seemed simple is actually quite hard, sometimes due to the tooling you have, the angles you have to hold things at, and the placement of the grip. After spending my first 8 hour session forging blades, I reread my books, and found another level of understanding. You can read how things are done, then imagine the impracticalities and difficulties you may face and properly think of how you would do it when you are standing there with a hot piece of steel in your tongs. I'm not trying to forge a sword to make a good sword, I know that won't happen. I'm doing it to learn more, to properly relate to written words so that when I eventually do come to forging a sword properly, I will have a good idea what I'm up against and how I will face the problems.
-
I've seen a finish on many products here that have a very 'steely' appearance, and was wondering how to achieve it. It's not the bluey colour that you get after it comes off the forge, but it is somewhere between black and silver. Any idea how to achieve this? I'm thinking a quench in vegetable oil or maybe some form of etching. The attatched photo is sort of what I mean, but this is a more polished example. First of all, how do I get a blackened finish? And second, how do I get a more metallic one like the one pictured. I like how it looks refined and finished, but also definitely looks forged and rustic.
-
Owen, I'll make it my job to come and visit you as soon as I get some time off school! To have an such an experienced and accomplished bladesmith so close to me without even visiting is a crime! Not sure what I could offer in return that you wouldn't be able to make 10x better, but it would be nice to have a peek at a proper bladesmith's shop and come back with a little bit of loot!
-
Hi Steve. I'm aware of how to taper metal, and I have done a fair amount of basic blacksmithing skills prior to moving on to bladesmithing. In theory, it is the same as tapering any other piece of steel, but the length brings it's own problems, as maintaining a straight and centered taper becomes a lot more difficult. The best way I can see would be to draw it out using a rounded die or the horn of the anvil, that way it should be centered and should draw out rather than just increase the thickness, as I get when I peen it. I'll be getting a lot of tools next week, as I'm really working with the barebones hammer and anvil. The other option would be to use a bottom fuller to put deep grooves in it, similar to peening, but a lot deeper, I just need to be sure they are the same depth both sides. I'm rather offended by your claim that I don't take on board advice. That's why I'm here, asking questions, looking at other people's work, how they do things and trying to translate that into my own work. I post what I make here, sometimes with videos so that I can get advice on how to improve my work, all the way down to hammer control and position. I'm sure you didn't mean to cause offense, but someone who doesn't take advice from more experienced smiths is incredibly arrogant which is one of the things I despise the most. What I make will be a wallhanger, just like the last one, not least because I'll be forging mild steel. The reason for this is that I wanted to have a go at swordsmithing without wasting good steel, so I can get a taste of the practical problems of swordsmithing to relate to when I'm reading theory. The other reason is that I don't have the facilities to properly heat treat a sword due to the length, so using a nice piece of 5160 would be a complete waste.
-
I had a go at forging my first sword the other week as I have spent a lot of time learning the theory, but theory is better understood when you can relate it to practical experience. It didn't go too badly, at least it was easier than I thought it was going to be after hearing what people say about swordsmithing, although I did have one problem that was far bigger than the others. I draw out the tang, then I forge it so that the blade is 2" at the base, tapering to 1" at the tip. This is where I struggled. First, how do you get an even taper? Because marking the steel wouldn't work, forging the blade down to a 1" tip that must be dead straight was quite difficult, what is the best approach for this? The other one I had was when drawing the steel down to the taper, even when peening the edge properly, I ended up making the steel bunch up and become thicker around the edge rather than drawing down and keeping the thickness uniform. With this and trying to keep the line dead straight and without flaws, I had quite a hard time and ended up having to do a fair bit of grinding before forging the bevels. I've read 'The Complete Bladesmith' cover to cover a few times, but it really goes into no detail about forging the taper, obviously this calls upon some of the stuff learned when knifemaking, but it really is quite different and a bit of advice would be most useful!
-
Thanks Thomas, that was very enlightening! I'll check out the company you mentioned. What is the best way to differentiate wrought iron from cast iron when sifting through scrap? I can't really go around whacking things with a hammer or etching them while I'm there, sometimes the use of the piece can give a hint, I guess, but is there an easier way? Really, low grade stuff is what I want, the plan is to form it to the shape I want for my knife fittings then heavily etch them for a dramatic look!
-
Definitely check out Jim's books if you can, I own the Complete Bladesmith which covers just about everything including pattern welding. I don't know how I would manage without that book!
-
Many of you here have been blacksmiths for many a year, I however, have just started a few months ago. Nowadays, wrought iron is very hard to come buy as it isn't produced in any scale any more, and as most of what I do is bladesmithing, I've never really forged iron. I saw a wonderful example of an etched wrought iron crossguard and pommel on the forums, and I'd like to make something similar for a knife I am making. From what I gather, wrought iron is iron that has been folded, welded and hammered many times to get rid of many of the impurities found in cast iron. I have a piece of cast iron I managed to find, so if I were to weld it back on itself many times, I would have wrought iron? And with the etching, is it just a case of etching the wrought iron as it is? I assume the layering of the iron produces the desired effect and that I don't have to add a different metal to the billet, like with pattern welding steel, to create the contrast? Thanks!
-
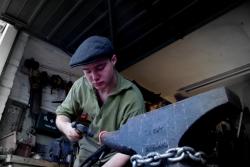
If you don't want to read this, watch the video, it covers most of what I'm going to be typing! Having not fully finished a knife before (first time I've heat treated one), I decided I'd try and get one made for a camp I was going on the following weekend. Inexperience and rushing is usually a recipe for disaster, but this came out okay! I got all the forging done over the weekend which took about 16 hours in total. I then spent the rest of the week doing all the rough grinding which was done mainly with files with a little help from the angle grinder to get started! It was hard to find time as I was at at school all day, and had homework and other commitments. I got the heat treating done Thursday (after getting home at about 5PM after Army Cadets), and spent the rest of Thursday and Friday hurriedly polishing and sharpening as I had to leave for camp at 6PM Friday! I got it all finished to a standard I was happy with. In retrospect, I would have liked to have made the whole blade look a bit rougher, like some of Stormcrow's blades, as this type of chopping blade gets some rough treatment, so the 400-grit finish gets ruined after quite a bit of use making the blade look ugly, whereas if I had left some marks in, it would not be a problem and may have made the blade look better overall. It was forged from 5160 spring steel and has a 1/4" thick spine, which tapers all the way down to the blade, rather than having bevels. It makes it very useful for splitting kindling up. The blade is 7.5" long. The sharpening was done quickly, but ti is still plenty sharp enough to cut yourself by accident (I discovered that quick enough!) and to cut through materials with little resistance such as falling paper. The temper turned out softer than I would have liked due to mistakes during my first heat treatment, meaning that I haven't tested it too thoroughly on steel, although I tested it on the edge of some 3mm steel plate which it cuts into nicely and doesn't damage the edge, but I don't think it would stand up to extended use. Here is the video if you're too lazy to read! Anyway, I got it done in time which I was pleased about. I used camp to test out the blade, and it turned out quite well. I was splitting small logs, cutting old tins and letting other people play with it. It came back slightly scratched and slightly less sharp, but it stood up nicely. The handle was a temporary solution, but I actually quite like it and it seems to work well, so I plan to stick with it! The weight of the blade made it perfect for using in the same way as an axe, but the sharpness made it good for whittling and carving. It was also very good at hacking off smaller branches and cutting bits of wood in a V as you would with an axe. All in all, it was everything I wanted from a camp knife, and not a bad first effort by my standards! Also managed to throw together a sheath from an old bit of boot, another rushed effort!
-
I posted earlier in General Blacksmithing about a group of bladesmiths I met while on holiday in France. It was very interesting and there were some lovely examples of anvils there. Some looked ancient, some lovely new european style anvils, and even a farrier's anvil. Sorry about the pictures, I was messing with the shutter speed earlier that day and forgot to set it back, meaning the pictures were hardly visible. I'm amazed the pictures were salvageable at all, but I managed to get them decent, unfortunately because the sensitivity automatically went high to compensate, they are very grainy. Can anyone explain what the cardboard and tape is for on some of them? Anyway, enjoy!
-
Met some fellow blacksmiths on holiday!
Gundog48 posted a topic in Blacksmithing, General Discussion
I was on holiday in the French Alps when I heard the wonderful and familiar sound of an anvil. I soon traced the sound down to a small blacksmiths shop in Morillon with an instructional setup.There were a few experienced blacksmiths and a few novices getting instruction on bladesmithing. My French was pretty limited, so we couldn't talk too much, but there were some lovely anvils and forges there. A brilliant use of such a small shop considering how many were using it! This was my first time seeing someone else's shot pin the flesh, got to try out a hand crank blower and see how they faced the same problems different to me. Sorry some of the pictures are really grainy. I was playing around with shutter speed earlier and forgot to put it back before taking the pictures so they were really dark, managed to brighten them up to visible, but due to the darkness they were taken at a high sensitivity, which made it all grainy. -
I'm looking forward to the outcome of this. I'd like to learn to become a full-time blacksmith, but it is a difficult trade to get into, especially with the different types of blacksmithing and it being perceived by most people as nothing more than a historic craft that is no longer relevant.
-
Roughly how thick are the finished blades at the spine?
-
Nice, being new to this, what's the best way to prevent rust on a blade. I've know oiling it does the job, but how do you prevent it over the long term? Either way, I'm going to be forging some kitchen knives shortly!
-
I've been interested in forging some kitchen knives, but I was always under the impression that plain carbon steel was unsuitable as it is more sucsceptable to corrosion from the food itself and required oiling to stop rust which could contaminate the food. I'd love to make a nice kitchen knife, am I wrong here? I thought it was really stainless only when it came to kitchen knives?
-
Easiest way for me to anneal?
Gundog48 replied to Gundog48's topic in Heat Treating Knives, Blades etc
Apologies, I meant tempering- I have moments like this! I'll get some test pieces and try the different methods, see which I prefer! -
I have two products, a 1085 large knife and a 5160 tomahawk that I need to harden and anneal. Hardening will be heating up in my forge and quenching in oil. The plan for annealing was to use my oven, which has promptly died in protest of this idea before I could even test it. So, I have a butane/propane torch, a forge, a BBQ with a temperature gauge and two pieces to anneal, probably at the same temperature. What do you think is the best course of action, bearing in mind that this is the only annealing I have done?
-
Thanks Mat! I've taken a look at it, but I don't think I have the skill to carve the shape I want out of rubber, but I could do so with wood, so I think using greensand may work best. I'm on the lookout for greensand suppliers! I think it looks pretty doable, just as long as I can make the mold well enough!
-
I'm forging a sword at the moment and need to make a special crossguard for it. The design would be difficult to forge, and I'd like to make it out of brass, so I believe casting brass into a mold would be the best option. I plan to do this in my coke forge, I don't think I'll have too much of a problem as this has melted steel before with ease! I plan to make a crucible out of stainless steel pipe if that would be sufficient? The thing I'm really struggling with is making the mold. I take it I need a special type of sand, and something to hold it together other than water. Because it's a 3D object I'd have to make two parts and put them together, do I then make some kind of tube for the metal to travel down to meet them in the gap? Any advice or resources for finding out more would be great! Thanks for your help!
-
How is it even possible to do that? Even I was striking the anvil face directly with a 20lb sledge after quenching it with water while hot, I don't think I could manage that!
-
I've been reading your comments and have decided I'm massively overreacting! I've never had it glow red, so I have nothing to worry about! I built my firepot Friday and tested it yesterday, I'm incredibly happy with the results, I'll get some pictures on here. It's made of 3/4" steel plate, so it has a huge mass to absorb heat too!
-
I've been reading your comments and have decided I'm massively overreacting! I've never had
-
Thanks Phil! Doesn't appear to be sandwiched, just a silvery looking piece of metal! Do you mean that I could use two denominations of cupro-nickle coins, or layered cupro-nickel with bronze coins? How can I tell when they are at welding temperature? Can you point me in the direction of somewhere I could do some research?