

Frosty
-
Posts
47,096 -
Joined
-
Last visited
Content Type
Profiles
Forums
Articles
Gallery
Downloads
Events
Everything posted by Frosty
-
If this isn't living proof of the benefits of good neighbor relations I don't know what is. All you need do is get the forge burning and go to work. I'd call that a pretty complete kit, fancy stuff can follow but that's enough to make the fancy stuff in time. Congratulations! Frosty The Lucky.
-

Steel plate on cast iron anvil?
Frosty replied to falsevacuum's topic in Anvils, Swage Blocks, and Mandrels
Return it if you can and find a heavy piece of steel to forge on you don't really need more. However if you can't get them to take it back consider this. You'll need a place you can build a substantial fire, one large enough to bring that ASO to near orange heat. Then cut and grind the plate till it matches the anvil then shine up the face and the steel plate. Lay sticks of fluxed silver solder across the anvil about 3/4" apart, and wire the plate down tight. If you can't get fluxed silver solder buy the correct flux. Now turn the anvil plate down and balance it on a couple legs to keep it say 4-6" off the bottom of the fire. Now build a fire and gradually bring the anvil's temp up till a couple pieces of silver solder laid in the center of the base, farthest from the fire melt. Let the thing cool gradually. You'll be able to tell if the solder flowed because the weight of the anvil will have driven what excess there is from the joint. You now have an ASO with a steel face plate. Unfortunately it's an A-36 faceplate and not hardenable better than cast iron but still . . . Yes silver solder is strong enough to make this work, we used it to bond tungsten carbides to the teeth on our earth drill bits and if a 453 Detroit Diesel can't knock the carbides off the teeth while it rips them bodily out of the bit you most certainly aren't going to be able to delaminate a steel plate with a hand hammer. Just a thought from your weird Uncle, Frosty The Lucky. -
I like to wheel in and loaf with a happy little whine. Frosty The Lucky.
-
It's the cheese in my you know. Frosty The Lucky.
-
Good beginner/practice projects for arc welding
Frosty replied to Michael Cochran's topic in Welding/Fab General Discussion
Find something for a base it doesn't need to be really heavy but should be at least 18" across both ways. It can be round square, you can weld legs, a flat X, etc. It just needs to be wide enough to be reasonable stable and not be a trip hazard. Trip hazard is why I really dislike wheel rims for stand bases of most any kind. Once you have a base you need a post (vertical member) and cross bar. I suggest welding the post to the base plate, move it a couple feet from your anvil and using a straight edge laid across the face mark the post. Now lay the post flat on a bench and lay whatever you're using for the cross bar across the post aligned with the mark. Remember the mark is level with the anvil face so cross it below the mark and mark the post again, THIS is your cut line. Cut the post and weld your cross bar on. Viola, welded blacksmith's helper! Sorry, I just now reread your question. I'm afraid this isn't idiot proof, idiots are just too darned clever I gave up trying to fool them with simple decades ago. Frosty The Lucky. -
Hey I was right, I WAS wrong. Glenn lives in the western half of Virginia I don't know why they have two but it's not the only state with a split locality so I guess it's not so strange. Makes me wonder if living in a big chimney soots him? Frosty The Lucky.
-
You don't really find gold IN the black sand it just pans out close to the way gold does. Being closer to gold's specific gravity it's a clue to looking for gold because the eddies that allow black sand to fall out of the current will drop gold instantly. If you pull black sand with a magnet you'll be separating it from the gold, leaving the gold in the creek for other folk who know how to prospect and pan like . . . me. <grin> Frosty The Lucky.
-
Good beginner/practice projects for arc welding
Frosty replied to Michael Cochran's topic in Welding/Fab General Discussion
I've only ever run 200amps a few times besides running that hot will reduce your duty cycle and you'll find yourself taking frequent breaks to let the machine cool down. Tell the guy/gal at the welding supply you want to run a 7018 equivalent on an AC only welder, s/he'll fix you up. No problemo. Frosty The Lucky. -
Good beginner/practice projects for arc welding
Frosty replied to Michael Cochran's topic in Welding/Fab General Discussion
Does your welder have a DC setting? If not you'll need to get one of the AC versions of the 70xx rods, I'd just tell you which one but can't remember. I've always had a DC capable welder so rarely encountered the AC 70xx rods. They're out there though, maybe just ask at the local welding supply. Like Charles says E6011 is great down and dirty rod, if you can strike an spark it'll lay a good bead. Well it'll let YOU lay a good bead but it's fast freeze so it doesn't lay down and wet the edges for pretty and smooth beads. Frosty The Lucky. -
Pretty darned cool . . . Oh WAIT! That is NOT the traditional way blacksmiths did it back in the day, they had the apprentice do it with a dull draw knife. Oh. . . Wait again, I used a draw knife though it wasn't dull I made the mistake of letting the bark dry first so it was much harder to remove. That's a pretty piece of wood, I'd be thinking about stain while it dries. I'm a fashion maven here about you know so I naturally think about making the forge look pretty. Glenn lives in his own little world most of the time but likes company and started IFI so folk could visit. Physically he's in Big Chimney and if memory serves Tenn. I won't be a bit surprised it's another state or he lives IN A big chimney Frosty The Lucky.
-
Looking good Russell, kind of the way I made my spruce anvil stand. Well, it IS the same thing I did I just used a little different methods and set my anvil deeper. I got the block from a saw mill in Anchorage and it was green too. As it dried it shrunk onto my anvil's base clamping it down solid. the checking never effected anything so I wouldn't worry. That was white spruce though, I don't know about hickory but expect it'll be just fine even if it checks. What killed my block eventually was the concrete floor. Wood doesn't last very long in direct contact with concrete mind rotted from the heart out so I didn't even notice for years. Then I went to load it in the pickup for a Demo and noticed all the rotten bits on the floor when I hoisted it up. That anvil has a steel stand now and will live on it while I'm around. I'm thinking if I'd put my block on a piece of green or brown pressure treated ply wood it would maybe still be sound. Or once it had dried I'd treated it with copper sulphate wood paint stuff. (I can't recall what it's called) I was recommended to dilute an oil that sets say boiled linseed oil and keep mopping the top till it starts coming out the bottom. I know the copper sulphate wood treatment works, we used to paint guardrail posts with it before the state finally broke down and bought treated posts and it lasted decades unless broken off of course. That's a pretty block and is going to serve for a long time. Are you going to peal it? Frosty The Lucky.
-
Frontier/Fur Trade Blacksmithing
Frosty replied to Bo T's topic in Blacksmithing, General Discussion
Have you tried twisting your fork onto a stick? I call them pig tail toasting forks, they're light and small enough for back packers and we have sticks all over the place so you don't have to sit and hold your hand over the fire to toast a piece of steak, bread, etc. Oh, and once you've toasted dinner you can remove the stick and poke the fork into a log or the ground, twist a candle into the pig tail and enjoy a romantic candle lit dinner with your sweety. Frosty The Lucky. -
The easiest surest way I know to mark straight lines down a round section without special tools is to lay in in or on a piece of angle iron and use the angle as the guide. Making opposing marks is trickier but not so hard. Wrap a piece of string around the piece and mark it with a pen so the ink marks two positions on the string. Now unwrap it and fold it so the ink marks are touching. The crease between the marks is the center, mark it there. This gives you two story marks that will be diametrically opposed when wrapped around the original stock. The larger the diameter the easier but this trick works pretty easily down to 1/2" dia. Oh, NO do NOT use a sharpy or such, and old school Bic ball point is perfect you don't want the ink soaking outward into a smudge. Frosty The Lucky.
-
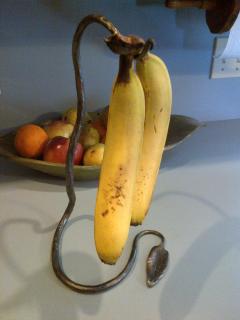 Sounds good, I'll give it a shot. I like bananas and they don't like laying on the counter. Thanks. Frosty The Lucky.
 -
Good beginner/practice projects for arc welding
Frosty replied to Michael Cochran's topic in Welding/Fab General Discussion
Good learning projects are ones that don't support much weight or take much abuse. For instance welding up a hand railing would NOT be a good beginner's project, if someone say fell on the steps and grabbed it it might break and make for worse injuries. That's just a for instance. What you want to do is make sure your welds aren't going to have to take much stress or be in a position someone might get hurt if a weld fails. I know that's the kind of thing you're asking, I'm just saying it out loud, an old fart's caution. Here's one we used to do a lot of. Buy some 1/4" x 1" strap stock. Cut it into 1" lengths. You can grind a scarf or set them about 1/8" apart and weld them back together. Tack on one side, flatten while still hot and weld them on the other side. Once they're chipped put it in the vise with the weld a little more than 1/4" above the jaws, cover with a rag and hit it with a hammer. The rag is to prevent pieces flying as a safety precaution. When you can bend it over without it breaking you'll be on track. I did hundreds of these it was a shop class learn to weld thing. If we were in the dog house we had to cut out coupons with a hack saw and file the scarf bevels. Frosty The Lucky. -
Newbe needs help with anvil for sale
Frosty replied to tewitt1949's topic in Anvils, Swage Blocks, and Mandrels
Bo: Take a closer look at the pictures. What looks like it might be a face plate may actually be a cast feature intended to mimic a face plate. Or as my cast Swedish steel anvil the appearance of a face plate is just a cast in feature but it's as top quality as an anvil can get. The lesson here is appearances can be deceiving, these pics just have too little detail to be able to develop a valid opinion. There are a lot of guys here who have decades of experience judging anvil quality and condition and none of them are speaking up except to say we need better pictures and more info. About face plates. They are generally a good thing, even if they're beaten up some. Judging their condition involves a couple issues: physical damage dents, dings and chipped edges are pretty normal wear and tear, how bad is THE quantitative judgement. Torch cuts and weld spatter is abuse and all too common. A delaminated or fire annealed face plate is serious damage and can be determined by a rebound test. It is simply eyeball estimating how much energy the anvil returns to an impacting steel object. It's incident of rebound. The easiest method is to bounce a steel bearing off the face from a given height and estimating how far it bounces. Lots of guys say use a 1" bearing or a 1/2" bearing or some such. It doesn't matter, not really, though a tiny bearing would be a PITA. It's the hardness of the steel and it's shape that counts. A sphere will always rebound at a predictable angle so just brushing the dust off the face is all the prep you need. I have some 3/8" bearings and that's what I carry in a pocket when I'm out garage saling. A larger bearing will bounce higher so it's easier to judge because the % scale is larger. Just don't get carried away. The other easy test it to let a smooth faced hammer bounce on it and estimate the rebound. I keep a light, about 8oz. ball pein in the SUV at all times, the one in the pickup is heavier because I drive the pin out of the hitch receiver with it. I always have a hammer. What you're looking for besides % rebound is uniformity of rebound. There will be natural variation and it is a perfect example of where you need to do most of your work. The center of the anvil directly over the waist will have the best rebound while the heal and horn will have significantly less. This is to be expected. What you don't want to see but CERTAINLY want to find are dead spots. If you're finding say 75% rebound and hit a spot with 20% or one that just says clack you've found a dead spot. In an anvil with a welded face plate this PROBABLY indicates a weld failure or delamination. I like using a hammer better than a bearing because you can literally FEEL it through the handle. If you're interested it's easy to define the size and shape of the delamination which will also tell you a little more. Tap around the delamination till you find where it transitions to good face. If the transition is relatively sharp it's probably a failed weld. If on the other hand it fades, say over an inch then it's where some blankety blank used it as a bench to gas weld or torch heat something and ran it's temper out. either way it's a BAD spot and takes someone with expert skills and good equipment and time to repair. It's a deal killer unless the price drops through the floor. Cast anvils are a different kettle of soup. Some are what we call ASOs (Anvil Shaped Objects) and barely better than nothing for blacksmithing. ASOs are generally common in hardware stores and are cast iron, soft and easily chipped. Like I say they're better than nothing and I mean NOTHING. Do NOT buy one for any long term use they're okay hardy tool holders but will even wear, they're too heavy for door stops but make good boat anchors. Good ones? Oh you BETCHA, some are world class excellent anvils, Swedish cast steel is about as good as it gets. The guys have been waiting for this, Soderfors anvils are as good an anvil as I've ever used but it's not the only brand, Kolhswa is another Swedish steel anvil and top shelf, Brooks, are up there and there are some modern American cast steel anvils that are top shelf, Nimba is the only brand coming to mind right now. It's TBI damage <sigh> Anyway, there are good cast steel anvils but you gotta be careful, rebound test will give you a good idea if it's hard enough to perform well. Then there are the forged anvils with forged iron or steel bodies and welded high carbon steel face. New ones are very high quality and can be trusted to be worth the money, there are rare exceptions but the people making them will replace them if notified. Old forged anvils should be rebound tested. Last but far FAR from least is an American Icon anvil, the Fisher. They have a high carbon steel face and a cast iron body. They're not only top shelf forging anvils they are quiet. Oh you can hear them but they do NOT ring, if a different type anvil made that sound you'd rightly call it a dead face. Fisher's however are quiet because the cast iron body has a different resonant frequency than the high carbon steel face so the sound wave from impact doesn't reverberate the different frequencies are self damping. I LOVE Fishers they're great anvils. And wasn't that long and windy? Sure it's long but it's just touching on evaluating an anvil and even knowing all this junk you need to actually see, hear and feel it to be able to accurately evaluate an anvil. This entire craft is built on two things, knowledge and practice. A little knowledge requires a LOT of practice to make it properly useful. Now I'm thinking after putting all this bandwidth out if there isn't a section on IFI about evaluating anvils. It might be a good one. Get some of the really knowledgeable guys to post how they test and evaluate anvils or heck just tools. Hmmmm? Frosty The Lucky. -
Truth is making tongs is such a perfect beginner's project and it takes a lot less effort and skill than repairing old damaged tongs. Seriously, to repair a damaged pair of tongs you have to know quite a bit: What they're made from, mild steel?, WI? Medium C steel? You need to assess the damage itself as well as the condition of the steel/iron. Can you weld it at all? What kind of weld? Can you forge weld, on rusty, crudded up iron/steel? Arc: Mig, tig, stick? What kind of rod or wire? It's not a simple thing unless all the tongs need is a little straightening and a new rivet. I jump on those you betcha. I have a bunch more that aren't in that bad condition that have hung there for years because it's more work than I want to do. Heck, my slip joint pliers with welded on reins is actually darned useful general purpose tongs. Forging your own tongs is probably 90% drawing, a couple shoulders, a little bending, punch a couple holes and pein a rivet. These are all earliest stage beginner processes and all need to be practiced. We've seen several examples of darned nice tongs made from RR spikes here lately. That saves a person having to estimate how much stock to use for a pair and it's good tough steel. Coil spring makes excellent tongs though it's harder to move on the anvil and requires proper handling in use. For instance you can't let them get to red heat and quench them in the slack tub or risk embrittling them. You gotta keep them cool or let them normalize on the floor. Same for using 4140 stock for tongs, another superior tong stock. Spring or 4140 is springier than mild so you can make your tongs thinner and lighter and they'll grip better because the reins won't bend as easily. Light stronger and better performers? Anyway, that's my long rambly opinion about refurbishing old tongs. Don't, make new ones instead, you new guys need the practice and few things in life feel as good as using tools you've made with your own hands. Frosty The Lucky.
-
I've seen the paper roll used in a welding shop way back when, the owner lady didn't like the idea of us drawing on the floor. <BOYS gasp> Something I've been keeping my eyes open for is old computer driven wall projector, I can't think of the name right now. It'd be sweet (well I think it would) to be able to project CADD right on the wall, bench or floor in the shop. Frosty The Lucky.
-
Thermal Arc 19 pin same as Hobart 19 pin?
Frosty replied to Judson Yaggy's topic in Welding/Fab General Discussion
About who to call regarding interchangability of parts. Several years ago my Lincoln Ranger 9 gen set wasn't putting out 240v correctly and kept shutting down when I tried. So I took it in to the certified Lincoln service guys at the Lincoln dealer in Anchorage who promptly screwed the machine up royally. In spite of my writing clearly on the work order that the 240v electrical outlet was in need or service the tech kept trying to "FIX" the welder side to run 250amps at 240v. A Ranger 9 has NO SUCH SETTING!!! Setting it at max output across the board and dead shorting the leads was his test method and after stopping the 17hp engine cold several times managed to twist the output shaft and shear the key. A local guy who just repairs engines and welders fixed it in about a week and she works a charm just like new now. The certified service center not only waved their bill but only one call to corporate and an E-mail with the competent mechanic's statement and bill with pics, had the local shop paying his bill too. Okay, all that story actually ties in. You can't take the dealer's word for it certified or not, they're just human. However an electric motor repair shop is set up to test and trouble shoot virtually anything electrical coming in the door and they aren't there to sell THEIR product. Were it me I'd take the whole sheebang into Hayden Electric in Anchorage and see what the Pros have to say. Just their test bench that wouldn't fit in a 2 car garage. Just my dos copecs. Frosty The Lucky. -
That's very much like the one we use in our wood stove Yves. Of all the fire tools I've used in stoves, fire places & pits, coal forges, etc. this is my favorite kind. Frosty The Lucky.
-
And toes. Never forget your toes. Frosty The Lucky.
-
Comes naturally if the stove is rolling nicely. <grin> Frosty The Lucky.
-
 That's perfectly clear, thanks again Jim. Ideas for variations are really starting to simmer. Say twisting the sq. first for instance. I'm really kind of taken with how it looks like it was smooshed. Now I'm seeing feet. Something for the notebook for sure. Frosty The Lucky.
 -
Thank you Jim. If I'm envisioning what you're saying correctly this resembles fold forming to a degree? Did you come up with the process? Are there other examples? Thanks again. Frosty The Lucky.
-
Don't make assumptions Sean, especially NOT with dangerous chemicals. Read the label and it will tell you exactly what's in it and how much. If not Google the brand and and product name. Look for the MSDS for the basics but the specifics like % dilution will be on the product label or company site. San Diego eh, I grew up in the San Fernando Valley, Sylmar. You don't think I'm going to remember that after I check the next post do you? (I WISH!) Now, click on your avatar or name at the upper left of the page. Then click on edit profile and under location put YOUR general location. Save. Easy peasy. Don't worry, it's not a rule, putting your general location out there in public is up to you but there are some real benefits. I'll bet there are at least 50 guys on IFI who live within an hour's drive of you but if they don't know you're that close they'll never mention the big hammer in or knife, square wheel build, forge and burner, etc. workshop or whatever to you, they won't know you're there. Ont he other hand some folk just like their privacy and aren't saying. S'up to you and I won't bug you about it anymore. I've only messed with pattern welded billets a couple times, one for a bit in a little francesca like thing I made a few years ago. I just cooked up my own ferric chloride and let it soak till I liked it. No, I'm not recommending you cook your own etchants I'm just saying you gotta be very careful with this stuff and do NOT give something a try just because someone online says IT will work. You have zero idea who's flapping their gums or wagglng their fingers. I can say I'm 6'6" bronzed blond Adonis just as easily as some 13yr old who plays WOW says you can do X. Unless you can verify the facts with a legitimate source, some things are just too dangerous to mess with. Let's see, since Weird Uncle Frosty is on a safety roll. You have PPE, the correct PPE. Yes? By all means you may ask me what PPE is, don't worry you cant be a fool if you do. If you don't and you need it on the other hand, you'll just be another cautionary tale. What do you propose to do your etching in? What kind of exhaust system? Lighting? 1ST. AID kit? Spill control/clean up? Frosty The Lucky.