

pre6422hornet
-
Posts
36 -
Joined
-
Last visited
Content Type
Profiles
Forums
Articles
Gallery
Downloads
Events
Everything posted by pre6422hornet
-
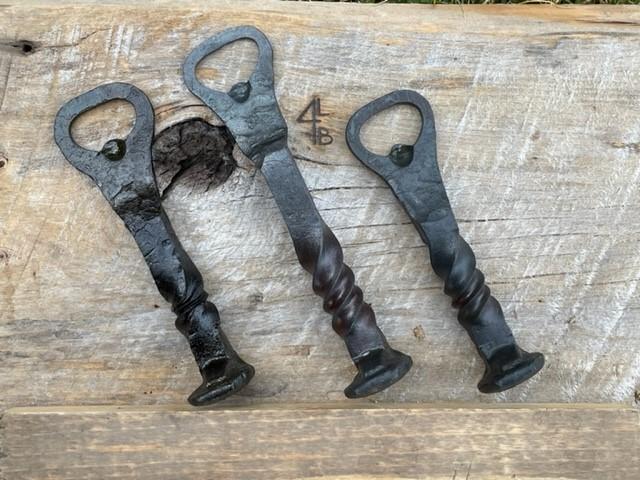
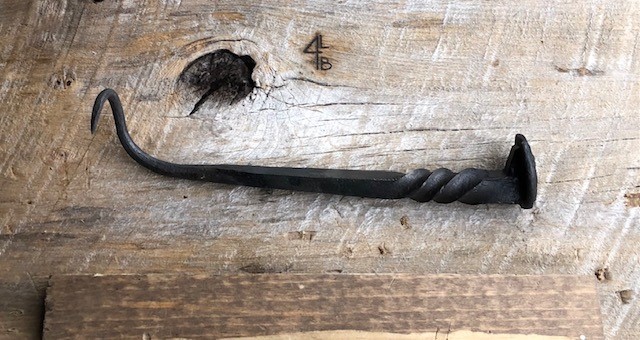
Here are few bottle openers I made a couple weeks ago. I purchased my first new hammer ( rounding) and was trying it out for the first time. First one on the left, last one on the right. Definitely had a learning curve with the hammer. Man does it move metal. Here they are. If you ever need to open a cold one, then break a window, hammer in a nail, etc.. this may work HAHA.
-
What did you do in the shop today?
pre6422hornet replied to Mark Ling's topic in Blacksmithing, General Discussion
Okay guys so last night I took a break and decided to make a little rectangle tube to insert into the forge to help with heating up knives and such a little more evenly. I have never been technically trained in welding, but it has always fascinated me. I have a stick welder and have been playing with it practicing with settings, rods, etc.. trying to get better. While not perfect by any means I was pretty happy to be able to take the four pieces of steel I had and was able to weld them together in short order and the welds were the best I have ever done. Please be kind...... I am a big boy so if you see something blatantly wrong by the pic please don't hesitate. Always looking to learn.
-
yeah those wire wheels can do a great job but I am always spooked when using them. A few weeks ago while removing the rust from my new to me post vice I didn't notice our 8 year old daughter had walked outside ( I went out to the driveway to keep the rust cloud out of the shop) and was standing at my 4 o' clock. I quick discussion on PPE and letting her feel the sharpness of the wheel with her fingers was enough to get the point across. So she then proceeded to ride her skateboard down the driveway and faceplant in the street.... thank goodness for helmets..
-
No they didn't. It was a " this was my grandads and it was in his basement". I did walk away with an old wood pulley on a chain that used to " hang in grandads barn" as well. I plan on hanging it in our house eventually. To cool to throw away.
-
Frosty your story regarding mail hits home. So right after Thanksgiving my wife shipped out an order of clothes from our boutique to a customer who asked for shipping even though she lived 1.5 miles away ( we offer free shipping). Took 9 days to go 1.5 miles. Actually it went 1/3 mile to the post office, then back past the shop and 1.5 miles to the customer.... Hey TP they are both in pretty good condition. The screw has very sharp edged threads and it holds nicely.
-
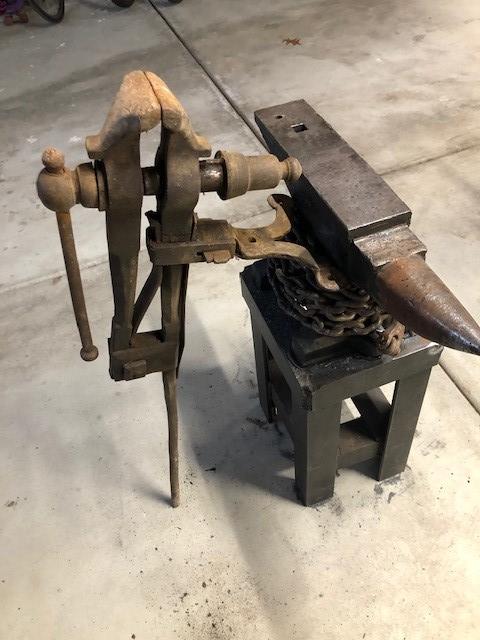
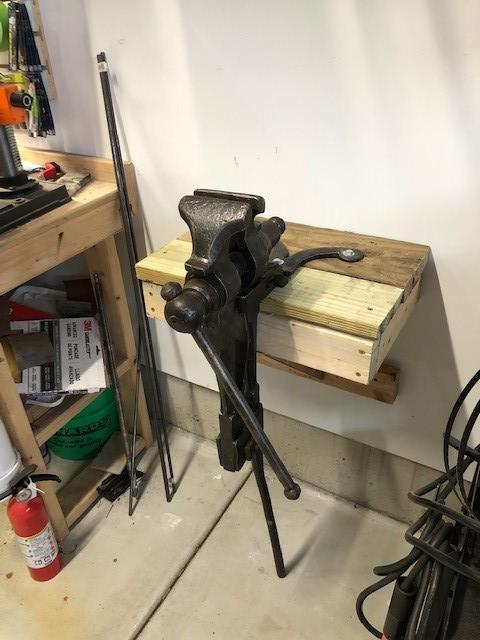
I have been searching for leg vice for quite some time now and missed out on quite a few, but this one came up a few weeks ago about 5 miles from my house. The person just wanted to get rid of it and the price was right so me and the girls ( 4 daughters) went over to check it out. It looks to me to be a Peter Wright but I am not an expert. It has no stampings that I can find even after wire wheeling her other than a very faint "50" stamped on to the front. It does have the two lines cast into the screw housing similiar to a PW I believe. Anyway I took it completely apart, wire wheeled it all, greased the screw a bit, re positioned the spring so it actually worked and opened the jaws, and mounted it on a crude shelf. I am not at the point of pounding anything on it yet, only twisting railroad spikes and holding scales for hand sanding before glue up. I will mount it up properly in the future. Will also straighten the leg at a later date as well.

-
What finish should I use for blades and knives?
pre6422hornet replied to White Nomad's topic in Finish and Polish for Knives
Yeah Frosty it is the craze it seems. It gives the blade finish that worn look, especially after etching. I use a rotary tumbler and some river rock from the.... river Haha. Really simple. Let the knife tumble for 4 or 5 minutes, rinse it off and it is done. Almost all my knife orders are for a stonewashed finished. I tend to prefer to let a knife gather its own battle scars, but as we all know there are people out their who would prefer to have that done when they purchase so they can look the part. -
What finish should I use for blades and knives?
pre6422hornet replied to White Nomad's topic in Finish and Polish for Knives
I use 80/20 of ferric chloride and white vinegar to achieve the grey etch below. I primarily use 1084 and 8670 steel. j sand to 800/clean with acetone/clean with water and Dawn dishwashing soap/rinse/dry 4 min in the etching tank/take out and neutralize with windex, scrub blade with 0000 steel wool/dip in water and rinse/ dry off and repeat entire process. then I stonewash. these two are 8670 These are 1084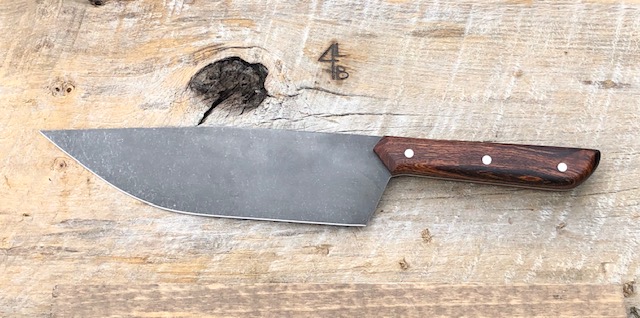
-
What did you do in the shop today?
pre6422hornet replied to Mark Ling's topic in Blacksmithing, General Discussion
That holder is awesome! Great job! -
This thread has made me laugh a few times thinking about my paternal grandpa. He was a machinist for 50 years and took his machinist thinking into his woodwork for sure. We used to kid gramps that he coined the phrase " measure twice cut once", but we always added " measure twice, cut once 1/32 too long then spend two hours hand sanding to make it fit perfect"... I remember in 2000 I purchased my first house. I put a small 10x12 deck on the back of the house. Gramps helped me grid out the post holes perfectly, he made sure all the holes were EXACTLY the measurement needed to pass inspection etc... A few days later I had the floor framed up and stringers installed. Gramps came over and measured and determined it was off square by 1/4 inch or so. He then proceeded to pull the entire thing apart, find where I messed up, and then reset everything back so it was perfect. I just shook my head and kept saying " Gramps the decking will hide it". His response " But I will know it is off". Miss him dearly. He passed 8 years ago and not a week goes by that I wish I could call him on the phone and just talk. Three weeks ago I went and picked up his 1952 Craftsman table saw that he bought brand new and used to cut every board of the house he lived in his entire life. Used it this week to square up some knife handle blocks before cutting them into scales. I am sure gramps was smiling.
-
What did you do in the shop today?
pre6422hornet replied to Mark Ling's topic in Blacksmithing, General Discussion
Absolutely 100%. -
What did you do in the shop today?
pre6422hornet replied to Mark Ling's topic in Blacksmithing, General Discussion
Thanks TP! And that is awesome regarding the hammers. It makes me slow down and take it all in as well. I still have my first hammer my grandpa ever gave me. Its a little small ball pein that weighs maybe 1/4 of a pound and he machined it at work on his breaks in the weeks after I was born. He stamped my birthday and name into the handle. I still use it today 47 years later when I need to ever so slightly persuade something to move. -
What did you do in the shop today?
pre6422hornet replied to Mark Ling's topic in Blacksmithing, General Discussion
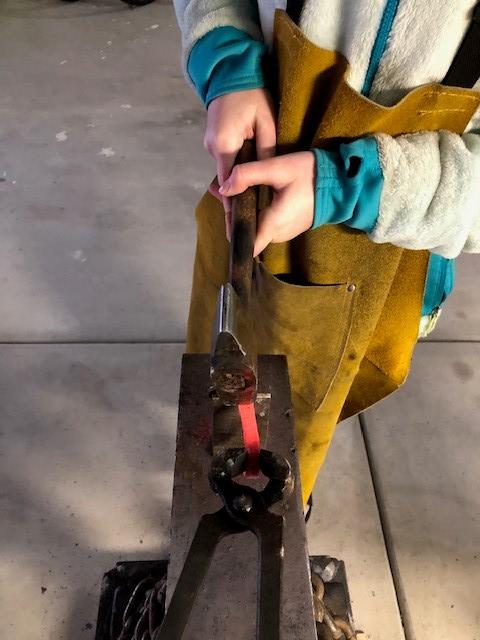
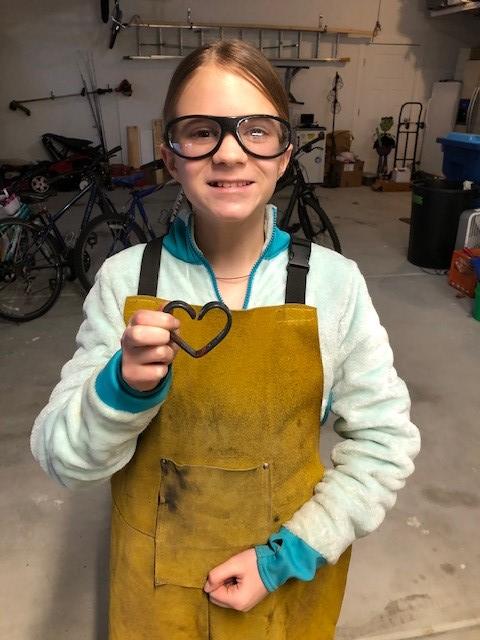
Spent the weekend working on some stock removal knives that should be heading out to their new owners this week, and spent an AMAZING couple hours in the shop with our 11 year daughter. She is very much a crafter, sews by hand better than a machine darn near, and loves to get her hands dirty. She asked me if she could help me the next time I was going to use my "tinker" ( what she calls my anvil). She watched as I drew out a railroad spike into a steak turner, and in-between heats she used one of my smaller hammers to heat up and hammer out this heart for my wife from 3/8" big box store welding steel. She did all the hammering while I worked the steel across the face. It was like having my own little power hammer! Haha! We even used a hardy tool to crease the point of the heart before bending. Well after we sent a picture to the grandmas we were asked to make a few more! Now our 13 year daughter wants in on the fun too. I really do enjoy teaching them how to use tools.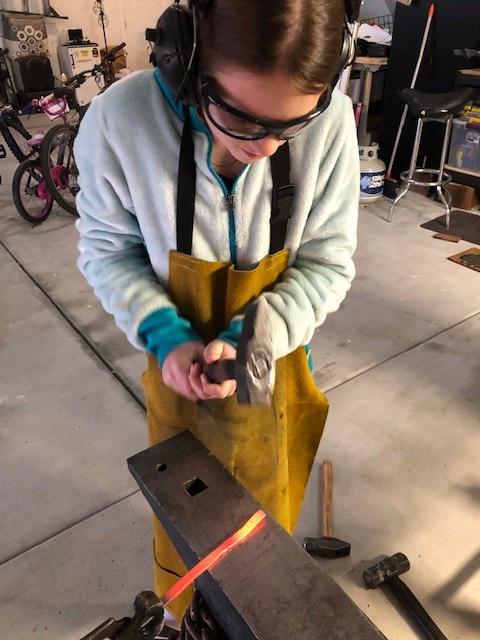
-
What did you do in the shop today?
pre6422hornet replied to Mark Ling's topic in Blacksmithing, General Discussion
Hidden tang... now I got it. Always learning. Makes complete sense. -
What did you do in the shop today?
pre6422hornet replied to Mark Ling's topic in Blacksmithing, General Discussion
Sorry TP I meant integral tang. Up until this everything has been full tang. -
What did you do in the shop today?
pre6422hornet replied to Mark Ling's topic in Blacksmithing, General Discussion
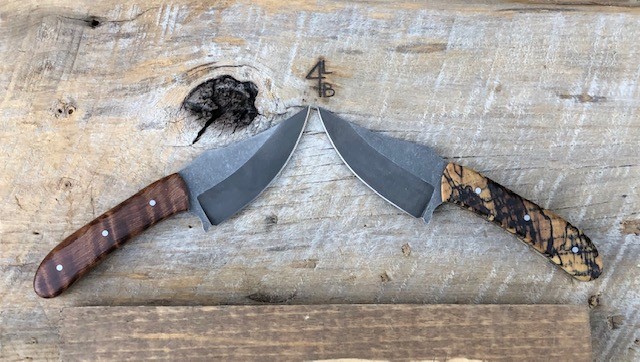
Wings sound mighty good! Might have to fire up the smoker today. I personally like them smoked, then seared the last few minutes to crisp. Not today but I finished up my first ever attempt at: 1. Damascus, 1084 and 15n20 27 layers 2. Integral 3. fitting a guard ( not really a guard, just a decorative layer really). Learned a lot on this build. Failed at hand fitting the guard slot in the dragon skin damascus, tried to file way to much material inbetween fitting. Second attempt was a lot better. Scale is stabilized, dyed redwood with desert ironwood. My kids have already claimed this as theirs as it is perfect for them to slice up apples and cheese.
-
What did you do in the shop today?
pre6422hornet replied to Mark Ling's topic in Blacksmithing, General Discussion
I did not but that makes complete sense, same as straightening anything else being drawn out. Thanks TP! Yeah I don't plan on doing anything with the knife other than opening up UPS boxes with it or just having it in the shop. I will stick to better carbon steels for knives. -
What did you do in the shop today?
pre6422hornet replied to Mark Ling's topic in Blacksmithing, General Discussion
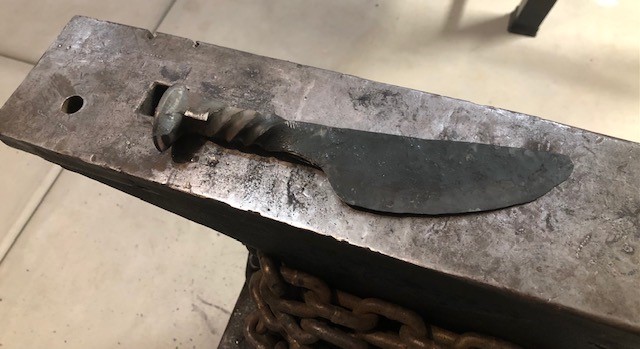
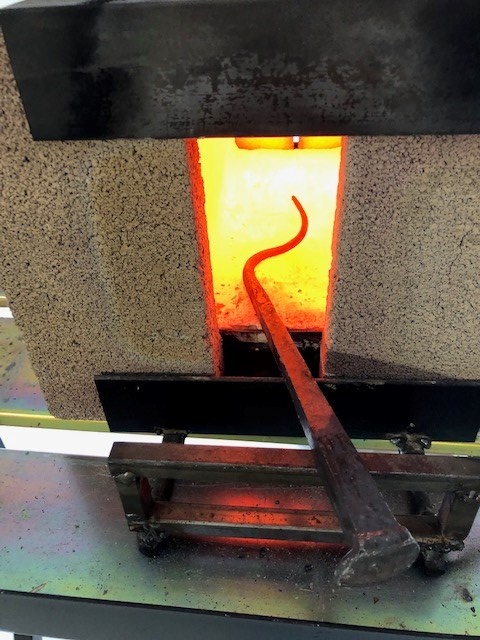
Spent a little time out in the shop yesterday between my two oldest girls swimming meet ( pickup/drop off) since no spectators are allowed. Drew out another spike for a steak turner, still have to perform the tail but my 11 year old made me promise to wait for her as she wants to help so that will happen another day. Then decided to try a hammer out a knife. Made some mistakes as the blade started to banana a little and I did not forge the tip well at all. I will probably hit it with the grinder to get the tip, but the bevels are even and I have a nice straight edge. Some things learned yesterday: 1. Need to plumb in shut off valves in the forge so I can run one burner when only needing to heat a small portion of the medium. Or maybe I am wrong and it will use more fuel to keep it at temp only running one burner. 2. Once I get the spike flattened out a bit, use the horn and bend the spike down so when working the bevels the blade comes back up and does not banana 3. Work the tip in the beginning. NOT the end... AS you can see. 4. I need a post vice. Twisting on the bench, at least on mine, is a pain. A post vice on its own on a stand would help this. 5. A long distance relative reached out to me and said he had two books on blacksmithing he wants to send me and I can't wait to read them. " The Complete Blacksmith" and " The Pattern Welded Blade". Looking forward to both.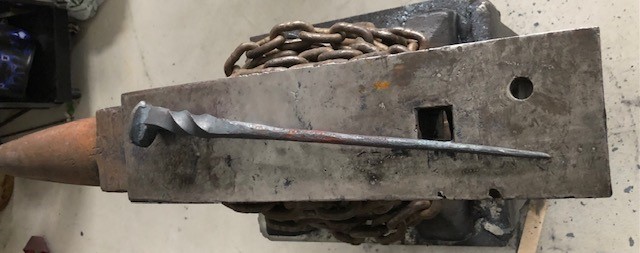
-
What did you do in the shop today?
pre6422hornet replied to Mark Ling's topic in Blacksmithing, General Discussion
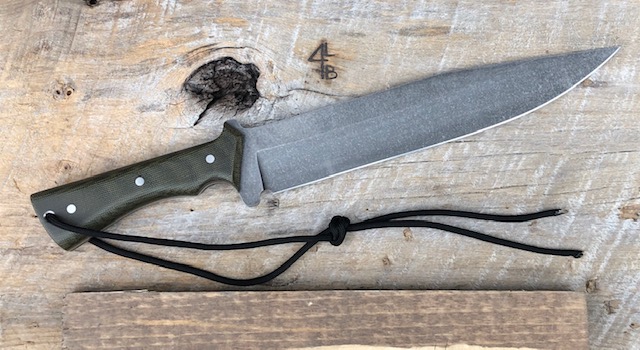
So this is a little project I have been working on for a bit now. I jumped into the deep end of forge welding and stacked up 9 layers of 1084 and 15n20, two inches long and just under one inch thick. I tack welded them together, welded on a handle and let er rip. Without having a press I did this all by hand and got one heck of a workout. All drawn out to about 7 inches. I then used my bandsaw to cut them into 3 inch sections, then cleaned them up on the grinder, restacked and welded. Back into the forge it went and came out with the ugliest billet/knife shape ever drawn out.. In all reality I was just going for a flat bar that I could then draw out and cut on the bandsaw. . Yesterday I heat treated and started grinding on it, and did a quick etch before starting to hand sand I have a ton to learn and again had so much fun. So far I haven't seen any cracks or issues. I did not use any flux, but spent a lot of time grinding clean each restack before moving on and I am sure lost a layer or two in the process. I learned that for anything bigger than this it will take alot more layers/bigger starting stack. I need to invest in a 40 or 100 pound propane tank... Forging temps run around 10 PSI and the tank froze. Slow and steady was more productive than trying to draw it out as fast as I could. Getting ready to finish the hand sand today and final fit the dragon skin damascus guard ( had a piece on hand). I glued a piece of desert iron wood onto some dyed redwood burl for the handle. The amount of knowledge I have learned by reading on this forum is more than anywhere I have ever been and I thank you all.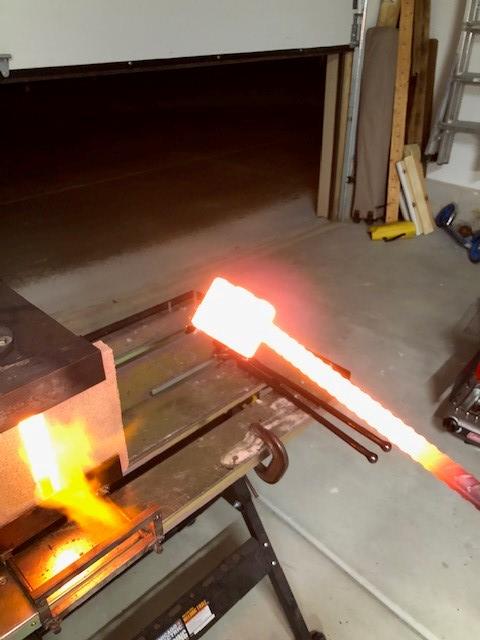

-
What did you do in the shop today?
pre6422hornet replied to Mark Ling's topic in Blacksmithing, General Discussion
Christmas all the way for me! Man I miss the red and green. -
What did you do in the shop today?
pre6422hornet replied to Mark Ling's topic in Blacksmithing, General Discussion
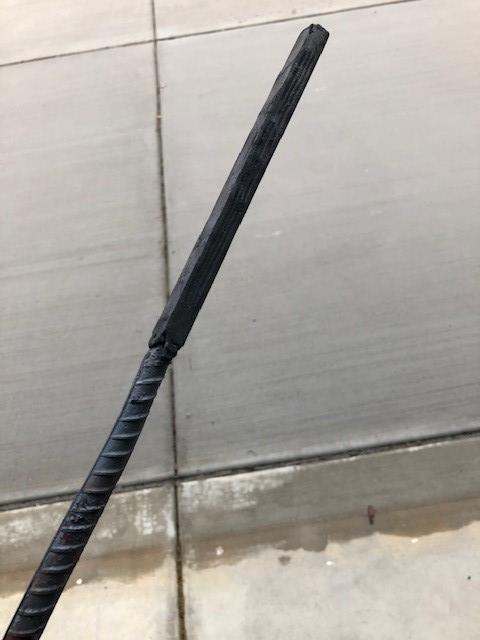
I was able to get some knives cut out of some flat stock for orders, then decided to jump all into hammering on a railroad spike. This is my first attempt so please be kind in the criticism. My dual 1/2" Frosty Burner forge survived our move 80 miles last month to a new house and man do I like it. Heats up fast at 3PSI and sips the fuel. I literally had a blast this afternoon. Drawing out the spike, rounding the tip, twisting the handle, etc.. was just flat out fun. Can't wait to do it again soon. I wish I would have discovered this years ago.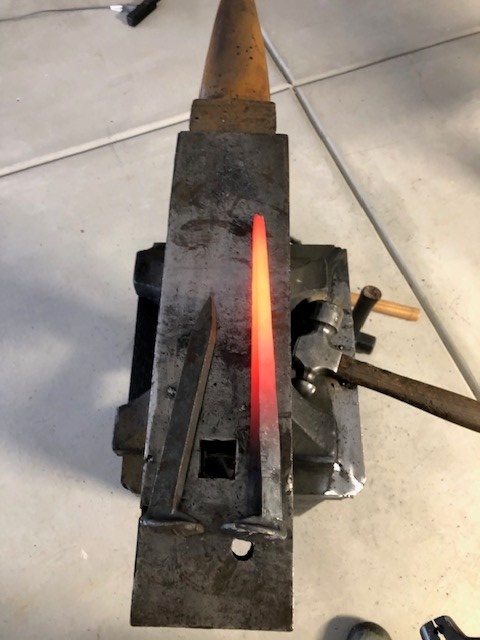
-
I can tell you that the two burner forge I built two months ago with Frosty's directions is running the 1/2" burners and it is HOT!! I am in the middle of moving the family 70 miles so the shop is completely torn apart, but once in the new shop I can't wait to get it back up and running. Oh yeah it sips the propane too. Good luck with the build!
-
What did you do in the shop today?
pre6422hornet replied to Mark Ling's topic in Blacksmithing, General Discussion
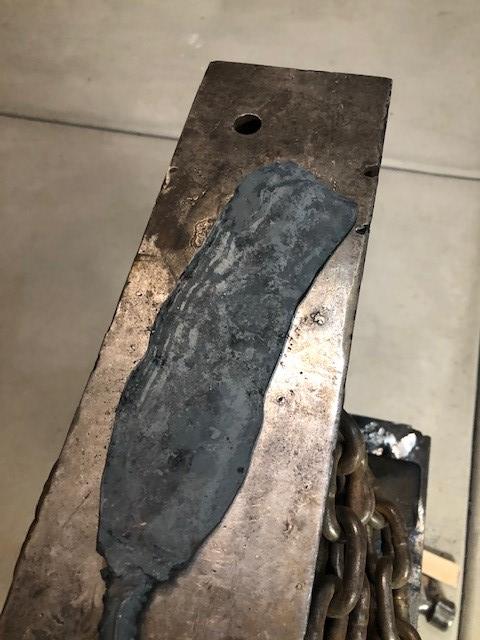
Was asked by a fellow in Idaho to replicate a knife his grandad made back in the 70's. He sent me a pick with a ruler next to it so I could measure and duplicate. Took a little time but the finished blank is below the pic. The pic is oversized as the original knife is only 7 inches long. 1084 at .140 is what I am using instead of Damascus.
-
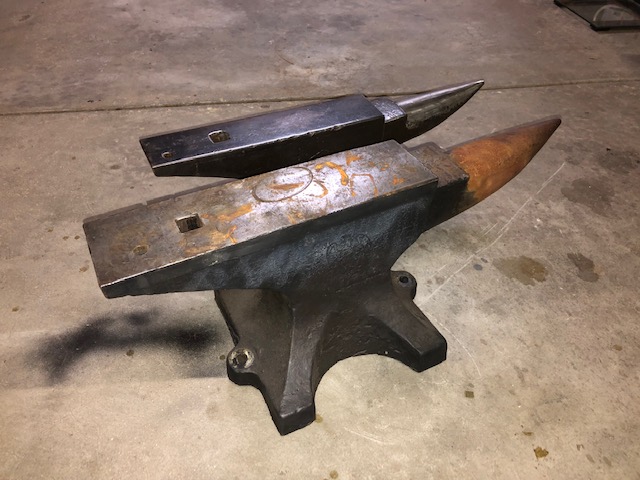
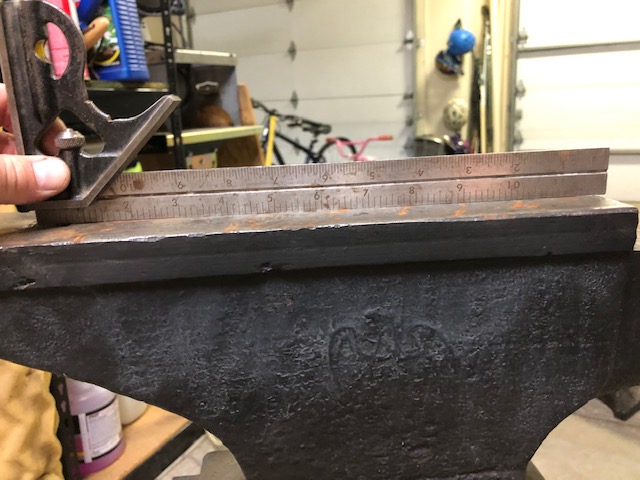
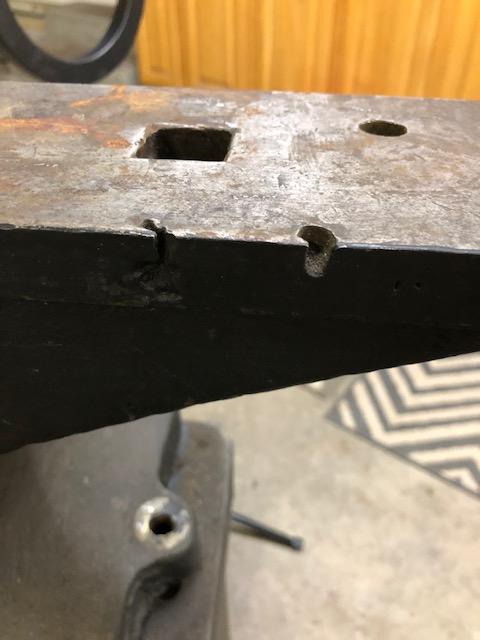
I was able to grab this one last night ( thanks Josh for answering my questions). 150 pounder that looks like it was barely used, but it does have two torch marks on the one edge. A lifetime body shop man owned this since new and his daughter is selling all his tools. He has dementia and the $$$ is going for his care. When I talked to her she didn't know what kind it was, but the pic she sent I was pretty sure what it was. I paid a fair price and it came with an all welded 130 pound stand. I brought it home and took it off the stand for transporting and set it next to my 103 pound 1900 Trenton. The face is dead nuts flat and by my own measurements rebound is at 97-98%. IMG_3335.MOV The only negative that I can see is the torch marks. i am super excited for this anvil as I live in the burbs and the dead "ring" of the Fisher is great for my neighbors. Can't wait to get the stand shortened by about 2 inches, rebolt it up and let er rip!
-
Anvil resurfacing ??
pre6422hornet replied to Mr. Pushups's topic in Repairing and Modification to Anvils
I have had good luck, albeit it took almost a year for the first one and another 3 months for the second, on link removed. I just kept trying and eventually was lucky enough to be the first one to say "mine". The last one was a gold mind of tools from a lifetime of automotive body work.