

pre6422hornet
-
Posts
36 -
Joined
-
Last visited
Content Type
Profiles
Forums
Articles
Gallery
Downloads
Events
Everything posted by pre6422hornet
-
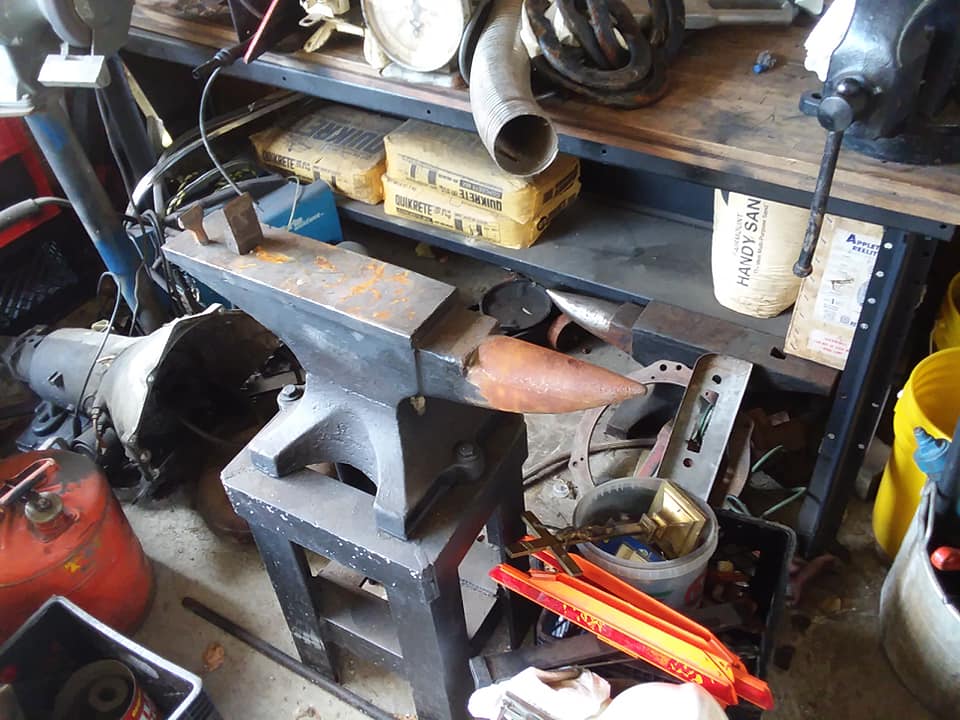
Trying to go look at this one tonight or tomorrow... Looks to be a Fisher, but not 100% sure. The seller says it is a 175 pounder.
-
What did you do in the shop today?
pre6422hornet replied to Mark Ling's topic in Blacksmithing, General Discussion
Sorry about that. I didn't even realize it was in italics. -
What did you do in the shop today?
pre6422hornet replied to Mark Ling's topic in Blacksmithing, General Discussion
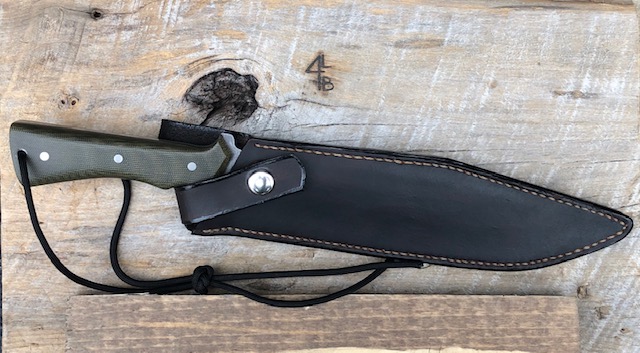
This is the first knife, albeit stock removal, to be finished since I fired up the new forge last week. 1084, 9" inch blade, .180 thick. Green canvas Micarta handle. I used the forge for the heat treat and I am really happy with it. No hot spots and there was zero warps out of the quench. A customer in Michigan ordered this for a feral pig hunt coming up at the end of September. Leather work by me as well.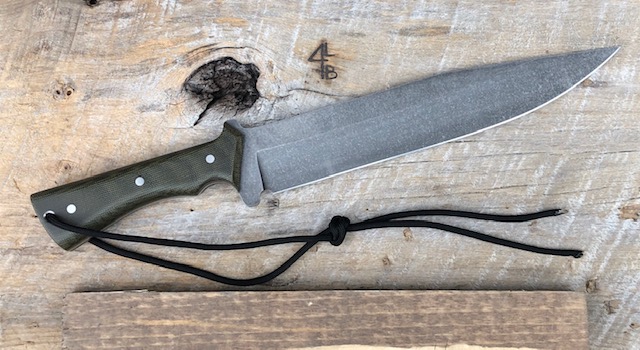
-
I might be way off on this but it looks like you used a 1.25x.75 Tee. Shouldn't it be a 1x.75?
-
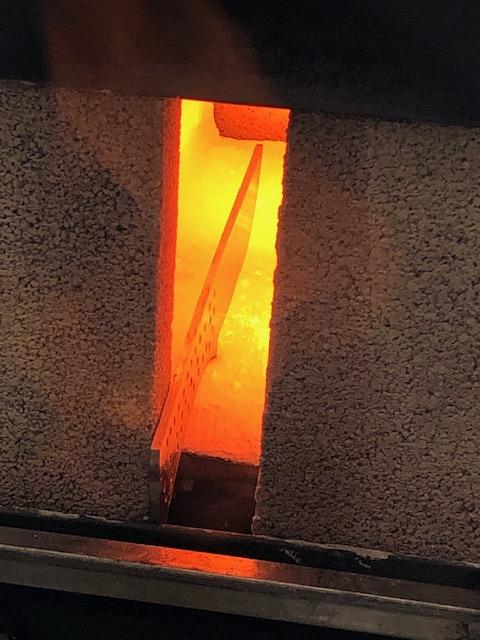
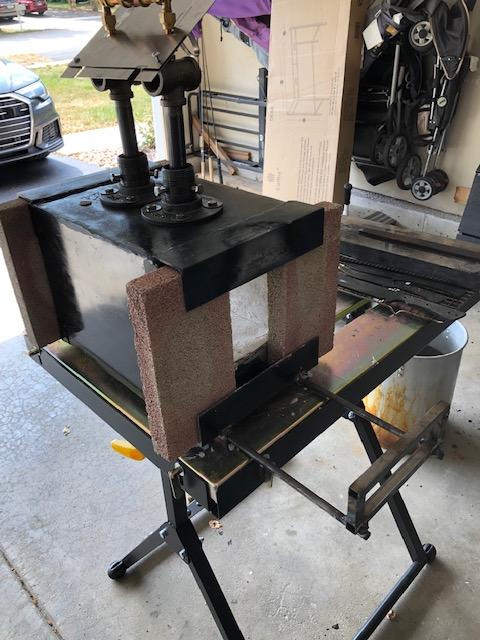
So two years ago I took the plunge and built a brick pile forge with a simple propane torch for a burner. I started making cleavers and hunting knives out of reclaimed sawmill blades of 8670 steel. While the brick pile worked for what I needed it for it was not big enough. Controlling hot spots was tough, especially with cleavers. I then started gathering more tools, an anvil, etc.. and wanted to dive into more traditional blacksmithing and forging knives. Read a ton off here and joined a month or two ago. Decided to go with a 12x5x5 internal dimension forge, so I can fit cleavers in when needed. I welded together 11 gauge steel together, welded on some brick door holders out of angle iron, and after messaging Frosty I had completely forgot about a sliding tool shelf. I scrounged up some 1/2 square tube and 1/2 rod and welded one on. Two 1/2" T Burners, two layers of 1" kaowool, two layers of Satanite, and a layer of Matrikote and she was ready to go. The little heat shield was just something to help divert the chimney effect on shutdown from my gas line, which is rubber for the moment. Tuning in the burners was easy. One was burning very well and a nice blue cone and the other was burning pretty green. I let it burn for a bit just to be sure and when it was still green I cut off 1/16 and tried again. Still green so I cut it down 1/16 again. This time it was perfect. Here she is running at 7 PSI. IMG_3141.MOV IMG_3142.MOV I heat treated some 1084 knives this morning ( .120 and .180). At 3-4 PSI the .120 was reaching non magnetic in 90 seconds and the .180 would reach it around the 4 minute mark. I noticed that the knives came out with zero to little warpage even after quenching, which is music to my ears as I struggled with the BPF and hot spots. Here is one of the .120's I can't thank all of you enough for the info and just wanted to share it with you all. I am very very pleased with the forge and can't wait to hammer some hot steel with it. I have rebar that will be practiced on.
-
I don't know the specific answer to your questions, but I can tell you I just finished an interior dimension forge of 12x5x5 with two one inch layers of wool, 2 layers of Satanite, and one layer of Matrikote and just this morning heat treated some 1084 (.120 and .180) knives. At 3 PSI I was getting to non magnetic state in 90 seconds on the .120 and three minutes on the .180. Plenty hot and efficient for what I am using it for currently and I am pretty sure when I am ready to try and forge weld, it won't be a problem. I have (2) 1/2 inch T burners.
-
I currently am almost done building my first forge. Interior dimensions after blanket/satanite/matrikote will be roughly 4.5 tall x 5 inches wide x 12 inches long. Frosty gave me some advice that I took and installed (2) 1/2" T burners instead of one 3/4" (thanks again Frosty!). I have not let the forge heat up fully yet as I just fired it briefly to set the wool after rigidizing. Today I buttered on the satanite and now she is quietly sleeping in the shop for a day or two. But from what I saw and felt, at only 7 psi and only kaowool, it was pretty xxxx hot after only running two minutes. Once I get her complete I will post up pics and how she runs. PS the reason for the taller/wider than normal forge is I make cleavers and wanted them to fit....
-
Thanks Frosty. I have been so busy with my day job and finishing 4 knives for orders I haven't had an opportunity to even start to assemble the forge. I have everything I need except some Kastolite 30 and a kiln wash, but I plan on contacting Glenn for some of both. Since I had everything to make the 3/4" Burner I did and lit it ( yeah outside the forge).. Holy xxxx that was amazing. I had my two oldest daughters in the shop, one holding the extinguisher in case dad blew himself up, and they were grinning ear to ear. I am gathering everything for two 1/2" burners and will go that route and I appreciate the insight and once you said it, the light bulb went off in my head. I will let you know how it goes. I did take an opportunity when I had the brick pile forge running on Monday during the normalizing/quench sequence to heat up some rebar and for the first time I was able to hit some hot steel on my 120 year old Trenton. That made me grin from ear to ear. What a feeling. I need to get this forge done and caught up so I can play some more. thanks again, Pat
-
Thanks Frosty! Yeah I figured small is better. I do not have a welder yet so I am going to be using the drill press and bolting together (4) 12"x9" pieces of 11 gauge steel using 1" square steel tubing for corner supports. Then two 1" layers of 8# Kaowool and Santanite finish to form a ovalish shape and unless my calcs are off it should be between 235-275. 12x5 is roughly the size. I figured I would not be going over the 350 mark so one 3/4 " T burner would be good. No plans at forge welding in the near future, just hammering out railroad spikes learning. Maybe I am thinking it wrong, but wrote everything down cause I am old school ( gramps ways of doing things rubbed off on me) and hope my math was correct. Please tell me if I am way out in left field on this. Just waiting on the Kaowool and rigidizer to get here but I have everything else here ready to drill/tap/assemble. thanks again guys! Learning all this cool stuff that steel does when heated is fascinating.
-
Thank you Thomas! We actually lived in Rio Rancho back in 2014-1015. Gorgeous weather and scenery.. We loved the mountains and I grew pretty fond of Green Chile. To this day I still ask for Enchiladas Christmas and everyone back here looks at me funny!
-
Hey everyone. Pat here... Dad to four amazing daughters ( all under the age of 13) and besides being a full time Automotive Executive for the past 19 years ( 28 years total in auto), and owner of two clothing boutiques with my wife, I decided two years ago to start making knives but not because of forged in fire. My grandpa was a machinist for 50 years and taught all of us grandkids how to build stuff, use a micrometer, etc... He made his own filet knives and tools naturally and I have always been good with my hands ( make rifle stocks too). I decided to give knife making a try when looking for a cleaver for kitchen use. I used some old 8670 sawmill blades and crafted one with some Brazilian cherry I had laying around. It worked well, looked okay, and the edge held up so when a friends wife asked for one as a gift, I had no idea that one cleaver would start a side business/hobby that would consume all my free time at night and cause me to dump $$ into belt grinders, steel, wood, drill press, wood band saw, metal band saw, clumsy brick forge, etc... 30 knives sold later and I purchased my first anvil ( 100 year old Trenton) and now I am upgrading my forge. I have all the materials and I have been reading on this site for the past year while I learned stock removal ( still a TON to learn). IF I could quit my job and afford insurance and do this full time I would but unfortunately our two youngest have Epilepsy so the med bills are pretty intense. Thanks in advance for all the great info I have read or will read and yes if you are into old Winchester boltaction rifles.... I have a thing for Pre 64's... Oh yeah.. building 250 ish cu inch forge with a Frosty T burner. Thanks Frosty!