BK02
-
Posts
13 -
Joined
-
Last visited
Recent Profile Visitors
88 profile views


-
Going to try making my first hammer here soon. We’ll see how she holds up. Not exactly sure what makes it seem weak, but we’ll see what happens. I will eventually put 1/4” wall tubing for the legs, mainly to help the stand be more bottom heavy. I do not see a point to thicken the 1/2” plate any, because with how it’s constructed, theres no reason for anything to bend. The failure would almost have to be caused by shearing since the legs are so close to the base of the anvil. I will probably widen the stance of the legs out to closer to 20 degrees. I won’t ever tip it over during use as is, but I think one of my dumb dogs running into it hard enough could cause an issue lol
-
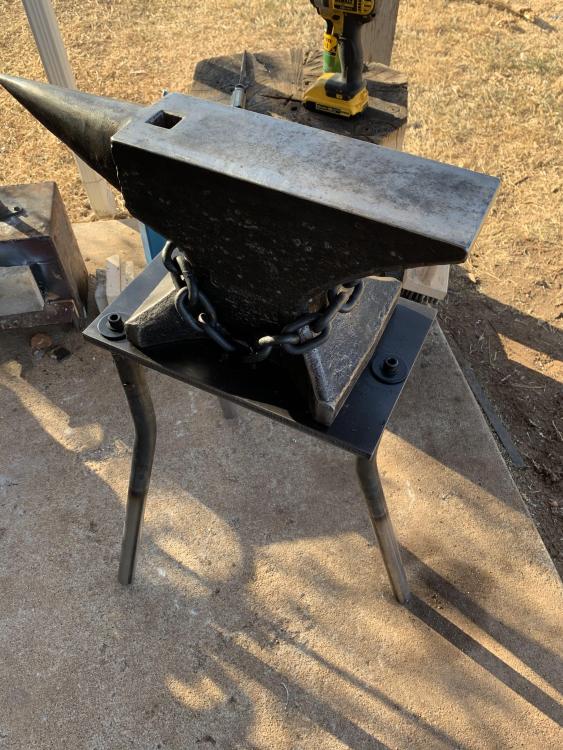
I was worried about the stiffness as well, and am looking to put bracing on the legs, but I spent an hour forging on it earlier, and I can tell it’s working a better than the stump was. Ring is completely gone, and seems to have slightly more rebound, and I can tell the force is going directly into the concrete below, more so than with the hard maple stump. I will probably upgrade to the 1/4” wall legs eventually as it does have some flex torsionally, but that isn’t a massive concern right now. The goal was just to have a somewhat easily taken down and portable stand so I can travel and move it around easily.
-
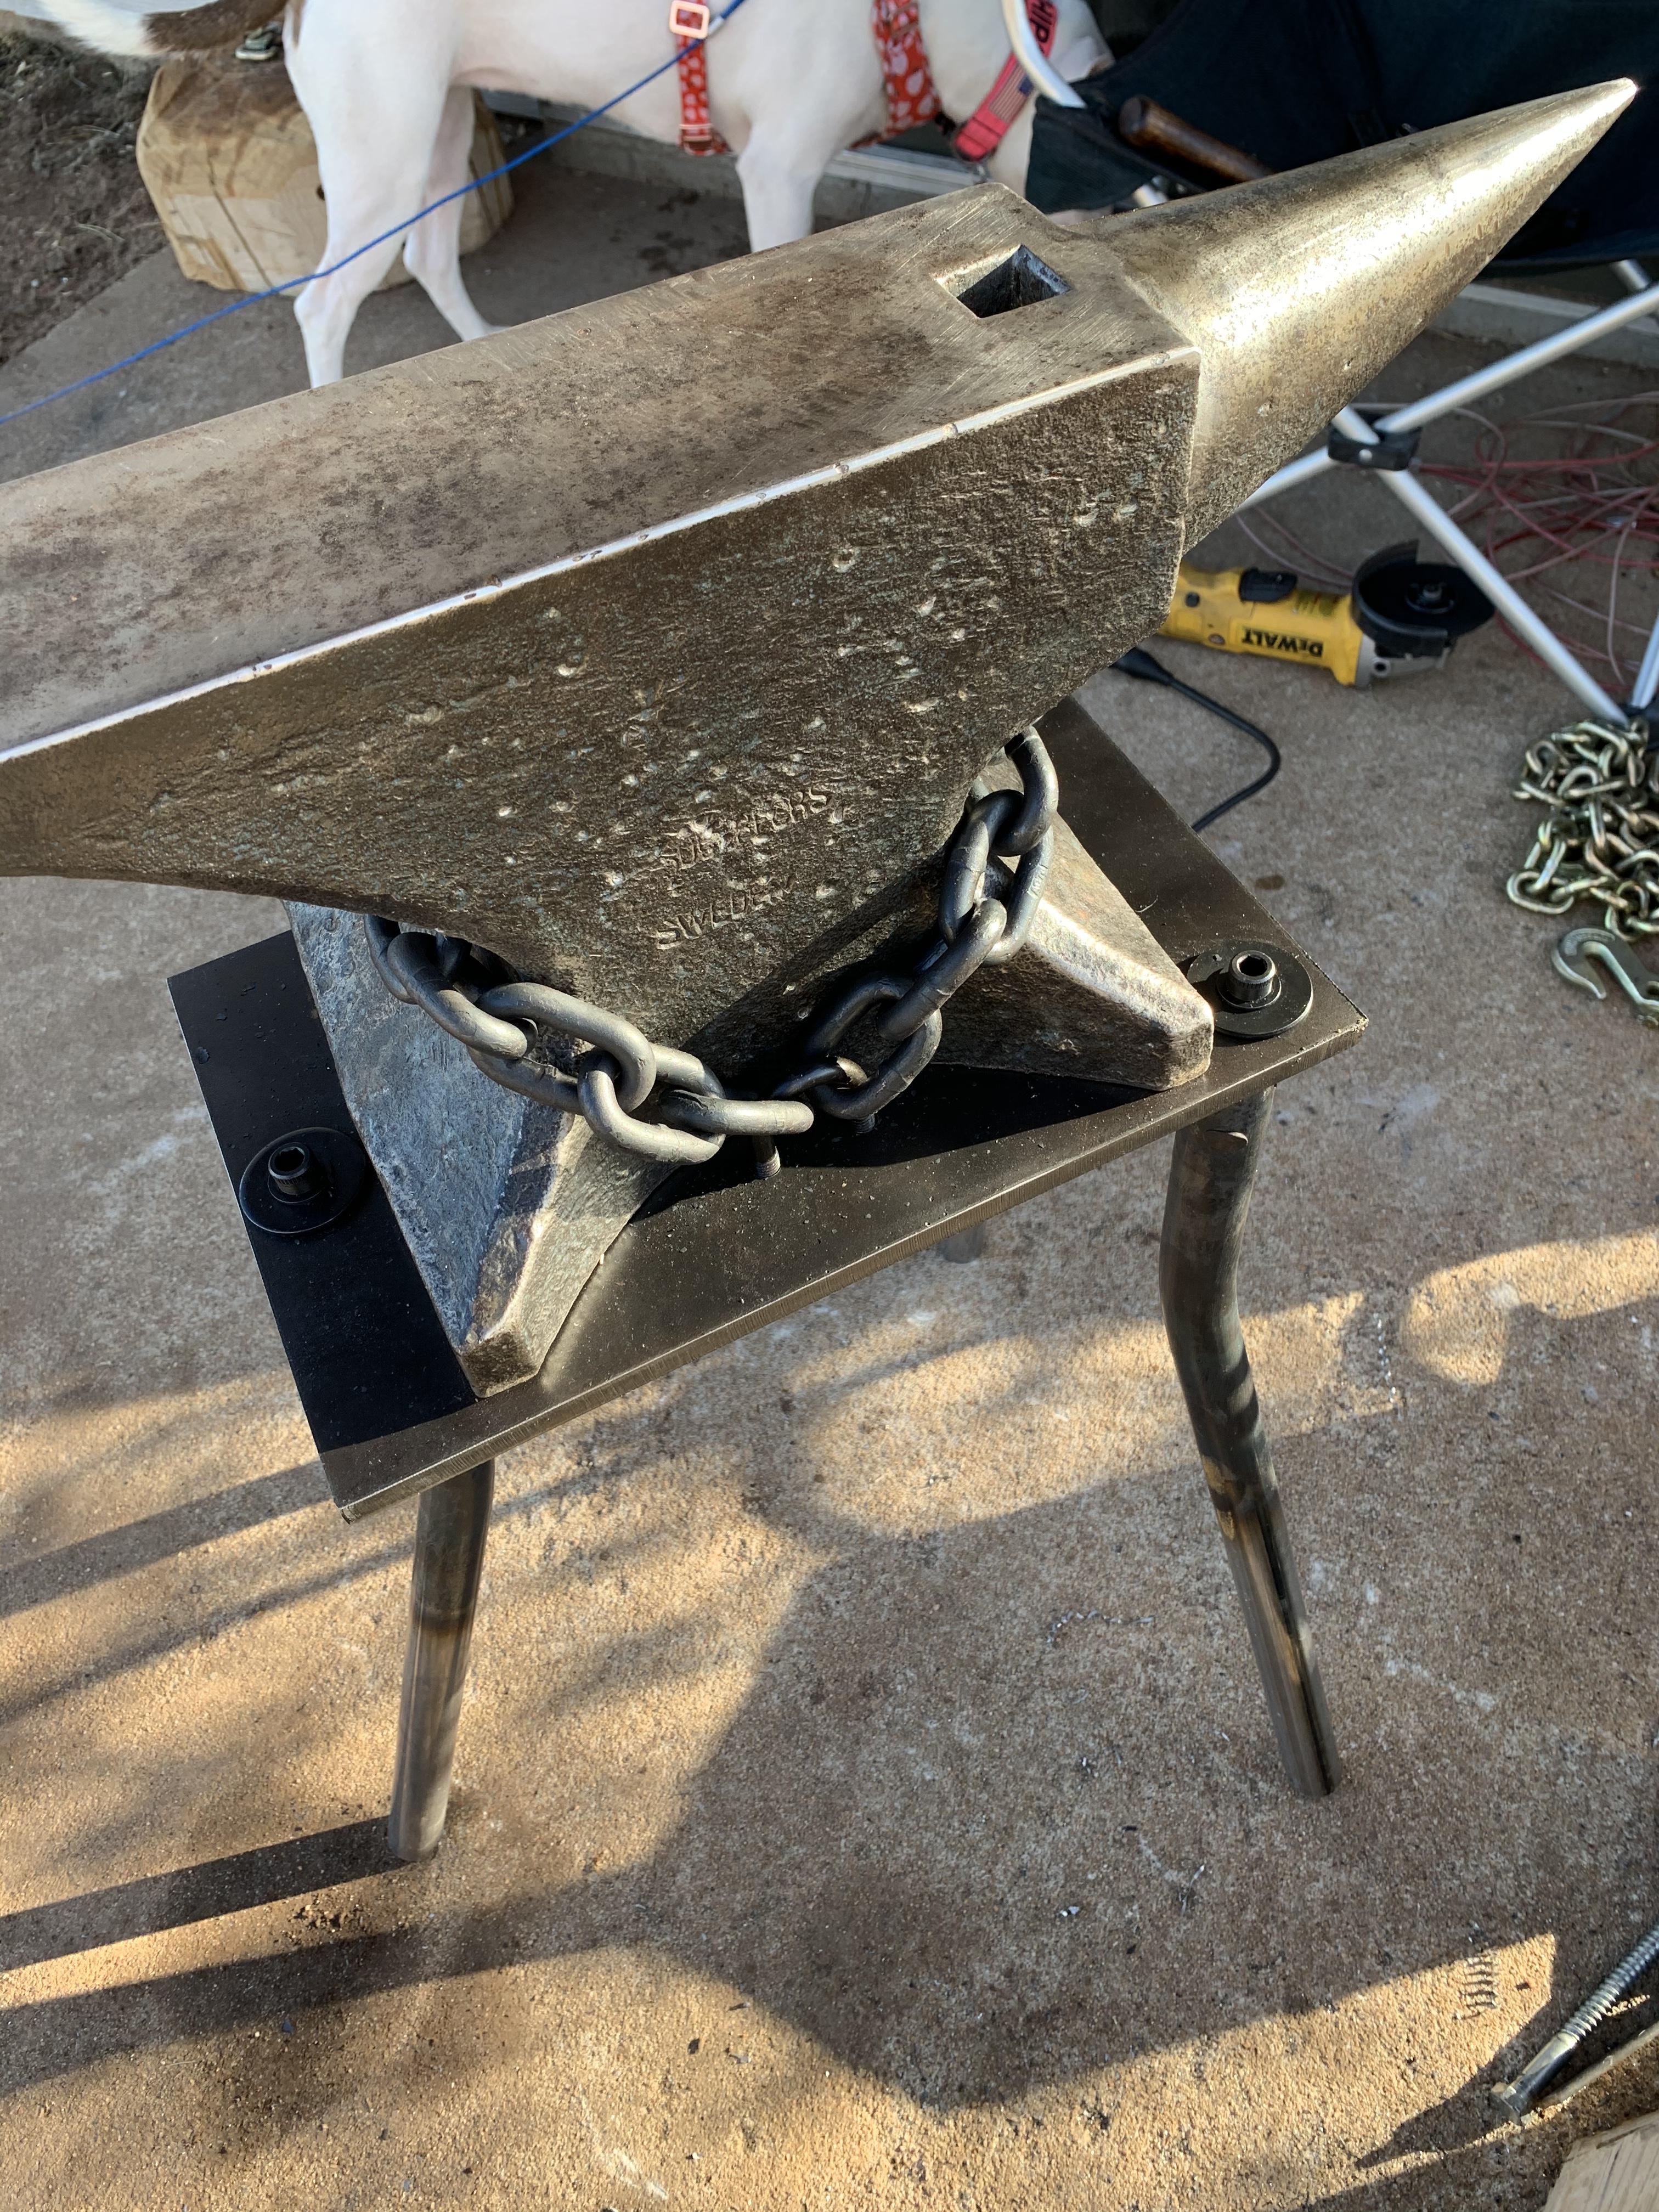
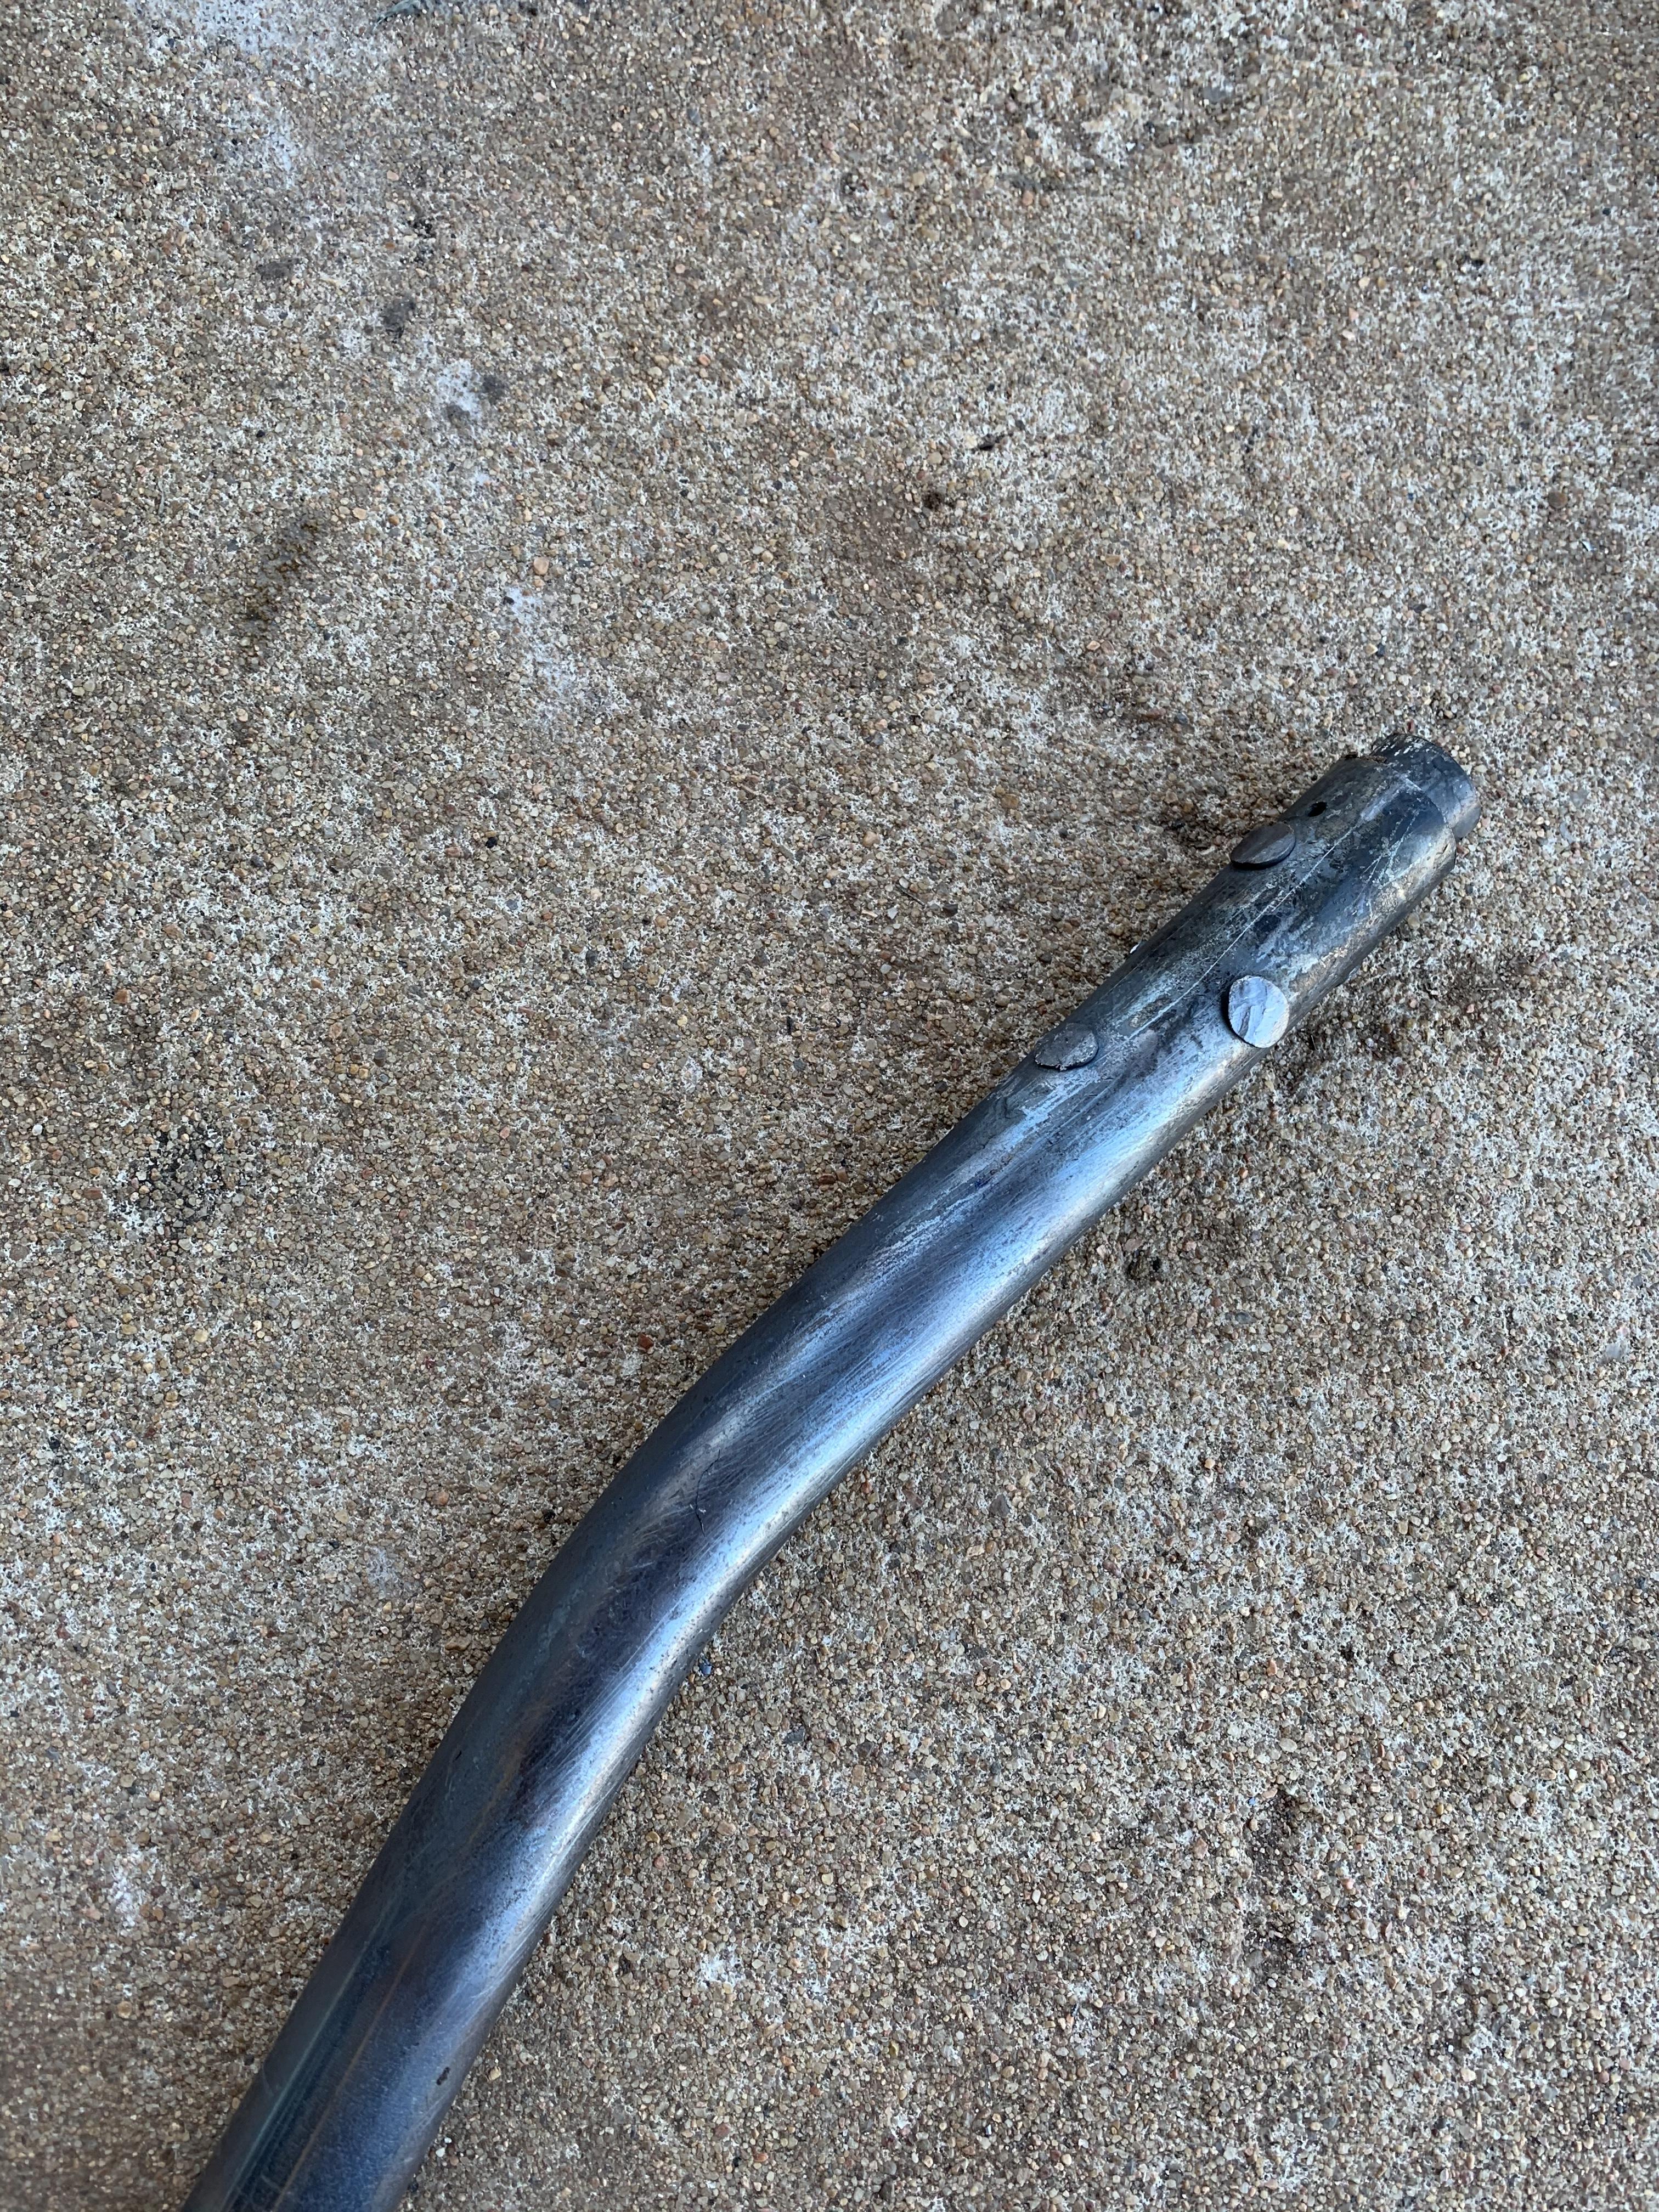
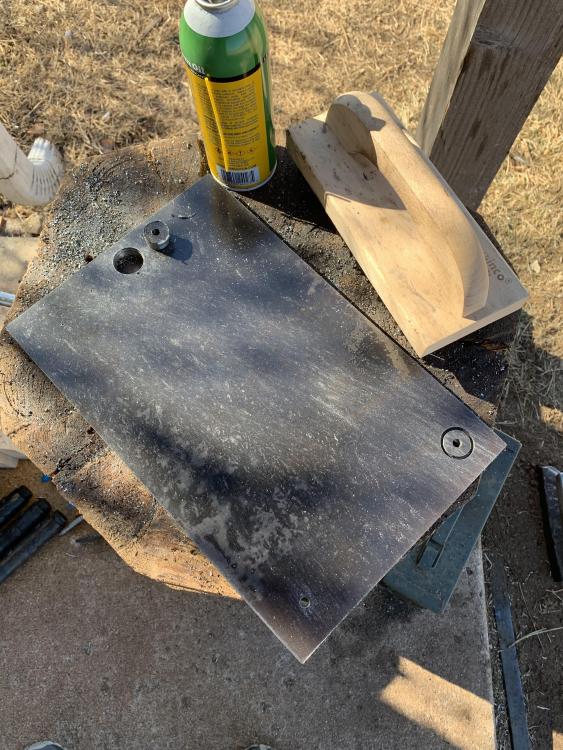
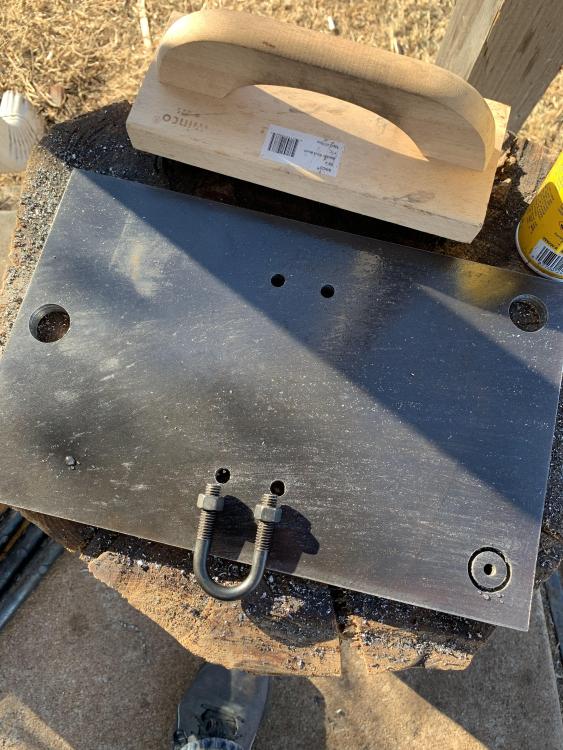
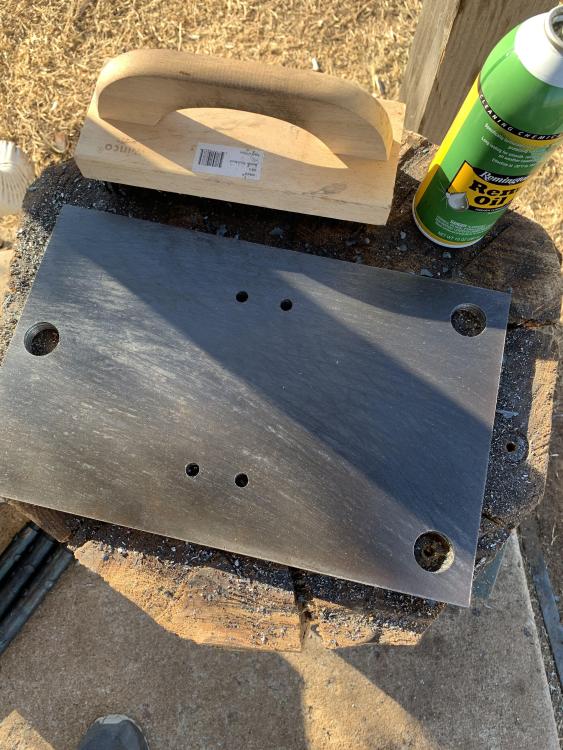
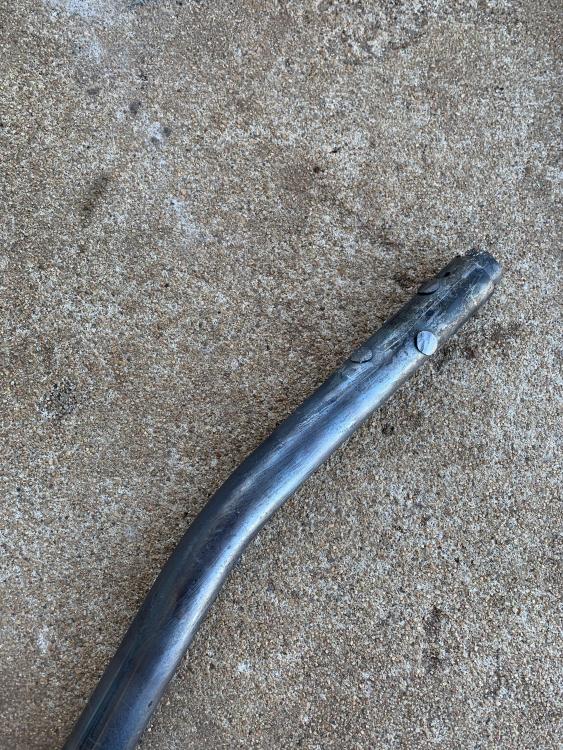
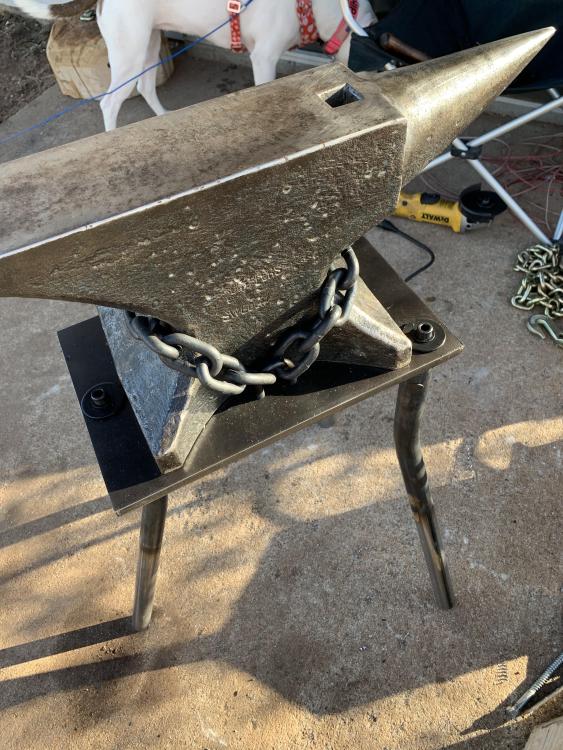
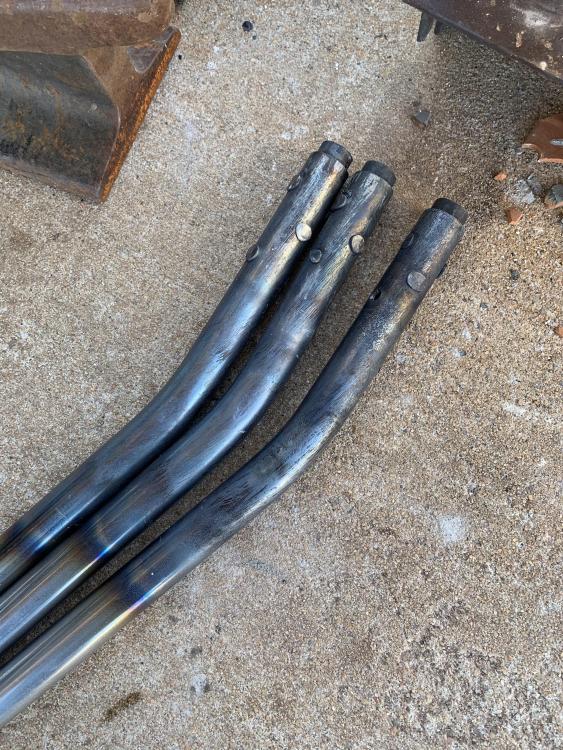
I made something I’ve never really seen on here. It’s a steel anvil tripod with no welding. Only tools I used was a Dewalt drill, and my forge and anvil for the rivets. Very simple to make, and very cost effective, I think I spent less than $150 for all the materials including the 3/8-16 tap and corresponding drill bit. Materials Used: 1-1/4” OD .120 wall mild tubing(would recommend 1-1/2” OD .250” wall for anvils much heavier than 100lbs)- Legs 1” OD 1144 rod- Threaded rod insert for legs 1/4” 4140 rod- Rivets for legs 3/8-16x1-1/4” Grade 8 flange socket head screw- leg retention method 1.625” OD 3/8” washers- leg retention method Black oxide 3/8x16 U bolt 1” ID- Chain tensioning 3/8” chain- anvil retention 1/2” mild plate(would recommend 5/8” or 3/4” for anvils much heavier than 100lbs)- anvil mounting base How I constructed it: The legs I cut the 1144 rods into 4” lengths since I ordered a 1’ length. Then, I drilled and threaded the rod for 3/8-16 bolts. Once that was done, I drilled the holes in the leg and 1144 rod for the 1/4” rivets. To do this, I had about .450” of the rod protruding from the leg tubing so it would countersink into the base for a better fit, while still allowing the bolt to be only pulling the leg material into the base.(different thickness plates will require different lengths protruding) To keep everything tight so nothing moves will I am drilling, I just clamped it in the vise tight enough so the rod would not shift. After I drilled one hole, I put some 1/4” rod in the hole to make sure everything would stay lined up. Next I put 2” length of 1/4” 4140 into the forge(3/8” protruding on either side for the 1.5D rule for rivet heads). I started the rivet on the first heat, got the other two started, and then put the whole assembly in the forge and got it hot enough to finish all 3 rivets in one heat. After all of those were assembled, I bent the legs. Nothing too this part. Just got the section below where the 4” rod ended a little above a dull red heat, clamped the end in the vise, and bent them all to the same angle, about 15 degree. Immediately after the bed was completed, I took it to the anvil and hammered down where the bend was to make sure there was no folding or creases happening on the tubing. The base The base on mine is 1/2”x9”x14” mild steel. Every anvil will require slightly different dimensions, so this part is most depending on the anvil you’re wanting to mount. If you are using 3/8” chain, the U bolts should be about 7/16” away from the side of the anvil, to allow room for the 3/8” chain to fit in between there. You’ll have to cut two pieces of chain, length depending on how large the base of the anvil is. Mine required 9 links per piece to reach around to the U bolts equally. Start with more than you need, and you can cut links off as you go to get the right length. Assembly is very straight forward. You bolt the legs to the base. I find it to balance best with the single leg pointing straight out from the horn or heel, and the two legs that are together pointing almost straight out from the side, this will prevent it from easily being pushed over. (If you are making the legs longer than mine(24”), I would make the bends closer to 20 degrees to add stability) When you’re securing the anvil to the base with the chain and U bolts, make sure to tighten the U bolts evenly, so the chain is tight. Once you think it’s tight, tap on the chain to make sure all the slack is out of it, and it’s all the way against the anvil, and then tighten them a bit more. I will be dressing the edges and corners of the steel plate to make it less sharp and more appealing to the eye, and would recommend others do the same. I will also probably add a couple loops for tongs and hammers. Hopefully this helps anyone who doesn’t have a welder, or wants an easily disassembled for travel stand. I am very impressed with the rigidity of the .120 wall tubes, but I think .250” wall would work a little better since it would be more stiff and add more weight to the bottom end of it. I will be adding sand to my legs to further dampen sound and add some weight. Bryce


-
Just need to round the sharp corners. I will make a full detailed post of the materials and measurements used to make this. Long story short, very stiff for being bolted together, and makes my Sodorfors ring almost non-existent.


-
Yeah she’s nice. Just forged out an h13 hammer eye punch. It laughed at the h13. I haven’t forged anything else on it yet, and it isn’t even properly mounted yet, but it moved h13 like my 100lb Holland moved 4140. Even did some pretty “cold” forging to clean it up a little before air hardening. Not a single mark on the anvil, but the face of my hammer did have some marks from hammering the h13. Really impressive. I’m building a no-welding-required steel tripod stand. It should be pretty interesting and work well. I’ll post pictures and an explanation in that area of the forum and maybe one here.
-
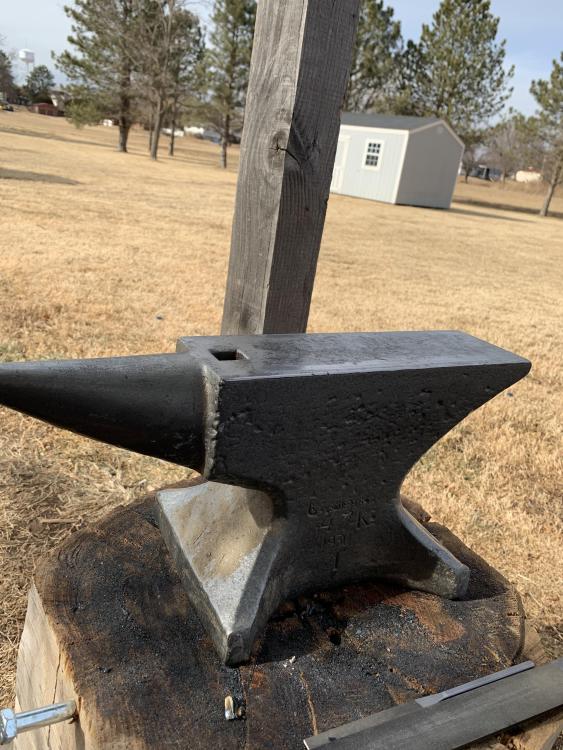
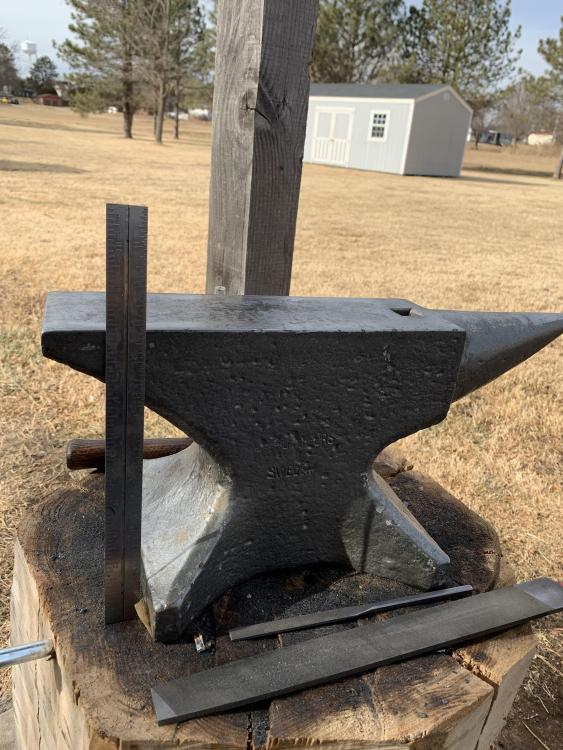
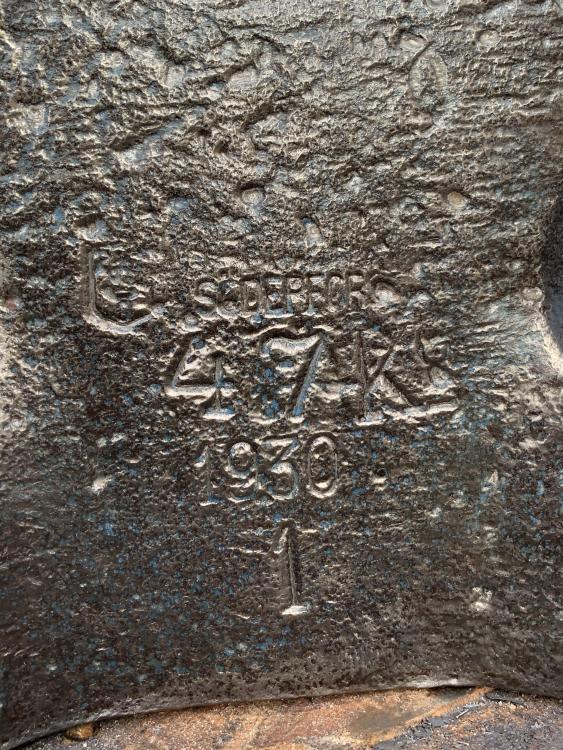
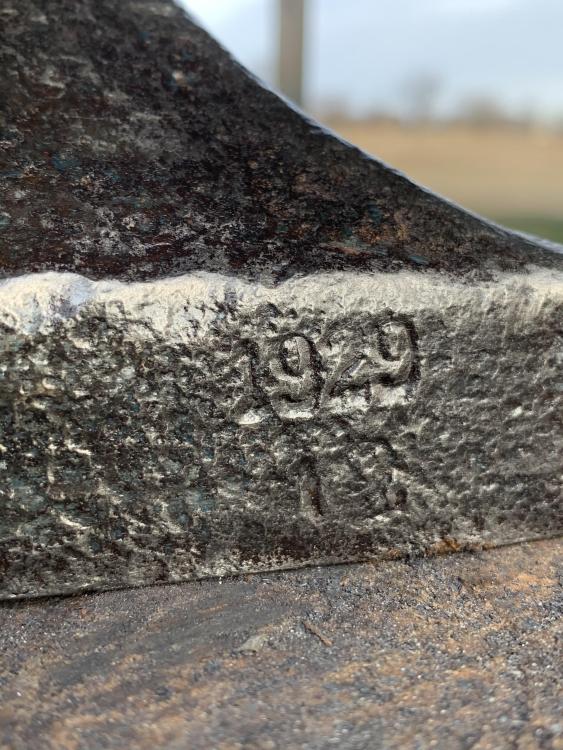
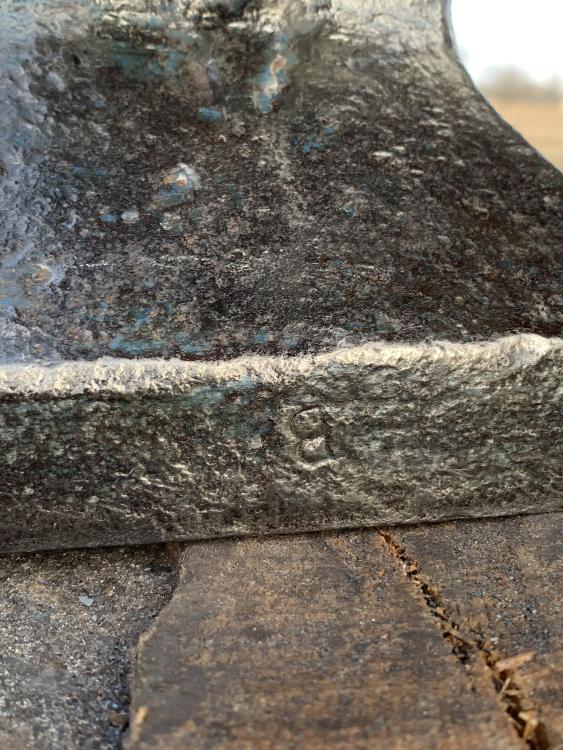
Did you notice the 1929 with what appears to be a 12 underneath it? Someone on the anvil group on Facebook said it is probably a New Years anvil. Never really heard or seen that. But the 1930 with a 1 under it, makes me think that he may be correct? Any ideas? I thought you would Frosty. It’s going to be my main anvil for now, and when I get a bigger area to work, I’ll get a bigger one and put this one on traveling duties. I’m really impressed with the quality. It really is as hard as you say, harder than the Holland I just sold.
-
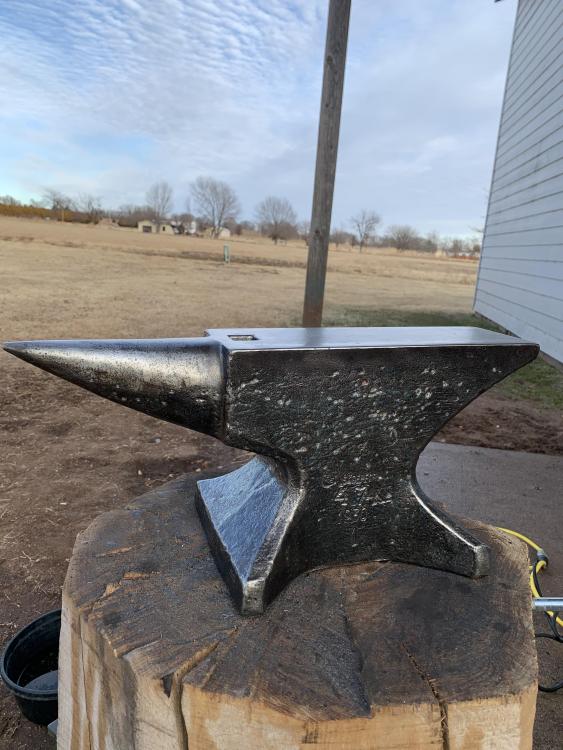
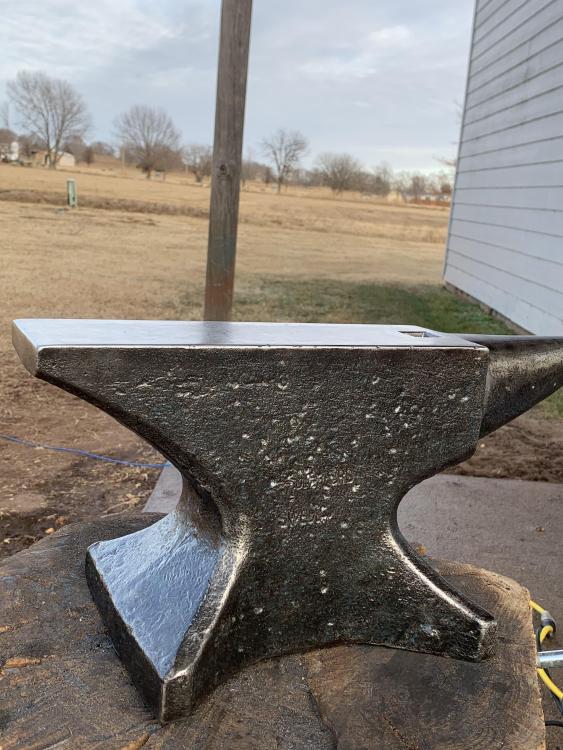
I thought everyone would like to see my 47kg sodorfors I just received a couple hours ago from Emerald Koch from Austria. I thought it looks awesome with the paint...after a cleaned it off with a wire wheel and added a coat of tung oil, I was blown away by the beauty of this anvil. It’s the most beautiful 100lber I’ve ever seen, I could be biased, but I don’t care. I think Frosty will appreciate this, as while I was waiting for this anvil to arrive, I was up late everynight reading all the forums about soderfors and he was always jealous of everyone else’s lol. Can anyone give me info on the 1929 stamp that’s on the base? Seemed weird since the date was 1930.