sfeile
-
Posts
358 -
Joined
-
Last visited
Content Type
Profiles
Forums
Articles
Gallery
Downloads
Events
Everything posted by sfeile
-

What did you do in the shop today?
sfeile replied to Mark Ling's topic in Blacksmithing, General Discussion
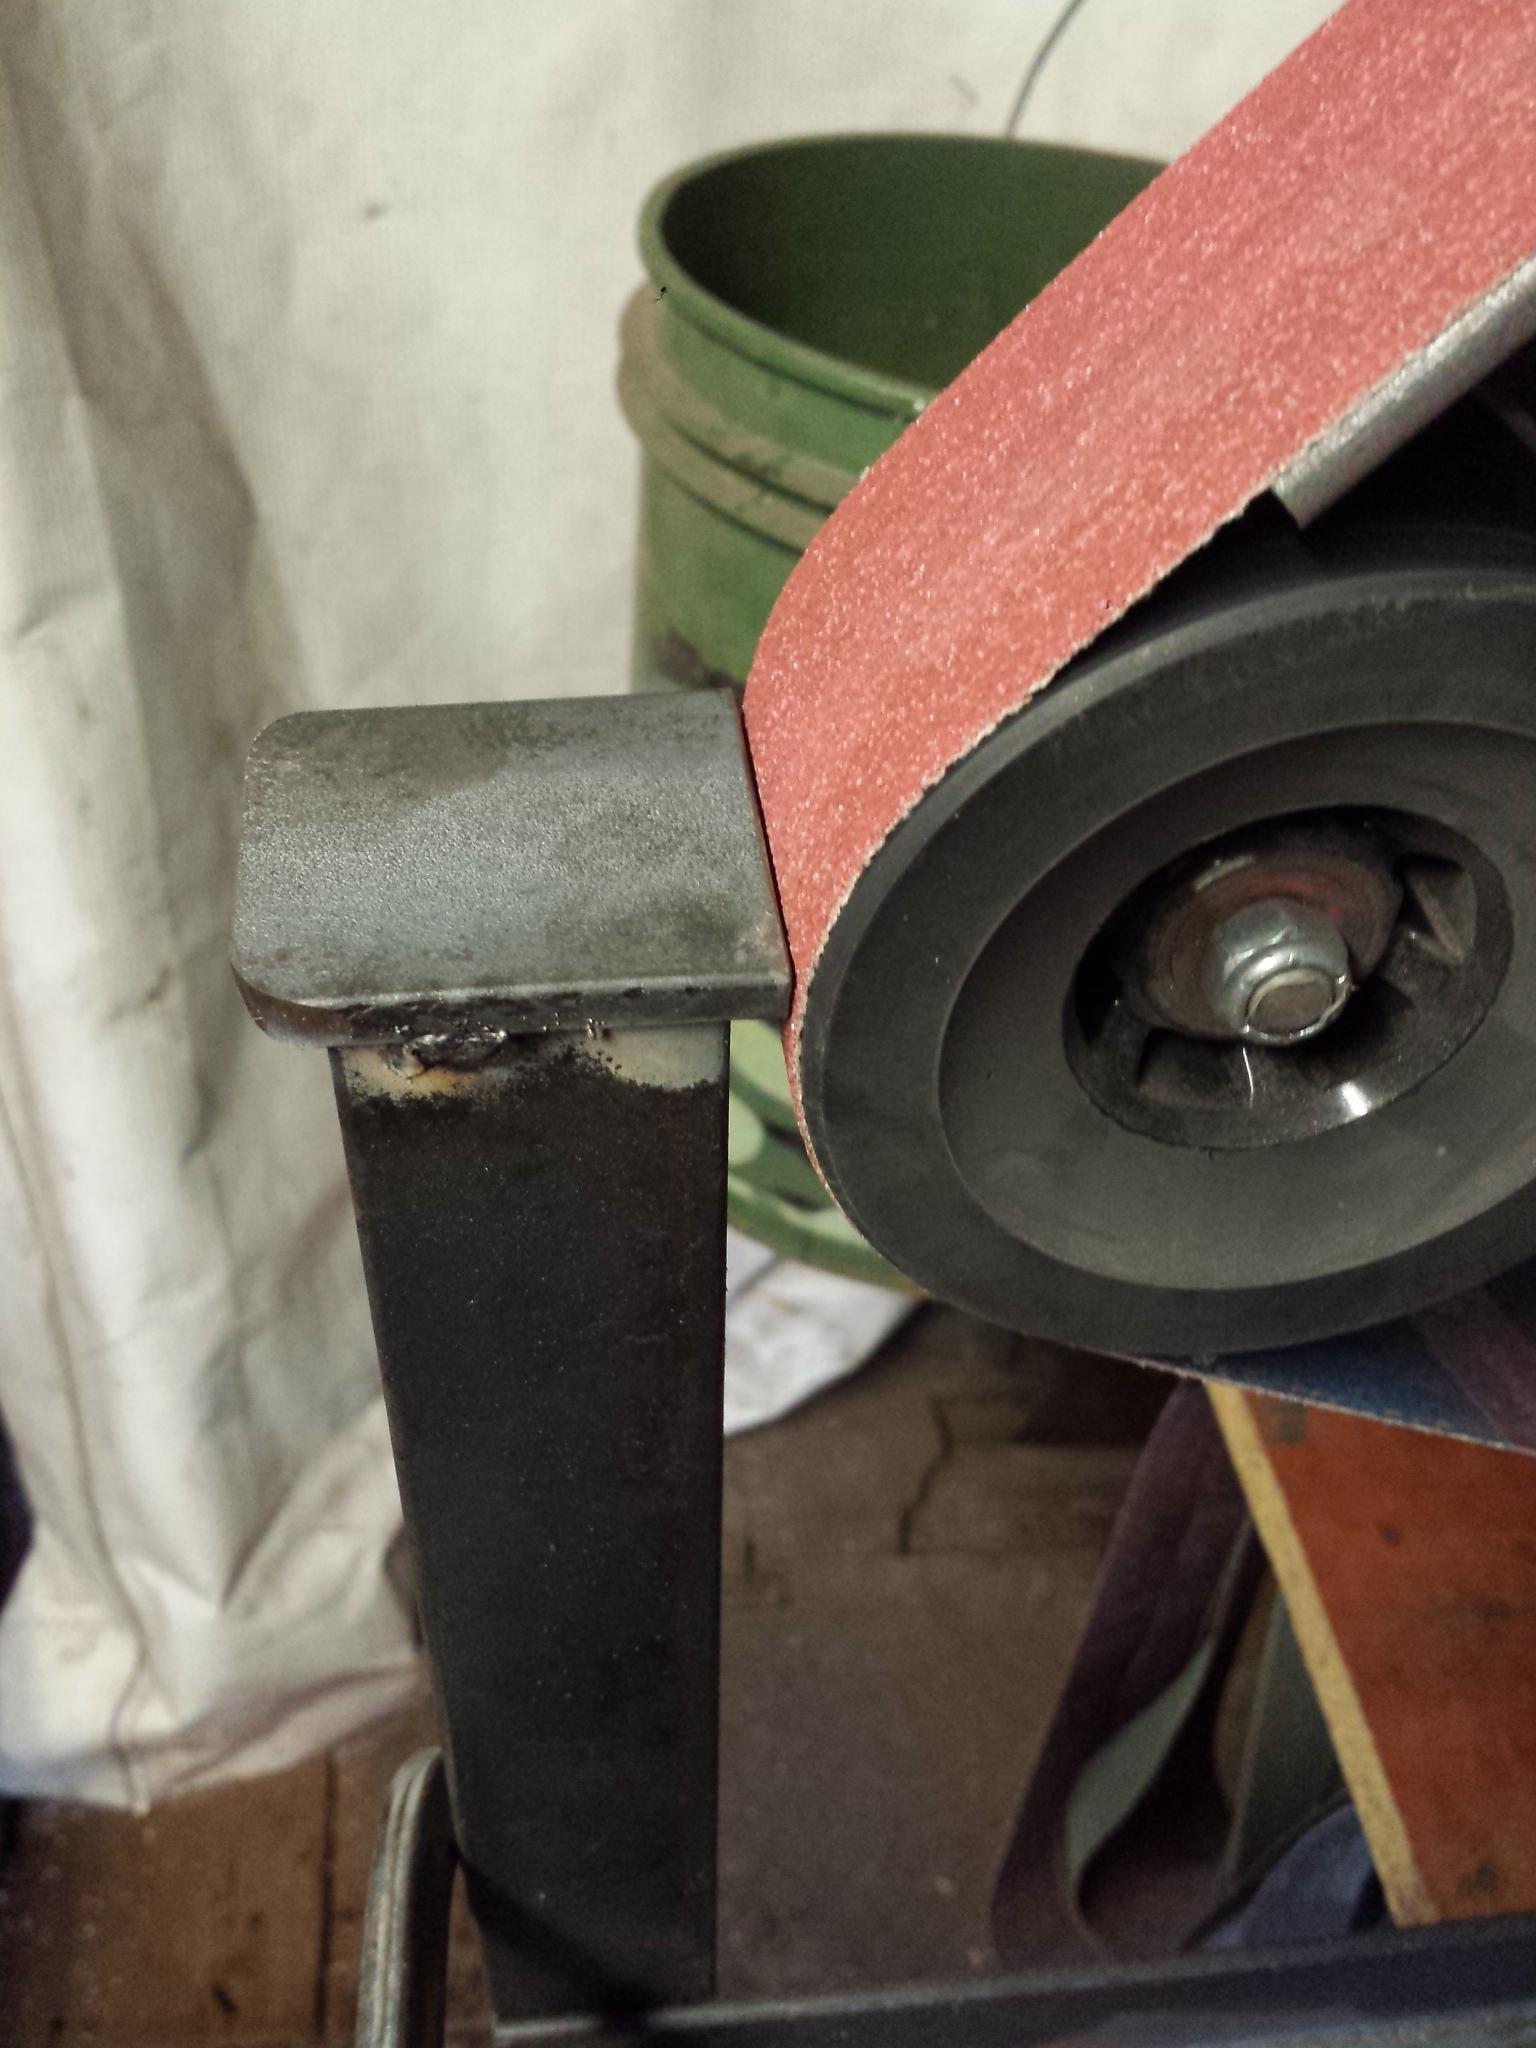
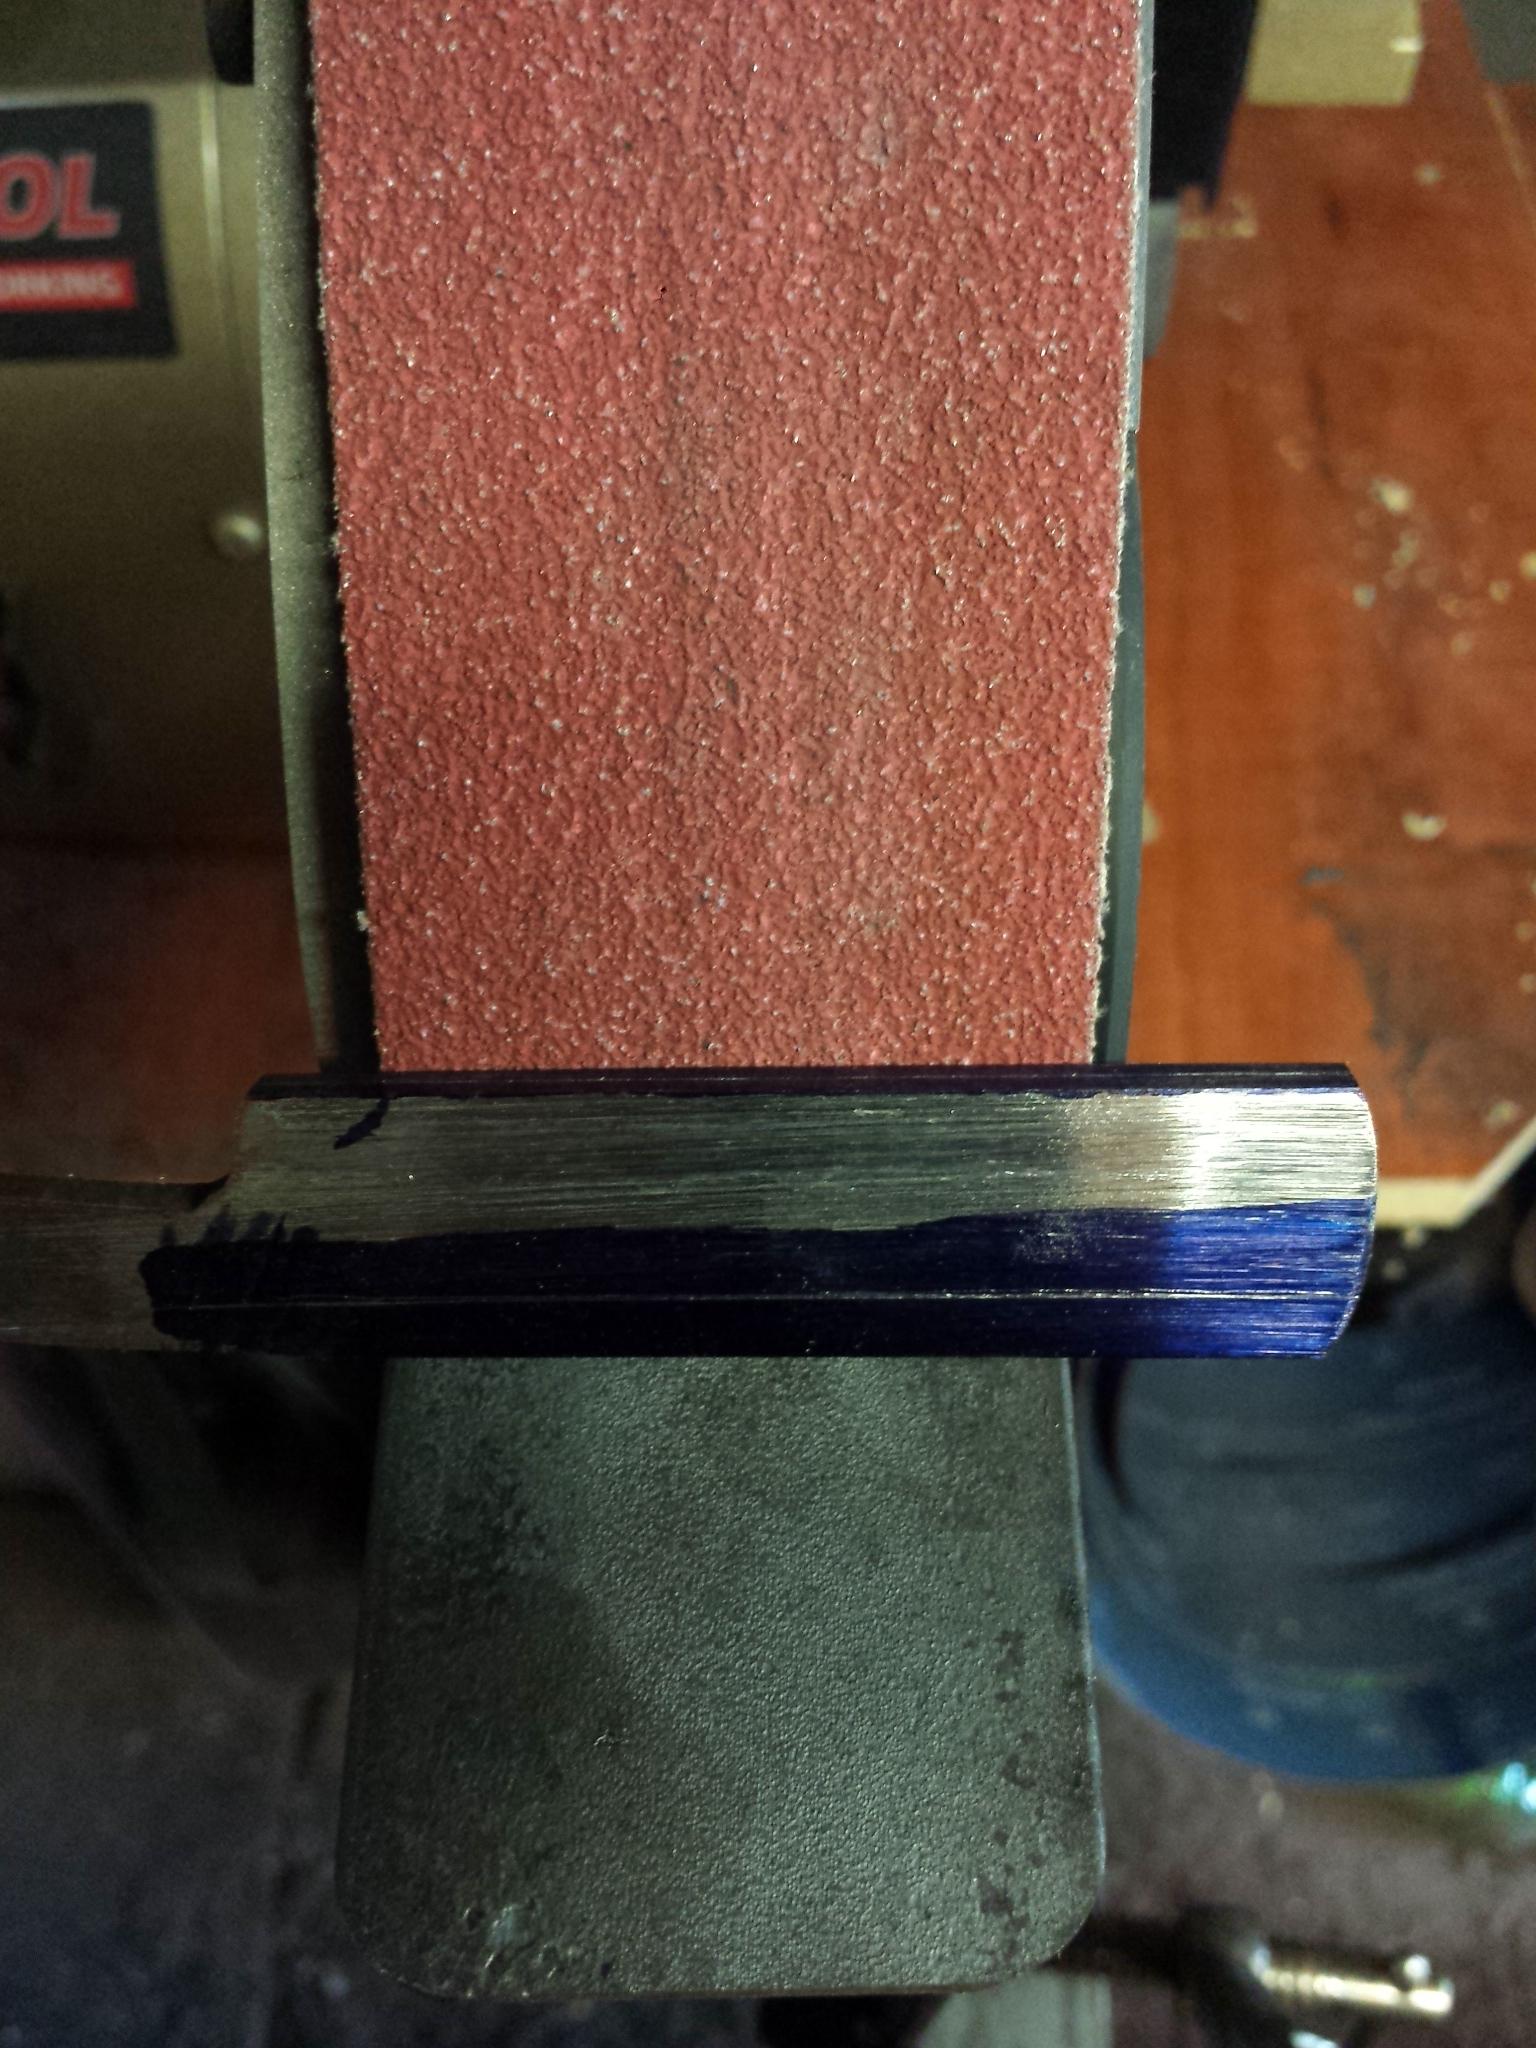
I made a basic tool rest for my belt grinder today and started putting a hollow grind in a straight razor. It's still too thick, even for heat treating, but it was about all I could get done before the mosquitoes carried me off. They were bad today for some reason.

-
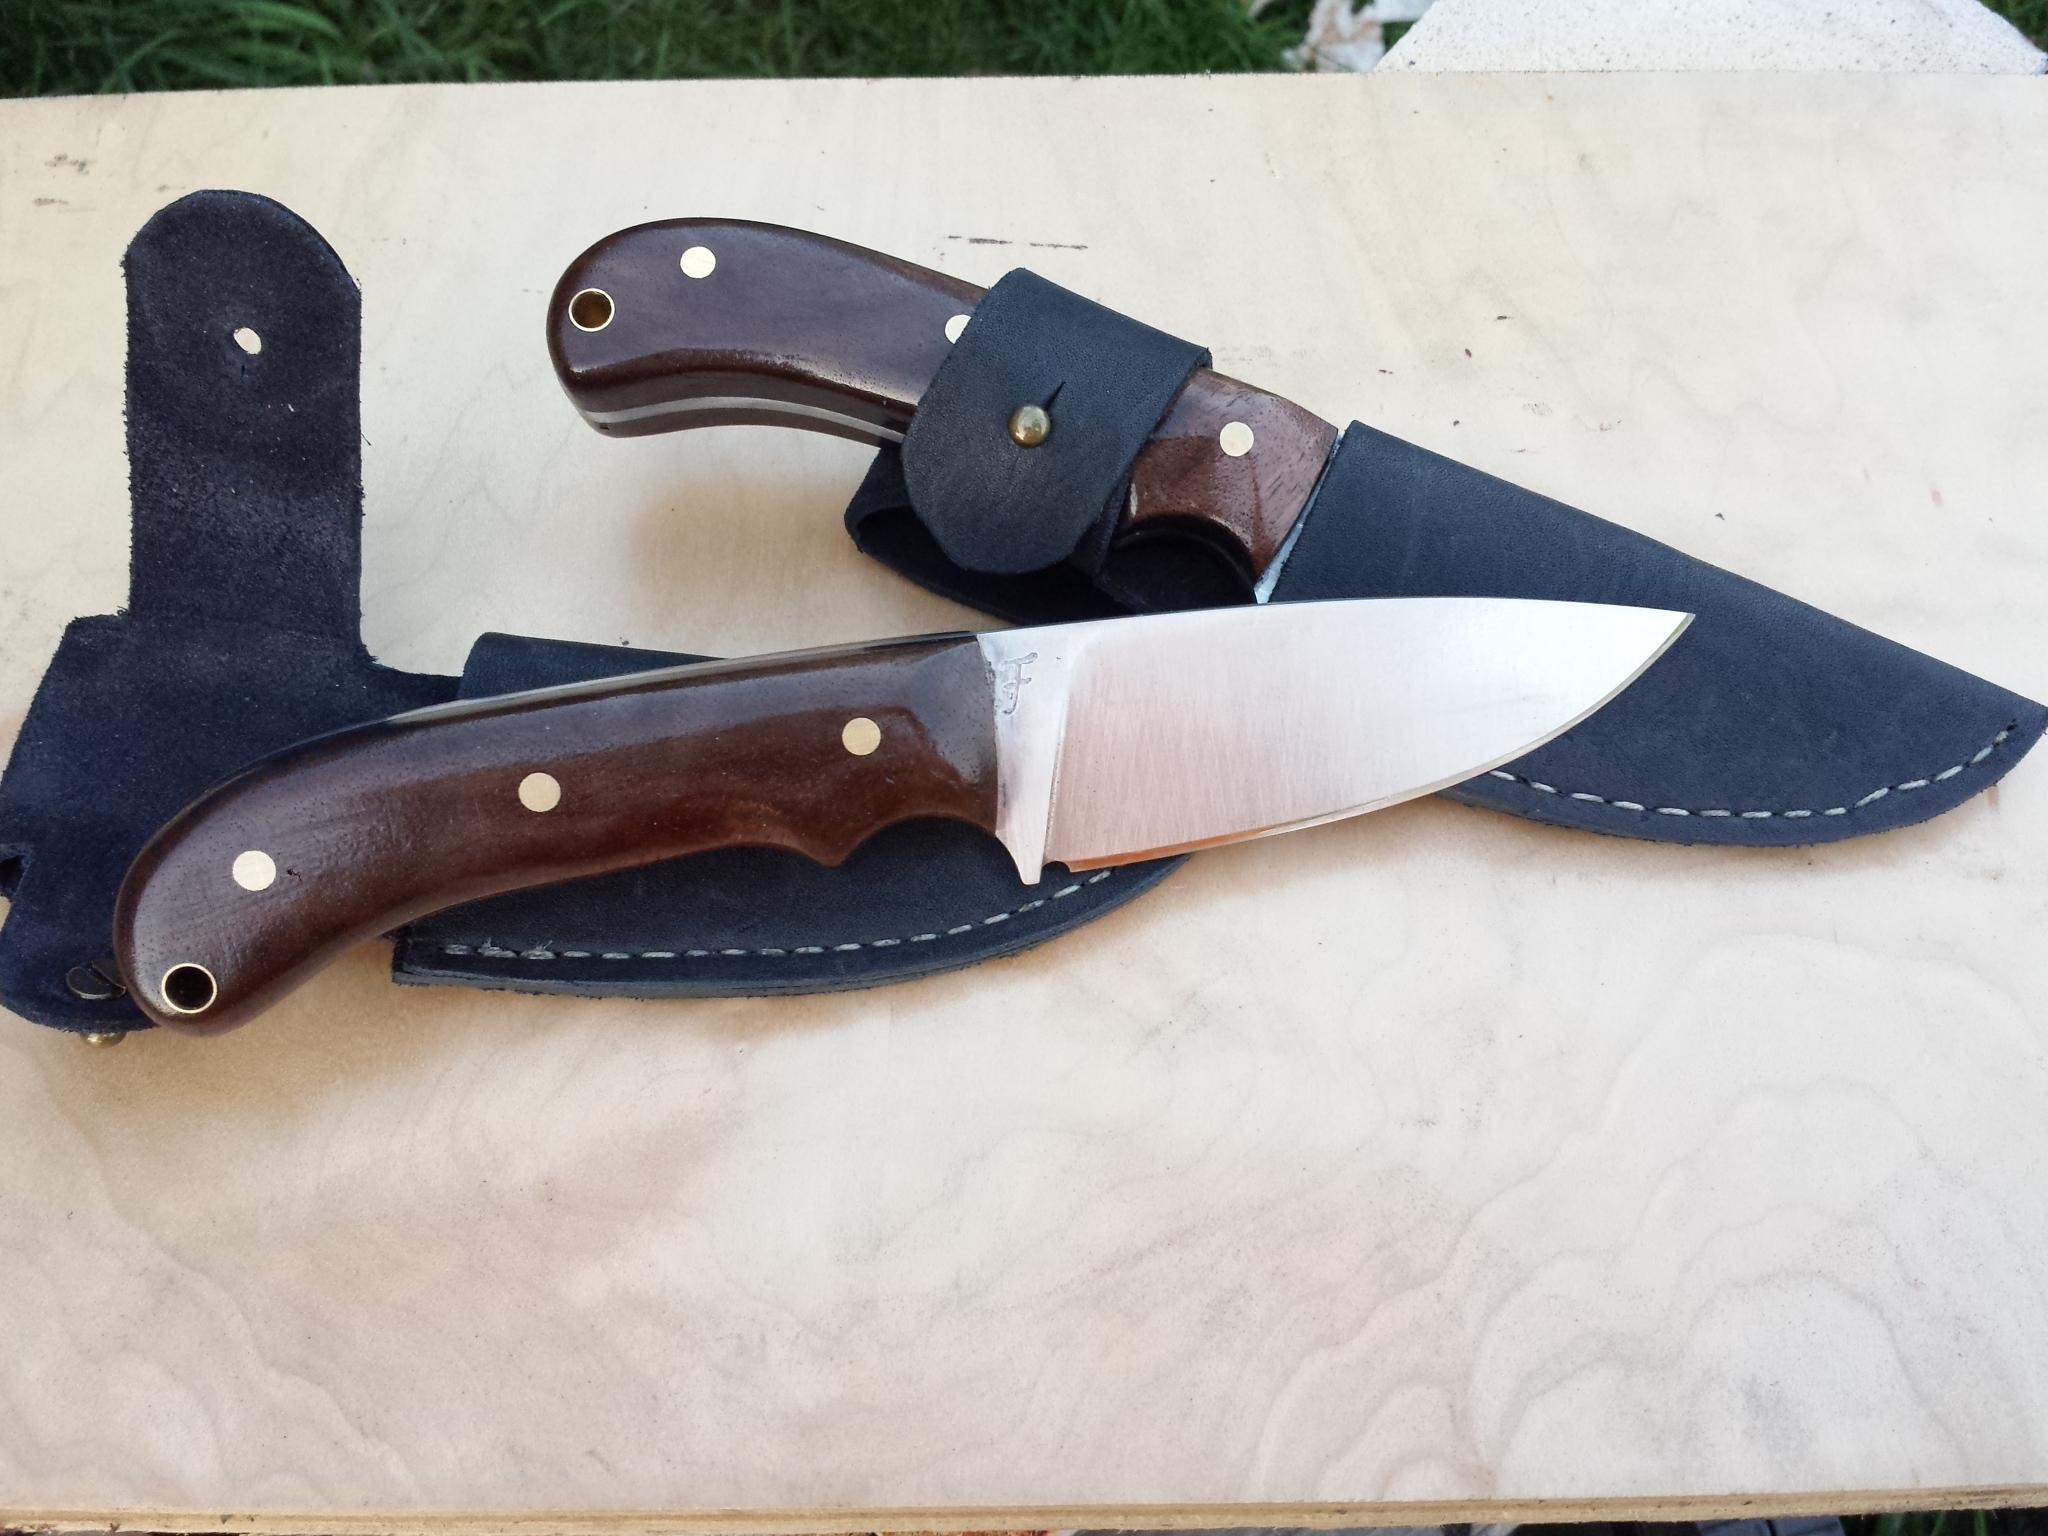
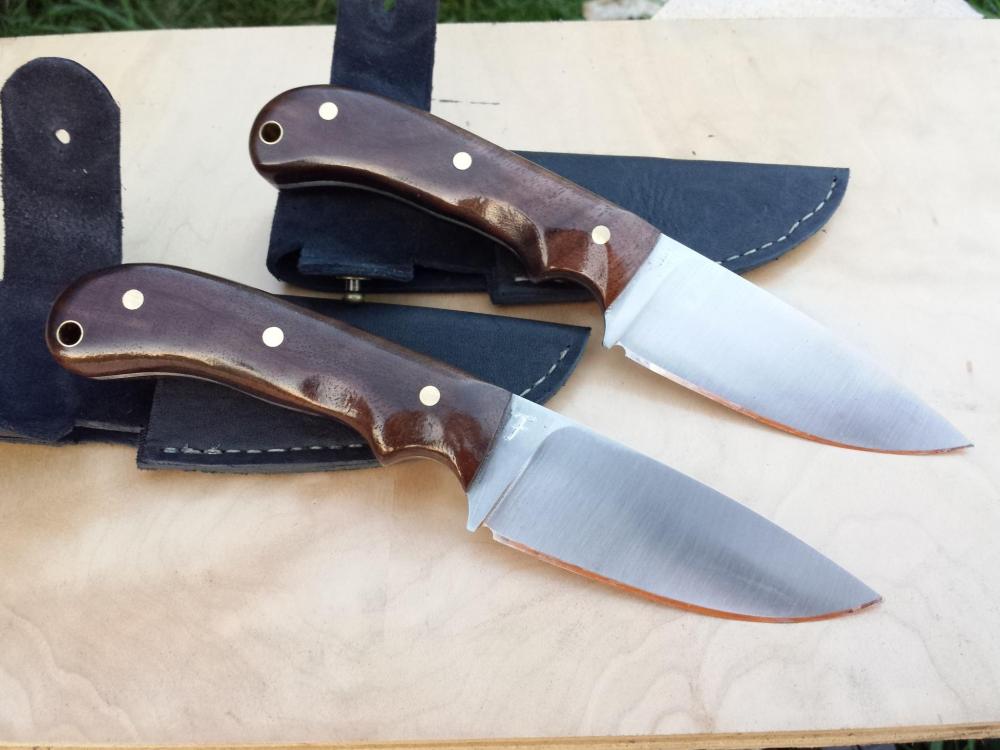
Got a couple more done.

-
Very nice work!!!
-
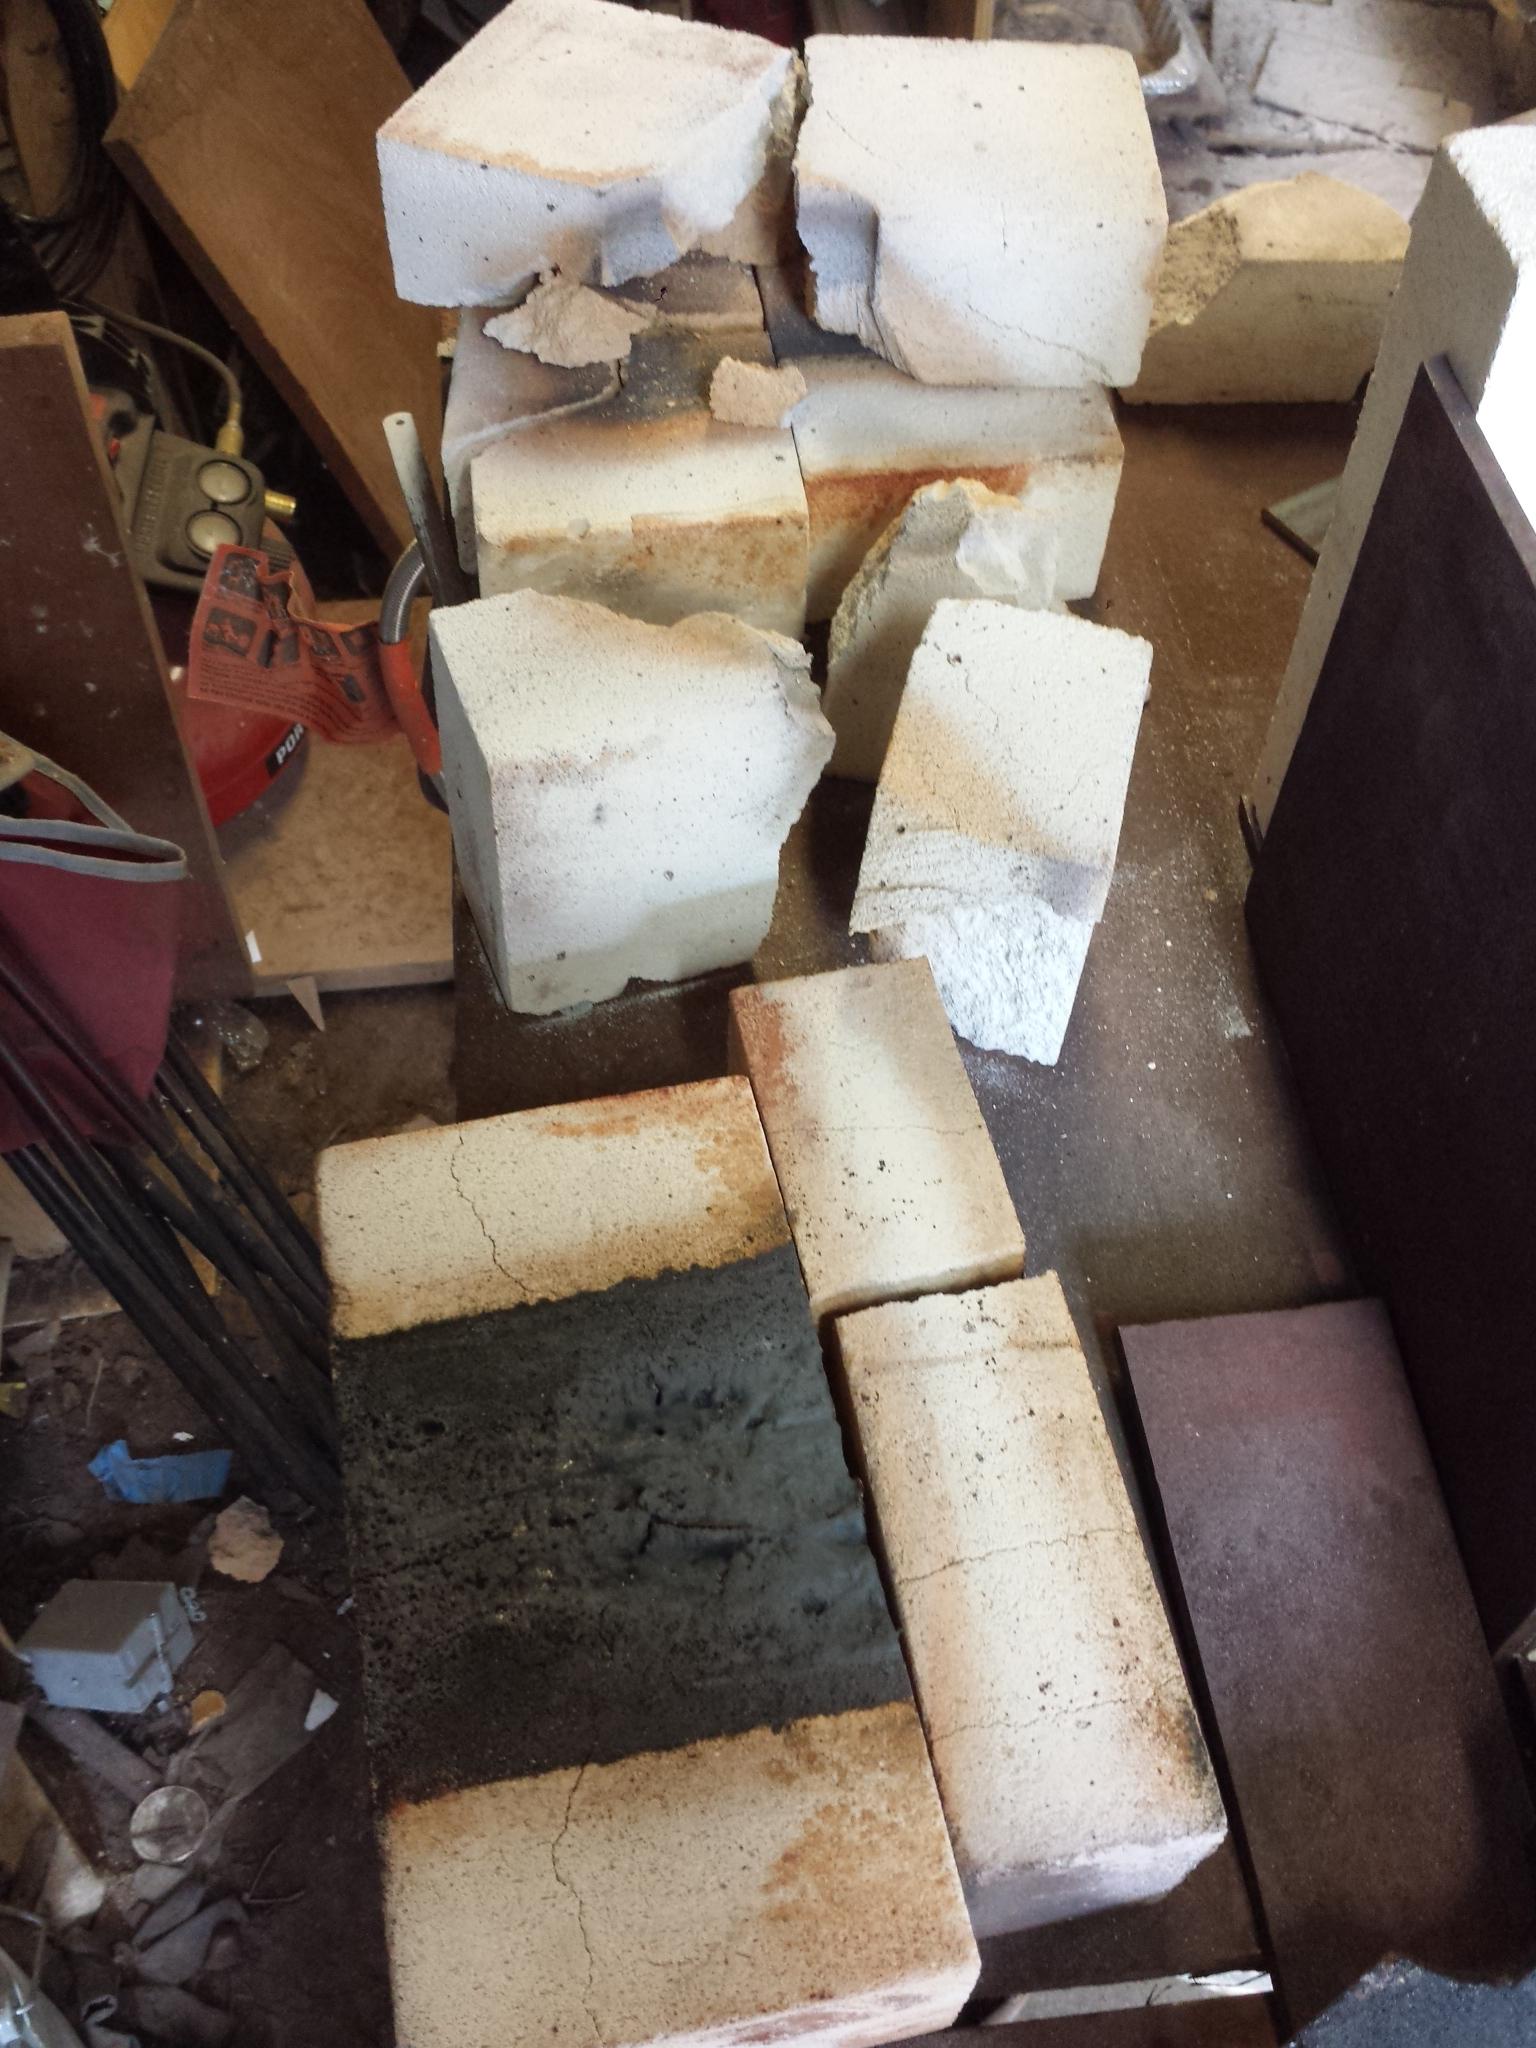
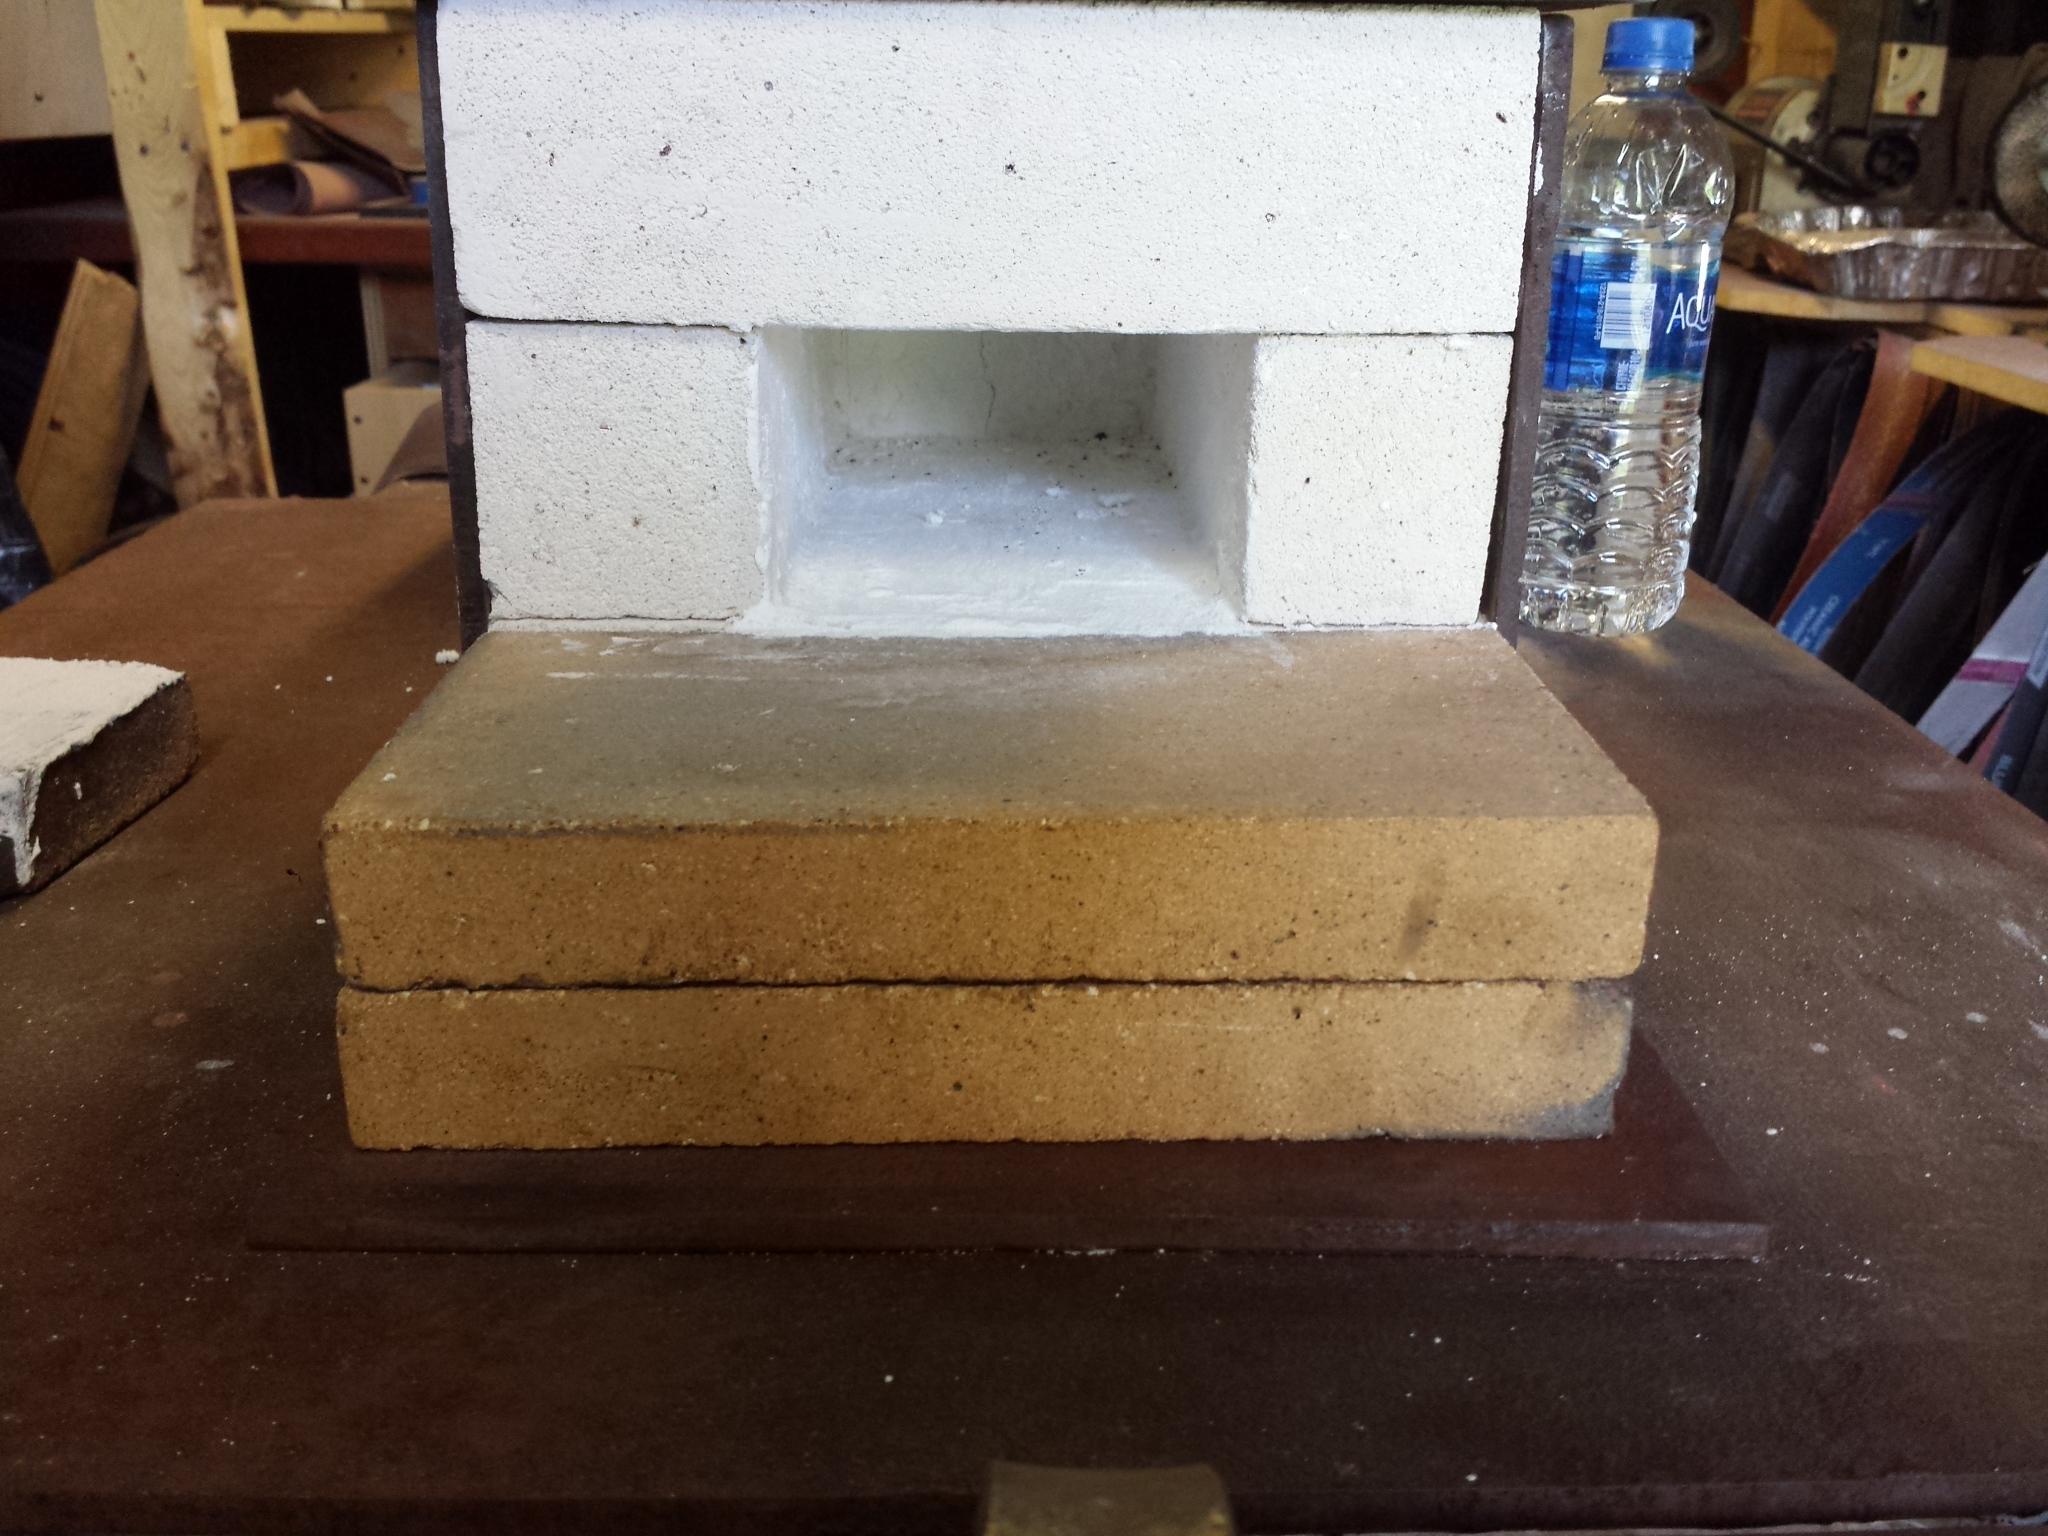
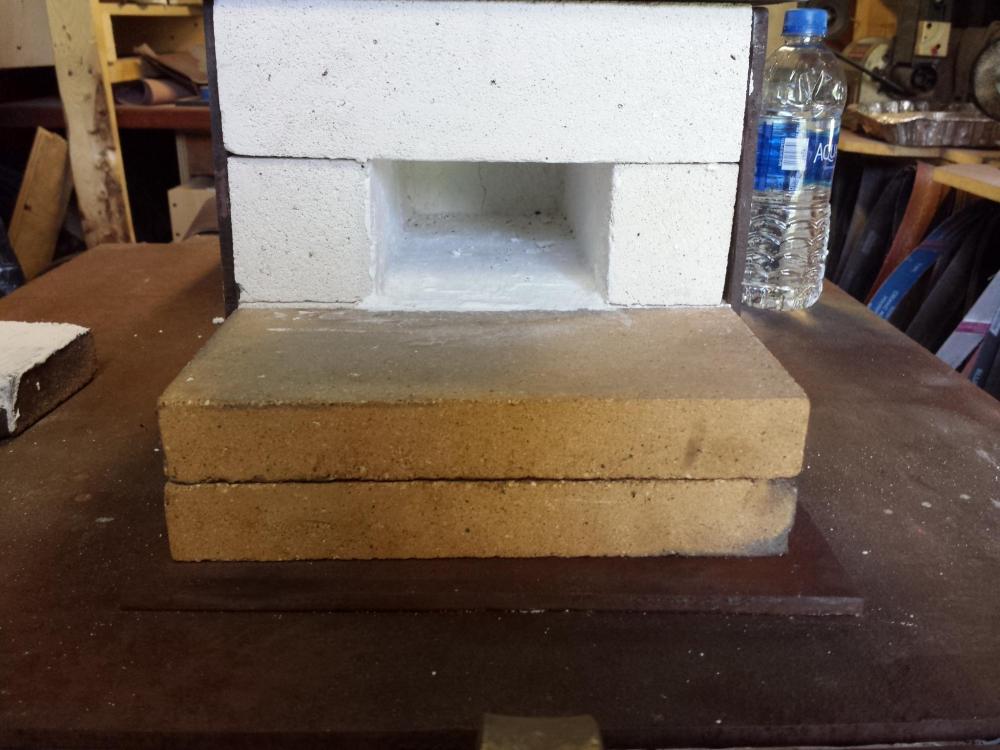
I use a 2 and 1/2 inch thick K26 brick. (2600 degree rating) I got a case of them from amazon. Shipping is what kills you on those, usually as much as the brick itself. Maybe check local pottery places as it's sometimes used as kiln brick also. The only issue I would see with using soft brick in the configuration you currently have, is that is breaks very easily. The continued thermo-cycling of the forge use will cause a lot of cracking as they heat and cool. Mine is enclosed in a metal box, so it isn't as big of an issue to me as it all stays contained and basically in one piece. Your open sides may allow pieces to fall off and become unstable letting it fall apart. You can try coating the brick you currently have with an IR coating. If you shorten it by one section, add a layer of brick to the floor, and coat the entire inside with Plistix or Matrikote, it should get pretty hot fairly quickly. At least enough to get you moving some metal and see what you like or don't like about it with only a $20 or so investment. Then you can use that experience to decide if you want to run that style with better refractory long term, or change it up completely. Being a similar setup, I have my burner roughly an inch back into my top refractory. It may not be the ideal number, but it is working well in my forge.
-
The one thing I see, is that looks like hard fire brick. If it is, it doesn't insulate very well. I learned that the hard way making my own first forge from hard brick. It steals as much heat as it retains. This will use a lot more gas and take a lot more time to heat a piece. It can also cause you a problem with your wooden boards underneath it allowing too much heat through and heating up your plate on the bottom. In the photo where it is lit, you see the pieces in direct contact with the flame glowing brightly, but the rest is not. That's where your heat is going instead of into your work. I'm not sure why the shelf is in the back, but that is going to be another place you lose heat. Just an extra thing to heat up. With the burner towards the front, you can probably lose one brick length in the back to make it more efficient also. If I'm figuring correctly, you are around 448 cubic inches in that configuration (minus a bit for the shelf) which is most likely exceeding the space you can heat effectively with that burner. I'm thinking that burner should be good for about 350 cubic inches. I understand working with what you can get. Try removing the last section of length and doubling your floor. That will reduce your inside dimensions and should heat a little better until you can get better materials. Also, as Glen said, get rid of the flammable straps. And probably the wood underneath as well. Coating the inside with an IR reflective like Plistix may help some also. I'm sure others will be a long soon with more experience than I have though.
-
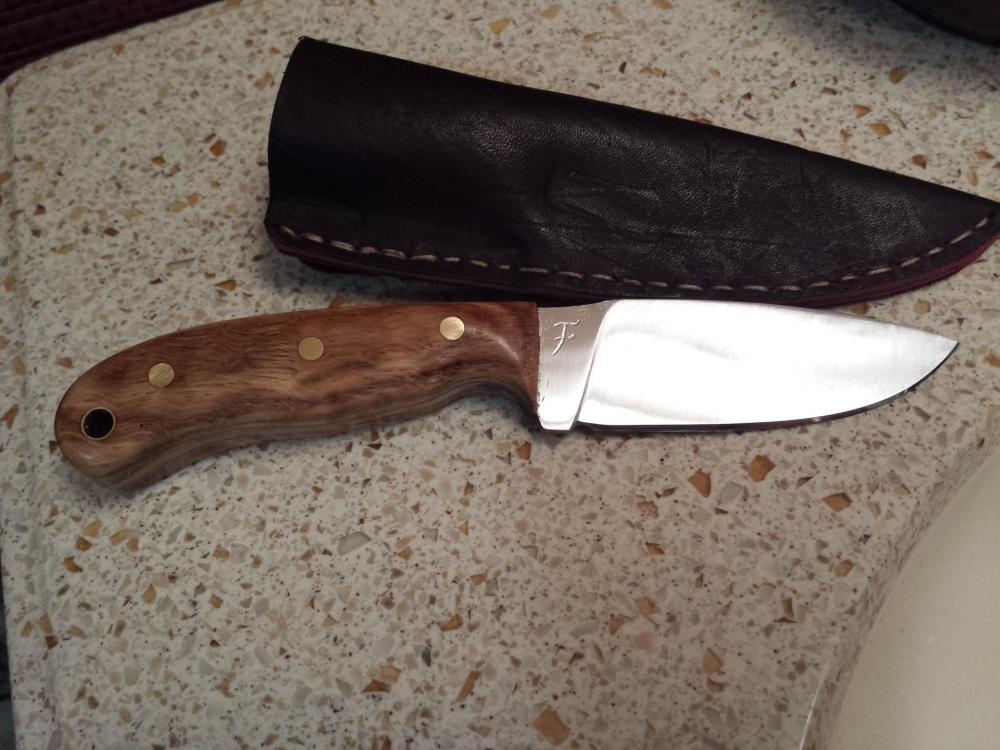
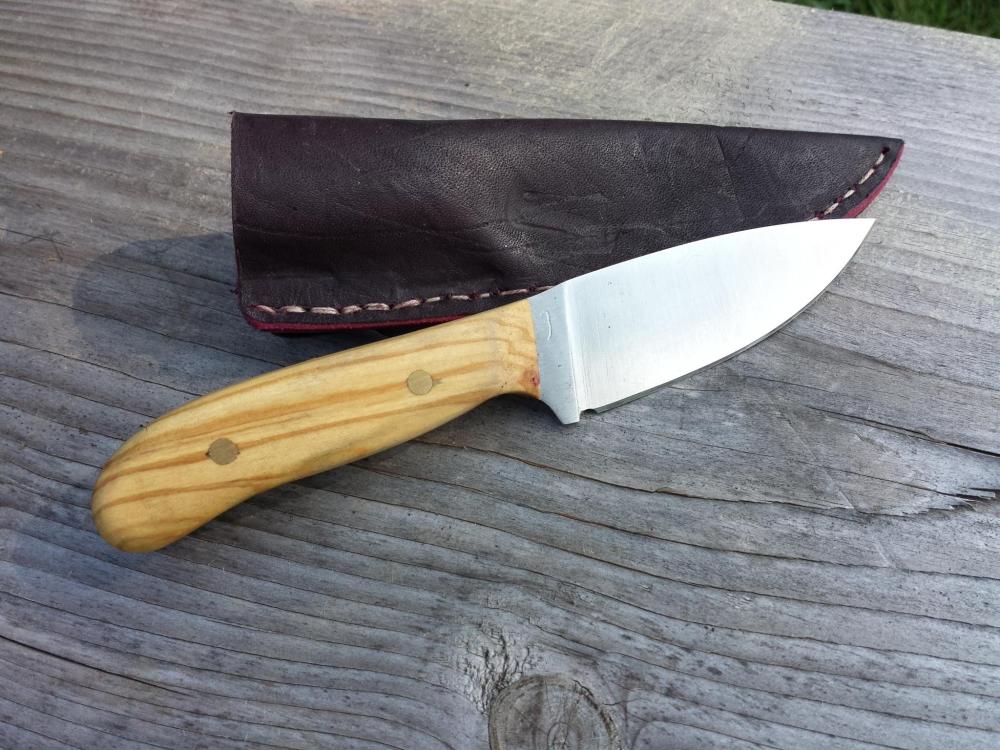
Thanks Zrognak! Latest one to come out of the shop.
-
Absolutely stunning!
-
Those are very nice! Stunning detail and excellent fit and finish. I'm envious of your leather work as well. Mine is almost up to an amateur level now haha.
-
What did you do in the shop today?
sfeile replied to Mark Ling's topic in Blacksmithing, General Discussion
That's a nice little anvil Zrognak. Would be great for peening straight razor pins. I ripped apart my forge today. I've had the same refractory brick in it for 9 months now. A lot of cracks from thermo-cycling, but it was still together and working. I got my order of Plistix from Wayne the other day though, so I decided to just tear out the whole thing and put new refractory in and coat it. So now I'm in hurry up and wait mode....
-
I could very well be wrong, but I believe those would be iron or at best mild steel, not a high carbon steel you would want for a blade.
-
Couple more finished.

-
Your forged pair looks better than the first pair I did. The main thing I see (and I did this myself when I started) is your steel is rolling over itself in places. Looks like you are either not getting enough heat, or working it too long and letting it get too cool. May also be part of why it is going where it wants instead of where you want it to. I'm definitely not a great smith, but that's just something that caught my eye and made me think of my own mistakes.
-
What did you do in the shop today?
sfeile replied to Mark Ling's topic in Blacksmithing, General Discussion
I need to make a trip to Ohio.... You are making some awesome looking hammers. -
That sounds like a plan!
-
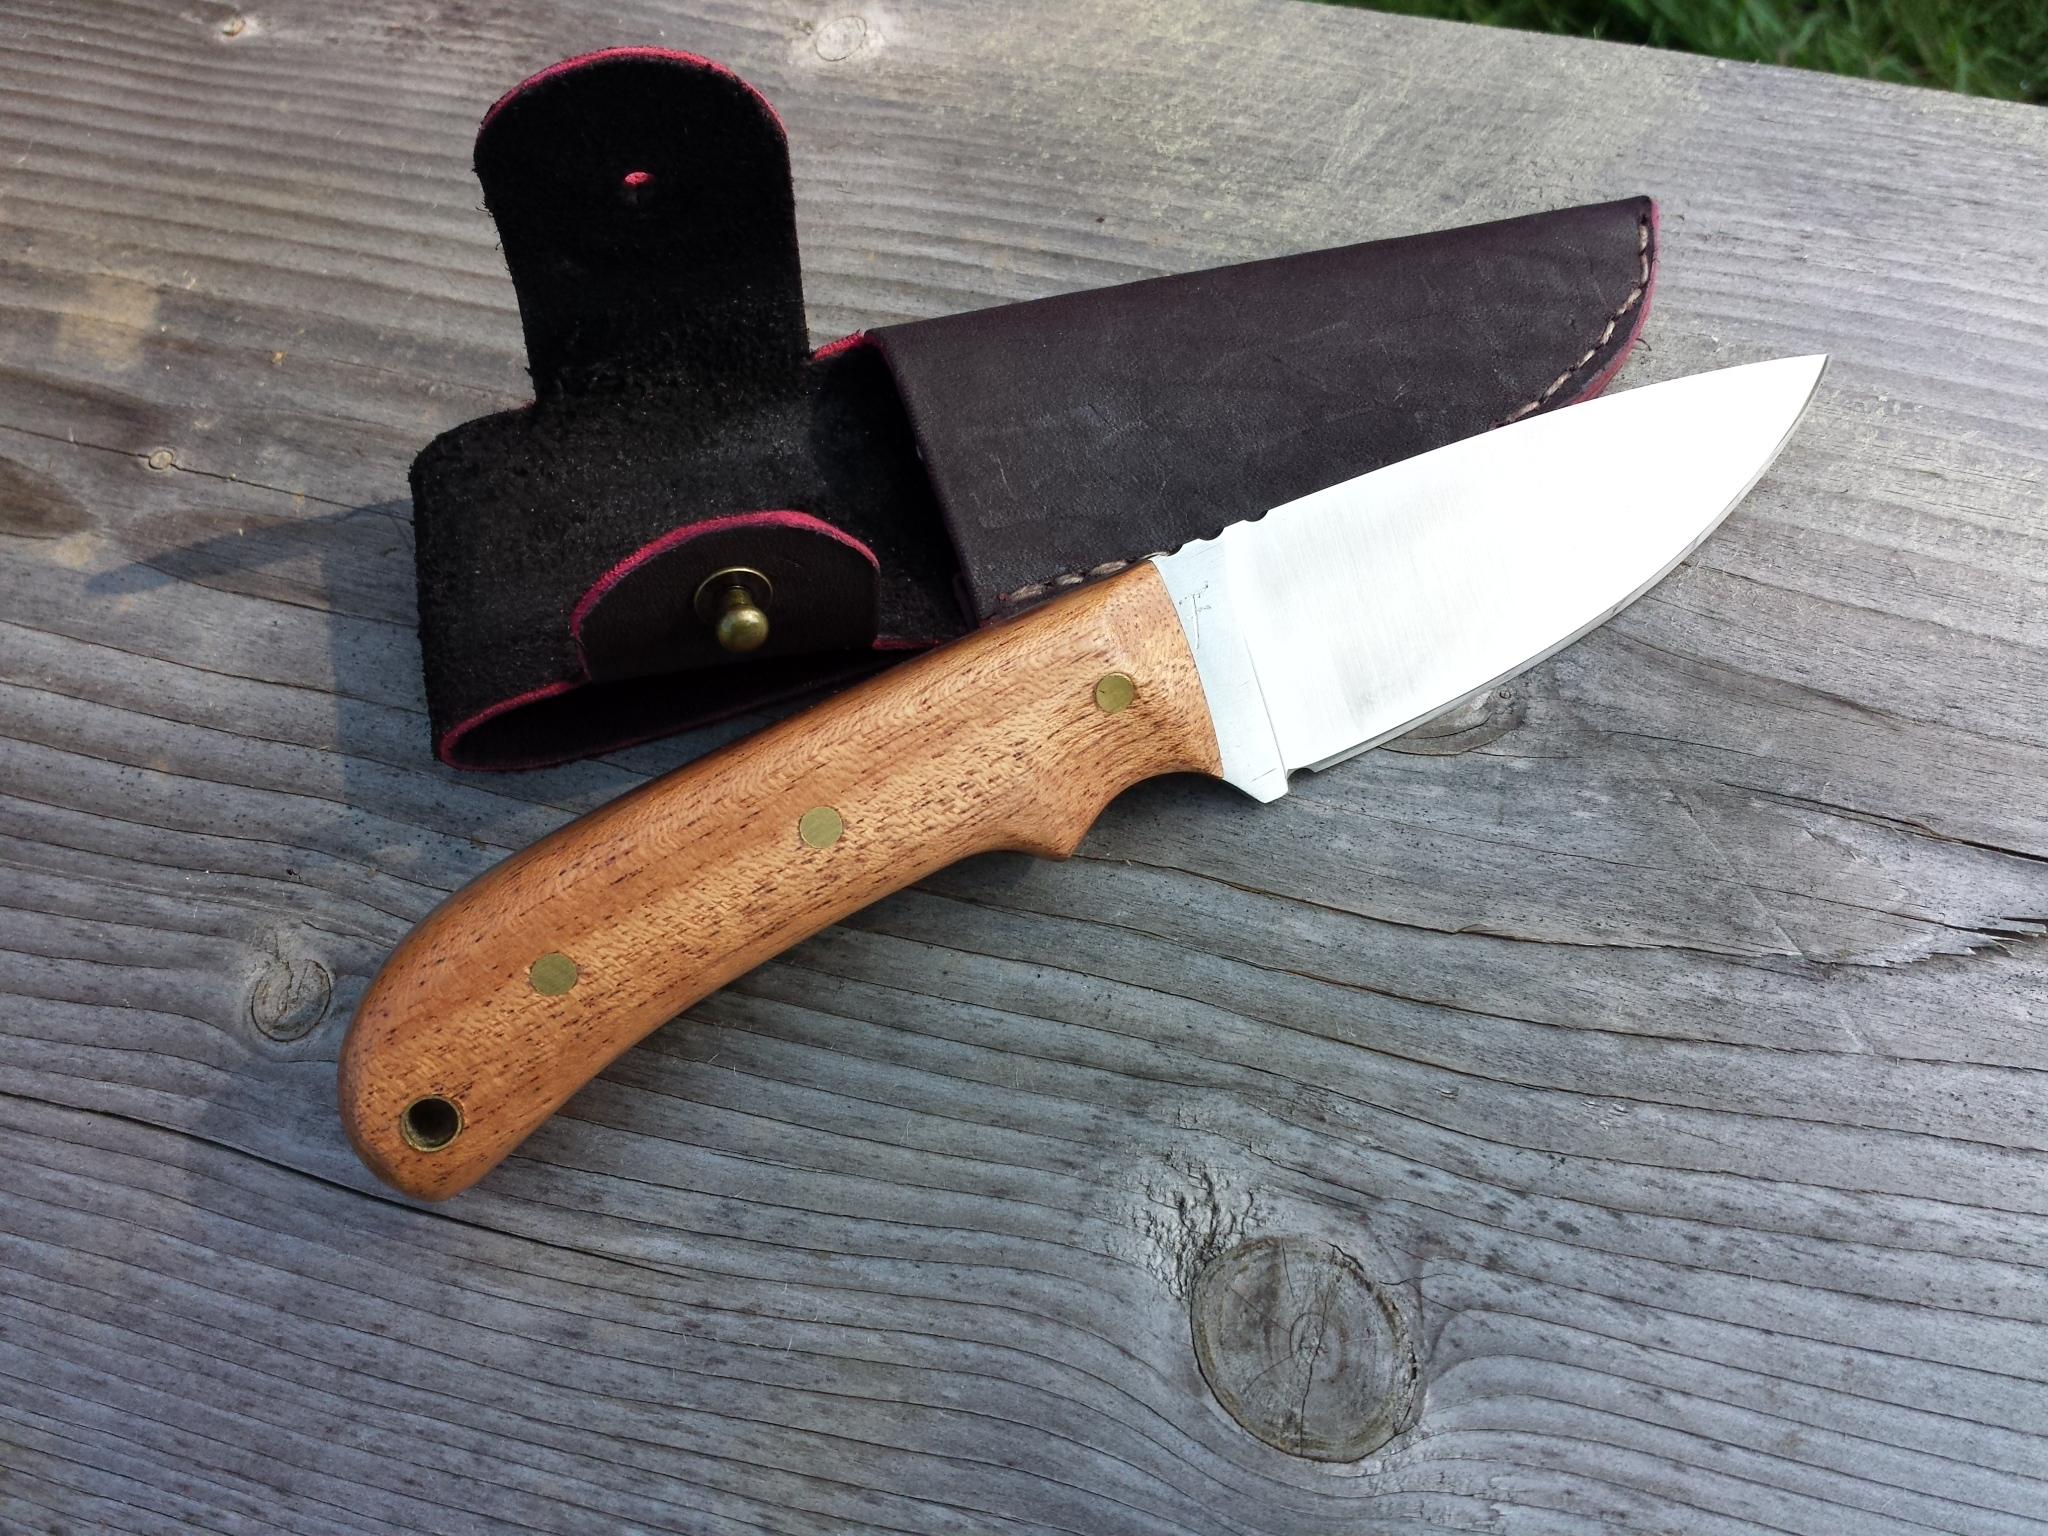
Some of my recent work - comment/critiques wanted (pic heavy)
sfeile replied to billyO's topic in Knife Making
The only thing I can see to even be nit-picky about (and this is probably getting really nit-picky), is that I see a couple wire edges left on the sharpened edges. I shave with straight razors, so the sight of those make me cringe a little, but other than that they look spectacular. -
Could very well be, but not something worth arguing with them over ya know. There is a car parts yard really close to my house that is on the lookout for a few things like springs and axles for me, so that makes up for it I guess. Costs a little more than scrap price, but still reasonable.
-
What did you do in the shop today?
sfeile replied to Mark Ling's topic in Blacksmithing, General Discussion
No need to be sorry on my end Das. No nerve struck here. I was just agreeing that it will work. A 70 pound and a little beat up, yeah, he will probably want to upgrade at some point, but that should definitely get him started for sure. -
I live in PA, but right on the border of NY. A couple big scrap yards close to me in NY, but they told me the same thing. State law won't allow them to let me in or to even sell anything.
-
What did you do in the shop today?
sfeile replied to Mark Ling's topic in Blacksmithing, General Discussion
My Vulcan is a little bigger (110lbs) but they actually are a pretty decent anvil. I've made quite a bit of stuff off of mine. -
Thank you!
-
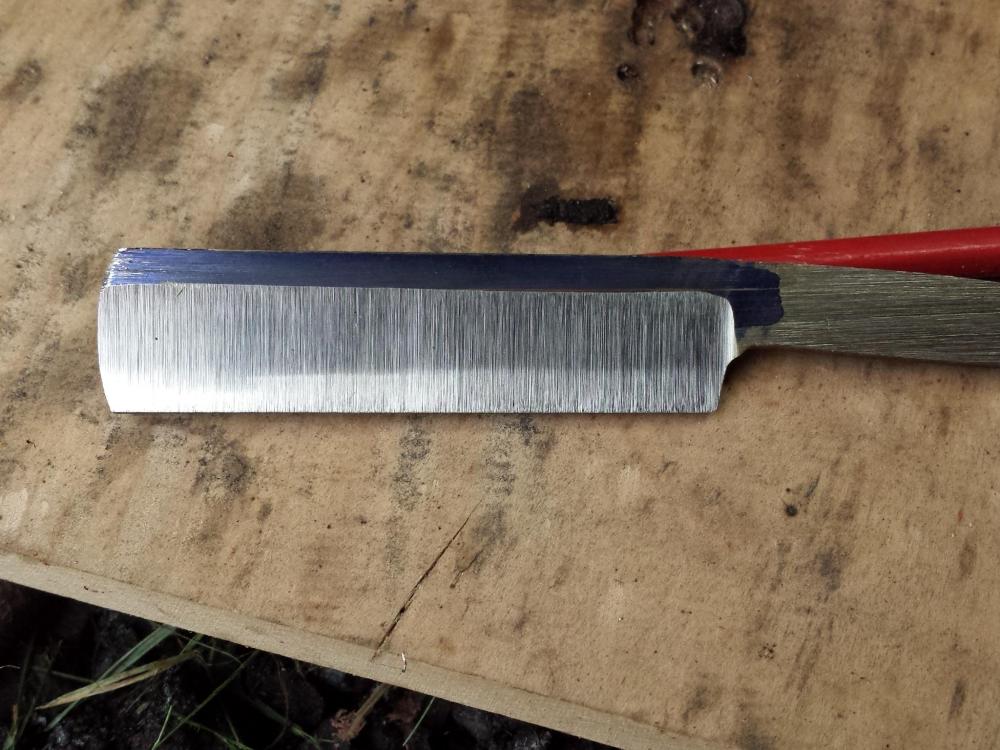
I have to apologize to you, I meant thermo-cycling, not normalizing. Thermo-cycling will help realign the grain structure after you have been beating on it and pushing it around in all different directions. 1/8 inch isn't bad. That is going to be a better angle than I was thinking. Probably just optical illusion, but for some reason that looked like thicker stock. Did you already grind that to a cutting edge? You should leave it thicker than the finished edge before you quench. I usually stay about a dime's thickness. The thinner it is, the higher the chance of warping. That short of a grind it may have enough meat behind it to be ok though. If you did get it close to sharpened, at least you can do some cut testing with it. Not to test sharpness, as it won't be extremely sharp at this point, but to see how much resistance you have with your grind being the way it is. Best way to know what will suit your application is to try it out. One of my first kitchen knives I had to take back to the grinder to thin the profile a little more as it was pushing away in a cut instead of sliding through. In hindsight, I wish I had tried it earlier in the process because it hurts a little to take something you spent hours polishing back to an 80 grit belt.....
-
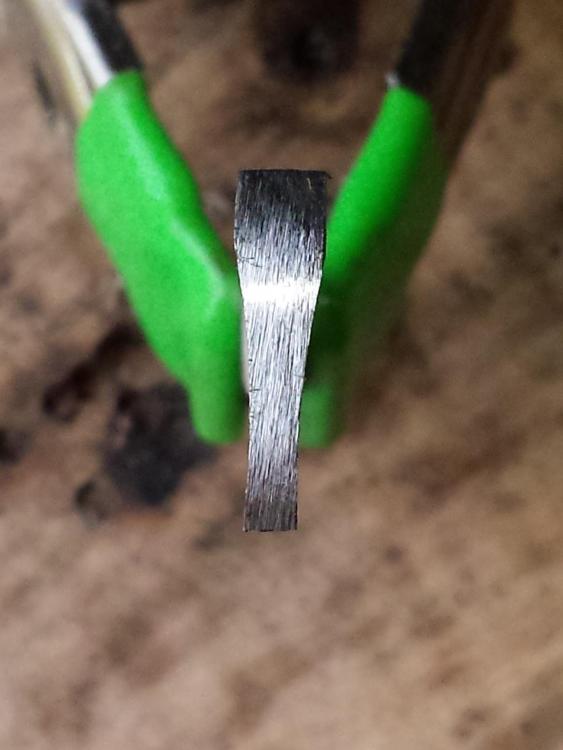
First thing, if you haven't already, get the inside of that forge treated so you don't have kaowool dust floating around in the air. That's not very healthy. Check the gas forge section for the name brands and places to get it. There is a member here that sells all the supplies you would need at a reasonable cost. On to the knives. The forged knife doesn't look too bad at all for your fist knife. I'm glad to see that you are neither afraid of reading or of a file. Both are very useful tools and will help you go far. I see a few heavy hammer marks, and I see some rough looking spots in the steel. Looking at the photo of your anvil I think that is a little of your problem. The hammer marks will go away as you become more skilled. The rough texture of the steel looks to be in part from either hammering scale into the steel or just from the anvil face. It looks like a cast iron anvil to me. Take a flap wheel and clean the surface of it. It doesn't have to be mirror smooth, but get the rust/dirt/corrosion/pits out of the working area so they don't transfer into your work. Keep in mind the cast is a soft anvil and you may need to keep up with dressing it every so often. Not a big deal on a hardened face anvil, but we work with what we got right? Some of it may also be from overheating. Be careful you don't burn your steel. I can do it in my single burner forge, so it will be even easier to do in such a small forge with two burners. Did you do any normalizing before you quenched? Keep an eye out at yardsales etc... for a little toaster oven. They make a decent temper oven and the Mrs. won't get fed up with you using her oven for knives. Needs some work on fit and finish, but as you said, you made some mistakes and learned. That's the important part. I make plenty of mistakes so don't think I'm downing on you for that. For the stock removal knife. Annealing first will help you work easier on a high carbon steel. You can do some real grunt work on your 4x36. It's not the ideal grinder for making knives, but can certainly aid you in many aspects of shaping your blade. I've made a few off of a 4x36. It looks like you have some vise jaw marks in the spine. Some lead, brass, copper, or even wood can help keep those out of your blade. Personally, the bevel looks really steep to me. Great for batoning through kindling, but not so good for cutting. What is the thickness of the material? If it is thin stock it may be just fine, but it looks fairly thick to me. A little cleanup and fixing the blade geometry (of course the particular geometry depends on the intended use) and it should be a fine knife. Keep reading, keep taking notes, and keep going. Looks like you are off to a pretty good start.
-
Very nice!
-
What did you do in the shop today?
sfeile replied to Mark Ling's topic in Blacksmithing, General Discussion
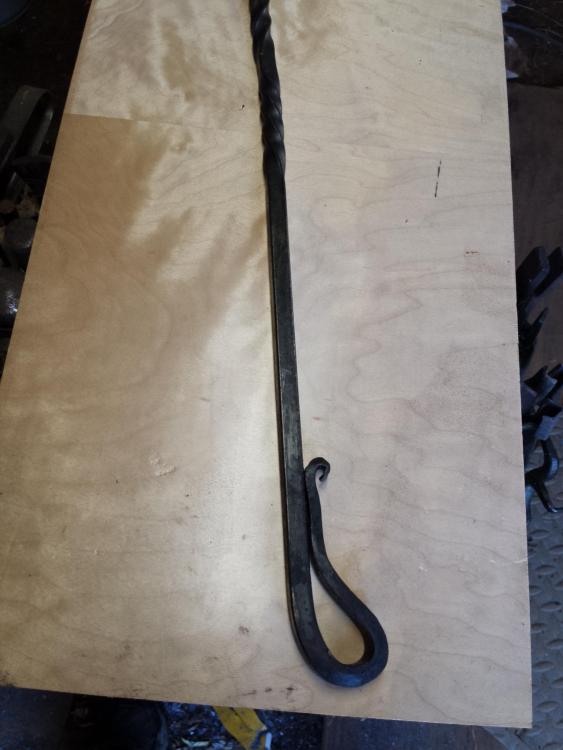
I actually did something that wasn't a knife!!! I got reminded of a few things in the process. First thing, black steel can still be hot enough to burn..... Second thing, pay attention to where your arm is when operating the vise handle while trying to clamp hot steel..... And the third thing, I definitely still need much work on my basic blacksmithing techniques. But overall, decent day besides the pain in my arm. I got a dutch oven lid lifter made. Strong enough that it lifts my 5 gallon bucket of quench oil, so it should handle a lid ok.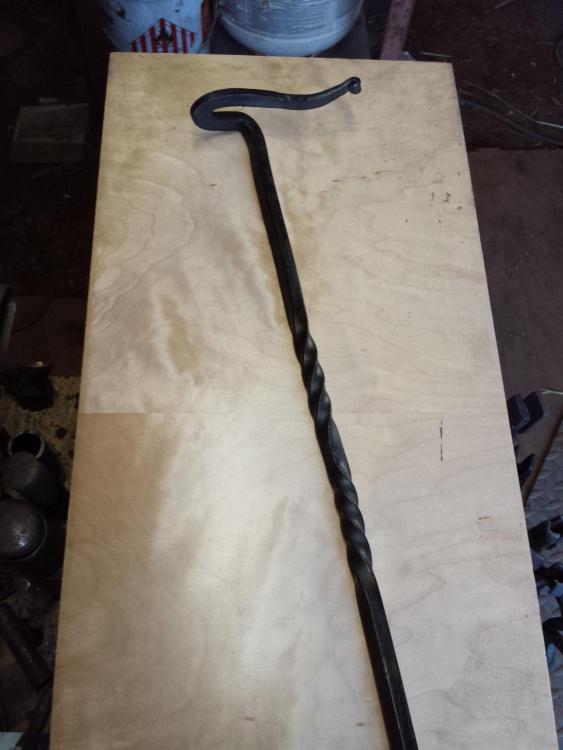
-
That is a very good suggestion. I hadn't thought of that but I can see it now that you mentioned it. Thank you!