sfeile
-
Posts
358 -
Joined
-
Last visited
Content Type
Profiles
Forums
Articles
Gallery
Downloads
Events
Everything posted by sfeile
-
Yes blaze have been a very good belt.
-
Have a lot of time on this machine now and would not hesitate to recommend it. The only issue I had with ot was the step up transformer was a little underpowered and would trip trying to run the grinder full out. In my new shop I have it wired directly to 220v and can run full power with no issues at all.
-
I have not used red label, but I would not recommend combat for ceramic belts. I have some 2x72 ceramics from them and they have no longevity at all. I recently spoke to someone who carries their line and he said they have had many other complaints of the same thing. Blaze belts are good as are tru-grit. I have also just purchased some of Brodbeck Ironworks ceramic belts and they seem to work exceptionally well.
-

ABANA October 14, 2021 Meet Johnstown PA
sfeile replied to jlpservicesinc's topic in Events, Hammer ins, Where to meet
I'm not going to make it to this one guys/gals. Had some money set aside to make the trip and ended up with my refrigerator and my car both taking a crap. So between replacement of the first and repairs of the second, I used up my play money. -
Thanks Frosty.
-
Got it. Do what I have that is working, just add a little more to the floor. Thanks everyone for the help.
-
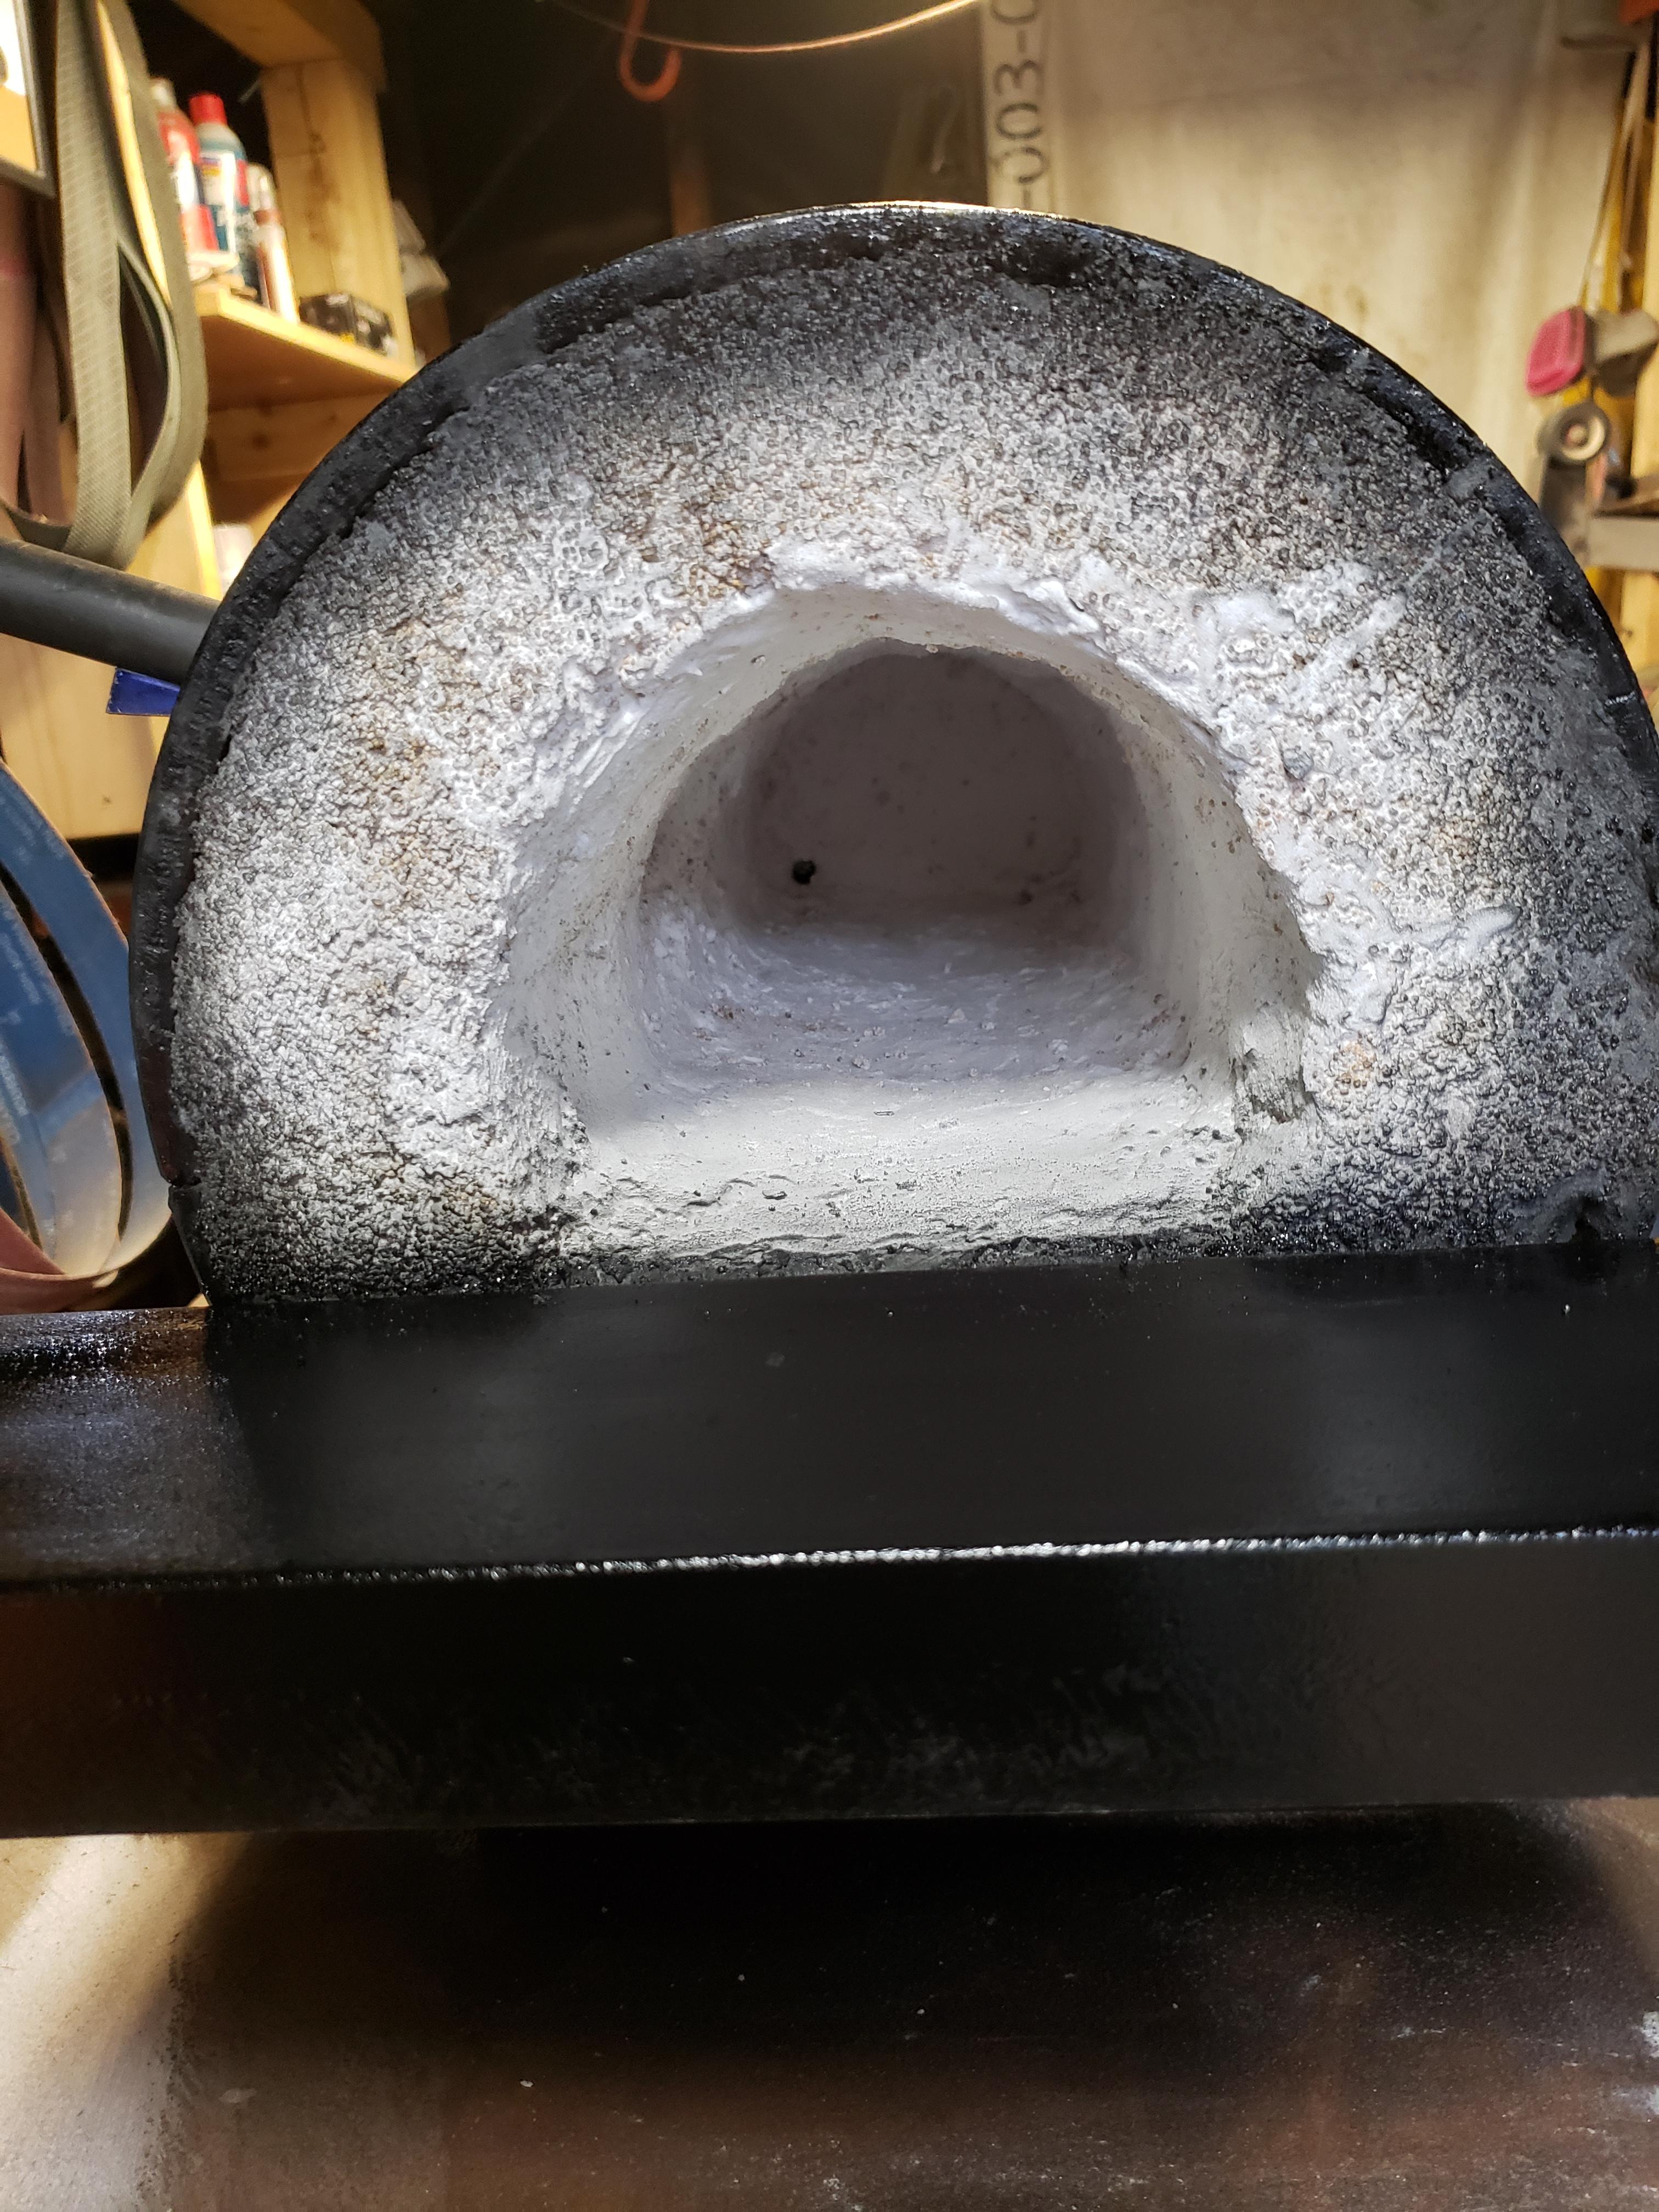
Thanks Frosty. Another thought after looking the 101 thread I saw the high alumina kiln shelves mentioned. Would that be a feasible option? I found a 3/4 inch shelf that is just about the right size to fit my forge without much trimming. I read Mikey mentioning that they were good insulators and came up to heat quickly, as well as being durable under heat. Oh, one other question as I can't find it anywhere... I saw in the supplies thread that 2 layers of 1 inch kaowool was better than 1 layer of 2 inch. Right now I have one layer of 2 inch. What is the difference? I'll get whatever is better, I was just wondering the reason behind it to help make me more smarterer.
-
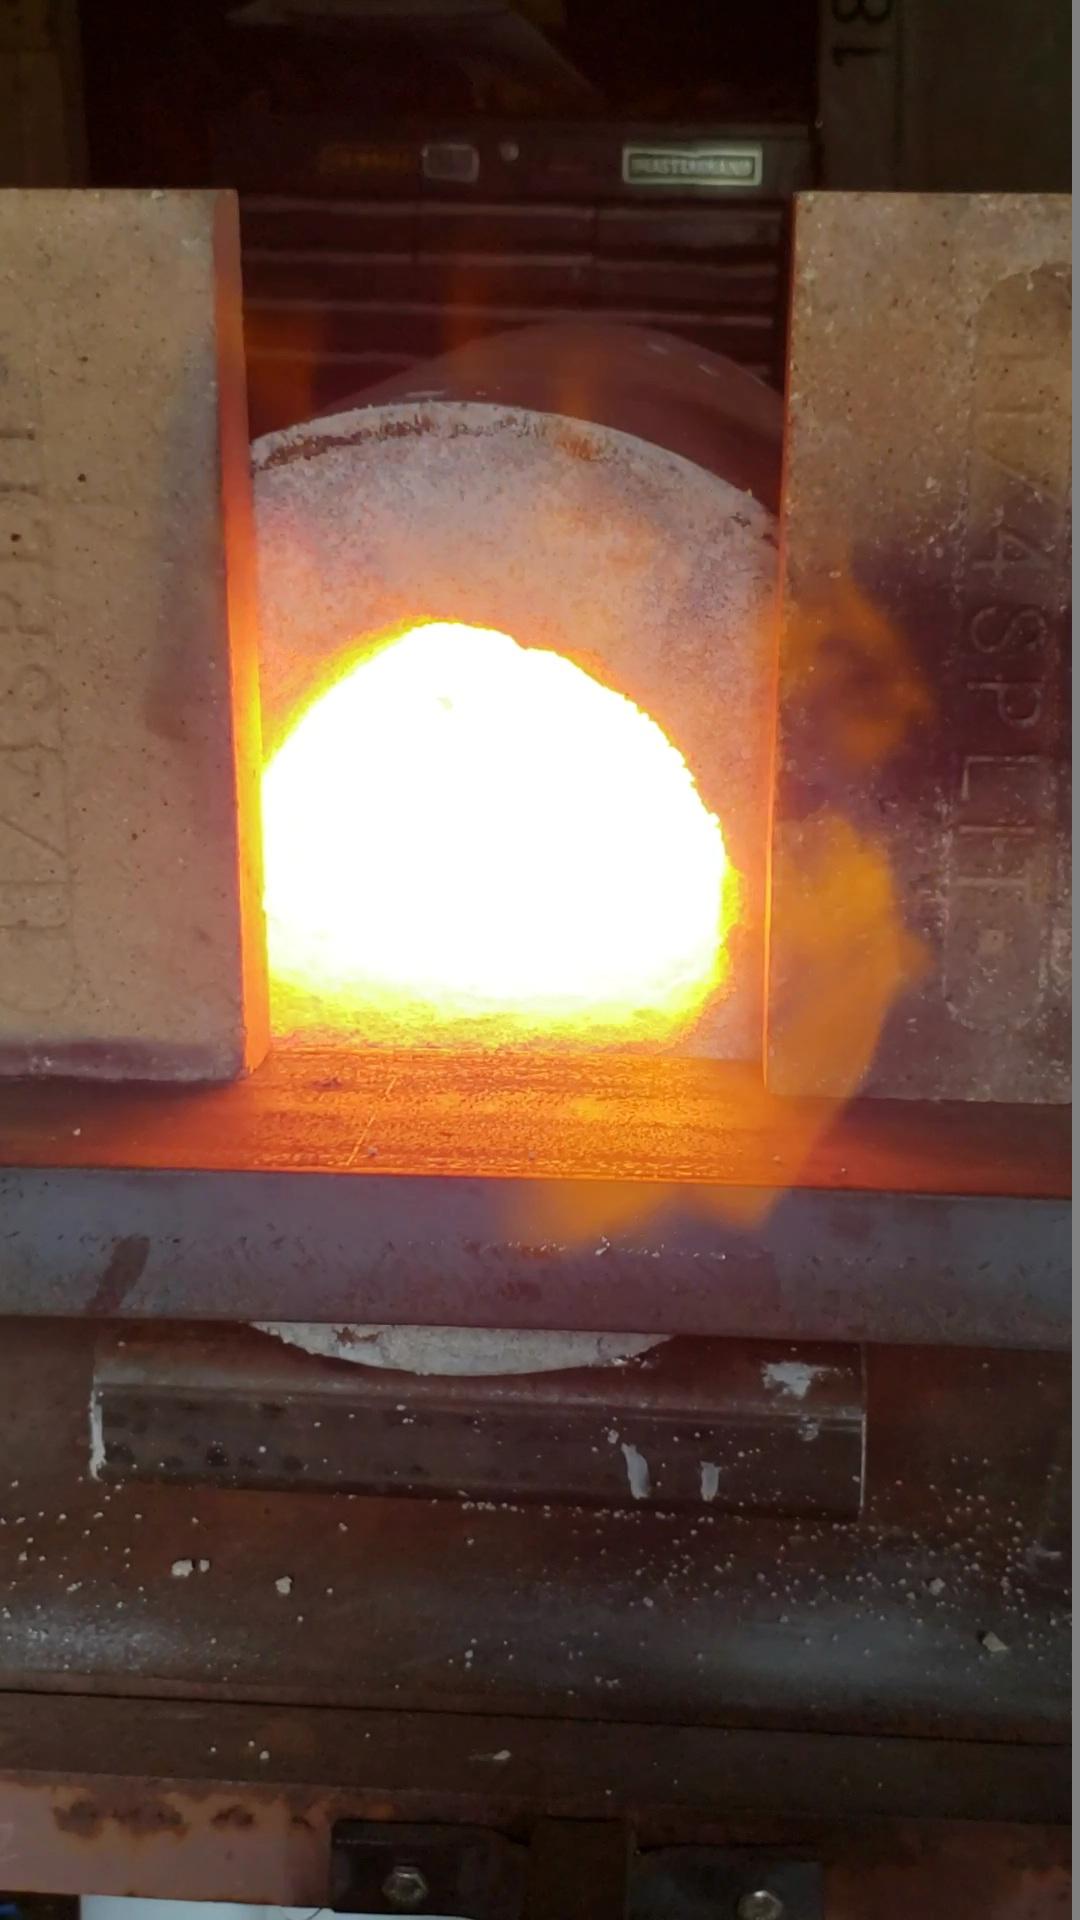
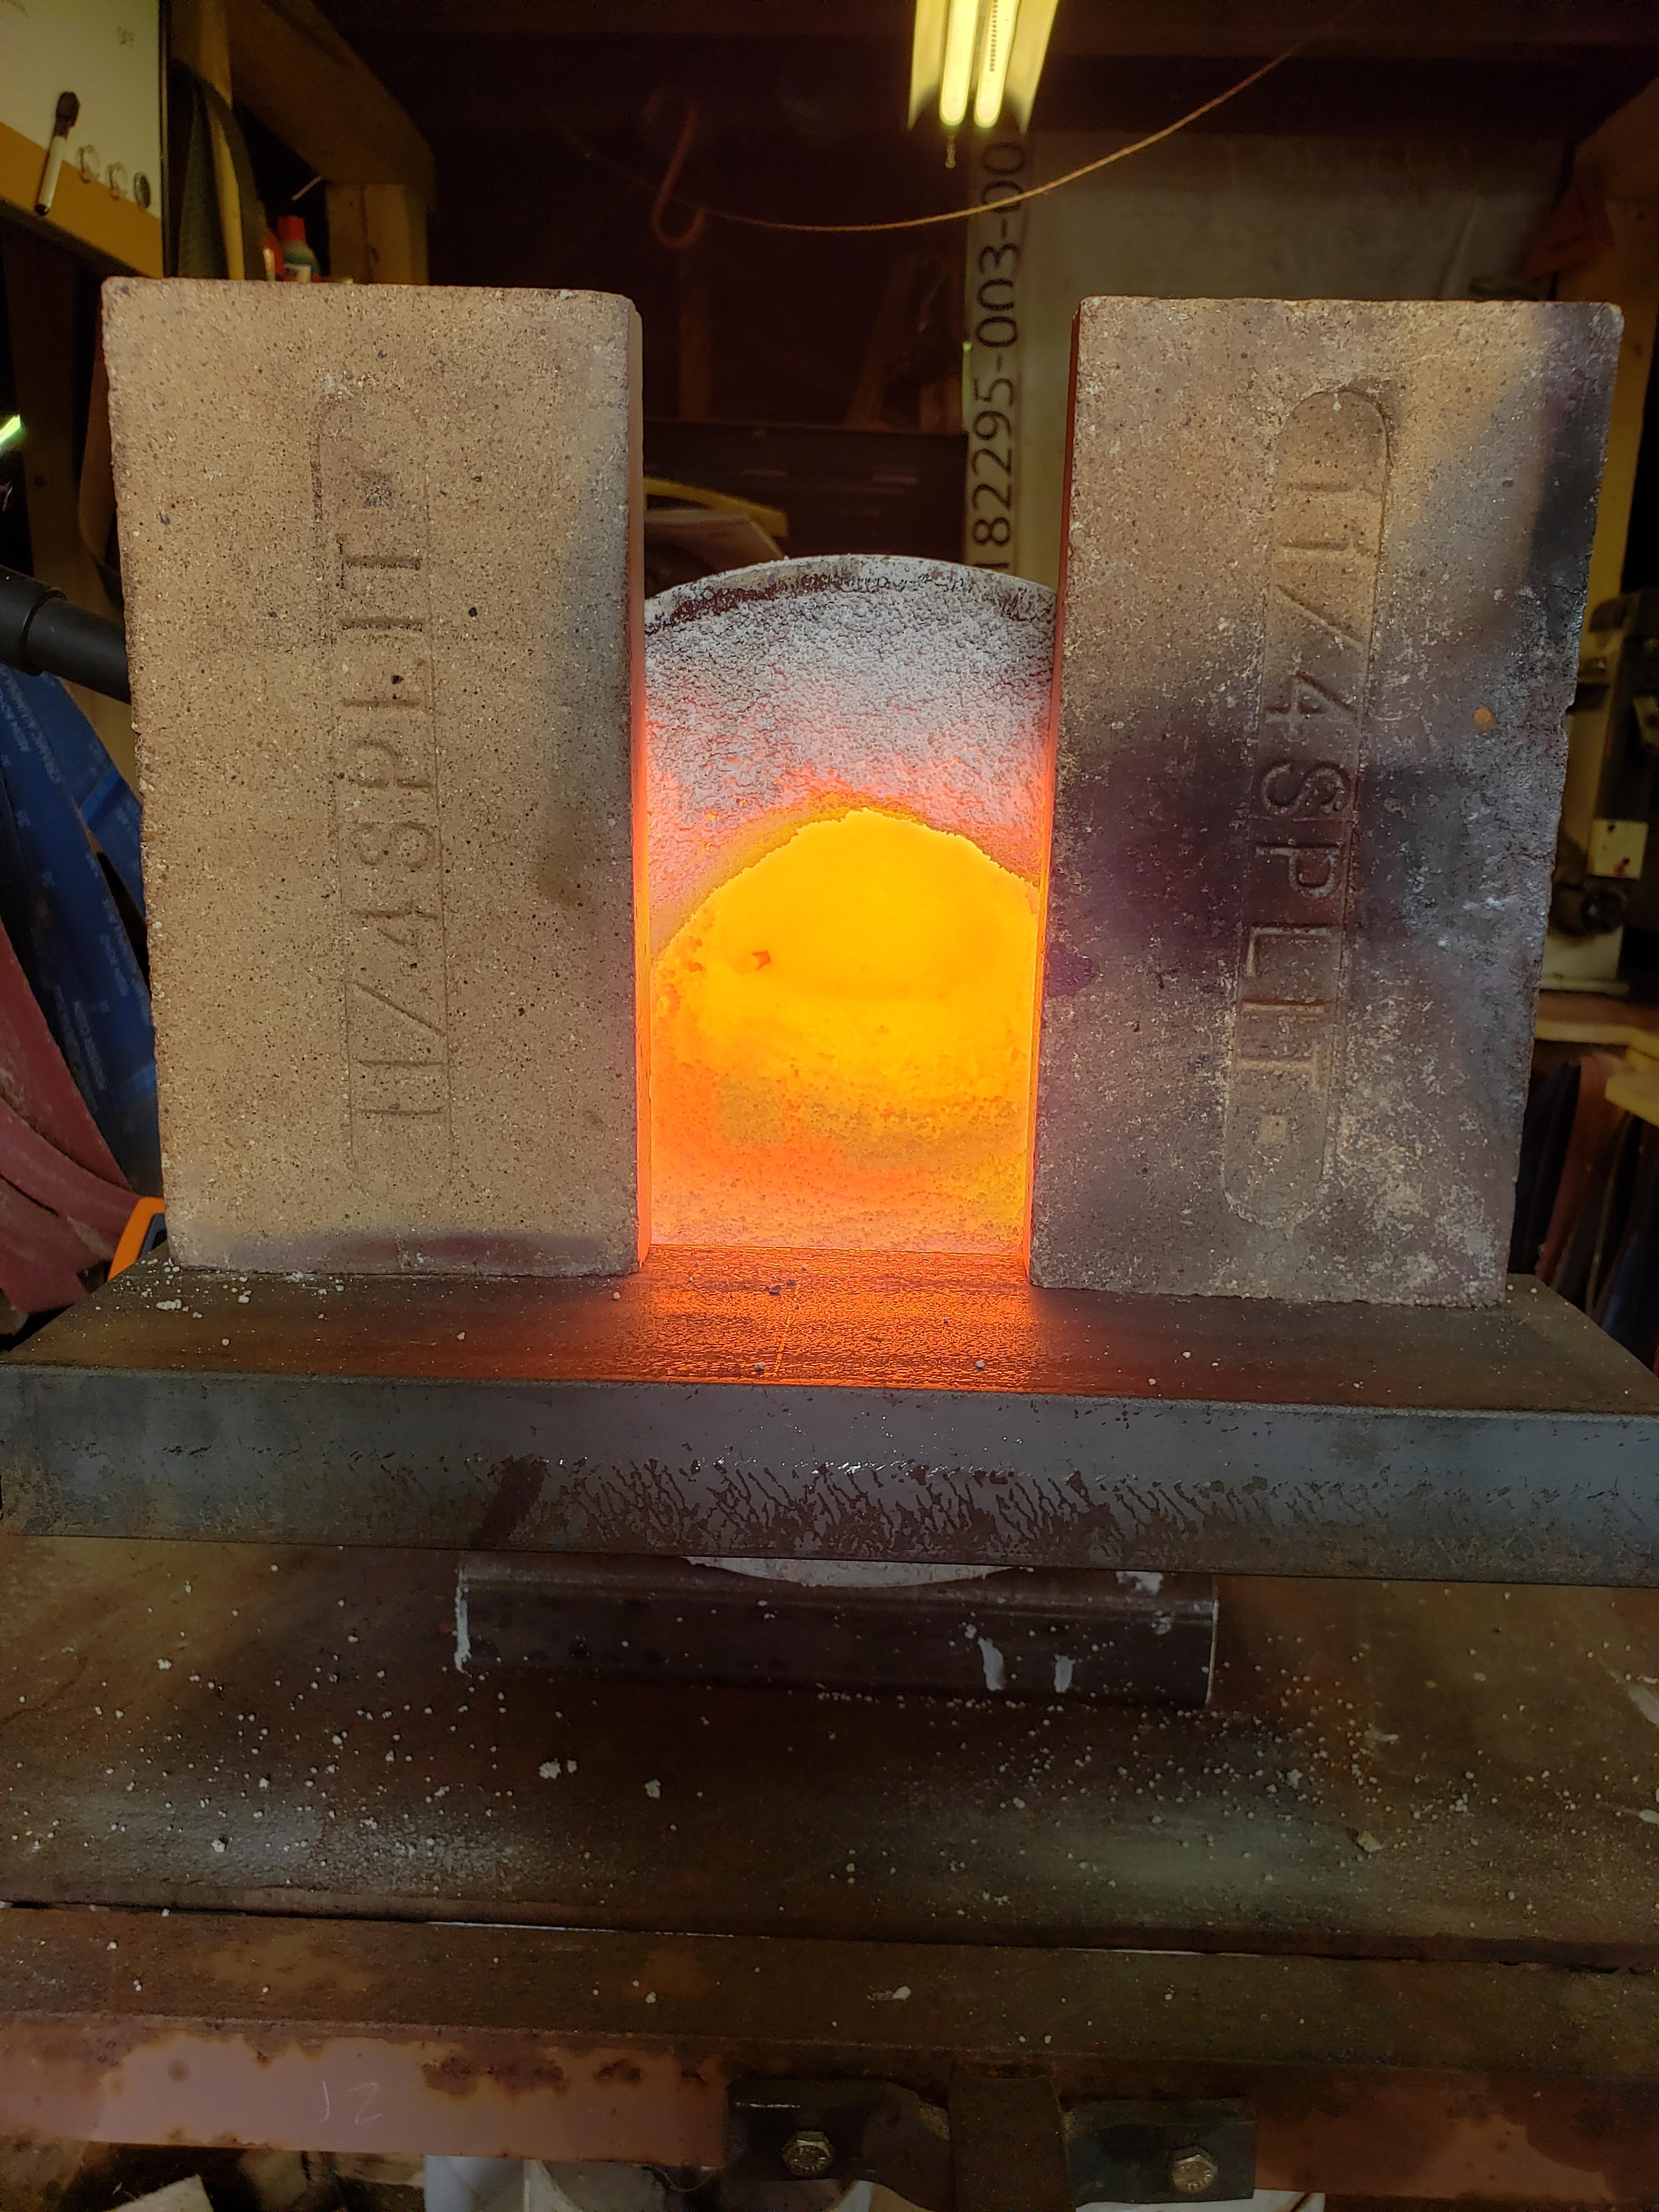
I currently have a forge built from a piece of 10 inch pipe with 2 inches of Kaowool ceramic blanket, satinite coating, and a plistix wash over that. It's only a single burner, but gets plenty hot (thermocouple says 2400) and holds the heat well and rather evenly. Now on to where I have a question. The floor is in pretty bad shape and it is going to need re-done. Currently, it is built up with kaowool to have a flat floor. When I re-line it, I was thinking of how to make the floor a bit more durable. I know hard brick like I use for the doors doesn't insulate well, but it is extremely durable. With the current configuration of 2 inches of kaowool that would be under it, would it still drain a lot of heat from me? I know it would take more energy to get it to heat, but would it work? It is only a single burner and I am about at maximum output for my burner vs interior size to attain welding heat currently. My other concern would be if it would heat evenly enough. I do notice on the door bricks the orange doesn't travel much past the exposure area. If I did use them, I would apply the plistix to them like the rest of the interior, but I'm not sure if that would be enough to keep them from being as much of a heat sink or if they would heat unevenly anyway. My other option would be that I have some 2 inch soft insulating fire brick left over from the little box forge build that I ran before building this one. I know it's not as durable, but does heat evenly and more efficiently. I'm wanting to delve further into forge welding, so durability is definitely a concern, but as I said, I can't really afford to lose much heat at this point. Any experience and/or advice would be greatly appreciated.


-
What did you do in the shop today?
sfeile replied to Mark Ling's topic in Blacksmithing, General Discussion
Friday I got this cut out of a piece of crane rail. And yes..... I know the benefit of standing it on end to get more mass under the hammer, but didn't care as that is not the most important function. It did however, pass the extremely important ring test. Right now that is the only thing that matters when working with grandpa. As well as getting to pick and sort out the tools you want. I just need to get it mounted on a block for him. I think we have some flawed oak laminate blocks at work that are about 10 inches square. Should work perfect.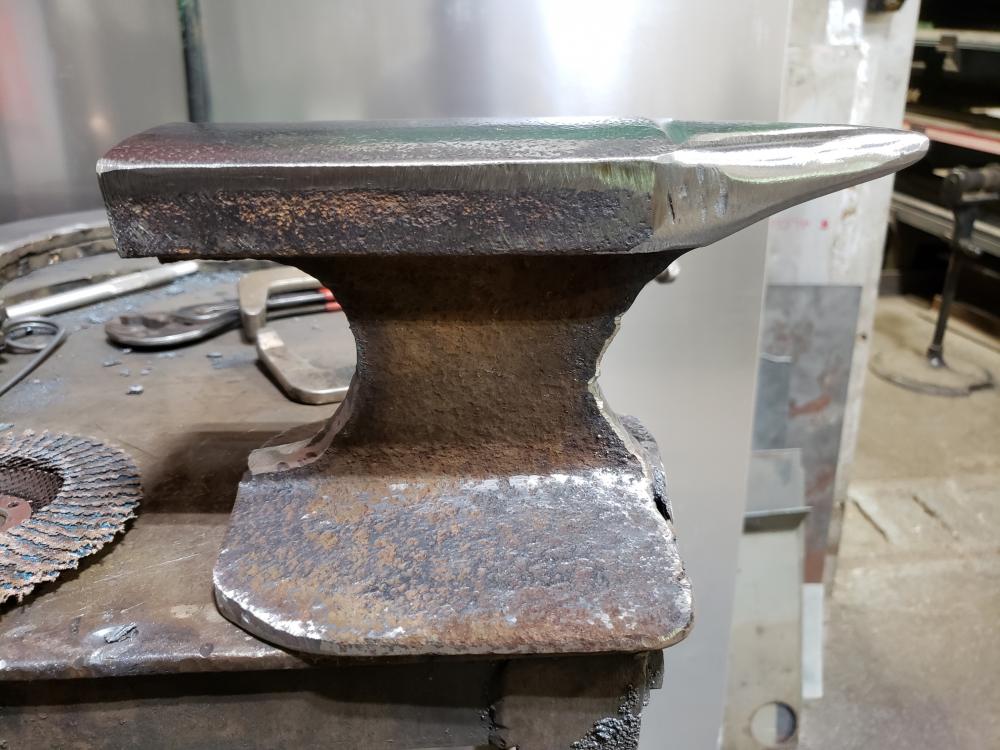

-
What did you do in the shop today?
sfeile replied to Mark Ling's topic in Blacksmithing, General Discussion
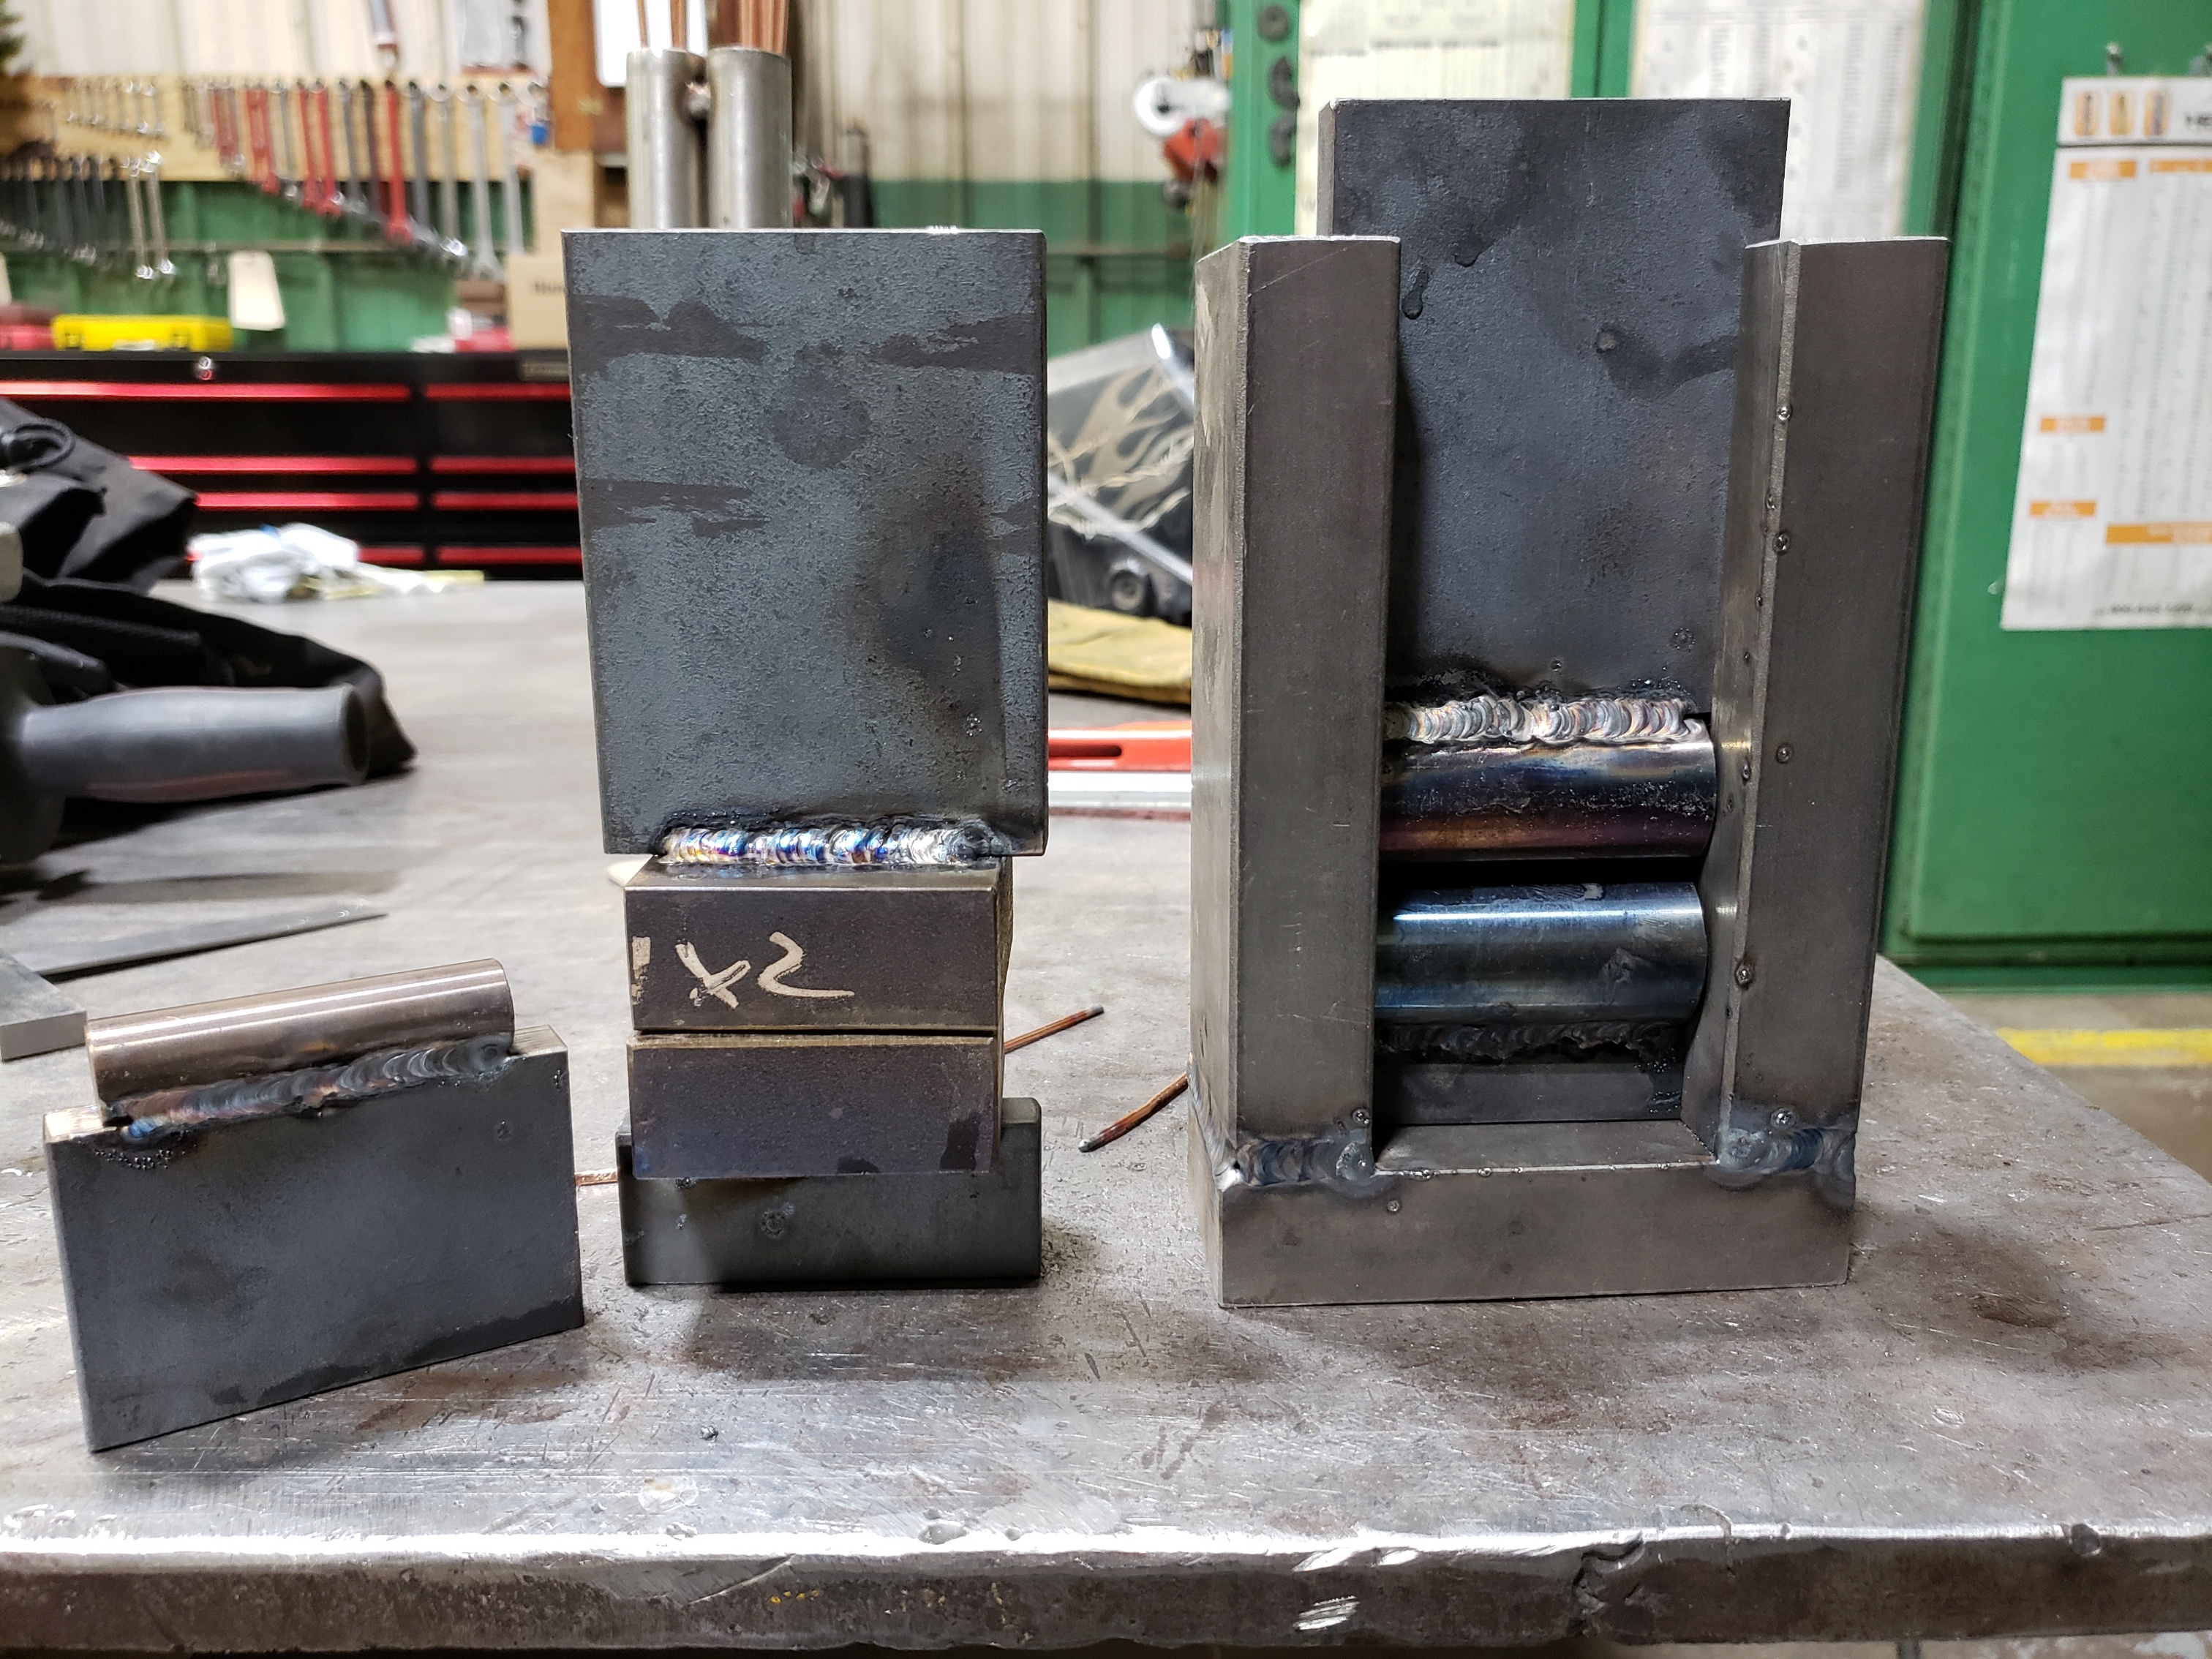
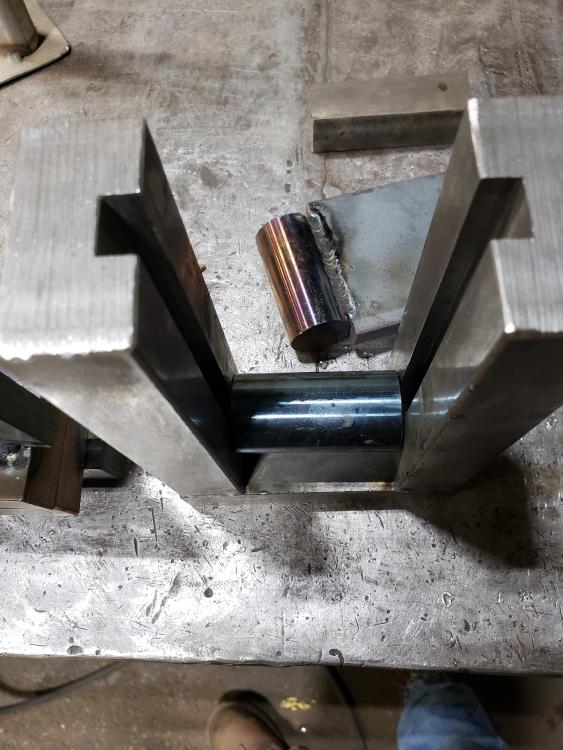
I used scrap pieces from work and made it up as I went, but sure. The sides and bottom are 1x2 inch solid bar. The side pieces are 6 inches long with a slot milled in them. I used a half inch mill and went 10 thousandths either side to allow the half inch plates to slide. I think I went 300 thousandths deep. The plates were just leftover 1/2 x 3 flat stock pieces. The round stock on the drawing dies is 1 and 5/8ish. It's from our matcon feeders and I can't recall the exact diameter at the moment. I just cut them to fit inside which made them about 2 and 3/8 inches, and milled a flat to center them better when welding them to the plates. The flatter pieces are just more of the 1x2 cut to 2 and 3/8 long. The forming bottom die just has a piece of 1/2 inch ground and polished welded onto it. The bottom piece was just cut to fit. (Roughly 5 inches long.) After welding the sides in place I slid all the pieces together and tacked them in place so I could keep them all centered and even. Hence all the arc marks. Scratch start TIG likes to jump when you pull it off fast and not really paying attention.... -
What did you do in the shop today?
sfeile replied to Mark Ling's topic in Blacksmithing, General Discussion
Had some time in the work shop to finally got around to finishing this thing for the workshop.... So far I made drawing and flattening dies as well as one for starting finger grooves in blades. (ok... the handles actually, not the blade...) Still want to make a set that is tapered on one side to help keep things even if I'm trying to draw down for a hidden tang or something. I still need to weld the key stock on the end of it for the hardy hole, but I wanted to tack it in place just in case it was off a little bit. My little Vulcan sloped towards the horn quite a bit. This will be the first hardy tool I've made for the Trenton and want to make sure it sits flat on the face. Probably going to weld some square stock on the top dies for a striking face also.
-
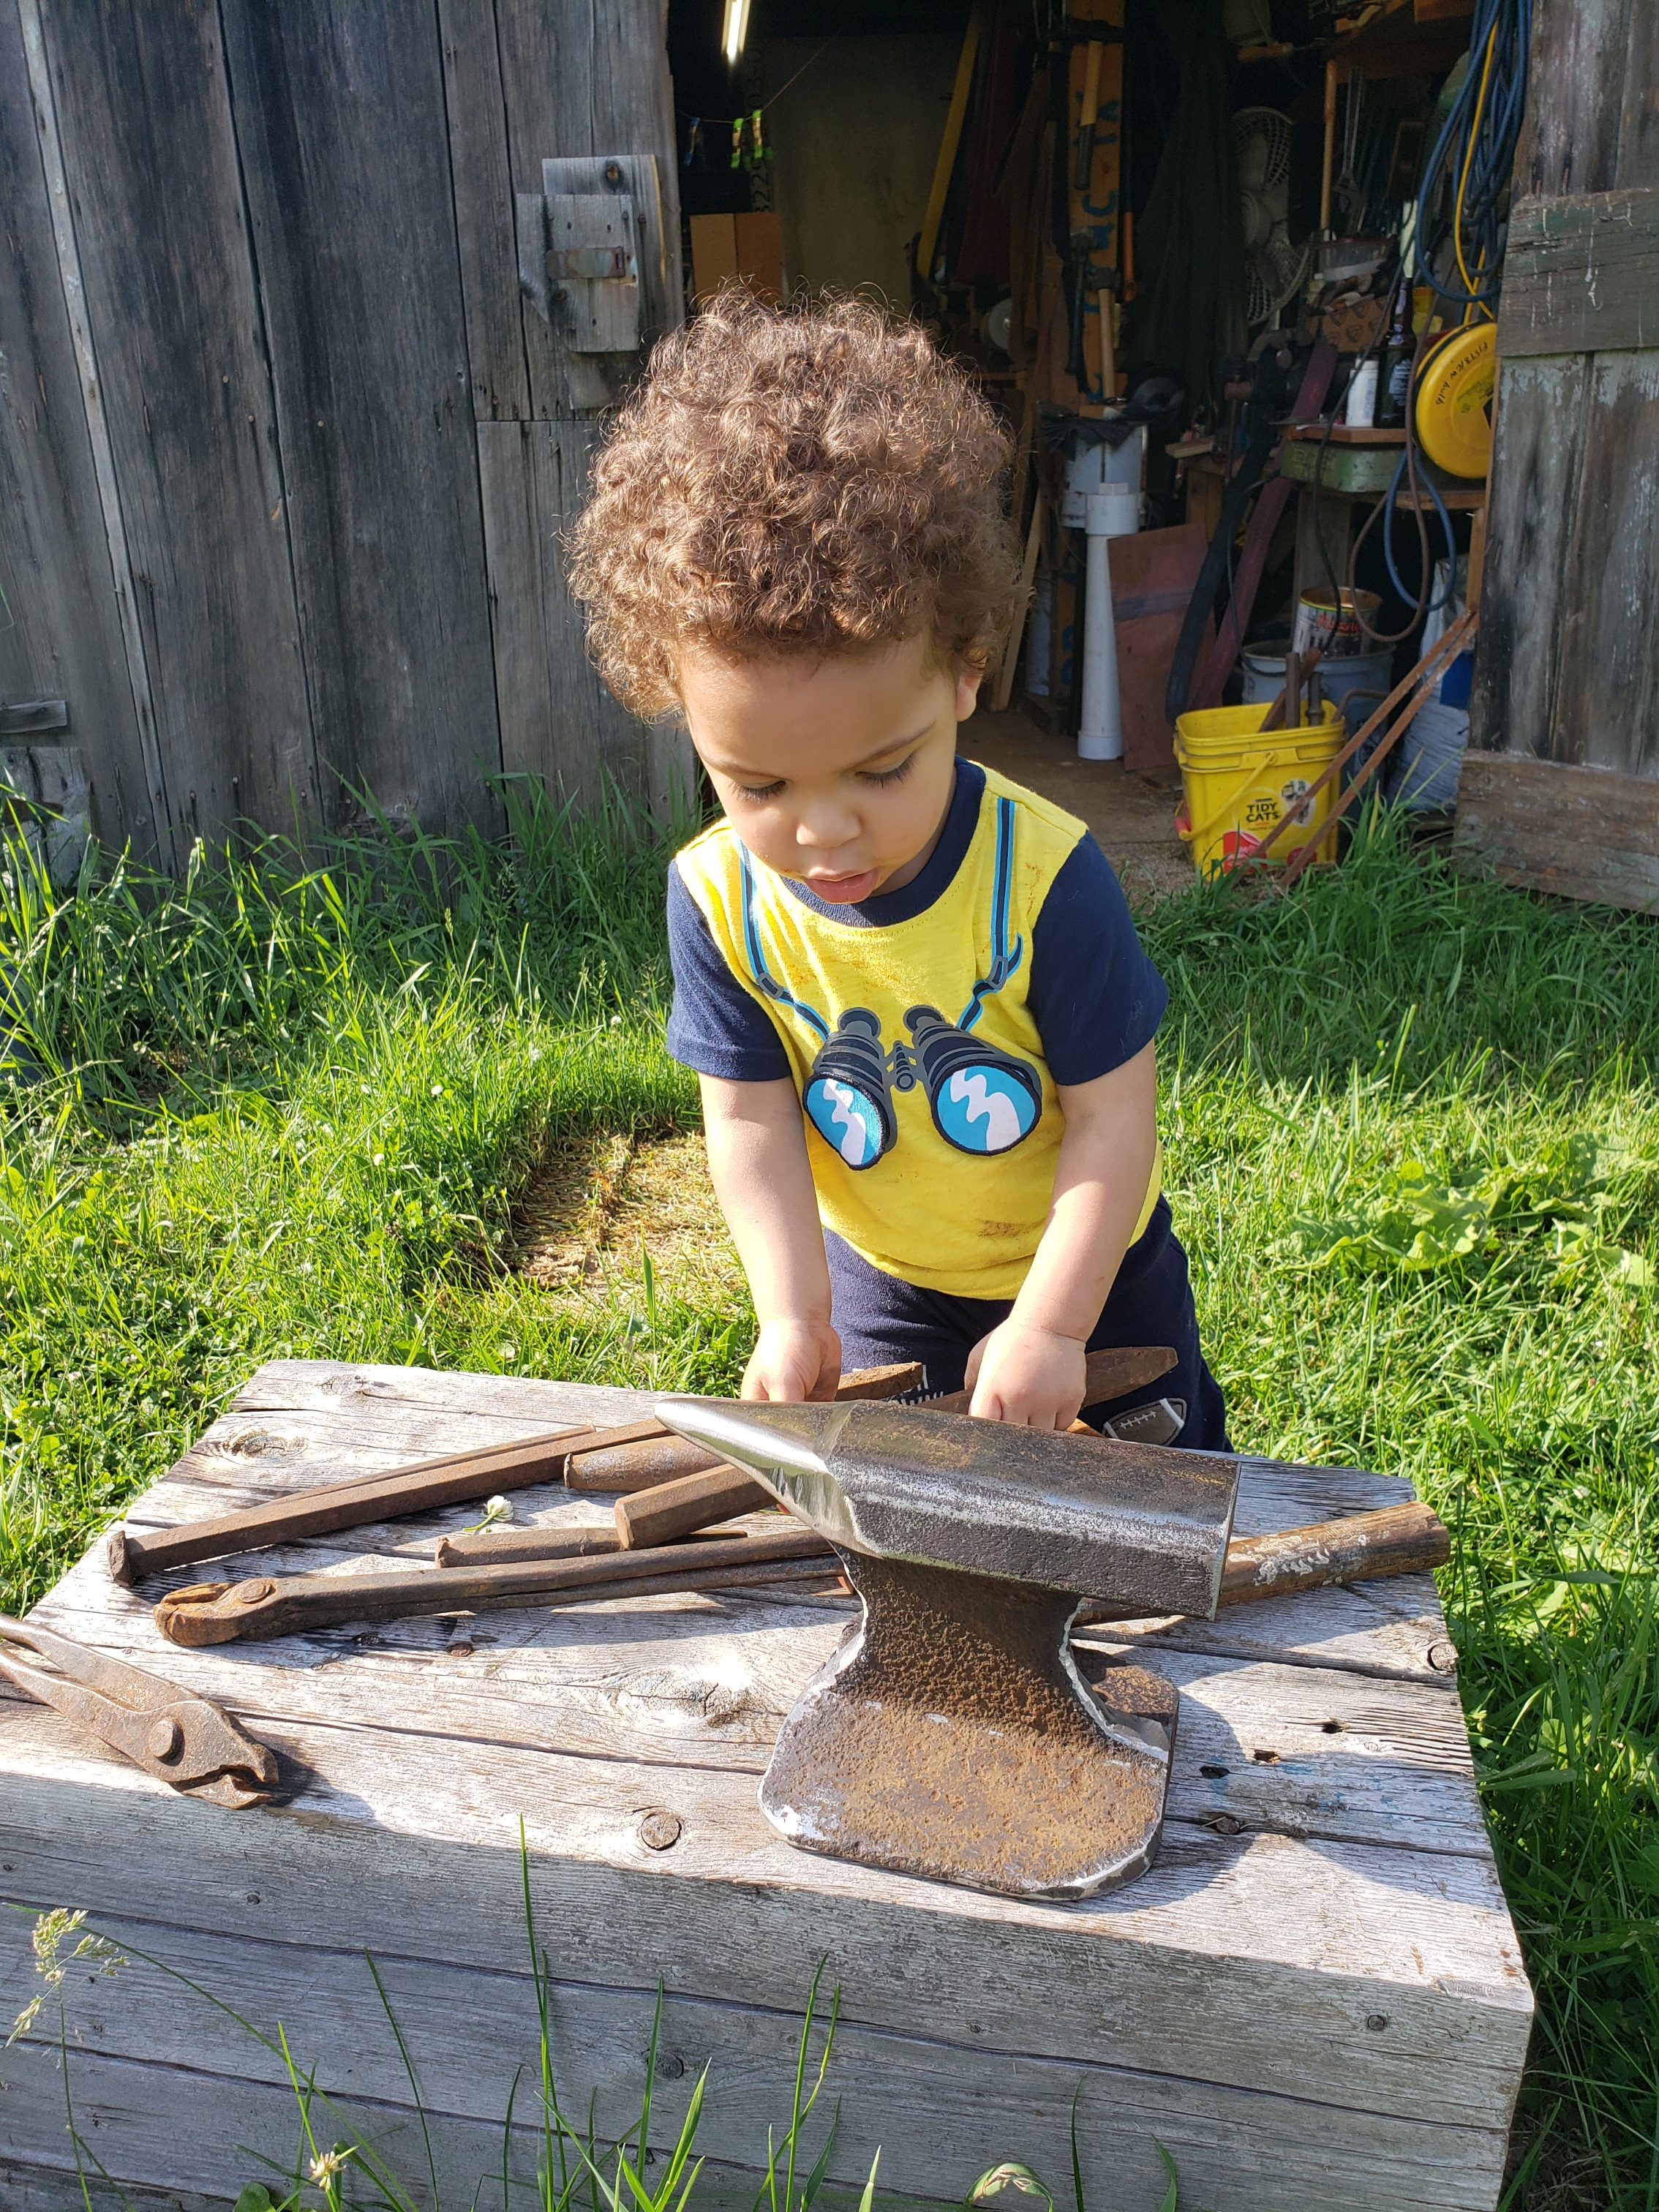
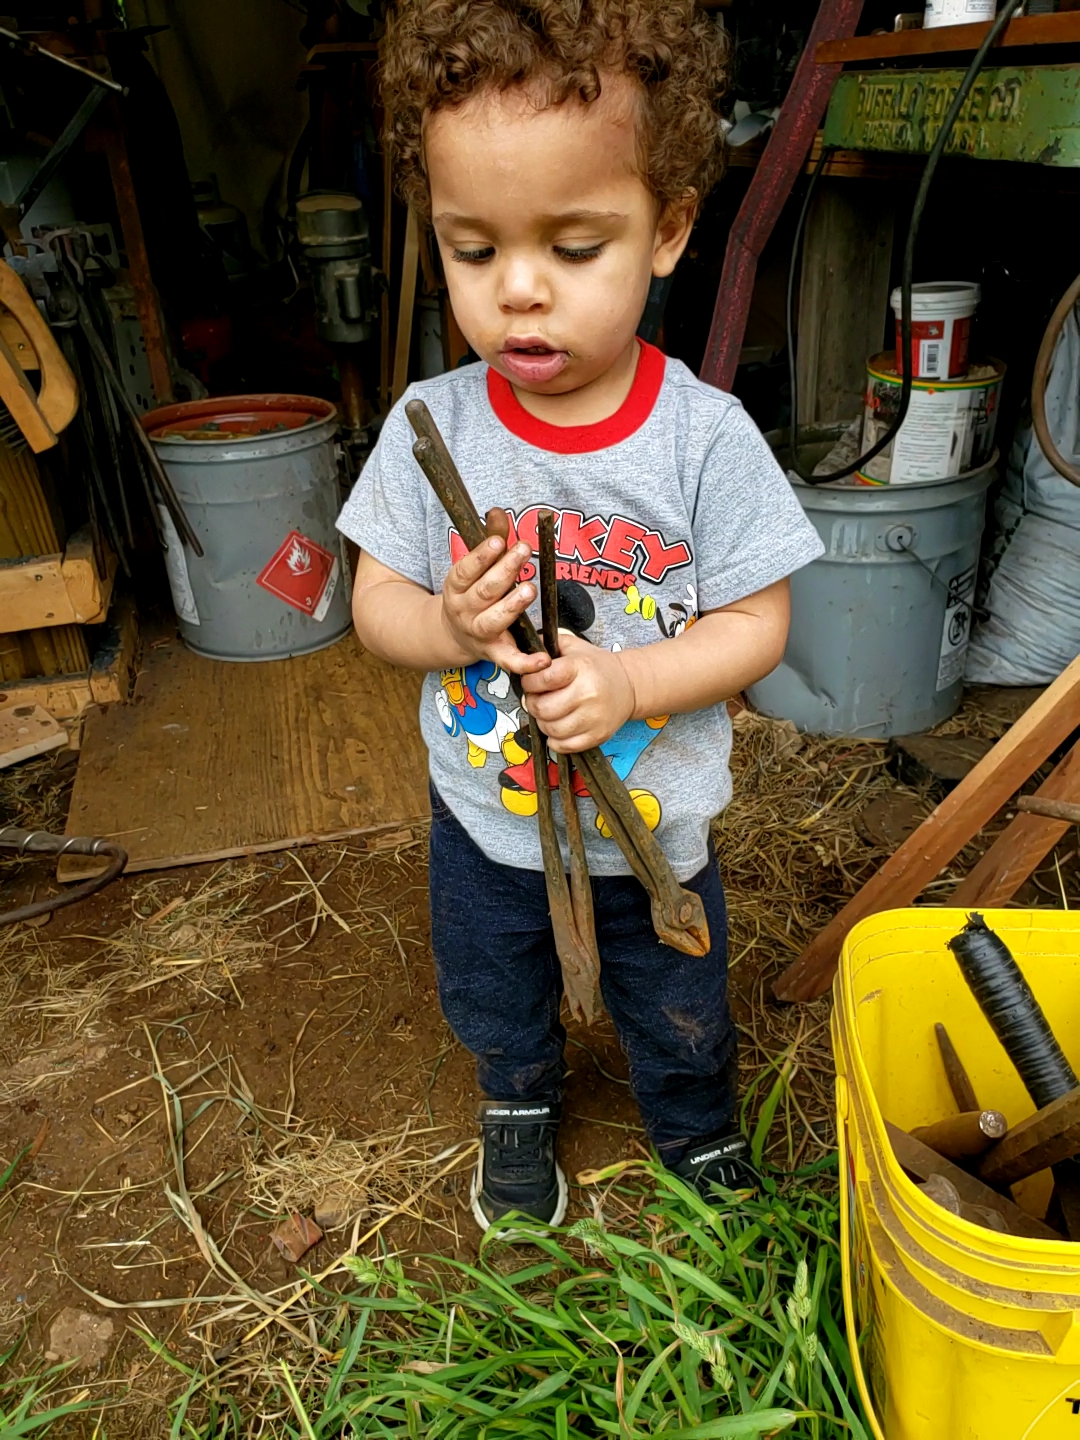
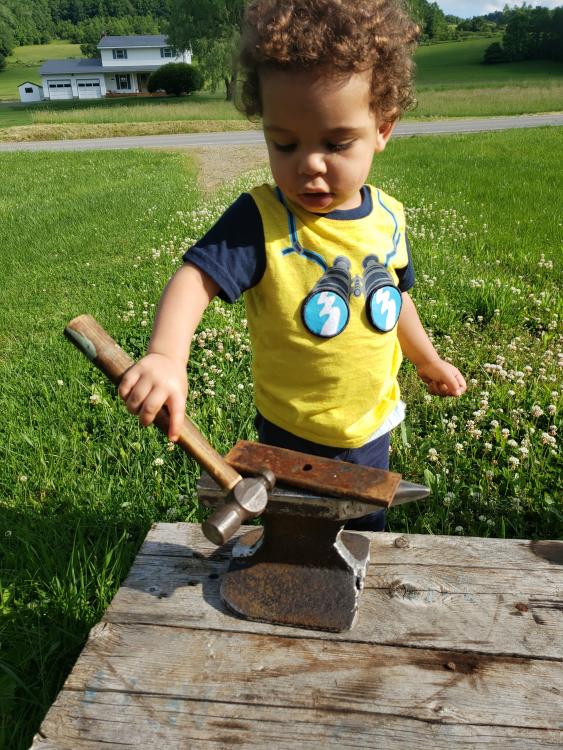
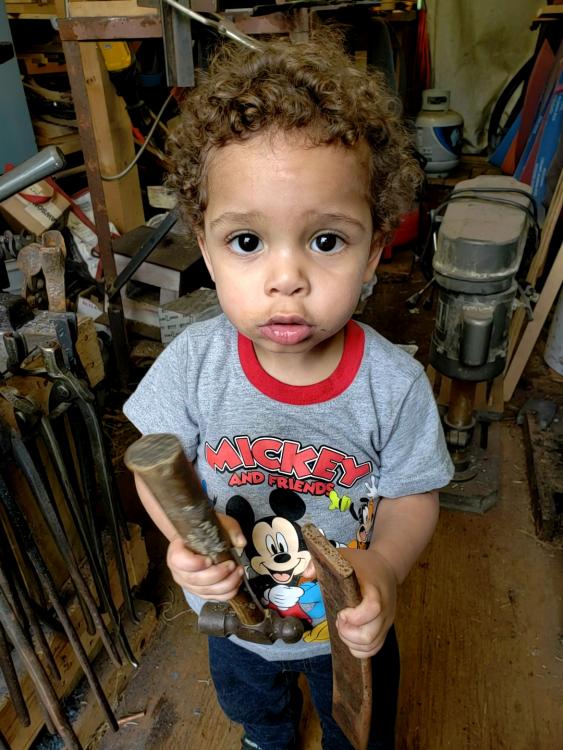
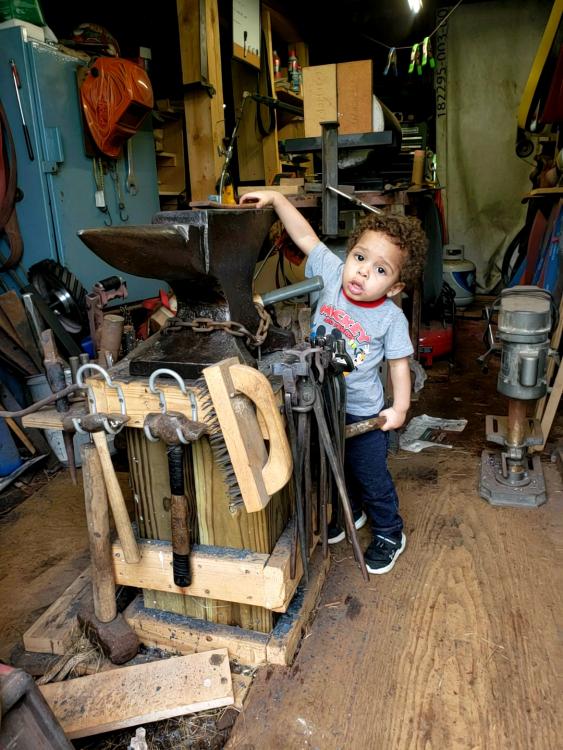
I have the old block I used for a stand before I built this one lying outside of the shop. He uses that more than anything. He does have his own hammer already, and today he claimed a couple of old tongs that were in the bucket of stuff I got with the anvil. He will have his own soon, probably a wooden one to start though. He won't even be 2 until August, but hopefully he continues to show a little interest. It was actually his idea to open the shop today. We were out in the yard playing and he went to the door and tried to open it wanting in to get his tools.

-
Well.... It's grandbaby approved now, so the real test has been passed.
-
Thanks guys. So pretty safe to call it a Trenton then. I have a few projects lined up for it already as soon as I get the time to get out there now. Anxious to do some more hammering on it.
-
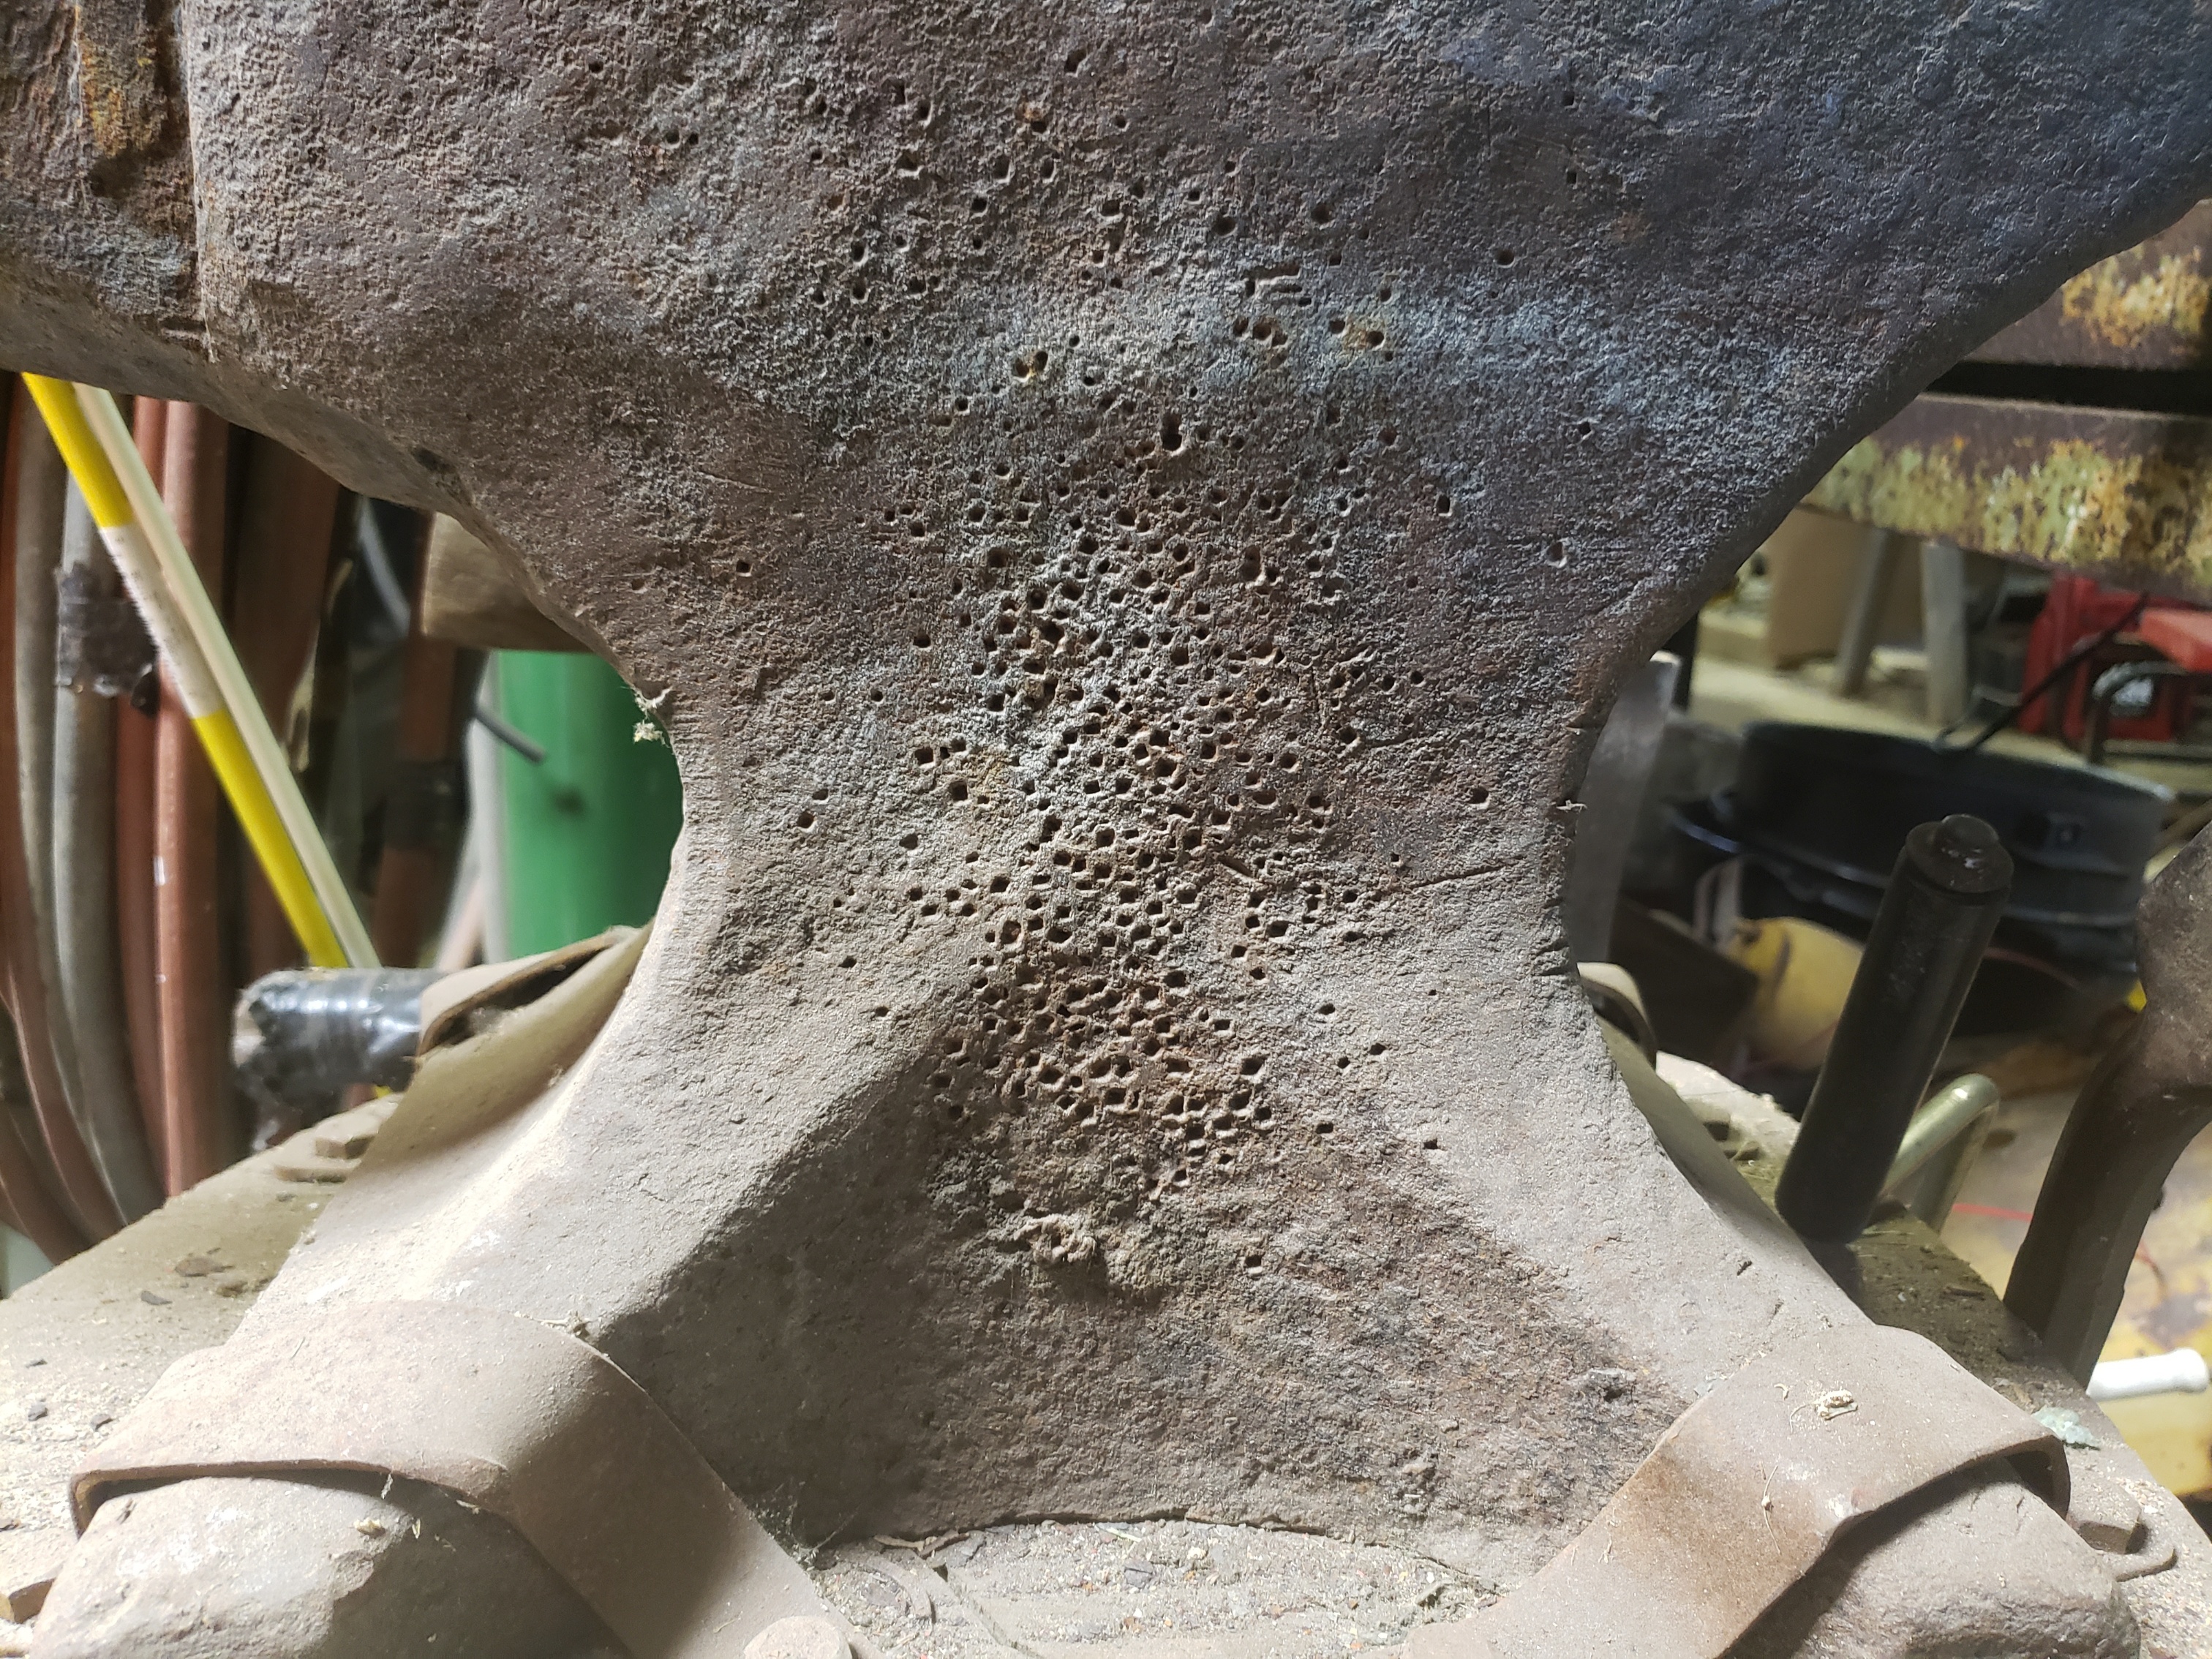
Very cool for the information. Thank you. The other side just has a few more punch marks. There were/are quite a few chisel marks around the bottom of the waist and at the top of the foot as well. So my thinking was they made a lot of tooling. I was kind of hoping to keep my little vulcan for the grandbaby when I upgraded, but being able to trade up for this one was too good to pass on. Plus he's not quite 2 yet, so I have a couple days to work on something for him.
-
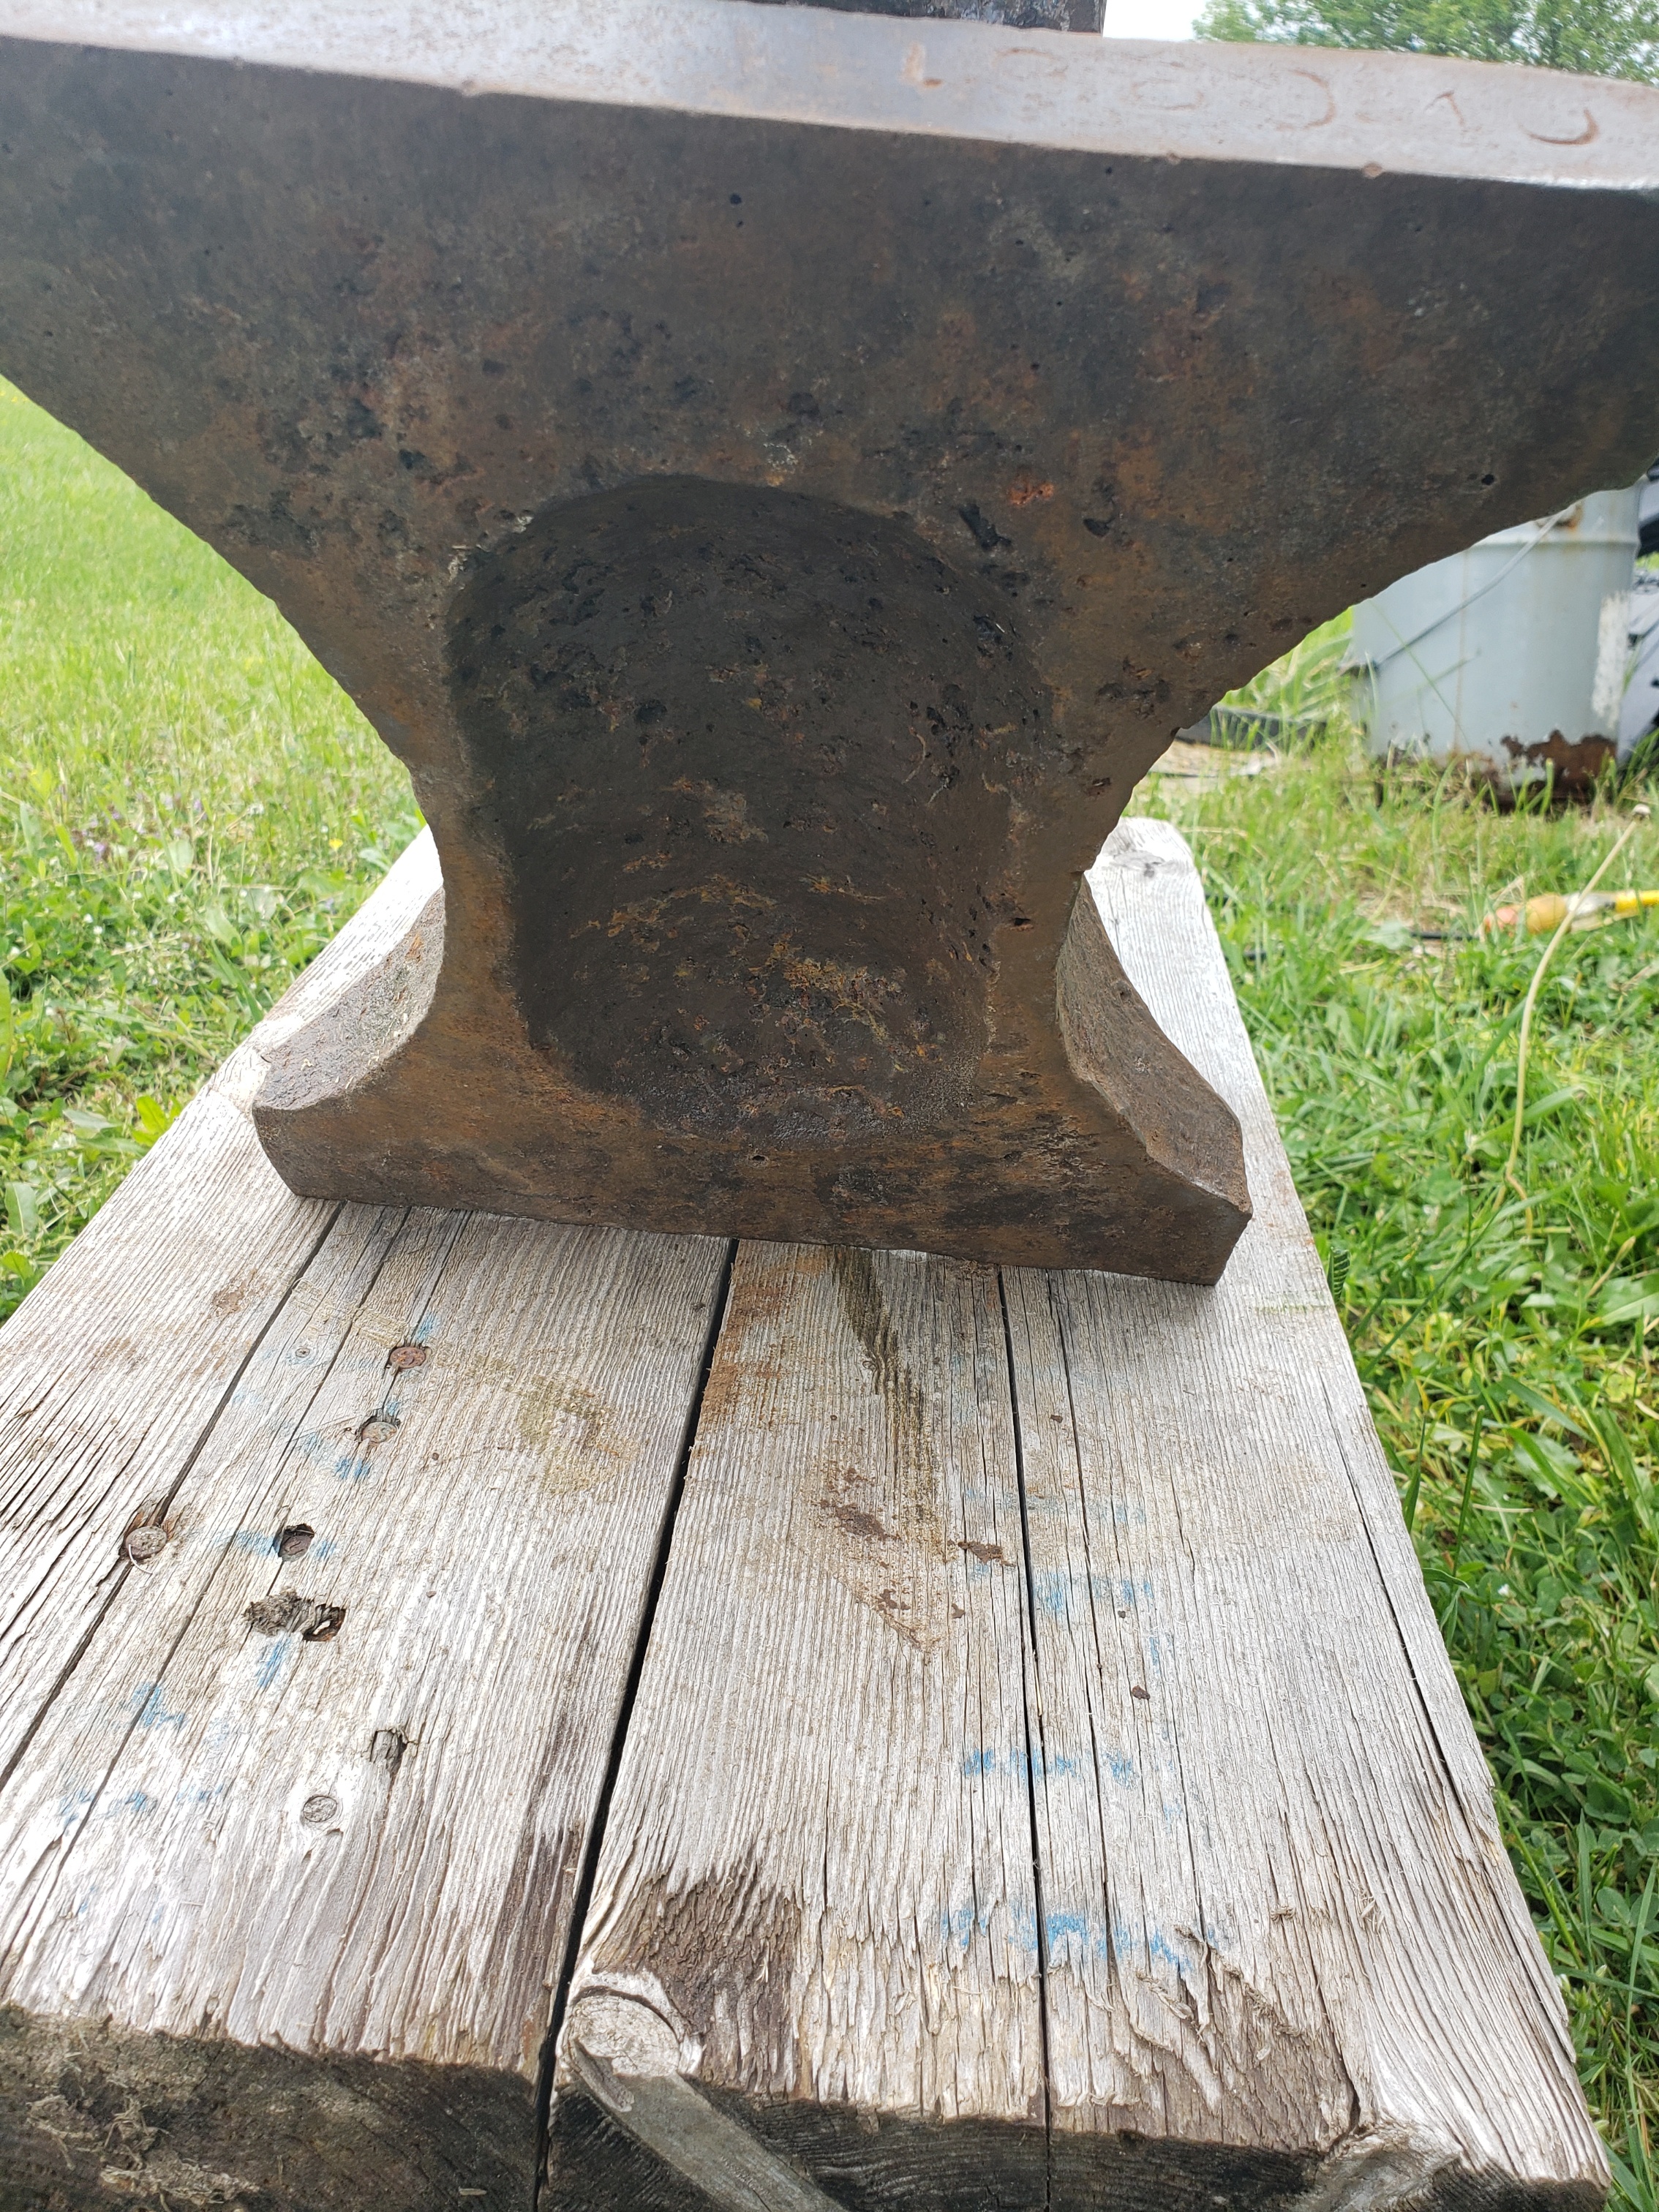
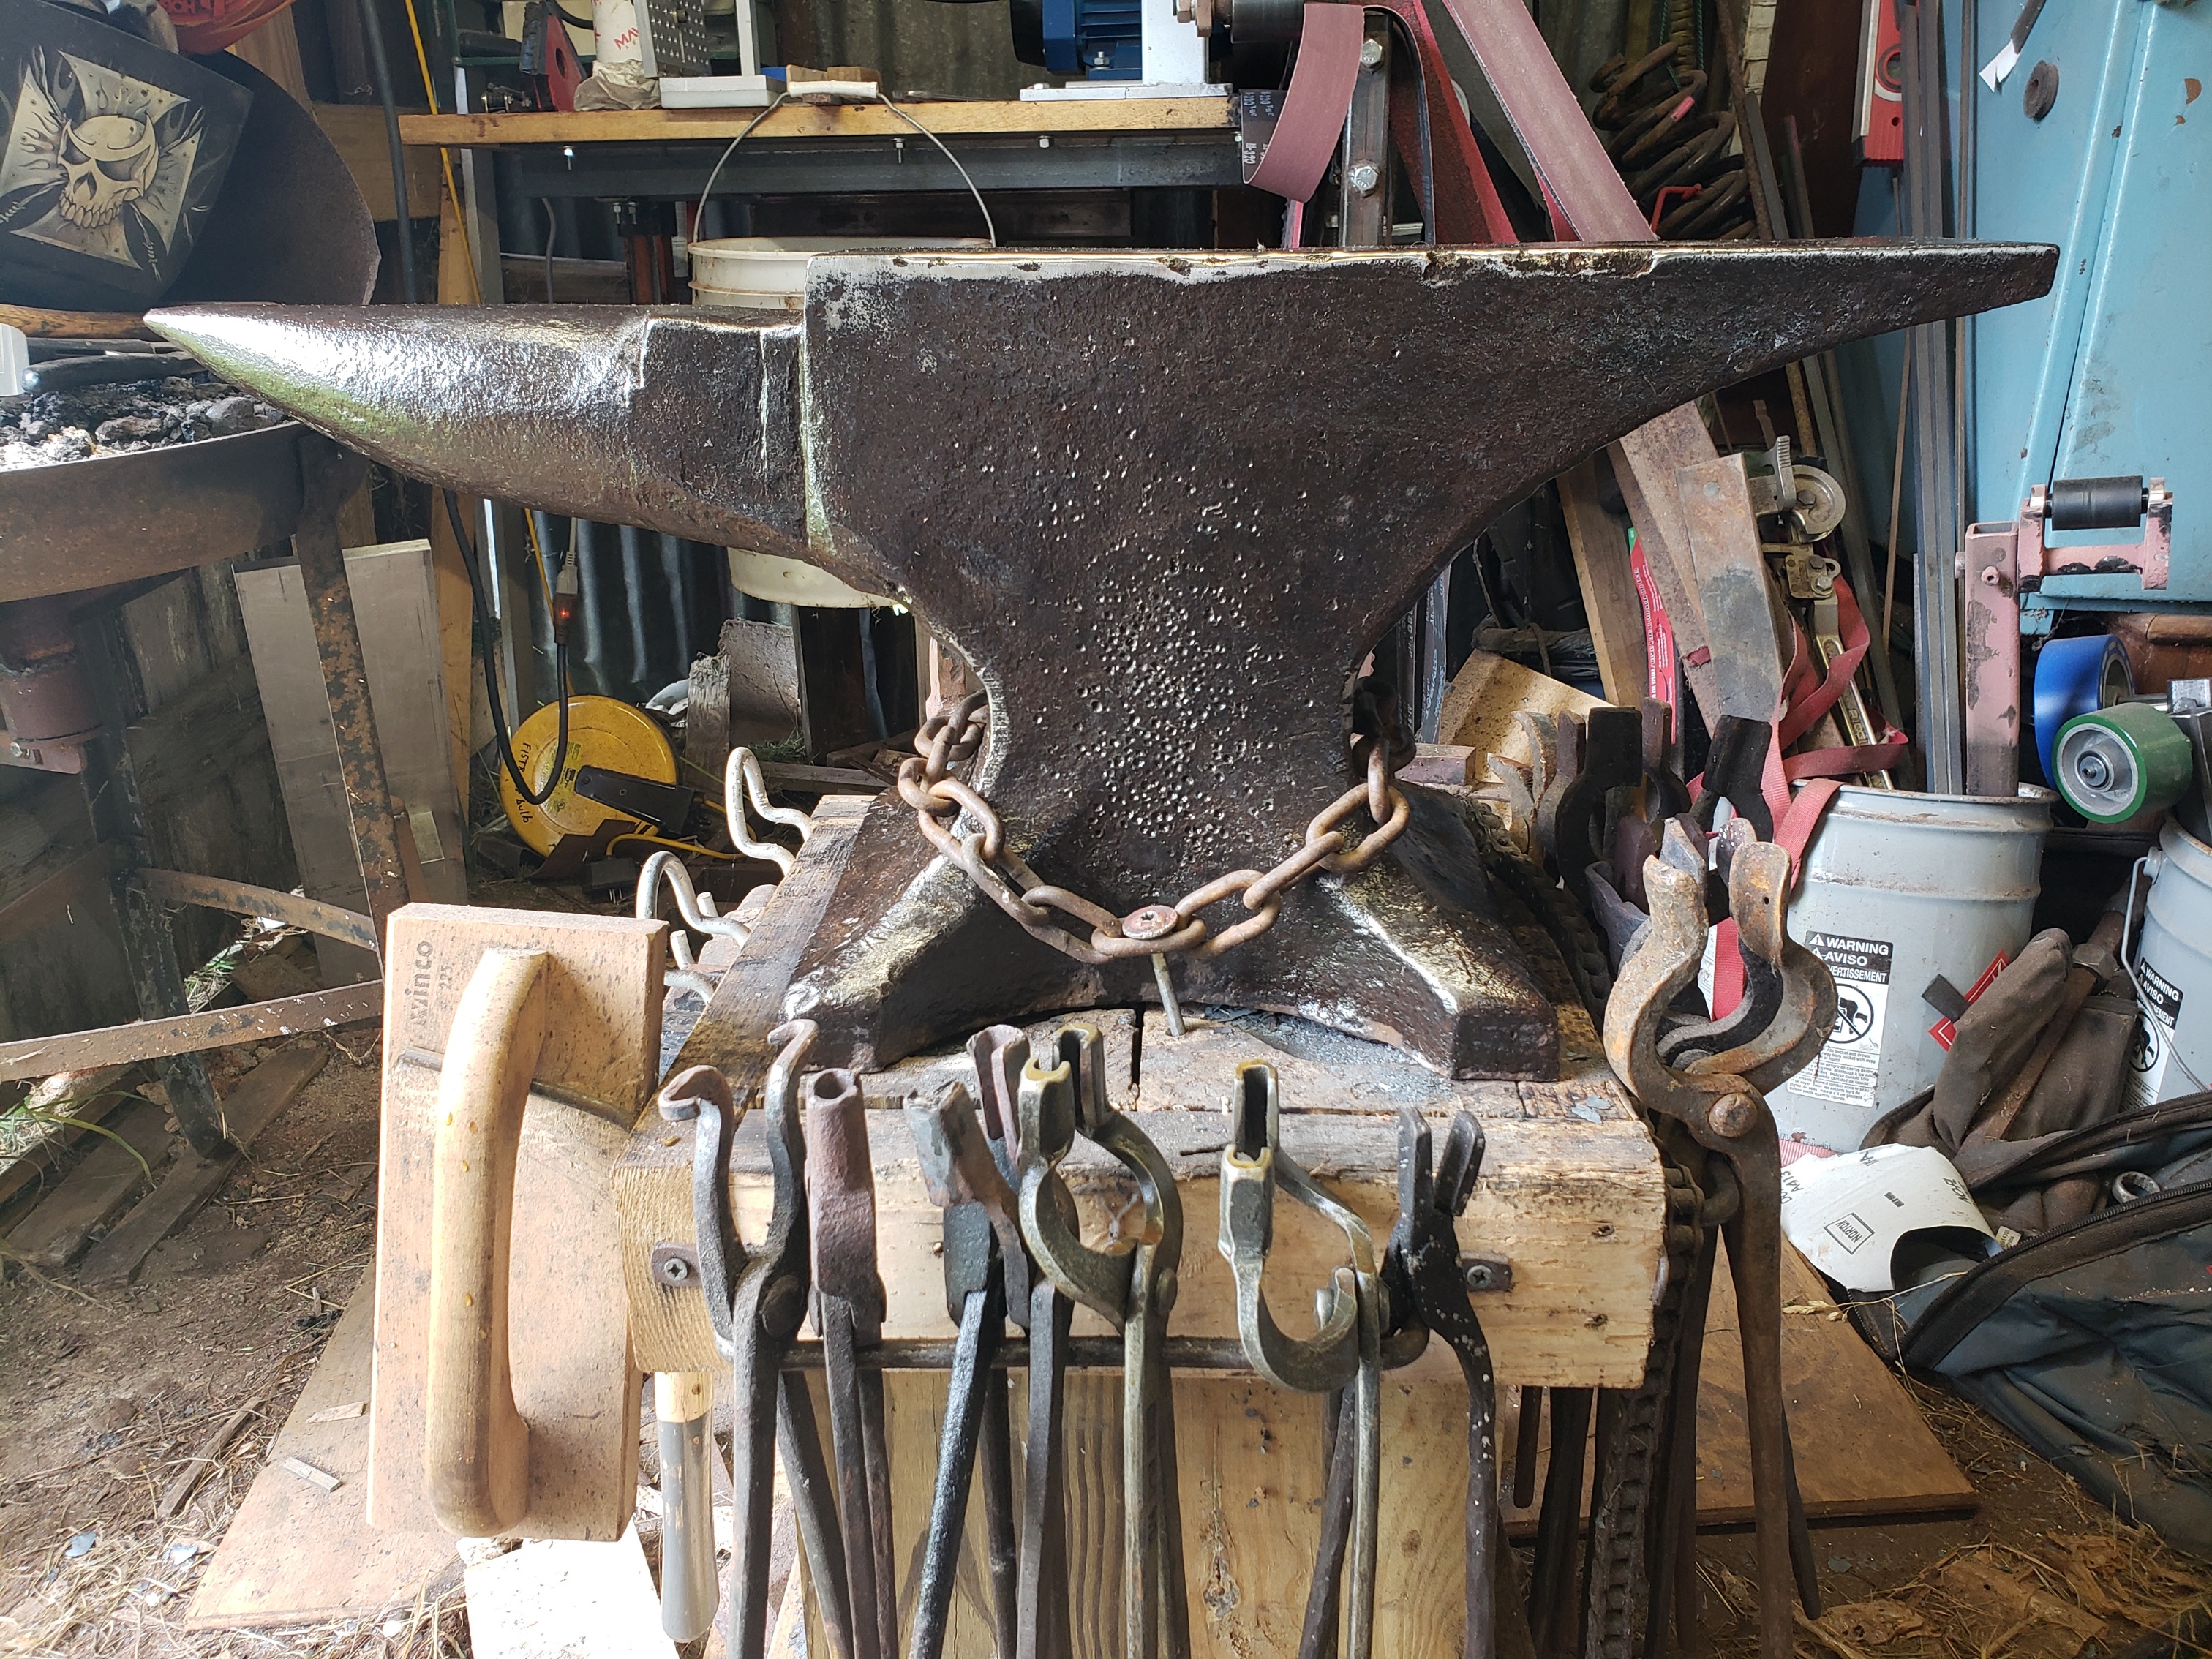
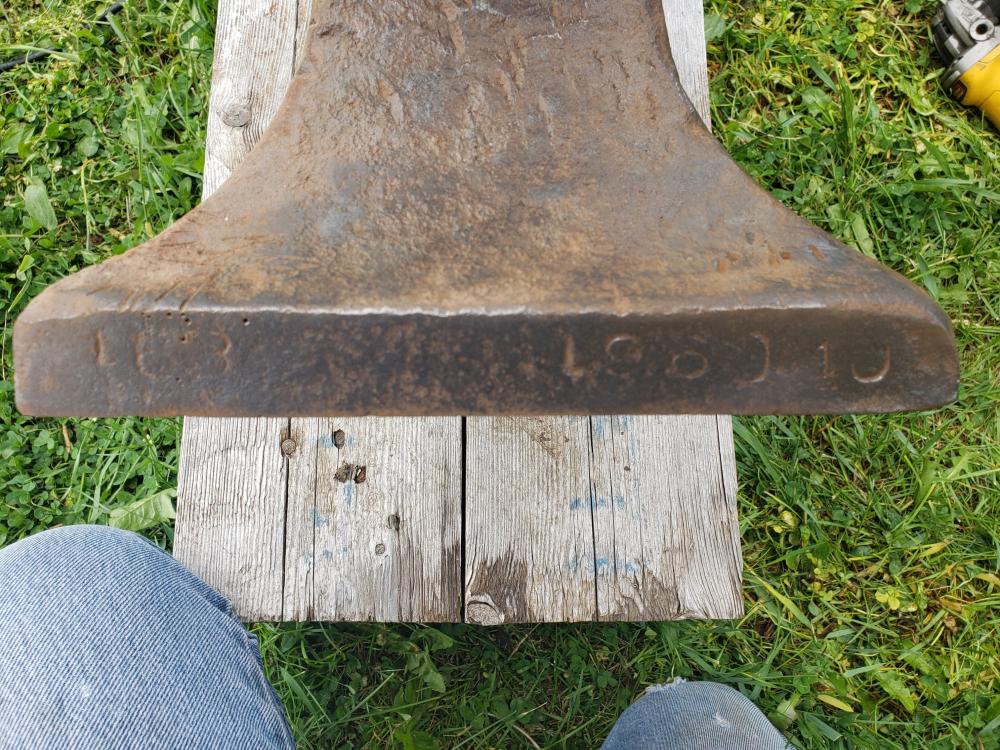
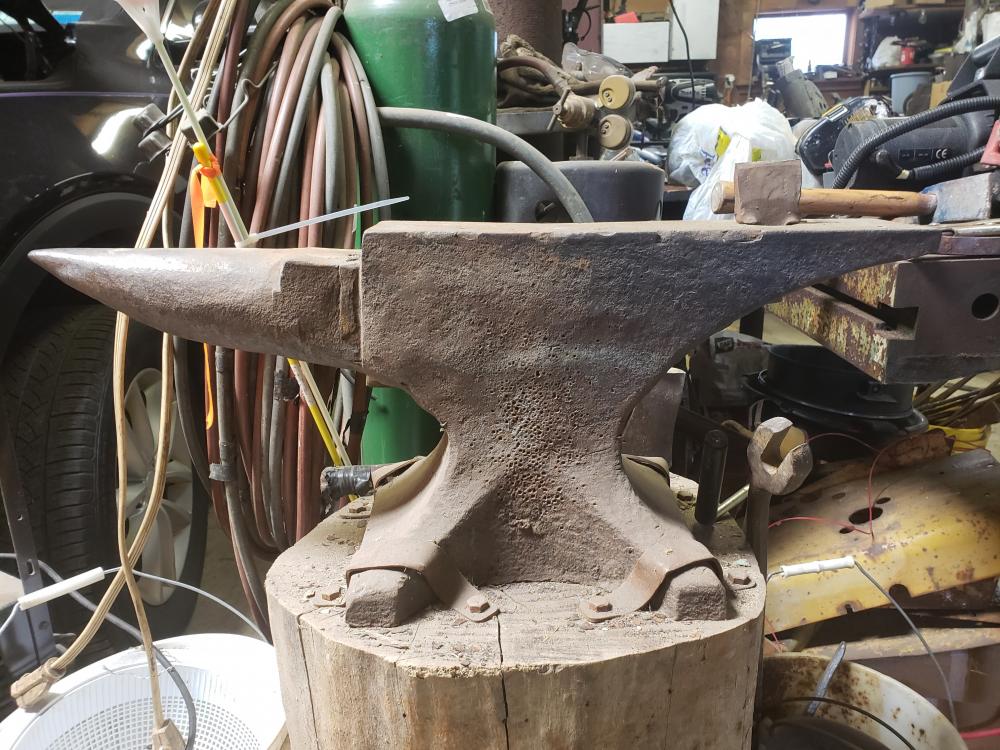
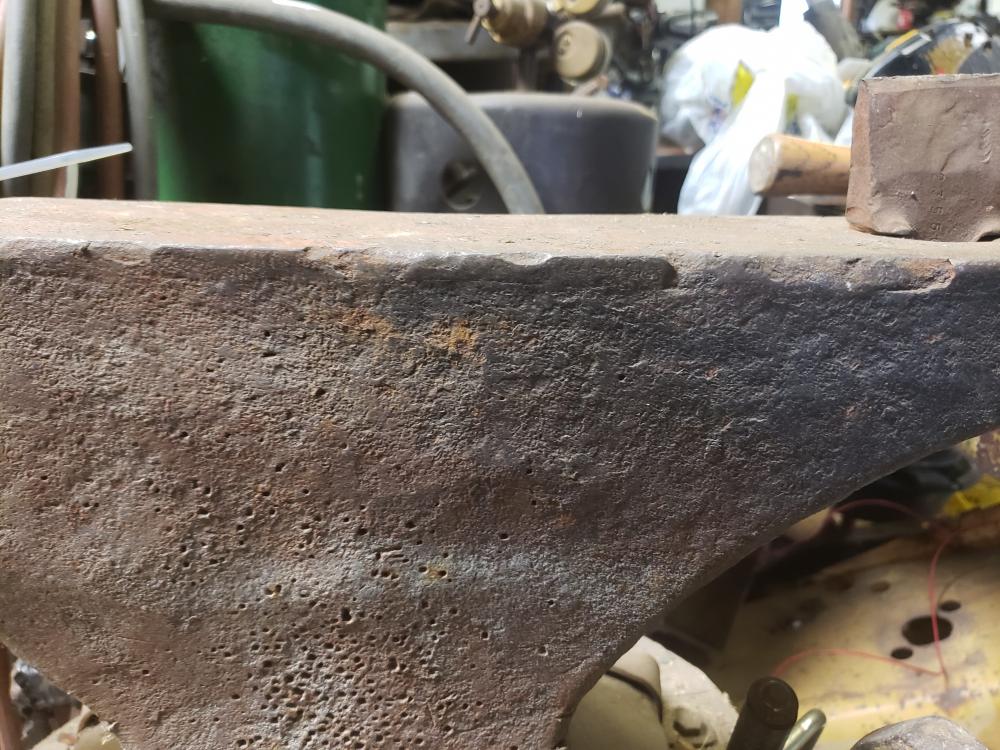
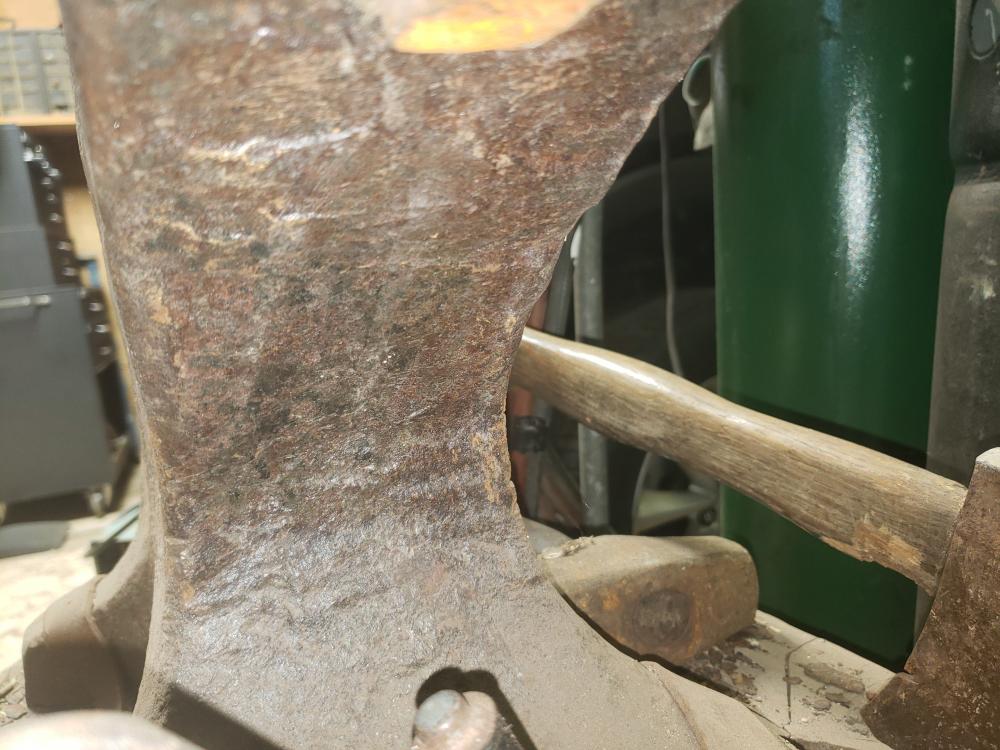
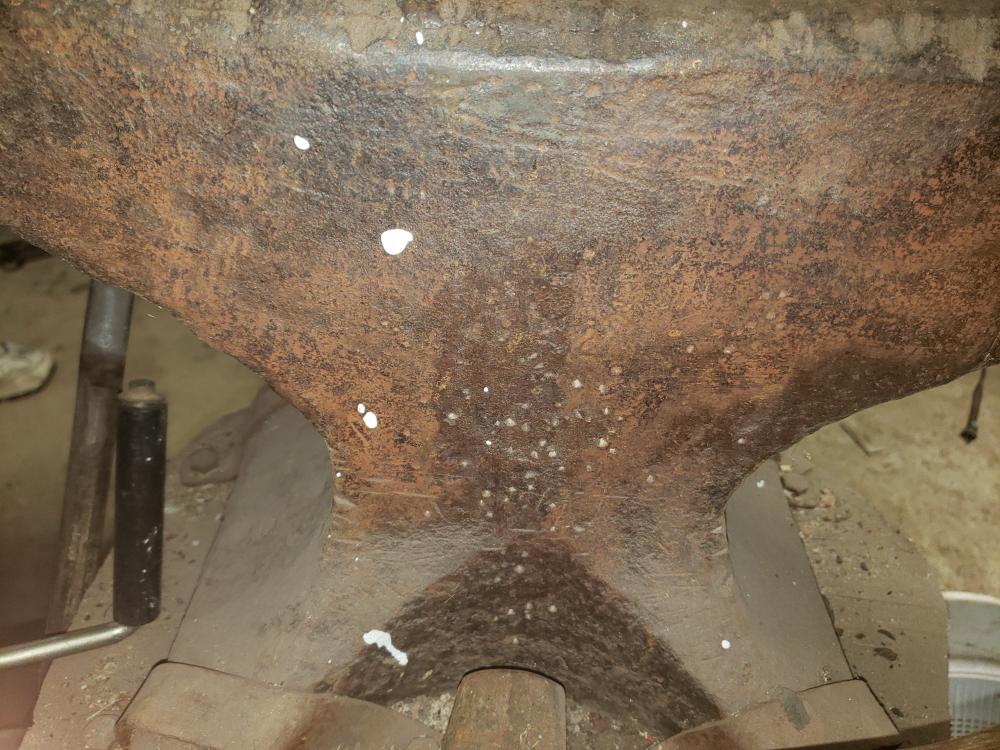
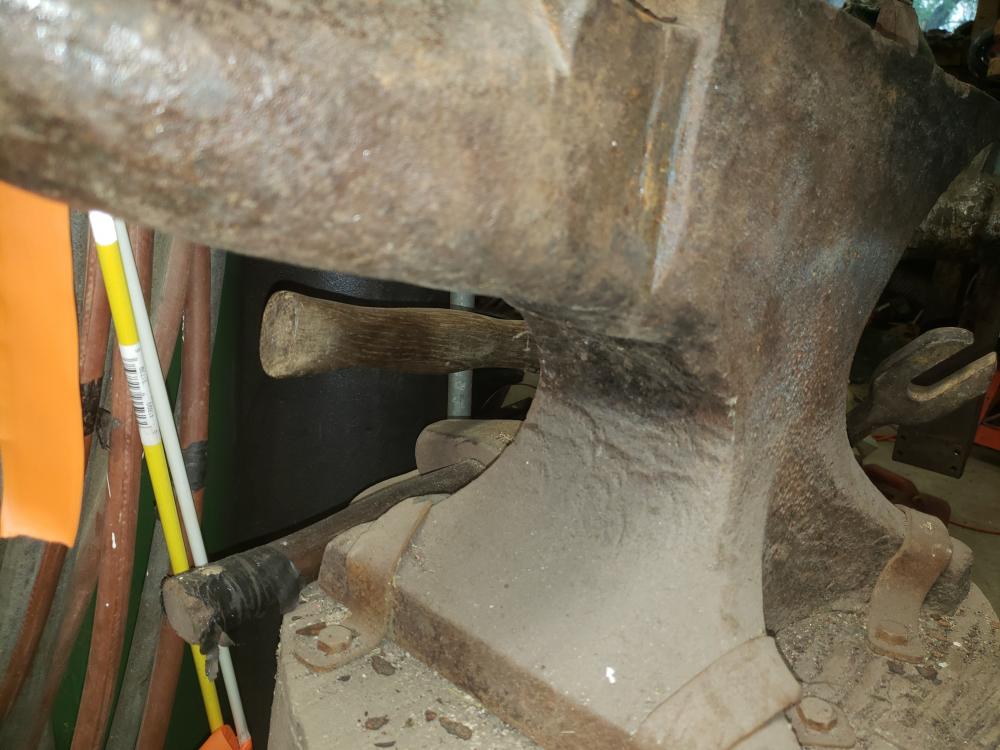
Got out today and got it out of the trunk and cleaned up. The worst chips on the side away from me I rounded off and made radius' (is that right?) out of. Mostly just to keep them from chipping further, but the will make an ok spot for starting handle contours when I'm making knives. Well, in my brain at least. I did use a flap wheel for that and just lightly on the face to clean up a few spots that looked like weld spatter that had landed on the heel. The rest was just wire wheeled and rubbed the whole thing down with linseed oil. I got it mounted on my block and chained down like the little Vulcan was. It is slightly higher than the Vulcan that I set doing the knuckle thing, but it actually feels more comfortable to use that way. Time will tell on that one I guess. I did get it on a scale. It weighs in at 160 pounds. I also found just a few hints left of some stamping on the foot under the horn. Looks to me like it has a 163 and a 1960 10 stamped into it. 163 pounds and made in Oct. 1960 maybe? No clue personally. It also has a bit of depression in the center of the foot. So I still have no clue who it was made by, but I did forge out a knife blank from a piece of 1095. Hits very nice and has a decent ring without being tuning fork annoying. Definitely more than the "thump" I got from the Vulcan. A ball bearing is showing about 85ish% rebound. Overall I am quite happy with the upgrade and don't think I did too bad on the score. My little 110lb Vulcan is going back to where this one came from as he only uses it to flatten things out once in a while and would rather see the big one get used. The only downside to it is all of the turning cams, cut off tools, and everything else I made for the 1/2 inch hardy on the Vulcan will need an adapter or re-built to fit the 1 inch hardy on this one. It also came with a bucket full of jackhammer bits and random tongs so making some new ones won't be an issue. I also haven't finished machining my guillotine, so that can be made to fit as well. Would be cool to find out what it is, but it works great even if I never do.


-
ABANA October 14, 2021 Meet Johnstown PA
sfeile replied to jlpservicesinc's topic in Events, Hammer ins, Where to meet
That would be awesome. I've talked with Aric (daswulf) quite a bit in the past although I've been mia and slacking. Hopefully he will make it and I can meet you both in person. -
ABANA October 14, 2021 Meet Johnstown PA
sfeile replied to jlpservicesinc's topic in Events, Hammer ins, Where to meet
I'm going to try my best. I do like watching your videos and a welding lesson would be awesome to see. I've just managed to make a blade from my 3rd ever attempt at forge welding. Turned out mostly ok, but I do have 2 small cold shuts in it. Always looking to learn more though. -
ABANA October 14, 2021 Meet Johnstown PA
sfeile replied to jlpservicesinc's topic in Events, Hammer ins, Where to meet
I am going to have to plan for this. Just went to my first meet in Reynoldsville last week. This one is a bit farther but since I know about it earlier than the week before, I should be able to plan a little better. -
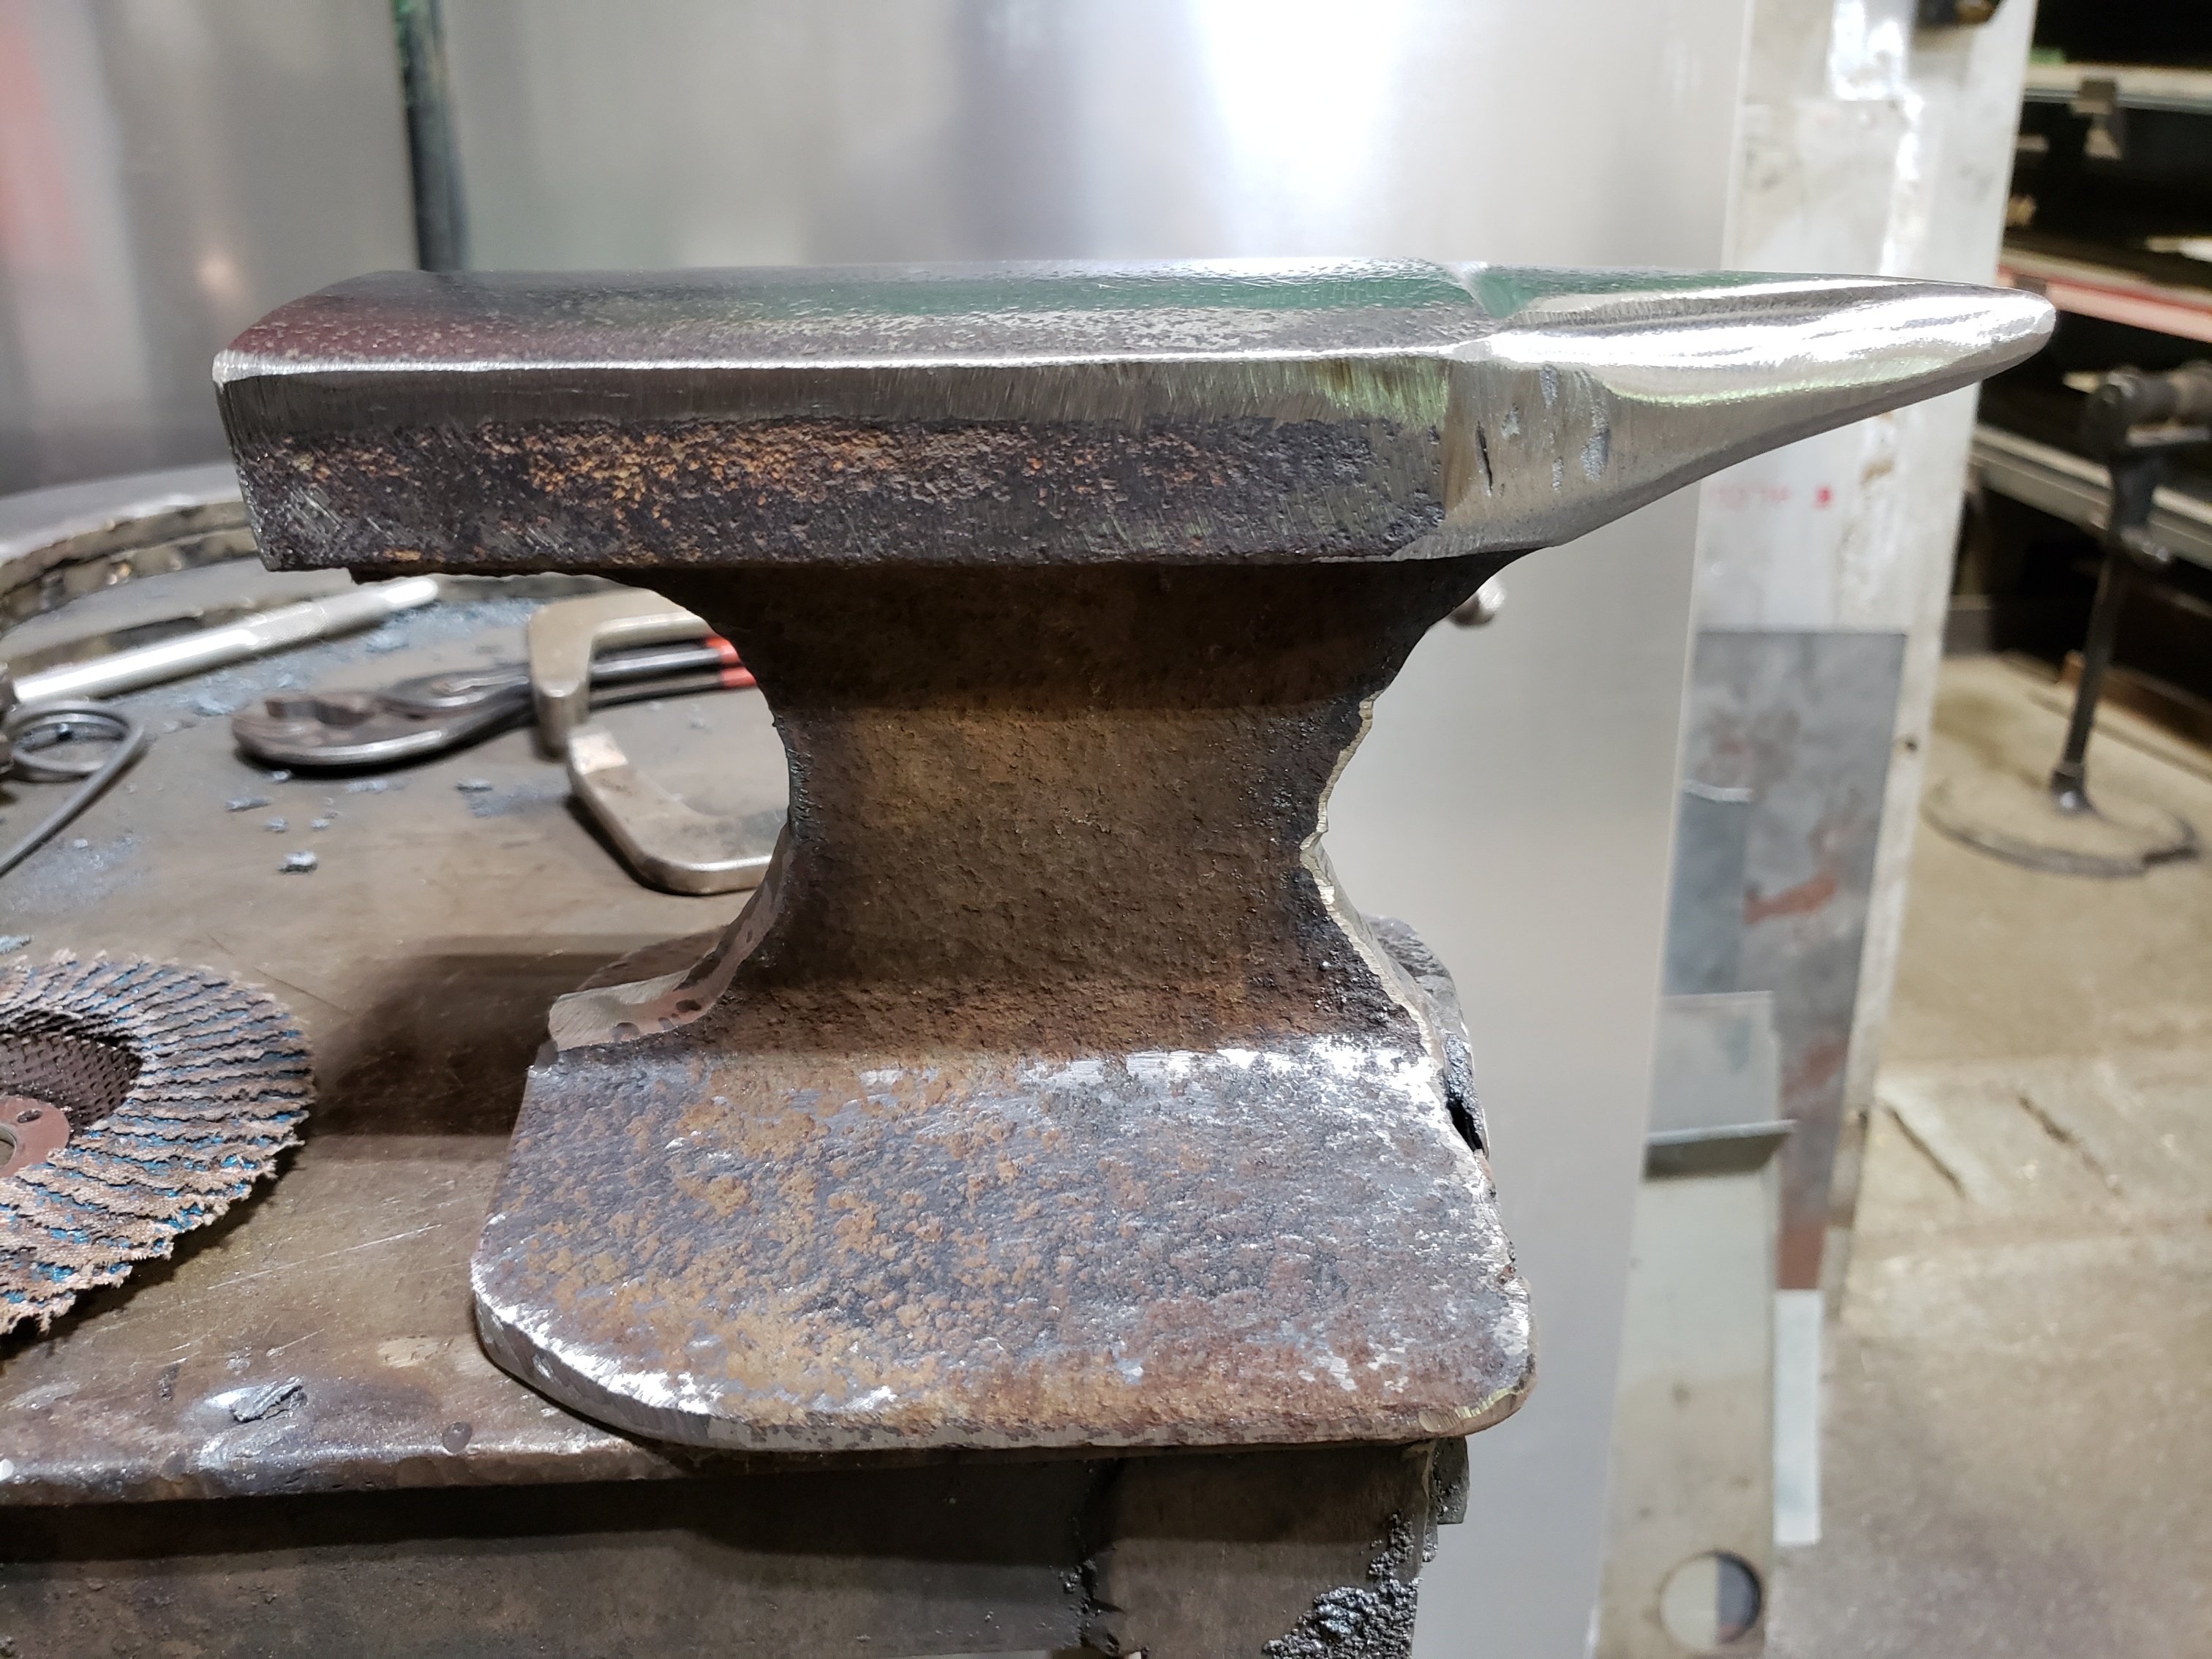
Really no clue on the maker or age, but it appears to be cast with a plate. I can't find any markings on it. Looks like there is a lot of plate left and it's actually quite flat. Some chipping on the edges, but I think it's within rounding range for what I would do with it. Weight is 150 from what I was told. Haven't put it on a scale to check yet.

-
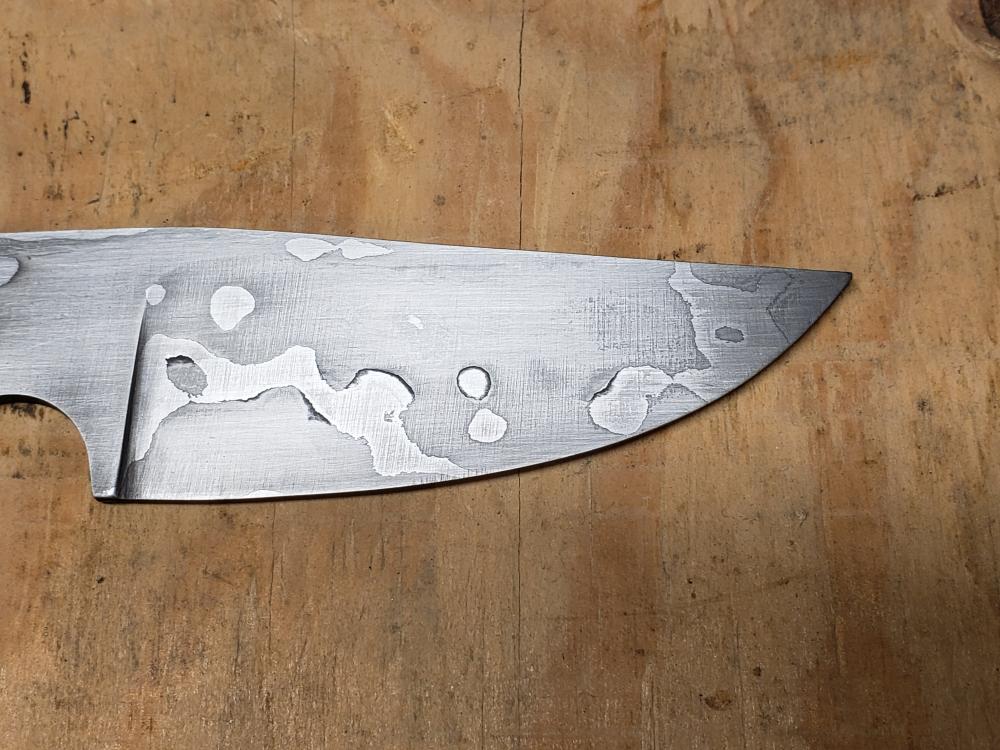
Here it is all finished up except for sharpening. I know an Amish saddlemaker that does an amazing job making sheathes, so I will do the final edge after he is done with it.

-
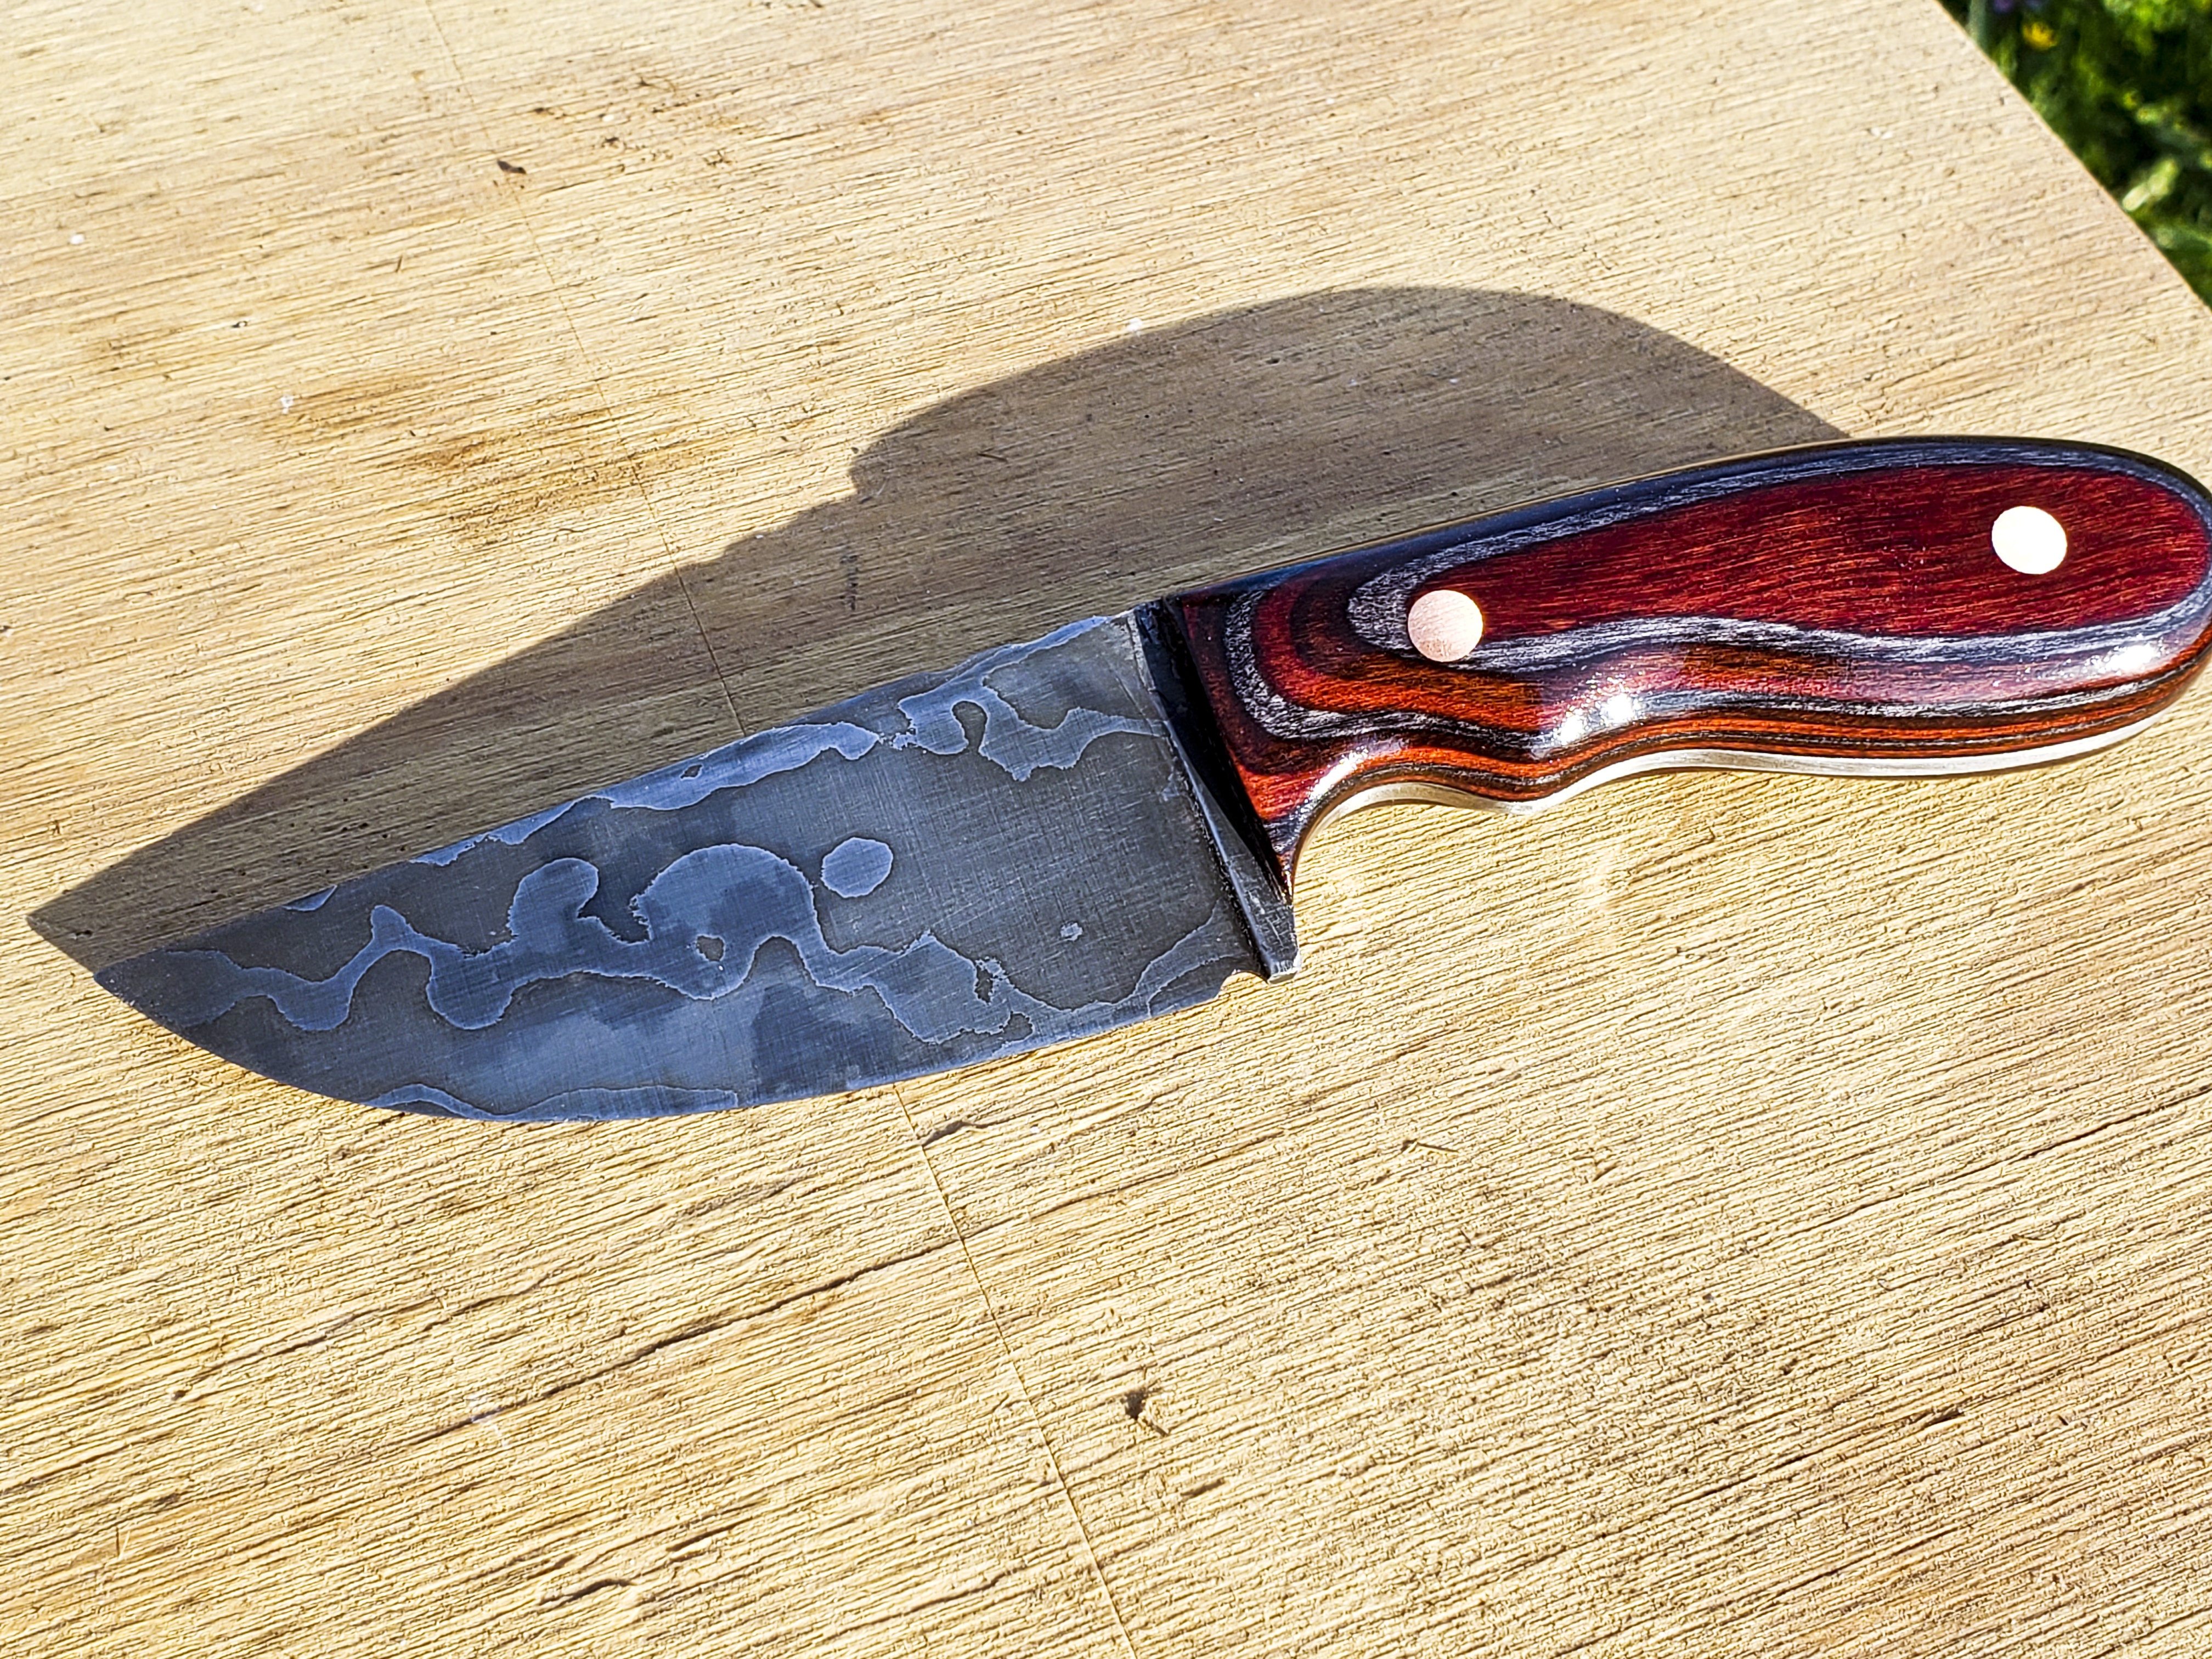
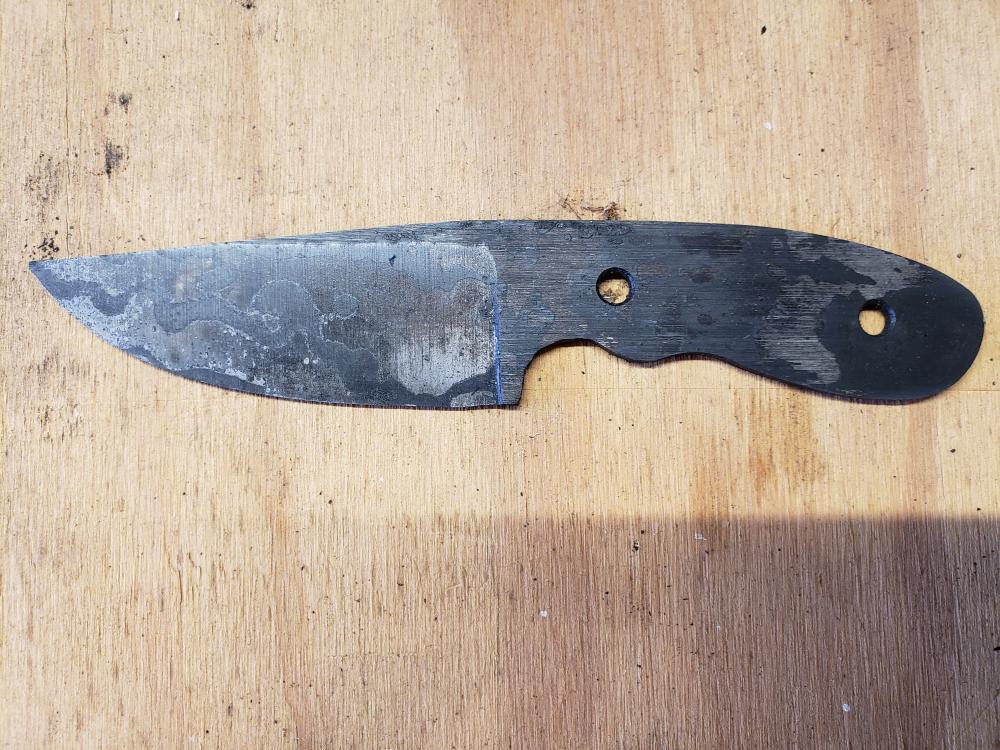
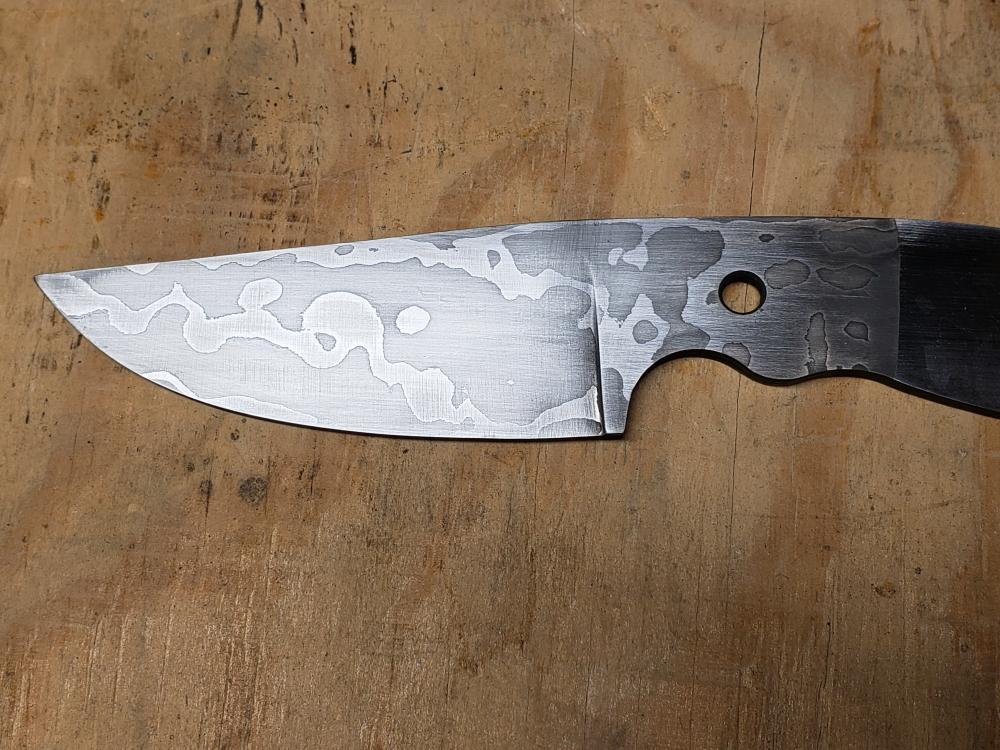
Thanks Irondragon, anvil, and Rojo. Thomas, fair point. It was four layers of .049" 15n20, and three layers of .125" 1095. So just over 9/16 of an inch thick and inch and a half by two inches.
-
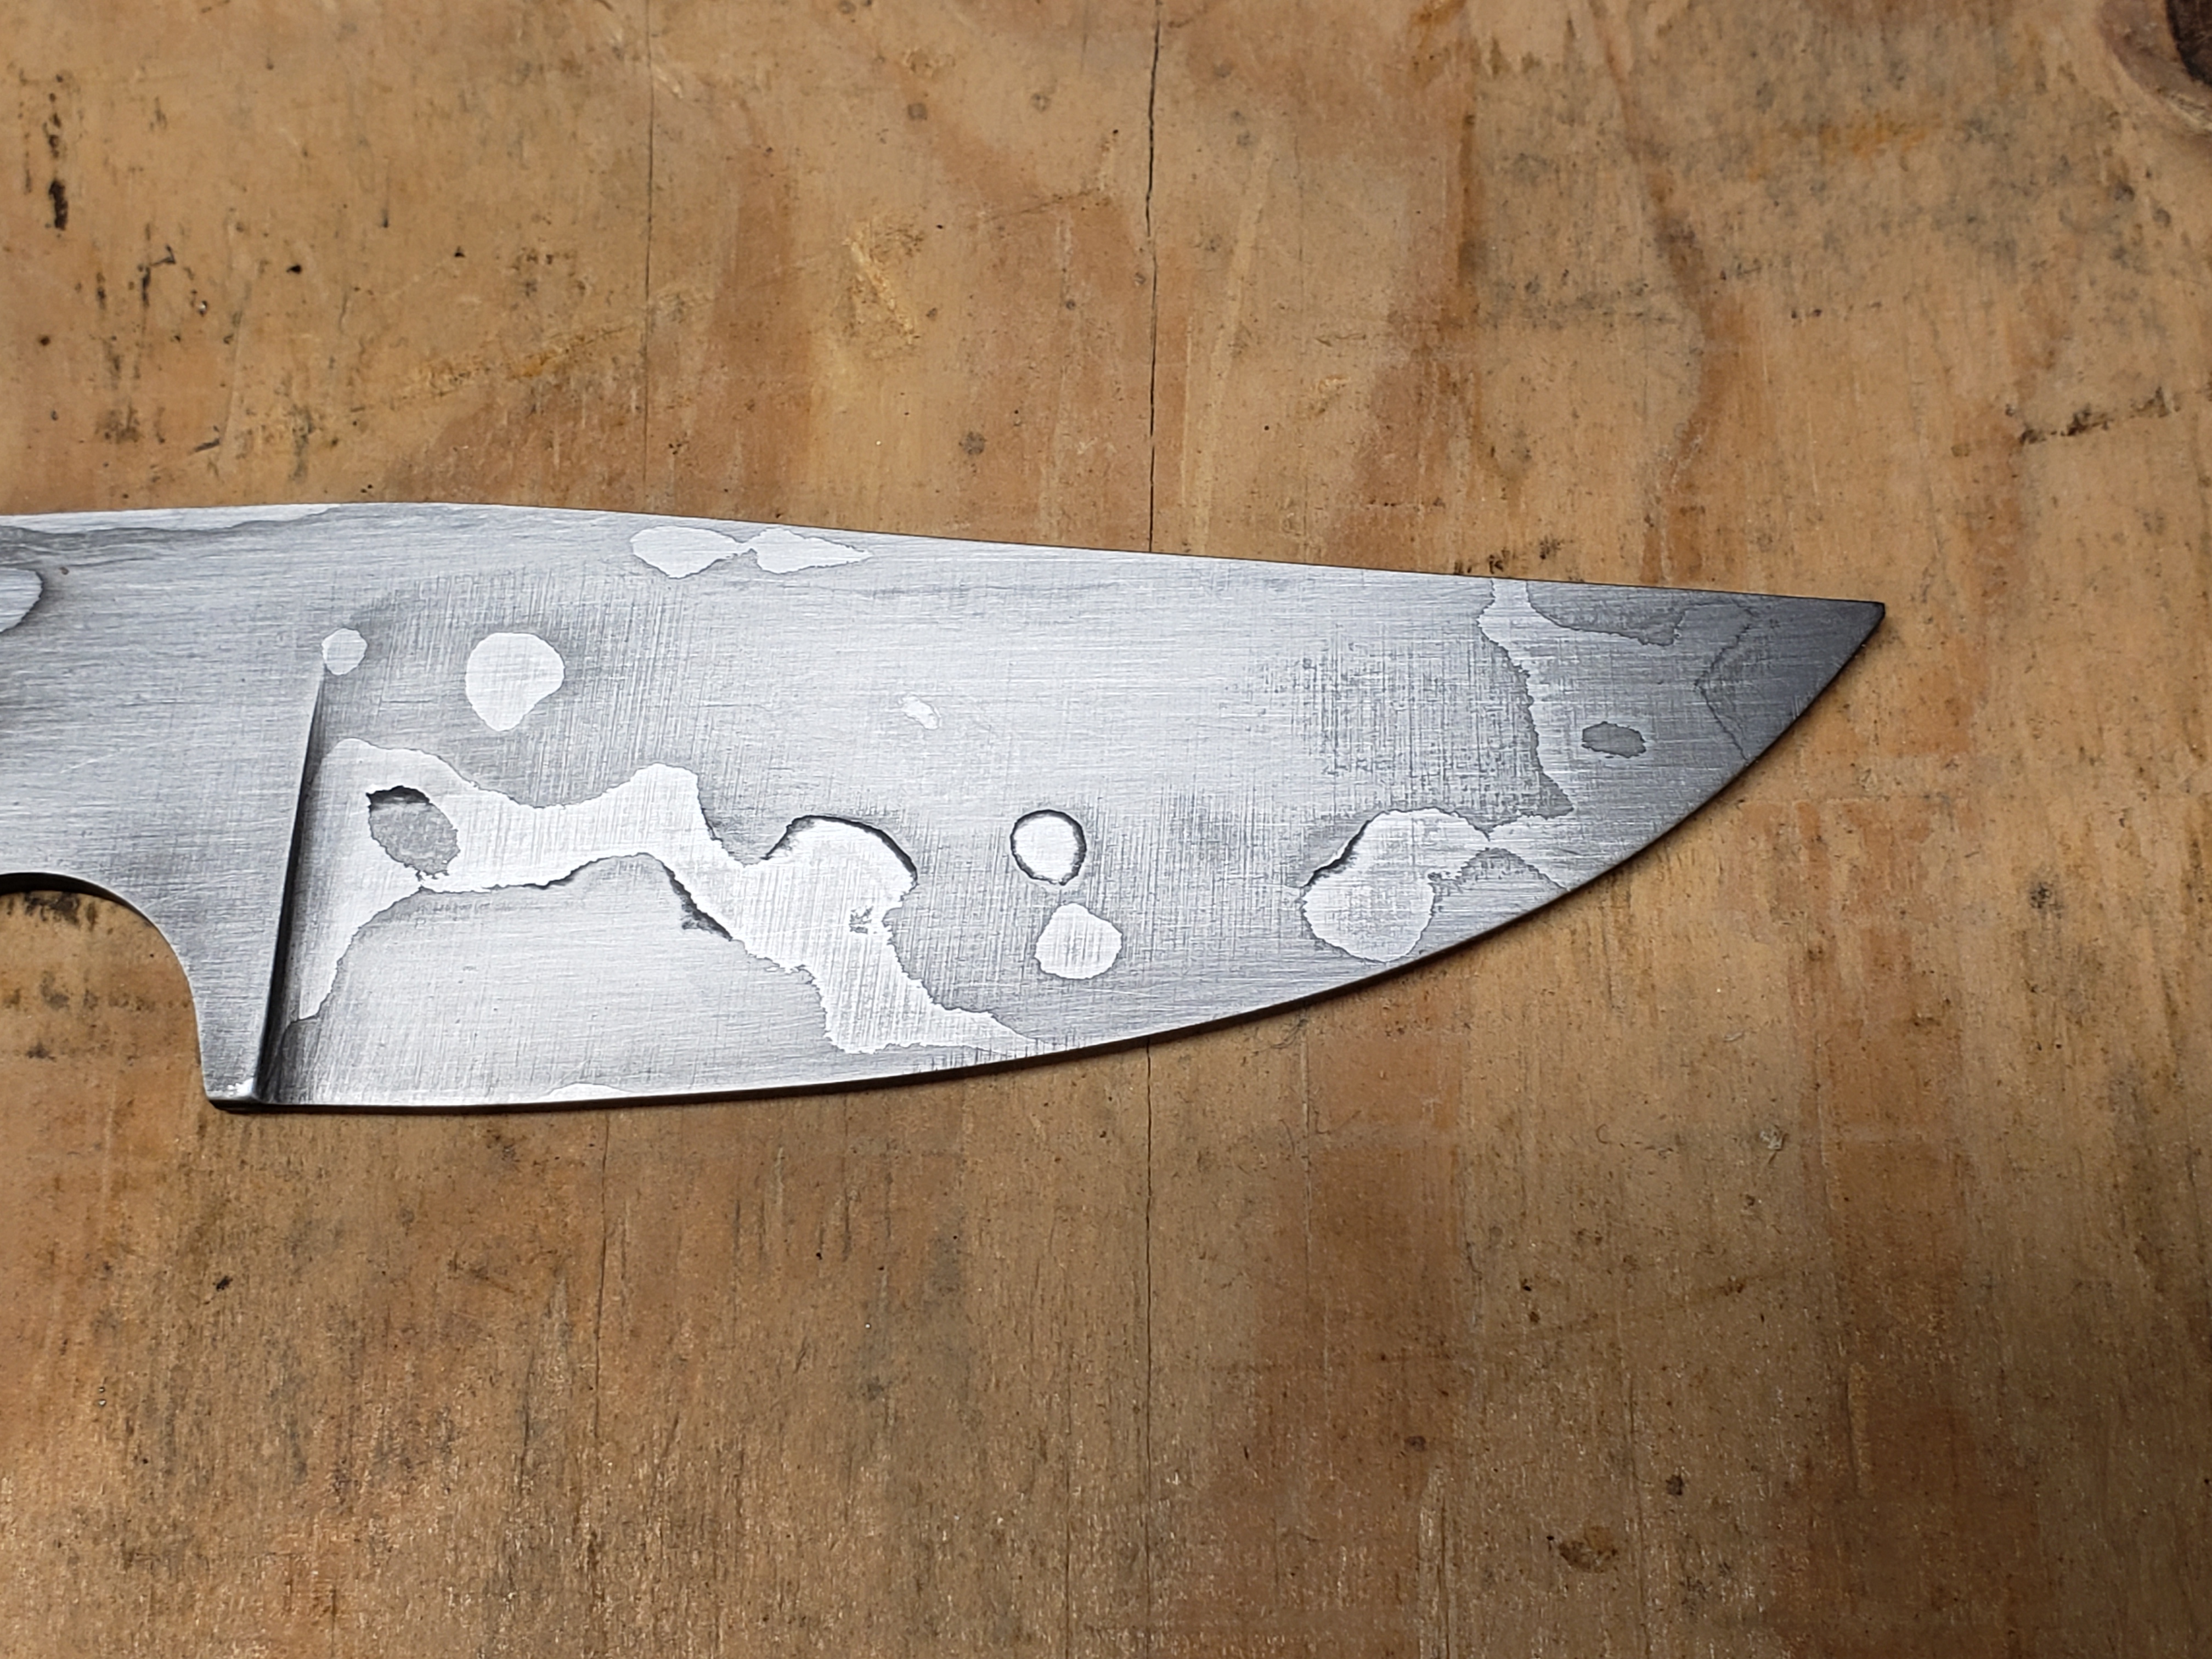
Tried making a billet to see if I could actually do it. Started out wrong actually because I only had 7 layers of 1095 and 15n20 and it was a pretty small billet. So not much heat retention at all when trying to set my welds. Also, my 15n20 was thinner than my 1095, but for some reason I put them on the outsides of my stack, so I lost a lot of them to scale. Somehow however, everything actually went mostly right. Well... Except the whole trying to put a bit of birdseye pattern into it. Being so small and already drawn out to far, I couldn't drill the holes deep enough, so the pattern didn't come through. I had enough material to squeak this little thing out of it. (just after quenching) I did find out tonight that an etch will really show your failures in sanding. I also found a couple of small voids in one side. Not a full delam because I can't hook them with my nail or anything, but there is definitely a bit of a depression in those couple spots. Overall though, I'm not overly mad about it being my first pattern welded blade.
-
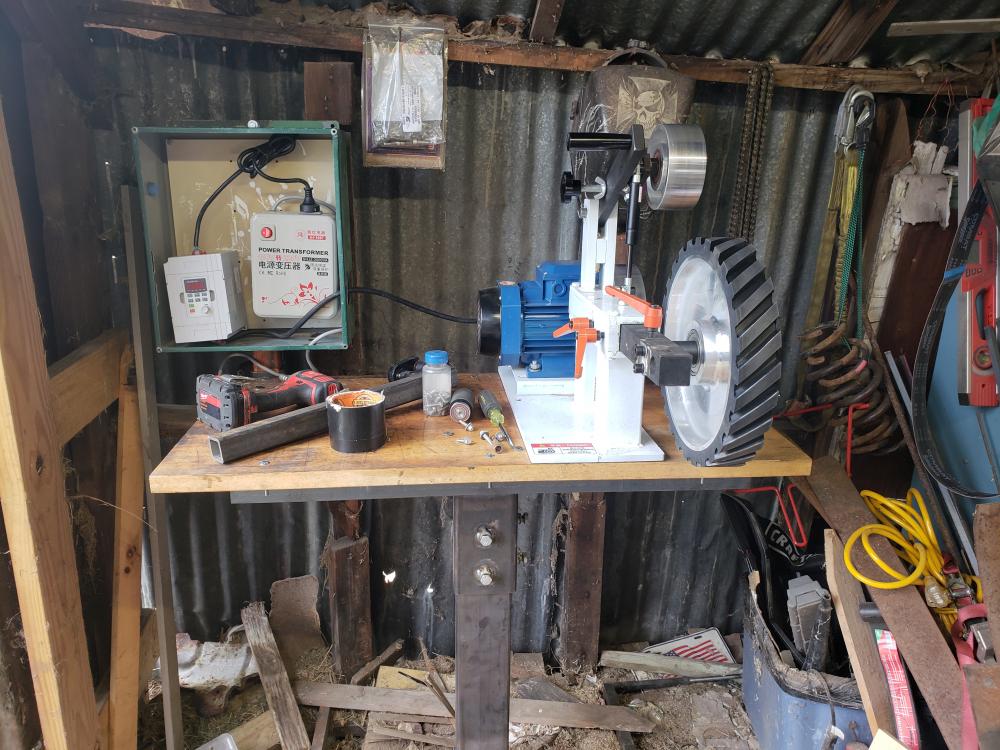
Might be a little late to the party, but I recently bought one. Based on the photos and being a maintenance machinist and welder, I figured I could adapt it to run 72 inch belts without too much work. When it arrived some small things like how the tracking wheel was mounted were different from the photo, but overall it is very solidly built. Good heavy steel framework and the tracking and drive wheels are aluminum and not plastic like some of the cheaper versions on the bay. Out of the box, the 72 inch belt will fit on the 12 inch wheel with no alterations needed. It only came with one arm and you needed to change the attachments. Doing so, neither the small wheel attachment or the flat platten would fit the 72 inch belts the way that it was drilled. Instead of drilling new holes, I took some tube steel and just made new arms for the flat platten and small wheel attachment. Doing that allows the 72 inch belts to run with no other alterations to the machine. It runs smooth and quiet, and has plenty of power. I was able to do in 30 minutes what would have taken me 4 hours with my little converted 2x48 I was using. Same grits of ceramic belts too. The flat platten came with a graphite pad on it to help keep belts cooler and reduce the thump of a belt seam, but still gives a stiff enough backing to keep your grinds flat. The motor is sealed. The bearings are all quality NSK and a standard readily available size. The only real downfall to it is the VFD needs an enclosure. That is your on and off switch as well as your speed control, so you need to figure out something to keep dust out, but still keep it accessible. I only have a handful of good grinding sessions on it at this point, but so far would have no reservations recommending it to someone. (still getting it set up in the photo)
-
I started with leaf springs because I had a couple full packs given to me from a family friend when I started. As Chris said, they are a mystery steel. Free steel is good if you take the time to do some test samples from each pack to see how they react to quenching and tempering to dial them in so to speak. If you are buying them, you would honestly be better off just buying knife steel. You get a known alloy with known baselines for heat treat, and you don't have to worry about hidden stress fractures.