MC Hammer
Members
-
Joined
-
Last visited
Everything posted by MC Hammer
-
I'm thinking it's the lifetime warranty version of the reindeer law ornaments you see this time of year. Guaranteed not to blow over in a bad snow storm or your money back.
-
I don't have the years in that most of these guys do, but I think you need to ask yourself a question: Is this anvil a stepping stone to a better one down the road, or am I looking to buy the anvil I'm going to have for a long time? If it's just a stepping stone, Fatfudd makes a lot of sense with his suggestions. You don't need a perfect anvil to start out with and if the bad welding job chips over the years it won't matter too much to you as you will be saving up money for that really nice anvil that you'll have for the rest of your forging years. If you are looking for a great anvil to last the years, the others comments of caution make the most sense. That's a lot of money to lay out for something that is a big question mark with the welding that has been done on it. I'd have to pass on it if I were looking for an anvil to last the long haul. My crummy 2 cents is that if you are looking for a beater anvil, there are plenty more out there for less money that can be used hard without worry. I personally wouldn't spend that kind of money on a welded anvil when I didn't know who welded it and if they did it properly without damaging the rest of the face plate.
-
I can see a lot of good uses for that in a shop! After a day of forging on it you'd have a literal hot seat
-
Please take a lot of pictures and post them. We'd love to see how hot metal is moved without a lot of the tools we probably take for granted here.
-
I forgot to tell you that after you are done with the wire wheel cleaning, you need to wash the whole anvil with soap and water really well to get all the rust dust off and out of all the crevices before oiling. That's a really important step as oiling with the rust dust on there will just be a mess. Good luck and be sure to post a picture after you get it cleaned up so we can see all your hard work.
-
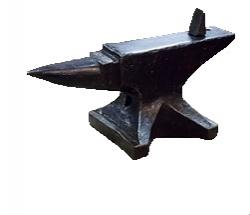
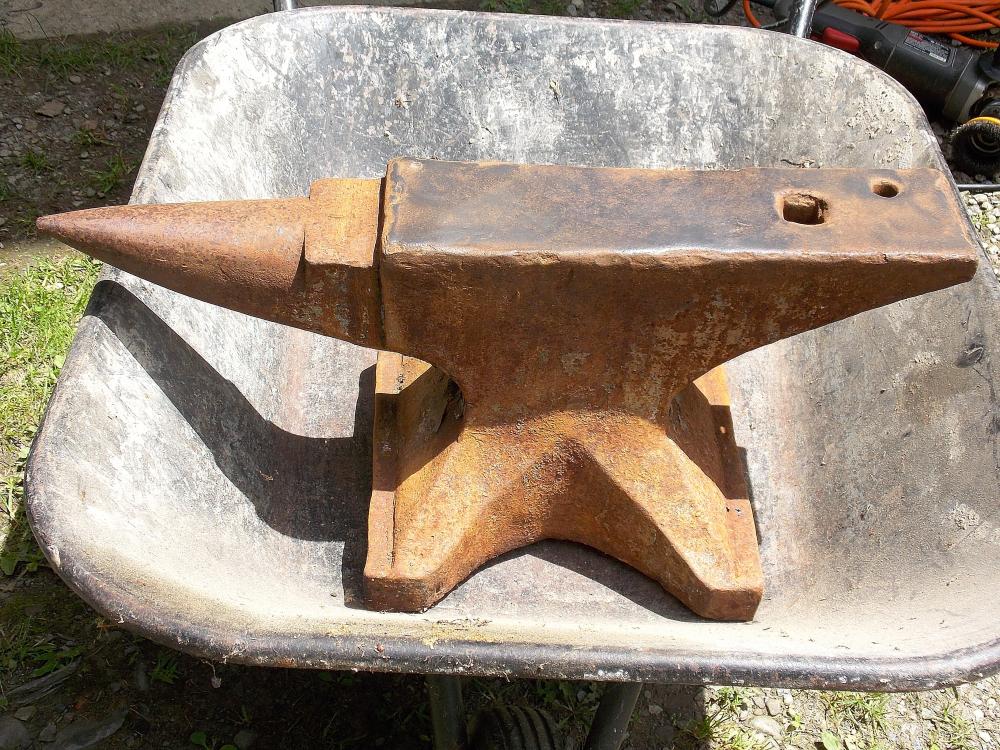
I'm not sure I would clean it up for him. If you do it to your liking, it might not be to his. I also think that it will make him appreciate the nice gift all the more to clean it and make it his own. Me personally, I'd rather do the cleaning so I can decide how much patina I want or if I want to do anything else to it. I've seen some anvils on craigs list that were over-cleaned and looked like a shiny new nickel. Please know that no type of cleaning will hurt the anvil's performance, just the look of it. If you are set on cleaning it, a wire wheel attachment to an angle grinder works really well. It takes all the surface rust off without removing much of the patina. This top picture is my anvil before cleaning. As you can see, there was a lot more rust on my anvil compared to yours. Here's the same anvil after the angle grinder clean-up and oiling with a rag dampened with clean 10W-30 engine oil. After cleaning I found the weight stamped on it and other markings. This took about 3 hours of constant work to get it to this condition. With a hand held wire brush it would take quite a bit longer I imagine. Keep in mind, this was the look I was going for but other smiths here may not care for it or see the need to clean their anvils at all. They work just fine without any cleaning. Like others said, don't do any grinding on it with anything! Once you grind metal off the hardened steel top you've shortened the life of the anvil. The top will polish up with use.
.thumb.JPG.a4c94a8f6f51a74b72fa59e06225e93a.JPG)
-
You got a smoking deal at $200. You might bring tears to his eyes seeing he's now using a piece of railroad track. I still say that you get "siblings of the year" in this community of blacksmiths. Santa is just glad that you are the one who will have to deliver that present
-
Thank you everyone, I learned a lot from this thread!
-
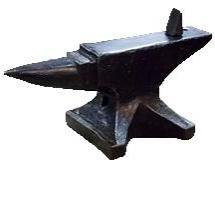
Wow, what a nice brother you are!! When starting out I would have been super happy if someone in my family had purchased me an anvil like this one. The ring and rebound look very good and the edges are pretty clean. That fact that it comes with a fitted base is a huge plus for your brother. He can basically start forging on it. You did good!!
-
I once had a lady of antique shop ask me what in the world I wanted these old "tent" stakes for. Well they were nice masonry chisels and I just told her I like having tent stakes on hand...especially for 50 cents each! I was driving around for my job and happened to have "the eye" working and it spotted a pile of lumber at the curb with square nails sticking out of it. I stopped and my hunch was right, I found to really old lag screws in one of the pieces and lucky for me they just turned right out of the rotten wood. I'll be happy I have those lags someday on a future project.
-
I have the same diamondback forge you do. Why isn't it working out for you or are you just thinking of something with more juice? I really like the side door that opens up. So many times I've had to use that feature to fit something in there.
-
You had me laughing C-1 I know just the type of shop you are talking about. I think there's something in the hunt though that's so appealing. Though you smell a dead mouse or cat evidence, you just know there's a hardie tool or a pair of tongs hiding in there somewhere.
-
Luke D, maybe you should just use that railroad track until you can make some things to sell. Then save your money because even a so-so real anvil is better than an ASO. You are a player in the decent anvil game at $200-$300. You aren't going to get the best of the best, but what you need is something with a good face, horn, and hardie / pritchel holes. Once you forge on something with good rebound you'll be glad you didn't get the HF or Grizzley. Tuck that $50 away in an envelope and mark it "Anvil Fund" and save. It doesn't have to cost a lot to start forging. Sounds like you have the piece of track, now you need a heat source, a couple pair of tongs, and a decent hammer or two. All that's not much of an investment. But, if you are serious about starting a forge, you must be serious about investing in the right tools if you ever hope to realize that dream of owning the forge business or hobby.
-
Nice finds Irondragon!! I love the junk shops - you know, the ones you have to dig through piles of stuff. Those are the best. If my hands are getting dirty sifting through the stuff I know I'm going to find something great.
-
Thomas Powers You almost had me convinced to turn that forge the other way until I thought about where my 100 pounder is located and the hose situation. I like it well away from the dragon's breath. I like the simple design of that leg swinging around. Hmmmm, the gears are starting to turn already. It looks like it pulls out to adjust the length. I love that idea because it's just simple and it works. Thanks for posting that picture.
-
Well said Frosty. There's no shame in buying a forge already made and there's no shame in building one if you have the skills. In the end, it's whatever brings you the greatest success forging hot metal.
-
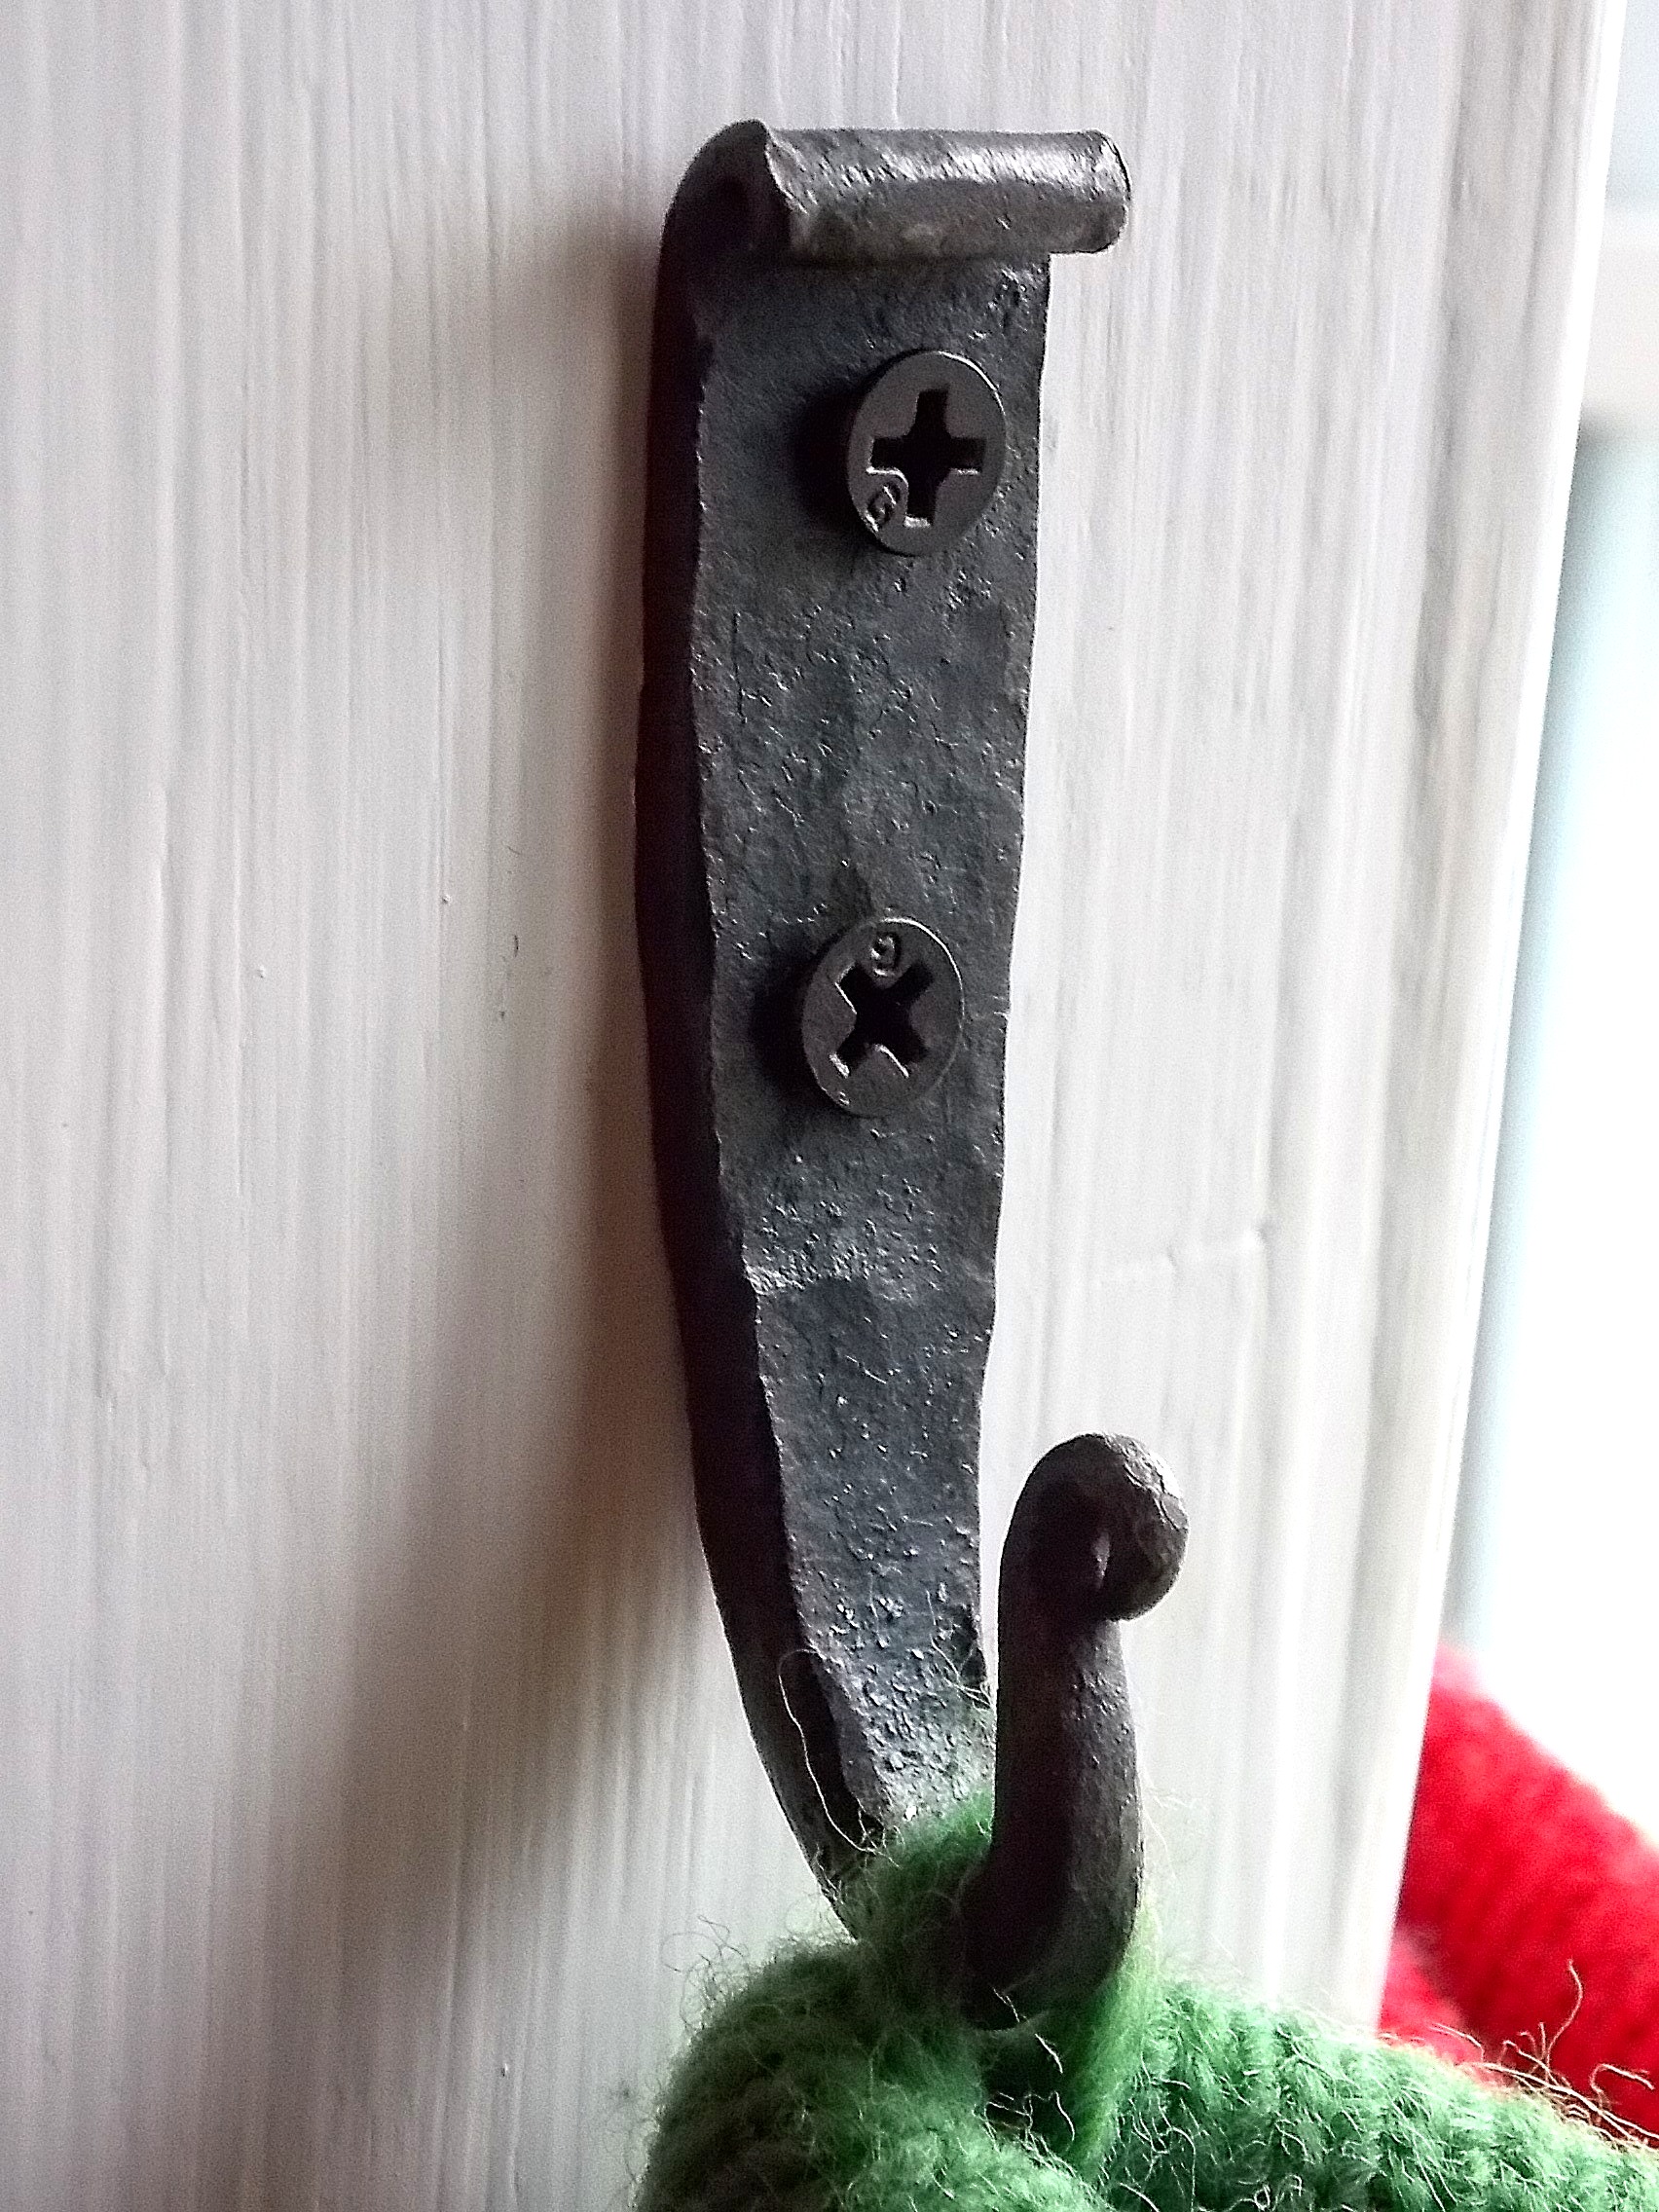
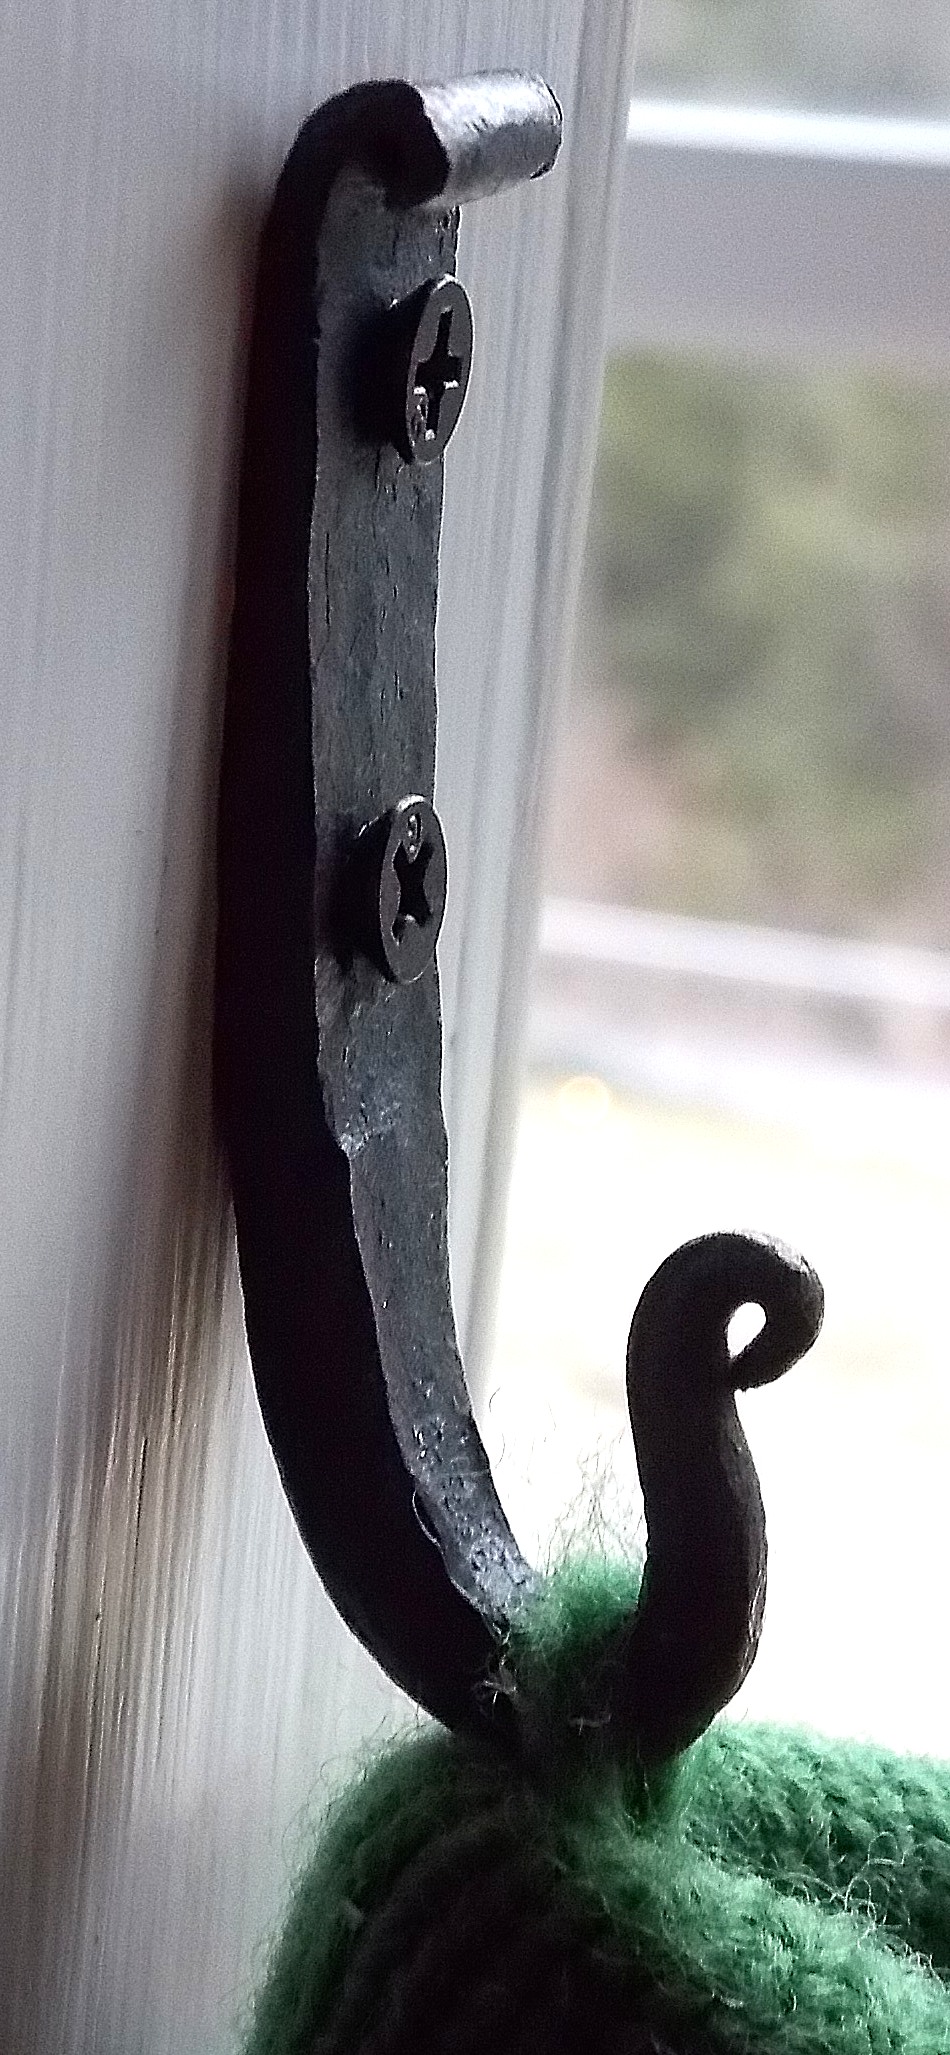
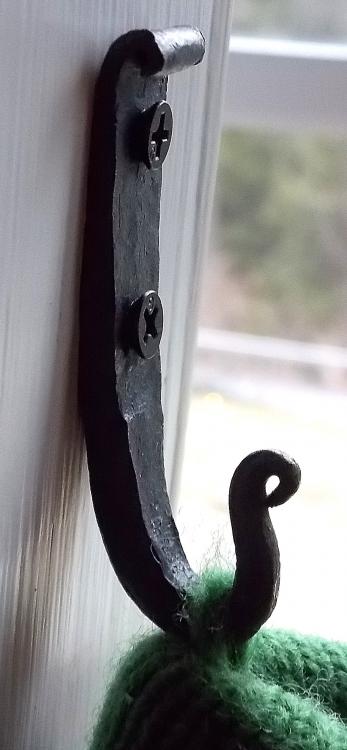
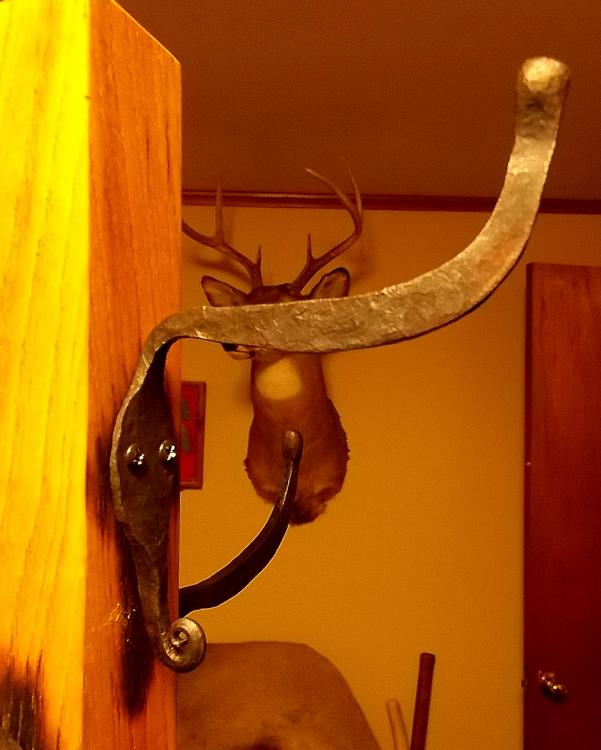
All great constructive comments guys, thank you. As a newbie it's always a risk to post your rough work knowing there are guys here who are just doing phenomenal work in steel. But hey we all start somewhere and my hope was that I'd get some good advice and may even encourage another newbie who'd look at it and say "Hey, I'm making better stuff than this guy so maybe I'm not doing so bad!" Bigfoot, I originally planned to have a smaller hook instead of a scroll but I decided to go with the scroll in the end. If I were selling it, definitely there should be a second hook for hats or a scarf or something. I do agree that the profile is a bit odd and should have a top part that the hook emerges out of. All great suggestions for the next time around. I think too that I should have done some research here to see more common designs for hooks like this one. The ones I took off were similar in design, but mine are marching to their own drum beat for sure which may not be a good thing unless someone is looking for that. Ausfire, Thomas: Yes, I really should countersink those screws and I like the idea of squaring off lags in the forge. All good ideas.
-
Thomas Powers. You are right, I only use the handle as a rack for the hammers when I store it. When in use I don't have any hammers there because of the dragon's breath and I don't like hot tool either. I realized that the first time I used this operation. I may try rotating the forge at some point to see if I like it, but right now my work flows pretty well. I can also slide a pair of long tongs onto the cart handle to act as a support for long pieces that I may be working with.
-
-
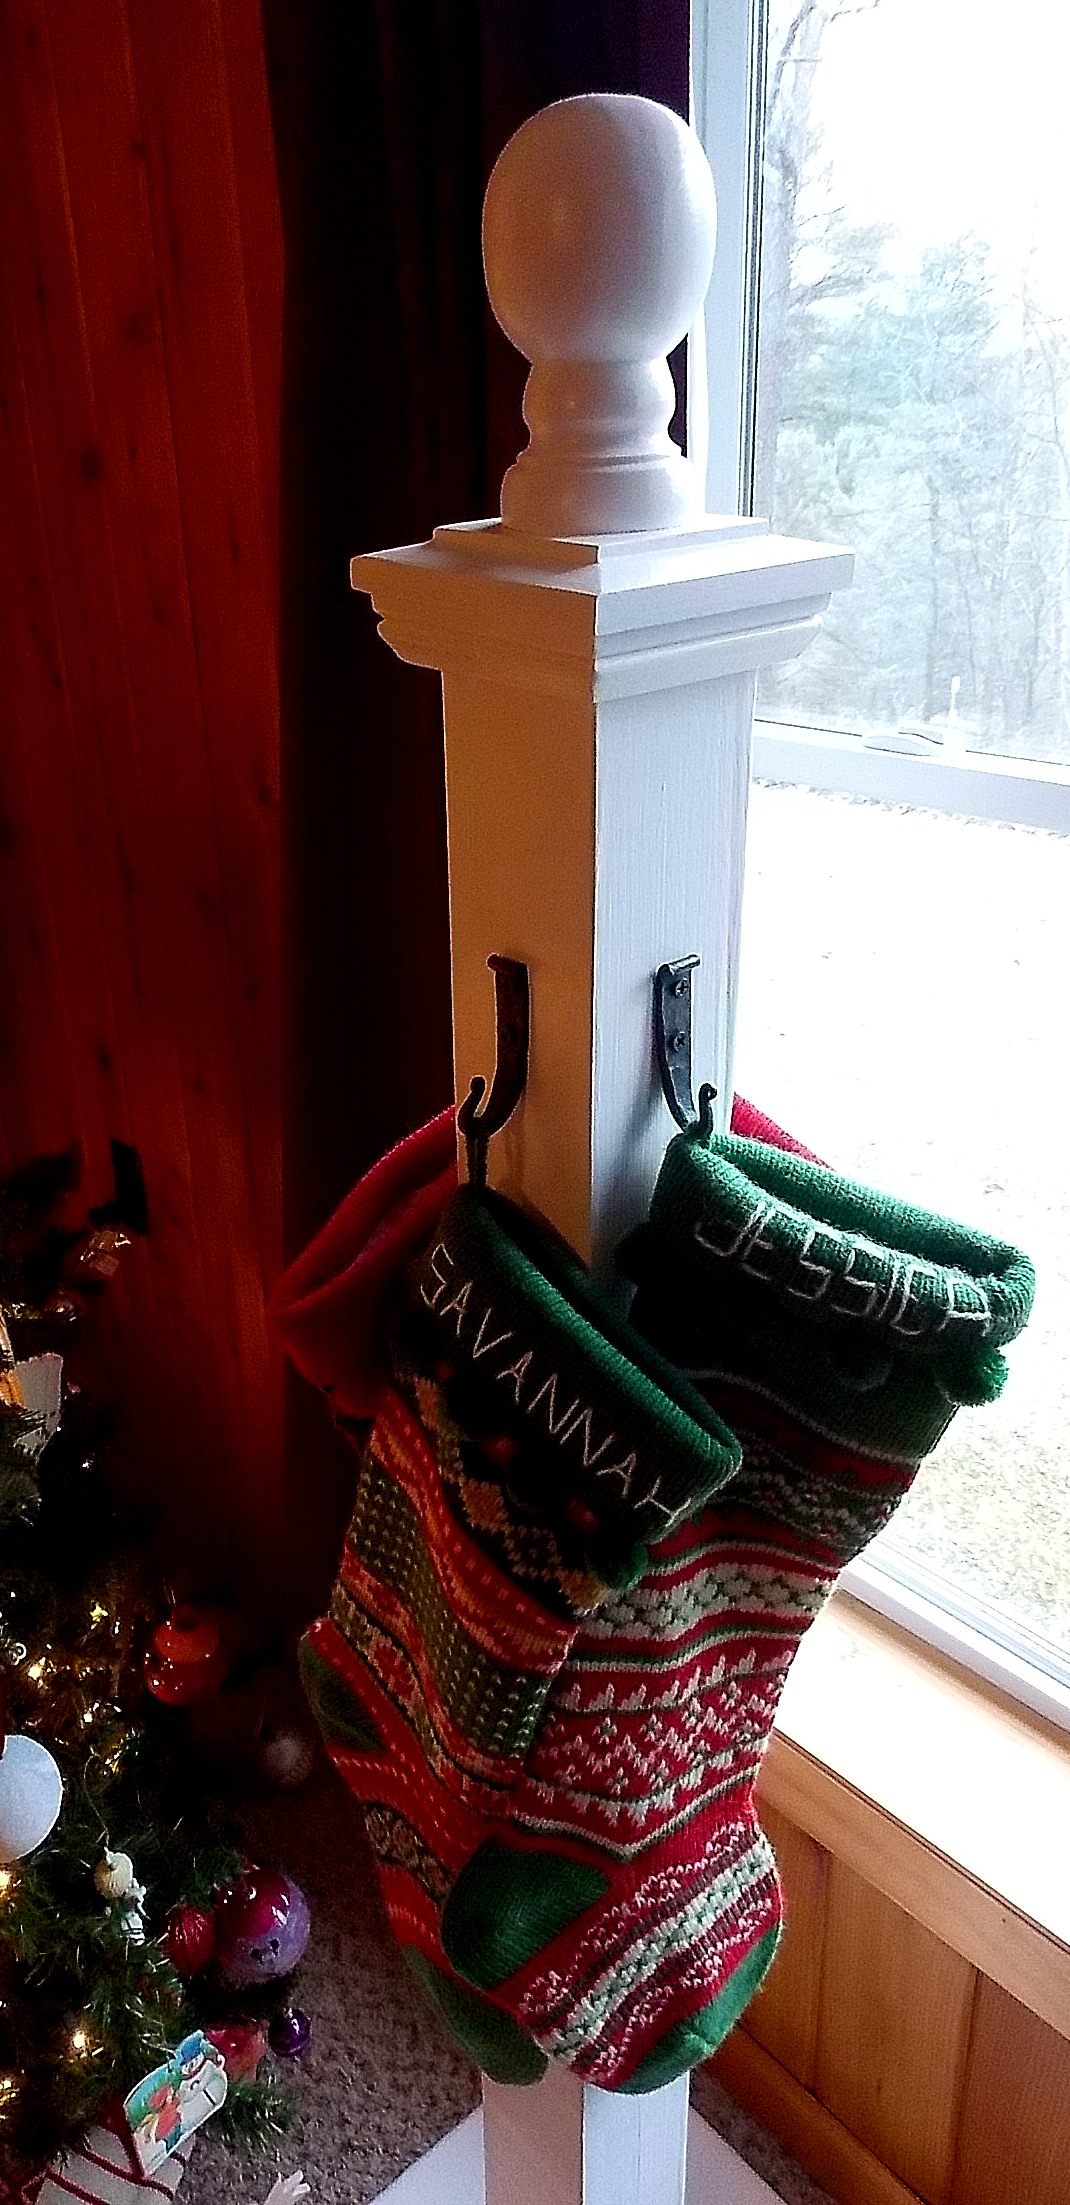
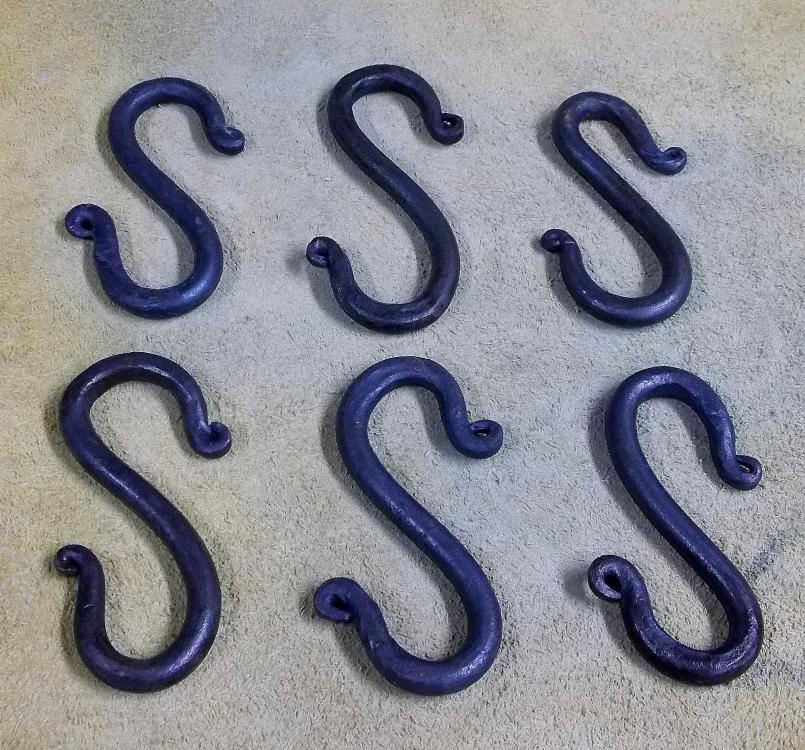
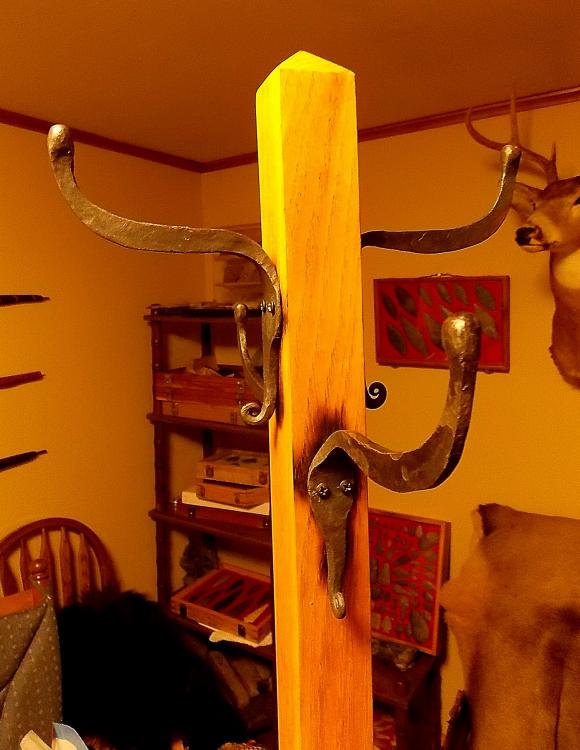
Here's some of the first things I've made after starting forging this year. Nothing great, but I'm learning. Some S hooks. I did all 6 in an assembly line effort. Learned a lot by drawing each one out, then rounding them. I was happy that I could draw each one out & round it one heat. I'm obviously still working on my scrolls. Scrolling tongs helped a lot. Here's a stocking holder post I made. The hooks were a freestyle thing because I needed to have the hook angled out more in order to have the stockings hang right when full of goodies. Getting all four to match was a challenge, but marking out my stock ahead of time helped as well as keeping them on the long stock while working them vs. using tongs. It's the design style I was going for so I was happy with them. The last is a hall tree restore that will be a present for Christmas. I removed the original hardware and put my own hooks on it. They were a challenge due to all the different shapes I had to forge. Sorry the pictures are not the greatest. My camera didn't like the lighting. I left them with a rustic finish. One thing I learned from both of these projects is that in the future I'm going to punch depressions where the screws go to hide them and make drilling easier. I'm having a lot of fun trying and am just glad I've made some things that I can put to use right away.


-
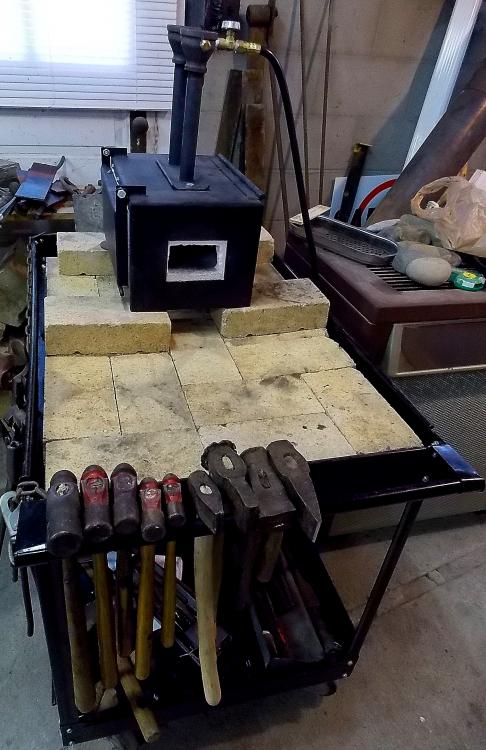
Here's a picture of the cart I bought from HF and how I've set it up to roll in and out of my garage. So far it's worked really well. The bricks are high temperature kiln bricks I picked up from someone who was using them for lawn and landscaping. I paid 40 cents a piece for them and they are way more durable than the white bricks. I wanted to build this thing so that I had a nice cooling area to place tools and hot metal. A happy accident is that when I want to allow something to cool slowly I can put it right under the forge. The only complaint I have is that it's a bit low, but the cart won't take the weight of anymore bricks without building some sort of support under it. This is just a temporary thing until I build a proper blacksmith shop.
-
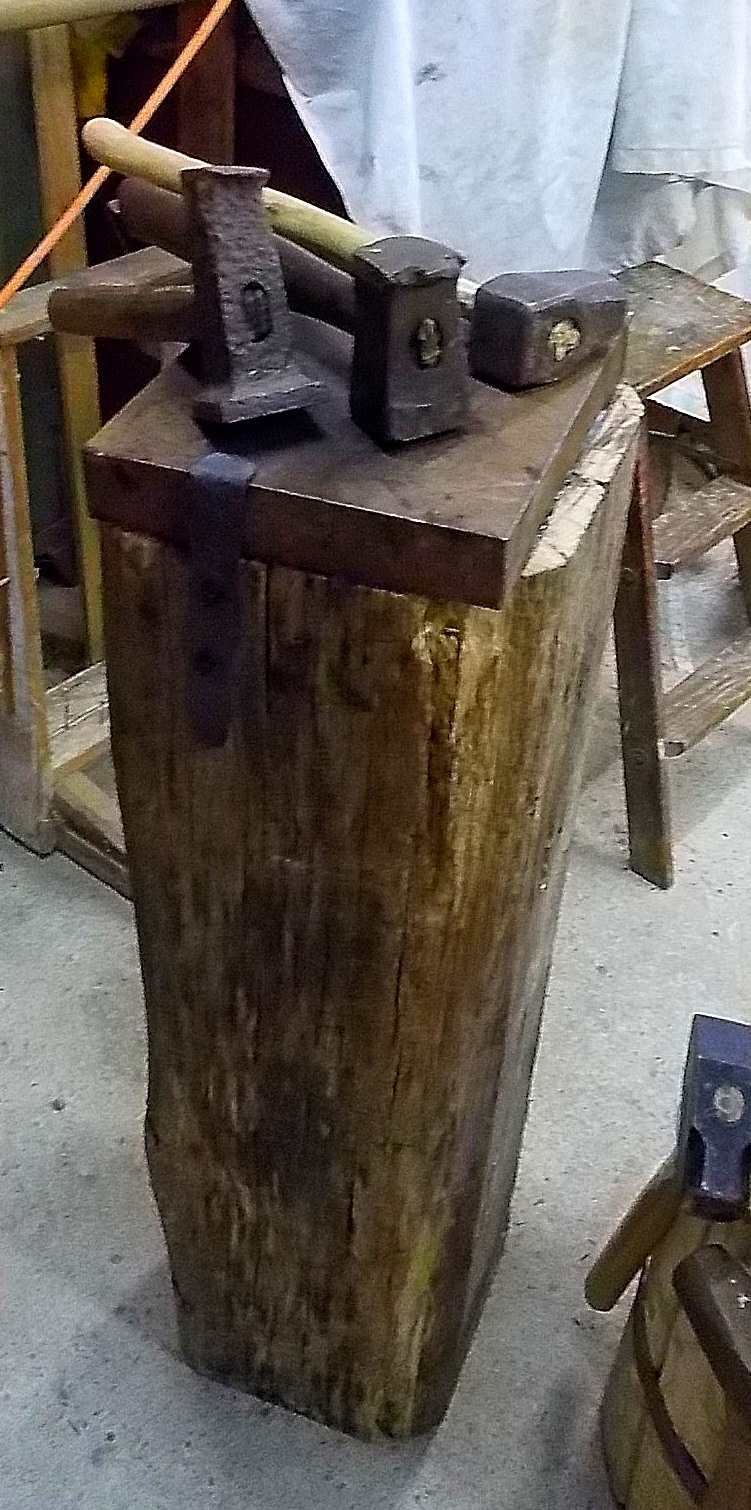
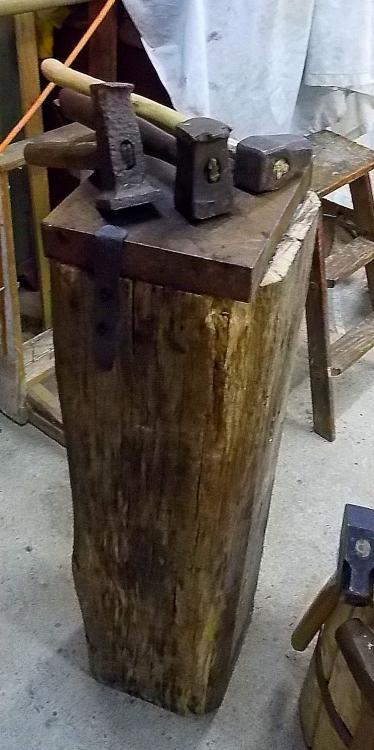
Just put the silicone caulking down on my anvil this morning. All I can say is Wow! It's at least a 70% reduction in ring and I feel like the rebound has increased. I obviously haven't forged on it because I need to let the silicone cure, but my test taps have me very impressed. If anyone is on the fence about doing this, don't hesitate to pull the trigger and use the silicone. The heel still seems to have a ring to it, but nowhere near what it was and the sweet spot has hardly any ring now. As a side note, I have a square block of steel I use my flatters on for things that need a super flat and smooth surface. I used some silicone under that and it went from a deafening ring to a thud - no kiddling, it sounds like a cast iron anvil now. Attached is a picture of my flatter "station". Yes, I have to come up with legs for it, but I want to use it a few more times to determine where the legs can go so they don't interfere with how I like to use this thing.
-
Jasent, LIke I said it is WAY cheaper to build a gas forge than to buy one. You've illustrated that very well by showing everyone just how cheap the parts are. You had access to experienced blacksmiths to walk you through it and by the sounds you have some experience putting things together. Not everyone has either or both of those things available to them. It's a daunting thing for someone new to blacksmithing to build their first gas forge. I agree 100% that IFI has everything you need instruction wise to build a gas forge, but I still wouldn't recommend it. If someone hasn't even hammered a piece of hot steel it's likely they won't even know what they need from a gas forge in order to do that. Now that I've used the gas forge I purchased, I have no doubt I can build my own if I choose to someday. I'm all for cheap, but I'm also all for having someone start out with tools that work or they will experience nothing but frustration trying to use cobbled together stuff.
-
I've always kept my tongs out of the quench water figuring it would harden them and make them brittle. Perhaps the K.I.S.S. principle comes to play with tongs. The old smiths didn't have all that much steel to contemplate what to use to make their tongs I'm guessing, so they must have used whatever they had on hand. Most of my old pairs I've bought look like medium carbon steel.
-
Cold bluing is not difficult - you wipe the solution on wait a minute and rinse off - repeat until it's as blue as you intend it to be. You can also brown it by heating it in the oven and putting Plum Brown solution on it. I have to hand it to you Brian, for never making an axe you made two first axes that look pretty good. I've not attempted one yet. I'm waiting to nail down forge welding so I can fold it like a lot of the old ones were done. If your customer is happy, that's really what matters with them.

.JPG.bae9cf56833b76b82b9355421aac6c34.JPG)