Will W.
Members
-
Joined
-
Last visited
Everything posted by Will W.
-
Good ol' vinegaroon. I made a bookcase recently and wanted it to look like a weathered antique. Used rough cut lumber, made about 75 square nails for it and stained it with vinegaroon. I love the way it made it look.
-
D.IVO First off, thanks for the honest reply. I agree completely about the file scratches. Thats all I can see when I look at it. I simply didn't have time to take them out, I finished everything up the same day I gave it to her. She absolutely loved it though, and said it will be put to good use, so I'm happy. Regarding the bend in the blade, I assume that something happened with the photo to make it appear that way. I realize that sounds silly and like im trying to deny that i did something wrong, but I feel like I would have noticed that when I was working on it, but I noticed no such thing. Perhaps it slipped by me, though. Wouldn't be the first time. I tried to polish it as well as I could without taking away the decent pattern I had (or hiding it, rather.) I have little experience with pattern welding and etching, in truth, so I'm not extremely familiar with getting the patterns to look good. I learn a lot every time. Thomas Now that's a lot of birthday knives that need to be made.
-
-
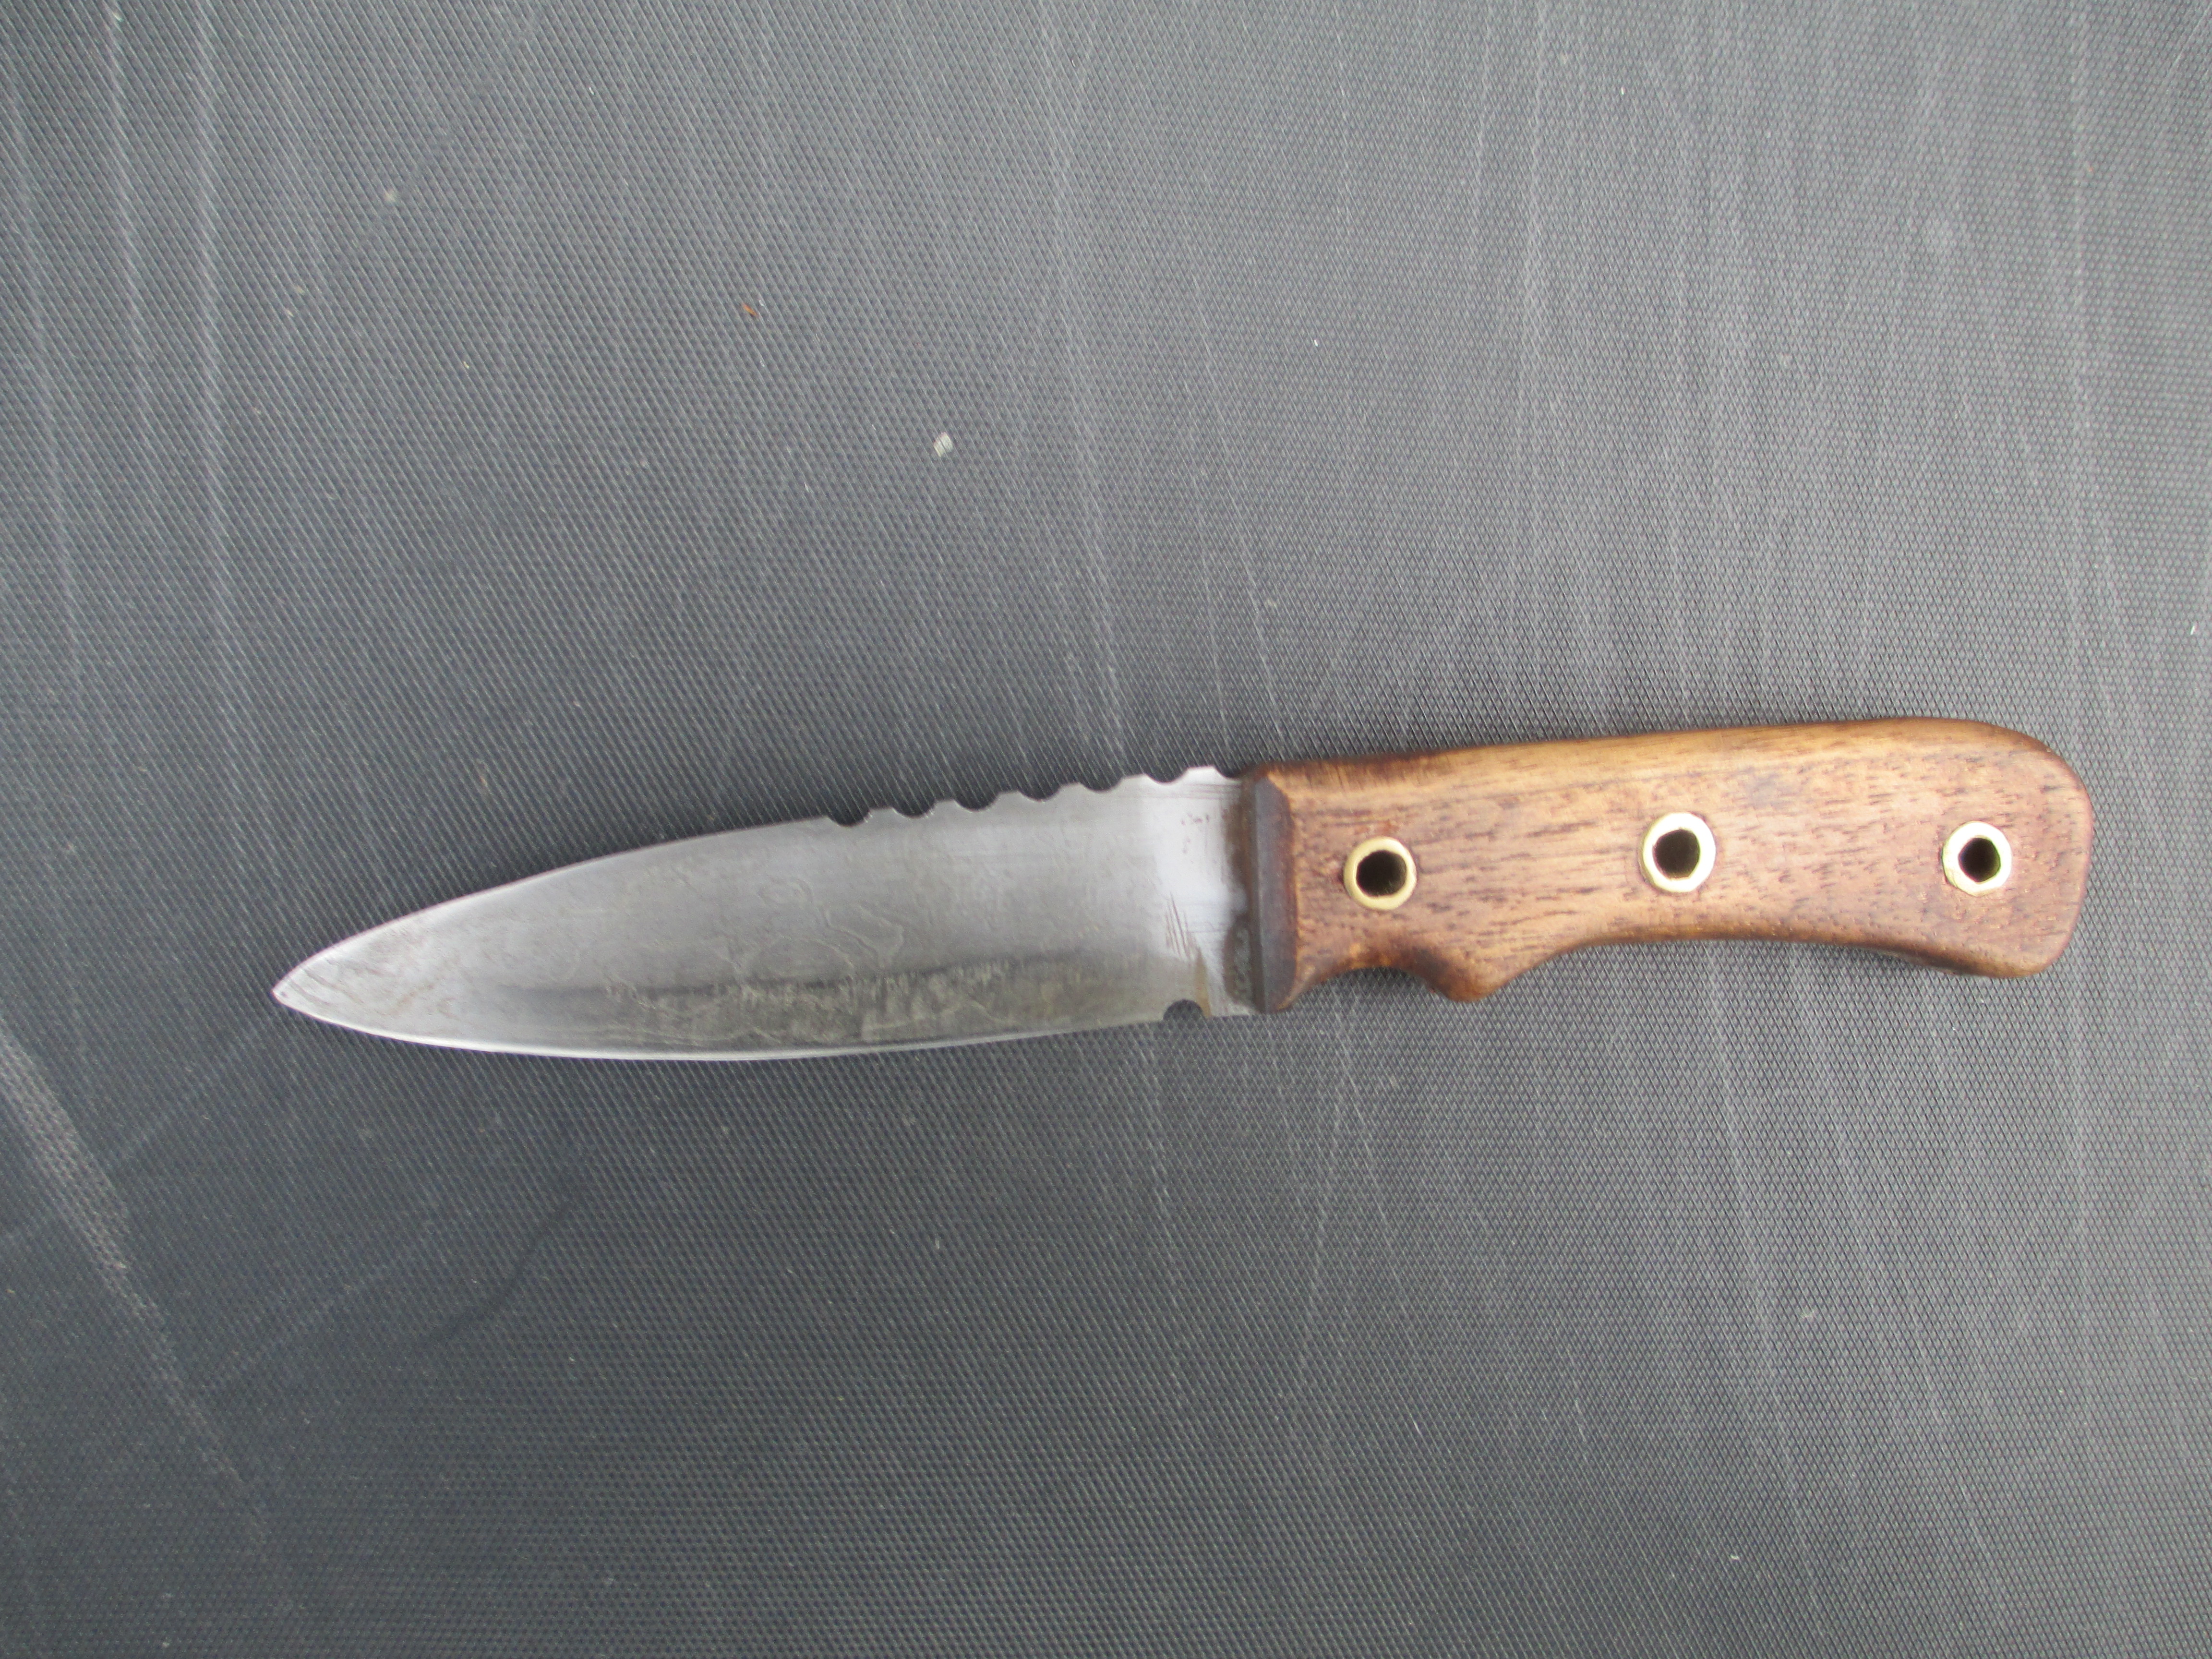
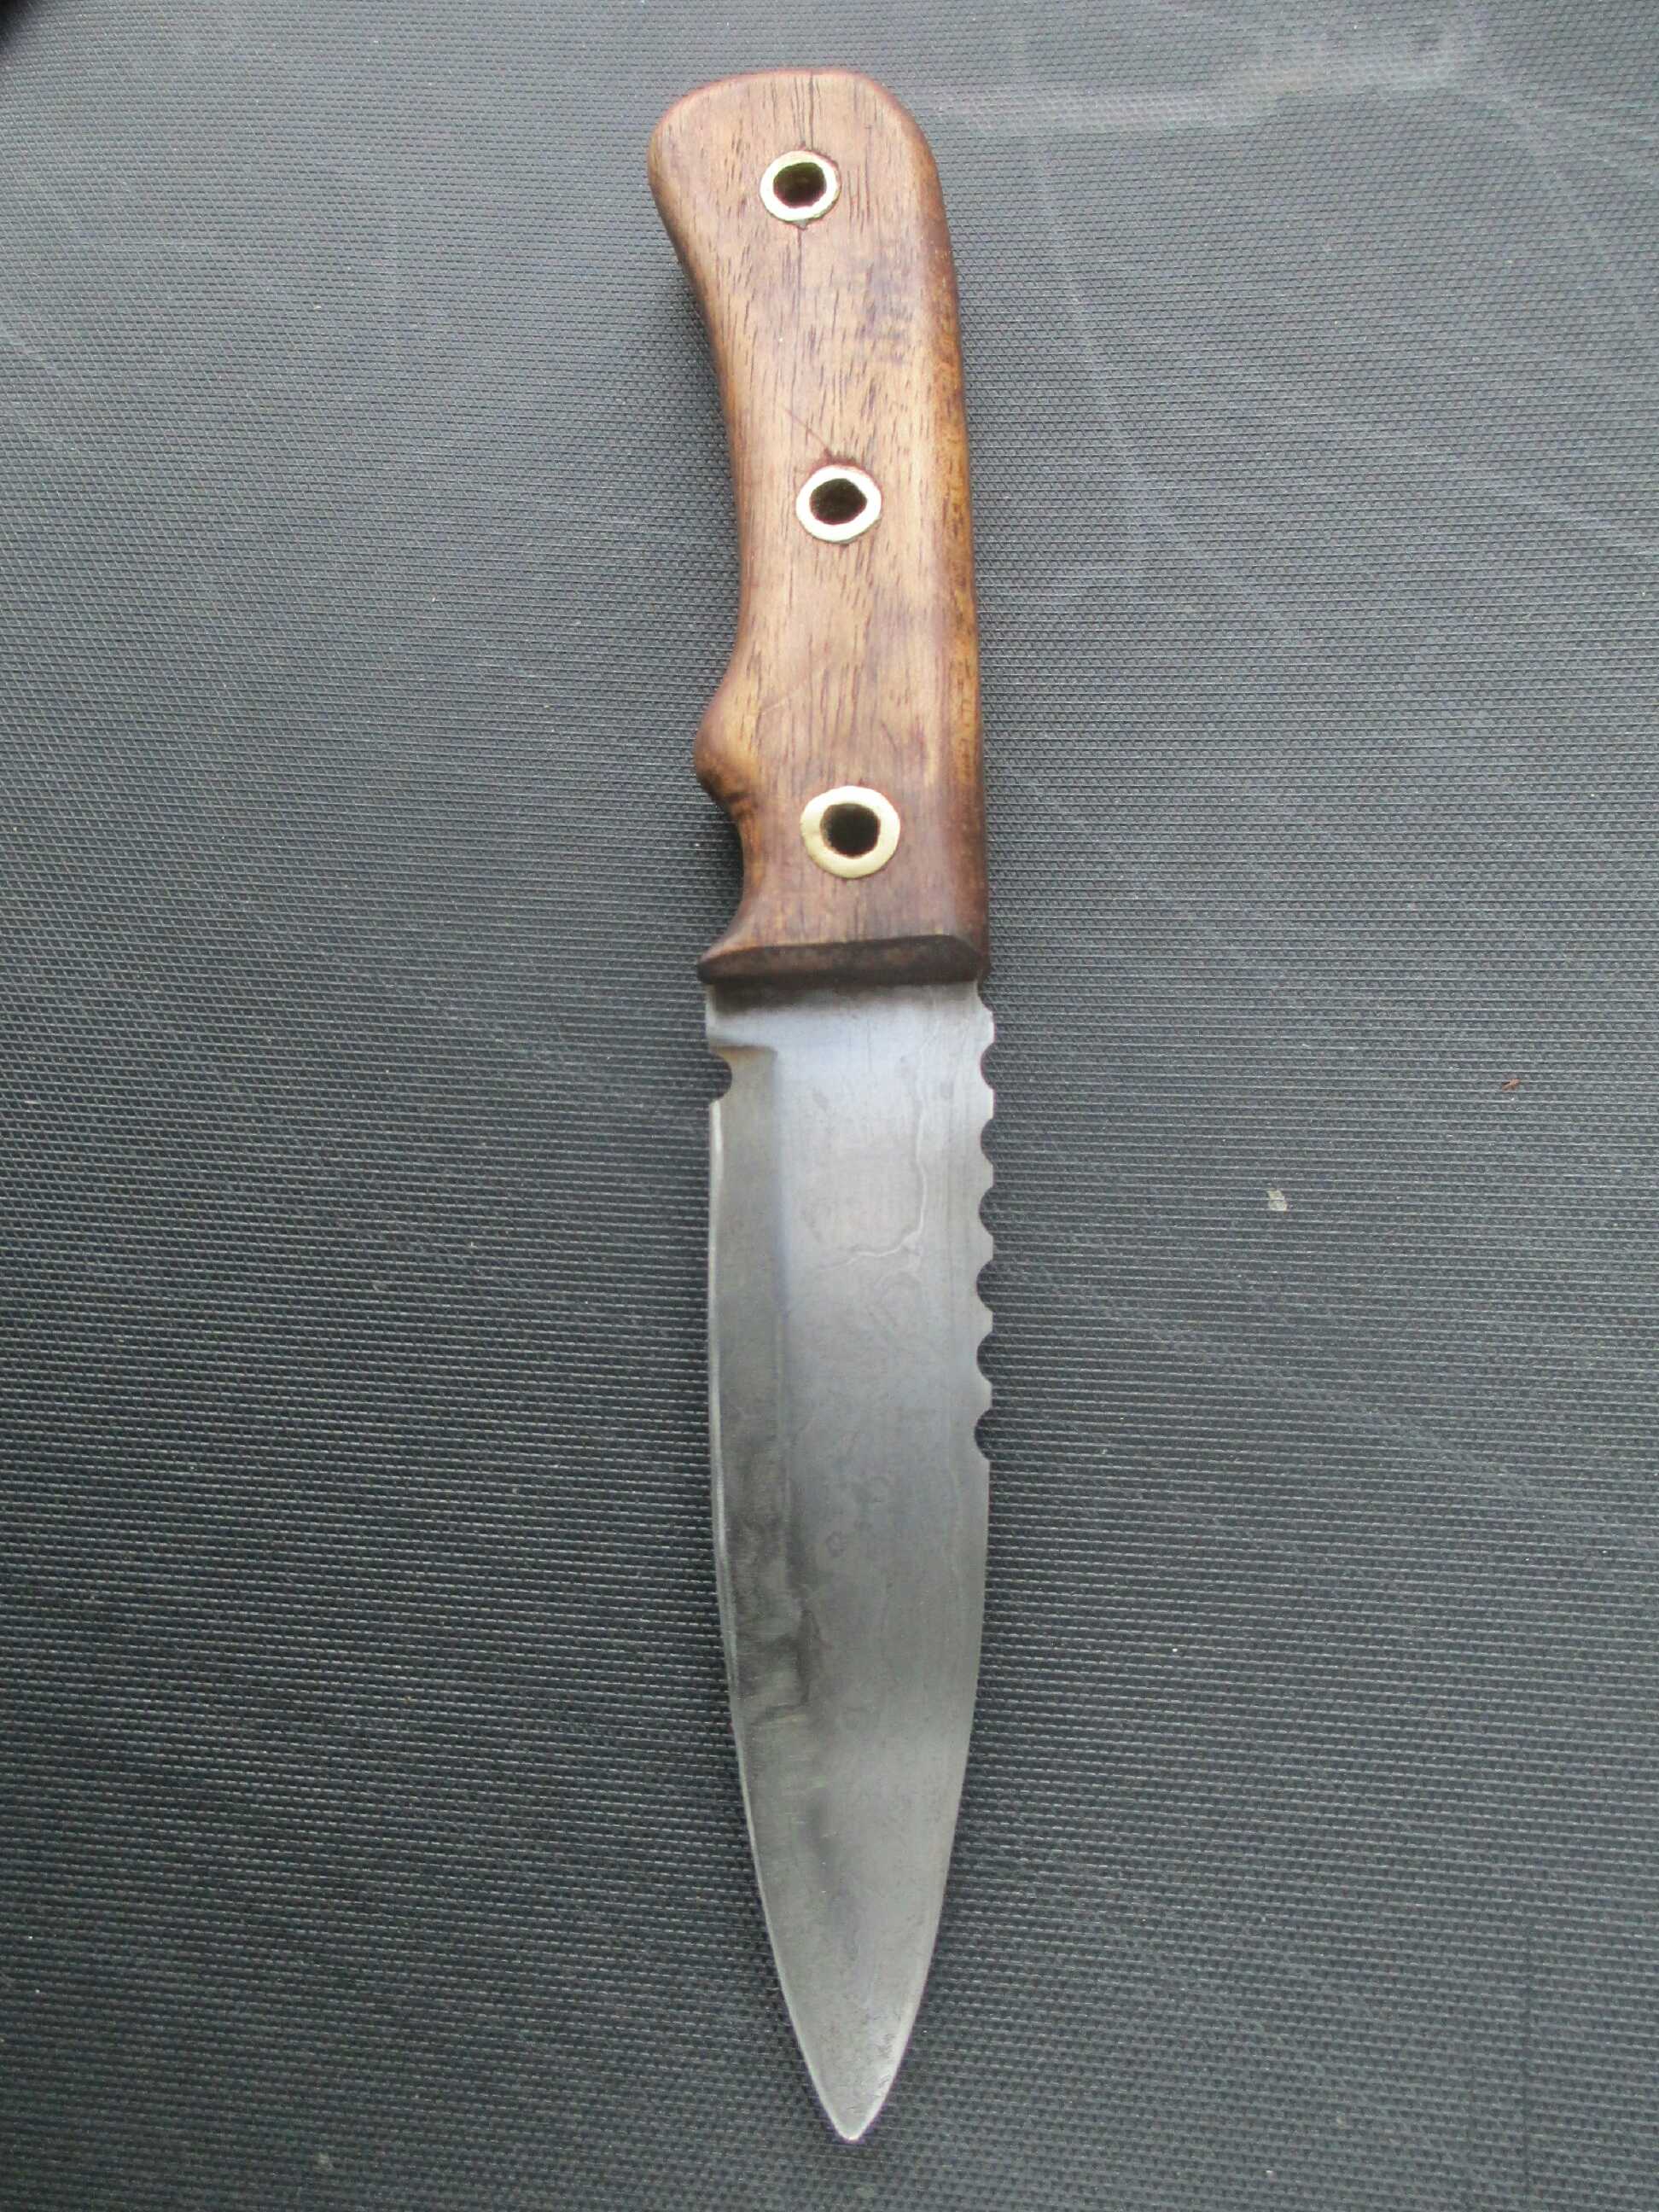
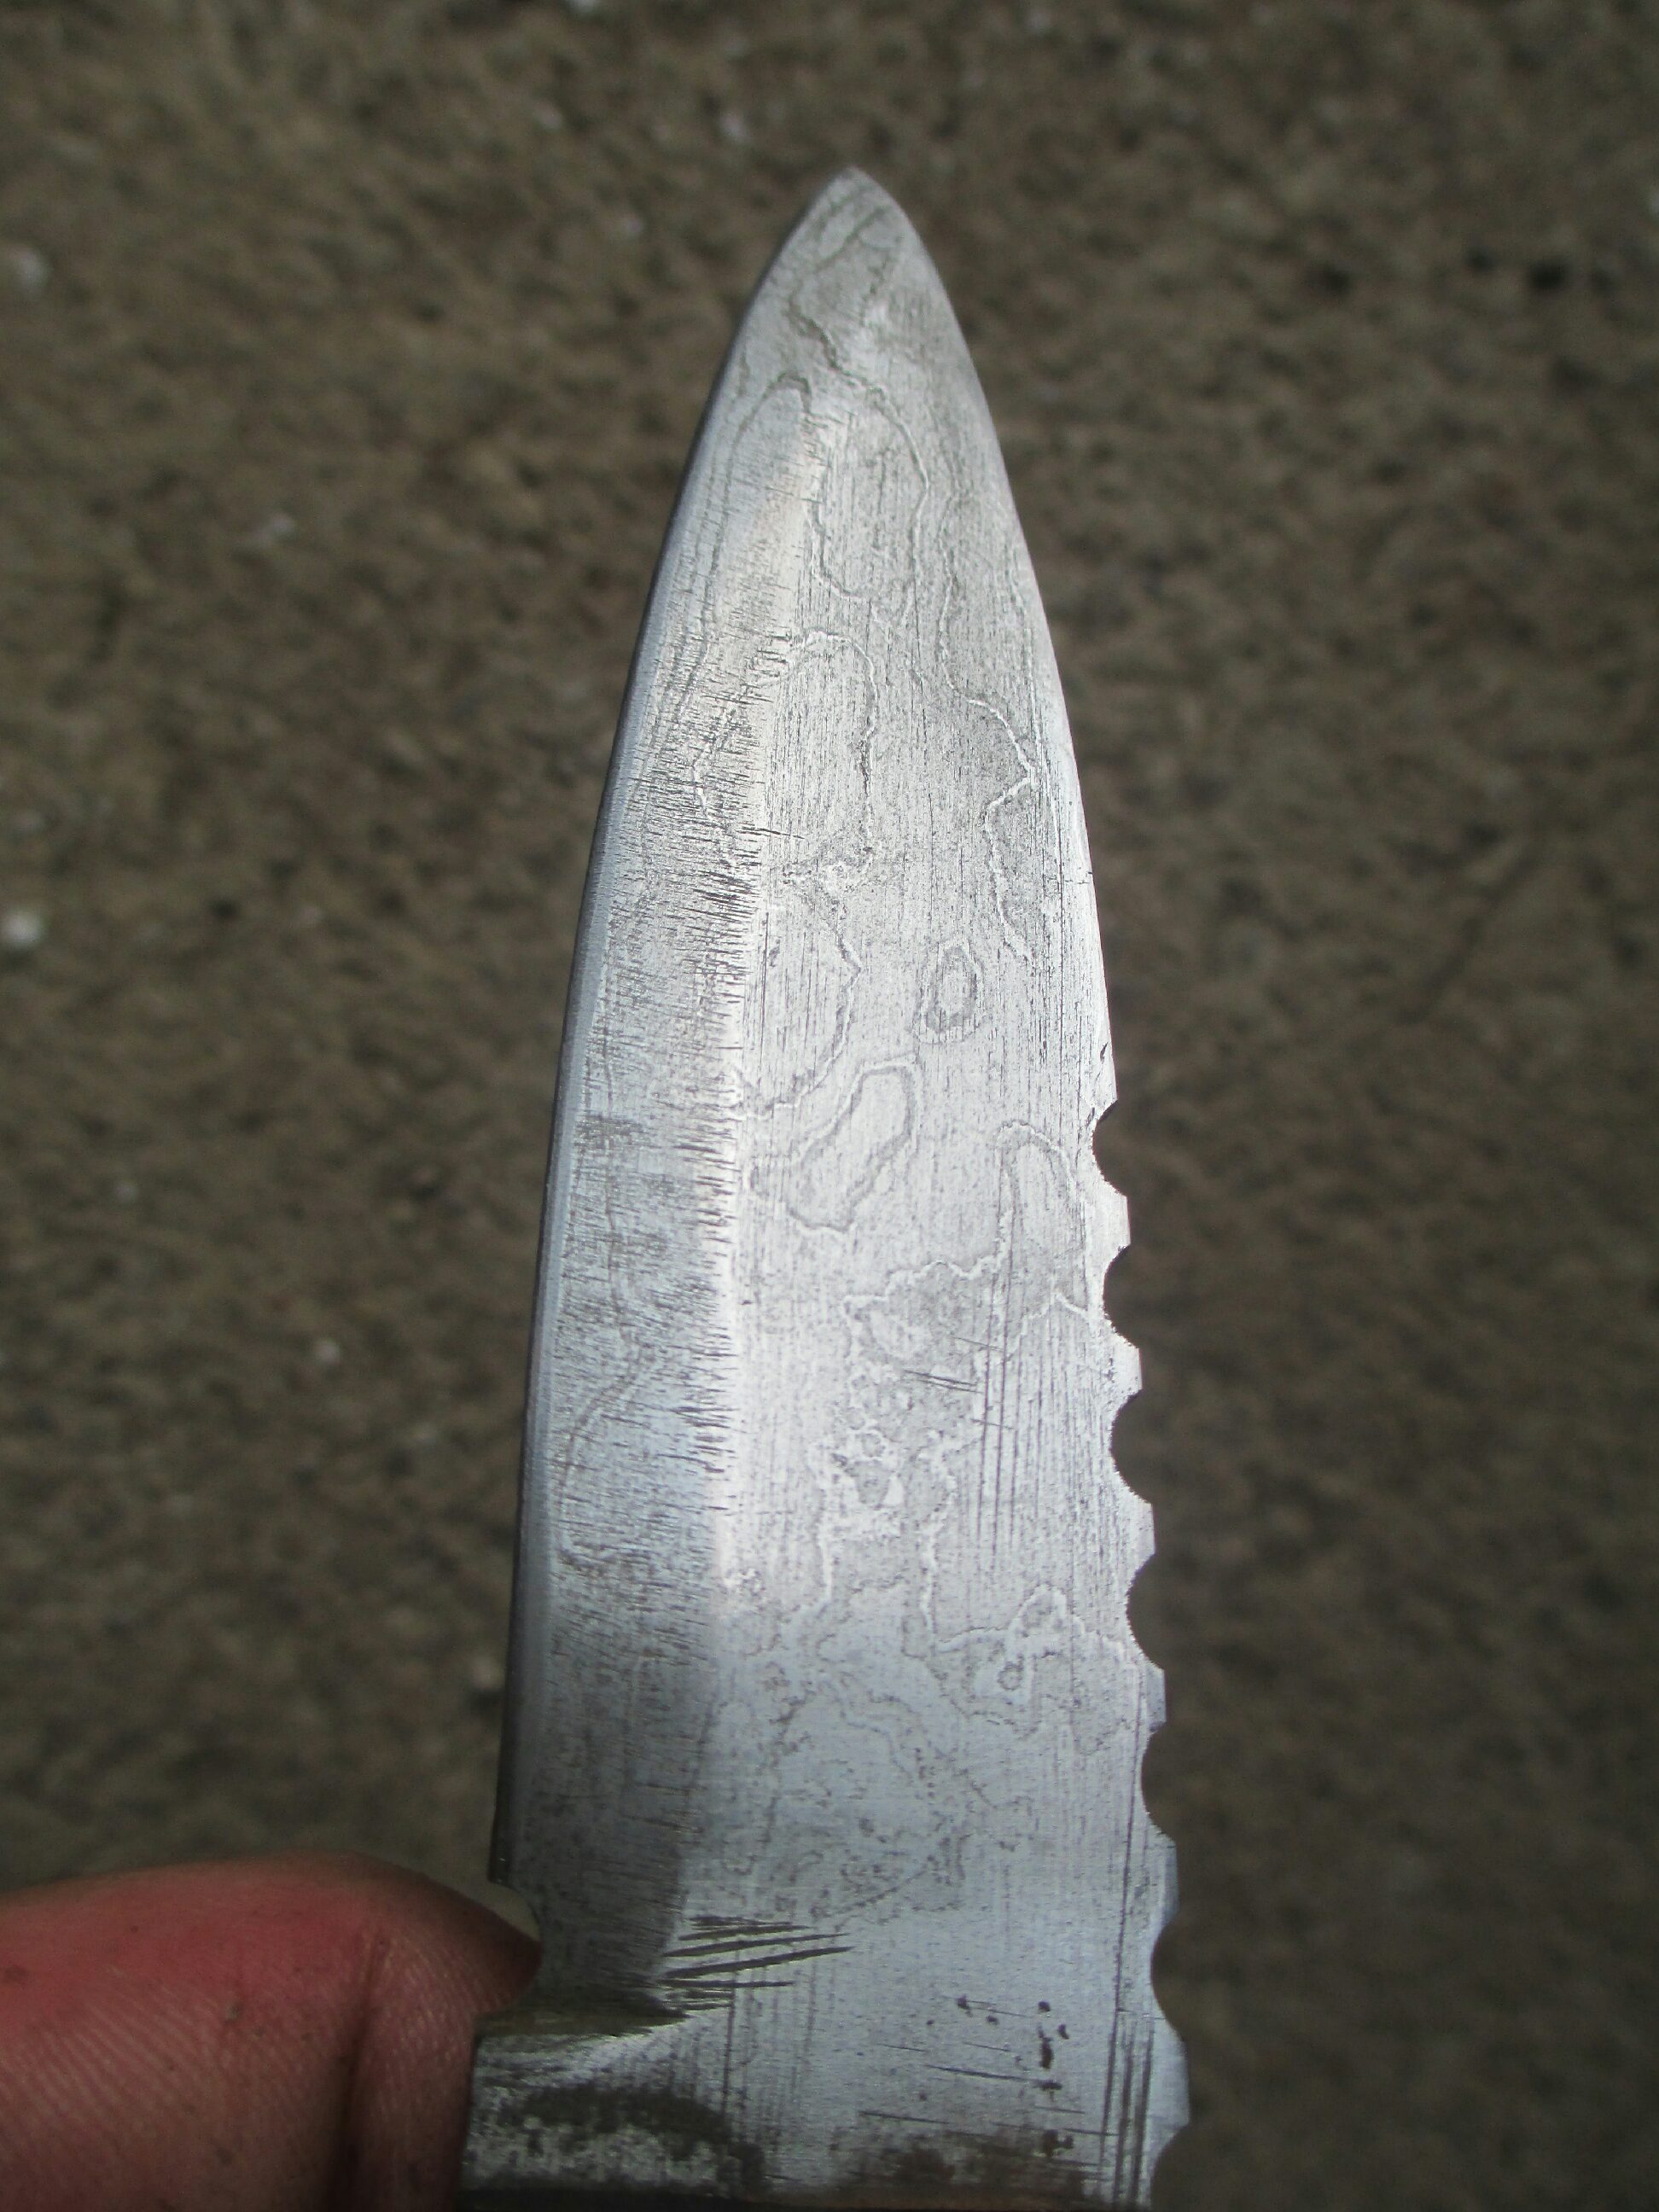
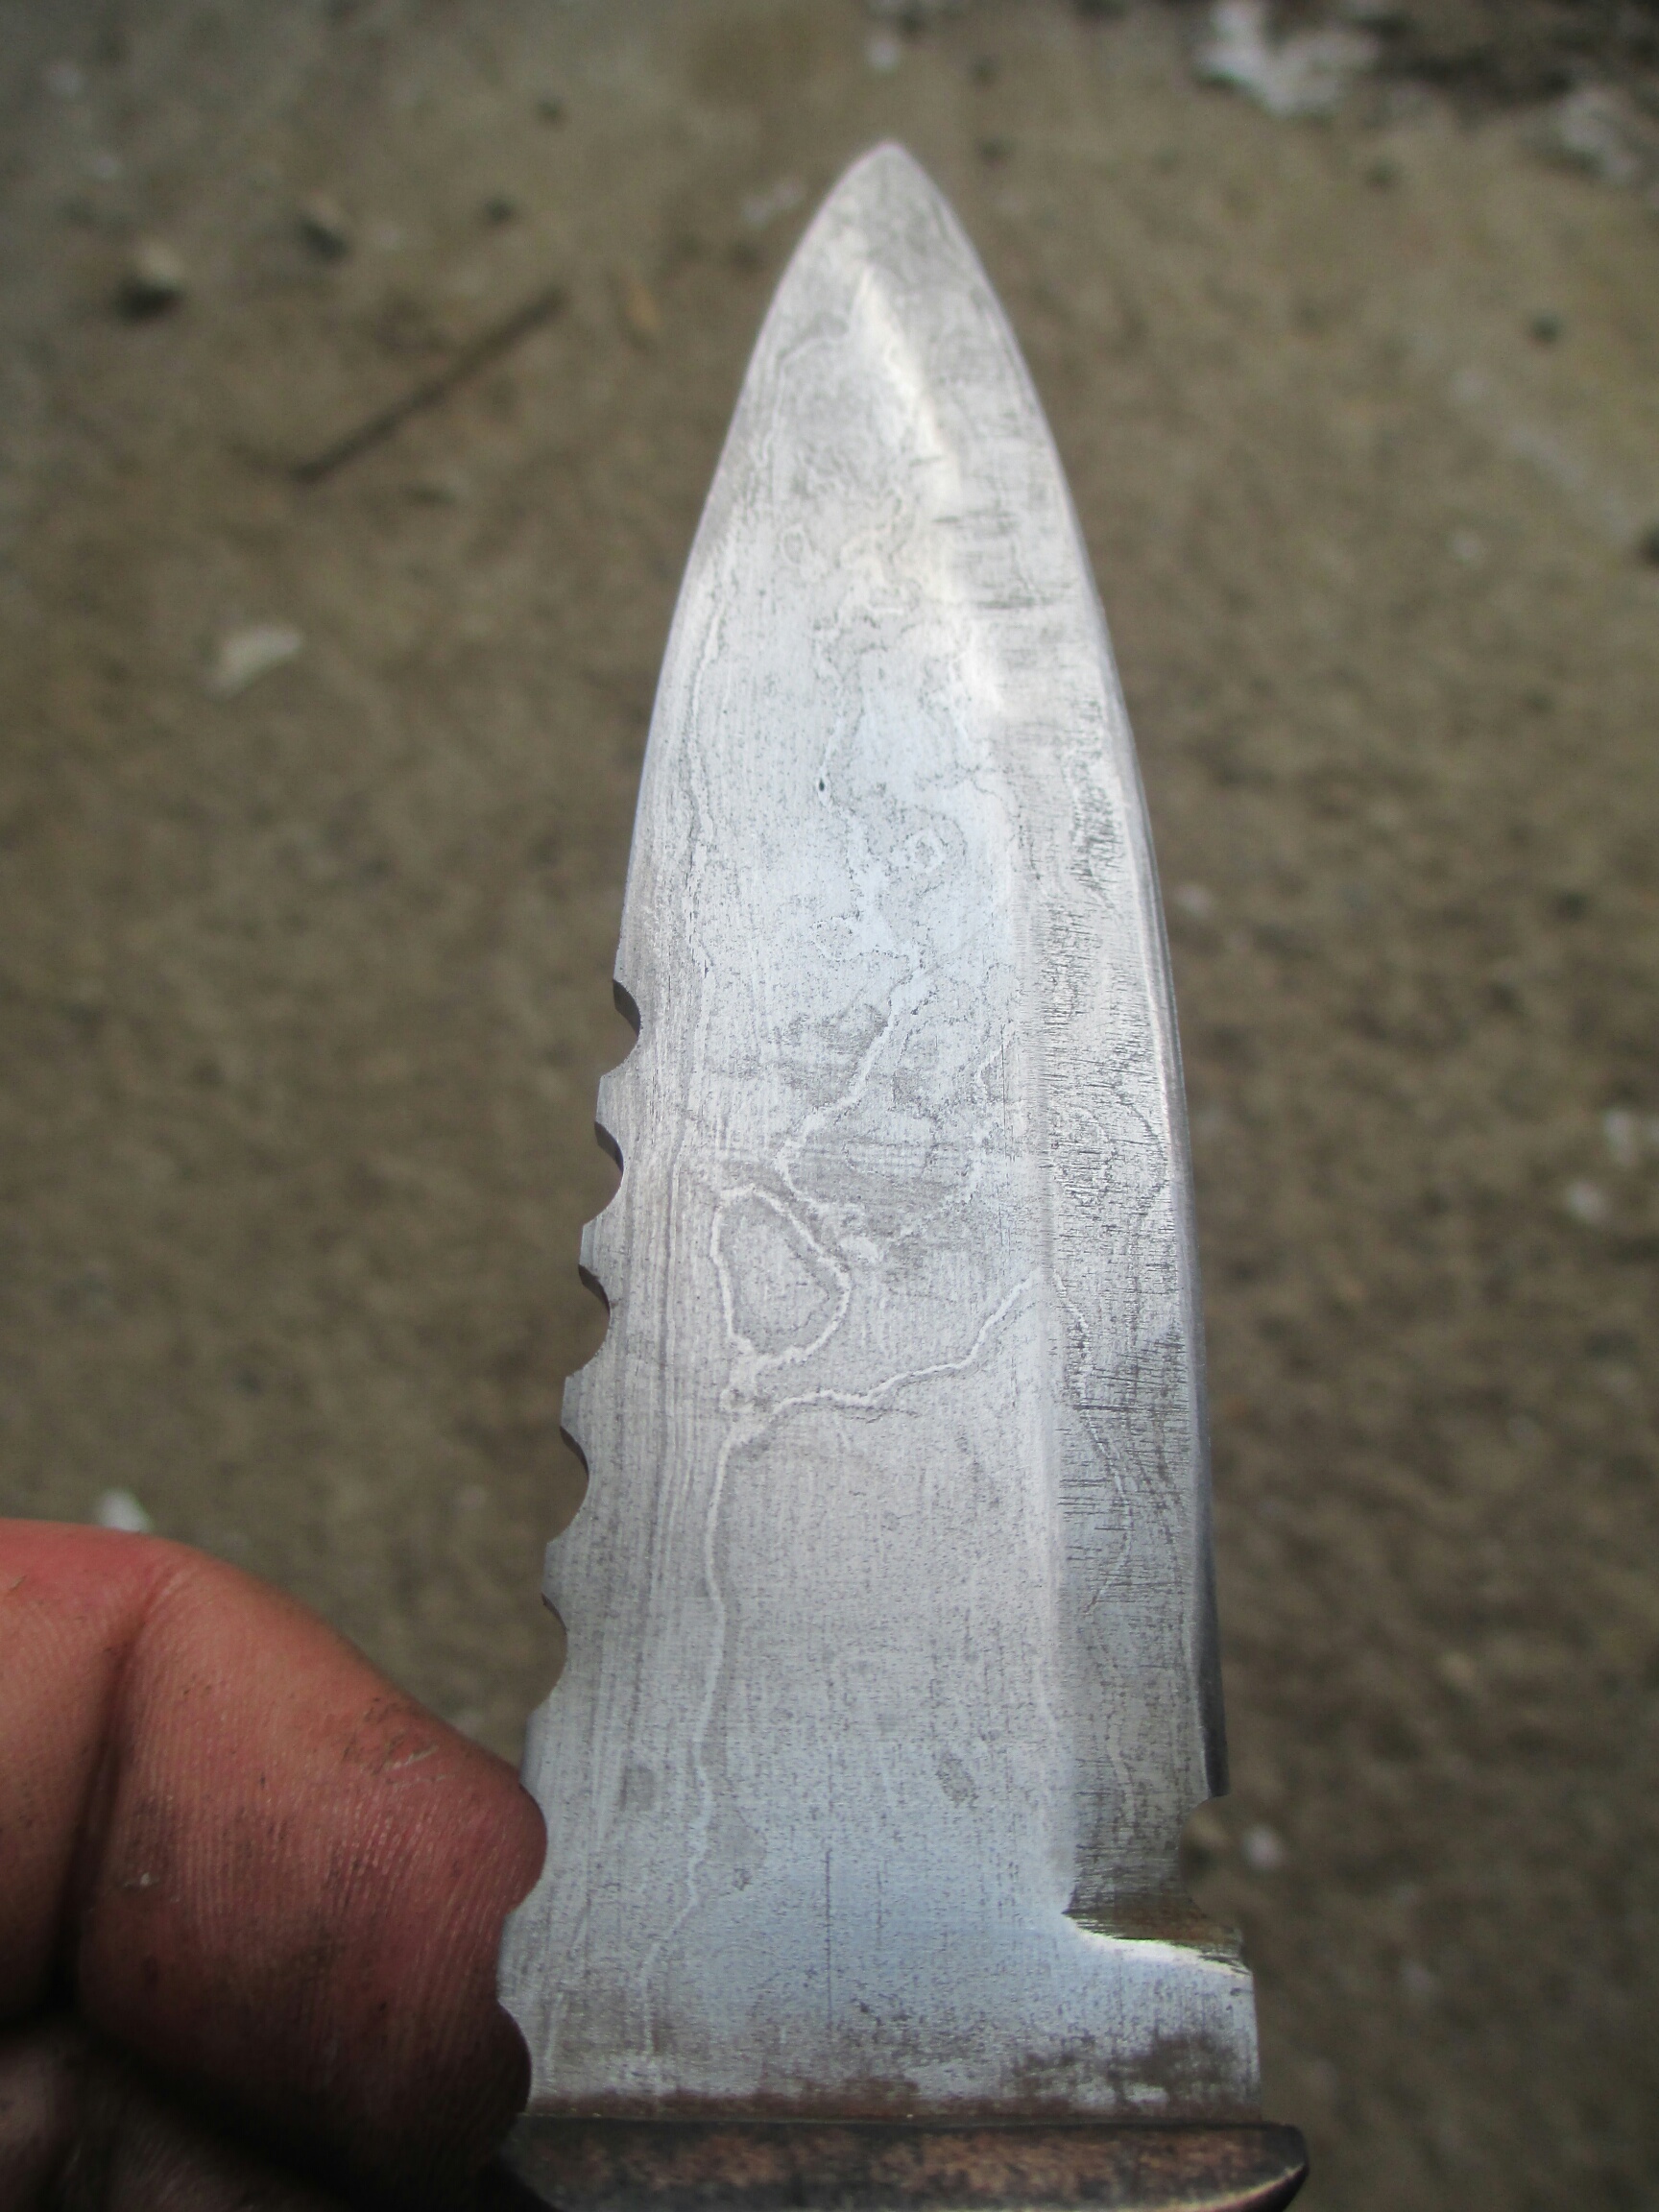
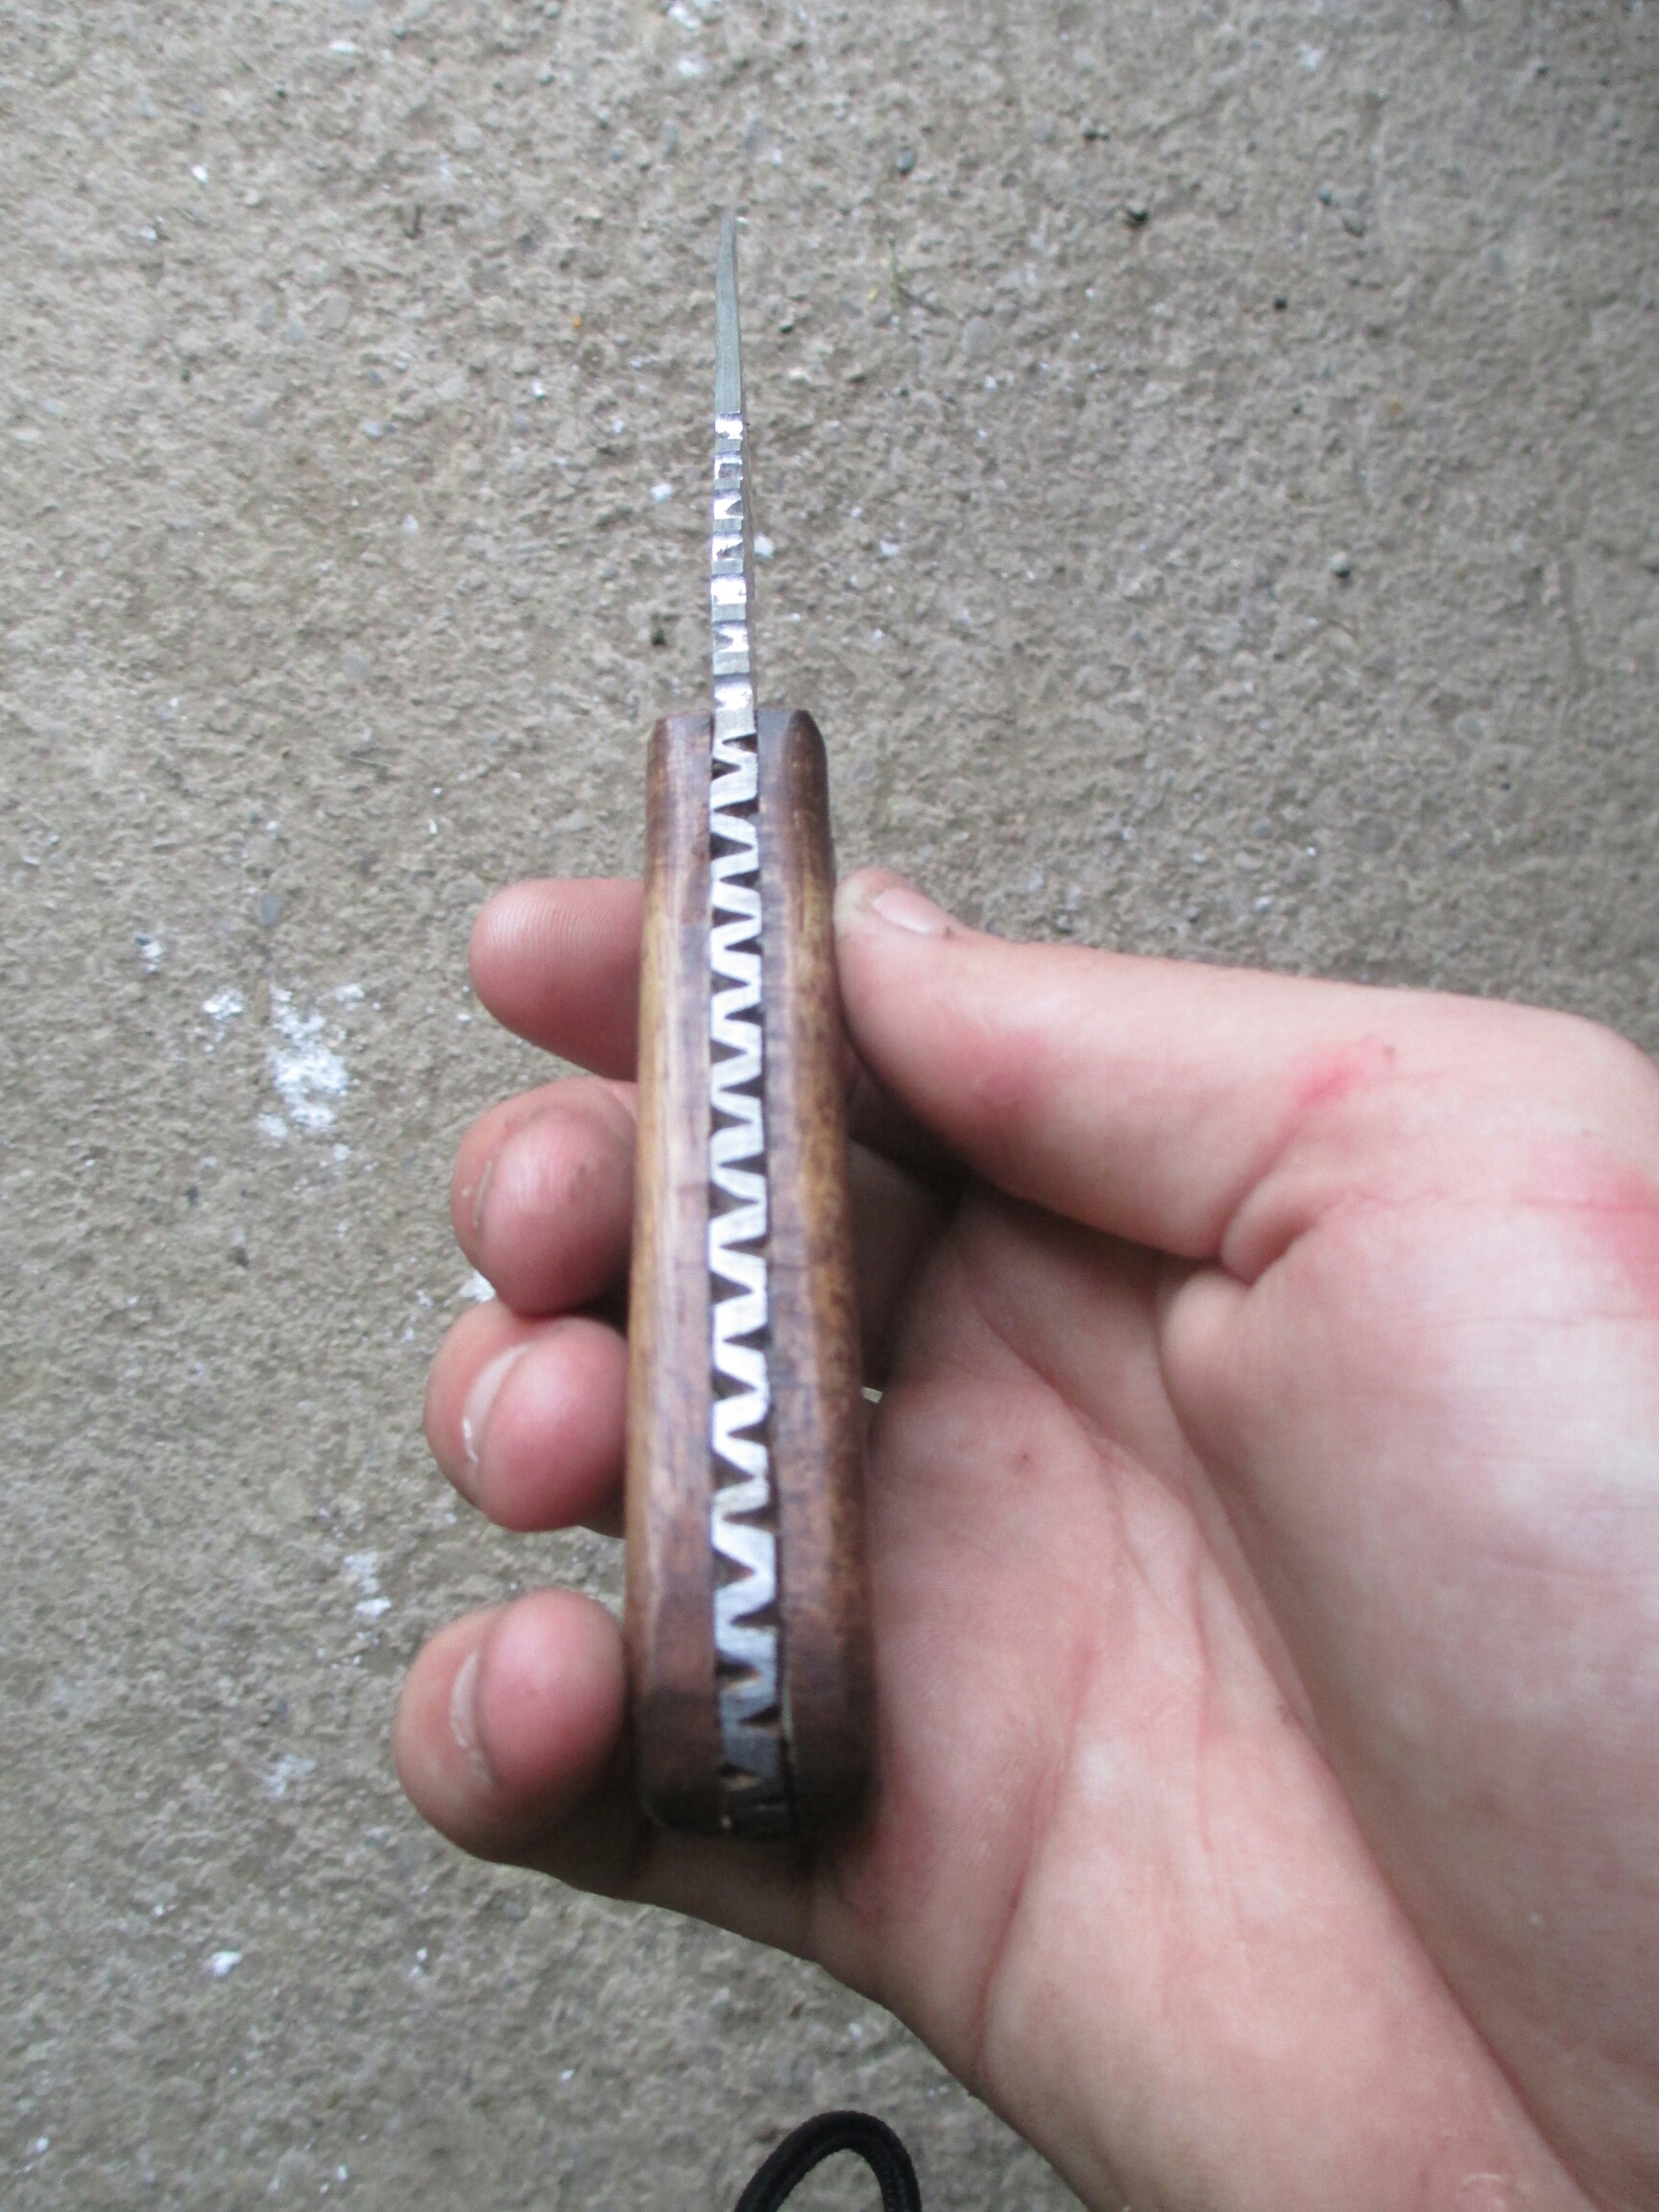
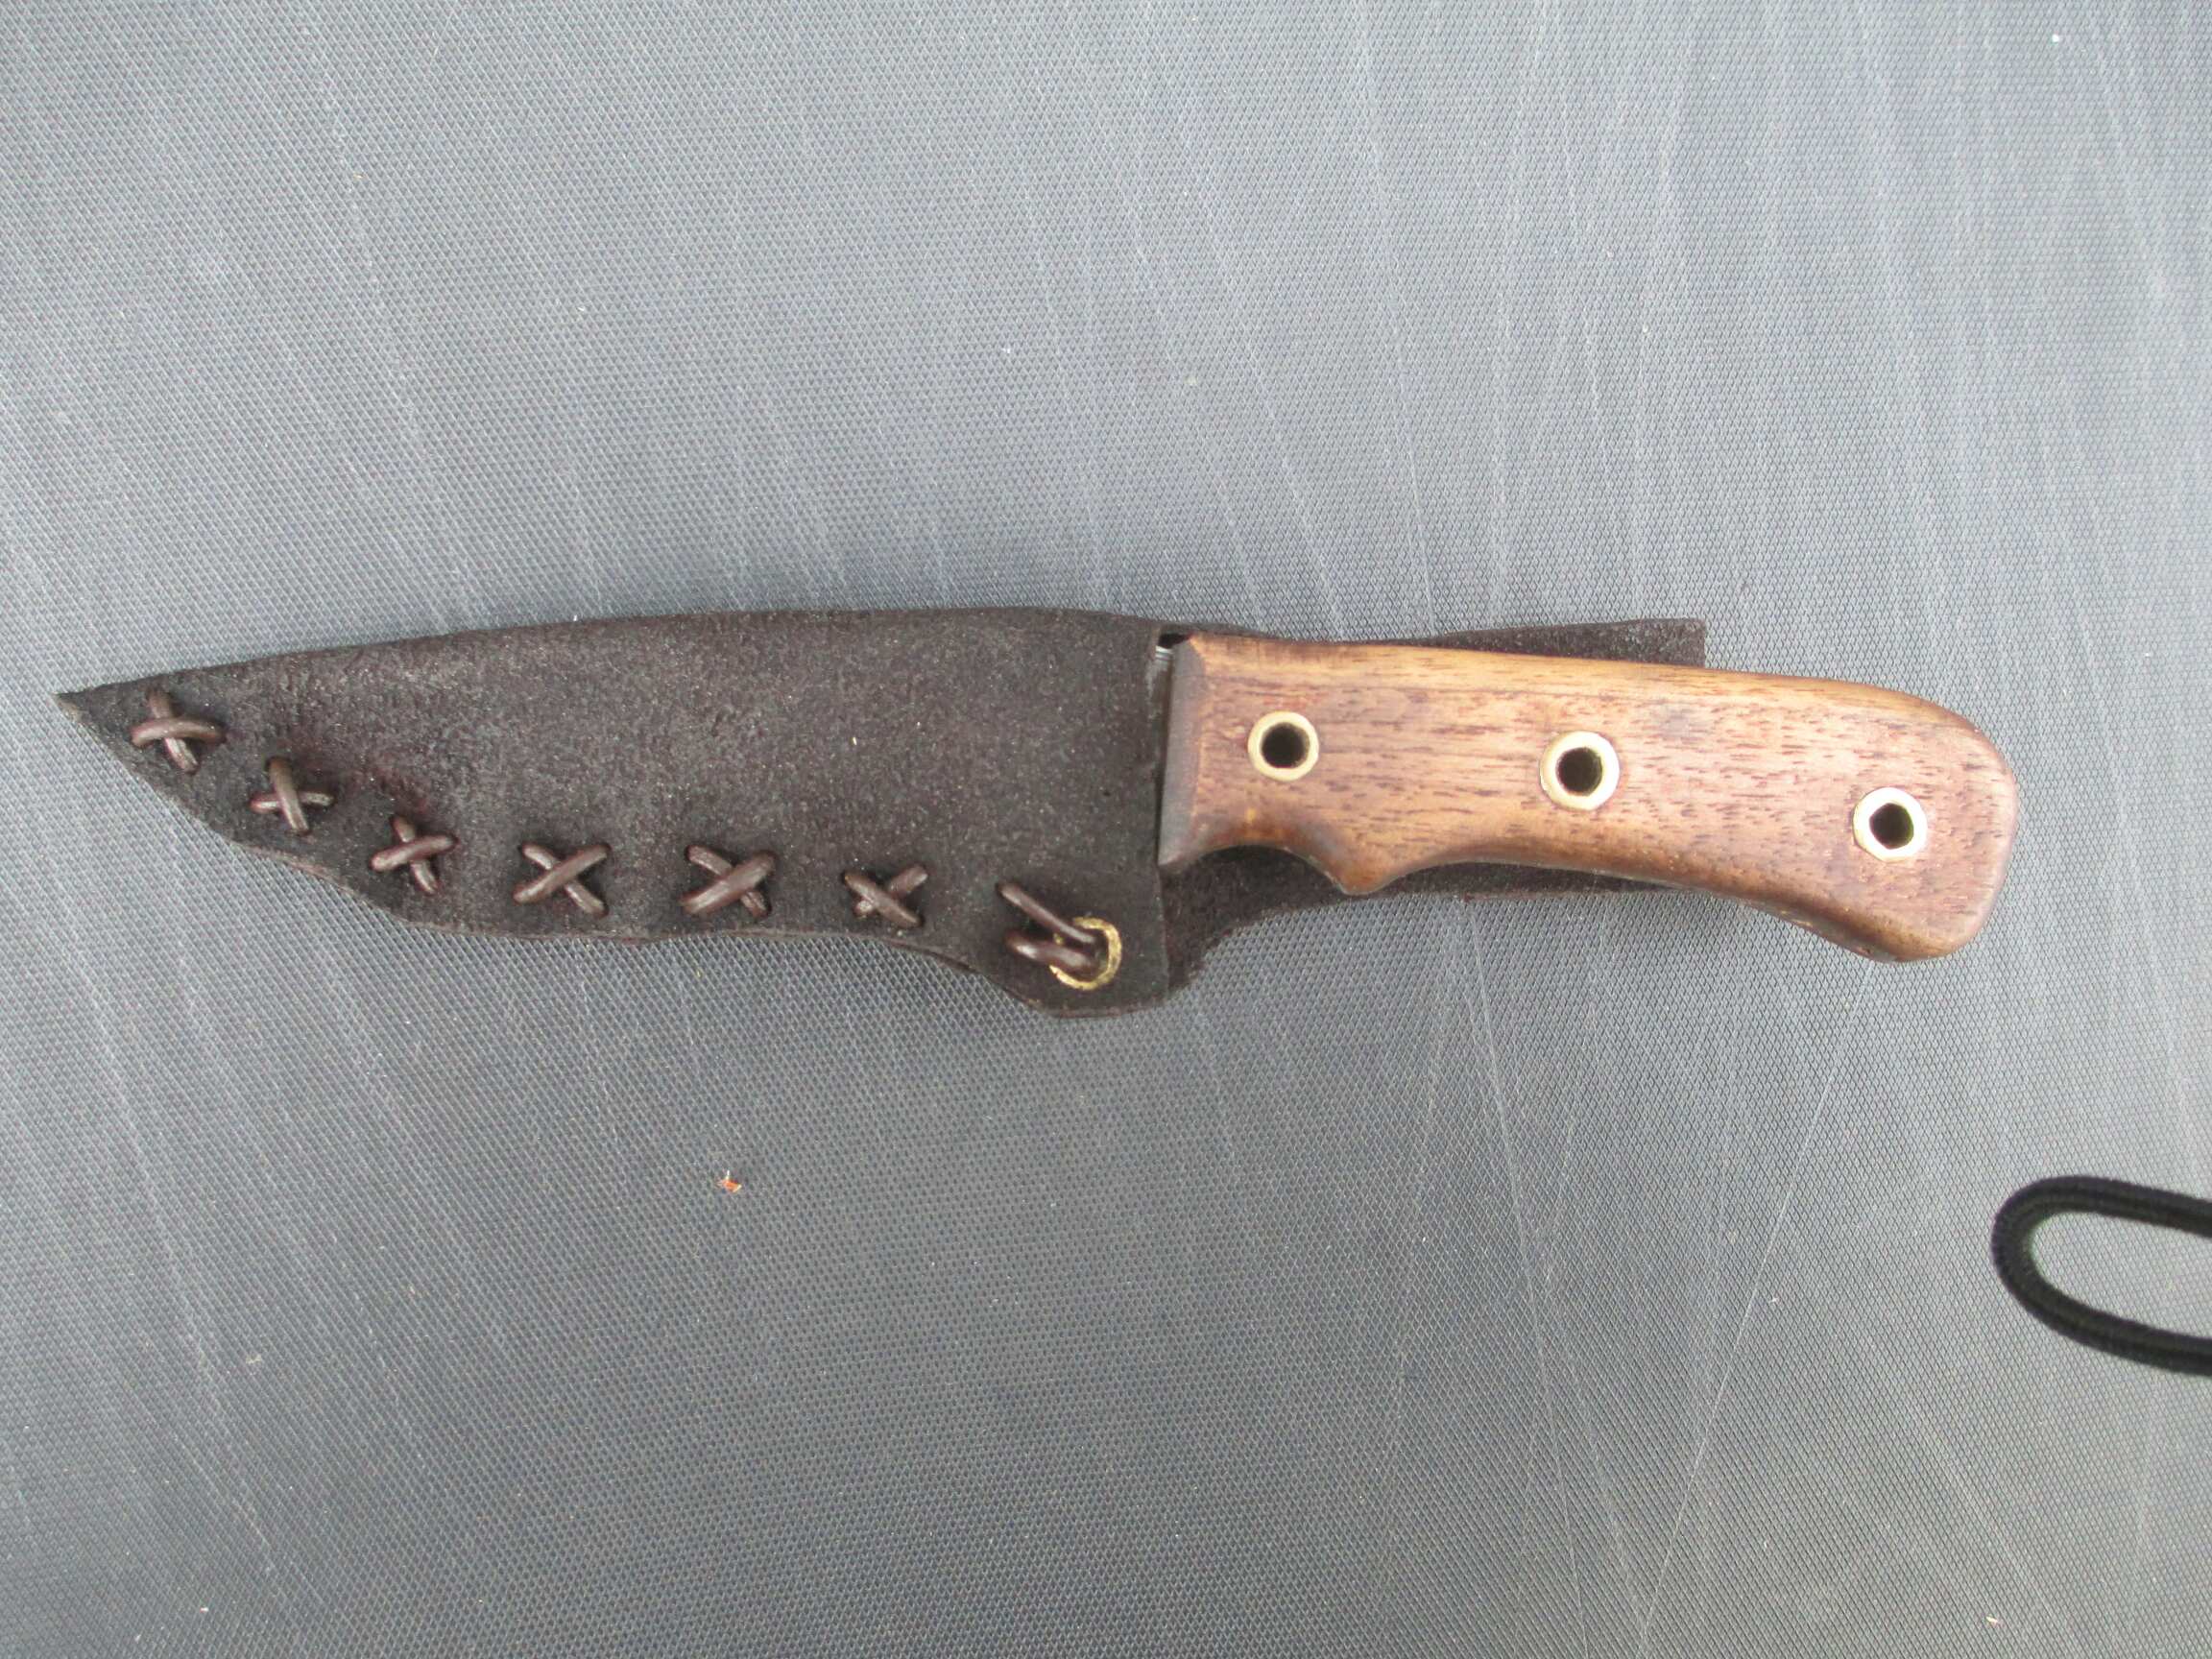
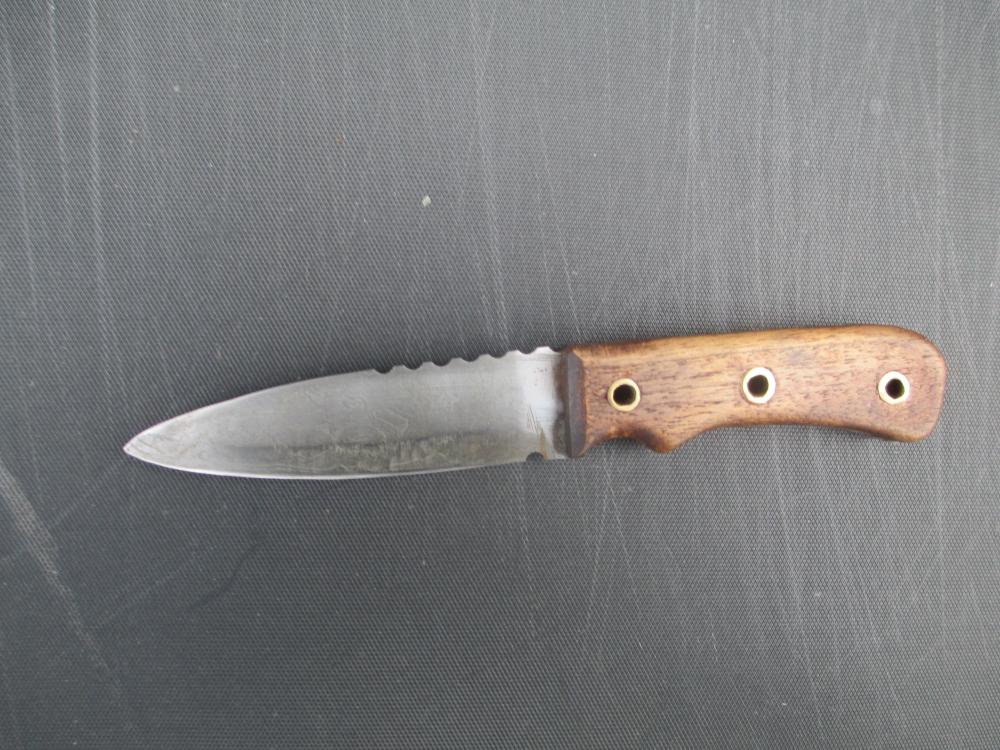
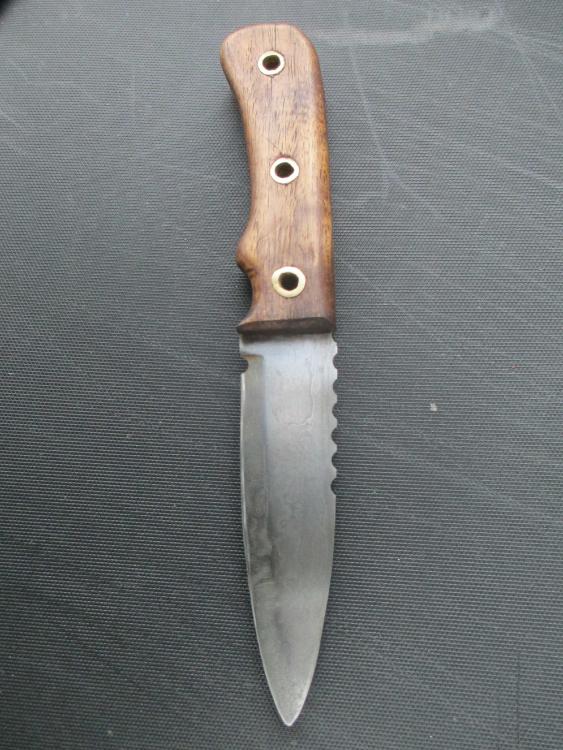
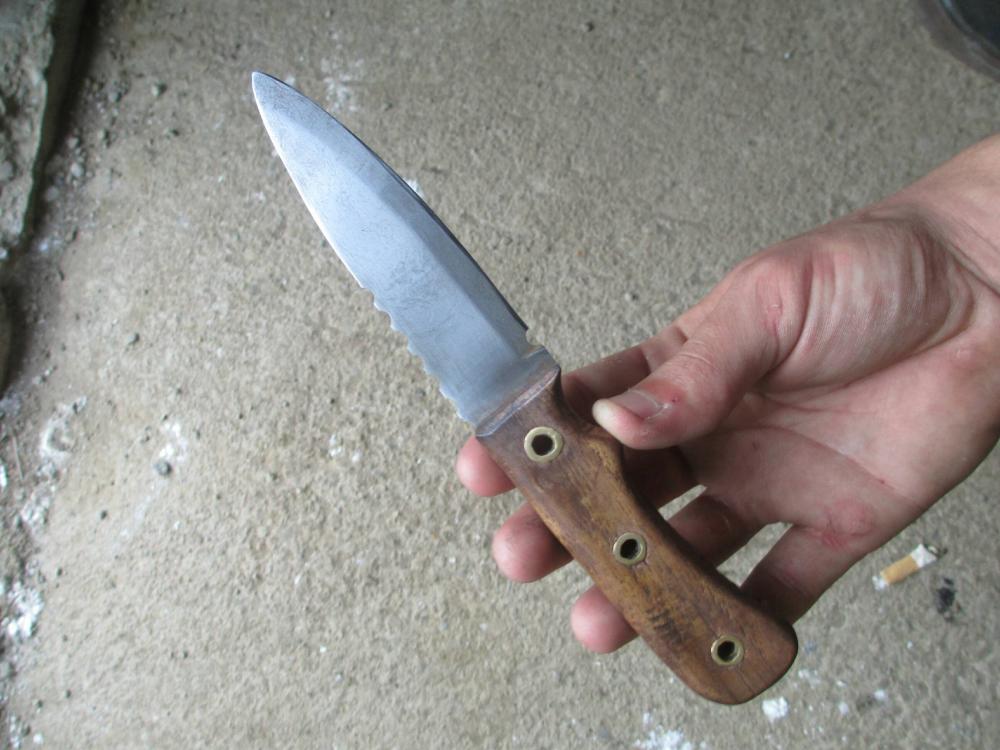
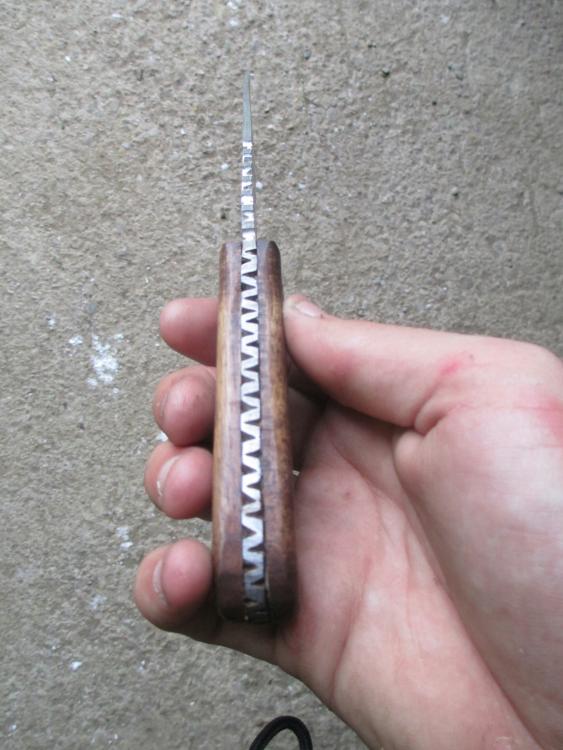
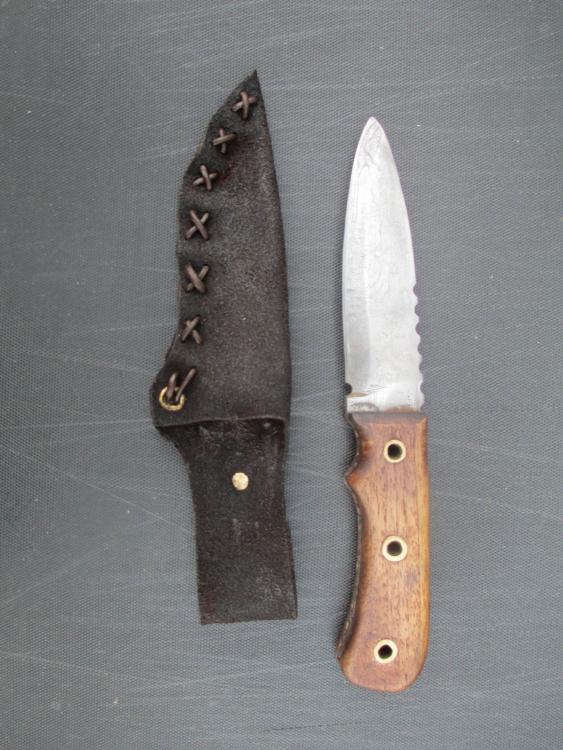
Hello all. This knife will be going to my sister-in-law for her birthday. It snuck up on me so I had to rush a little bit, and my work suffered a little. There's still some grind marks and file marks that I wish I could have worked out. I made the Damascus for this knife using 1/8" 1080 and the highest carbon pallet strapping I had (still a pretty low C content. ~1/16" tested using quench and break method) alternating 1 layer 1080 and 2 layers pallet strapping up to 16 layers, welded and then folded a single time for roughly 32 layers. I potentially could have folded again, but it was thin as it was and I didn't want to press my luck. The pattern is not as drastic as I was hoping for, but it looks better in person than the pictures show. 8" overall with a 4-1/4" blade. White walnut handle, stained "sedona red" with 1/4" brass tubing pins. Im not exactly sure how well the tubing pins hold by themselves, so i was quite liberal with the epoxy. Quenched at ~1600° in vegetable oil and then tempered at 375° for an hour. Despite the lower carbon content from the pallet strapping, it hardened up pretty well. Etched in muriatic acid. The file work goes all the way around the tang. The sheath is leather. The leather was very pliable and... "Floppy" for lack of a better term. I hardened it by applying melted beeswax, and allowing it to soak into the leather and solidify. This also colored it nicely. I am no leather worker, and my stitching shows. I used leather lace. I couldn't figure out how to end the stitch however, so I put an eyelet in (also brass tubing) and put both threads through before tying a knot on the other end. It looks a little odd, in my opinion, but I'm satisfied with it. Anyways, thanks for looking! Comments and criticisms are welcome, as always.


-
Forge welding almost always lowers the carbon content in the steel your working. It's called decarburization. Plus if your working with two steels that have different carbon contents, say 1095 and mild steel, you have to deal with carbon diffusion, where the carbon diffuses over the whole billet until it is homogenous. Basically that 1095 and mild steel billet, when solid, will likely end up with .4 or .5 % carbon across the whole thing (or something like that, idk the exact %) Repeated welding making the metal more pure sounds like he was referencing either bloomery steel or wrought iron. Modern alloys are already pretty darn pure.
-
I didn't see it mentioned yet, and I realize you said you are just beggining, so this information will really only do you good down the road, but... True 5160 is a bugger to forge weld to itself. It contains chromium, which can form chromium oxide when heated, not a big deal when simply forging it, but if enough builds up between layers in a billet, it will fight you the entire way. I have experienced this, and it's frustrating. Not to say it's impossible, it's just tricky. There are a few threads on here that talk about it in more detail if you're interested.
-
Drill bit echolocation?
-
Will do, arkie, thank you. I've tried to make a few horseshoes from scratch before and they are not easy. And that was just getting the shape down, to say nothing of forming the clips evenly and punching the holes in the correct spots. It is definitely an art in and of itself.
-
Oh my ... I absolutely love it! Fantastic job. Did you forge the gut hook? The only thing I can see that I don't care for (and it's really just personal preference) is the big hump in the middle of the handle. But that's minor, it looks awesome.
-
Wise words indeed. Thank you.
-
Haha yes, that's true. Seems like a good way to look at it. I'm sure it may serve a purpose at some point, but just like the spoilers, right now it just makes it look cool.
-
Interesting. Thanks for the replies everyone. Couldn't one just use the edge of the face for the same purpose though? Why cast in a whole separate section? Unfortunately my internet is being weird and won't let me view the video... Das This baby is (hopefully) going to stay with my family for generations. One day my great great grand children will be able to look at a 250-ish year old anvil and wonder what has been made on it before their time, just as I do now. Just realized someone commented on a thread about the same thing I asked and brought it up right underneath my thread. Oops. Sorry for the repeated content.
-
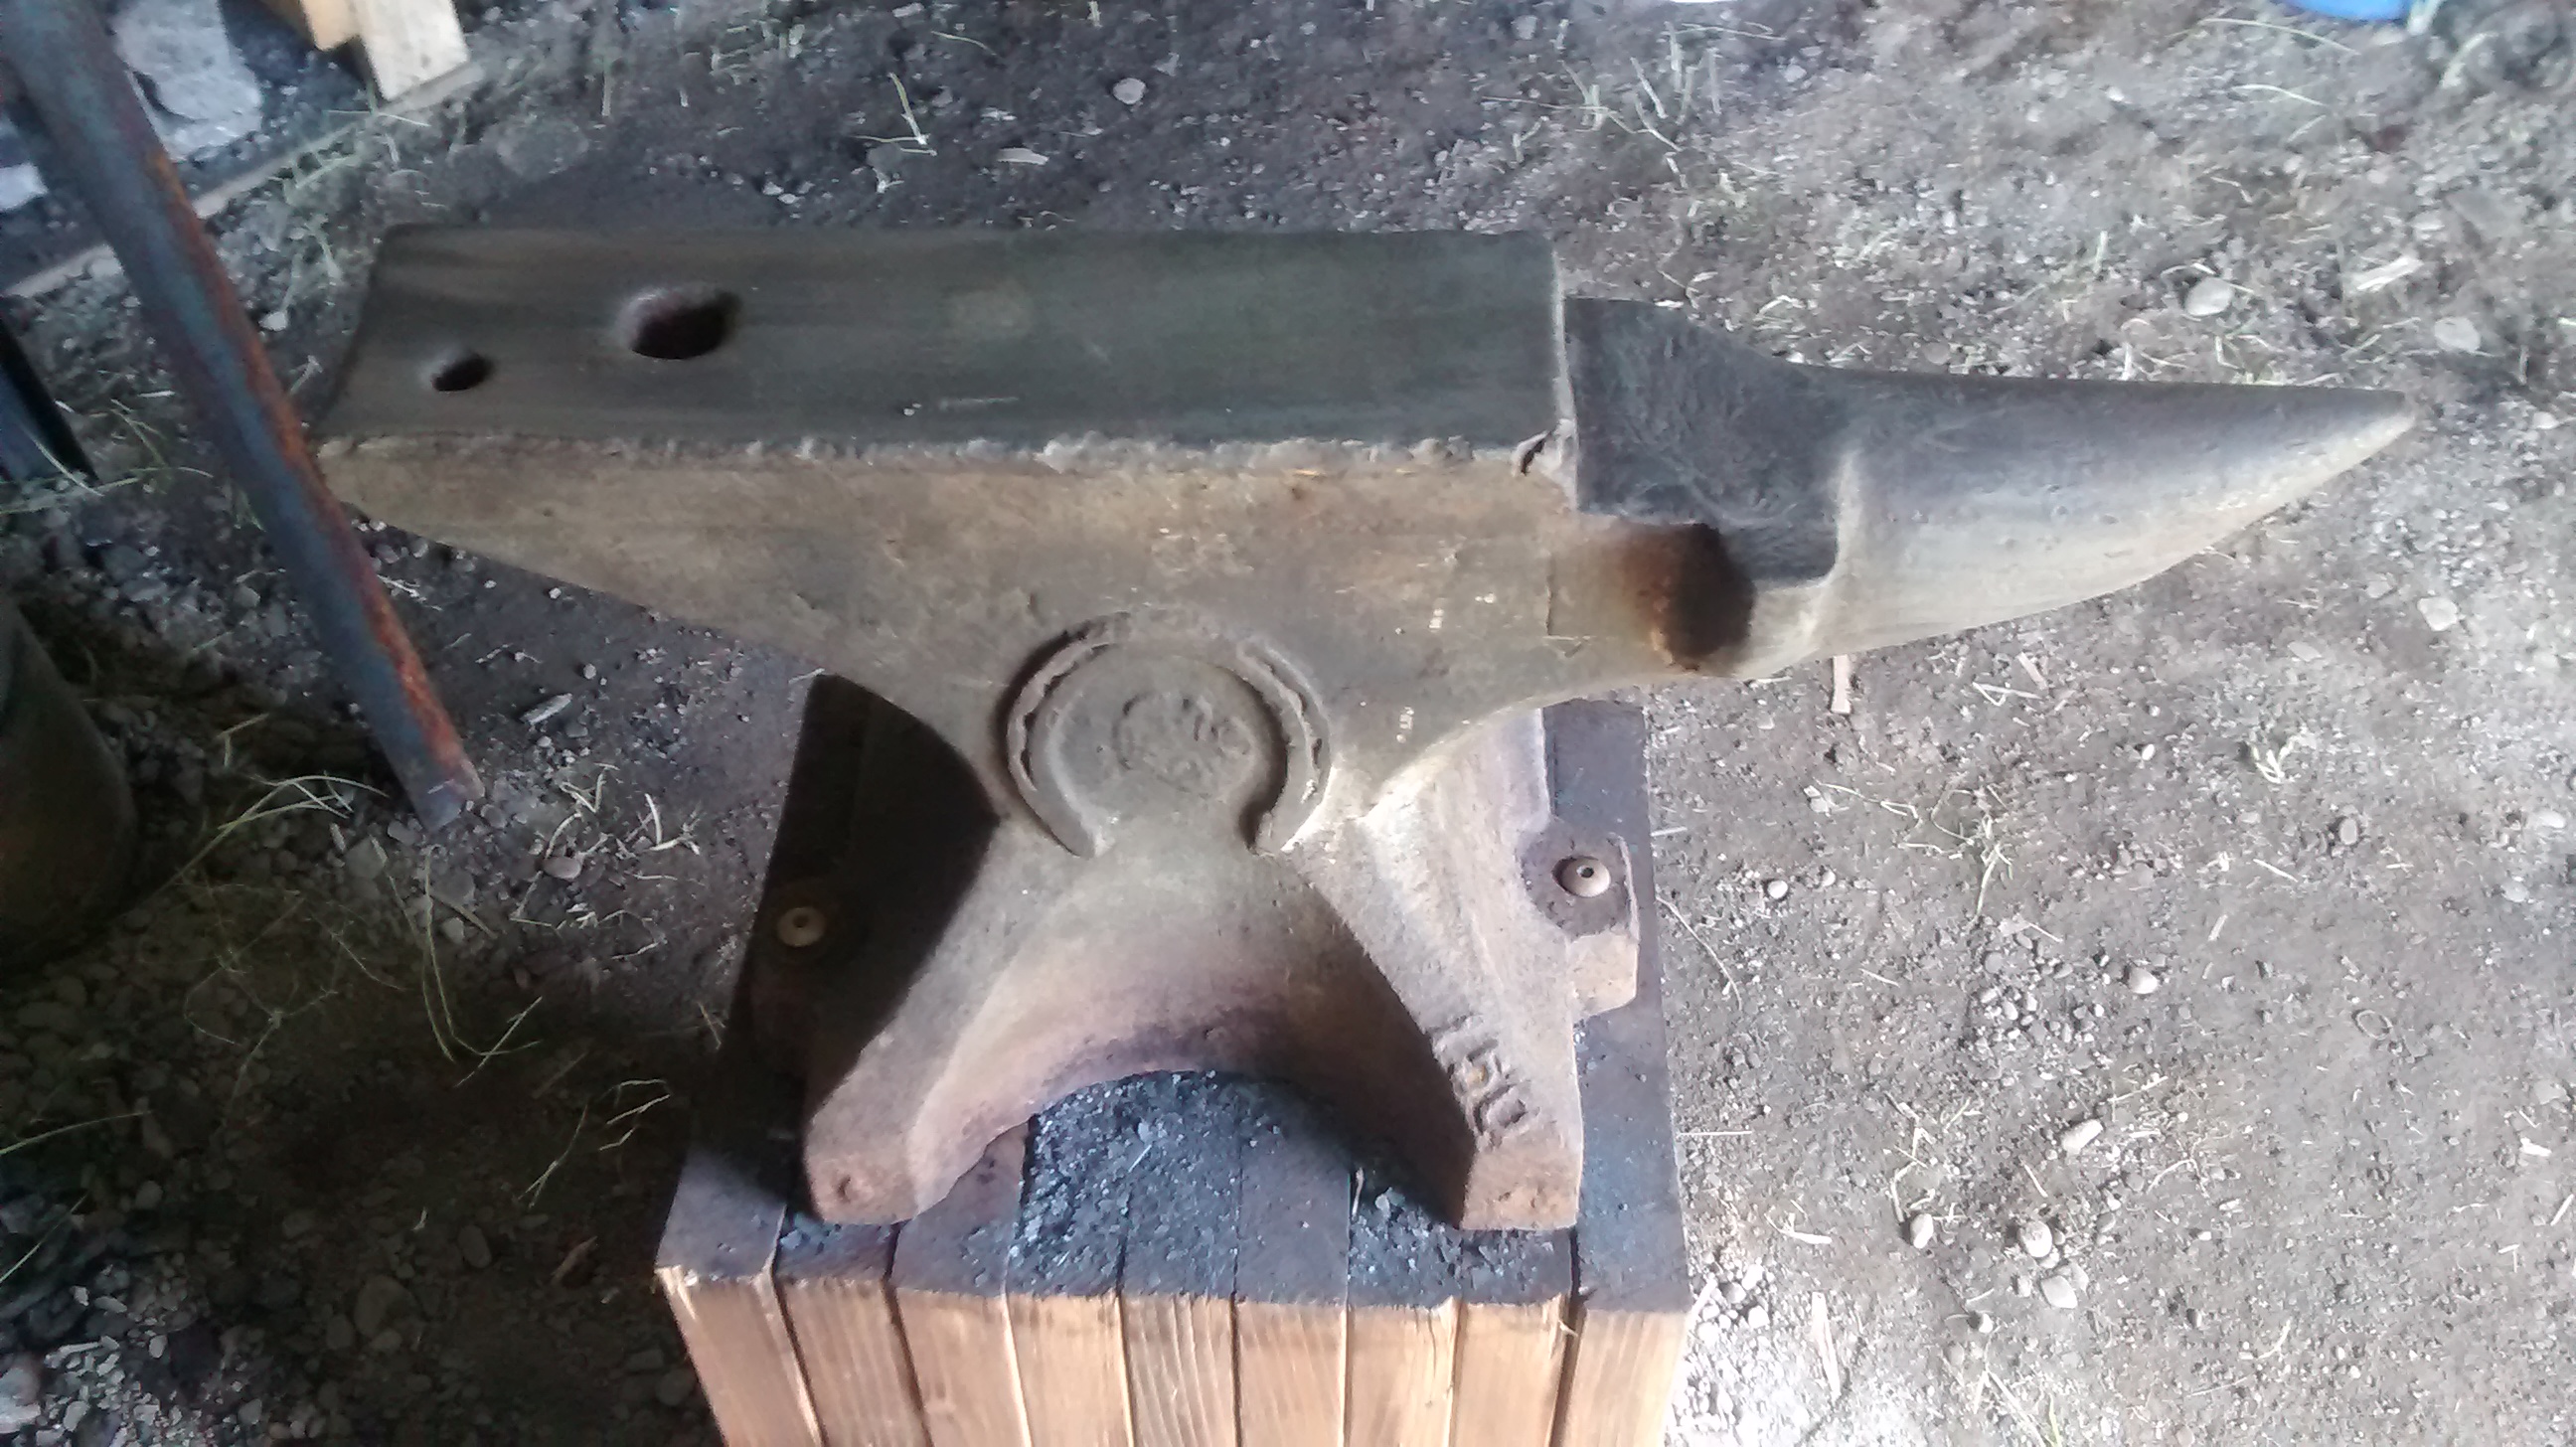
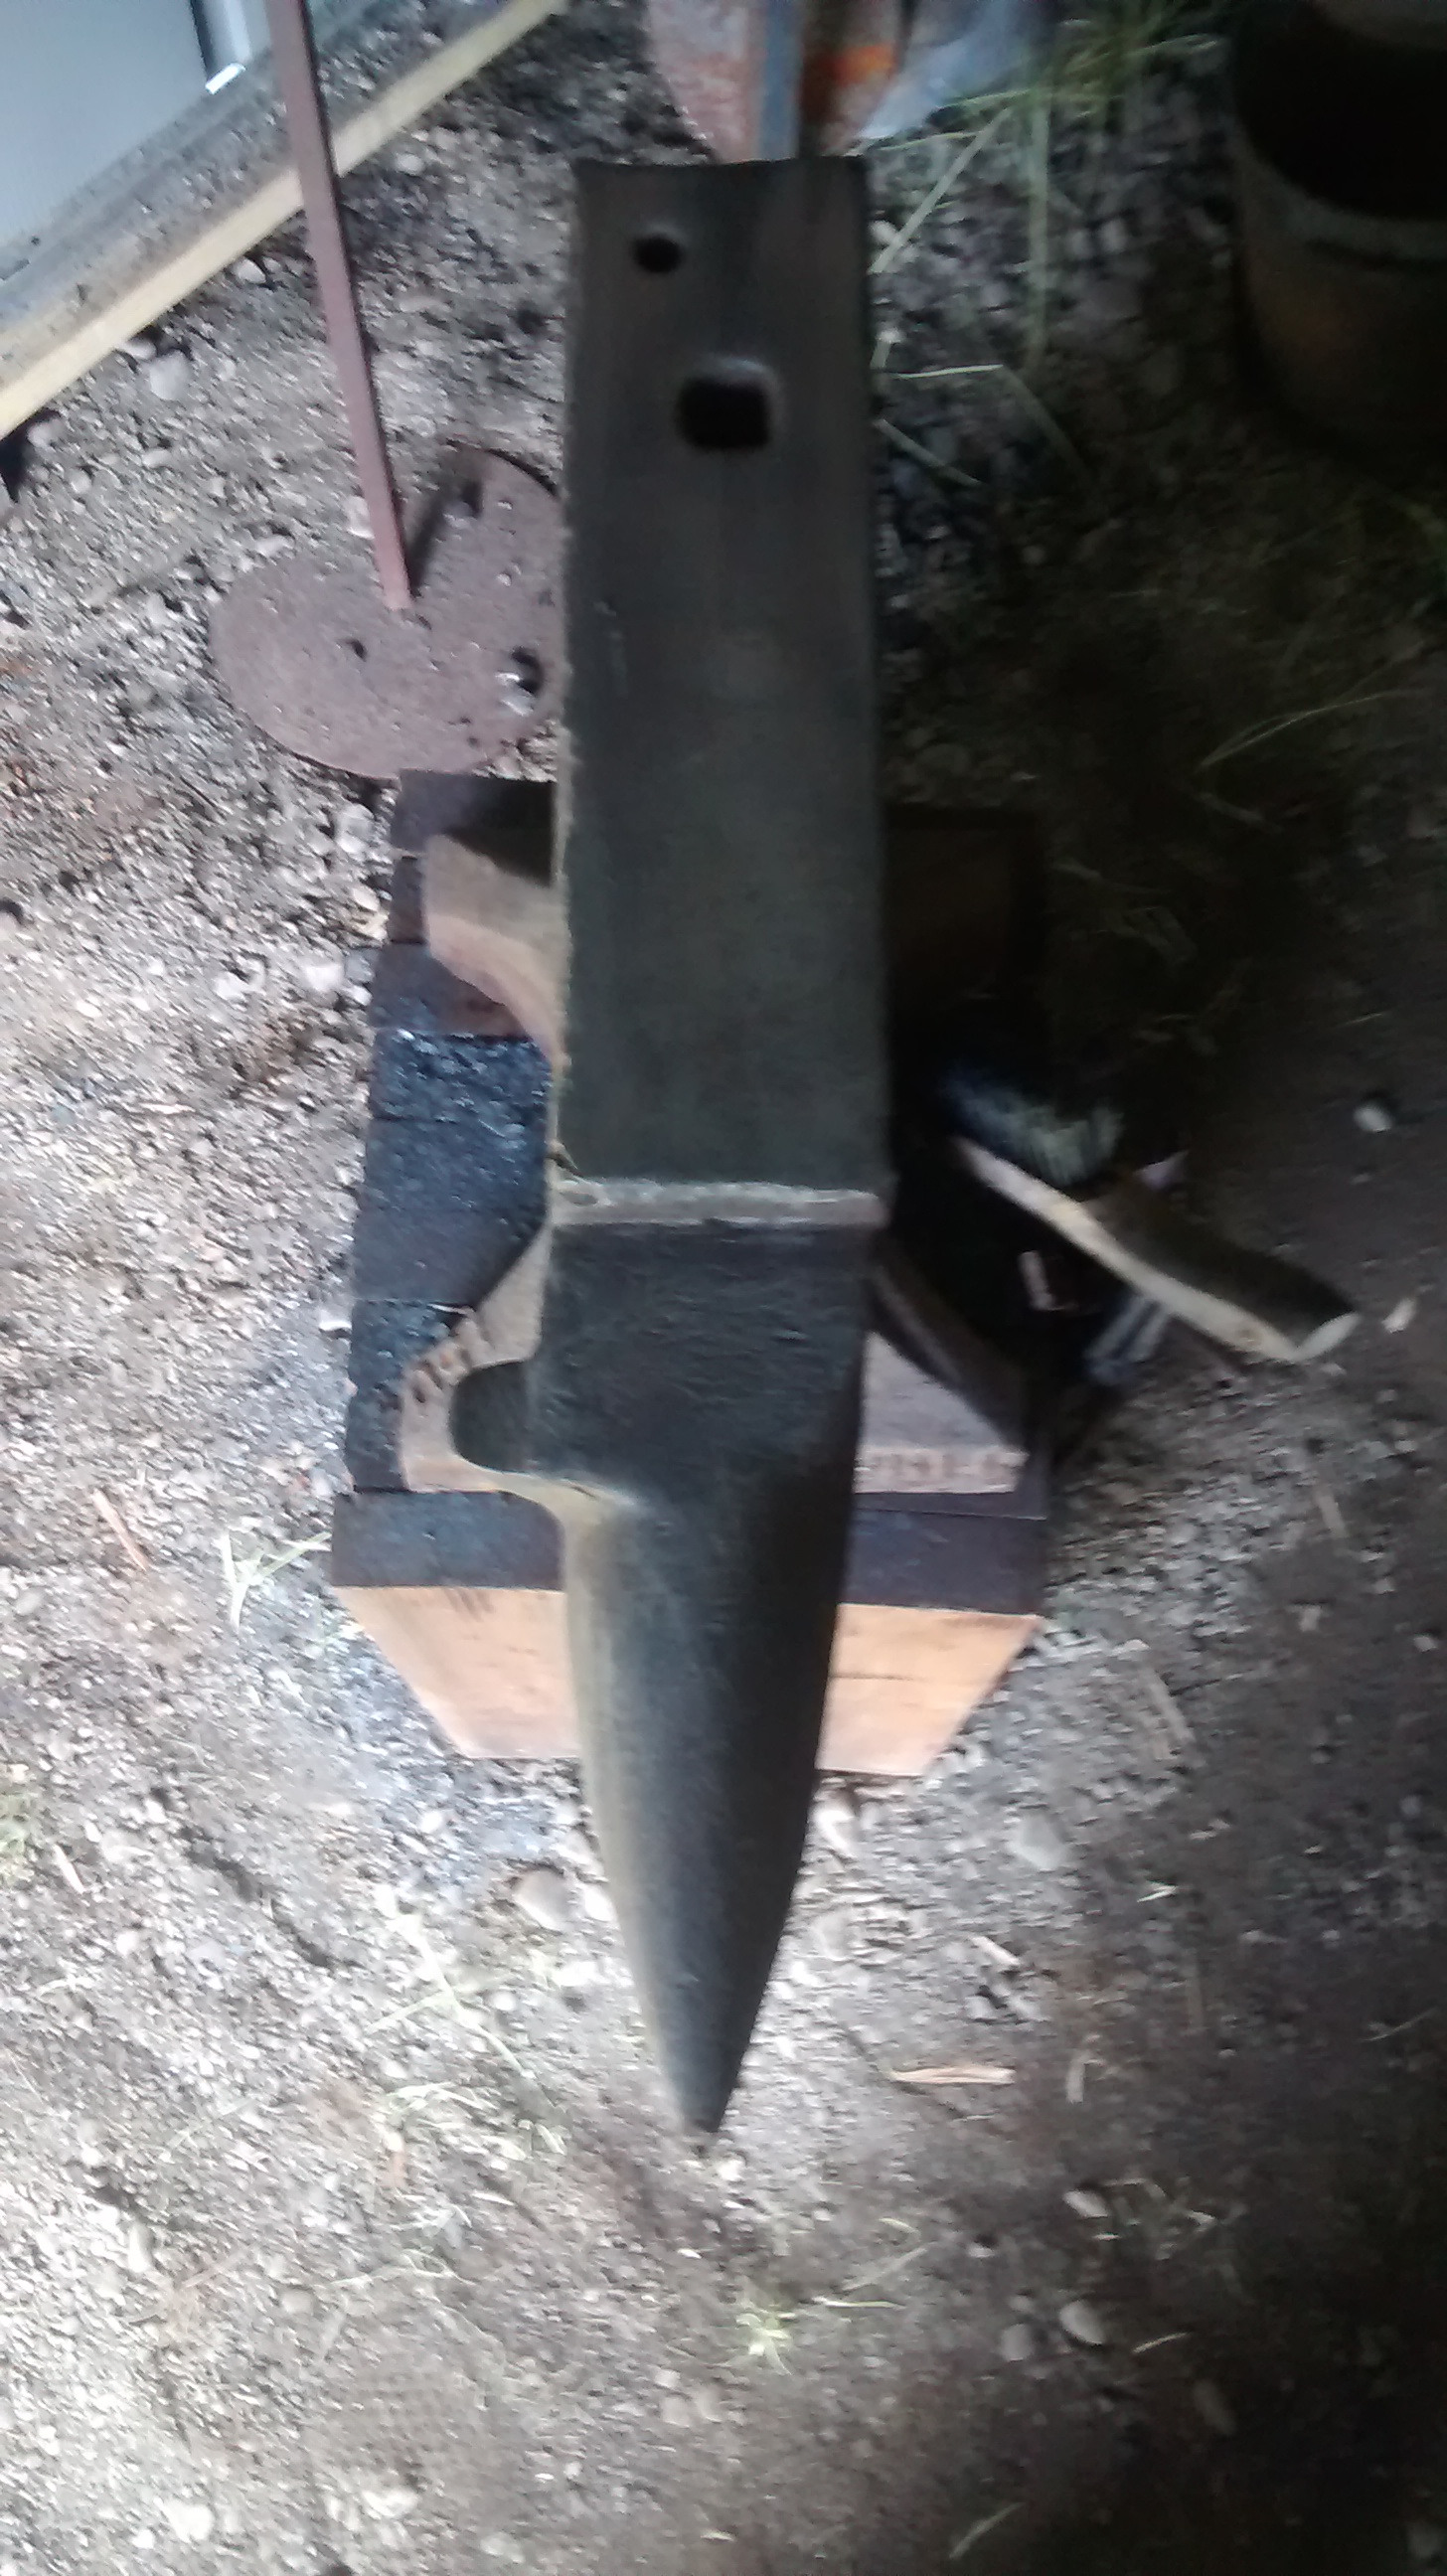
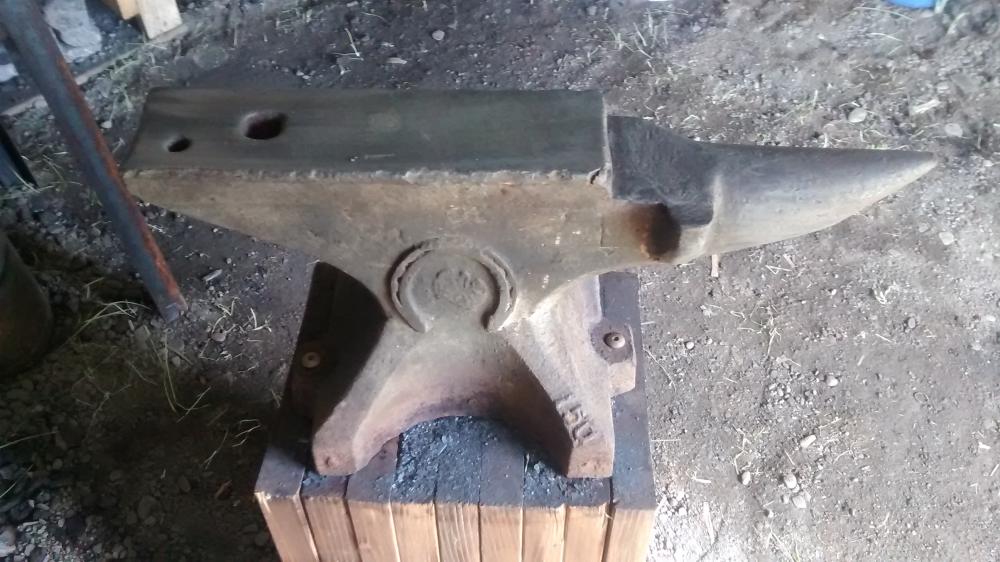
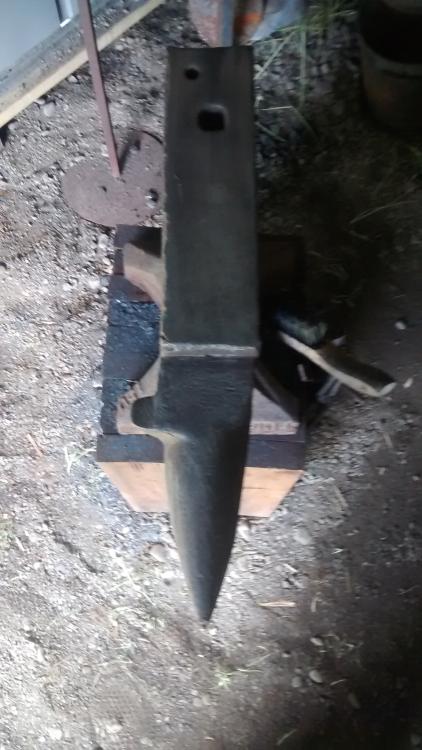
Hello fellow anvil enthusiasts. This is my 150# Fisher Farriers anvil, Circa 1905 (date is on the underside of the heel) I love the thing, its a fantastic anvil in my opinion, and I got it for a steal, so I can't complain too much. However I can't see the purpose of that little "nub" to the left of the horn in the second picture. I've been forging almost daily (it's not an addiction, I can quit any time I want!!!) for going on a year and a half, and I have never once had to use it. Ive tried to use it before, just to figure out its purpose, but in almost every situation, there is a better spot to use. The top is flat with sharp-ish corners, and then its round going downwards, and slowly tapers towards the bottom. Perhaps it's a farrier thing? What are your thoughts? Thanks.
-
You should try throwing a feather through a 1" thick steel plate. Your odds of success are better than winning the Powerball. Seriously though, don't get so caught up in the hype that you break the bank. You can do a lot of work and learn a LOT using a section of rail track, a pair of channel locks, a hammer, and a JABOD (just a box of dirt) forge. Check out the overwhelming amount of information on this site, and you'll see that you don't need a 500 pound anvil and a $1000 dollar forge to make beautiful things. Good luck.
-
I should put that on the sign on the front of my smithy. "The Frugal Blacksmith" has a nice ring to it.
-
Thank you JHCC. I have a 5 gal barrel of water I use to cool mild steel and that's about it. Reading about how some members high carbon blades have spontaneously become airborne while hot and finding their way perfectly into the water tub has made me cover it however lol. This is a good idea. Thanks for the tip. And yes... Thrifty... Let's call it thrifty...
-
I tried looking up some info on Alaska flux, and pulled up very little. But what I did find stated it was anhydrous borax and charcoal powder (or any other source of carbon, graphite for example) with some people saying boric acid as well. Is that correct? I like the idea of the extra carbon lowering the required temperature for welding, even if it is by a small amount.
-
Thomas I use a system similar to yours. Hand crank blower that I made (really want to build bellows eventually) and I have several grates for what size fire I need. If I'm making nails or chain, I don't need my entire 12" round firepot to be forging temp. But if I'm making an ax, different story. Glenn I made the mistake of screening fines indoors ONCE! I don't know why I didn't realize that was a bad idea, but I was cleaning black dust off of everything for a week.
-
True. I suppose that could work as a lid. But now I wonder if I have any plywood out in the shop... Interesting, about moving the coals over to the forge. You were able to keep a good supply in the actual forge? It burns up fast, transporting it would be a full time job, let alone forging too! Lol.
-
Agreed, absolutely. Also, agreed. Thomas Sounds like a lot of fun, camping under nature's tent. Can't imagine framing with black walnut though. It runs about &8 or $9 per board foot around my area. JHCC Red black walnut? Yeah, I want me a piece o' that!
-
Turbo Mine is made in a 55 gal drum, but winter is ~5 months out of the year around here (sometimes less, if we're lucky), so I'll be needing a lot more than what I can put in there. Glenn I'm hoping to keep it inside the shop somewhere and haul it out to the smithy in a few 5 gal buckets when needed. Concrete floor, so out of the elements solved. Problem is, theres a lot of stuff in the shop, so im trying to minimize wasted space storing charcoal. Critter proofing I had not considered. The mice do make the shop their home every winter, even though I give them clear instructions that I've already evicted them! Lol. Thanks for the food for thought. Thomas They're around. Usually not up for sale too often. There's a guy I know who sells barrels and drums, but I'm not positive that they come with sealable lids, and he charges quite a penny for just one, let alone the 10 I would probably need. Irondragon Thanks for the tip. I wouldn't think mice would want charcoal. Seems like poor nest material to me, but what do I know, I'm not a mouse. Seems like plastic drums or trash cans may be my best route. I'll have to do some price checking. Winter is a long way off, thankfully, so I have some time to plan I suppose. I wonder how heavy a trash can full of charcoal is. Maybe i could stack them to save space? Idk. Thanks for responding everybody.
-
Hello everybody. I've finally figured out how to make good charcoal with my recently built retort, and I typically just make it as I need it. My operation is over the fire pit I have out back, and it works a treat. But I got thinking, winter time, I'm not going to be able to make any charcoal, the fire pit is usually a few feet under snow. So in the fall, I planned on making a whole bunch (few hundred pounds probably) to hold me over until spring. But I don't quite know how I can store that much of it. Beat idea I have so far is either in trash cans, which I would have to buy (I'm cheap) or in black construction bags, the heavy duty ones, less chance of tearing than a regular trash bag. Just curious if anybody has any ideas for how I can store a whole lot of charcoal, preferably in the least amount of space as possible. I would love to hear anything you guys have. Thanks in advance.
-
Old topic, but... How could you make LEDs even better, one may ask? Solar panels. I have a solar LED light for my smithy (it's only 140 square feet) purchased at harbor freight for $30 iirc, and it's free lighting after purchase. Lights up the shop just fine. LEDs also use less power than incandescent or fluorescent, so they won't drain your battery bank if you had solar panels installed for a larger shop, or a home even. Also, anybody who has ever used an old metal cage drop light knows exactly how hot incandescent bulbs make them. Solution? Install a LED bulb, no excess heat. I'm with Frosty. LEDs are AWESOME!
-
Looks like I need to go to Kansas....
-
Another consideration is the sparks going up the chimney. Charcoal makes a lot of them (as Thomas mentioned) and you REALLY don't want those going onto a neighbor's porch, still hot. They likely wouldn't be hot enough to cause a fire, but it only has to happen *one* time for -you know what- to hit the fan really quickly. Some type of spark arrestor in the chimney may be a good idea, but I'm not exactly sure what you could use. I also burn charcoal, but my neighbors are bovine in nature so I've never had to consider it. They don't mind. Worth thinking about.