Bhutton
-
Posts
120 -
Joined
-
Last visited
Content Type
Profiles
Forums
Articles
Gallery
Downloads
Events
Everything posted by Bhutton
-
Kalamazoo wants you to jump thru hoops for pricing...ridiculous in my opinion.
-
Looking good...I like it! I've been wanting to build a grinder as well. I found polar bear forge (grinder in a box) on the net. Thinking I might go this route?
-
Charles...it may very well be annealed and I have the terminology wrong. I will definitely ask about the specific alloy...good call Charles!
-
Hi...I have the opportunity to pick up some non-tempered spring steel 1/4" x 1 1/2" x 24" long at a local spring shop. Is this worth checking into? Can items like hawks / knives / punches / chasing tools be made with this? It's free. So I'm all in. I'll let you know what I come up with.
-
Well, one things for sure...In today's world you better be able to multi-task...My children are much more advanced at this than their mother or I.
-
You don't know what you've done son...Now the lady of the house needs all red pans with matching bottoms...I know I went thru this...LOL Nice work...I really like it!
-
Nice looking hammer Pete...Really nice!
-
I picture this as being very large and heavy beings it's made out of 3/4"round...am i visualizing correctly?
-
Asking for design help for an anvil stand
Bhutton replied to JHCC's topic in Stands for Anvils, Swage Blocks, etc
A pyramid (from Greek: πυραμίς pyramis)[1][2] is a structure whose outer surfaces are triangular and converge to a single point at the top, making the shape roughly a pyramid in the geometric sense. A pyramid's design, with the majority of the weight closer to the ground,[3] and with the pyramidion on top means that less material higher up on the pyramid will be pushing down from above. This distribution of weight allowed early civilizations to create stable monumental structures. Pyramids have been built by civilizations in many parts of the world. For thousands of years, the largest structures on Earth were pyramids. JHCC...You've got yourself a heck of a stand. (A pyramid structured base - One of the strongest structures known to man) As Daswulf said...That's a beast!!!! Thanks for taking us on your journey! Awesome! (Paint that baby (Legs) red / white / blue...LOL) Do you know the total weight? -
Slide a collar / washer up and over the tubing and then do some welding...add a horizontal wood handle and you've got it. DIY
-
SJS...Thanks for all the good tips...I really appreciate it! Later Bruce
-
SJS...Great idea!!! (Anvil block with a radius) Do you forge the radius on the block or grind it? I'm thinking 4140 and grind file & shape? Your cup rack is awesome by the way!!
-
Ahh...Makes sence...but what would one use it for? Rubber/plastic with a crosspien.
-
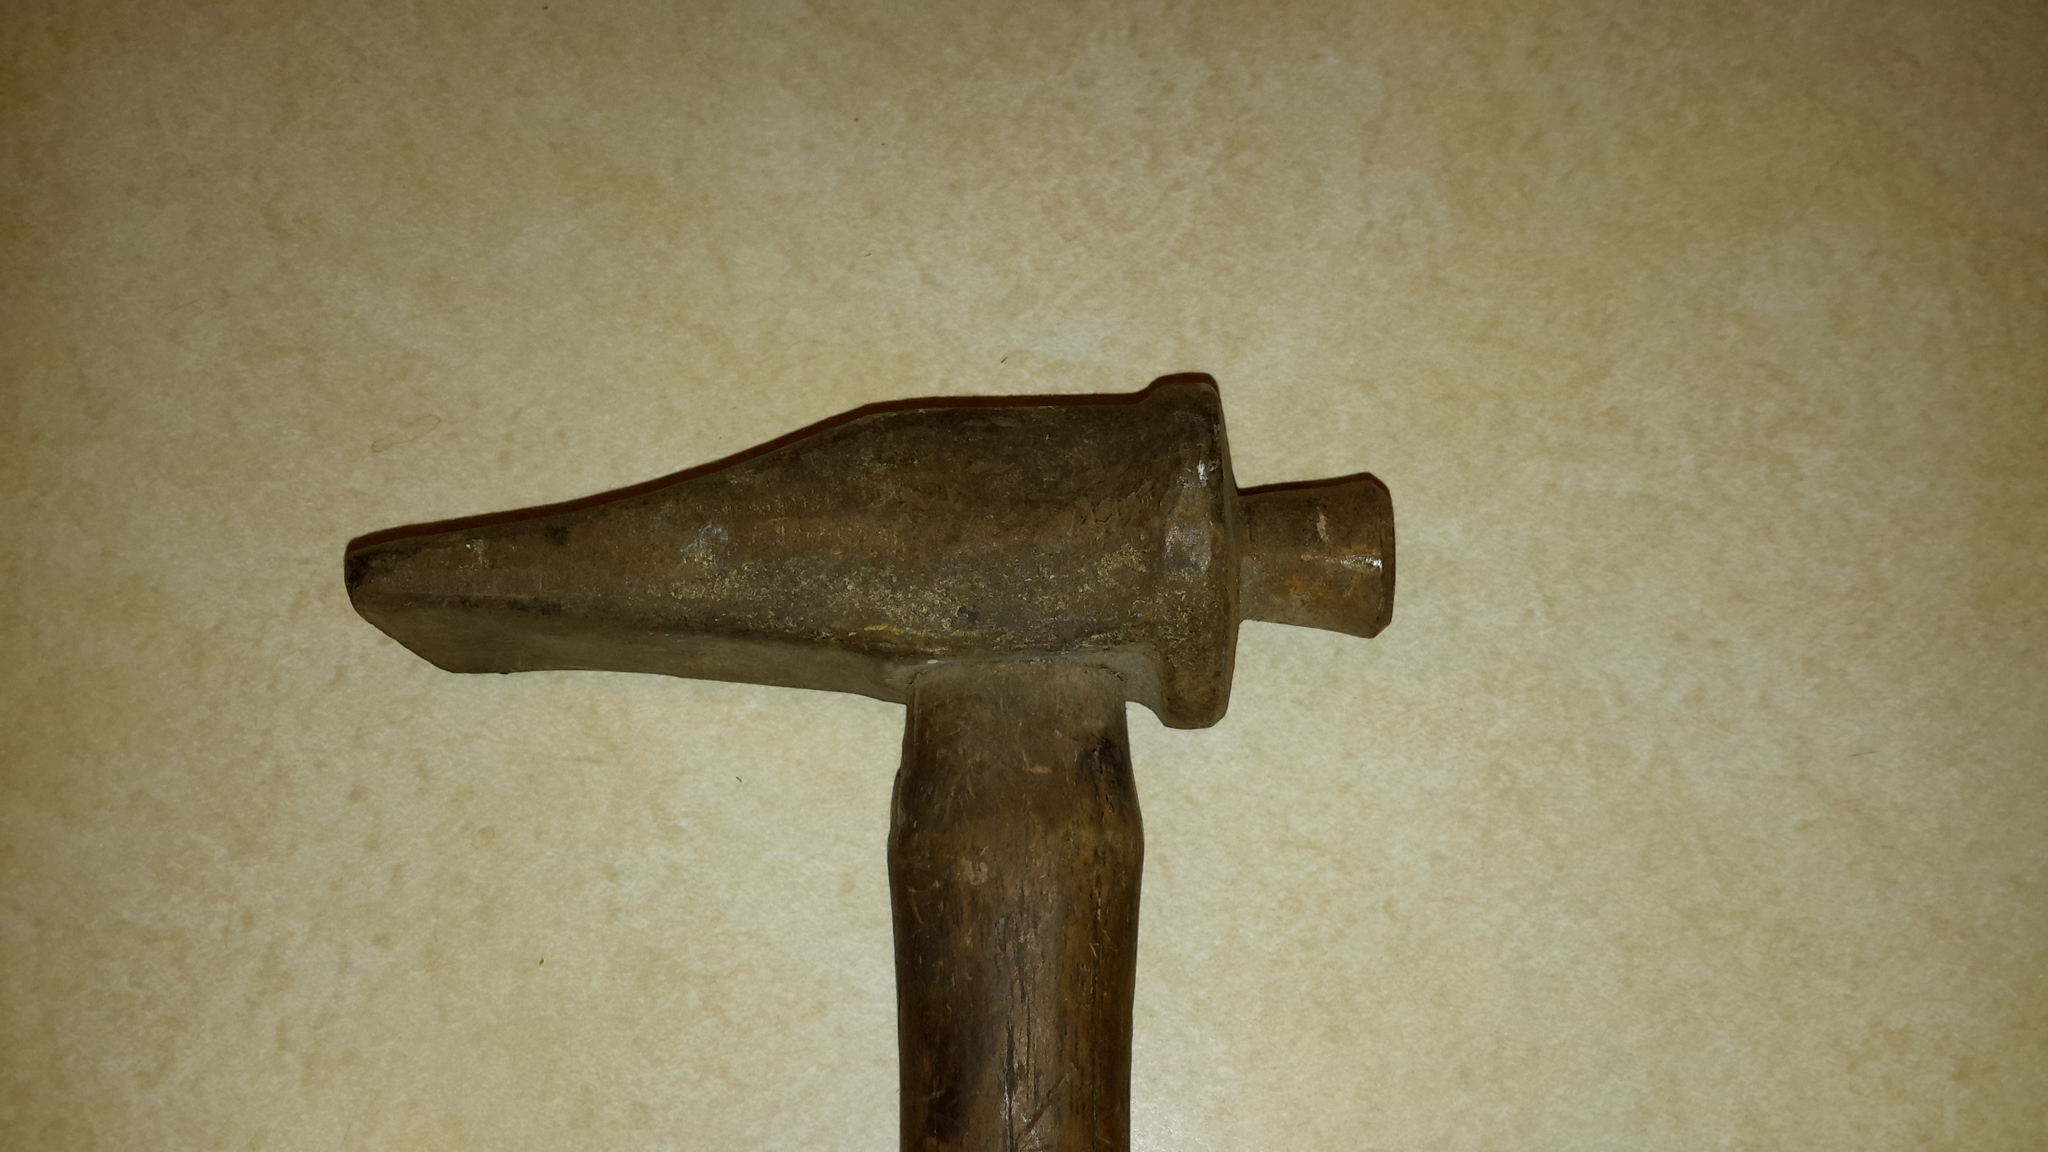
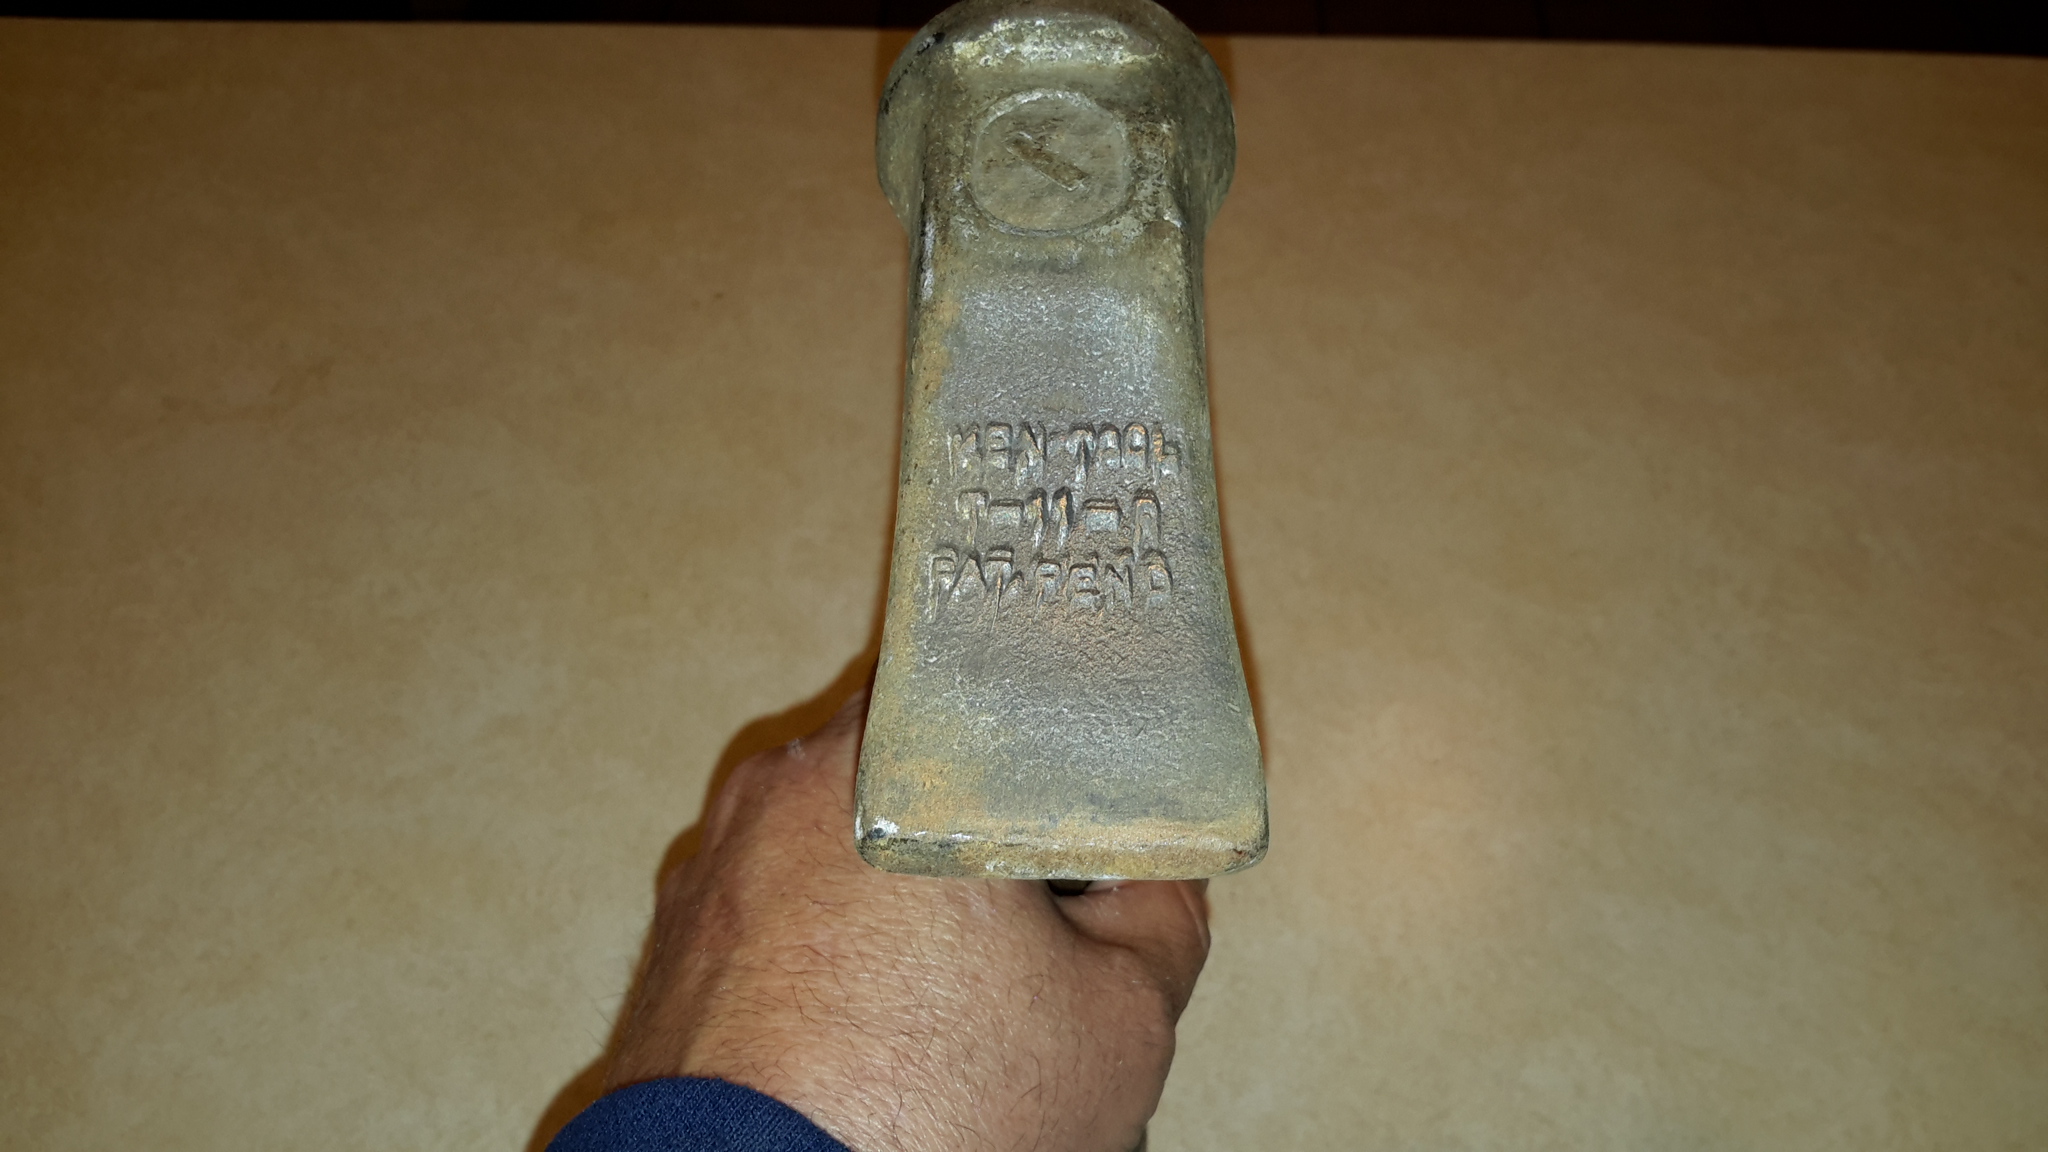
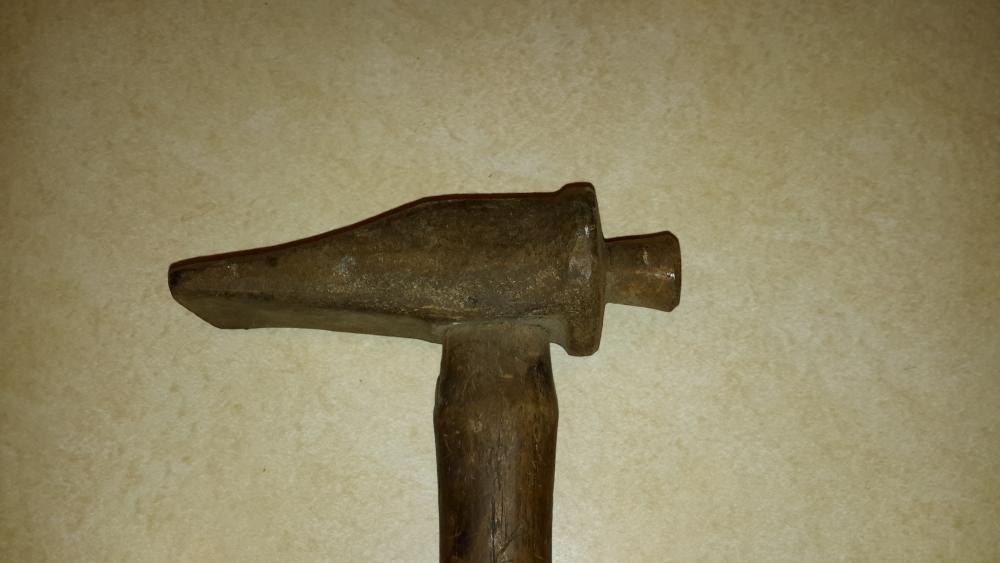
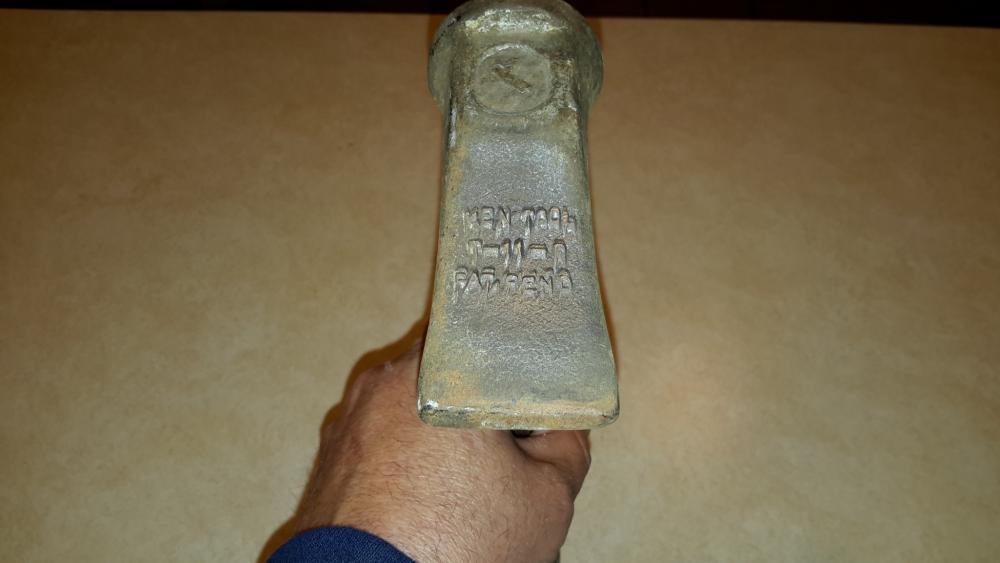
Purchased this in a box of auction junk...what type of hammer is it? Ken-tool T-11-P is cast into the hammer. Any help would be greatly appreciated. Thanks Bruce
-
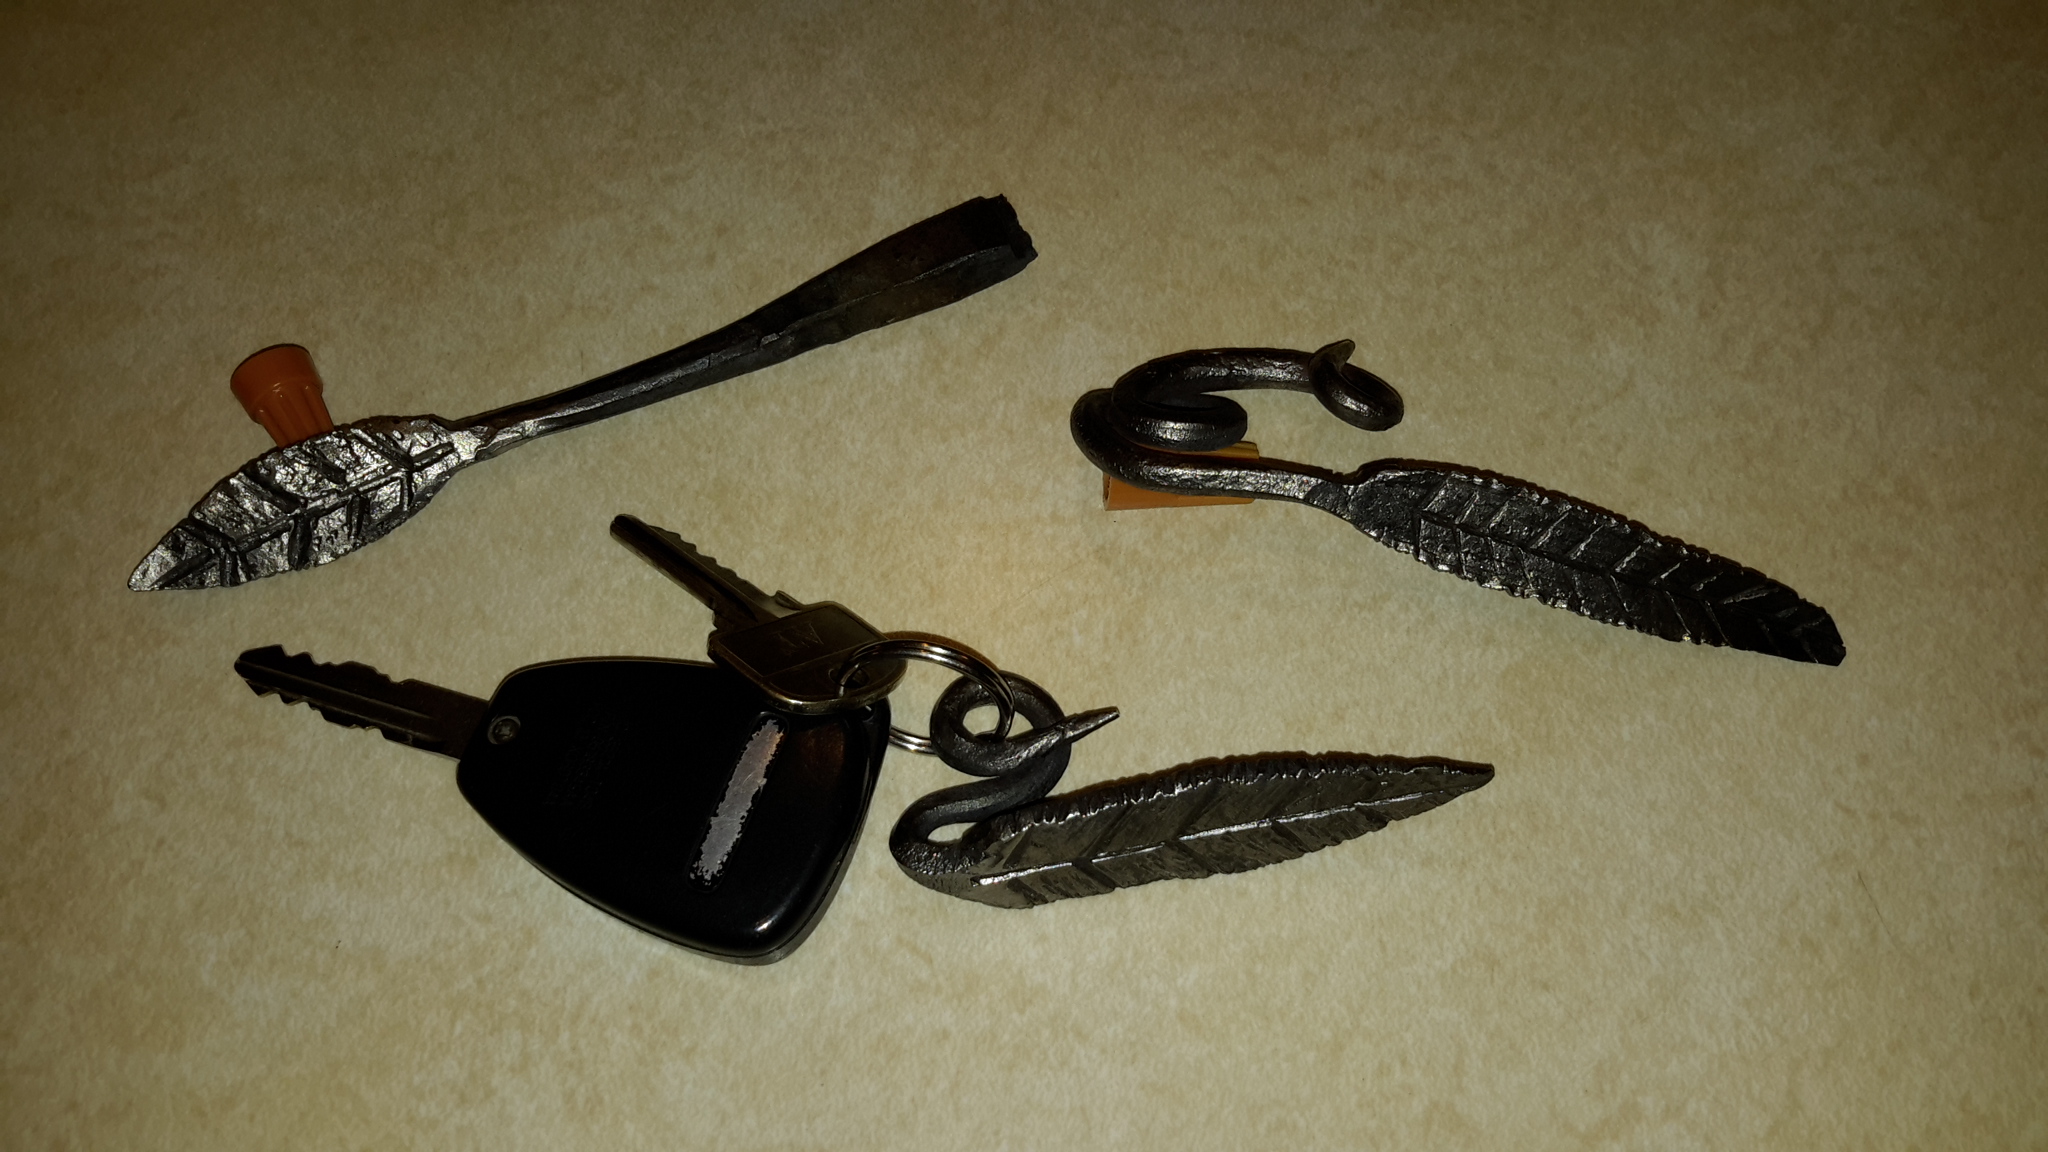
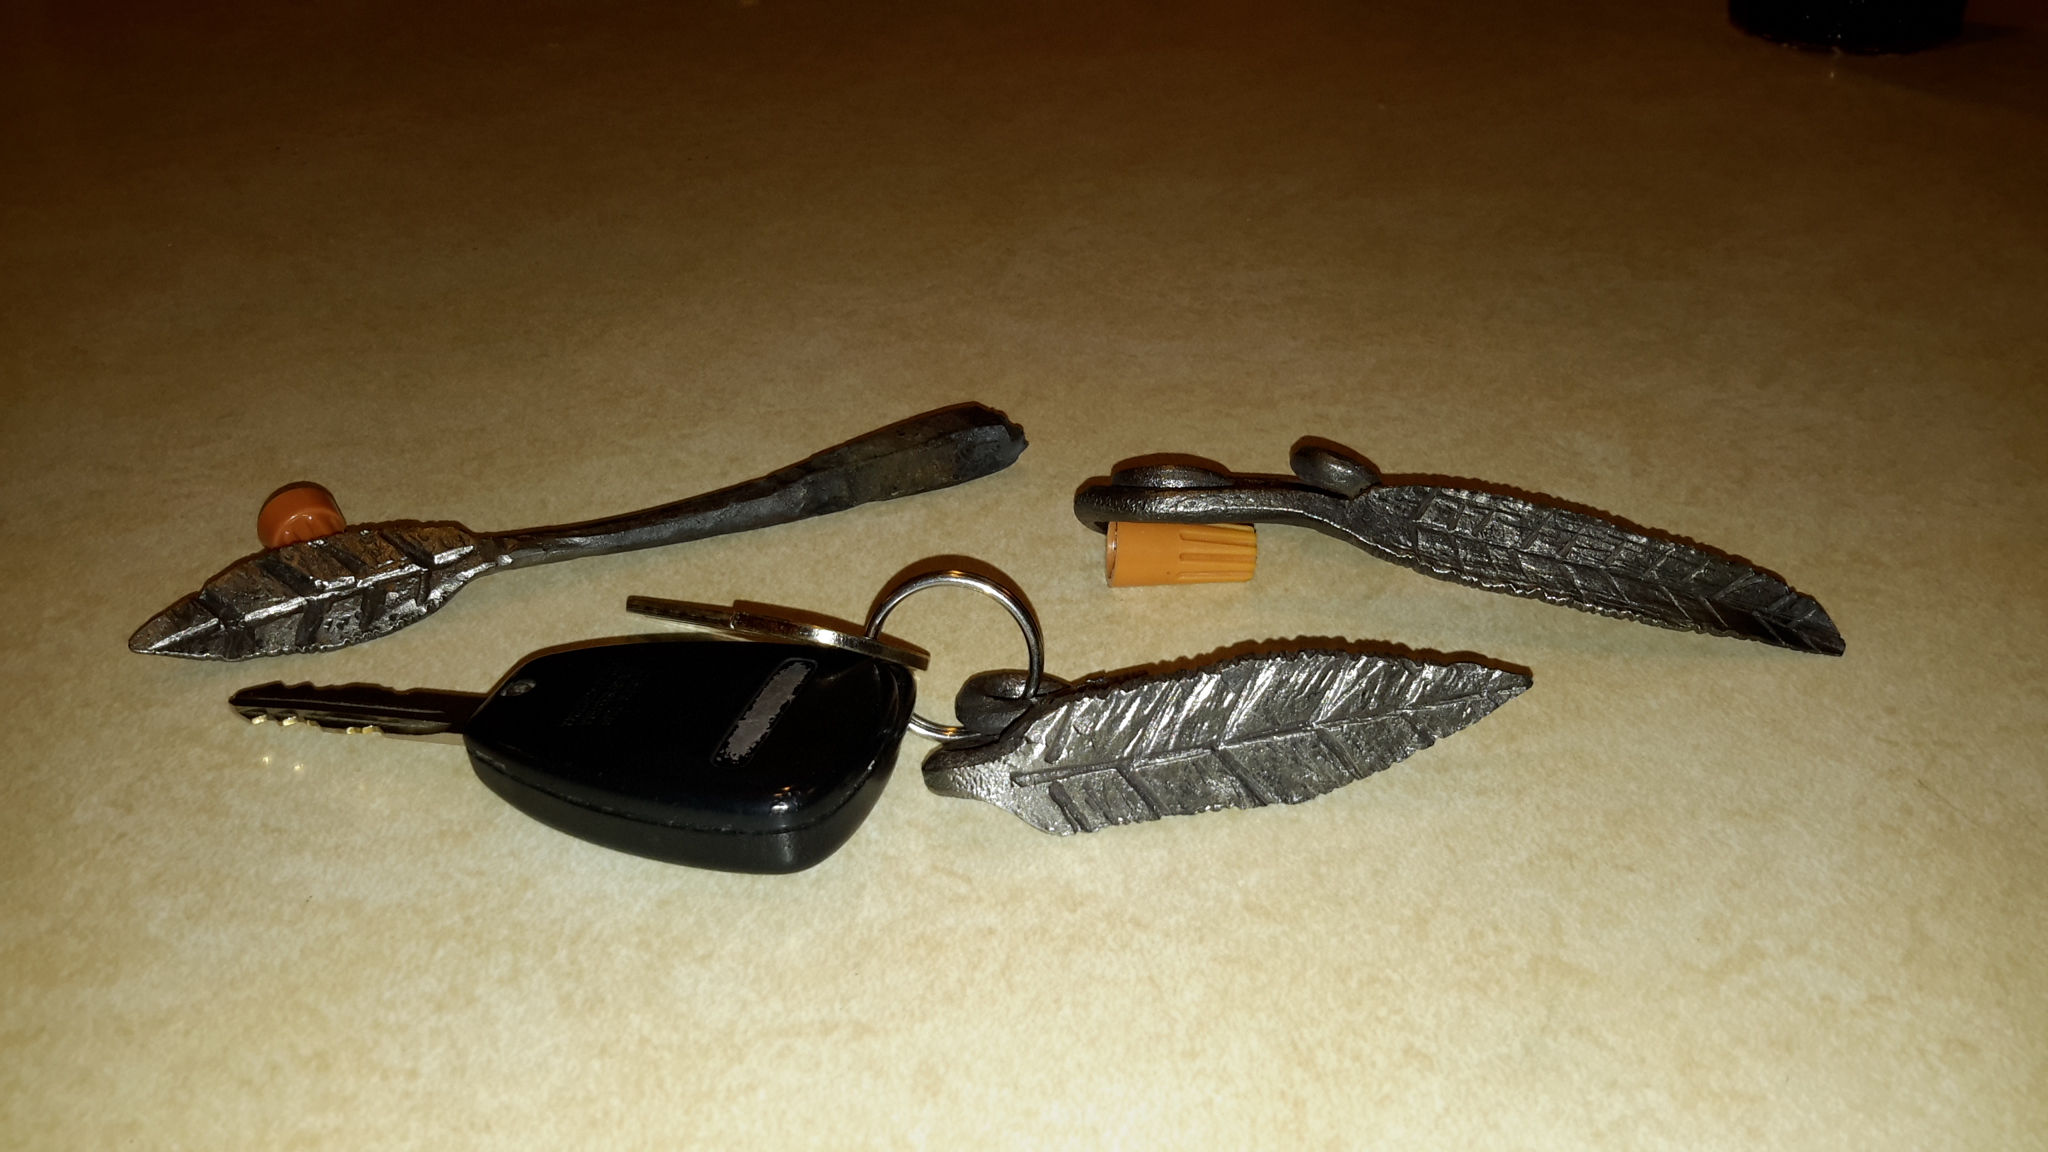
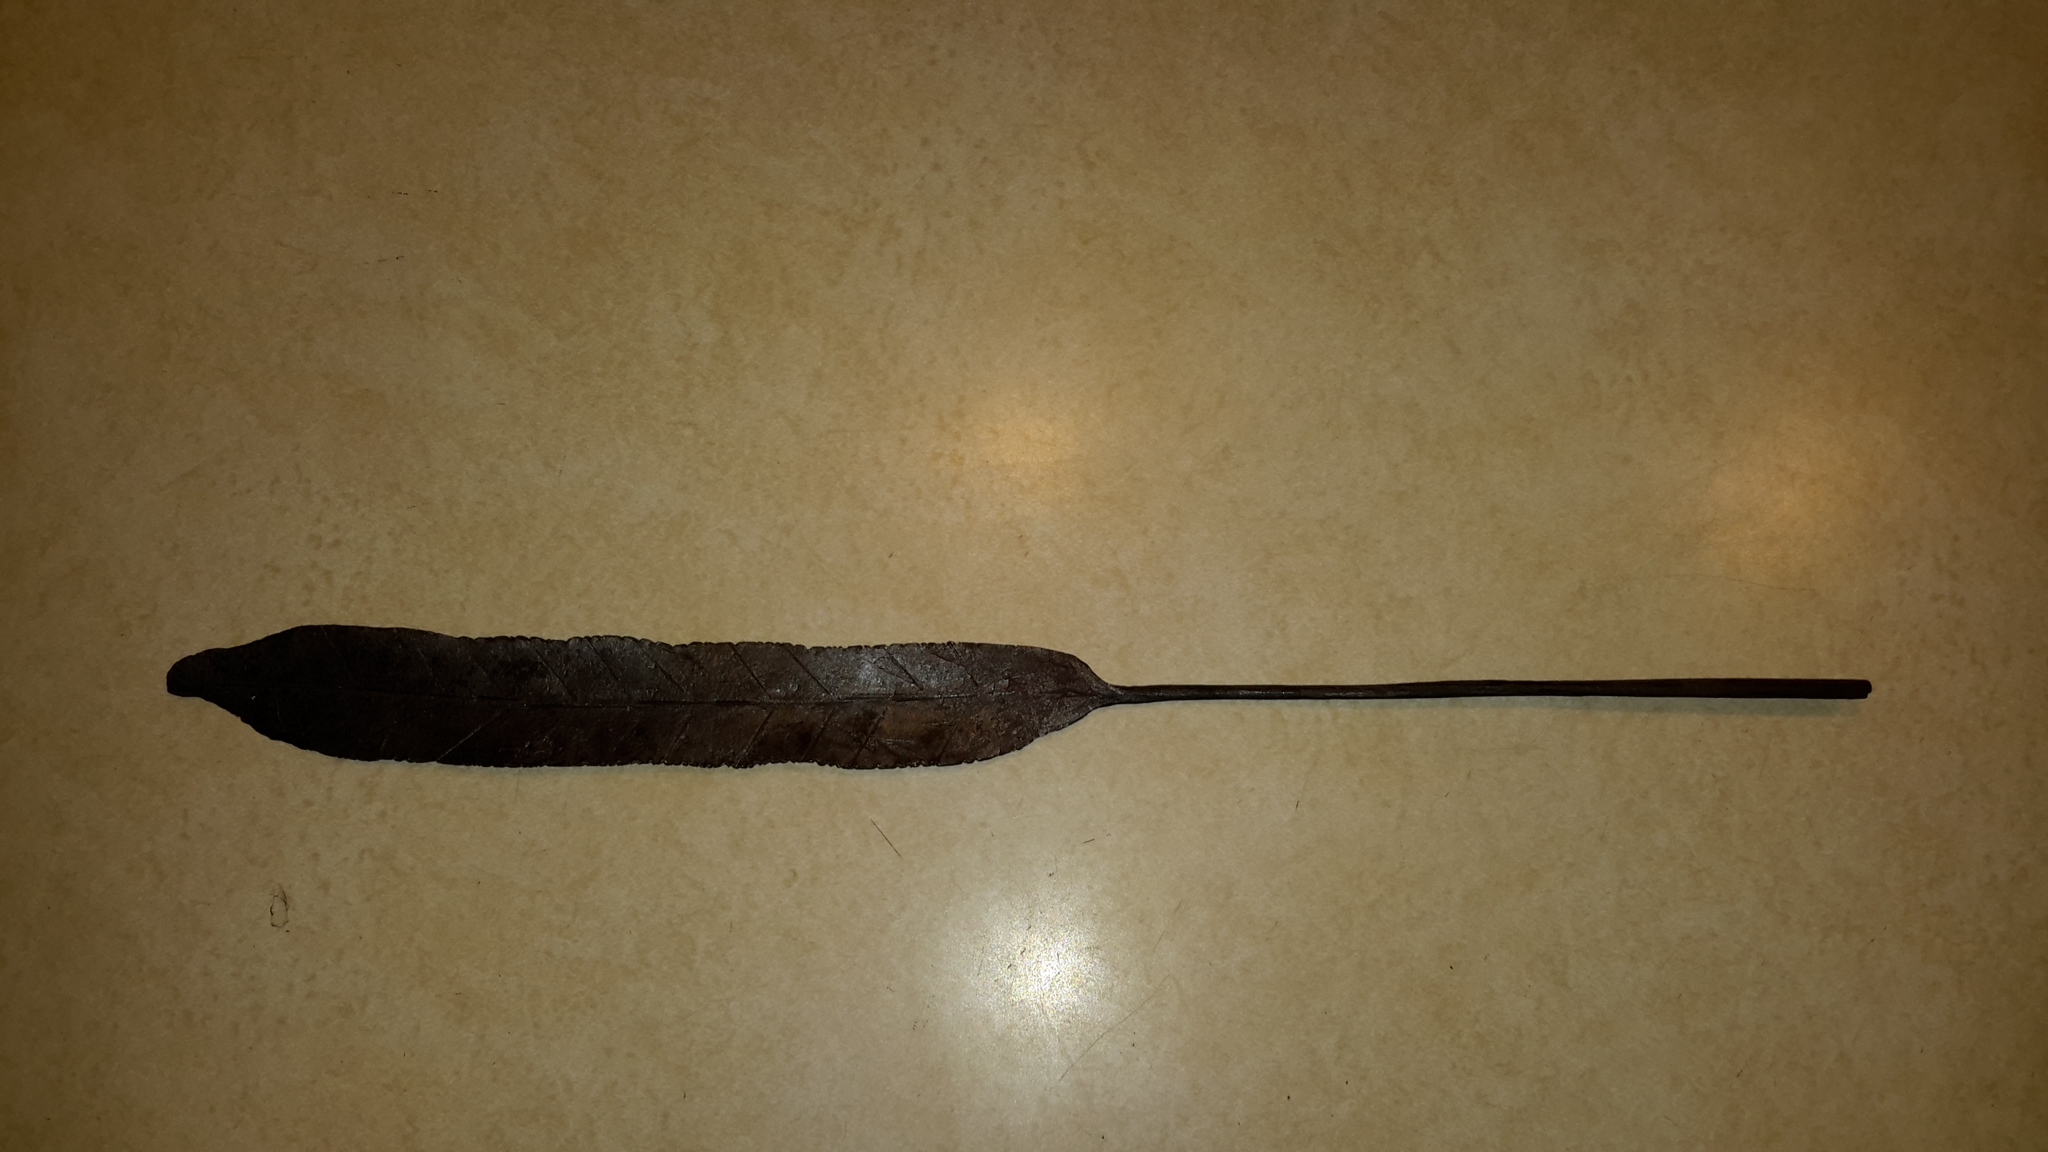
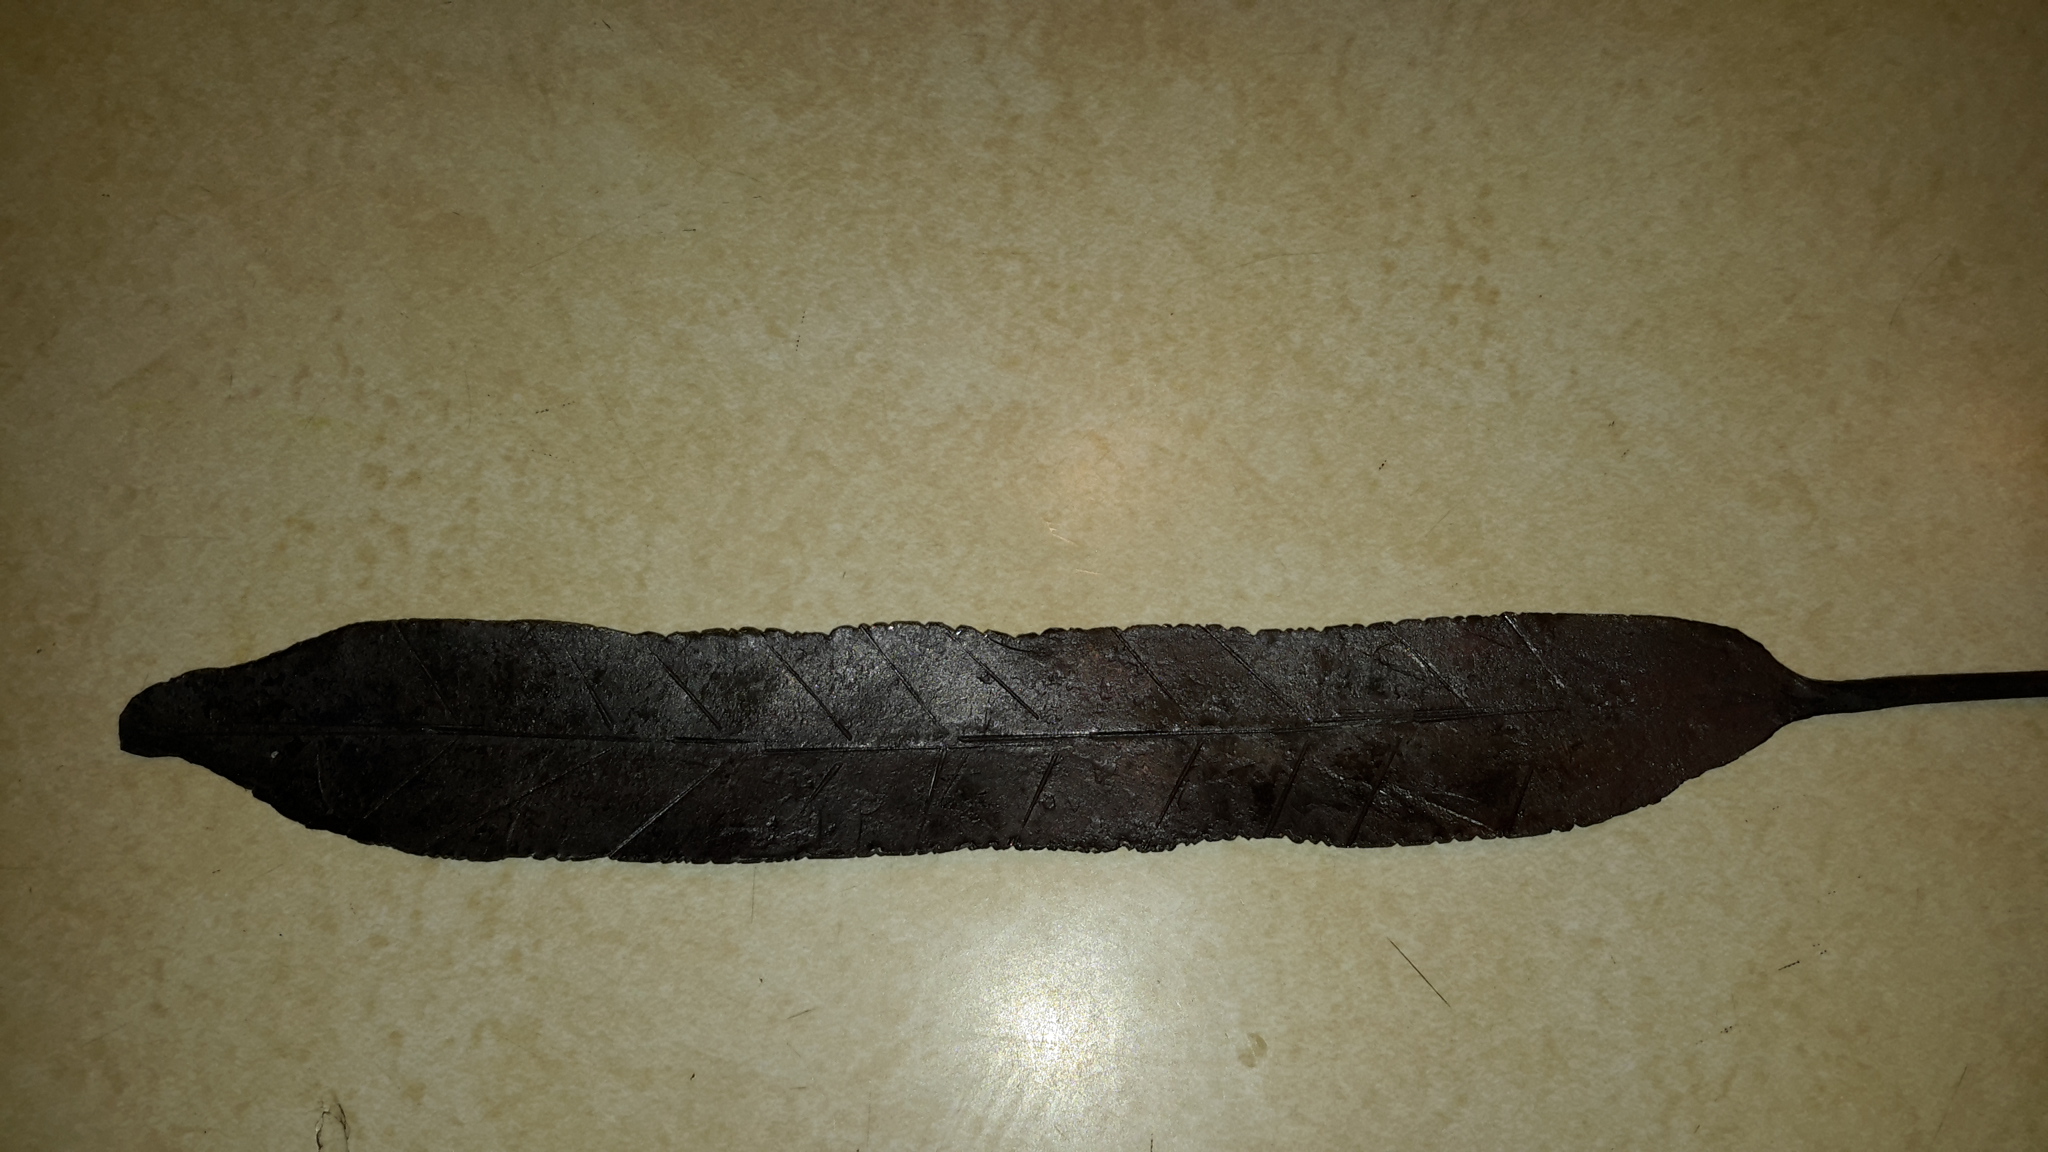
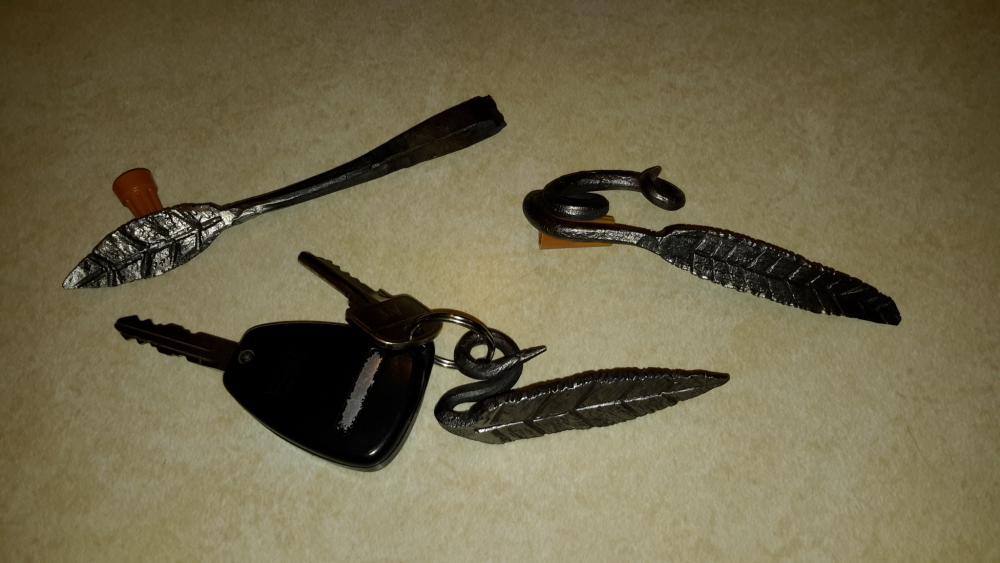
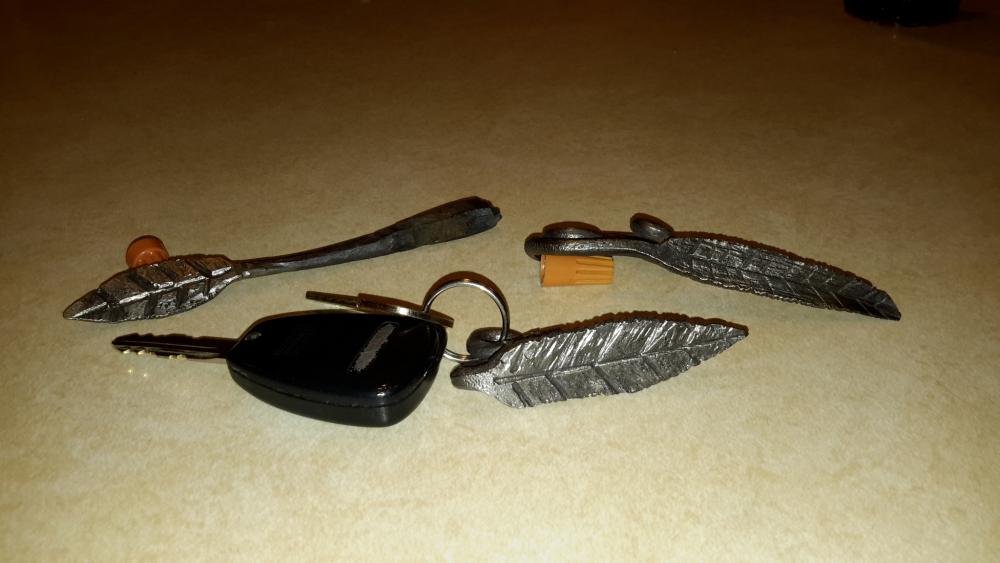
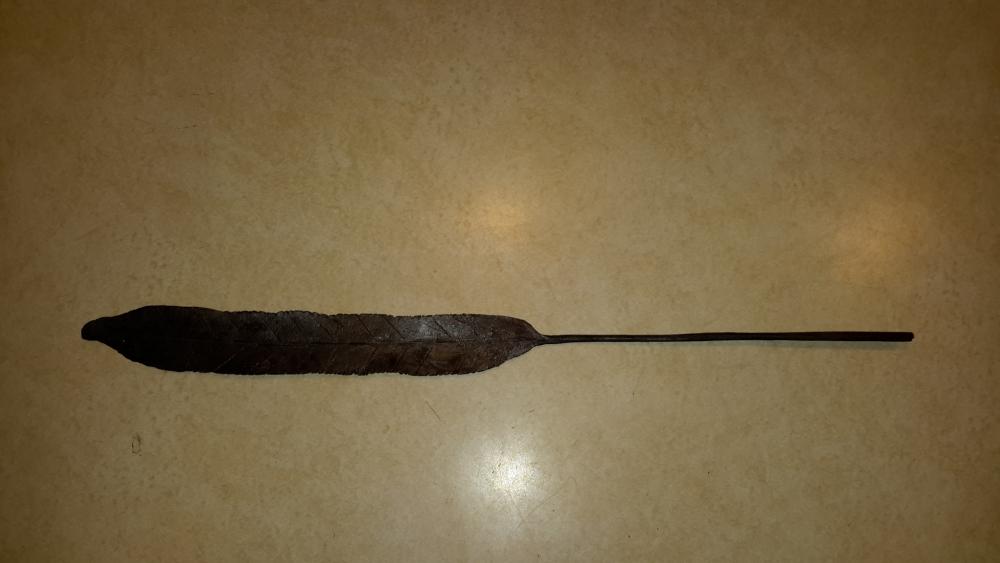
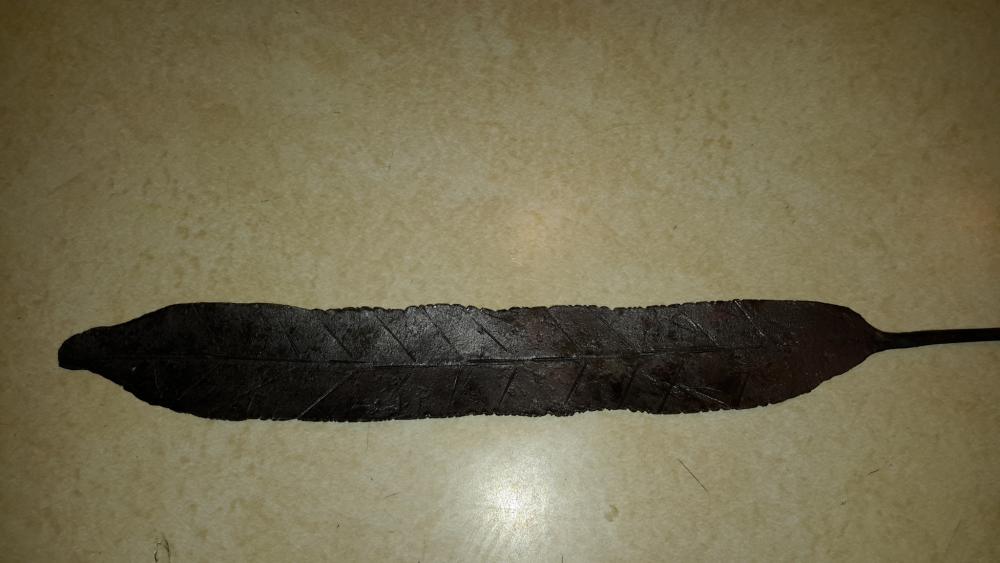
SJS...Thanks for your input...I use 3/8 sq. stock for these...The biggest problem I have is theres's not much of any square shoulders on my anvil...The edges all have radii on them from use / age and maybe design. (Mousehole anvil) I have made the current key-Leafs to where the leaf can slide into your pocket and let the keys hang on the outside. I have fabbed up some chasing tools yesterday that i need to try out. I noticed in a Brian Brazeal video that he forms the basic shape of the leaf (Leaving it thick) and then punches the leaf details and basically mashes the outer edges of the leaf to taper down thin with a half on half off technique with his chisel. This really thinned out the edges...I think next time i will try this technique. Would it be wise for me to make a shouldering tool to drop into my hardy hole for working up the square shoulders? Hopefully my artform will improve in time? Thanks in advance for any help / replies and ideas...What a great site!...Bruce
-
I like forging alot...but boy do I suck...how'd I do...Please critique.
-
Hi Deep...My forge design is similar but just a little larger...I can drag the forge outside & fired up and have a piece of 1/2" rebar bright orange in about 12-13 minutes. As all these guys have said to much air is your enemy. (I use bath fan and dimmer switch) Be sure to keep your stock level when heating...don't cram it down into the firepot at an angle, keep your air blast authoritive but not overblasting if that makes since? I have found that reducing the diameter of the firepot makes a difference with charcoal. I have my firepot (Brake drum) lined with brick and the firepot is approximately 6"X 6" X 4"-5" deep. I keep the charcoal piled up and have found the hottest part of the fire is about the top of the firepot to 1/2"-3/4" above the firepot. This gives me good heats but i dont think its anywhere near welding heat. Sounds like to me that you just need to do some tweaking......Nice looking build by the way. Im a greenhorn and very inexperienced take my advice with a grain of salt...Im looking to get the Modern blacksmith as well. I have attached a couple of photos of my firepot/forge.

-
Kevin...Yes it feels good. The video i watched the guy said he can make one in a little over an hour...Ive got 3 1/2 in this sucker...LOL BTW I came close to icing...LOL - I pretty much loose all hammer control after about an hour or so...Much more work than I anticipated. I need a rounding hammer after watching some of the videos by Brazeal...Wow - He's awesome...THANKS! Lots of fun!!!!!!!!!!!!!!
-
I took a chisel to it while it was hot....I just chipped it along the edges.
-
Hey everyone...Got my forge up and going and this is my first project. Its WIP but soon to be finished. I saw Chandler Dickinson make one of these on you tube...Thought id give it a try. I still need to draw out the stem at bit and curl it up to hold the incense stem. Flatening and drawing this out was much more difficult than i had imagined. Started out with 1/2" diameter re-bar. 18" overall length at the moment. Ill post more pics when complete. Thanks Bruce
-
2 3/8" deep X 3 1/2" square with the bricks in place - Burns charcoal pretty well. The actual firepot is 9" diameter without the bricks.
-
So I have another question....I have about 120 lbs of hardwood charcoal that I got for free. I think this will burn up rather quickly? I'm thinking of purchasing some coal. Should I mix the fuels? Charcoal and coal? Or should I just burn 1 fuel at a time? The small firepot that i show in the above photos is deep and small and works well with the charcoal...Will i need to change the pot arrangement for coal? A larger pot...remove the brick?
-
I like the strapping with tapered wedges to hold / tighten the bands. I plan on doing it to mine...Although it might take a good smith (Not me - LOL) to make the precision bends and wedges. Good luck with your forging.
-
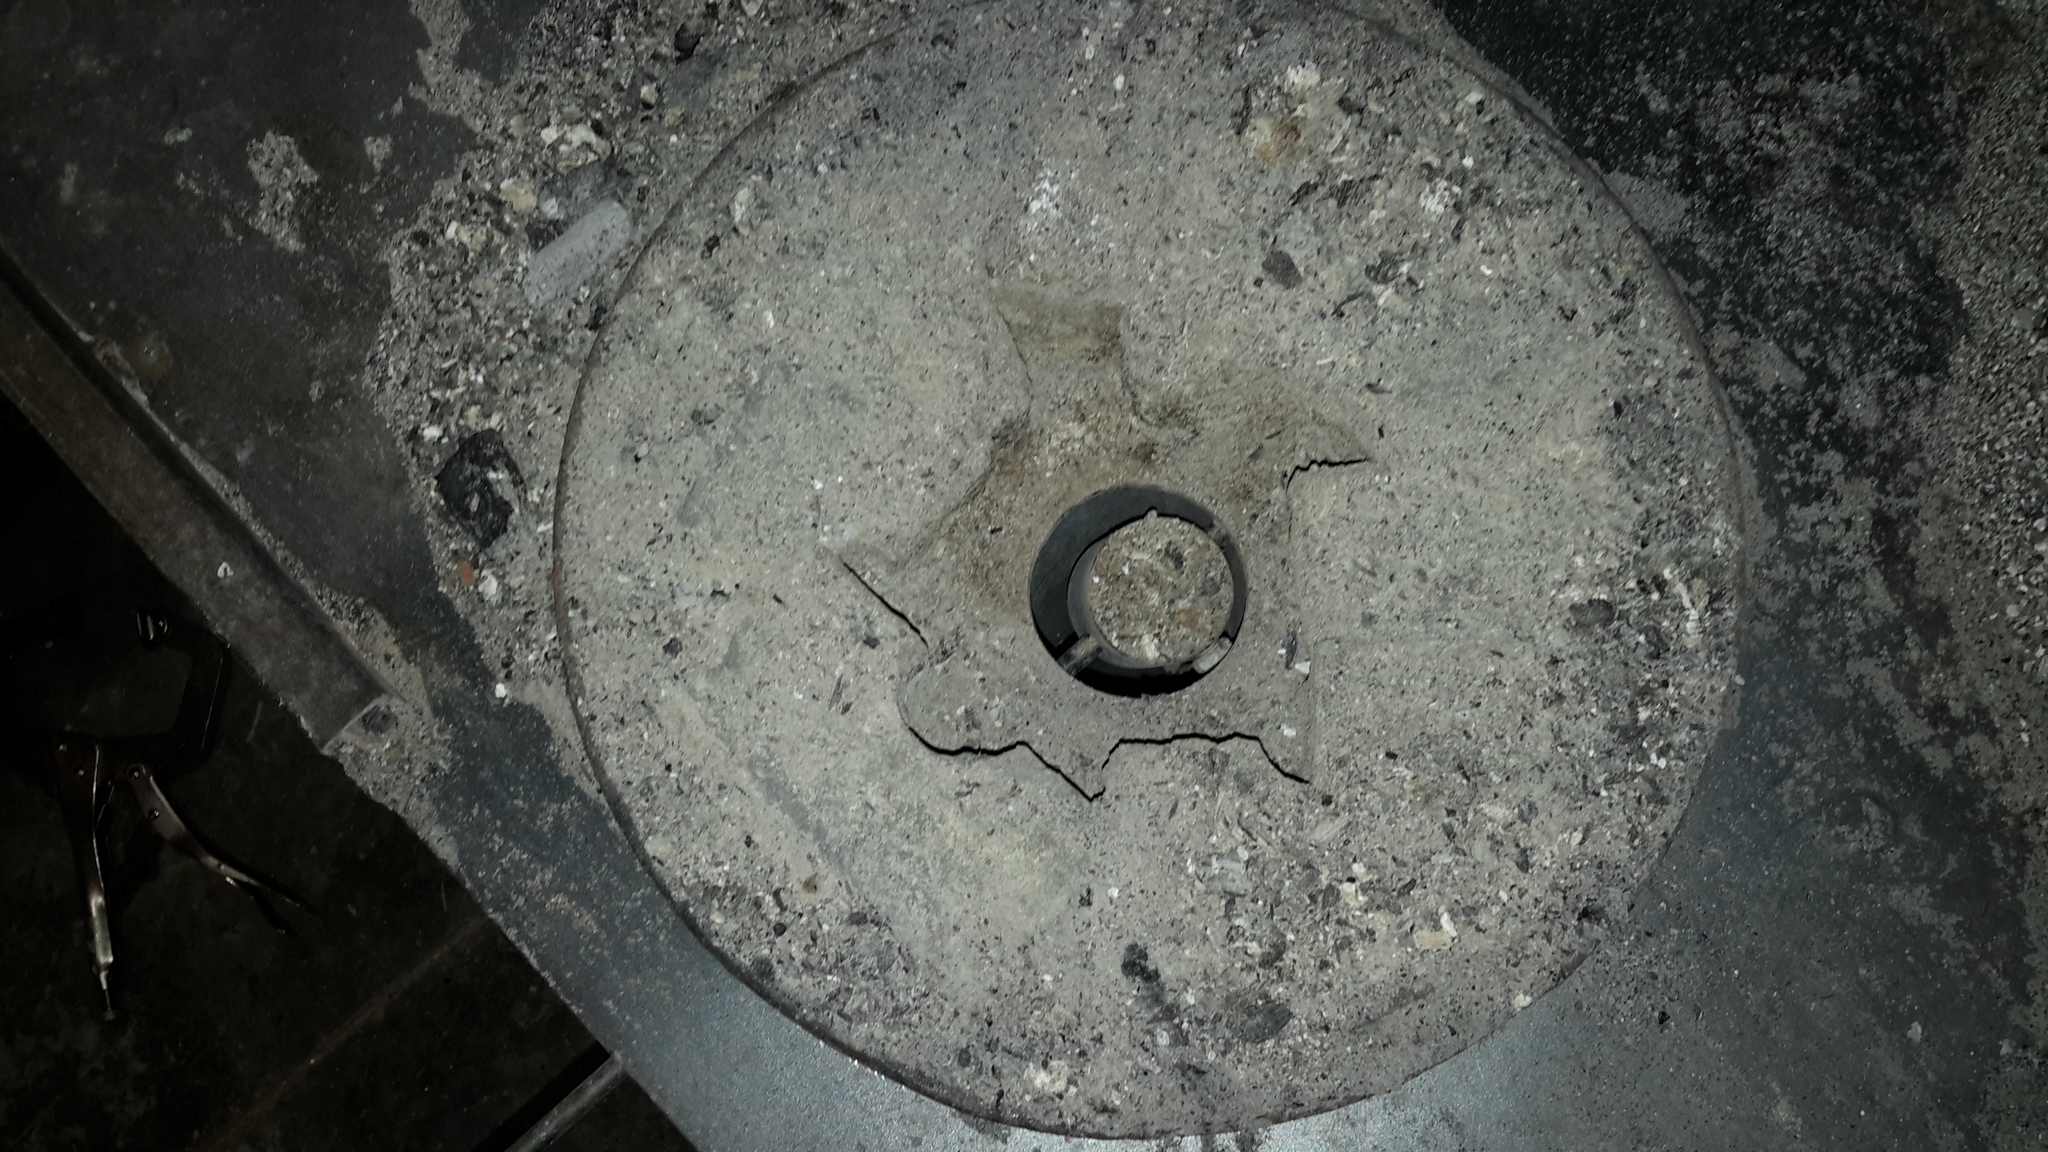
NIce anvil / find. I wouldnt worry about the big chip at the back of the anvil...In fact i would ask the guys if it would hurt to grind in a 1/2" - 3/4" Radius on the back edge. you never know this might be handy? My buddy has one of the pallet changers set into the floor like you've got in the photo....Awesome table...Awesome anvil! Frosty...Don't dock their tails. LOL
-
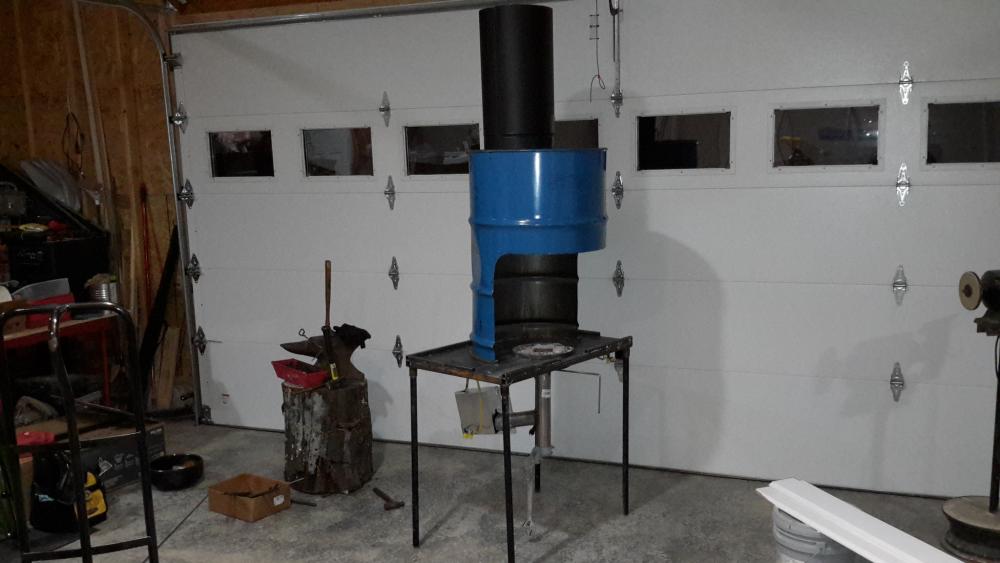
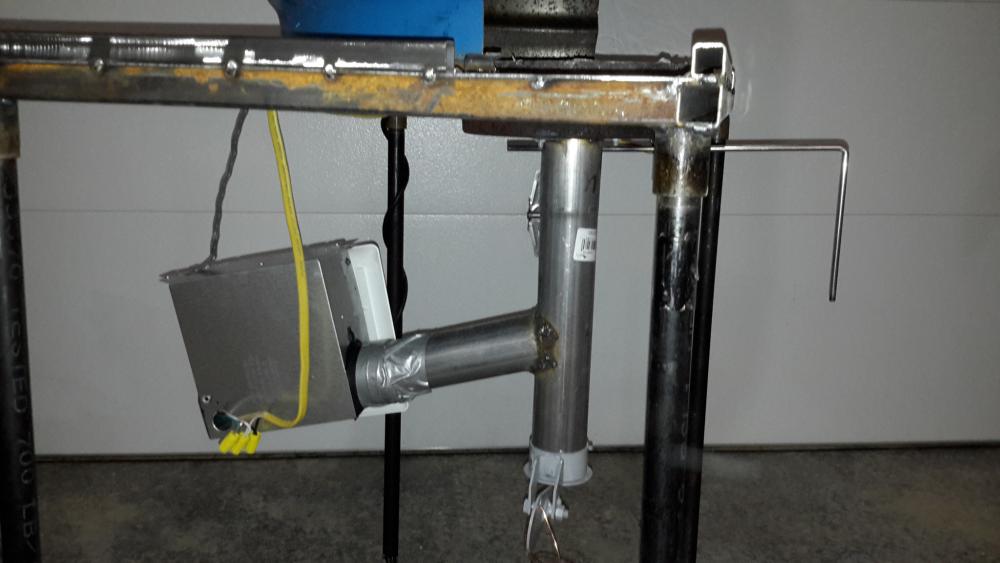
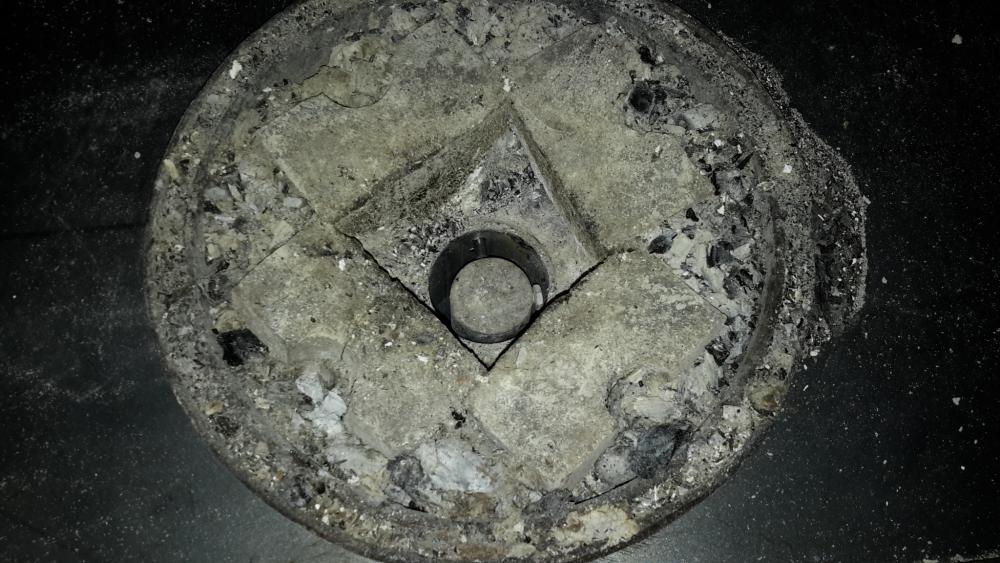
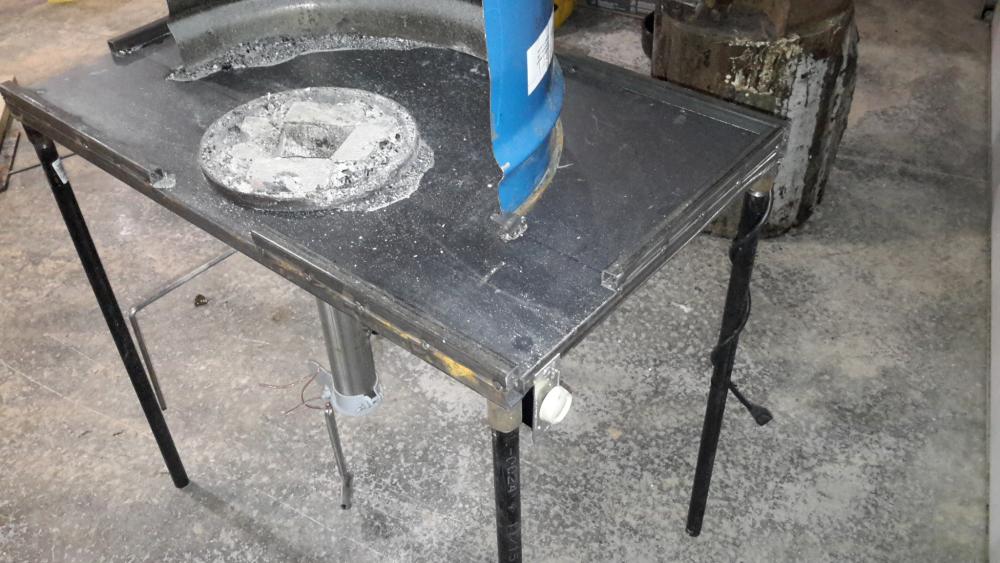
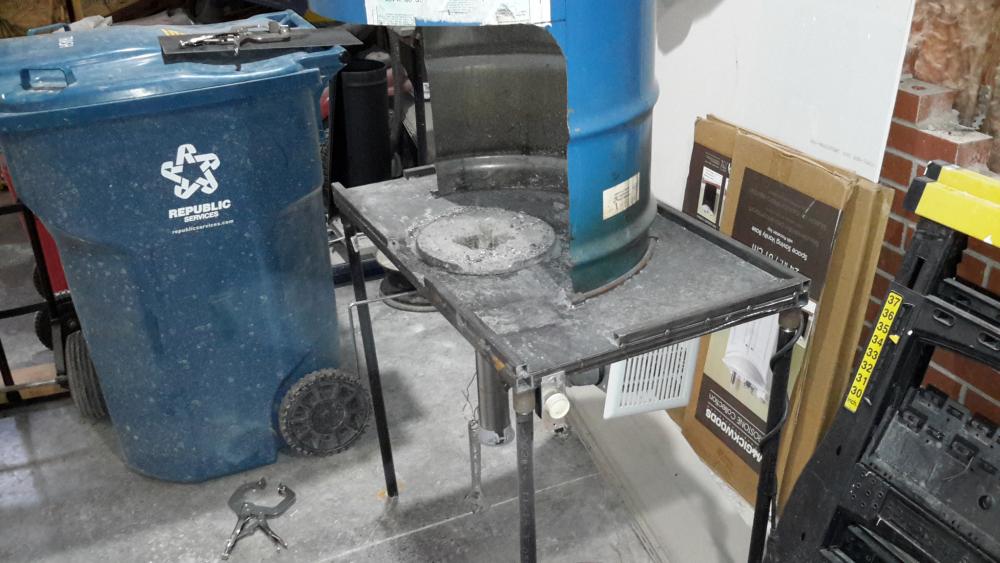
Well guys I took some of your advice but not all of it. I do appreciate all of your input. Glenn I was not trying to high jack your forge name or anything like that...No way! I went ahead and added a 12" flue pipe and a bath ex. fan & dimmer switch, still need to build onto the front of the table. I'm burning charcoal and installed 4 small pieces of brick in the fire pot. I fired this for the first time this afternoon and was impressed, it was partially windy at times and it appeared to draft well (the sparks from the charcoal were in a vortex / spinning motion going up and out of the drum)..I think I'm going to add 1 more section of flue pipe...once I get my hands on coal I figure the smoke will be much worse than the charcoal. Thanks guys happy forging.