
JHCC
-
Posts
19,349 -
Joined
-
Last visited
Content Type
Profiles
Forums
Articles
Gallery
Downloads
Events
Everything posted by JHCC
-
"Give me a place to stand, and I will move the earth." -- Archimedes
-
Δῶς μοι πᾶ στῶ καὶ τὰν γᾶν κινάσω.
-
Very nice. Maybe add a sail of woven wire mesh, perhaps in brass or copper?
-
I'd put my money on the "72" actually being a "12" with a rather strong upstroke on the "1". In the hundredweight system, that would make your anvil (1 x 112 lbs.) + (3 x 28 lbs.) + (12 x 1 lb.) = 112 + 84 + 12 = 208 lbs. In Columbus, I strongly recommend connecting with Adlai Stein at the Central Ohio School of Metalwork, as well as Southern Ohio Forge and Anvil (SOFA), the local branch of the Artist Blacksmith Association of North America. In addition to their regular meetings and classes, SOFA also hosts the annual Quad-State Blacksmiths Roundup in Troy, which draws folks from all over the world.
-
If you're willing to create a sufficiently beefy support mechanism, size is no limit.
-

What did you do in the shop today?
JHCC replied to Mark Ling's topic in Blacksmithing, General Discussion
Kim's videos are generally worth watching. He's got a series running right now showing the process of him restoring and 18th century spitjack, a clockwork mechanism for slowly turning a roasting spit by the fire. -
Fun fact: it has been argued that Cerberus, the three-headed dog that guards the entrance to the underworld in Greek mythology, gets his name from a proto-Indo-European *k̑érberos, meaning "spotted". While there are competing theories about the derivation, if this one is true, it means that Hades, the god of the dead, named his dog "Spot".
-
What did you do in the shop today?
JHCC replied to Mark Ling's topic in Blacksmithing, General Discussion
No, it’s from one of a pair of stands given to me by a friend. Not sure what the original use was, but they had 12” square steel plates on top. I still use the other one as a moveable stand for tools, moving it next to whatever I’m working on at the moment. -
What did you do in the shop today?
JHCC replied to Mark Ling's topic in Blacksmithing, General Discussion
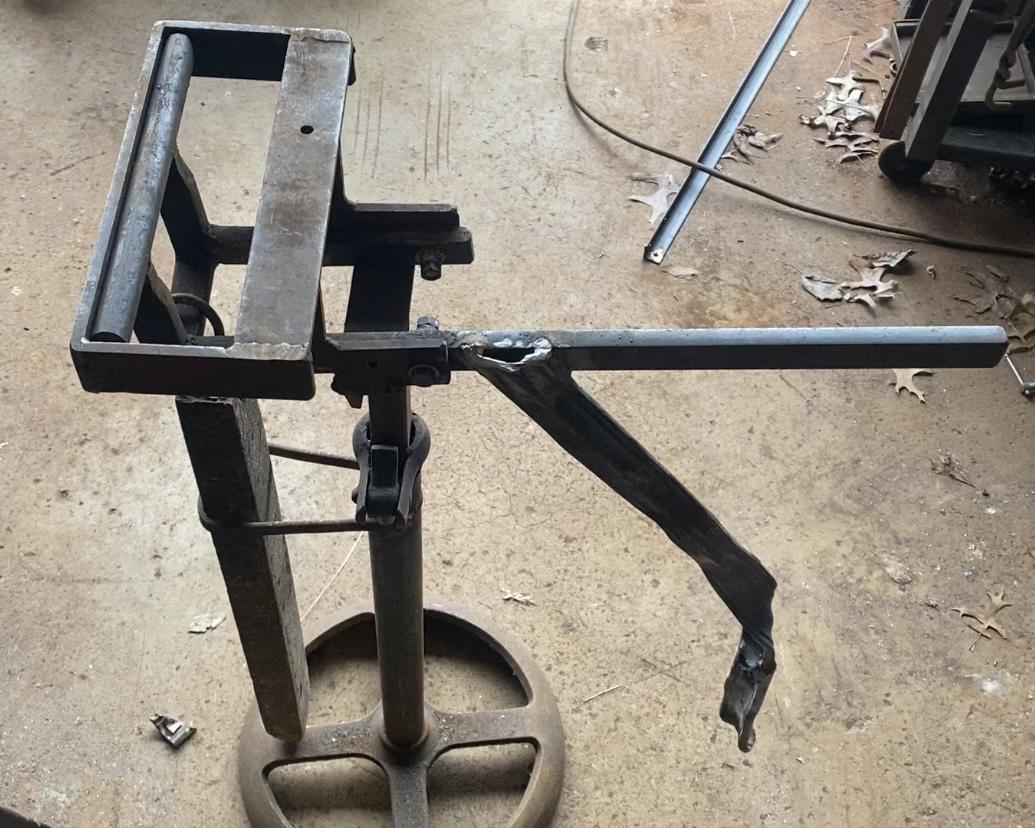
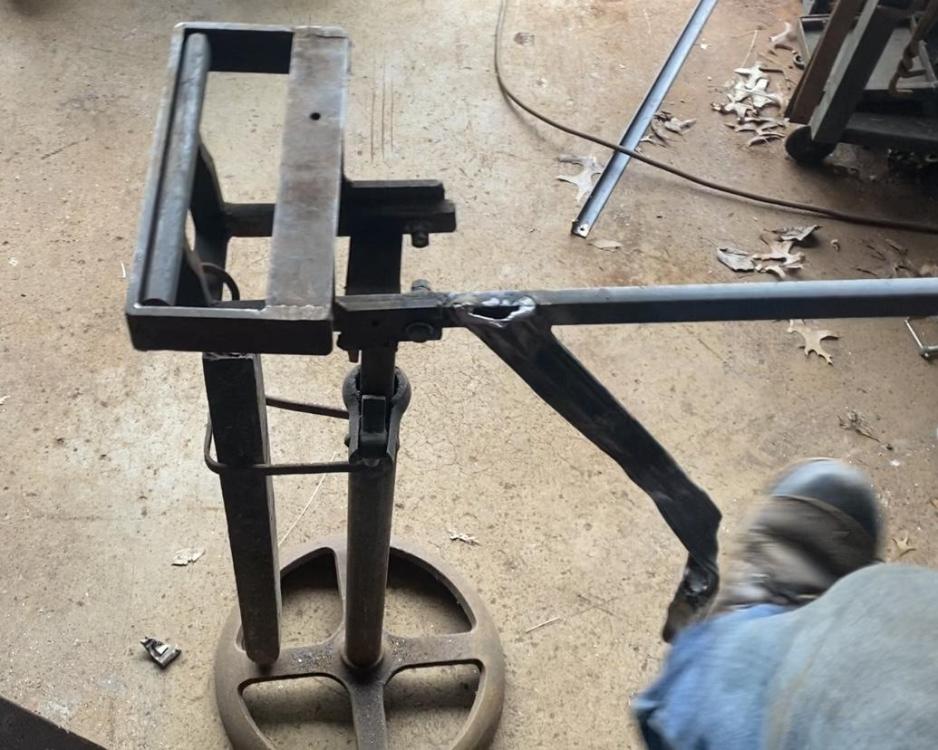
I stole the basic idea from Kim Thomas, who has such a hold-down incorporated in his “chisel stand”. My innovations were to eliminate the work surface, make the height adjustable, change the shape of the hold-down from an upside-down “U” to a double “T” (thus allowing the stock to be moved in and out of the sides rather than being threaded in from the end), and (now) adding the foot lever. I also added a guide to keep the counterweight from swinging around. -
What did you do in the shop today?
JHCC replied to Mark Ling's topic in Blacksmithing, General Discussion
Also added a foot lever to my stock support/hold down, for hands-free operation. (This was made from a piece of molded cap rail that I’d salvaged from a handrail that got hit by a car, spoiling it for its original use.)

-
What did you do in the shop today?
JHCC replied to Mark Ling's topic in Blacksmithing, General Discussion
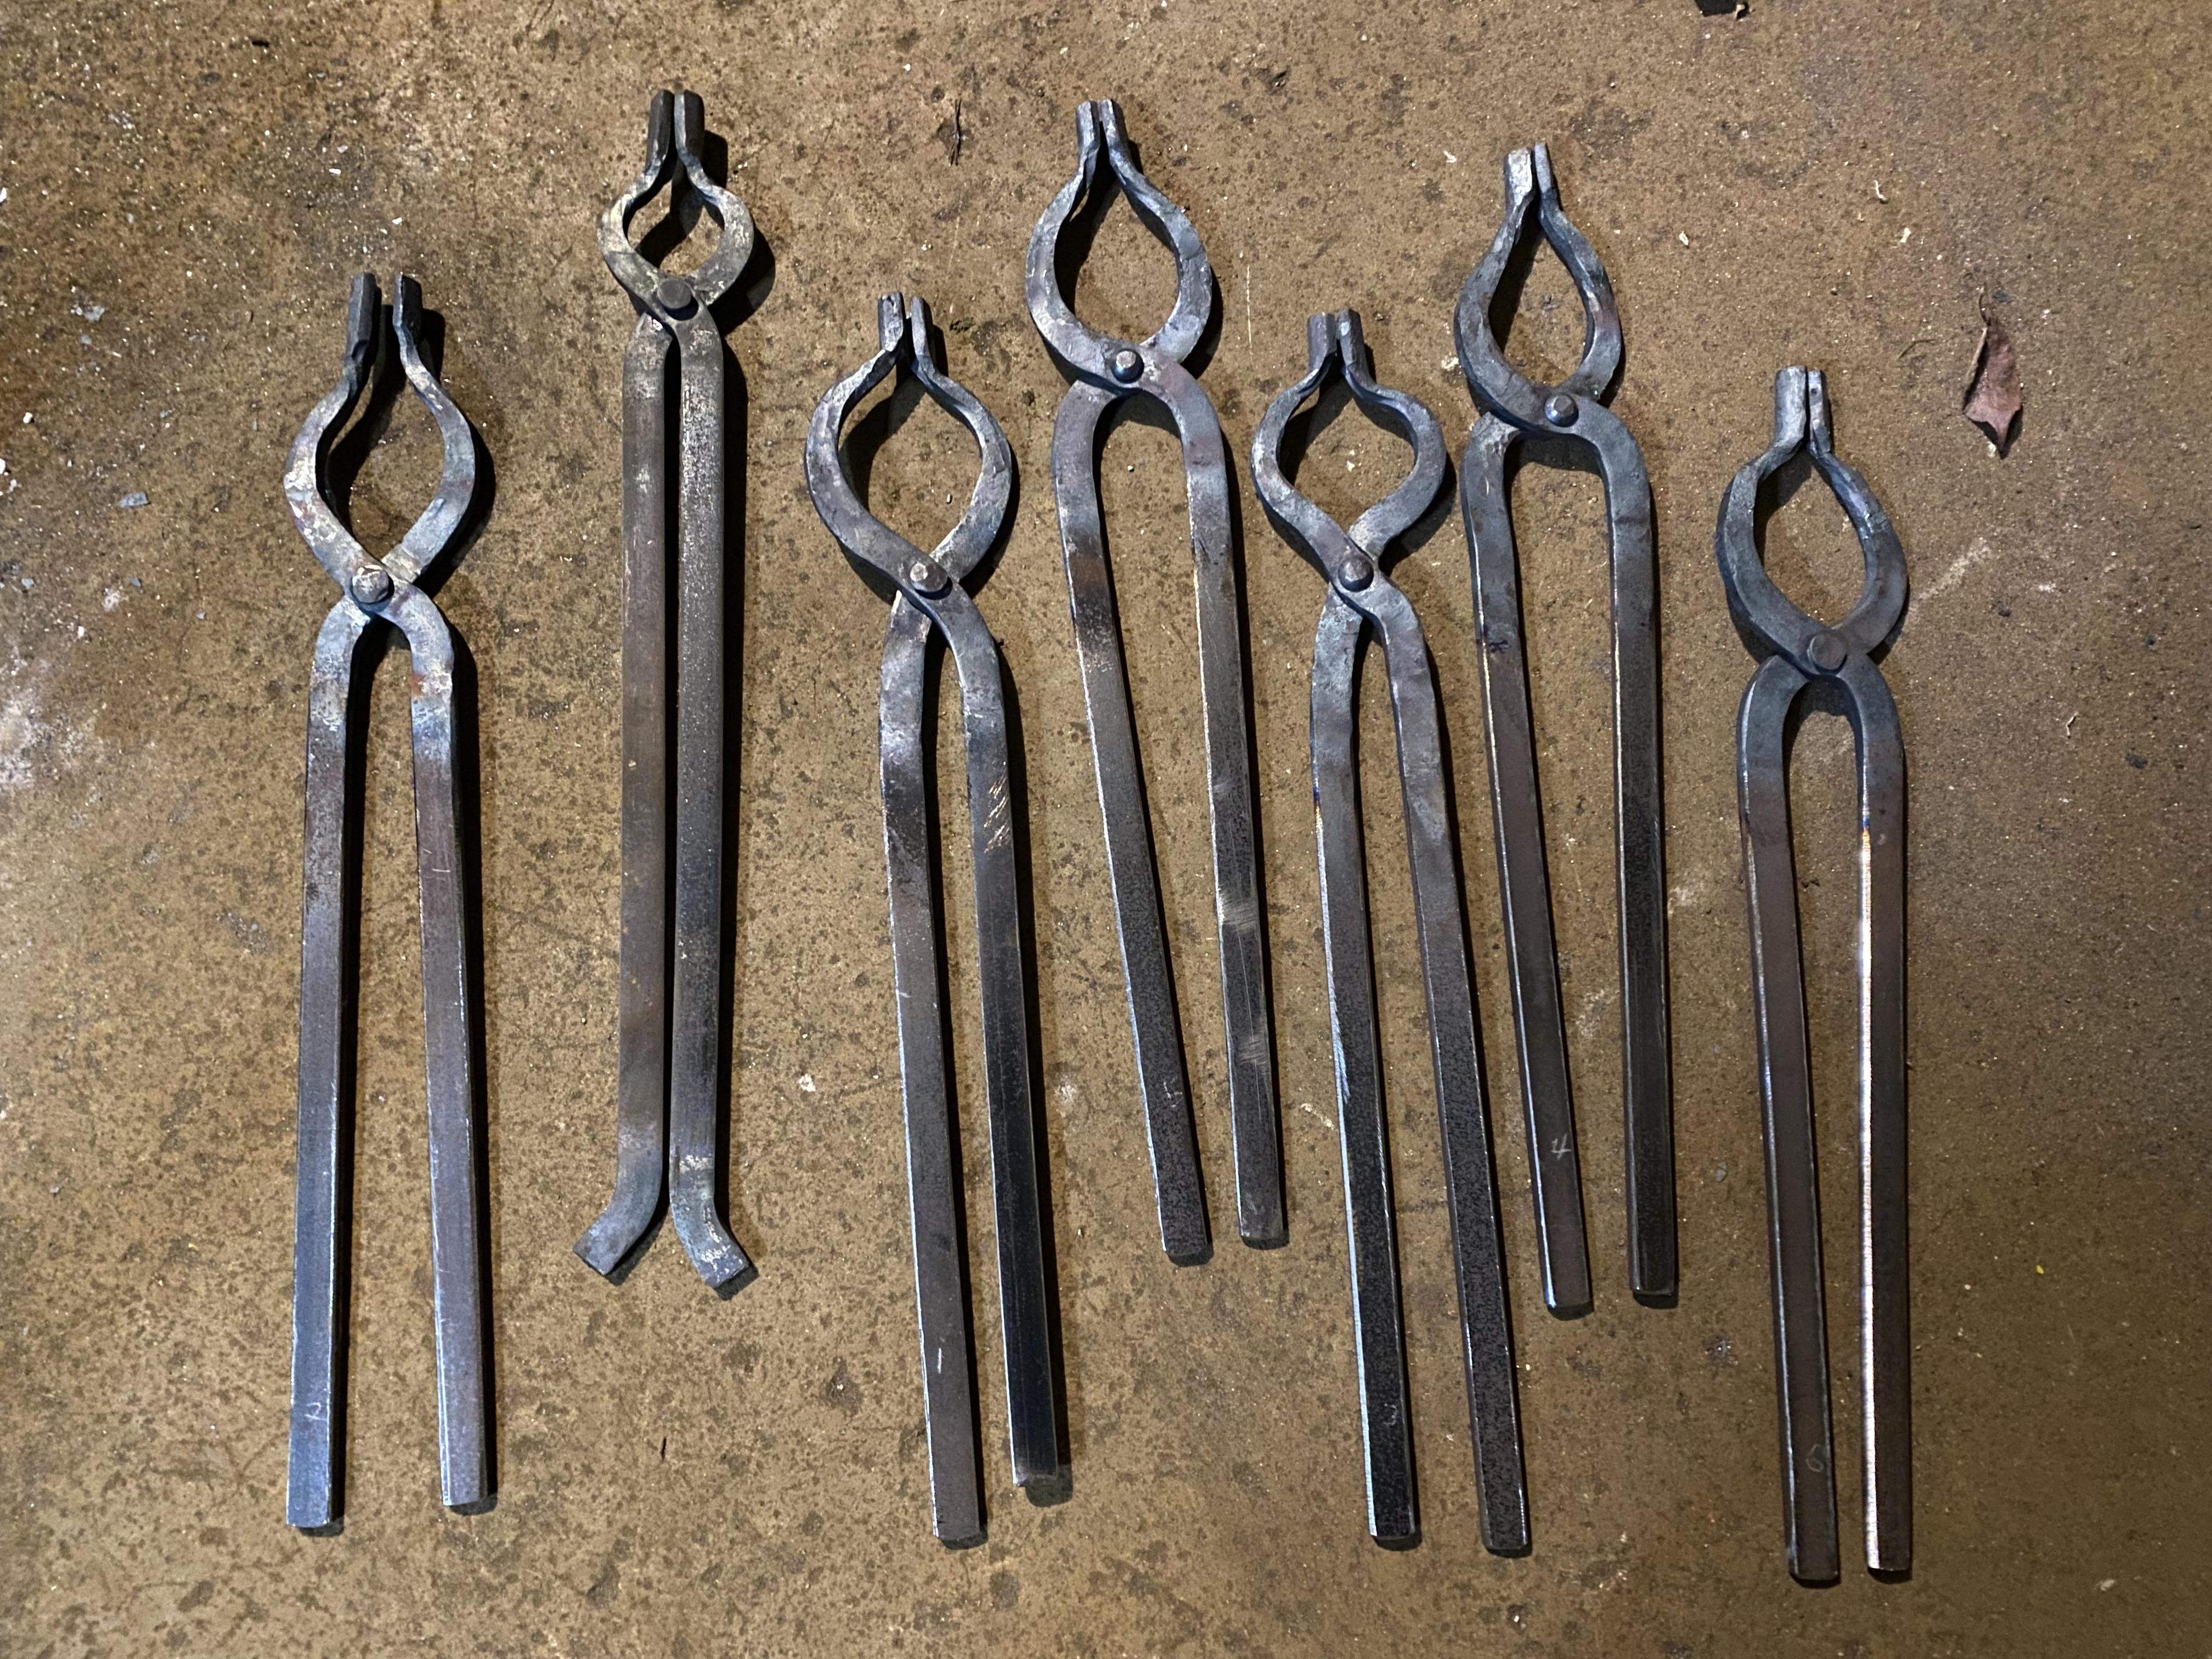
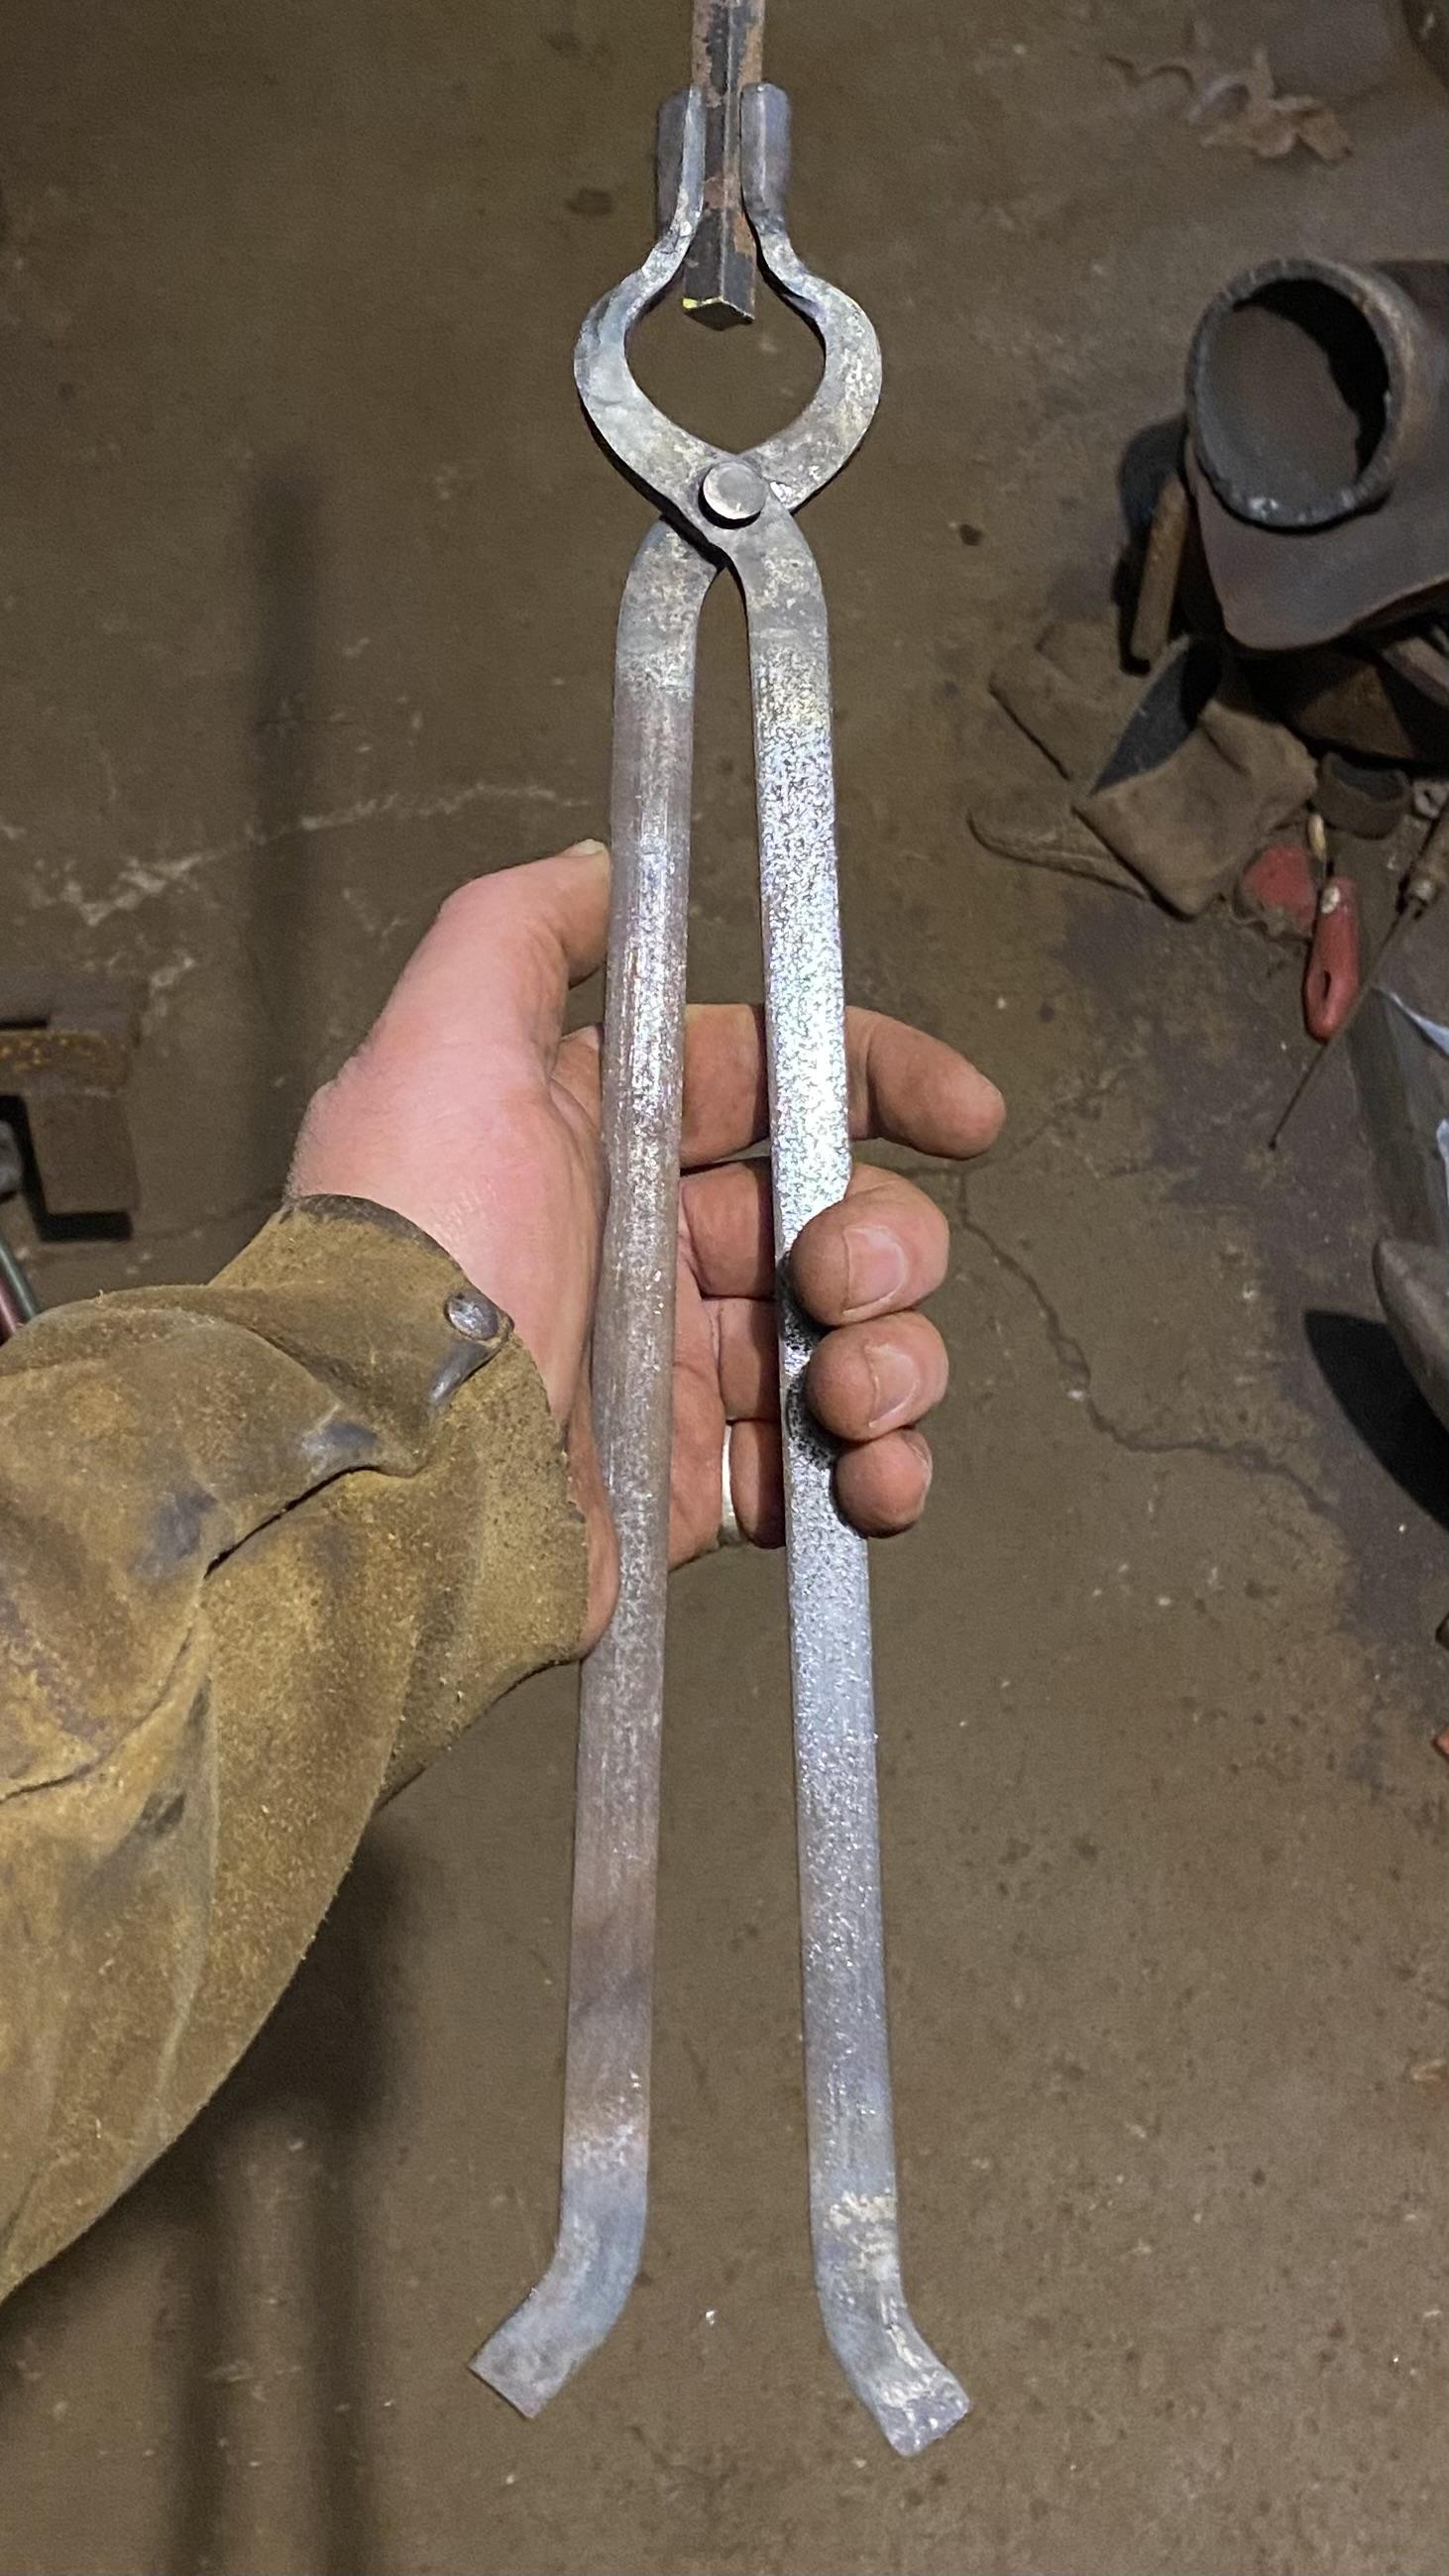
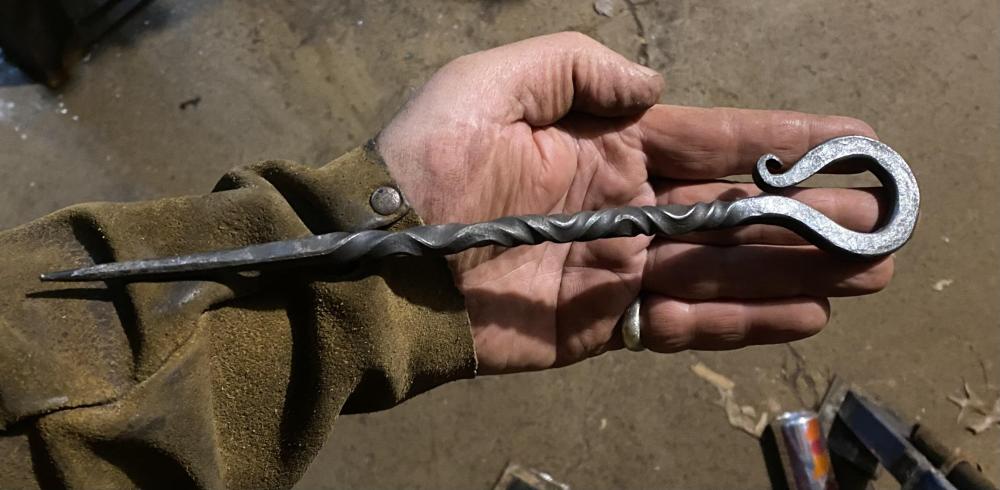
Finished the tongs. Not 100% happy with them, but it’s too late in the evening to do any more fiddling. I’ve got half a dozen total beginners coming over tomorrow. They will each make a bottle opener from 3/8” square bar. I also made a pointer to use during class, based on the one I saw Carl West using last week.
-
What did you do in the shop today?
JHCC replied to Mark Ling's topic in Blacksmithing, General Discussion
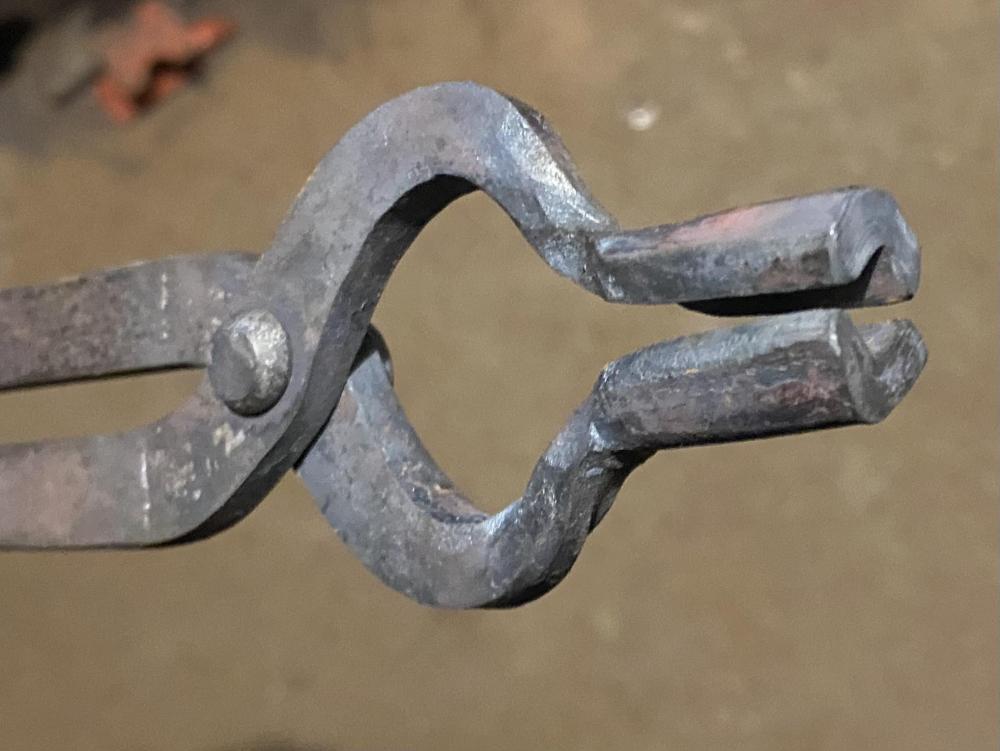
I am teaching a class on Sunday, so I need half a dozen pairs of 3/8” bolt tongs. Here’s the prototype; I’ll make the rest tomorrow. These are made from two 16” lengths of 1/4” x 1/2” flat bar, shouldered, tapered, twisted, bent, with the bits shaped on the fly press with the fuller & swage I made yesterday, and riveted. The first pair took about an hour, but I think I should be able to bring that down.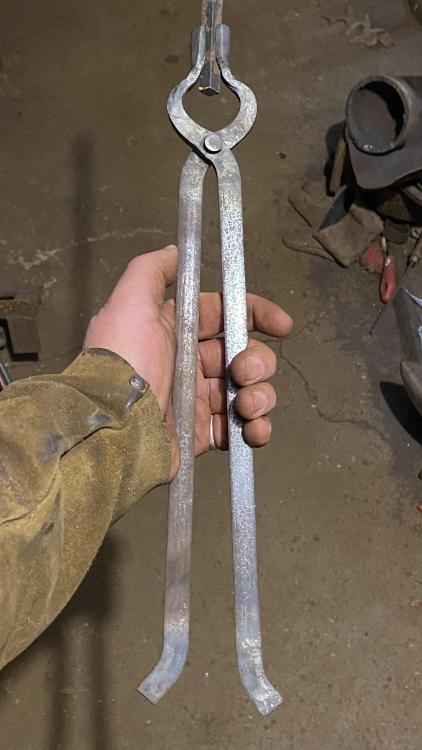
-
What did you do in the shop today?
JHCC replied to Mark Ling's topic in Blacksmithing, General Discussion
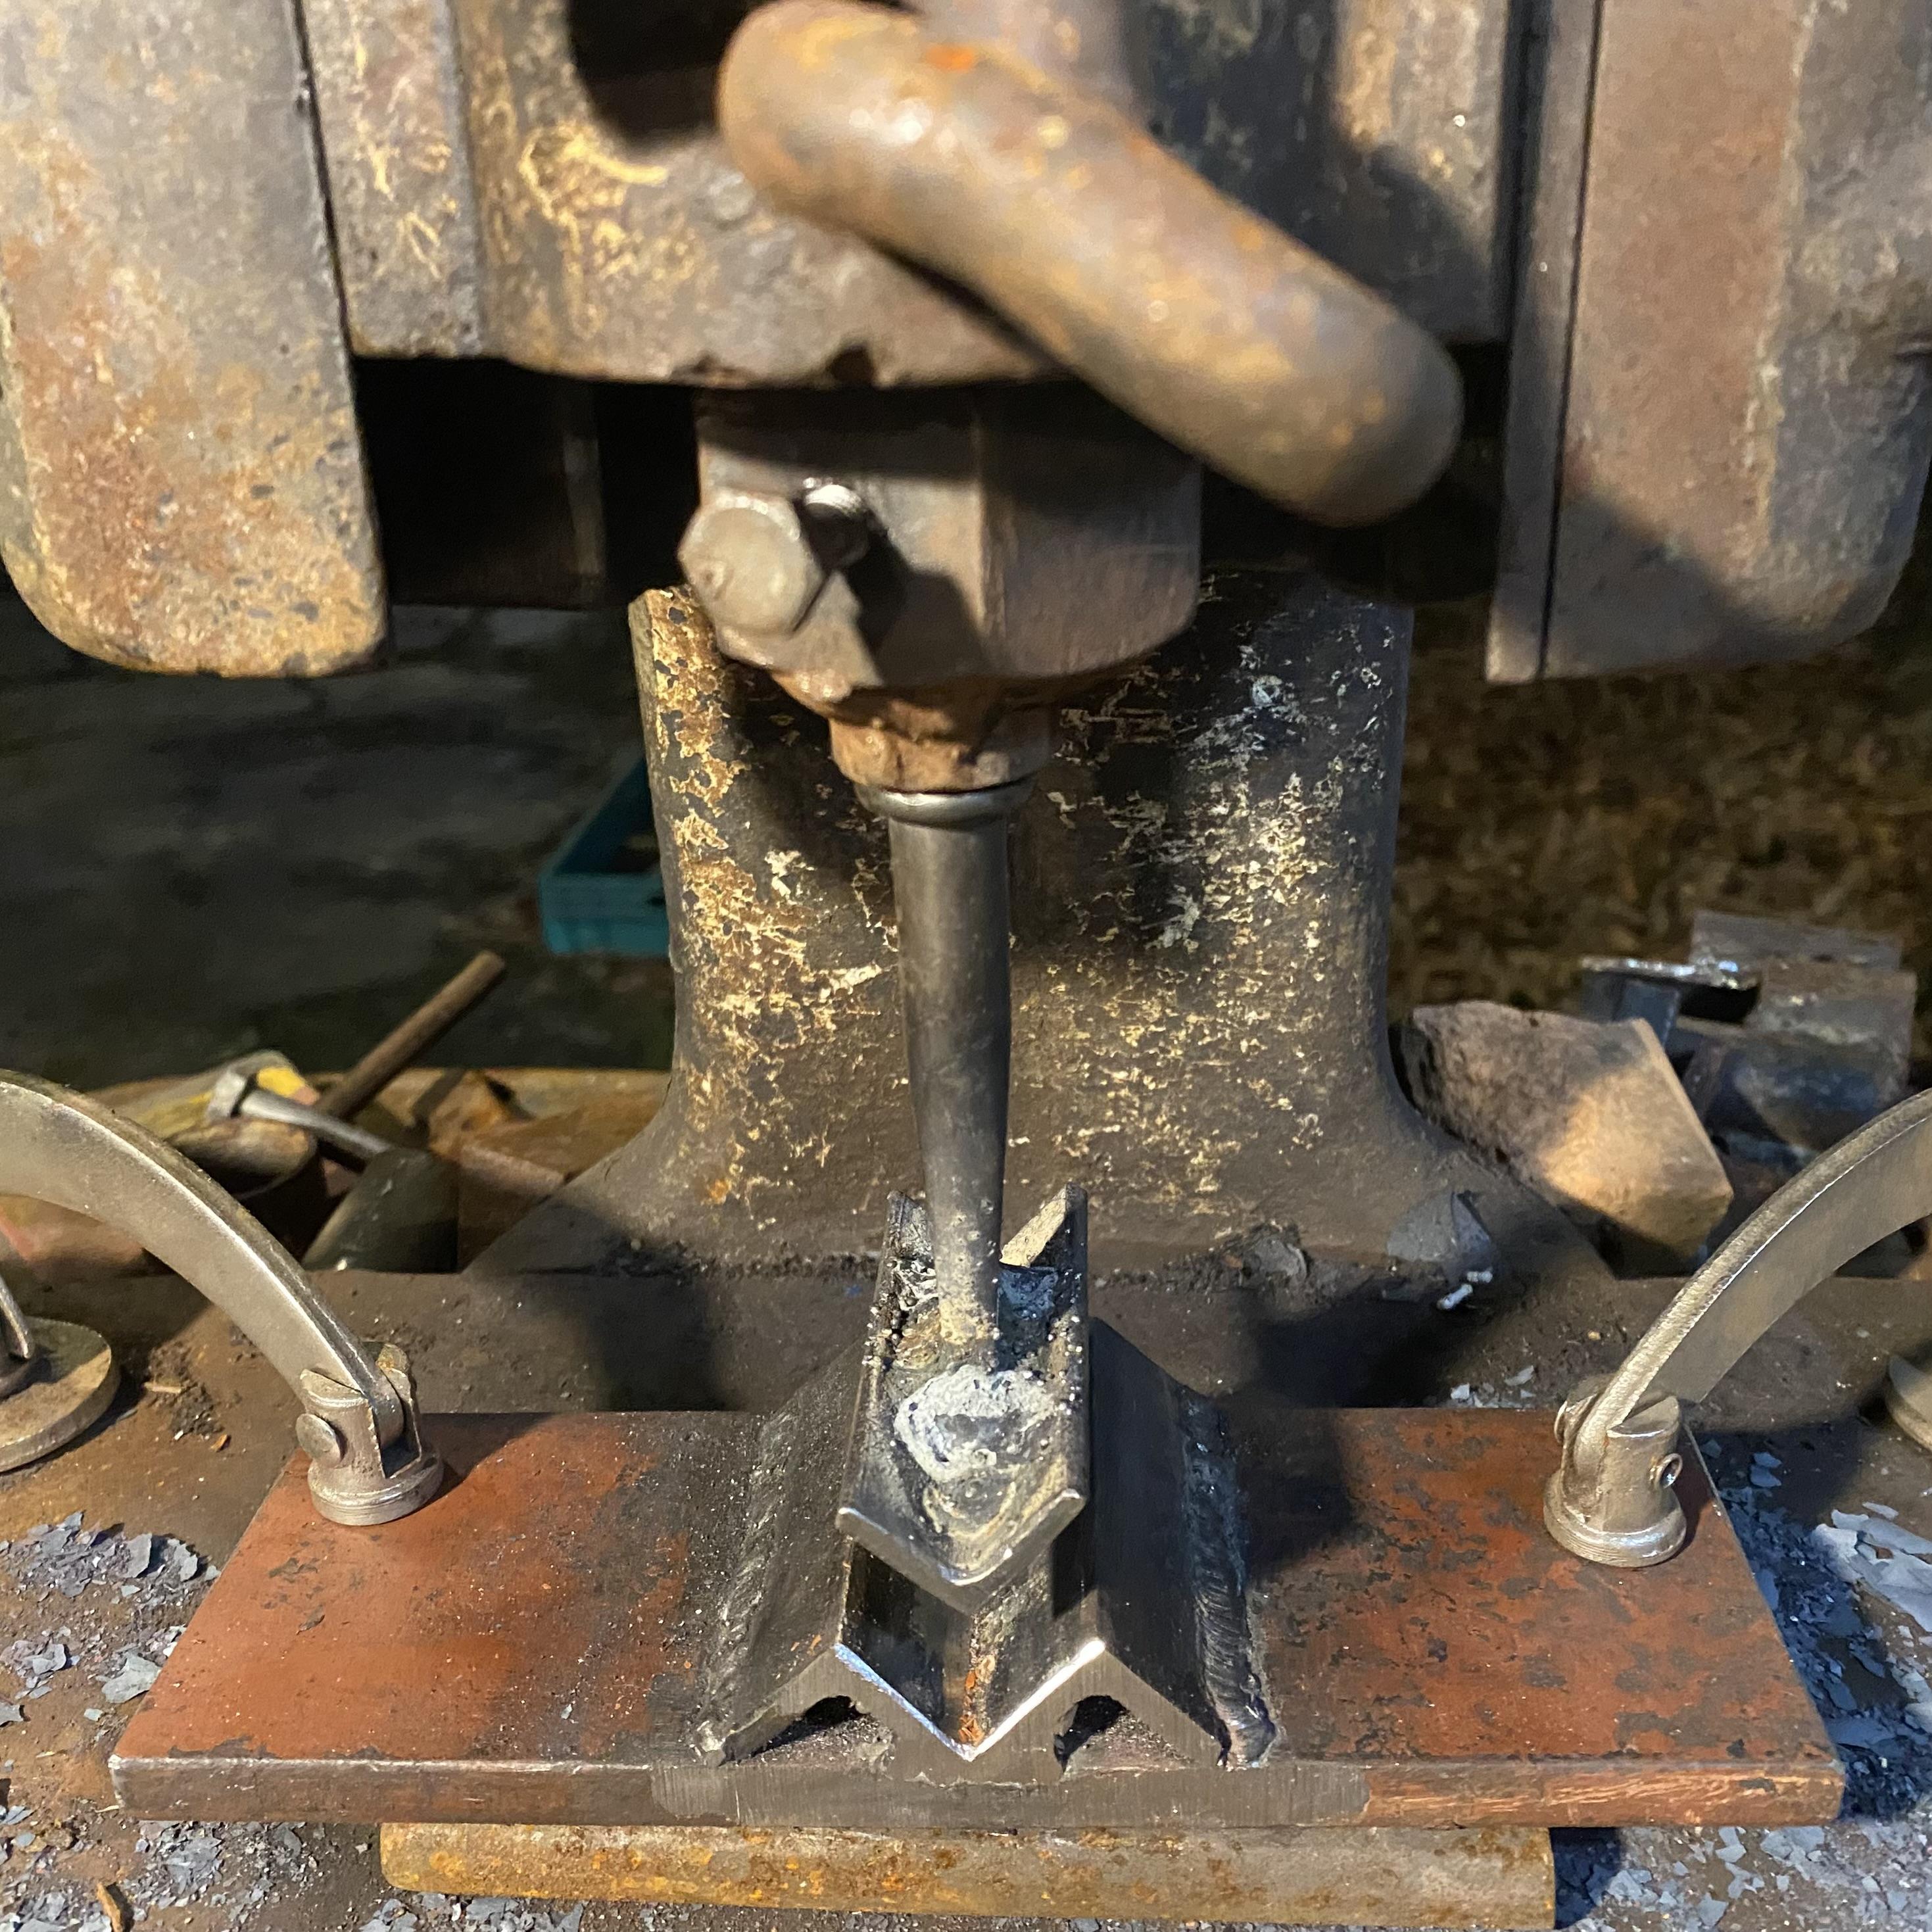
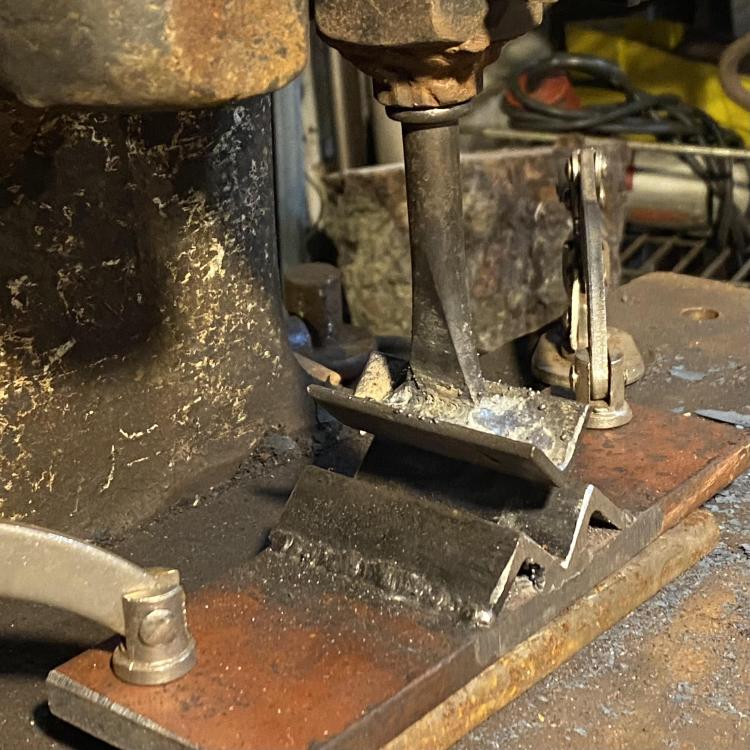
Welded up a small swage-and-fuller set for the fly press. (The shim under the lower piece is to raise it up to the proper height; my press still doesn't have a working depth stop.)
-
Ask, and you shall receive:
-
An interesting industrial drill press
JHCC replied to JHCC's topic in Drills, Post drills, Mag drills, etc
Could be worse: they have an old South Bend B-40 for sale as well.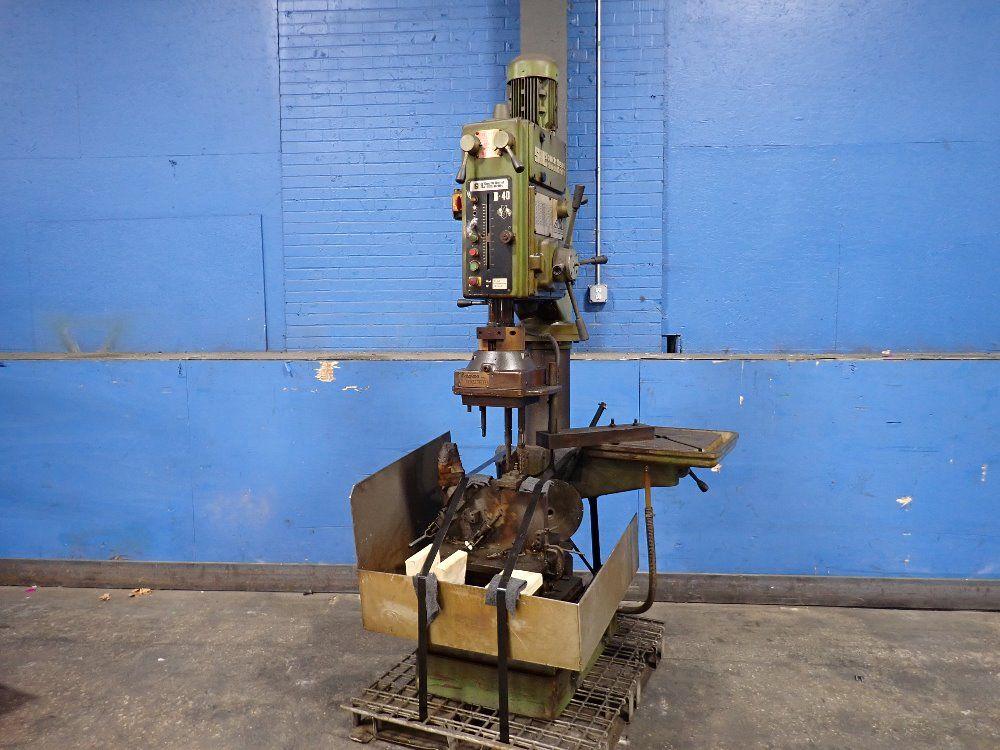
-
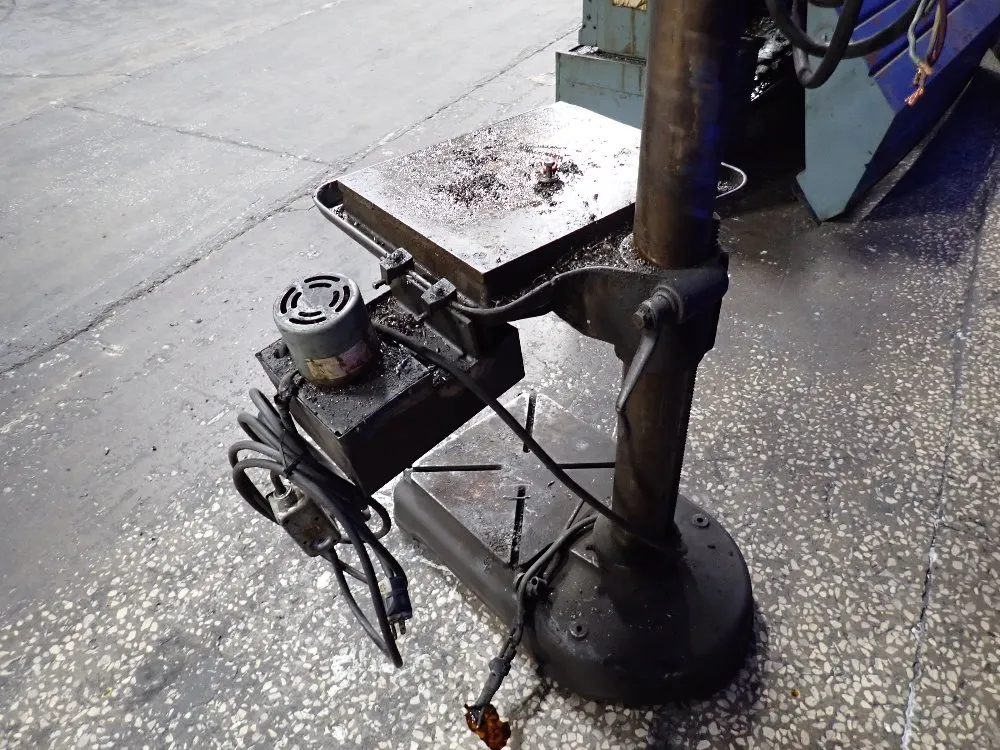
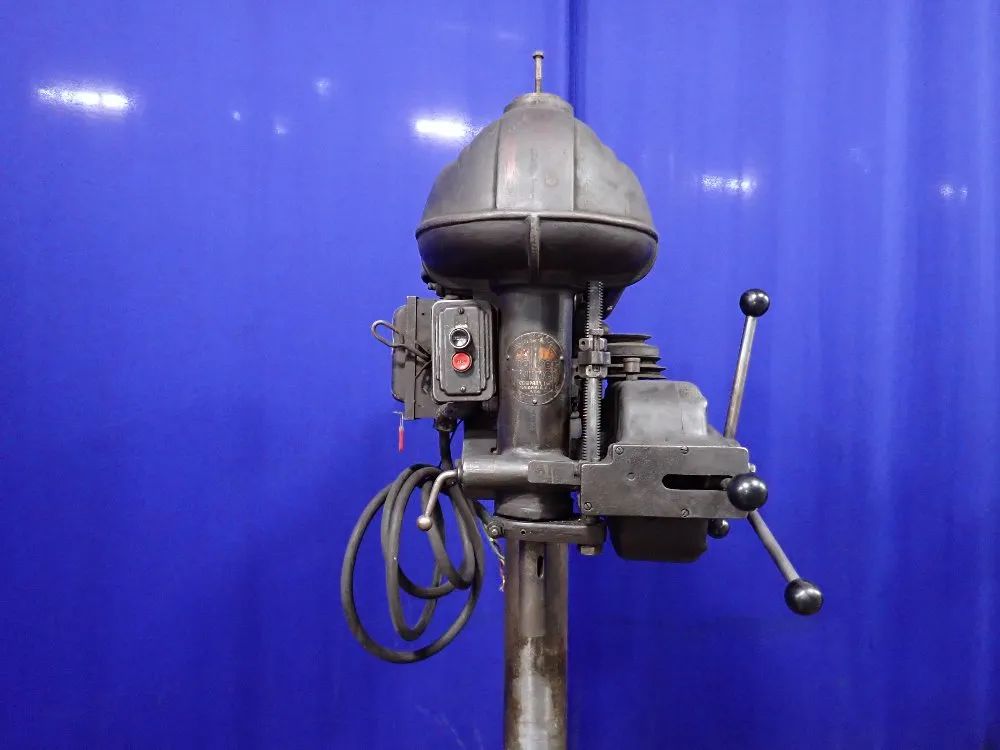
While browsing the website of my favorite industrial surplus warehouse, I encountered an old Walker Turner drill press which appears to have an interesting power feed. It looks like the lever in the front engages and disengages the feed: Which is powered by pulleys taking power off the main motor: I'm guessing that this doesn't have a reversing mechanism, but that the standard return spring takes it back up. No idea if it has anything that automatic disengages at a preset drilling depth or if the operator has to manually disengage the feed. I'm not sure what this thing attached to the side of the table is, but I suspect it might be a pump for lubricating oil. I doubt I'll be purchasing this, as I already have a drill press and would need to switch out the three-phase motor on this one for a single-phase. Nonetheless, I thought folks here might be interested in seeing a cool bit of old-school machinist tech.
-
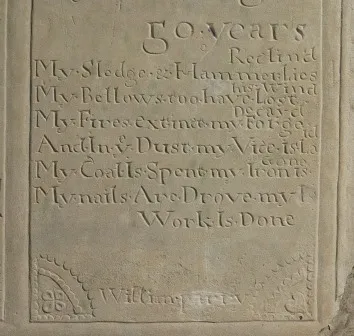
I think that's either misspelled or misread. Here's an image of an 18th century blacksmith's tombstone from Wales with what appears to be the same poem: (The image is from the website of a medieval historian who researches Welsh tombs; the specific entry is HERE.)
-
Did you scroll down to all the videos below the comments? There are a few hundred more!
-
Glad to hear the good news!
-
There are some great videos on the Facebook page of the Vikingeskibsmuseet i Roskilde (Roskilde Viking Ship Museum) showing the construction, fitting out, and sailing of their various Viking vessels, from smaller rowboats to full-size ships. Because the timbers are all hand-hewn, one nice thing for us smiths is see how different axes were used for different parts of the process. https://www.facebook.com/Vikingeskibsmuseet/videos_by (I'm fairly sure you don't need an FB account to watch these, as they are all set to Public.)
-
My previous vise was a "frankenvise" that had been cobbled together from the parts of at least three other vises, and the screw was quite worn out. After I got my current vise, I traded the old one to an engineering professor at OSU, who machined a new screw and screwbox just for fun. (I think he may have welded the new screw onto the old knob and handle as well, using the proper pre- and post-heating, of course.)
-
Just a reminder that we have to be very careful about looking at the past through the lens of how we think about the present (this is what the historians call "presentism"). A whole lot of stuff "back in the day" was just as disposable as stuff now; we just think that everything was made to a higher standard back then because (generally) it's only the good stuff that survived. Also, it's a good idea to remember to factor in inflation when looking at prices in the past: $10 had the same buying power just before WWI as over $300 today. That said, I agree that it's a real shame that the economics of consumer goods these days make it cheaper to replace than to repair. However, there is a growing community of people who prefer to take some extra time and trouble to fix things themselves; I myself recently replaced the broken screen on my son's "obsolete" cell phone at a fraction of the cost of a new one.
-
What did you do in the shop today?
JHCC replied to Mark Ling's topic in Blacksmithing, General Discussion
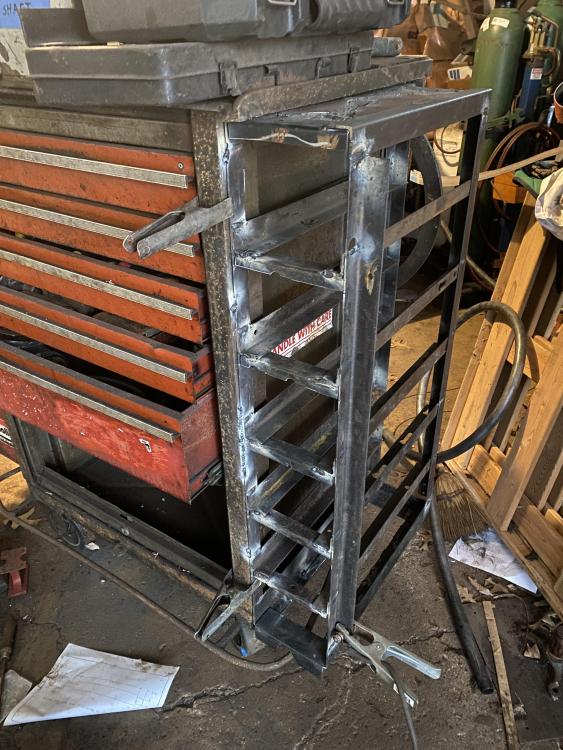
Welded up a bed rail frame to hold half a dozen drawers I picked up at the industrial surplus place. This I welded onto the side of my rolling tool cabinet, where it will hold the tooling for my Hossfeld.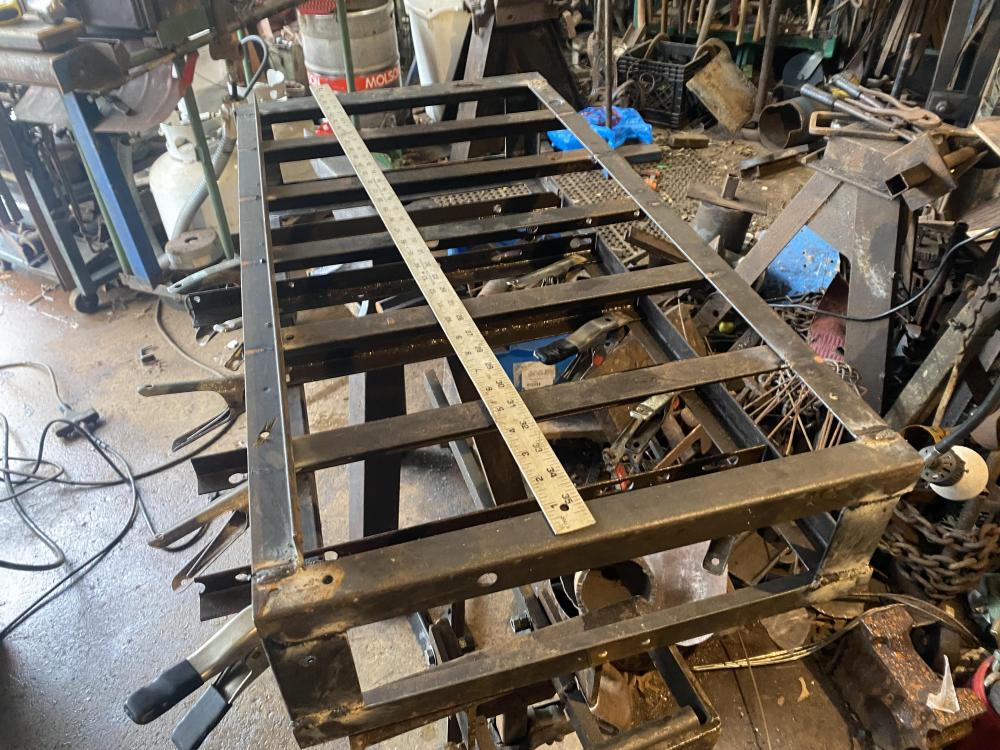

-
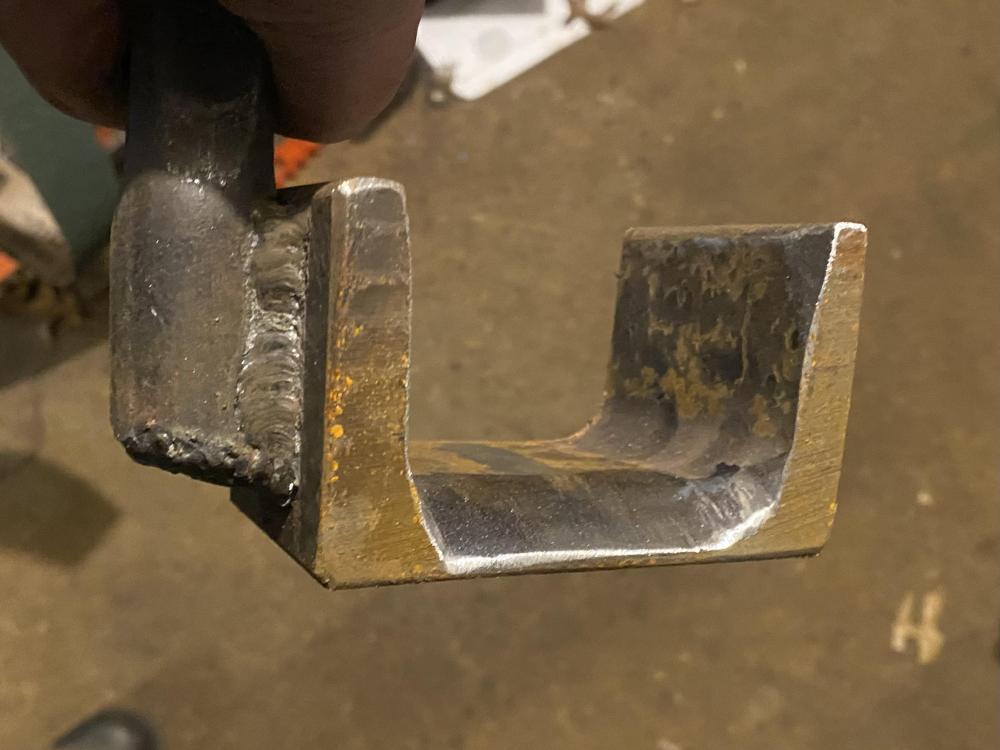
What did you do in the shop today?
JHCC replied to Mark Ling's topic in Blacksmithing, General Discussion
Anvil bridge.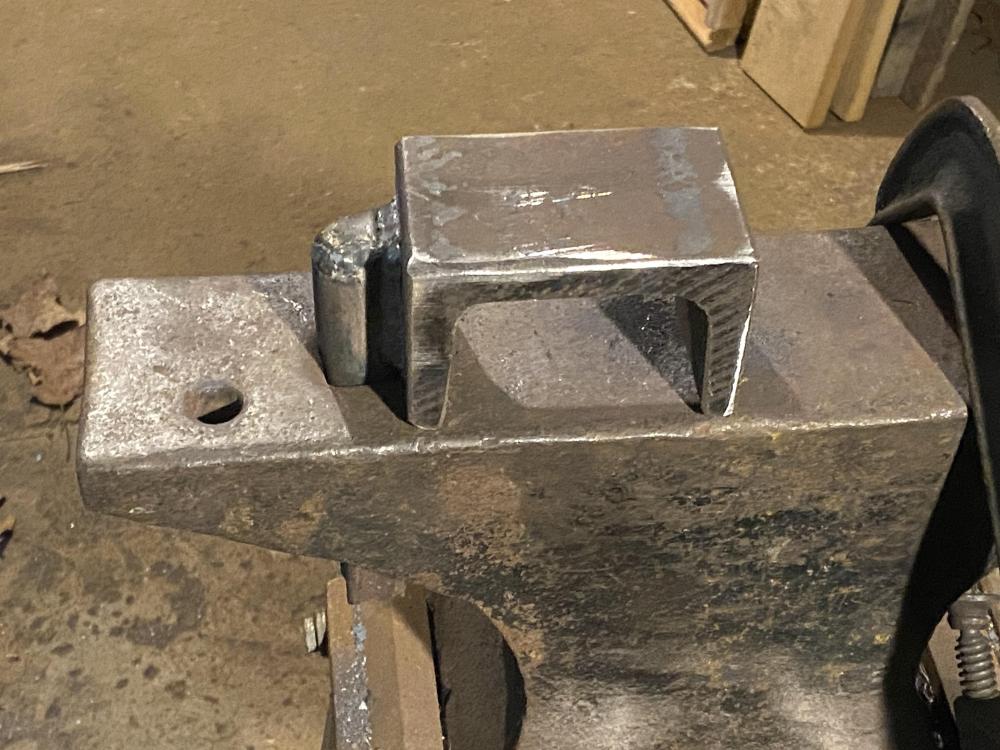
-
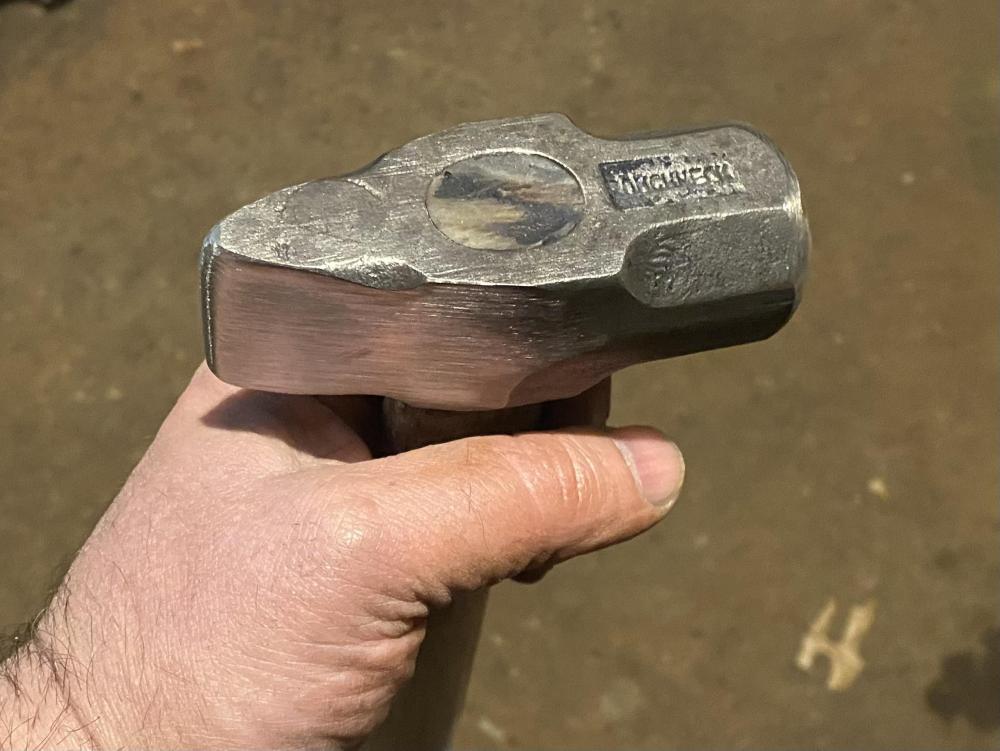
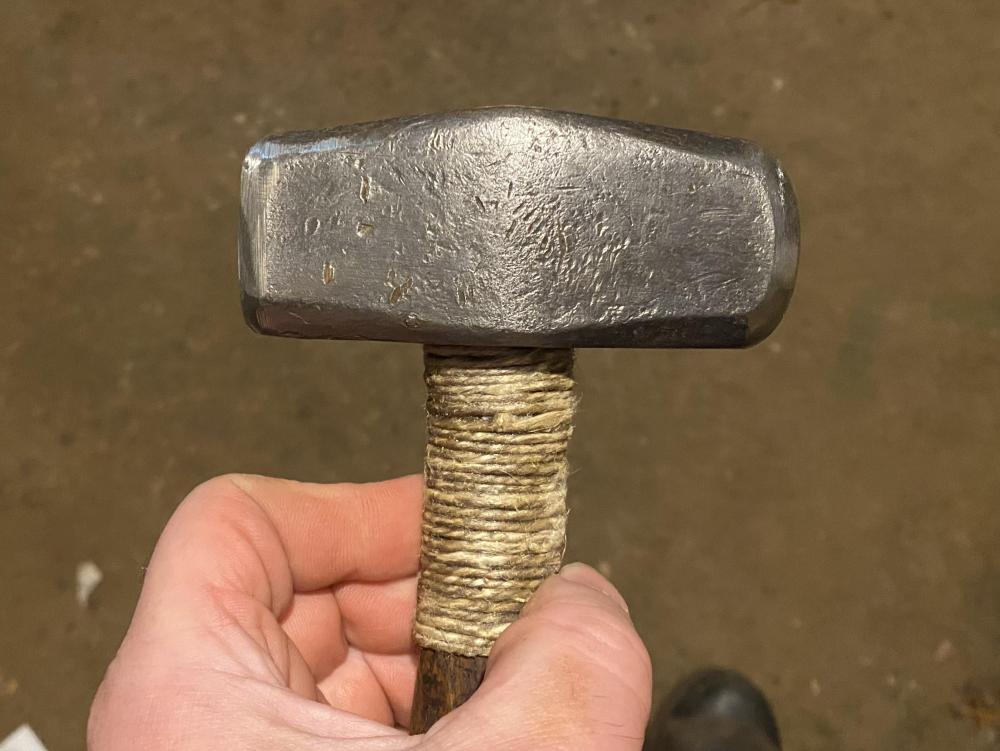
What did you do in the shop today?
JHCC replied to Mark Ling's topic in Blacksmithing, General Discussion
A couple of quick grinding jobs: converting two double-jack hammers into a straight peen and a rounding hammer (the latter of which also needed the gluing and reinforcing of a couple of handle cracks) and grinding a taper into the underside of the saddle tool I welded up a couple of weeks ago.