
JHCC
-
Posts
19,349 -
Joined
-
Last visited
Content Type
Profiles
Forums
Articles
Gallery
Downloads
Events
Everything posted by JHCC
-
Make a striker and pull chain.
-
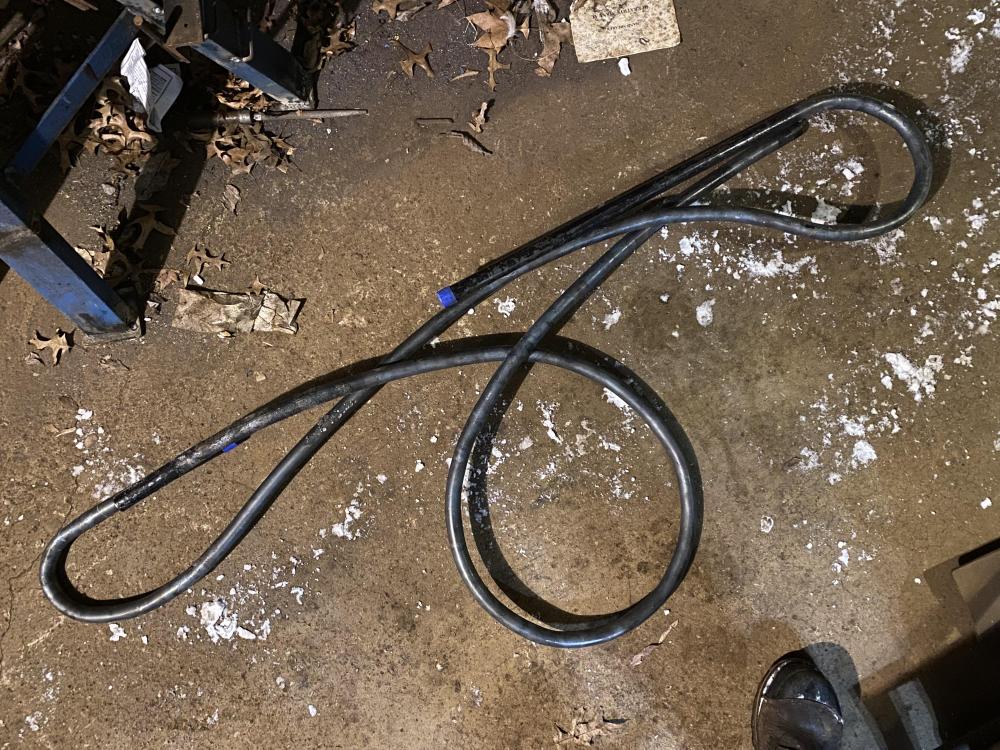
I got a 16” replacement closing spring for a screen door (the old-fashioned kind, not the new kind with an adjustable cylinder) at my local hardware store. This I cut in half and made into two loops, one for the post vise and the other for the big machinist’s vise.
-
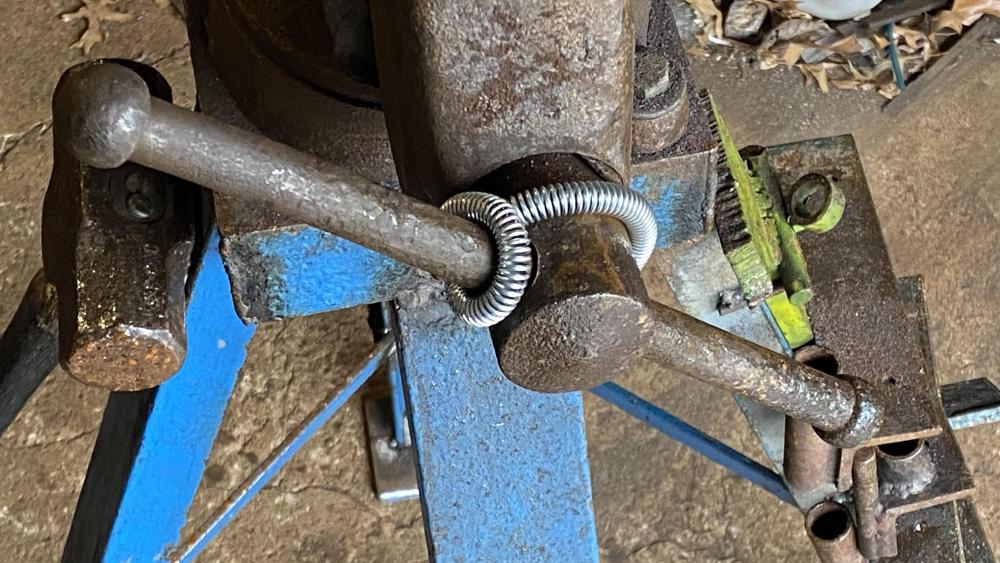
In fact, here’s one installed on my own post vise:

-
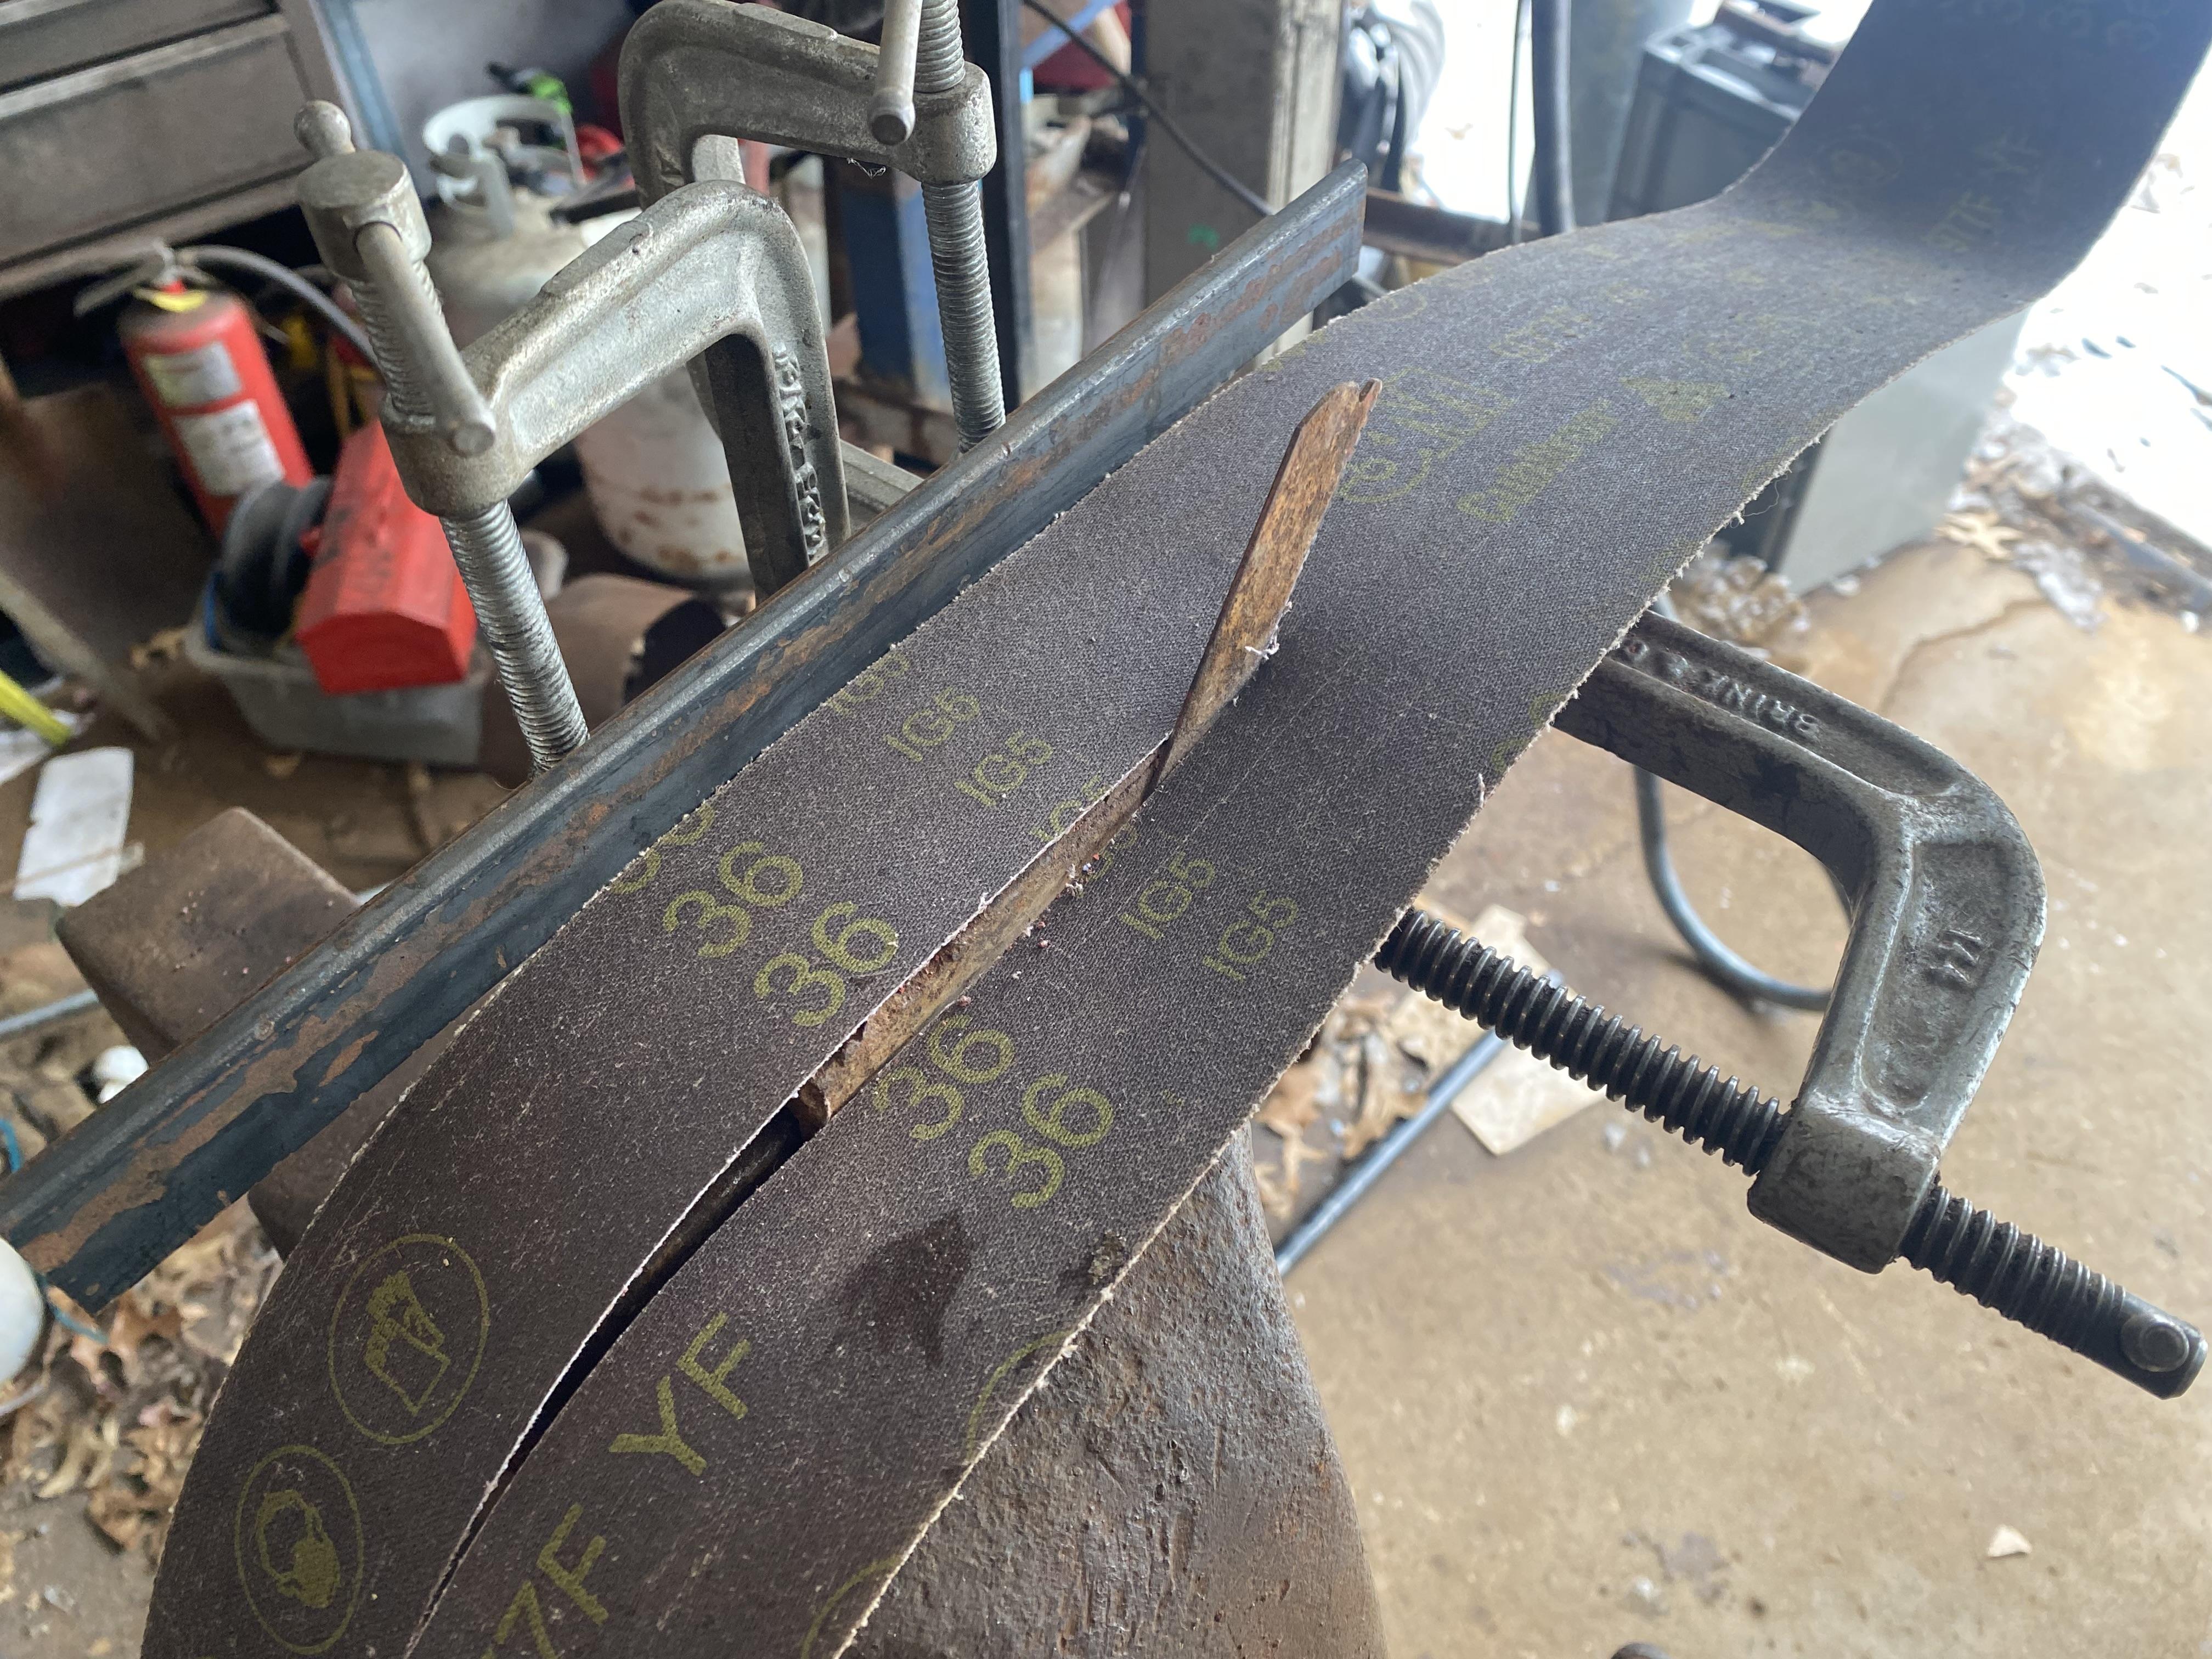
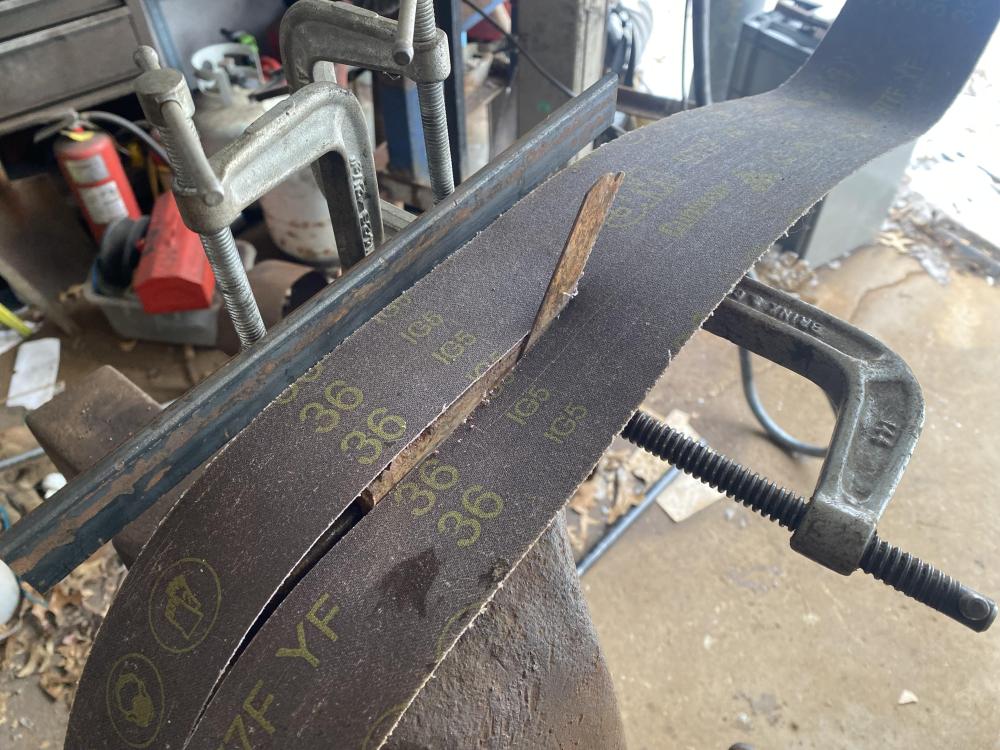
As noted elsewhere, I jury-rigged quite a good setup for splitting belts: I’ve got some ideas for making this a permanent setup. More to come. In the meantime, I’m gluing up the two halves, using the same cut angle as the original. The splice material is the blue tape, glued down with polyurethane adhesive. I’ll keep y’all posted.


-
Well, if you know about TPAAAT, you’re already on the right track! Don’t bother with sandblasting. Just brush off any loose rust and keep it well oiled.
-
I got a number of similar shafts from the industrial surplus place a few years ago, cut a couple of them into chunks, and sold them off my table at Quad-State.
-
Perfectly.
-
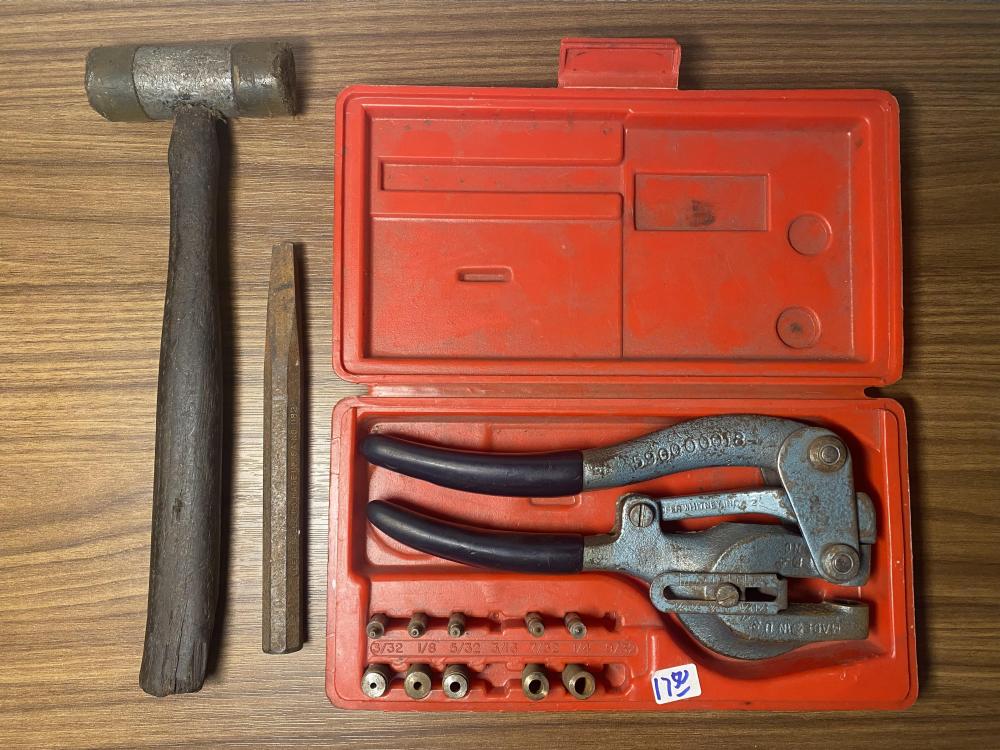
Depends on the metal. The largest punch in my set is 1/4" (the 9/32" is missing). According to the standard punching tonnage chart (see below), the No. 5 Jr's 1.2 tons will safely punch a 1/4" hole in 20ga high carbon or stainless steel, 18ga A36 steel, 16ga mild steel, 14ga brass, 12ga copper, and 10ga aluminum. (NB: this chart is copied from the website of the American Machinery Company. That's a commercial site, which is why I'm not providing a link. However, I'm fairly sure it's also in Machinery's Handbook and other such references.) *In this case, "safely" means that the calculated tonnage for a particular size hole is less that the 1.2 tons produced by the punch. For example, a 1/4" hole in 12ga copper requires 1.09 tons (2.09 tons x 0.52 conversion factor), whereas the same 1/4" hole in 10ga copper requires 1.4 tons (2.69 x 0.52) and thus is outside the punch's rated capacity.
-
acein, you could also consult the Heat Treater's Guide Companion app from ASM International and the ASM Heat Treating Society, available free for both Apple and Android platforms. It's an excellent resource for most steels in use in the US, apart from proprietary alloys from individual companies (such as 15N20 from Bohler-Uddeholm).
-
gewoon ik, it's a manual sheet metal punch. The little pieces at the bottom of the case are punches and their matching bolsters that are installed in the punch as needed for a particular job. (Note: each punch pin has a tiny point in the center, to help align the holes precisely.) The lever action of the handles produces an enormous amount of force; in this case, up to 1.2 imperial tons (1.219 metric tonnes). The combination of great force and the precise fit between the punch and the bolster makes a very clean hole in the metal, much cleaner, faster, rounder, and more precise than drilling with a twist bit. Buying one of these beauties new usually costs $100-$140 USD; just a replacement set of punches and bolsters is about $70. Used, they're typically around $50 or more, especially if you're getting it shipped from somewhere. This probably wouldn't be particularly useful to someone who doesn't do much sheet metal work, but I've been doing more and more over the last few years, and so I think it might come in very handy. If not, I should be able to sell it at a reasonable profit and buy some more steel and propane. In the mean time, I think I may fabricate a bracket to hold it in the vise. Roper Whitney sells such an item, but why pay for what I can build?
-
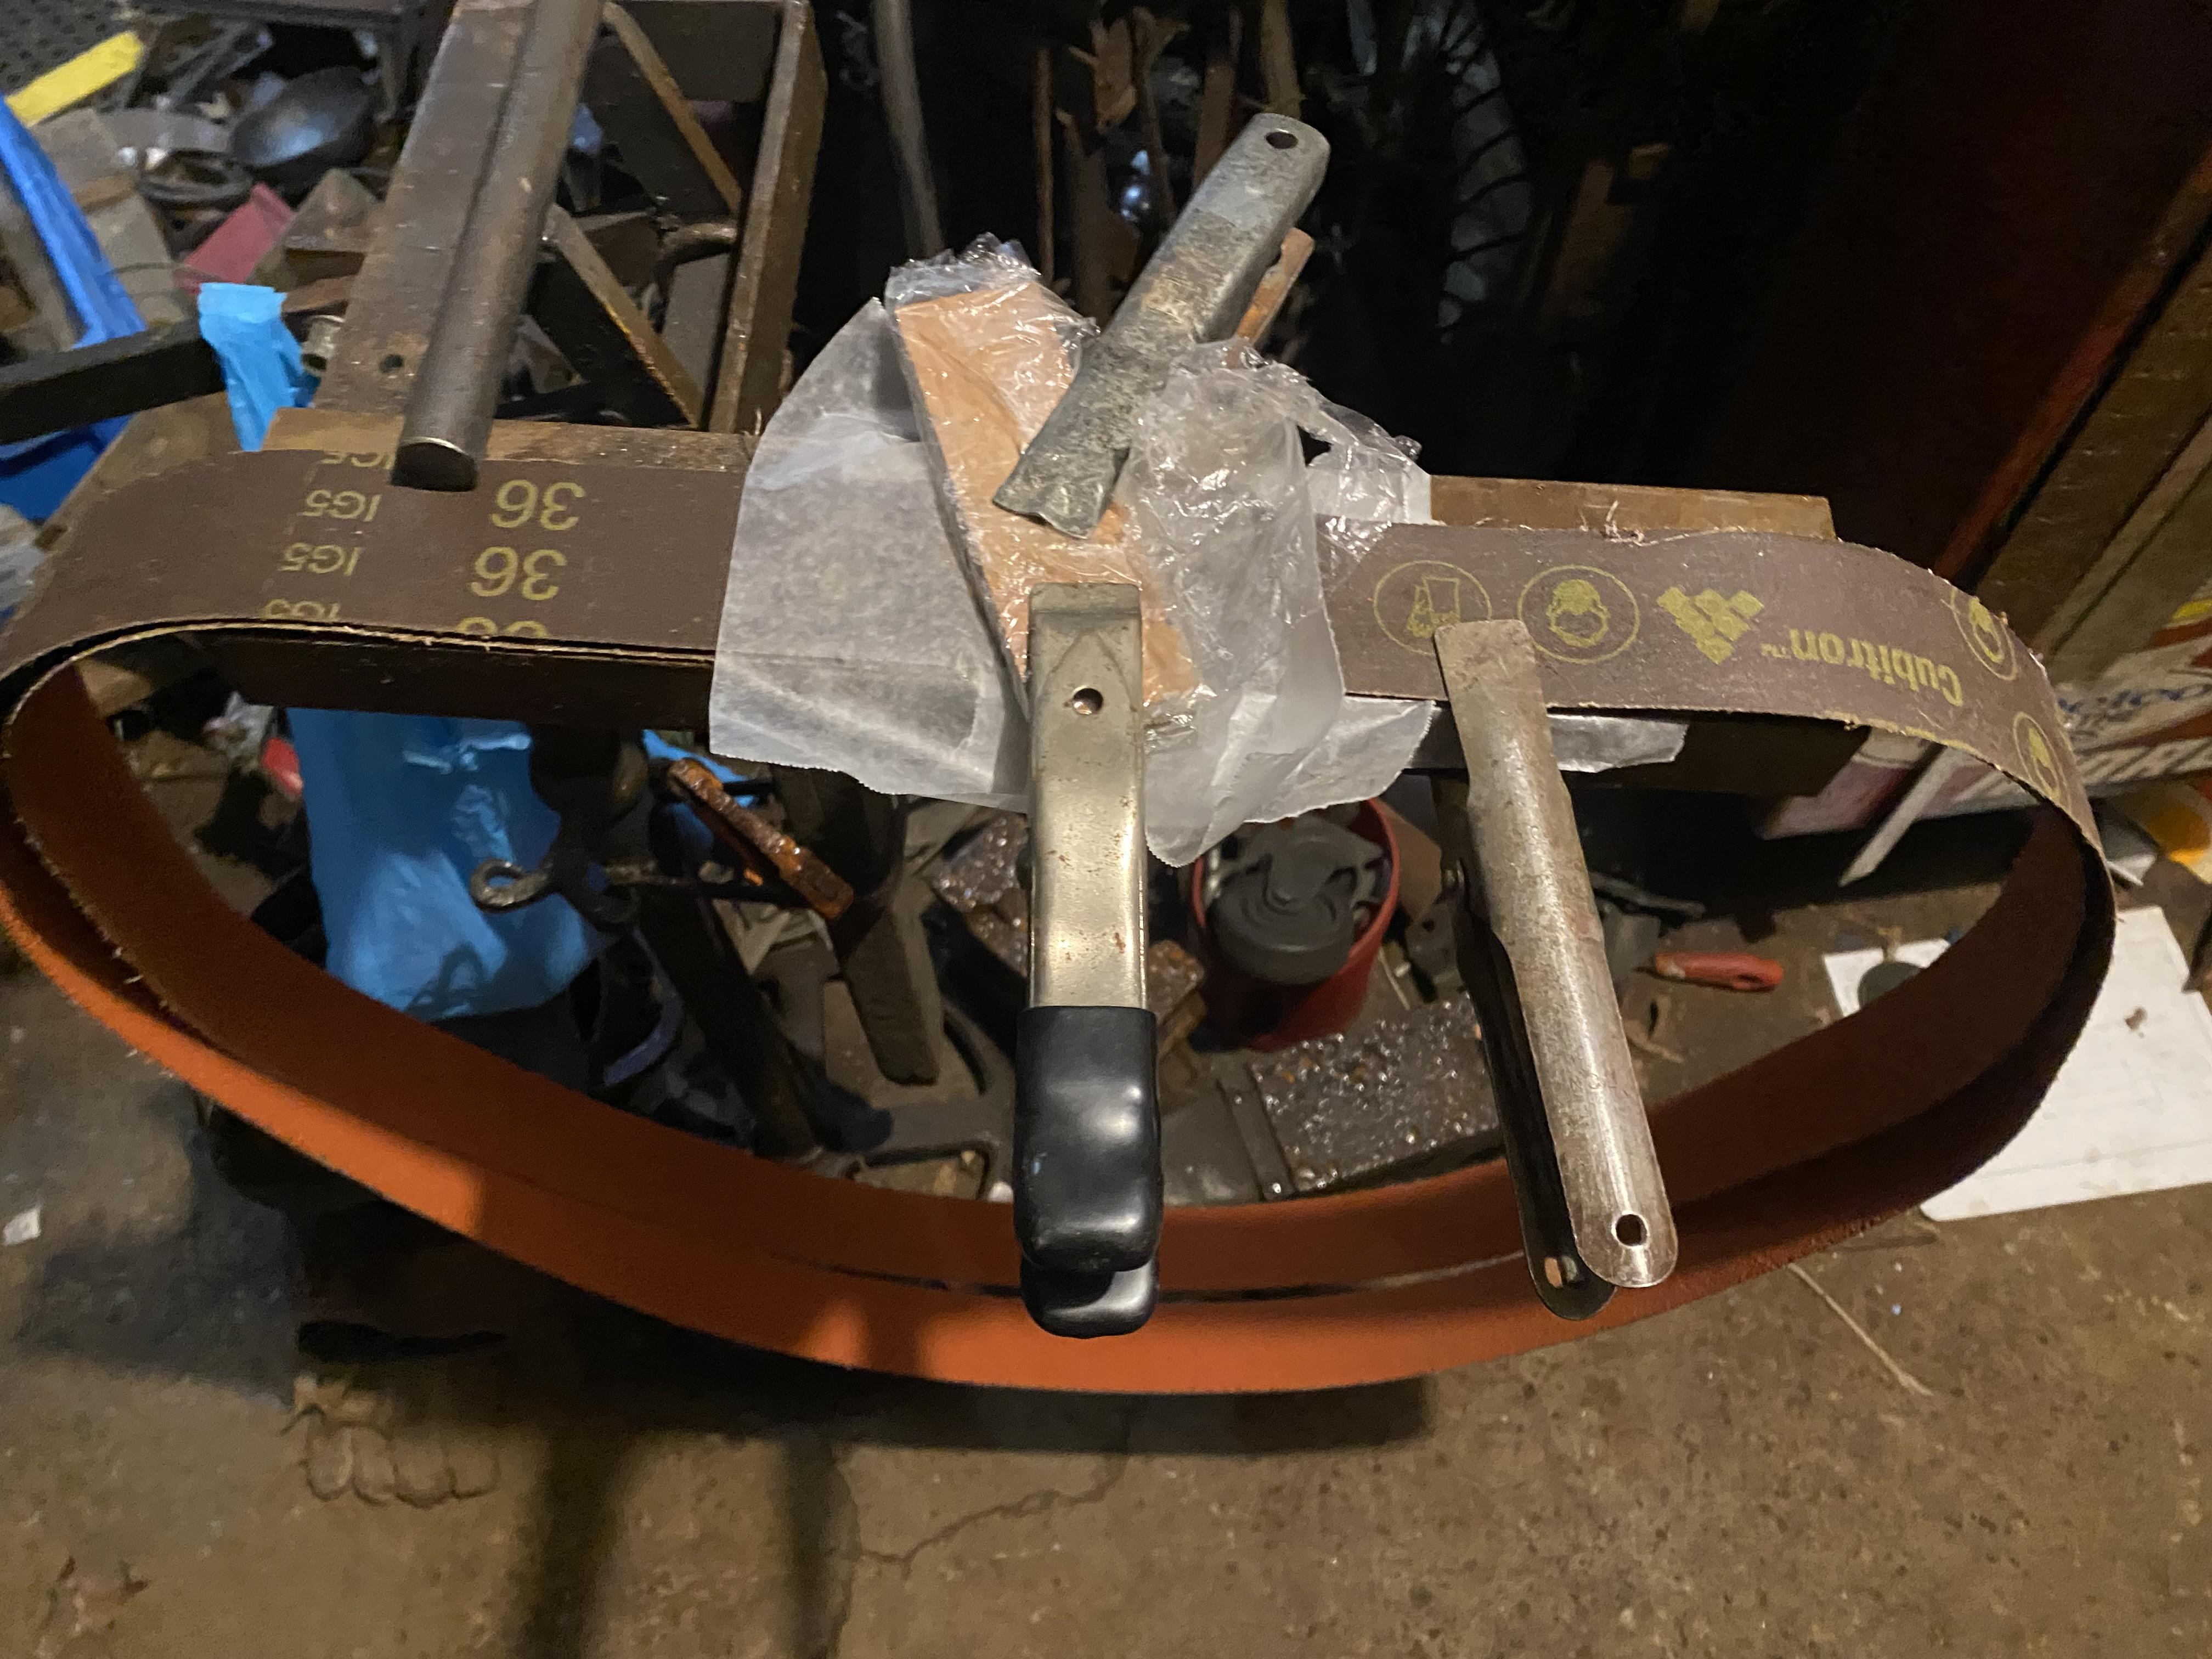
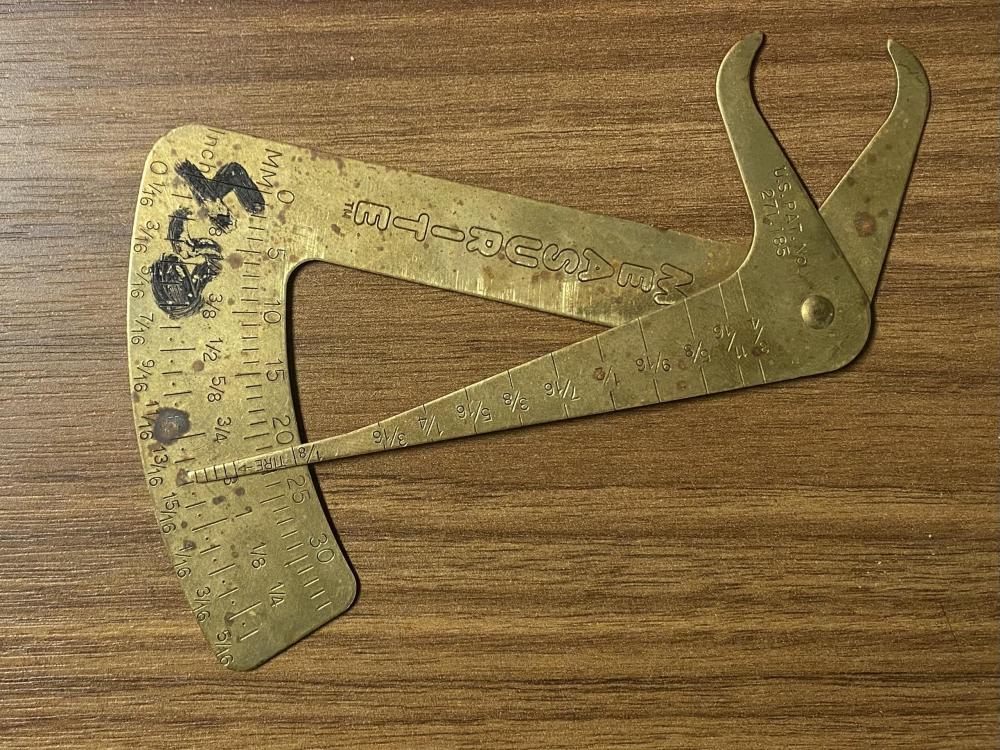
The next day, I went back for a couple of things I’d spotted but neglected to buy. First, a cute little measuring tool, with a caliper in imperial and metric, a tapered bore gauge, and (on the other side) a 5" ruler. And you can’t beat the price on the Roper Whitney No. 5 Jr: (The hammer and square punch were on the $1 table.)
-
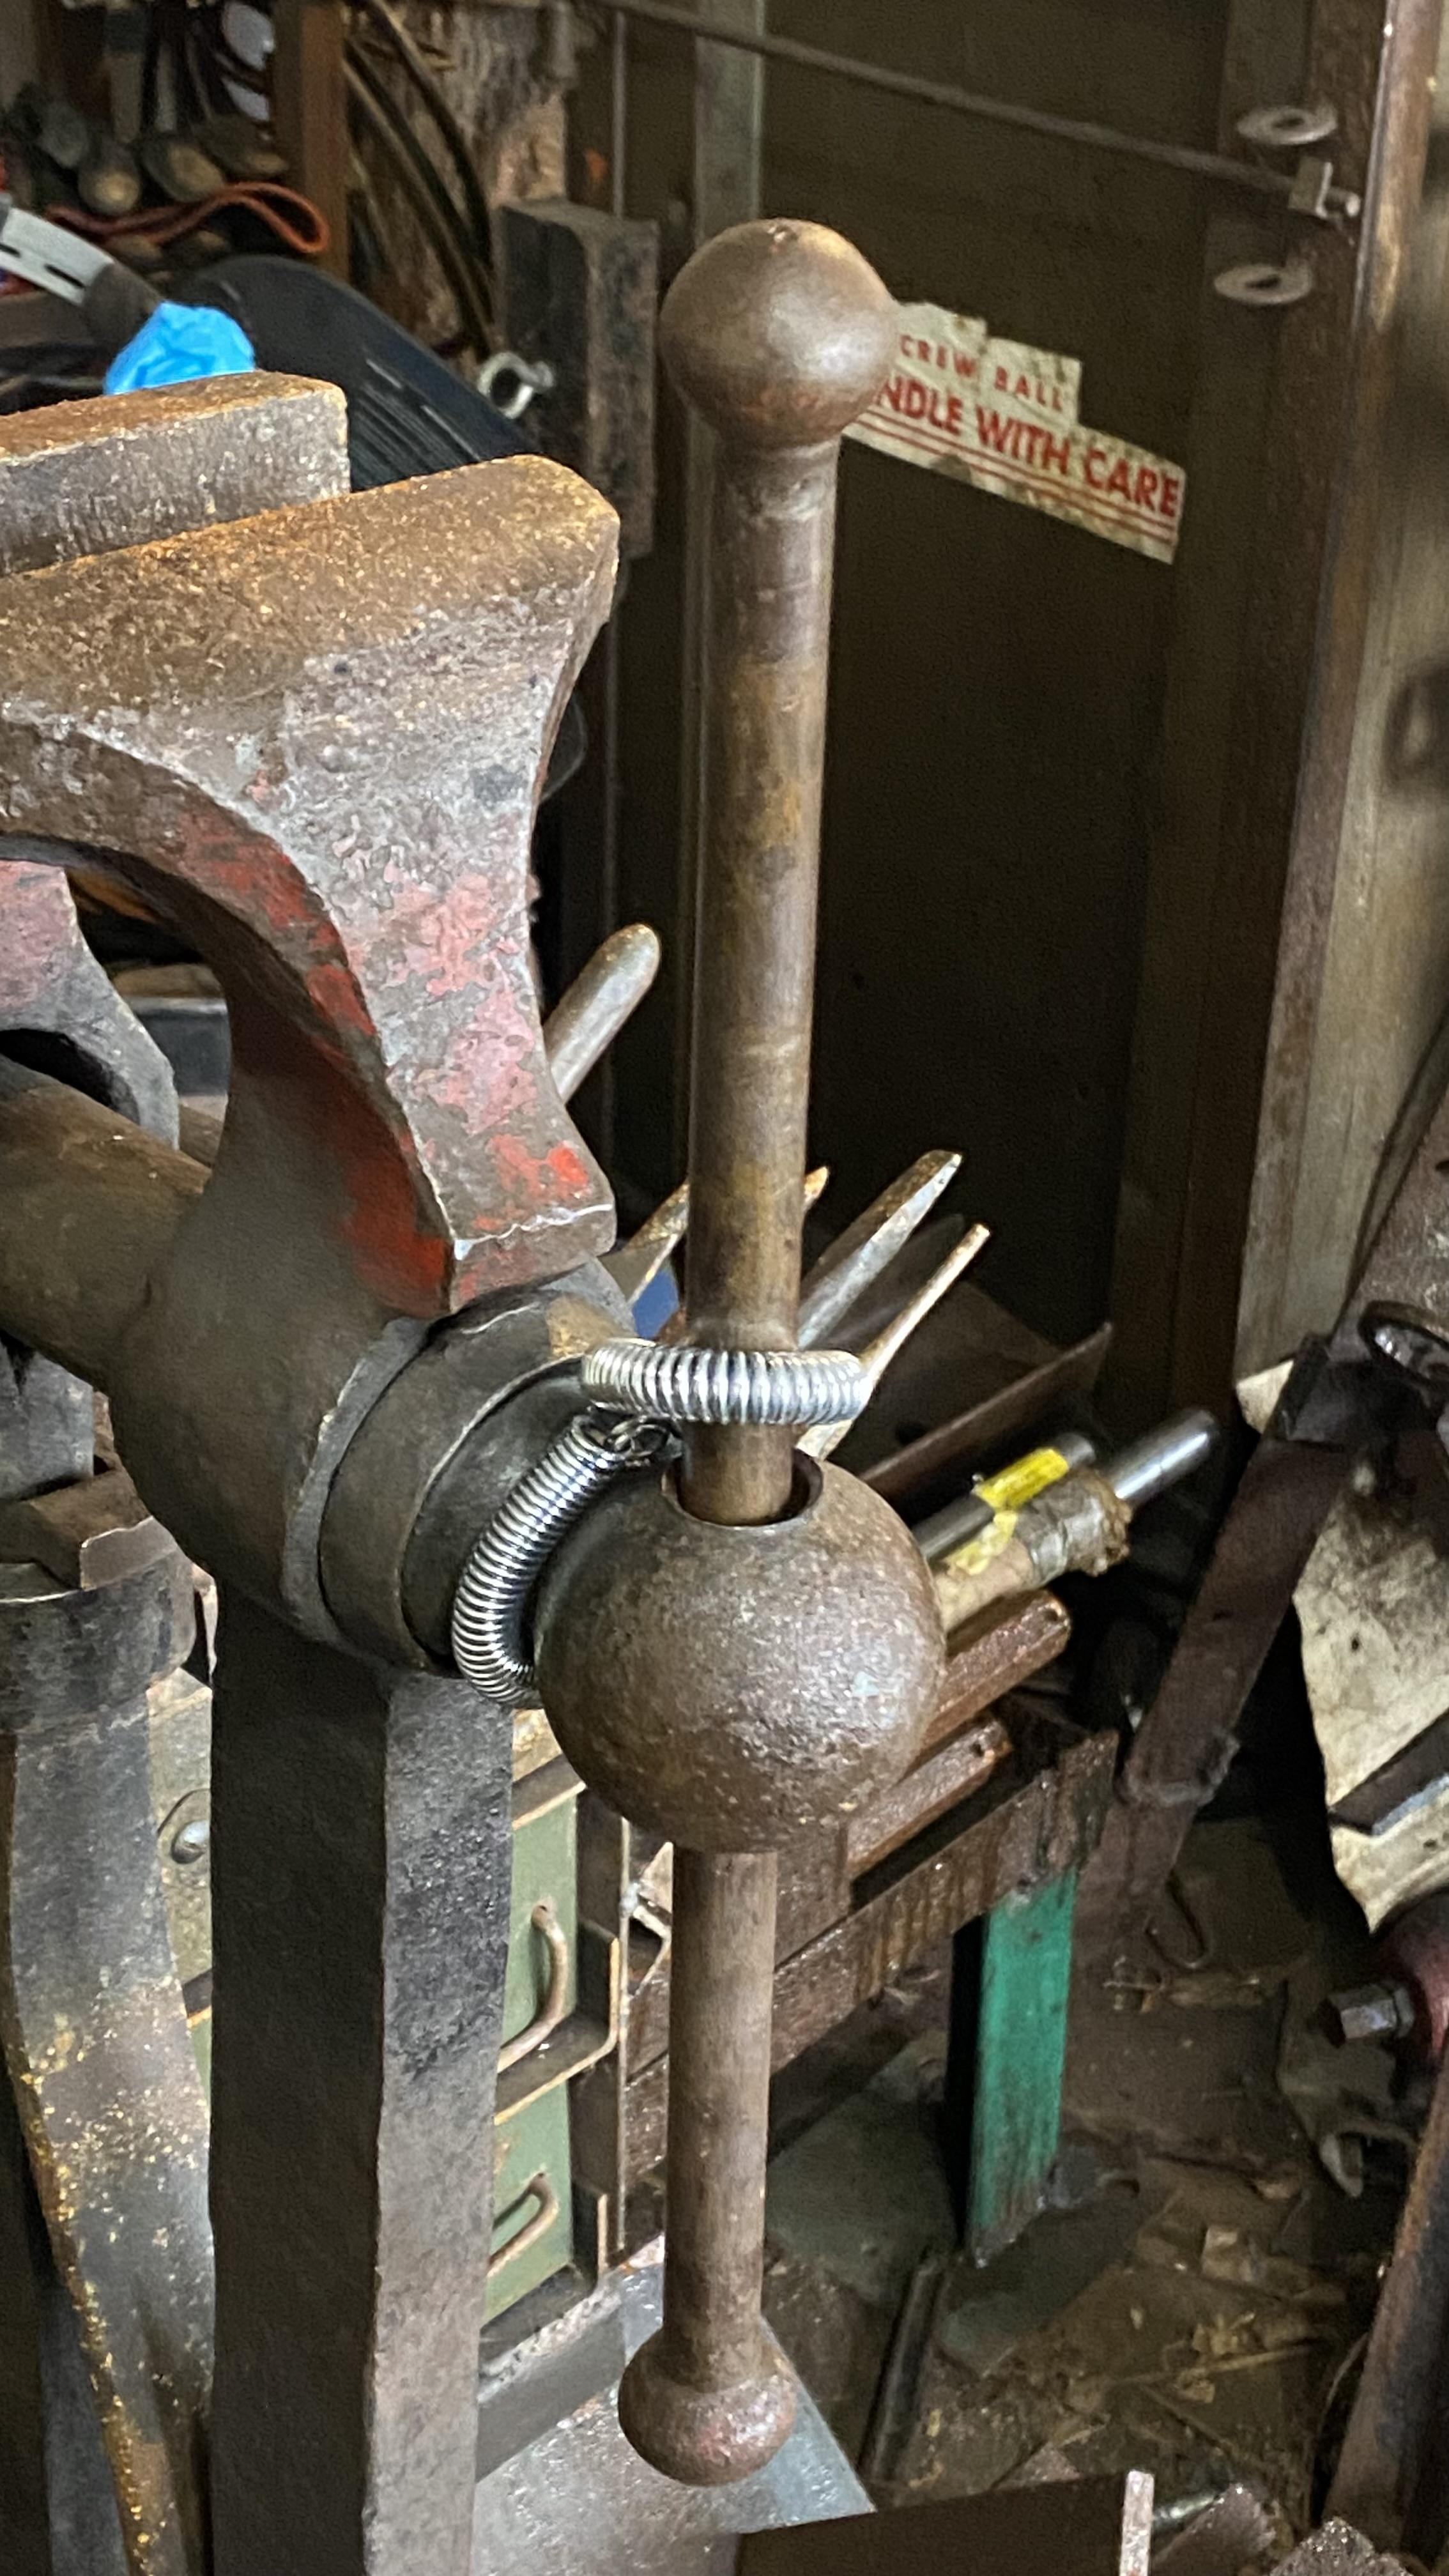
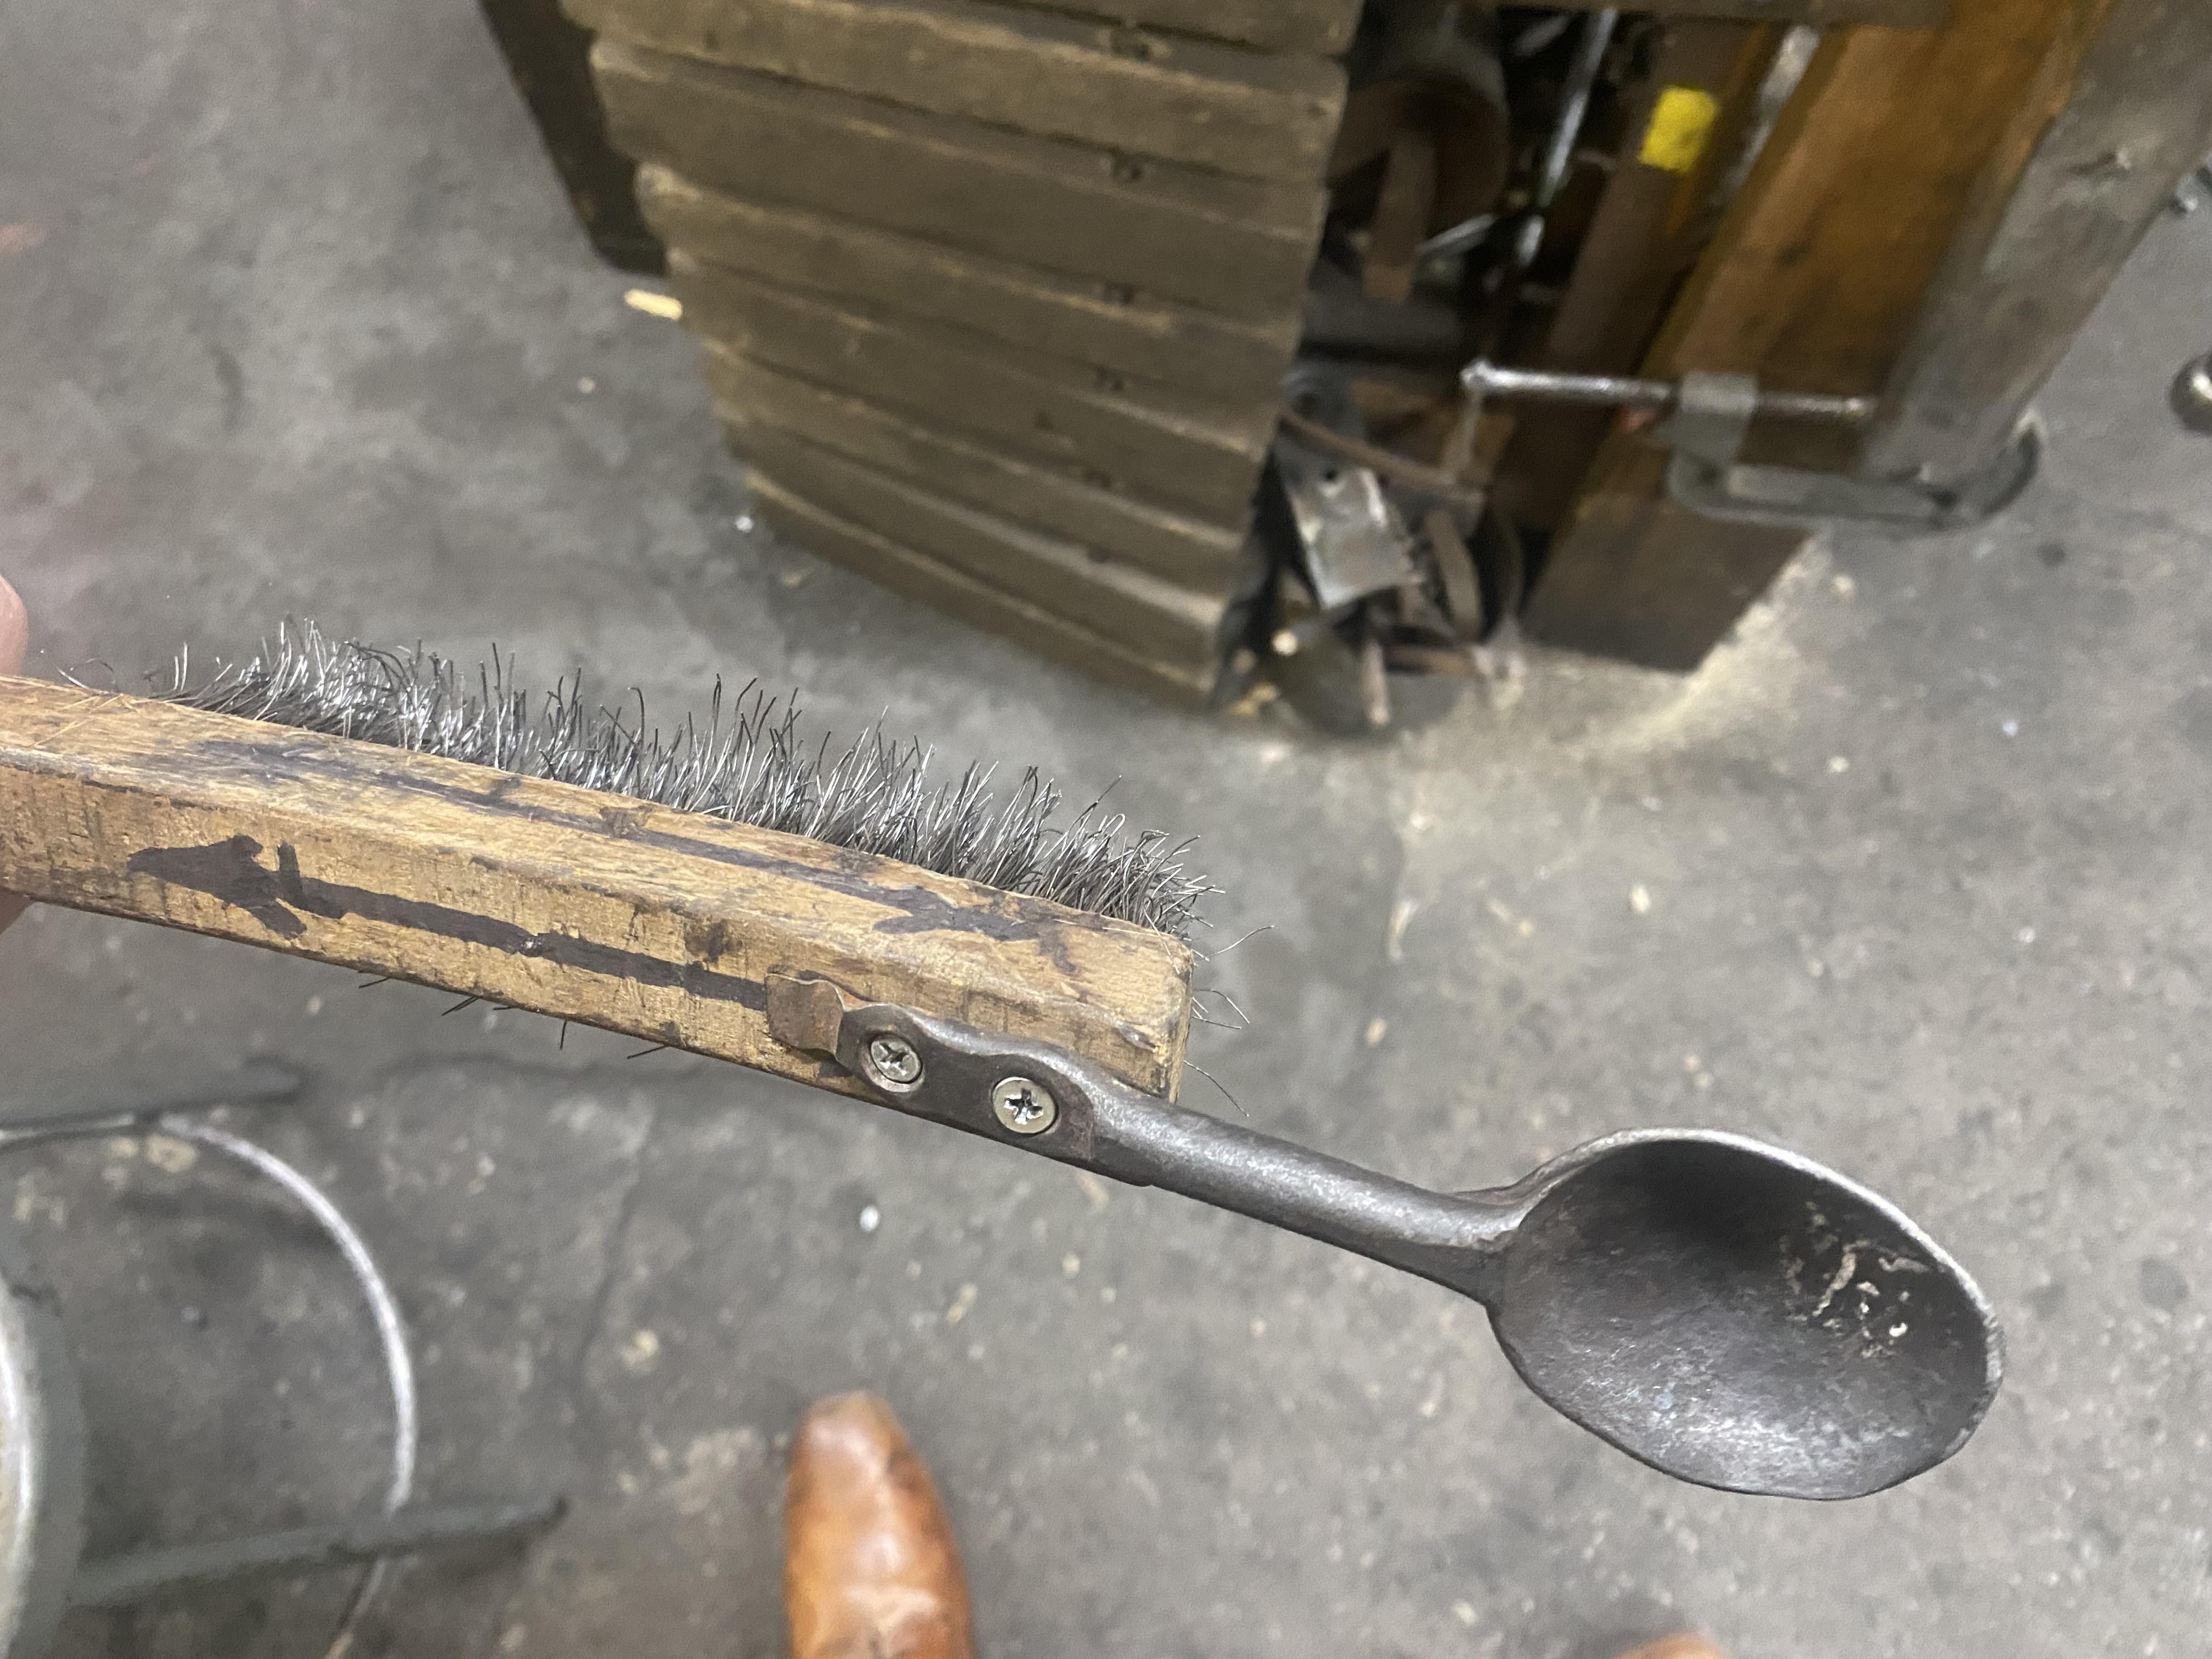
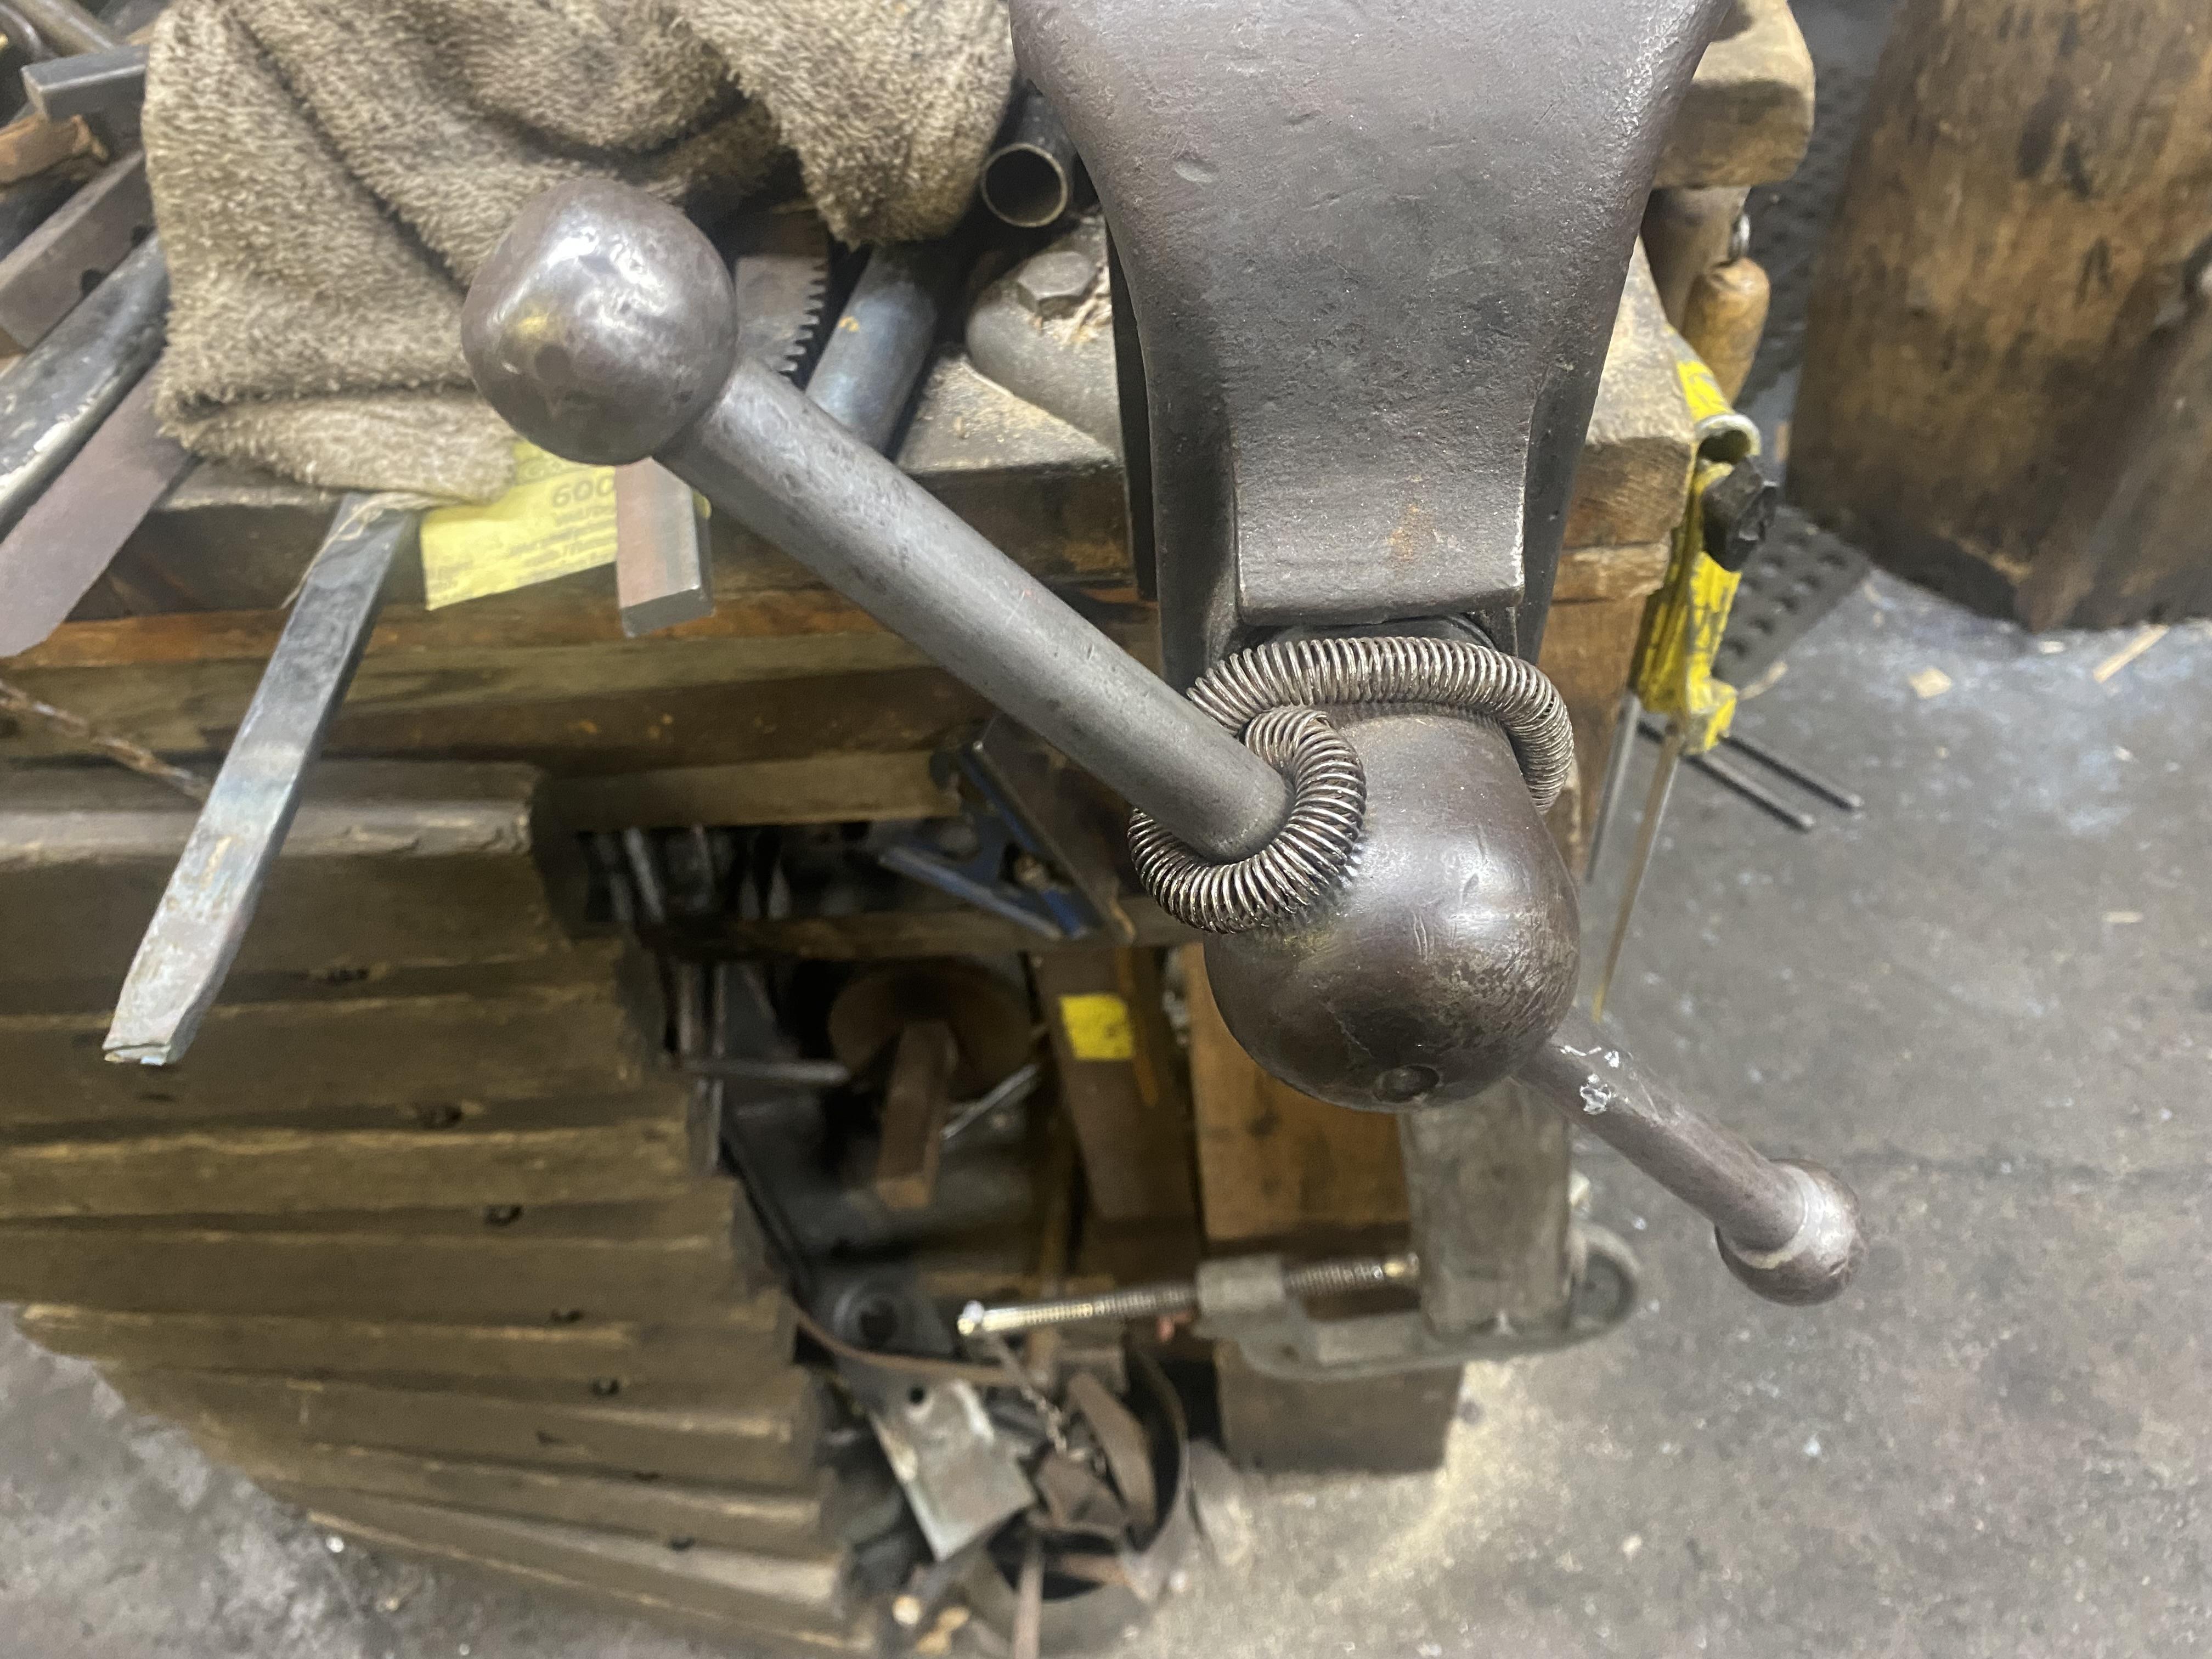
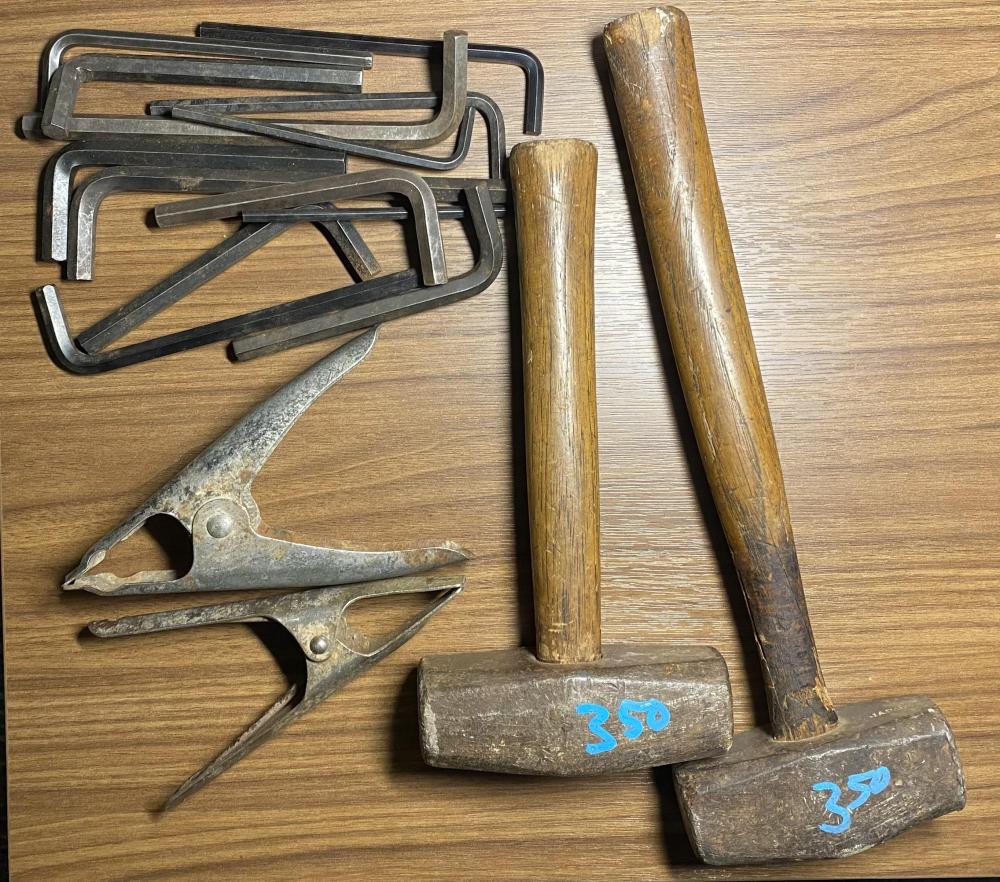
A couple of ideas from the Prospect Hill Forge blacksmithing school in Waltham, MA. A combination wire brush and flux spoon, for easier forge-weld prep: (Also in this photo is one of their flexible “mats”, for shorter students to stand on to put them at the proper height relative to the anvil. It’s made of thick boards drilled through and strung on thin steel cable. They have two or three in different thicknesses.) A figure-8 loop of thin coil spring, to keep your vise handle where you left it:


-

What did you do in the shop today?
JHCC replied to Mark Ling's topic in Blacksmithing, General Discussion
Yesterday, I met one of the owners of Prospect Hill Forge in Waltham, MA, and he invited me to come over to see the place this evening. I ended up observing a beginner’s class, which was quite as informative for pedagogical technique as for smithing. I also picked up a couple of ideas that I’ll be posting in the “Tips and Tricks” section. I liked their warning signage:
-
When I was a little kid in New Hampshire, the entire school district would knock off at noon on Fridays and go skiing. I never got good at it, but in retrospect, I wish I'd stuck with it a bit longer.
-
Discovered a great little used tool store in Waltham, MA, got all this for under $10, and met a blacksmith who invited me over to visit his forge tomorrow afternoon.
-
Because than as now, wares produced cheaply and in bulk were more profitable than high-quality products sold at a premium. We tend to assume that *everything* was made better then, because our perception is skewed by higher-quality goods being more likely to survive to the present.
-
According to this page from the University of Glasgow* libraries, it's from an 1850 collection of Valentine's Day cards: https://www.gla.ac.uk/myglasgow/library/files/special/exhibns/month/feb2002.html * Coincidentally, where my dad spent a year on a Fulbright Scholarship.
-
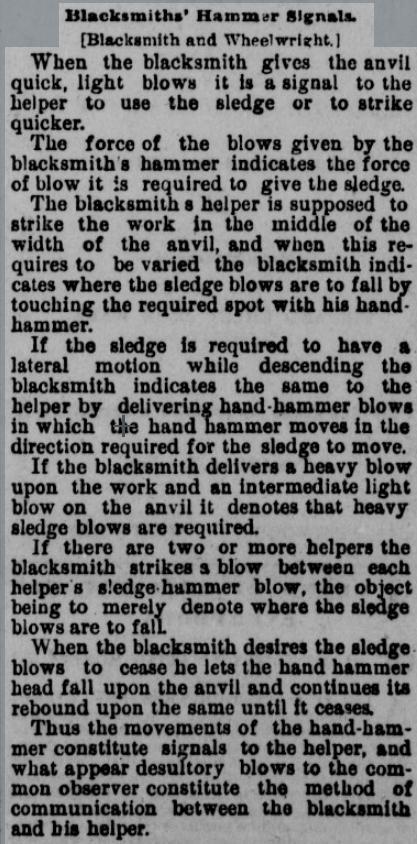
In those cases when I've had or been a striker for top-tool work (as well as when I've seen other smiths doing such work, either in person or on video), the cue has been verbal rather than visual. That is to say, the smith says something like "Hit" or "Go" rather than nodding, as the striker can keep their eye constantly on the tool rather than watching the smith. I know what you mean, but I'd rephrase that as "the little hammer models what the big hammer should do" or "the big hammer mimics what the little hammer does".
-
What did you do in the shop today?
JHCC replied to Mark Ling's topic in Blacksmithing, General Discussion
Two good catches: one safety, one hardware. -
Here's another view, without the highlights: I posted this on Facebook and tagged Aislinn Harris and Mark Sperry to ask what they do at CW. Here's Aislinn's reply: (My memory of the "striker needed" signal was off a bit, but close.)

-
This is an interesting code, and I can see how it would be useful in a shop where smith and striker are constantly working together and are both accustomed to this level of communication. On the few occasions I've worked with a striker, the only instruction I've used has been "Hit where I hit, hit harder when I hit harder and lighter when I hit lighter, and stop when I tap the anvil twice." When the Colonial Williamsburg blacksmiths demonstrated at Quad-State a few years back, they would signal to each other that they needed a striker by tapping the side of their anvil twice. They explained that in the shop at CW, there are no designated smith-and-striker teams, and whoever is free will respond to the signal.
-
The screech of cars colliding is one of my least favorite sounds. Glad no-one was hurt!
-
What did you do in the shop today?
JHCC replied to Mark Ling's topic in Blacksmithing, General Discussion
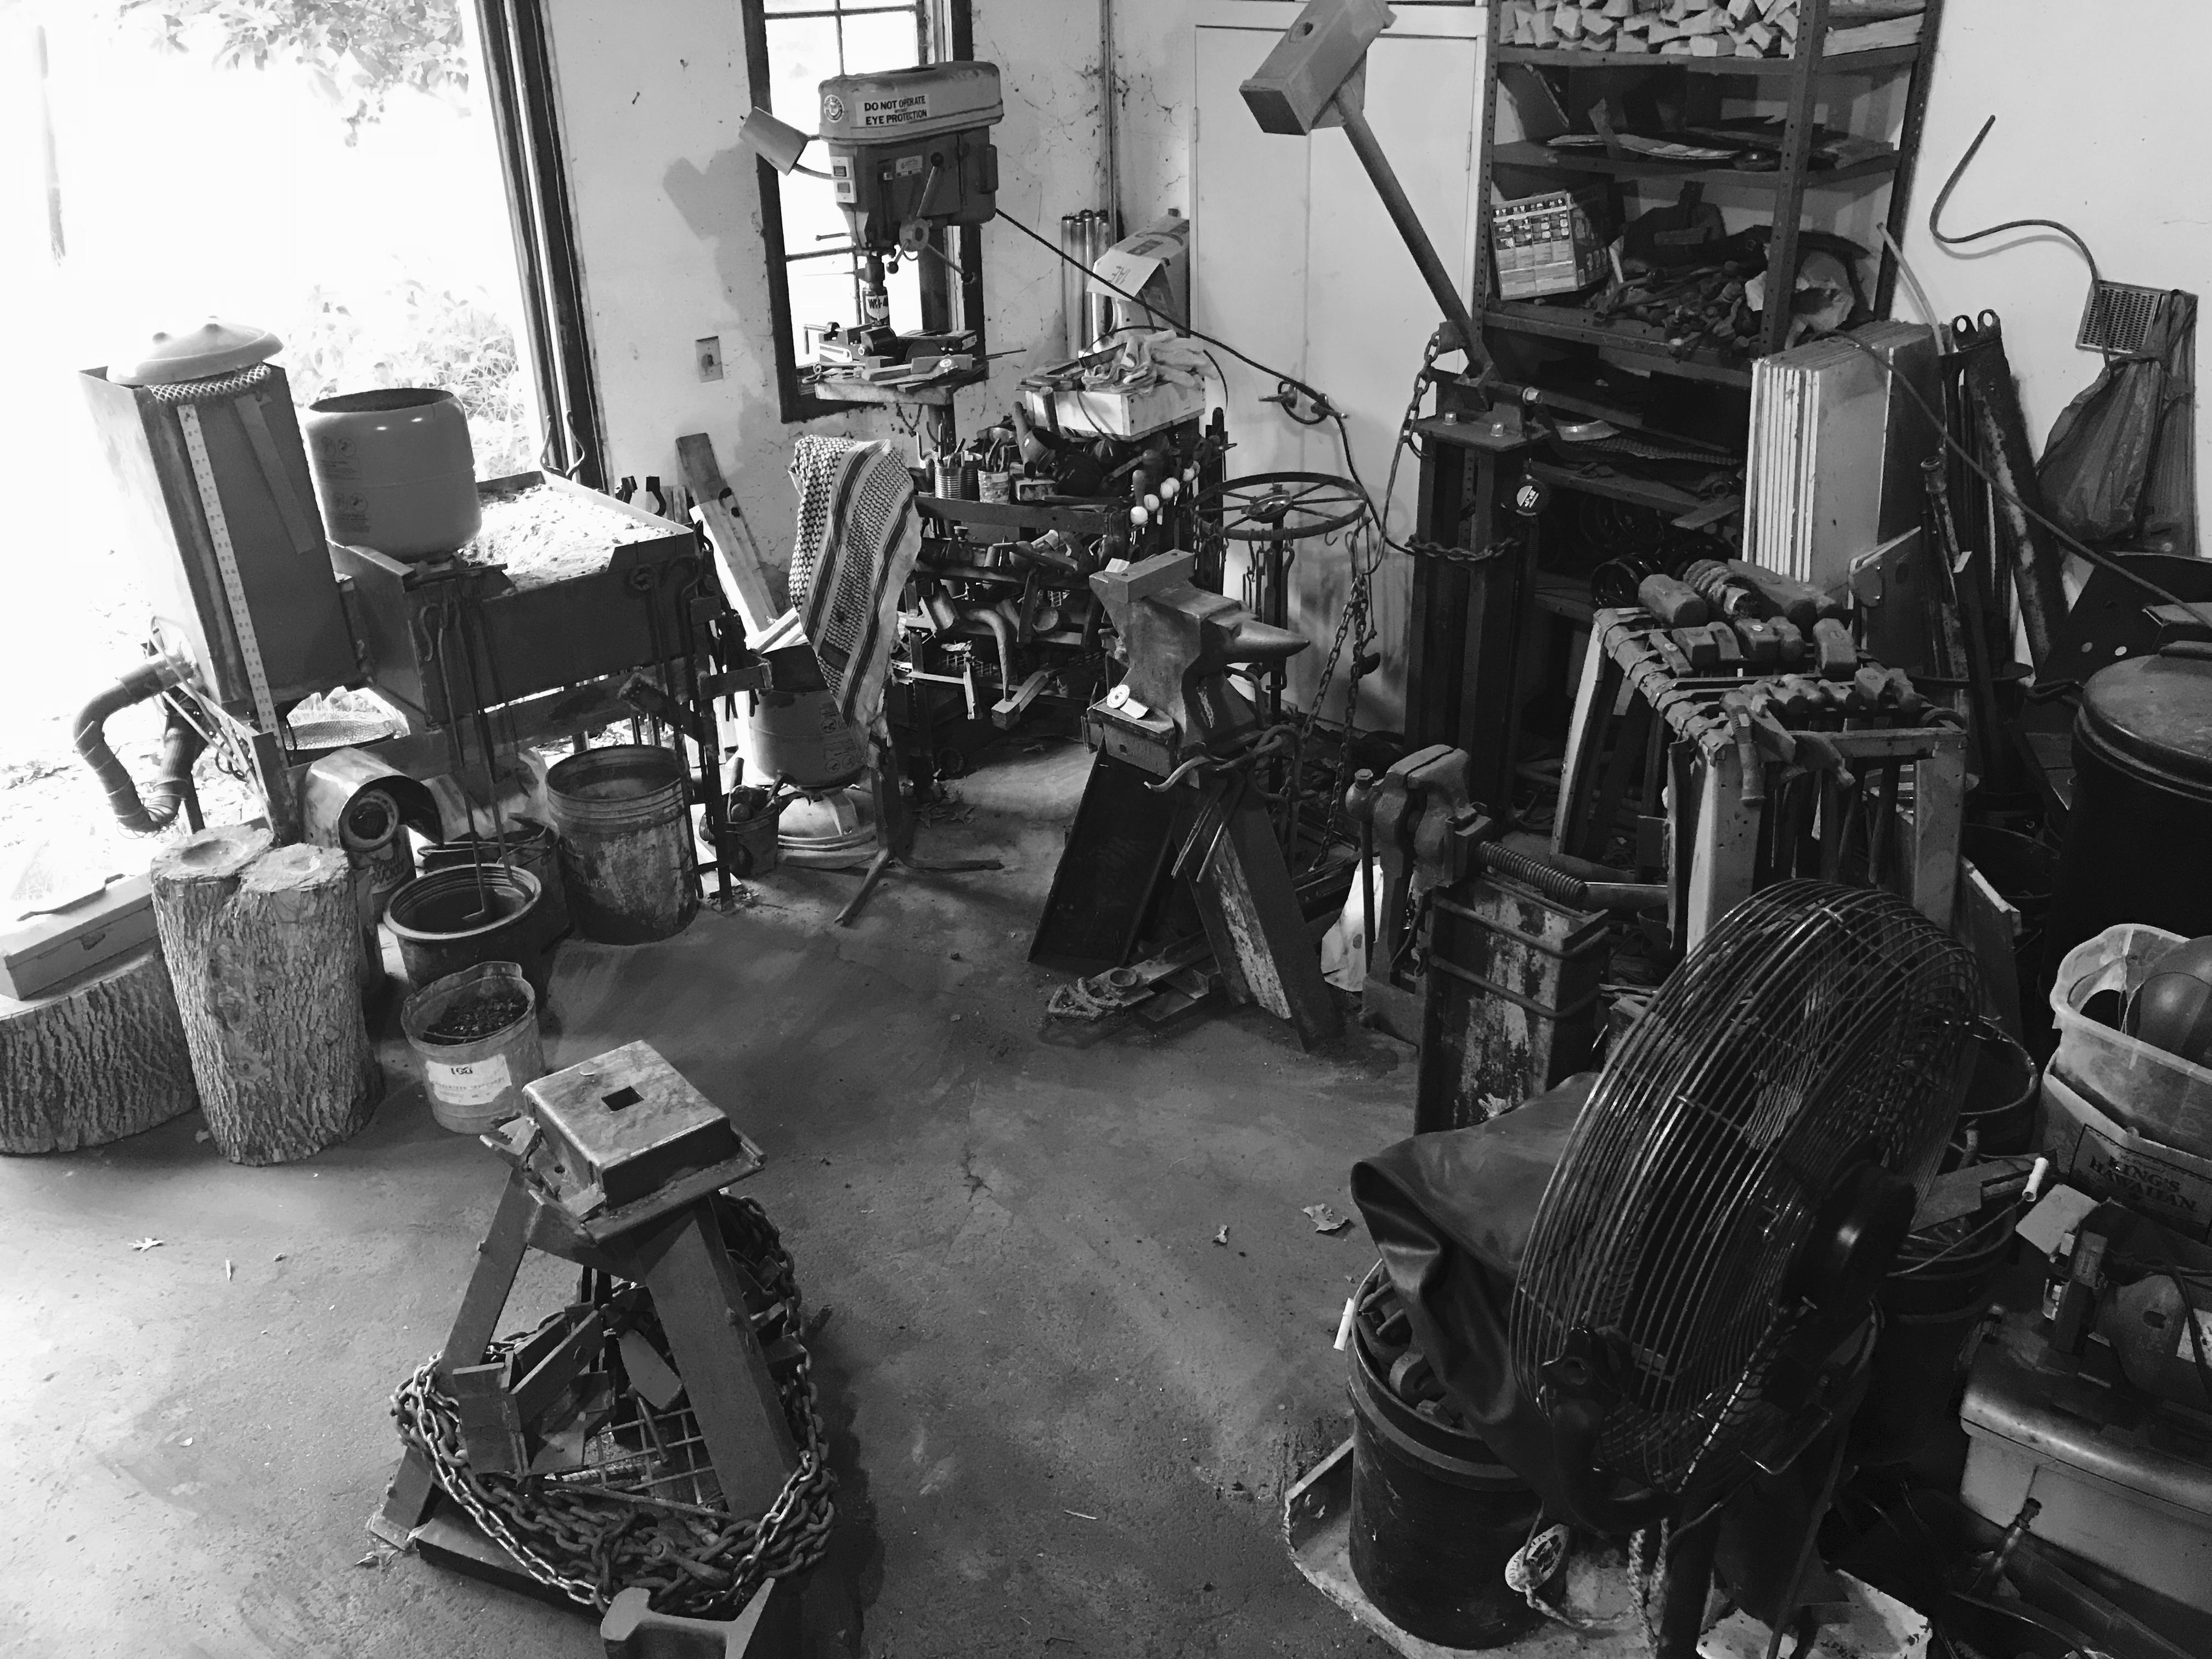
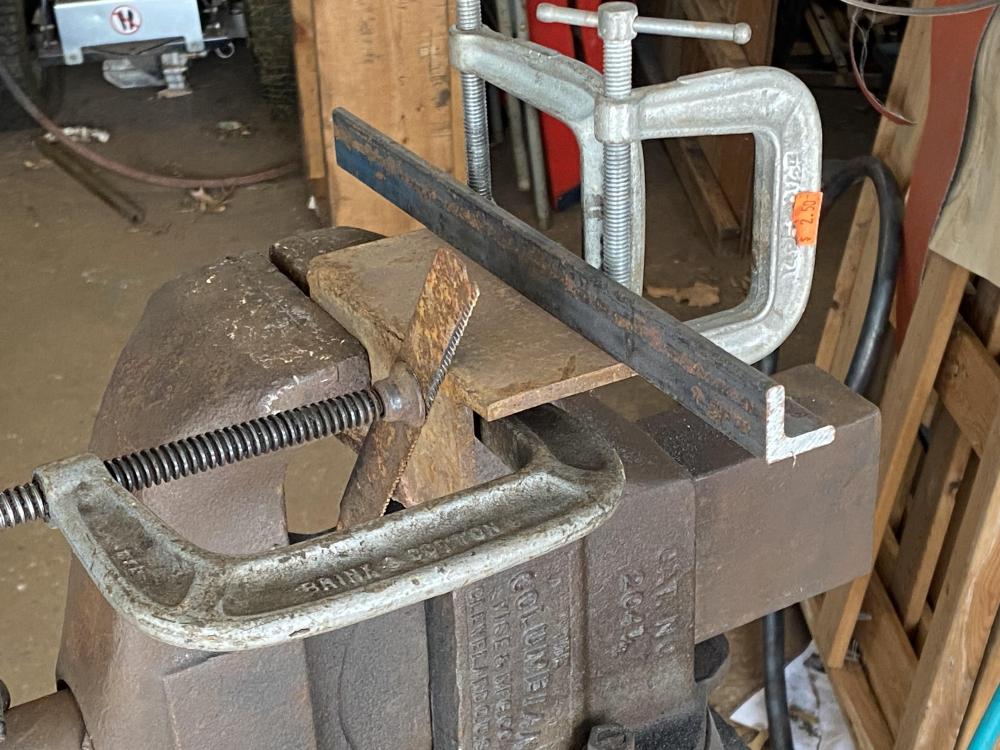
Progress on mounting brackets for the railing project. Also jury-rigged a sanding belt splitter out of two pieces of angle iron, three C-clamps, and an old sawzall blade: Which worked fine: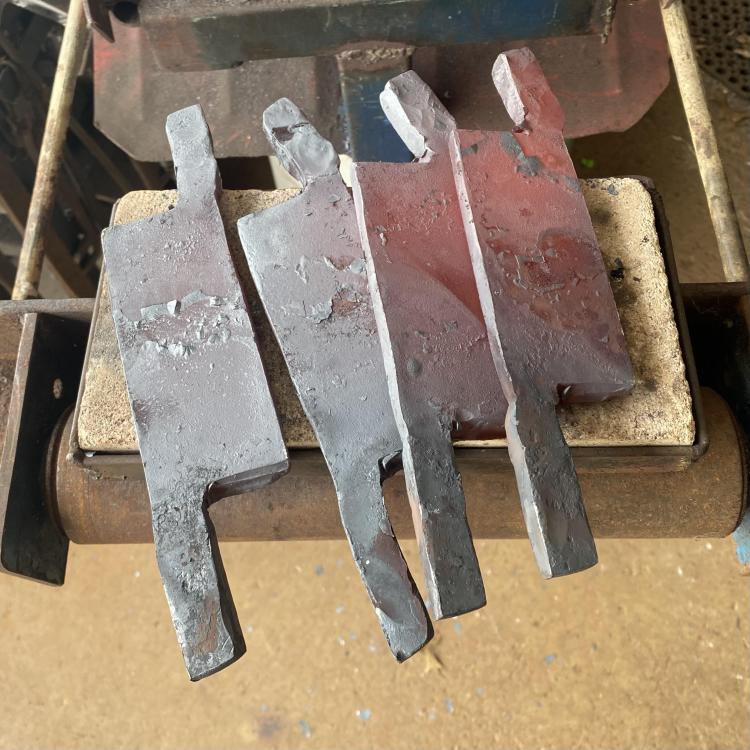

-
What did you do in the shop today?
JHCC replied to Mark Ling's topic in Blacksmithing, General Discussion
Nice looking cleaver, Goods!! -
What did you do in the shop today?
JHCC replied to Mark Ling's topic in Blacksmithing, General Discussion
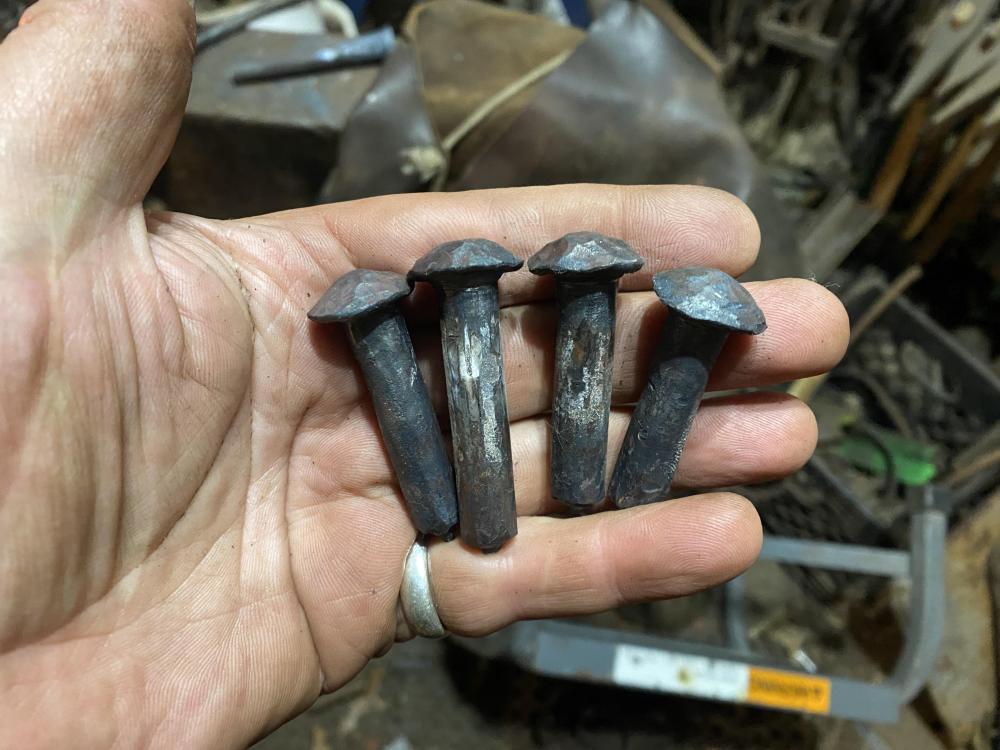
Working in my 14°F shop, I did some more work on the railing project: And made a few rivets: