Daswulf
-
Posts
9,763 -
Joined
-
Last visited
Content Type
Profiles
Forums
Articles
Gallery
Downloads
Events
Everything posted by Daswulf
-

Show me your Bottle Openers!
Daswulf replied to Arbalist's topic in Blacksmithing, General Discussion
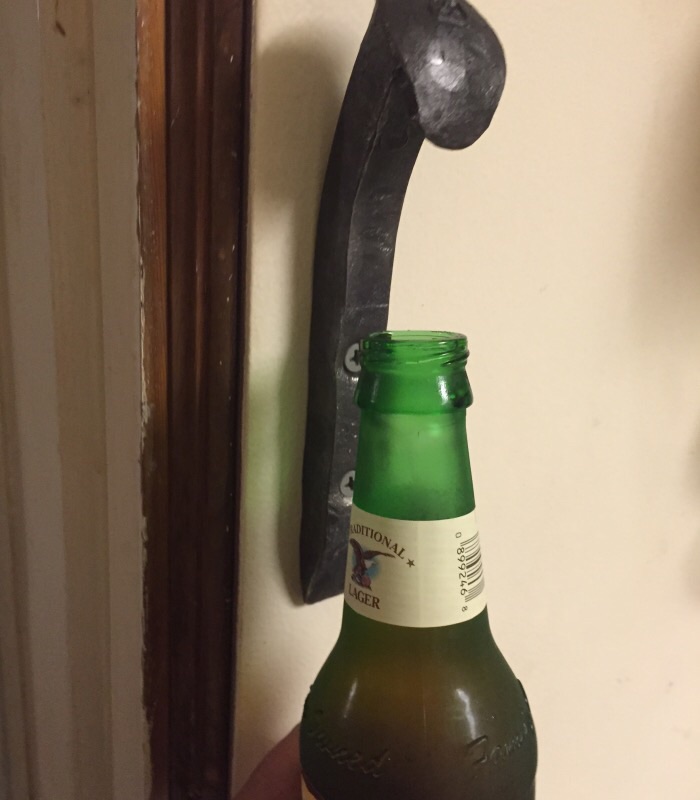
Arkie that was an interesting watch. all info helps at this point tho it is a bit of a different concept for what i'm doing. but Thanks again and it's more knowledge for me that i didnt know. i got the other two openers folded down a bit more and they are working perfectly. honestly it's just a matter of the shape of the front under part of the rr spike head. i'd like to squish it with minimal damage to the top face. Tho making a hammer like Gary did is now in my head to try to fit to the job. -
Show me your Bottle Openers!
Daswulf replied to Arbalist's topic in Blacksmithing, General Discussion
wasn't my idea to begin with but I liked it as well. Go for it. -
Show me your Bottle Openers!
Daswulf replied to Arbalist's topic in Blacksmithing, General Discussion
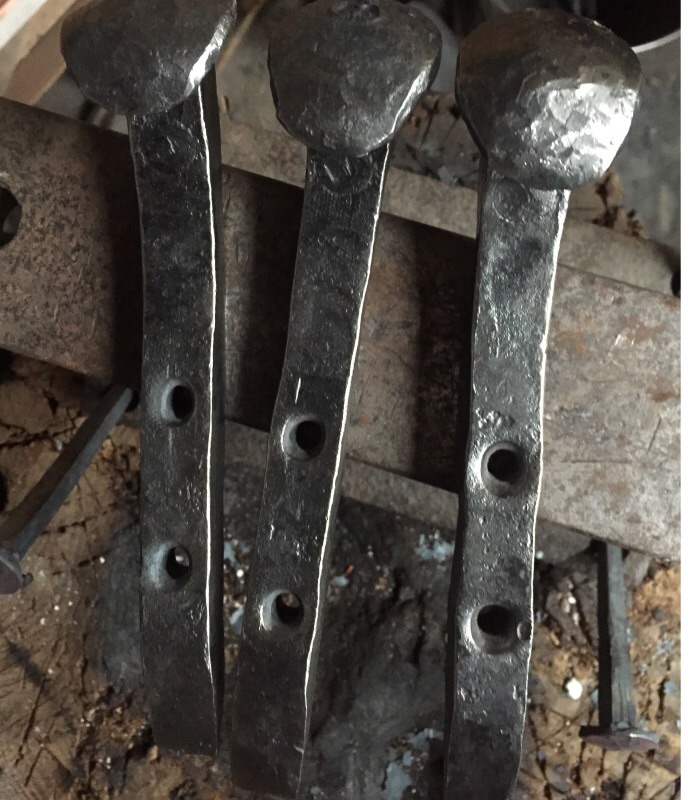
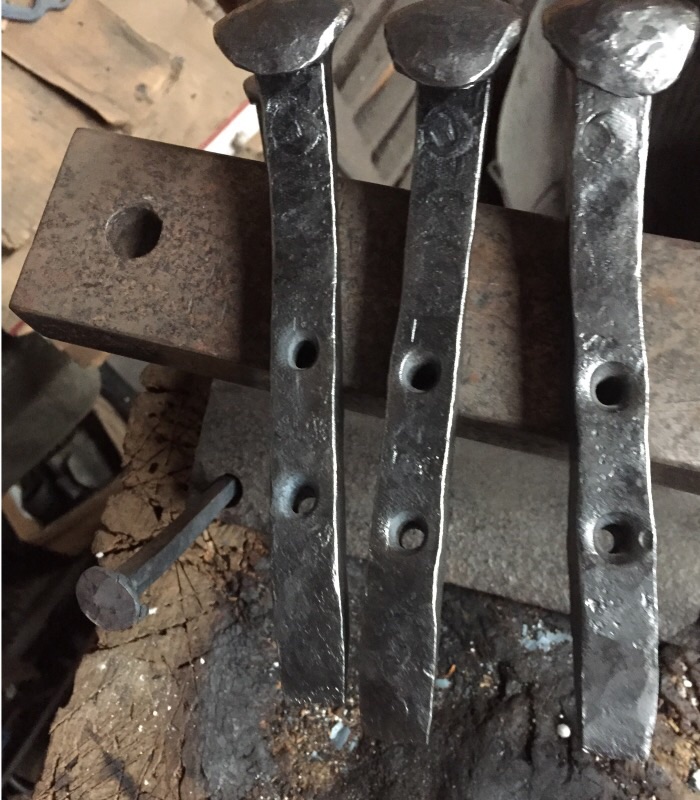
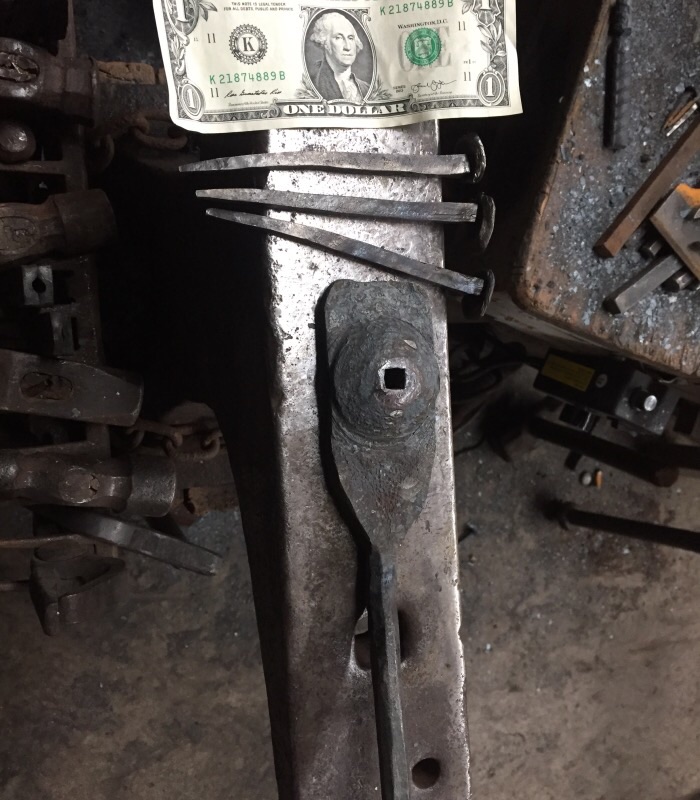
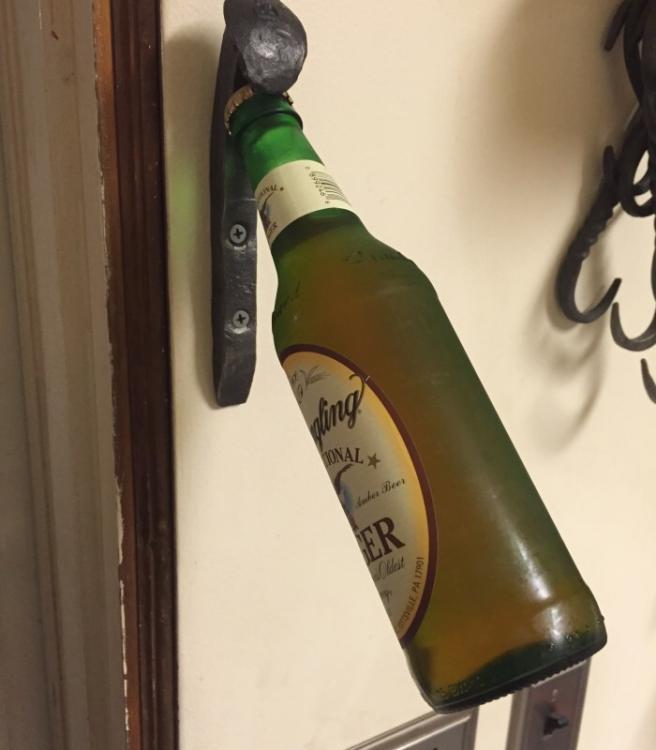
Thanks guys. I'm starting to get better at punching holes. And I read about counter sinking holes on here and had a "duh" moment. Frosty, I'm using a mix of beeswax, linseed oil, and turpentine. Applying it while it's about too hot to hold without a glove then wipe the excess off. Usually let things cool down to wire wheel them first then warm them back up on the dying fire when I'm done forging. You can mail your openers to me for proofing Jim, yeah, I have to thin the front lip and fold it around a bit for it to bite the cap. It's too thick to get away with not thinning it out. I'm still trying to find an easier way to do that more cleanly. So far I'm going between the post vice and that little rail anvil. -
Show me your Bottle Openers!
Daswulf replied to Arbalist's topic in Blacksmithing, General Discussion
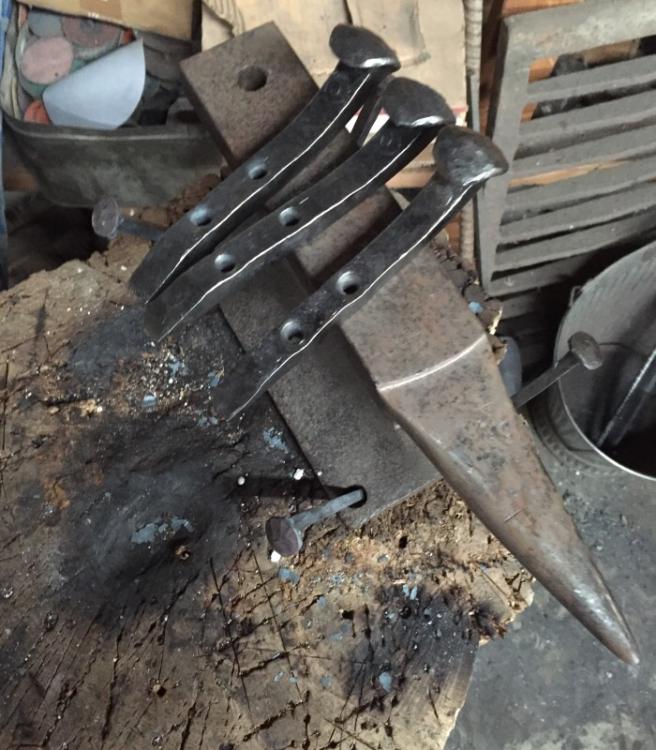
one works great. Other two need a light tweak to bite the lid a hair better but overall whoevers design it is it works. Had a happy customer today when he got it. -
Show me your Bottle Openers!
Daswulf replied to Arbalist's topic in Blacksmithing, General Discussion
ok so i saw this on google images and my friend liked it enough to want one so i tried to make 4 but made 3. not my design but i don't know who to credit so i'll just post it. cheers


-
Sounds like a good road trip for next year.
-
Need a little help here - newbie
Daswulf replied to Cyph's topic in Anvils, Swage Blocks, and Mandrels
there you go. and take a lil cash in your pocket. explain to them what you want to do, and what you are looking for and they may be nice and help you out. nice rectangular or square hunk of steel would be great but remember it dosnt have to be limited to that. -
I'm not really knowledgeable on these, but i dont Believe they were originally clay lined and i wouldnt know about color but i've seen some with the pot and blower black and the legs and gears red but thats just some i've seen. could have just been someones repaint. like i said i'm sure someone else on here could chime in with more info. here's a question, Do you plan to use it or just restore it? If your going to use it then make it how it would best work with the fuel your going to use in it.
-
Need a little help here - newbie
Daswulf replied to Cyph's topic in Anvils, Swage Blocks, and Mandrels
Your not limited to an "Anvil" to use as an anvil. there are many hunks of steel out there that would serve as an anvil. easiest most readily available case would be a sledge hammer head standing up. that could get you started until you found something better. think outside the box until you eventually find what you want. you can be learning valuable skills instead of Waiting to find that perfect "thing" to use. local scrap yard might let you look for some stuff and there are alot of potential anvils there. don't waste time that you could use to learn while searching for that "one thing" just get at it with what you can find for now and the rest will come to you in time. -
A lot to be said of Learning from others in person
Daswulf replied to Daswulf's topic in Blacksmithing, General Discussion
Darned forbidden... Thanks Ivan. -
Very sad i didnt make it to the other end of the state for this but Thank you guys so much for the pictures. its all outstanding and i'd loved to have seen it in person.
-
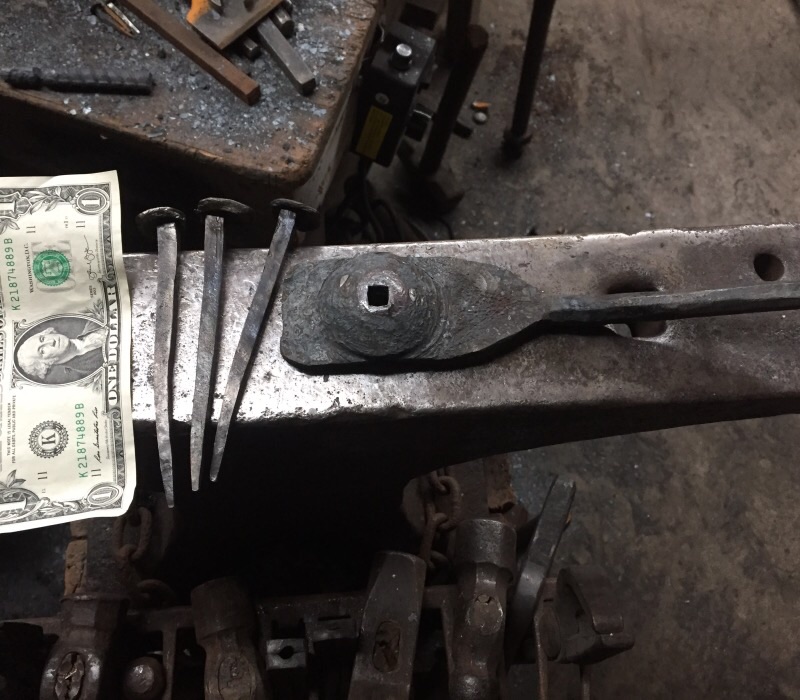
Crazy Ivan Came to my shop today to forge and teach me a bit. He's pretty good with tooling but after poking around and seeing a smaller post vice I had sitting there with a broken mount I asked him if we could make a new mount for it. His mind started working and in no time he dug up a piece of steel and had an idea. Well all I can say is that post vice is fully functional again and I learned a lot from the experience. He has more pictures and may be doing a post on it but here is the picture of the mount beside the broken nub. We worked it a tad more after the picture. But it's fully functional again. There is something to be said of learning from someone first hand. It's Thank you. I'll be glad to have him back anytime and will try to help in what ways I can.

-
Nail header failures, but I'm not quitting.
Daswulf replied to Daswulf's topic in Tools, general discussion
I did break 2 of em. Think they were the ones I quenched quickly to get em out of the header. other ones came out of the grader nicely. Thanks Frosty. They are some spikes. I have some free time this weekend finally so I'll get back at it. -
If you can post some pictures of it I'm sure these guys would be able to help you out way better.
-
what are you welding with? if they work then they work but man.. those welds...... Snakes shape looks fine tho but as Frosty said make the head more like a head and the tail like a tail and it'll look better. envision the creature your implying. but better then i have thought of one thing I see that i'd say to improve for holding rings is to round the part that holds the ring and not have it squared where steel could cut into gold. keep up the good work.
-
Nail header failures, but I'm not quitting.
Daswulf replied to Daswulf's topic in Tools, general discussion
those nails were rebar -
great work in my opinion on both ends
-
Nail header failures, but I'm not quitting.
Daswulf replied to Daswulf's topic in Tools, general discussion
they reminded me of spikes Frosty thanks. yeah Glenn, i shoulda straightened em when they were hot, or i bent em taking em out of the post. thought i had em straight didnt wanna tap em around cold. and i'll have to agree that hand forged nails probably hold Way better -
Scrapartoz Thanks so much for the advice.
-
Nail header failures, but I'm not quitting.
Daswulf replied to Daswulf's topic in Tools, general discussion
Haha. Never heard of that but sounds like it could do that. I drove em around an inch if that into a dry lucust stump then couldn't get em out. Had to heat em up to get em to finally pop out. Those suckers would hold well. -
If your willing to part with around $65. The one I use works perfect for my coal brake rotor forge it's the dayton blower 1tdn6. I looked up my part# and it changed to this one ^. As you seemed to be looking for a quiet one before it is super quiet and I run it off a variable speed switch I picked up at harbor freight. With the switch I rarely over 3/4 so its powerful enough. I have no need to run it on full. Plus side is mine fits right in the screw flange on my 2" pipe so I don't even have to attach it with anything, it just fits right in there. Simple. :)
-
Show me your Bottle Openers!
Daswulf replied to Arbalist's topic in Blacksmithing, General Discussion
the image was missing here but I googled it and found a picture of it. That's pretty cool. -
Show me your Bottle Openers!
Daswulf replied to Arbalist's topic in Blacksmithing, General Discussion
nope, these were old rusty bare steel wrenches. -
Nail header failures, but I'm not quitting.
Daswulf replied to Daswulf's topic in Tools, general discussion
ok so not trying, cause i was working on other stuff, i worked on my premade nail header to make large nails out of rebar. they didnt wiork out perfect but as i said this was in between stuff. I plan on making a real nail header and better nails, this was just for an idea and to make my other header useful. i'm not gettin g it right yet but im betting it's MY technique. we will see when i make a normal nail header and nails. i actually tapped these into my rr anvil into my stump a lil bit and they didnt want to come out till i heated em. they would work for that. could be better and i'll keep going till i make em right in any size. dont worry I didn't forget all the info you guys mentioned. I'll work on it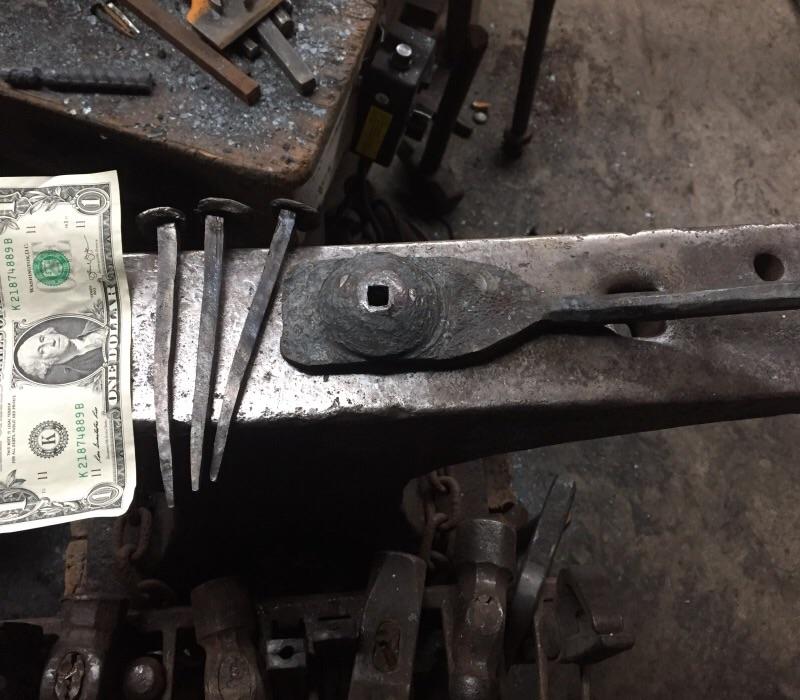
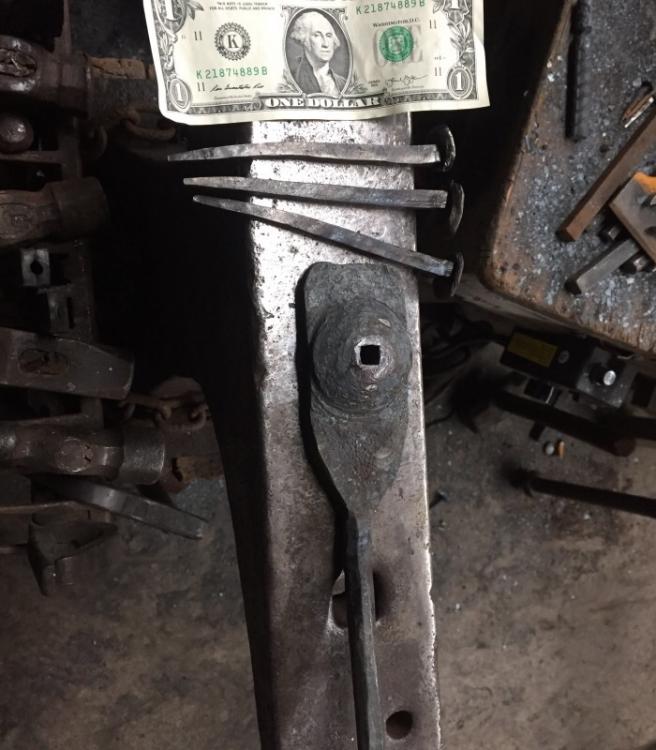
-
How do you start these? do you start with a goal or with a piece that gives you an idea? i see things that give me ideas but never have the other pieces to do what i envision.. absolutely amazing work by the way!