
brianbrazealblacksmith
-
Posts
1,683 -
Joined
-
Last visited
Content Type
Profiles
Forums
Articles
Gallery
Downloads
Events
Everything posted by brianbrazealblacksmith
-

Anvil Stand Help
brianbrazealblacksmith replied to Avadon's topic in Anvils, Swage Blocks, and Mandrels
Notice power hammer anvils and how they are backed by the angle of their foot and don't forget that they should be mounted to the Earth as solidly as possible. There is no difference from the way you should mount your anvil and the way you mount a power hammers' anvil. If your anvil moves when you strike it you are losing power just like you lose power if your power hammer is moving when you strike with it. MOUNT IT TO THE EARTH SO THAT IF ANYTHING MOVES AT ALL IT SHOULD BE THE WHOLE EARTH WHEN YOU STRIKE OR AS CLOSE TO THAT AS POSSIBLE. Tie your anvil into the Earth! You wouldn't leave a power hammer just setting there and expect to get much work out of it. -
Blacksmith Schools
brianbrazealblacksmith replied to Jeff Bly's topic in Blacksmithing, General Discussion
Good for you. When you get there tell him I, Brian, said to show you how to do a one heat tong blank. You'll be amazed, and if you pay attention and try what you see him do then try it yourself at least 10 times, you'll be able to do it yourself. The trick is to do what he does, nothing more nothing less, and you'll be able to do it in a heat yourself. And tell Bob the Brazeal brothers say Hi! -
Blacksmith Schools
brianbrazealblacksmith replied to Jeff Bly's topic in Blacksmithing, General Discussion
Yes there is. Being able to put yourself in a classroom situation and try some different approaches that you do not atempt in your day to day forging can open up many more possibilities. I was fortunate to be able to attend classes at Tom Clark's Ozark School of Blacksmithing and Alfred Habermann's courses at Helfstien Castle in the Chech Republic where I was exposed to many different techniques than I had been on my own. I had the opportunity to work with Tsur Sedan who taught Hofi's approach, Bob Patrick who I consider one of the best blacksmiths I have ever seen, Bill Bastas a smith with one of the best understandings of the principles of blacksmithing with a great way of comunicating it, and Tom himself one of the most driven men I have ever known. Then there was Alfred. who I spent 1 1/2 years with, who was the most giving and sharing man I have ever known, his way was to have you make what ever you needed before you could start whatever task you had at hand. Alfred and Tom are gone now, but Tsur, Bob, and Bill are still out there along with other smiths that I have never had much contact with like Rob Gunther and his sons, so if you can get around these guys where ever you can along with others I don't even know. you'll be better off for it. -
Another forge welded bundle
brianbrazealblacksmith replied to brianbrazealblacksmith's topic in Metal Sculpture & Carvings
You are very welcome, Nelson. I'm sure you'll like using a forge better than a torch, just be careful not to burn your steal. The torch experience you have should help you with that. Forging is very basic, not just to me. Every time you touch a piece of hot metal with a hammer and anvil it does what it does, nothing more nothing less. It does what you do to it. You're in control. The thought behind it all is the difficult part. You need to know where you're going and make it happen. You're in control. You just put your material under the dies, and it practically makes itself. I have had more success getting this across to people who have never done this type of work. I could give specific examples of first time forging experiences other than my son's, but I am very slow at typing. I have done more "banging away" than anyone I know.[what I mean by "banging away" is forging without knowing exactly what will happen and accepting what comes instead of choosing what will happen], and I wish I had more basic information to start with. That is why I am trying to share this information; I expect others to go alot further with forging than I'll ever go with my tme left to forge. -
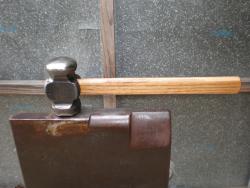
making your own hardie tools
brianbrazealblacksmith replied to bourne101's topic in Tools, general discussion
I went out after lunch and made a couple of hardies and took pictures of the scroll starter. The last picture is of my hardies I keep in my anvil stand. -
Another forge welded bundle
brianbrazealblacksmith replied to brianbrazealblacksmith's topic in Metal Sculpture & Carvings
I put candle cups on this morning and took pictures of the steps and tooling. -
Forging chrome moly steel
brianbrazealblacksmith replied to CRAFTBENDER's topic in Blacksmithing, General Discussion
From my experience chrome-moly welds very easily. I've made frog gigs with 5160 and made barbs by folding 1/8" onto itself and weld with no problems. Files also forge weld easily. -
I agree with Jimbob. You want control of your air flow, all the way on and all the way off and every thing in between no matter what your air source is.
-
Nice turtle, it looks like a baby snapping turtle. I'd like to see it done. I can see it's done efficiently; it's so clean.
-
I got started my first day of horseshoeing school making shoes back in 1982. I've been forging ever since.
-
Horseshoe art
brianbrazealblacksmith replied to easilyconfused's topic in Blacksmithing, General Discussion
Here are somethings I've made from horseshoes that I have pictures of, but there are countless things you can do with a shoe. -
Now that's a nice frog!
-
Another forge welded bundle
brianbrazealblacksmith replied to brianbrazealblacksmith's topic in Metal Sculpture & Carvings
Here's another suggestion of the forge welded bundle. It could be a table or a candlelabra. This is 5 pieces on each end in the bundle. 4 rectangular pieces surrounding 1 square piece. -
I also agree. It's the same when you're heading a nail or rivet. Great pictures Mark, as always.
-
Another forge welded bundle
brianbrazealblacksmith replied to brianbrazealblacksmith's topic in Metal Sculpture & Carvings
Here's a vase you can put a candle in it. It's made the same way except I flare the square tubing first then put the pieces in and forge weld. The stem and base are forged from the mass on the end. -
Another forge welded bundle
brianbrazealblacksmith replied to brianbrazealblacksmith's topic in Metal Sculpture & Carvings
I used the same rivet set punch that I used for the spikes and the flower on the S-hook on the chandelier. -
Another forge welded bundle
brianbrazealblacksmith replied to brianbrazealblacksmith's topic in Metal Sculpture & Carvings
Here's the squid. I descaled it and wire brushed it, so it's just bare metal. -
Scroll development question
brianbrazealblacksmith replied to HWooldridge's topic in Blacksmithing, General Discussion
The reason the dress makers tape doesn't work is because it is not the same thickness as your material. You'd have to make a scroll out of 1/4" material and measure the outside of that if you are making them out of 1/2" stock. You have to measure from the center of your material. One thing about scolling though is they are easy to tweak and make fit into the box. -
Another forge welded bundle
brianbrazealblacksmith replied to brianbrazealblacksmith's topic in Metal Sculpture & Carvings
Thank you, I have another example of this technique in Sculpture, Yard Art, etc. -
Another forge welded bundle
brianbrazealblacksmith replied to brianbrazealblacksmith's topic in Metal Sculpture & Carvings
It's the same pieces in all the pictures. I only have a forge, no torches. I'll make another when someone wants one. I'll leave it as is so others can see what not to do. It only takes about an hour if you're not taking pictures. I'm making a squid right now with the same technique. They're just examples for an upcoming class. -
Here's another example of a forge welded bundle. It's supposed to be a hummingbird. I haven't made one in quite a while, and I messed up on the wing arrangement, another reject. Here are the steps:
-
Nice job! That's one of the better ones I've see out there.
-
I think you are referring to the spike head itself. I used a rivet set punch that was undersized for the spike head, so it created a ring around it that may look lke a collar to you, but it is not a collar. If you'll notice the flower on the S hook that the chandelier hangs from you'll see the same rivet set employed without the ring because there is no head to set.
-
Alwin, Yes, I saw Hofi's approach after I got with Tom Clark in 2004, but they were doing it on a long tapered spike in the vice for a candle holder. It didn't afford as much backing and it was very limited. This approach is so much more versitile.
-
Alwin, I was wondering when someone was going to ask this question. You're sharp; I've been reading alot of your posts. I figured this one out the first time I did a spike on a candle cup. It is the most efficient way I've seen anywhere. Notice the spike is square. I set [monkey] the peices down then take a tool with a hole drilled in it of the appropriate size that shears the four corners down and rivets the pieces together. This can be done cold if you don't quench your spikes after you make them.