
brianbrazealblacksmith
-
Posts
1,683 -
Joined
-
Last visited
Content Type
Profiles
Forums
Articles
Gallery
Downloads
Events
Everything posted by brianbrazealblacksmith
-

Railroad track
brianbrazealblacksmith replied to Chris P's topic in Blacksmithing, General Discussion
Here are some examples of RR rail anvils. I don't know who made them, but they are some of the best examples I've seen. You can also bury the whole length vertically in the ground and use the cross section as an anvil or stand. -
Railroad track
brianbrazealblacksmith replied to Chris P's topic in Blacksmithing, General Discussion
Yes, it is too much to try and forge, but it can make some nice anvils. -
Slitter Geometry
brianbrazealblacksmith replied to archiphile's topic in Slitters, Punches, Drifts, etc
Here are pics of some fire tools I finished yesterday that show some slitting and drifting. -
I Forge Iron Auction
brianbrazealblacksmith replied to brianbrazealblacksmith's topic in Blacksmithing, General Discussion
Good point... here is the link-Karen Brian Brazeal Hand Forged Hammer - Blacksmithing Classifieds -
Nelson, I really like you table! I usually don't care too much for tubing and wrapping, but the way you applied it and made it look like it would be joined with the natural material caught my attention. I'll bet you could have joined that with just the wrap. Good job!
-
Karen again, (Brian's girl and partner), In an effort to help this site raise funds I e-mailed the blacksmiths, farriers and metal working teachers in our contact list. I included the Aussie Brush Fire Memorial thread link. I was surprised to find there were more than 125 on my list of contacts. I encouraged each of them to send our e-mail to their contacts in an effort to promote blacksmithing and to donate leaves for the memorial. I have already recieved a great response but realized the most important responses were from the teachers at high schools and community colleges stating they shared the info with their stundents. Blacksmithing was almost a lost craft because blacksmiths kept their secrets like magicians. We know now it is important to share this rediscovered knowledge with others and that is is not magic, and what better place than our schools. So I am asking all of you to send the IForgeIron link to the schools in your area in an effort to pass it on. Karen Malone This is what I sent to the schools, notice that I copied one of the threads. -Karen
-
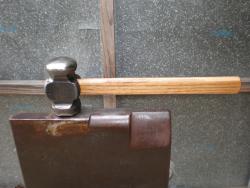
Hey all, this is Karen, (Brian's girl and partner). I wanted to make everyone aware that there is an auction to raise funds for this site. I found this site late last year and signed Brian up before he even knew how to turn the computer on and now look at what he can do. What a great site for all of you who have a passion for this craft! What a great site for all of us who know too much about blacksmithing without ever picking up a hammer. So please help this site and vist the auction. Thank you Glen and Andrew for my new found free time. Karen We made this hammer in remembrance of Professor Alfred Habermann especially for the I Forge Iron fund raiser, all proceeds from this auction will be donated to raise funds for the I Forge Iron website. Alfred would have referred to this as a chislier hammer. (repousse) It has an octagonal face, weighs 2 lbs and is completely hand forged with a striker by Brian and Ed Brazeal. Except for the faces, there is no grinding. Made from 1 3/4 inch 4140 round stock.
-
Animal Heads
brianbrazealblacksmith replied to brianbrazealblacksmith's topic in Metal Sculpture & Carvings
Dick, I don't think it should take you as long as it took me to learn these things. They are just basics. I really started learning when someone asked me how I was doing something, and trying to communicate that to someone else taught me more than anything I'd been doing before. Now I learn much easier, and I'm just getting started. The learning will never stop, and I thank you for the questions. Speaking of raising the bar, here's some fire tools I finished today: rake, shovel, and fluxing shovel. -
Animal Heads
brianbrazealblacksmith replied to brianbrazealblacksmith's topic in Metal Sculpture & Carvings
Dick, My computer wasn't working yesterday, so here are the pictures of the first steps of the horse head before you check it back to the dimension you start with and do the diagonals. I'll add the pics I showed before so no one has to go back to see them. -
Animal Heads
brianbrazealblacksmith replied to brianbrazealblacksmith's topic in Metal Sculpture & Carvings
Here's one I did today. I'll do some pictures of the notches tomarrow. This bottle opener started from 1/2"x 1/4", but that is not the easiest profile to start with. -
Animal Heads
brianbrazealblacksmith replied to brianbrazealblacksmith's topic in Metal Sculpture & Carvings
Dick, You're doing fine, but I would suggest starting with 1/4"x3/4". It is a much easier profile to manage. The proportions will come. Think about forging the rectangular profile to square at the chin and the base of the neck and a smaller rectangle at the first notch in front of the cheak. The first notch sets up your proportion, and you can take less than you'd think from the start. The cheaks are basically a square of the material. The half hammer face blow allows you to isolate the material, as I can see you've already got that down. Keep up the good work. Karen gives you another "Whoo Hoo!" -
Slitter Geometry
brianbrazealblacksmith replied to archiphile's topic in Slitters, Punches, Drifts, etc
Thank you all, also. This sight is helping me too. I've never really taken the time to document this stuff before now. I'm looking forward to going to Virginia. I've never been to that part of the country. We'll see you there. -
Slitter Geometry
brianbrazealblacksmith replied to archiphile's topic in Slitters, Punches, Drifts, etc
Okay, here's some better pictures of the slot punches that I use for thin stock. The second picture shows what happens when you drive your punch a little too far from the first side. The longer slot also shows what happens when your punch is not lined up. Notice the ledge on one end and the burr on the other end. The plugs still come out but not as cleanly. The next picture shows a better hole and the impression and depth that I drive the punch. The last picture shows the bad holes and the finished bottle opener made from the piece in the third picture. These punches get used alot and they rarely need redressing. The plug protects them from hitting the anvil and you don't need to punch out over a hole or in the vice where you could possibly hit it on an edge. These punches were made from 4140 because that's what I had at the time. -
Slitter Geometry
brianbrazealblacksmith replied to archiphile's topic in Slitters, Punches, Drifts, etc
I can see that the pictures don't show all the details now. Sorry! I'll get back out there and take some more. -
Slitter Geometry
brianbrazealblacksmith replied to archiphile's topic in Slitters, Punches, Drifts, etc
Gerald, I really liked what you called "wordy" in your above post. Keep those words coming! Also great pictures! I'll take some more pictures of those punches so you can see the grind. What the grind allows me to do is hundreds of holes without redressing my punches, unlike a flat bottom punch that will require dressing as soon as it gets mushroomed. Here are some other pics I took yesterday of the same principal. Let me know if it is clear. I intentionally included some mistakes that are marked with an X, so you can see what can go wrong. The handled slitting punch is ground for thicker stock and you can see how it touched the anvil and flattened its point. -
Slitter Geometry
brianbrazealblacksmith replied to archiphile's topic in Slitters, Punches, Drifts, etc
I'll take some more pictures. If you look at the plugs that came out and the holes that I didn't punch out you can see the impression the punch made and that is the negative of the grind. I'm doing this for the Blueprints that Archiphile suggested. Thanks for your response, Alwin. -
chemistry for scrapmongers
brianbrazealblacksmith replied to MattBower's topic in Blacksmithing, General Discussion
MattBower, I get most of my steel that I use from a suspension shop that uses 4140, so I know what it is. I've been getting it for free for 3 years now. I give the owners something that I've made every so often because I appreciate the thousands of pounds of material I've hauled away from there. If you send me a private message with your info, I'll make something to send to you to exchange for their services. I've had different coil springs respond differently under the hammer and would like to know what exactly it is. -
Slitter Geometry
brianbrazealblacksmith replied to archiphile's topic in Slitters, Punches, Drifts, etc
I'm not sure if my last pictures were clear enough. Can you all see the grind on those slitting punches? I've never seen anyone grind punches like that before for thin stock. That's one of the things I wish I knew from the start. -
Slitter Geometry
brianbrazealblacksmith replied to archiphile's topic in Slitters, Punches, Drifts, etc
Yes. you could do that, but I was talking about doing it all on your anvil where it can be done. If you didn't do it perfectly, it is better to take it to a piece of wood and pop the plug out. -
Slitter Geometry
brianbrazealblacksmith replied to archiphile's topic in Slitters, Punches, Drifts, etc
Archiphile, here is another way that I slit and drift thin stock. I can do 3/16", but you can not drive your punch to deep where it spreds the material out too much, so it's a little bit trickier to do 3/16th. If you drive your punch too far when you go to punch the plug out from the other side and hit the anvil, you will cause the plug to swell, and it will be harder to pop out clean. If you line up your punch perfectly, it will come out perfectly. If you don't, it will still come out because it seeks the path of least resistance, but it won't come out perfectly; there will be burrs. The drifts are made like Uri Hofi makes them where they are tapered in one direction and the width of your hole in the other direction.[This is a major improvement over traditional drifts that are just tapered round because with a round taper you get a shoulder from the smaller size of the drift at its starting point before you reach its finish point.] -
Animal Heads
brianbrazealblacksmith replied to brianbrazealblacksmith's topic in Metal Sculpture & Carvings
Good job DickL, that's a whole lot better than my first horse head! Karen really liked it too. She said to give you a Whoo Hoo! -
Punched circles for candle cups?
brianbrazealblacksmith replied to P. Bedard's topic in Blacksmithing, General Discussion
Here is one way Alfred Habermann had me forge candle cups. You start by upsetting the corners [these are 2"x2"x1/4"] in the first heat. Then you forge between the upsets with a ball fuller and a striker or a rounding hammer if you're by yourself. Finally hit the center with a ball fuller or rounding hammer, and it will raise the cup. No forms are needed. -
Slitter Geometry
brianbrazealblacksmith replied to archiphile's topic in Slitters, Punches, Drifts, etc
The first night that I was at Tom Clark's school he showed me a video of Alfred Habermann and Uri Hofi along with a few other smiths slitting and drifting a 4" hole in a 4" piece of round stock. -
chemistry for scrapmongers
brianbrazealblacksmith replied to MattBower's topic in Blacksmithing, General Discussion
MattBower, Thank you for that information! Coil spring is the only "junkyard steel" I normally use. I'd sure be interested to see what that checks out to be on those machines. -
Slitter Geometry
brianbrazealblacksmith replied to archiphile's topic in Slitters, Punches, Drifts, etc
I am sure it has all been done before, but I had never seen it. I had been on my own before I got with Tom. The metal will teach you if you pay attention. It is quite rewarding to rediscover this "lost art"!