
brianbrazealblacksmith
-
Posts
1,683 -
Joined
-
Last visited
Content Type
Profiles
Forums
Articles
Gallery
Downloads
Events
Everything posted by brianbrazealblacksmith
-

Spring Break with David
brianbrazealblacksmith replied to brianbrazealblacksmith's topic in Blacksmithing, General Discussion
Hey David, it's Karen... Good work and thanks for watching Brian for me, haha you get a WHOO HOO! Brian says come to the shop any time! -
Slitter Geometry
brianbrazealblacksmith replied to archiphile's topic in Slitters, Punches, Drifts, etc
I drive the "cold-chiseled punch" through from one side, almost all the way to the anvil, then punch the plug out with the same punch from the other side. I do the same for the other punches also, [notice the shape of the plugs that come out]. I only use flat bottom punches on occasions where I want a counter sunk hole. -
Another forge welded bundle
brianbrazealblacksmith replied to brianbrazealblacksmith's topic in Metal Sculpture & Carvings
I'll be in Placerville the middle of May at the Northern Califonia Classic demonstating. I don't think there is any charge. This event has been going on for over 20 years. It is a horseshoeing competition. If you have never seen one, you should make it a point to come. I think Karen posted it in the Calender. -
Spring Break with David
brianbrazealblacksmith replied to brianbrazealblacksmith's topic in Blacksmithing, General Discussion
Thank you, guys. I think I get more out of these opportunities than David. I love it, but I love sharing it with someone that's interested, more. I could see David get better every time he tried, and he could see it, too. You could hear it! -
Slitter Geometry
brianbrazealblacksmith replied to archiphile's topic in Slitters, Punches, Drifts, etc
whoops, I pressed the wrong button. Here are the pictures. -
Slitter Geometry
brianbrazealblacksmith replied to archiphile's topic in Slitters, Punches, Drifts, etc
Here are different bolsters. The one with the welded on hardy stem is the kind Alfred Habermann used that would fit in his anvils with a large hardy hole. The other one like his just sits over any hardy hole. the other types are what I came up with recently to solve all the problems that the others present. The radius blocks are alot easier to make and they can support your material perfectly as it develops and they work on any anvil. -
Spring Break with David
brianbrazealblacksmith replied to brianbrazealblacksmith's topic in Blacksmithing, General Discussion
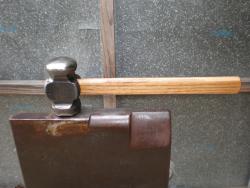
Here's what David did this morning. He did all the striking and did a very good job at it. We started with 1 1/4"x 1/4" just like is shown in the picture. He had to move a bit of steel. He also brought his hammers and his dad's hammer that we helped his dad make last year. He made and designed the cross for his mom. -
Slitter Geometry
brianbrazealblacksmith replied to archiphile's topic in Slitters, Punches, Drifts, etc
I'll take some more pictures tomarrow to show you more explicitly what I use as a bolster. It has been talked about briefly in this thead, but not in detail. That was a very good question. -
Spring Break with David
brianbrazealblacksmith replied to brianbrazealblacksmith's topic in Blacksmithing, General Discussion
That is a trivet. 1 circle,3 scrolls,6 spacers,6 collars. -
Another forge welded bundle
brianbrazealblacksmith replied to brianbrazealblacksmith's topic in Metal Sculpture & Carvings
Yeah, I told him not to be throwing it up into trees because it may get stuck, and it will come down! -
David came by this morning with his dad, my friend, Mark. David is on Spring break and he was here this morning, and he stayed all day. Look at what he made his first day! Oh, David is 10 years old.
-
Another forge welded bundle
brianbrazealblacksmith replied to brianbrazealblacksmith's topic in Metal Sculpture & Carvings
My friend's son, David, came to work in the shop this morning. He's on his Spring Break. So I had him make a grappling hook. He is 10 years old. Here it is: -
Slitter Geometry
brianbrazealblacksmith replied to archiphile's topic in Slitters, Punches, Drifts, etc
I know what you mean, Jimbob. 1" would have been a whole lot easier. You should check out some suspension shops in your area. I get 4140 round stock drops from a shop near me in sizes ranging from 2" to 5/8" and every size in between in 1/8" increments. -
Slitter Geometry
brianbrazealblacksmith replied to archiphile's topic in Slitters, Punches, Drifts, etc
Yes it's the same punch and it is ground the same. In the video the tap to start the eye is just a small pin prick at first so I can see if I'm in the center or not. If I'm not I can make another pin prick until I do get the center. Once you get the center, then you start driving the punch. As you can see in the video, we took our time to find the center and still punched the hole in one heat, and the plug fell out onto the anvil. That video is not edited. It is actual time minus the time to heat the piece. It took us 42 minutes to do that video. We turned the camera off in between heats, so the video is 20min. 35sec. If you go back a few posts towards the top of this page, I am showing how to make this punch end on a piece of 3/4" round stock. I make the handled punches the same except of course, I had to make the other parts first, and you have the hammer making video for that. -
tools forged in two days workshop at hofi forge
brianbrazealblacksmith replied to Hofi's topic in Tools, general discussion
Nice work! That should make another great Blueprint. -
Another forge welded bundle
brianbrazealblacksmith replied to brianbrazealblacksmith's topic in Metal Sculpture & Carvings
Here's another forge welded bundle. This one is supposed to be a sea anemone. It is one of the simplest, only 12 one heat tapers out of 1/4" square and 1 piece of 1/2" square in the middle of a 1/4"x1" collar. -
Forge Welded Squid...
brianbrazealblacksmith replied to andgott's topic in Metal Sculpture & Carvings
You'll find that this approach makes welding easier because you have a large mass onthe end that allows you to easily put it into your hot spot, and with a collar around the pieces, the area that you are welding starts out smaller than your hammer. This sets you up so the only contact with your hammer and anvil is where you are wanting to hit to make your weld. Besides not bringing your piece upto temp or not hitting squarely, there is little room for error. You can also wire the pieces together on the other side of the collar so they act as one piece and are not flopping all over the place and the wire can protect your finished pieces from excessive oxidation. -
Forge Welded Squid...
brianbrazealblacksmith replied to andgott's topic in Metal Sculpture & Carvings
Hi, This is Karen, I just got home from work and Brian showed me your squid! I can't believe no one else has responded! I wanted to give you a WHOO HOO! Only by trying wil you improve. Great job! -
Forge Welded Squid...
brianbrazealblacksmith replied to andgott's topic in Metal Sculpture & Carvings
Not a bad first attempt, but if you put a collar around the bundle of 9 pieces, it will create a scarf to hold the pieces together and give you the material to make the body of the squid. Nice first try! -
A new kind of leaf (for me)
brianbrazealblacksmith replied to divermike's topic in Metal Sculpture & Carvings
I like it! I can see alot of potential with that approach! I'm going to have to try that one out. -
Slitter Geometry
brianbrazealblacksmith replied to archiphile's topic in Slitters, Punches, Drifts, etc
Okay, Archiphile, I think we have enough for the Blueprint. I took pics of the steps for making all the punches and drifts this morning. As you'll see by the pics the punches and drifts are made exactly the same way. First, they start with the cut. I cut the same way that Uri Hofi shows on his BP on cutting so that I end up with a beveled cut that is centered. Then I make a square taper,[stop here for a square punch, grind and heat treat], since I'm making a 3/4" slitter, I taper down to 3/8" square. Next, I go to octagon then round,[stop at either stage if you want a octagonal or round punch, grind and heat treat]. Finally taper down on only two sides then grind and heat treat. If you are making drifts, you only grind the slight bulge on the sides. If you want square drifts, start with square stock. I do not heat treat my drifts. -
 collars
 -
Slitter Geometry
brianbrazealblacksmith replied to archiphile's topic in Slitters, Punches, Drifts, etc
I took some closer pictures of the slitting punches and the plugs that come out along with some drifts that I use when slot punching. I am trying to show what can happen when you are not lined up perfectly when you punch the plug out from the other side. The plug will show you where you are off. Also, if you go too far with your punch, your punch and plug will show where you went wrong. I do go almost all the way to my anvil when I'm punching like this, not just half way. I'm also including a few other punches with a similar grind, but I separated the different types this time. Let me know if this is clearer. -
Railroad track
brianbrazealblacksmith replied to Chris P's topic in Blacksmithing, General Discussion
They all have a plate welded to the top, but you can also use the track as is or grind or cut all the main forging dies into it. Ed and I forged our first prototype of the anvil we usually use from a twelve inch piece of track. [The main forging dies are: Flat, Fullers, and Butcher] -
mig and forge welding
brianbrazealblacksmith replied to saintjohnbarleycorn's topic in Blacksmithing, General Discussion
It depends on what you are doing. If you are welding up billets for pattern welding, then no you do not need to scarf, and the layers can simply be tacked to hold them together until they are forge welded. If you are welding scrolls, branches, or say tong reins, then yes you do need to scarf so you have extra material where you are forge welding the pieces together. The hammering required to make a weld would reduce your cross section of the pieces you're joining and make the area at the base of your weld smaller and thus the weakest link in your piece. No mig welding is required for this but it can be employed to hold several pieces together. There have been many threads on this Forum that illustrate different methods of doing this. I don't know how to direct you to those threads, but I'm sure someone does. Mark Aspery has done many excellent threads on this very topic. I've also posted a few with nontraditional scarfs.