piglet_74
Members
-
Joined
-
Last visited
Everything posted by piglet_74
-
Looking good so far! I went to smartflix.com and rented all of Steve Bleile's DVDs on welding and torch cutting. He covers alot of different processes and they use a camera with a welding filter on it to get some good shots of what a puddle should look like etc. I can sit and watch instructional videos like my wife watches the Kardashians (sp?) :-)
-
I like the cut and bend access channels you made. Saves on some welding.
-
I think this is where they have their practice videos of the process. http://www.youtube.com/user/HAYBUDDEN#p/u/18/2SRjNpJLmCc
-
I meant to do the mock up too but don't have the time. I'm picking up the steel for mine using the Fab. Mild Steel Firepot design that has been posted. I can torch out all the sections from a 5 foot piece of 3/8" thick by 6" wide flat stock from the local welding supply. They're charging about $25 for the piece. I bought a Centaur Clinker breaker to use with it. Please post pics as you progress with it. It would be great to see. Rob.
-
Nice job! Here are some similar designs. http://www.historicallocks.com/en/site/hl/Articles/The-history-of-padlocks/Viking-Era-800-1050/
-
Do you think this guy would charge more if we told him it was used in the railroad industry "back in the day" http://cgi.ebay.com/Old-Hand-Made-Anvil-Found-Asis-No-Returns-/390193257740?cmd=ViewItem&pt=LH_DefaultDomain_0&hash=item5ad9549d0c
-
I looked in the Postman book, the A disappears by about 1913 and by the late 1930's the N started to look more like an X. If the 200 is the weight then the serial 210525 would put it between 1943 and 1945. Hope this helps, Rob.
-
Take a look here. Header Plans I made one out of 1" X 3/4" I cut part way through and folded it back on itself then forge welded it. Then I drilled a small hole through it and size it with a file tang from the bottom. Rob.
-
That's nice! Do you light it with a striker or were you going to rig a pilot up or something? Nice mounting job too.
-
I made one here out of mild steel. I'm planning on using it for demos and some nails for a tool box. It's mild steel about 1/2" by 1" cut part way through and then bent over for a fagot weld. I drilled the hole and sized it with a round file tang based on a nail I started to tapper. I made about a half dozen and it seems to work well so far. http://www.iforgeiron.com/forum/f7/making-nails-refinements-14316/index2.html#post146480 http://www.iforgeiron.com/forum/attachments/f7/18975d1259078638-making-nails-refinements-nailheader.jpg Rob.
-
Good to have you back Frosty! "Last edited by Frosty; 11-23-2009 at 10:09 PM. Reason: spwlling. Can I blame it on trying to catch a falling tree with my head? " :-)
-
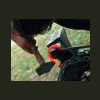
I finally had a chance to try to make another one this weekend. I was going to weld some spring steel on top of mild. I found that my makeshift firepot can get hot enough to weld but is not a good welding fire. I need to get some fire brick to make the pot deeper. I get a massive amount of scale buildup. So instead I did a fagot weld. Then I drilled a pilot hole and shaped it with the tang of a round file. Once it cooled I made a handful of nails and it seems to work pretty well. I made another weld on the other end but haven't created the hole yet. I'm waiting to see what size I actually end up at. The nails in the pic start off as 5/16" round rod.
-
There ya go! I'm going to takes the brakes off of that thing and stickem on the front of my softail. I'll never have to worry about a deer running into me again! Talk about stop on a dime :o
-
That's really interesting. I guess you need to be able to run off onto something at the end of the weld. At first I thought they were welding in a pipe hanger on the fly or something.
-
NASA - Friction Stir Weld Now they are "forge welding" the space shuttle. Pretty cool.
-
I made one similar to the design Grant shows, also from leaf spring. However, instead of cutting in from the sides and down, I just cut in from the sides and folded them towards the middle. Then they can be spread out or hammered in to adjust the fit. Just another way to skin the cat. Rob.
-
Welcome to the forum! When you get a chance head up to the top of the screen to "User CP" and edit your details about your location. Then people will be able to recommend resources in your area or be able to meet with you to help get you some hands on experience. Rob.
-
One recycling place near me won't sell it but I asked very excitedly about a piece of plate and the guy let me take it. Mason Dixon auto salvage also deals in scrap and you can peruse through the yard and then pay by weight. They're located on Rt 1 at the PA/MD line. Plus you'll find a lot of coil and leaf for doing different things.
-
Peach Bottom APS. We're in P3R17. We're doing a 500kv Transformer replacement, Generator stator rewind, and the usual 1/3 core refuel. We're a BWR. Do you ever make it down this far?
-
Karl, I'm in Elkton, MD. I get my coal from the guild I joined out in Westminster, MD. It's the Blacksmith Guild of Central Maryland. Great bunch of folks. They sell very good coal in 50lb bags for around $15 for non members and less for members. I would be happy to get together sometime and help you get going. Shoot me a PM. Right now we're in our reactor refueling outage at work but it's just about over. Then I'll have a little more free time. Let me know. Rob.
-
This is the first time I've seen this video. Just thought I wold pass it along. Interesting approach to shouldering. YouTube - Blacksmith Demonstration at the 2009 Brooklyn Fair Rob.
-
The kid proof one would be interesting to see. Could you post a pic? Or was it mainly the heat treating process you described that makes it that way? Thanks, Rob.
-
I think it's just the nature of spring steel when left dead hard. I had one break when a friend dropped it on concrete. I'm making him another one and telling him not to drop it on concrete. I was thinking about tempering the parts that you hold onto but was afraid it wouldn't throw good sparks if I accidentally tempered the striking edge too. Rob.
-
Thanks for taking a look. He invited me out to the property so hopefully I can get better shots of everything. I'll have to ask but I think everything goes with the house. I'll post better pics if I make out. Thanks again, Rob.
-