

Buzzkill
-
Posts
2,049 -
Joined
-
Last visited
Content Type
Profiles
Forums
Articles
Gallery
Downloads
Events
Everything posted by Buzzkill
-
Agreed, pretty much everything I've seen from templehound seems like it should be both used hard and admired when not in use. I'm a bit jealous.
-
A forged finish is fairly resistant to rust. However, a mirror finish resists rust somewhat. Either way, did you intend to use the blade and not care for it after use? A blade that is cleaned and dried after use typically will not show signs of rust. Having said that, depending on the leather you used in the sheath, that could have an impact, and certainly moisture trapped in the leather and/or against the blade could also cause rusting issues.
-
The first step was to have the bevels in good shape from forging. I spent more time and heats on that part than I would have preferred, but the results were decent. Learning to "uncorkscrew" a blade took a bit of trial and error. After that I ground each of the 4 bevel surfaces on the flat platen of my grinder in line with the belt rather than across it. I use a fairly strong magnet to help hold the blade while grinding. After the rough grind and the heat treatment I went back to the flat platen and again ground each bevel surface in line with the belt. I think I went to about 320 grit that way, then it was a lot of hand sanding using a flat bar and a lot of sandpaper strips from 400 grit to 2000 grit.
-
I second the belt driven buffer. I use a 1/3 hp motor with a slightly loose drive belt to the shaft and usually only 6 inch wheels. I'm willing to take the trade off in speed of attaining the desired finish to my perception of a safer buffing station. So far I've never had a blade yanked out of my hands but I have stalled the motor or slipped the belt a few times. Even with that setup I'm still wary when buffing and always try to stand off to the side a bit just in case. If I had a chainmail shirt I might even wear that. Another item for the "to do" list ......
-
FWIW, I got some broken pieces of kiln shelf from a pottery store that gives classes and sells knick knacks - as opposed to a pottery supply store. I gave the lady 10 bucks for 3 pieces that were big enough for me to cut to the size I wanted. It's worth a quick phone call or stop if you're in the area. The worst thing that can happen is they tell you no and you wasted a few minutes of time.
-
I have to agree with TP about anvils and auctions. I've wandered around a couple for several hours waiting for them to get to the anvil only to have the opening bid at or above my self-set limit. One I went to recently had an E-bay reseller who was paying what I considered ridiculous prices for tools and the one anvil that was there. With the recent renewed interest in blacksmithing you will have to be very lucky to find a good deal on a good anvil at a public auction.
-
The second pic looks pretty good to me, but since it's not in your forge it may behave differently in that environment due to back pressure. There's nothing wrong with using a needle valve to control the propane flow, but a regulator is better. A regulator really is just a valve that uses a spring, a diaphragm, and gas pressure to open or close some as needed to keep the outlet pressure constant. With only the needle valve, as the tank cools and/or gets close to being empty you may have to open it more to stay at the same heat in the forge. Of course if you have a regulator with a pressure gauge then you can also note the pressure setting that gave you the desired results and easily repeat that setting the next time. With only a needle valve or a regulator with no gauge it's a bit more trial and error each time.
-
If you want to start small like a coffee can or 2 brick forge you can do it for significantly less than that, but up to freon tank size or maybe even propane grill tank size you should still be able to stay under 200 dollars and make a good forge, assuming you have access to at least some basic tools. With your location I don't know about shipping costs and that might make it run a little higher than I'm thinking.
-
You posted this in the solid fuel forges section, so I have to assume that's what you intend to use for fuel. You gave us very little information to work with. If you are using solid fuel then I have to wonder why you are using cement, refractory or otherwise. I'd suggest taking some time to read through the pinned and/or sticky topics regarding solid fuel forges and I think you'll find answers to many of the questions you may have.
-
Leaf springs are funny critters sometimes. Some of them really want to return to the curve they had even after the heat and beat. I'll sometimes heat them, reverse the bend in them, and leave them that way for a day or two then straighten and anneal before ever trying to forge. Once you do get them the way you want, then several normalization cycles with checks for straightness and adjustments where needed helps get rid of that tendency to return to the original shape. Other than that .... yeah, forge thick and grind thin.
-
And following up on what Stan said; when/if you decide to build or buy a "better" forge, you can use the regulator, hose, and probably even the burner in your new forge so the money is not wasted.
-
I'm sure by now you've picked up that for inside the forge the recommendation is kaowool or equivalent (rigidized) for insulation, preferrably with a castable/rammable refractory hard liner and that coated with ITC-100 or equivalent. As a barrier between the bench and forge something like firebrick should be fine. Anything that will keep the high heat from the combustibles will do what you need.
-
That depends on a couple things. If your forge is well insulated it won't transfer much heat to whatever it's sitting on anyway, but if it is separated you know you won't be losing additional heat that way. The other thing has to do with how flammable the surface is that the forge rests on. Keep in mind that you will have flames coming out of your opening(s), so you want to minimize/eliminate direct flame contact (or even close proximity) with anything that can catch on fire. Other than that, pretty much anything that provides a stable mounting for your forge should work out well.
-
Diy leather holster - Glock 26
Buzzkill replied to rendoman's topic in Gunsmithing, Muskets, Flintlocks etc
I think if someone pulls out a Glock you know what time it is very quickly. -
How to Safely Remove Galvanized Coating?
Buzzkill replied to territorialmillworks's topic in Zinc, galvanized, and coatings
There's pretty much no chance at all that your anvil has a zinc coating on it, and Lou already gave you good anvil care tips. If you have to remove the galvanized coating from other objects an acid bath can work, but how fast it will strip depends on several things. The thickness of the coating, the concentration of the acid, the ambient temperature - all these things affect how quickly the coating will be removed. I find that typically one day in 5% vinegar (normal strength from the store) is enough. It also works for loosening/dissolving the scale from forging. If you do that just make sure you use something to neutralize the acid after removing it from the bath or it will rust quickly. Baking soda, an old toothbrush, and some water are all that's really needed. Rinse well and dry after that. Some of the guys on here do use electrolysis to clean up large rusty items such as anvils and get great results. I have not done this yet, so I'll leave those recommendations to someone who has. -
Thanks again for the compliments. There are a few things that haunt or motivate me when I'm creating a knife. One of them is a simple phrase I found on this site in Steve Sells' knife making classes - "Excellence is a decision." If it's not the best I can do at my current skill level with the tools and materials I have then it's not good enough. Fortunately I'm a hobby bladesmith. If I had to feed my family based on the work I turn out we'd all be a lot thinner or I'd have to get a lot faster.
-
Jay, Welcome to the forum. You've come to the right place, but you have a fair amount of reading to do that will answer most of the questions you've asked. Head to the solid fuels forge section and read the thread with "Just a box of dirt" in the title to get a good handle on side draft forges. You'll also find a few topics regarding using wood as fuel. Asking what the "best" anything here without a lot of qualifiers tends to bring out the curmudgeon in a number of people here. That will depend on the specific use of the blade and preferences that you and/or your customers have. Bladesmithing is a specialized area of blacksmithing. You can dive in head first if you want, but if you've never hammered hot steel before you may find your frustration level high and your success level low for a while. Generally it is recommended that you join a local blacksmith organization and get some face to face hammer time in with someone who can teach you the basics before moving into bladesmithing. I can't recommend strongly enough that you grab a comfy chair, a cold beverage of your choice, and some snacks and then spend a few hours reading the topics that interest you the most. Nearly any question you can think of as a beginner has probably been asked and answered in detail multiple times on the forum, but you do have to dig a little. The search function on the site isn't the best, so we often recommend that you do a web search with "iforgeiron" as part of your key phrase in your searches.
-
A couple thoughts; It looked like the flame was burning at the floor of the forge rather than a cone of flame at the end of the burner tube. That indicates a problem with the burner itself as far as alignment or tuning goes. You should have a somewhat cone-shaped blue flame where it enters the forge. In general you should not see yellow flames inside the forge at all, and only a little orange or yellow in the dragon's breath. How much have you played with your choke settings? Have you tried full open and nearly closed to see how that affects the flame in the forge? Secondly, I can't tell for sure the size of your propane tank, but if you are trying to run 2 burners from a single 20 lb propane tank you will be drawing propane so fast that it will quickly cool the cylinder and significantly reduce the propane pressure. I use two 20 pound tanks linked together for a single 3/4 inch diameter burner. Was there a difference when you first fired up the forge compared to a half hour later? Also, some of those propane tanks have a flow limiter built in since they are intended for use in gas grills and that doesn't require nearly the gas flow that we need for forges. Hopefully one or more of the real NA burner gurus will show up here to help you troubleshoot, but that's my 2 cents.
-
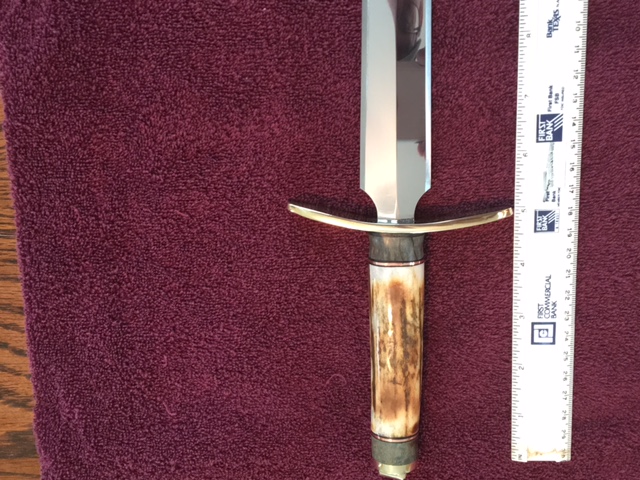
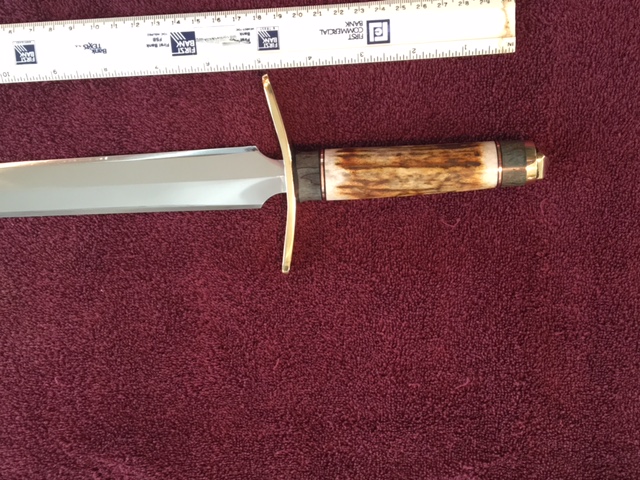
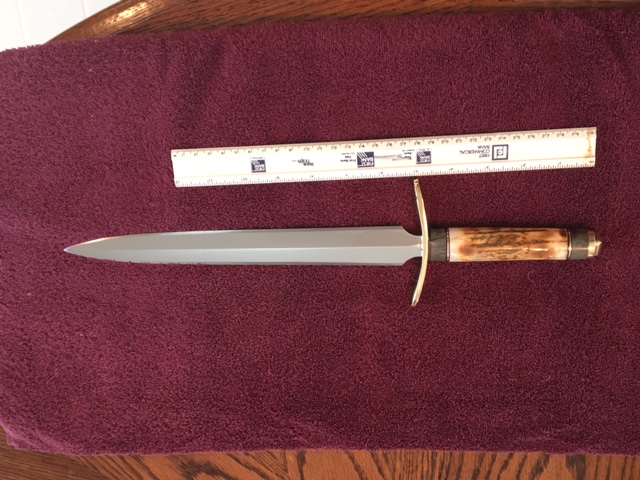
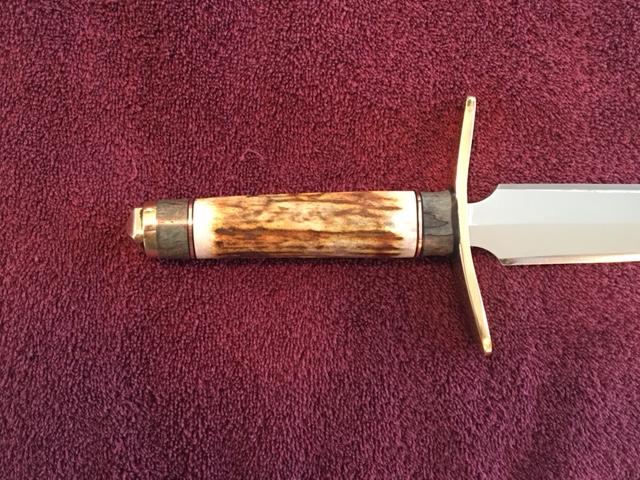
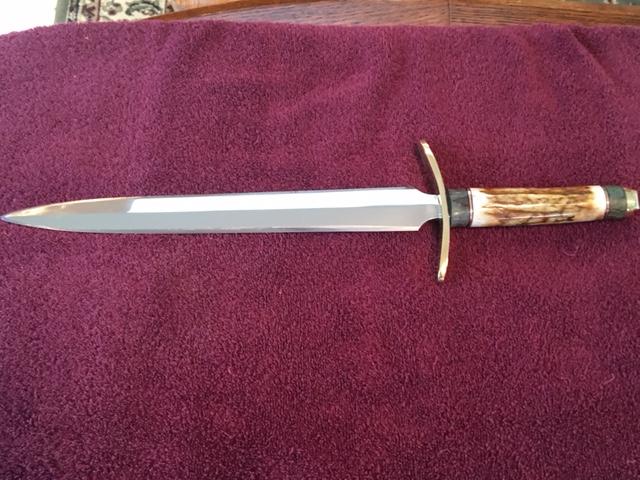
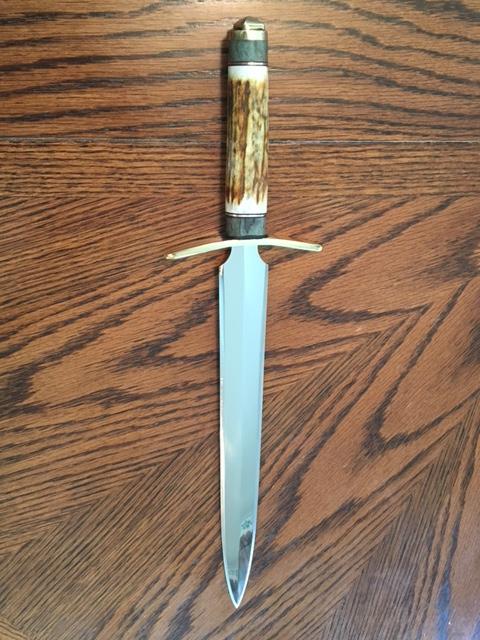
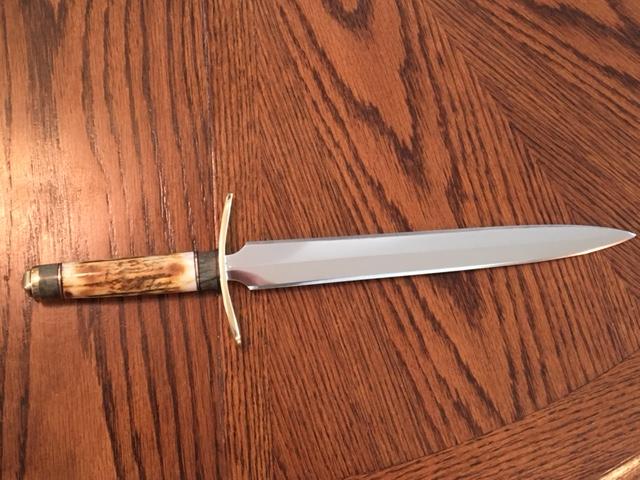
Thanks for all the compliments guys. I appreciate it. Well, he went out and bought an acrylic display case for it. You'd have to know my brother to understand how much of a compliment that actually is, but yeah I'd say he's happy. The antler was pretty much sun bleached out, so I browned it gently and slowly with a small hand torch and then lightly sanded it to bring the lighter colors back through. I'm not sure that's the preferred method, but at least visually I think it worked well. I wish my first knife looked that good! I've made a few over the past few years. That was just my first dagger. It was definitely a learning experience. Some things I thought would be much harder were not, and others were more troublesome/tedious than I anticipated. You nailed it. That's exactly how I made the guard, and I agree with what you've said. I'll have to get some stock that's more suitable for the next one or get set up for casting. Thanks for the input.
-
Here's the first dagger I've ever made. This was a birthday present for my younger brother whose birthday was at the beginning of September, but life happens and I wasn't able to get this finished up and to him until a couple weeks ago. In its previous life the blade was 3/4 inch coil spring. Guard and pommel pieces are brass. Handle is elk antler tine with some dyed and stabilized burl spacers with some copper for accent. It's certainly not perfect, but I'm mostly happy with the way it turned out. It's about 16 inches overall and about 11 inches from guard to tip. Comments or constructive criticism that can help make the next one better are always appreciated.


-
To all those smiths who told me railroad spikes were useless
Buzzkill replied to Forging Carver's topic in Knife Making
Chandler did shave hair off his arm after chopping through the 2x4 twice. Even he seemed to be surprised that his spike knife passed all the performance requirements, but he still said as we do that RR spikes are not great knife making material. -
Looks pretty darn good to me. I'm looking forward to see what you can create with it.
-
First off, welcome to the forum. There's lots of good info on here for you, but you have to dig for some of it. The search feature on here is less than ideal, so you're usually better off doing a web search and including "iforgeiron" as part of your key phrase to find things here. Secondly, Michael Porter is a member here, so you can ask him for clarification directly if needed. In general, multi-purpose tools don't perform any of their tasks as well as you'd like. The typical advice on here is build a forge for forging and build a furnace for melting. They do have a lot of similar components, but they are not identical in construction or in function so trying to use one for the other purpose will often result in frustration and limited success. Some of your questions will have potentially different answers depending on where you are in the world and what is most important to you. Since this is a world-wide forum it's best if you include your general location in your profile so that any answers which are location dependent can be addressed properly. I highly recommend getting a comfy chair, something to eat, a cold beverage and spending some time reading through the copious quantities of information available. For your interests I would start with the gas forge section of the forum. Read through Burners 101 and Forges 101 for starters. Both are authored by Michael Porter and have lots of good info and discussions contained within. There is also a section for foundries and casting that you will probably find interesting. I will say that you are on the right track with the ceramic blanket, a castable refractory for a liner, and ITC-100 (or comparable kiln wash). Forget about the portland cement or plaster of paris "refractories" you may have seen on YouTube or other places on the internet. They are not suitable materials for high temperatures, they will cost more money in the long run through fuel use, and may even be dangerous in certain circumstances.
-
To all those smiths who told me railroad spikes were useless
Buzzkill replied to Forging Carver's topic in Knife Making
I think you touched on the real point here. It's not that you can't make a sharp pointy thing from a RR spike - you can. We have historical examples of brass, bronze, copper, iron, even bone cutting utensils or weapons. However, a common theme in history is that sharp pointy things are made from the best material available in that location at that time. With that in mind, why would you choose to make a sharp pointy thing that you intended to use out of a substandard material? RR spikes turned into other objects definitely have novelty appeal, but why spend more time sharpening and/or repairing a blade than necessary? With the abundance of cheap steel that does make a good knife that will hold its edge it doesn't make much sense for anything other than a decoration. I wouldn't be at all surprised if someone were able to make a bronze knife that would pass the performance part of the ABS journeyman test, but would that make bronze a great choice for a knife? -
2" Tow Ball Hitch Cut Off Tool
Buzzkill replied to CTBlades's topic in Hot Cuts, Anvil devils, metal cutting on the anvil.
I had the same thought, but it looks like it would be fairly easy to weld some vertical pieces on that would keep it from rotating.